Español
Hola a todos, feliz y bendecido día.
Apostando a la buena y necesaria causa del reciclaje, hoy me uno al desafío del reciclaje creativo impulsado por nuestra compañera hiver @jennyzer , agradeciendo por supuesto a @fixie quien me permitió enterarme de este lindo desafío.
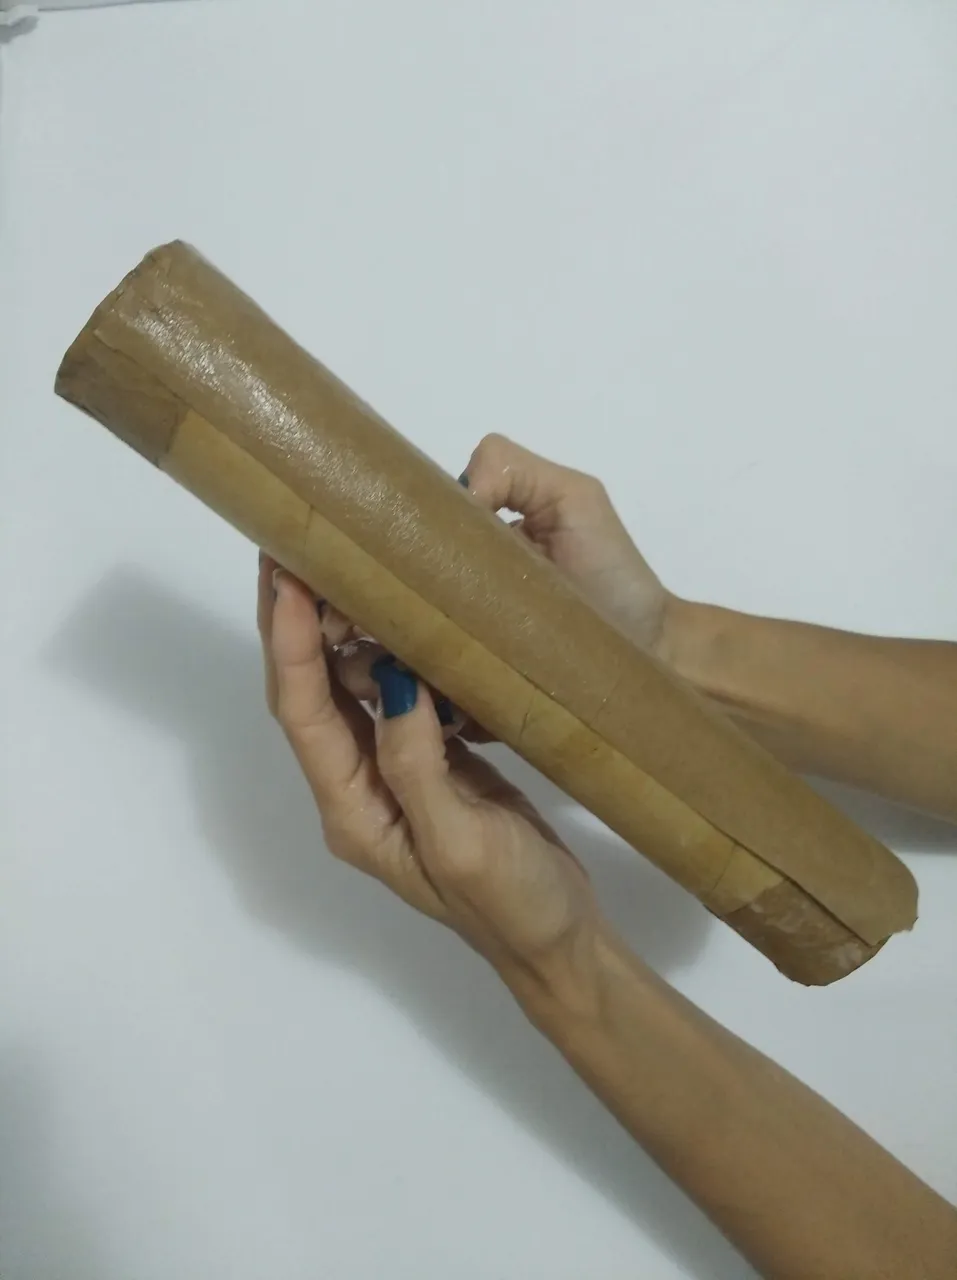
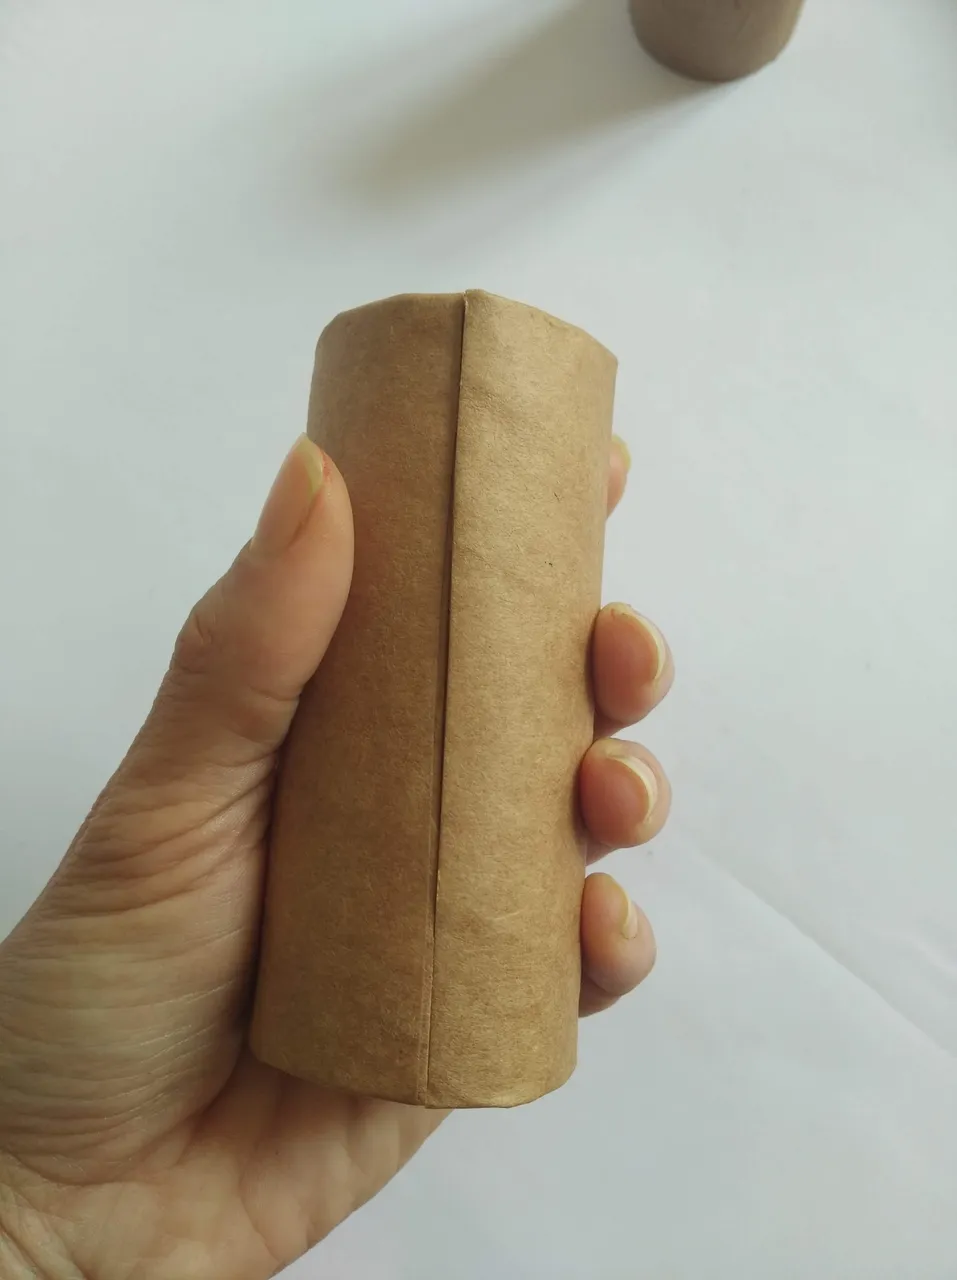
En mi cotidianidad el tema de la reutilización de las cosas está muy presente, en mi casa por donde mires hay un objeto de utilidad creado en su mayoría, a partir de un articulo reutilizado. Día a día trabajo con muchos materiales y los lapices y pinceles siempre están presentes. No se si les pasa a todos los que hacemos manualidades, pero cuando debo buscar un pincel especifico nunca lo consigo (risas), es por eso que decidí hacerme unos estuches de rollos de cartón para guardar mis pinceles y así tenerlos en un solo lugar evitando se me extravíen.
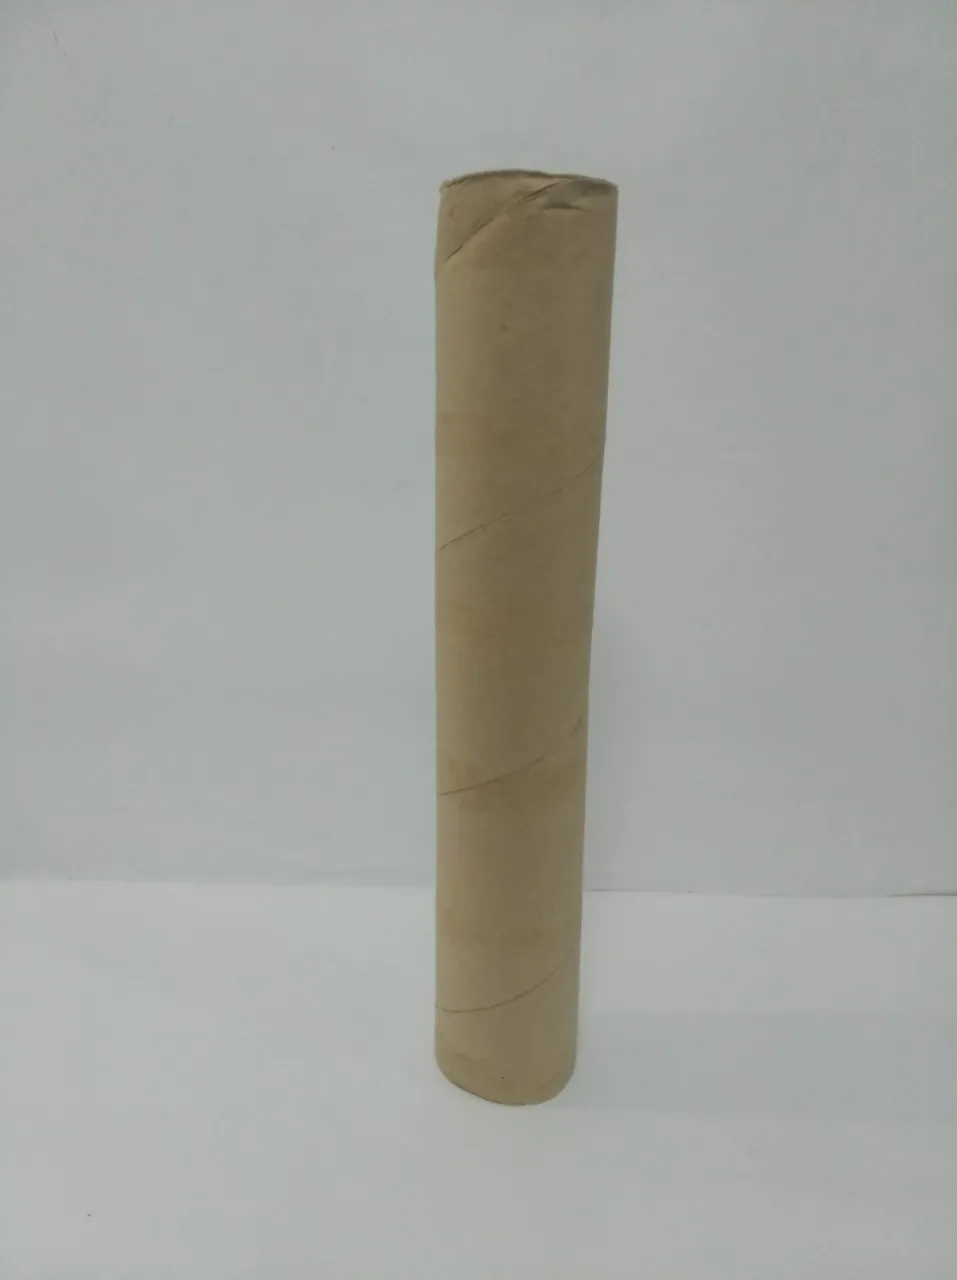
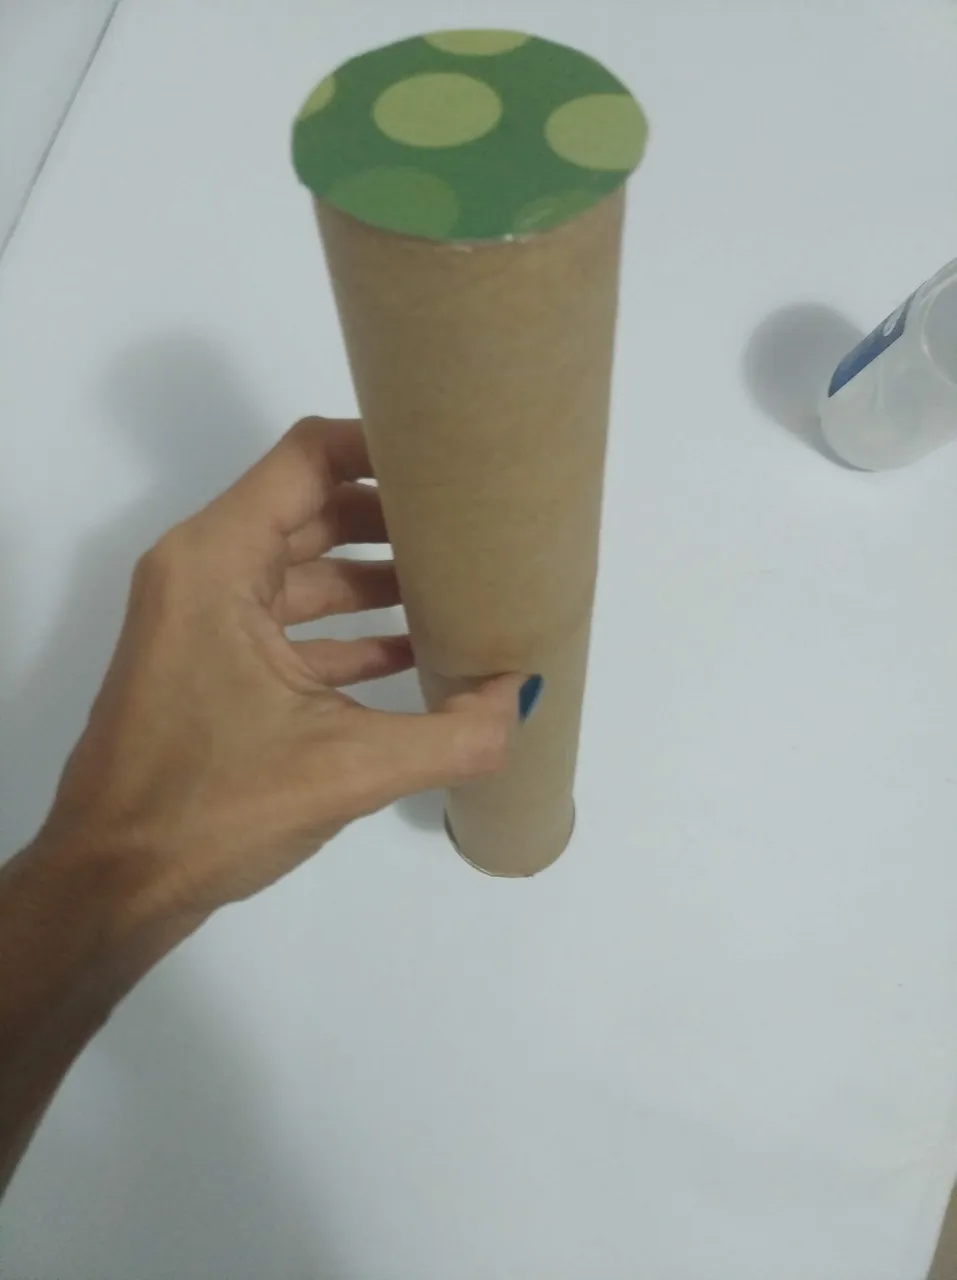
¿Cuantas veces has botado un rollo de cartón a la basura? Quizás muchas veces, pero hoy quiero mostrarte una idea de como reutilizar de forma creativa un rollo cartón que trae el papel absorbente de cocina (conocido en mi país como “Toallin”) y hacer de él un estuche para lapices o pinceles.
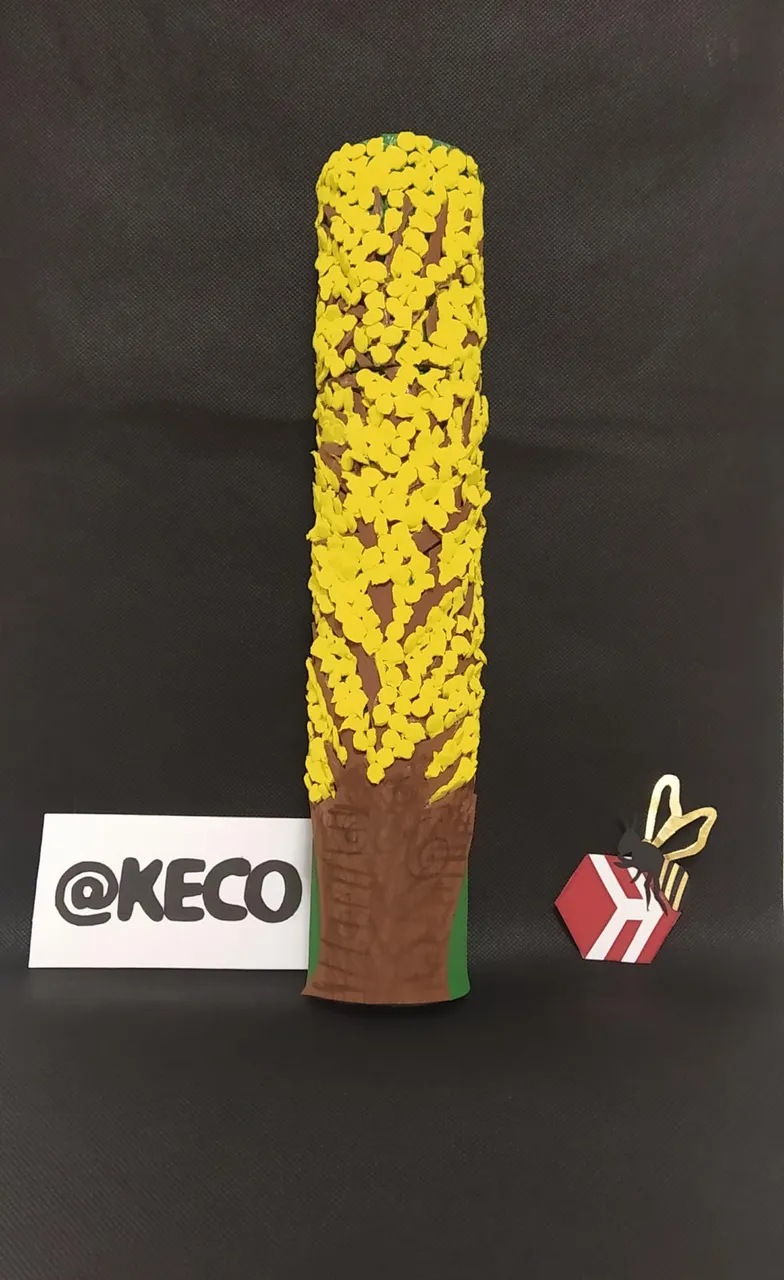
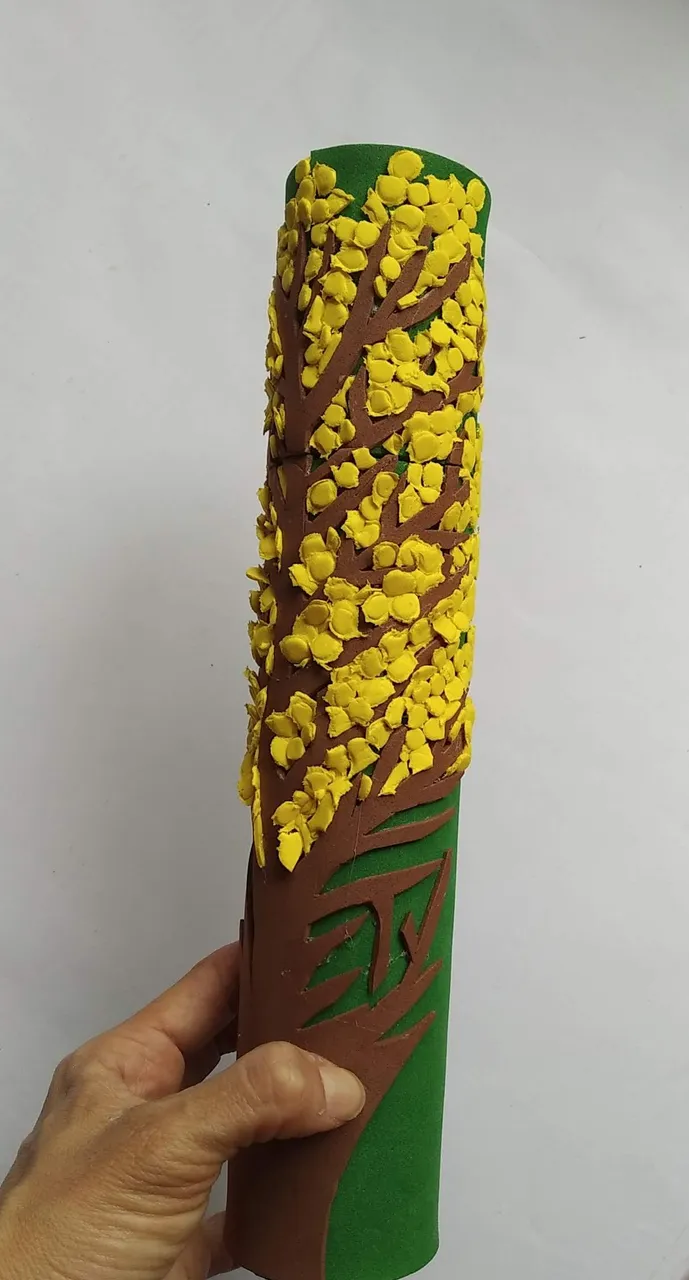
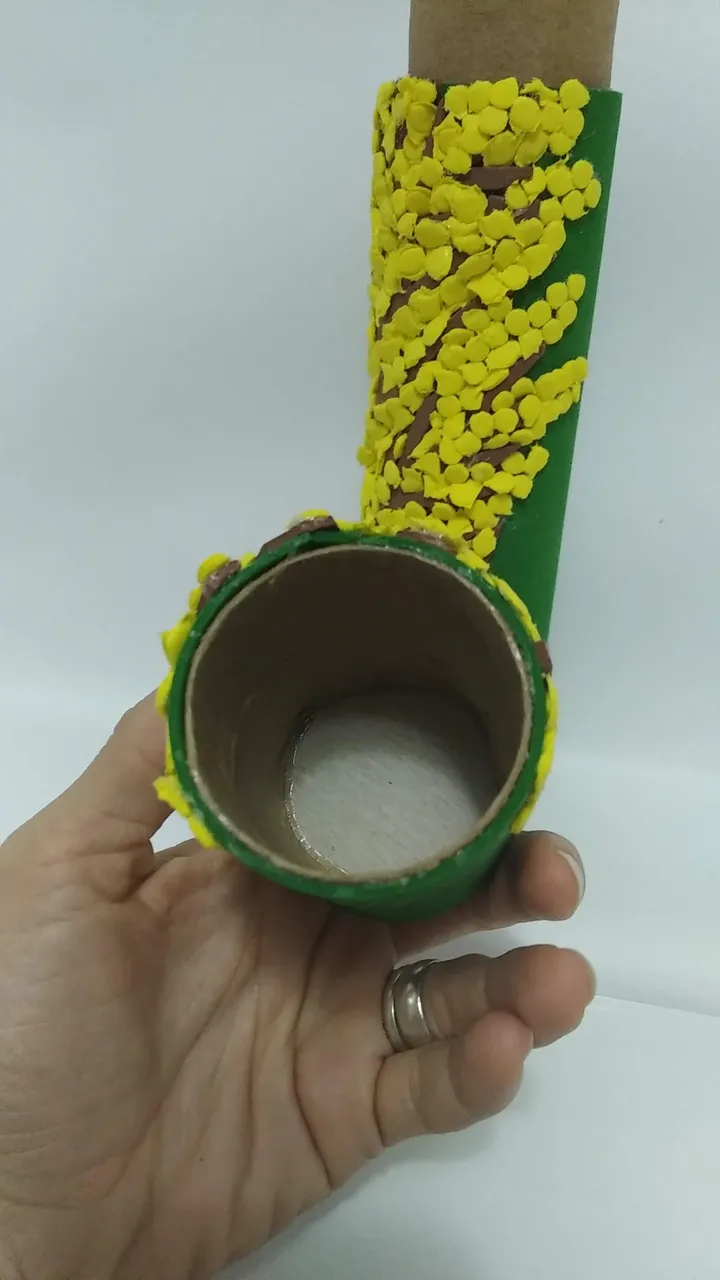
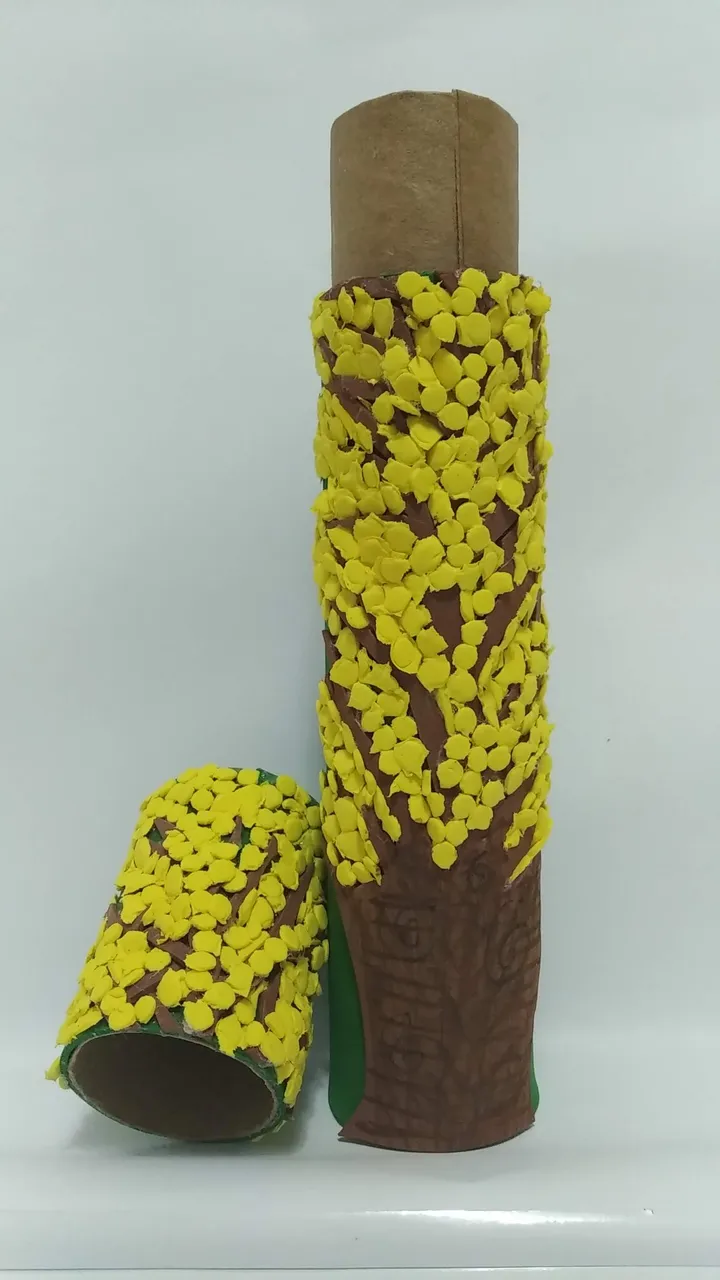
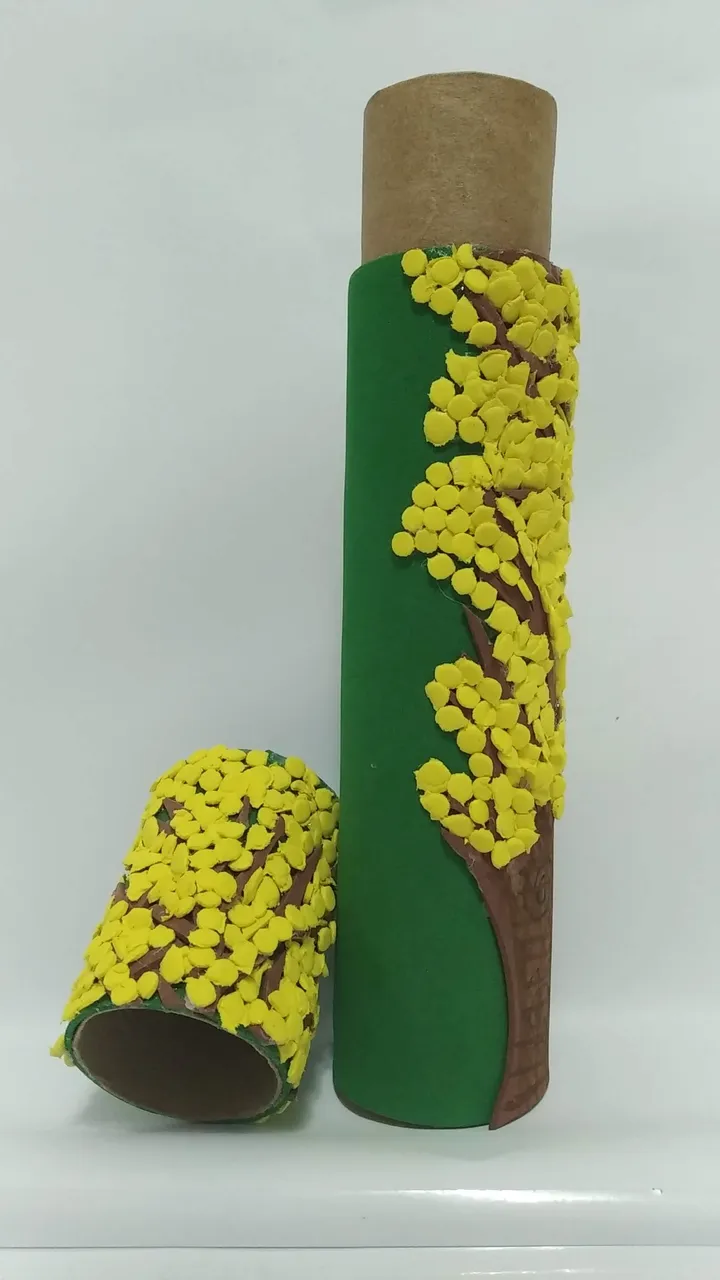
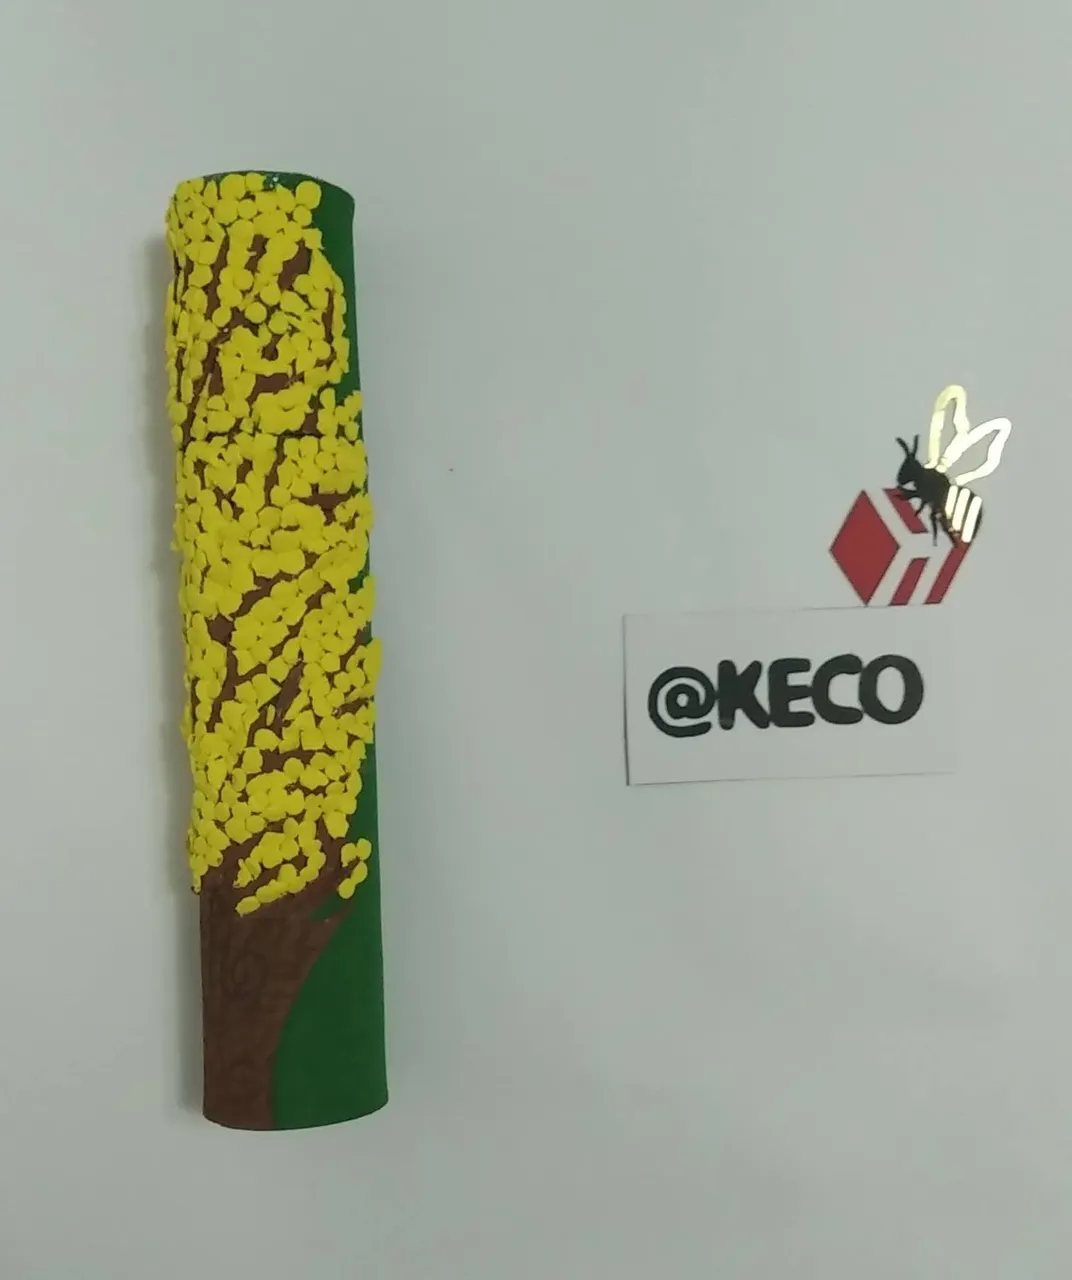
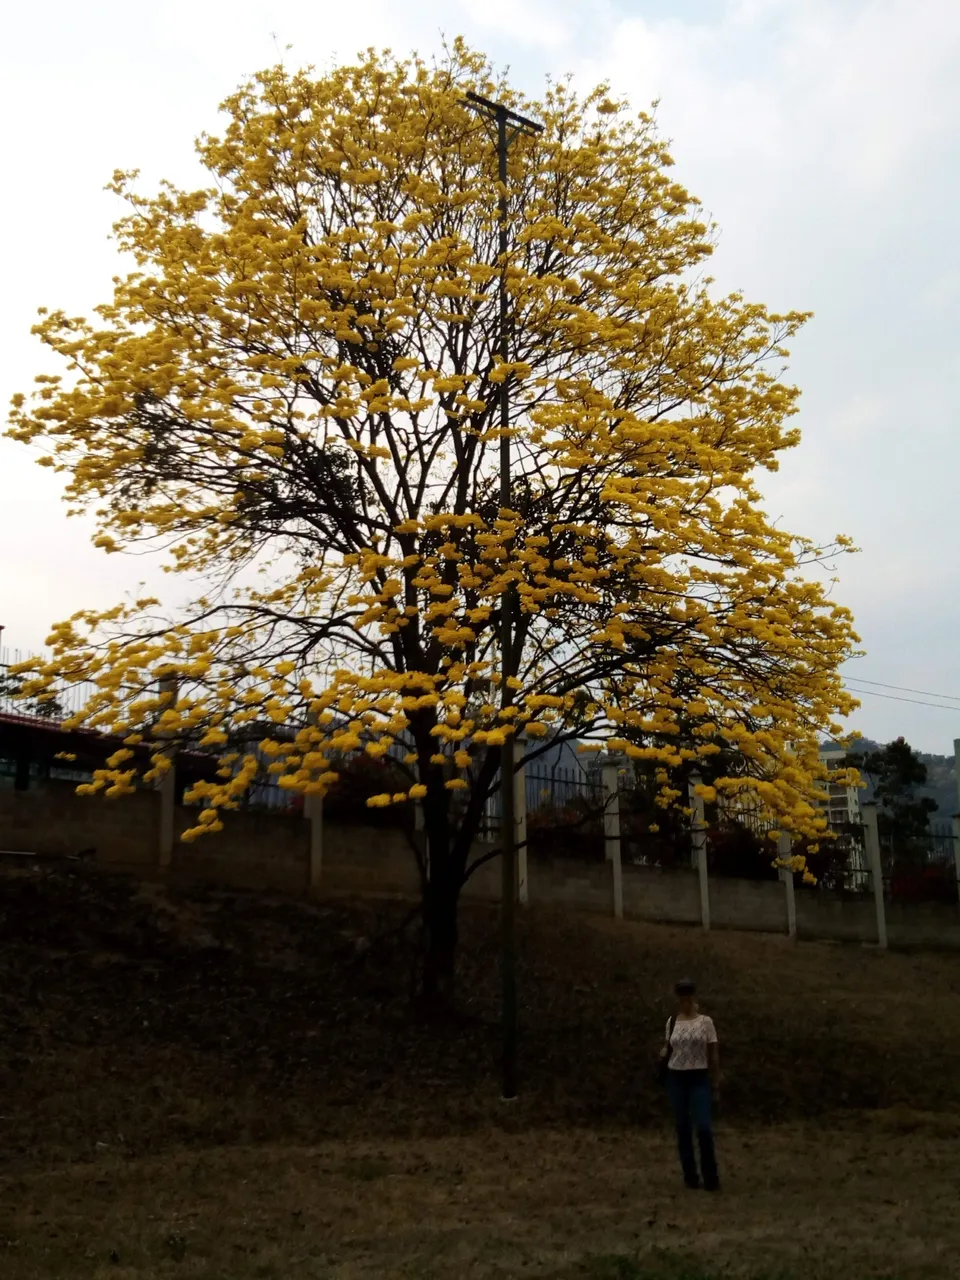
El estuche que hoy les muestro lo he decorado con nuestro árbol nacional, El Araguaney, en verdad amo a este árbol y me encanta ponerlo en todo lo que hago, incluso en las casitas para el nacimiento; cerca de casa tenemos uno y adoro su esplendor, incluso cuando no está floreado de amarillo. La decoración de este tipo de cilindros de cartón puede hacerse con cualquier material, incluso pintarlos a mano con pintura acrílica es genial. La Invitación es a que reutilicemos lo mas que podamos y ayudemos a darle nueva vida a eso que muchos consideran “desechos”
Sin más y esperando disfruten del trabajo realizado con amor, les dejo los materiales utilizados, el proceso y las imágenes del trabajo.
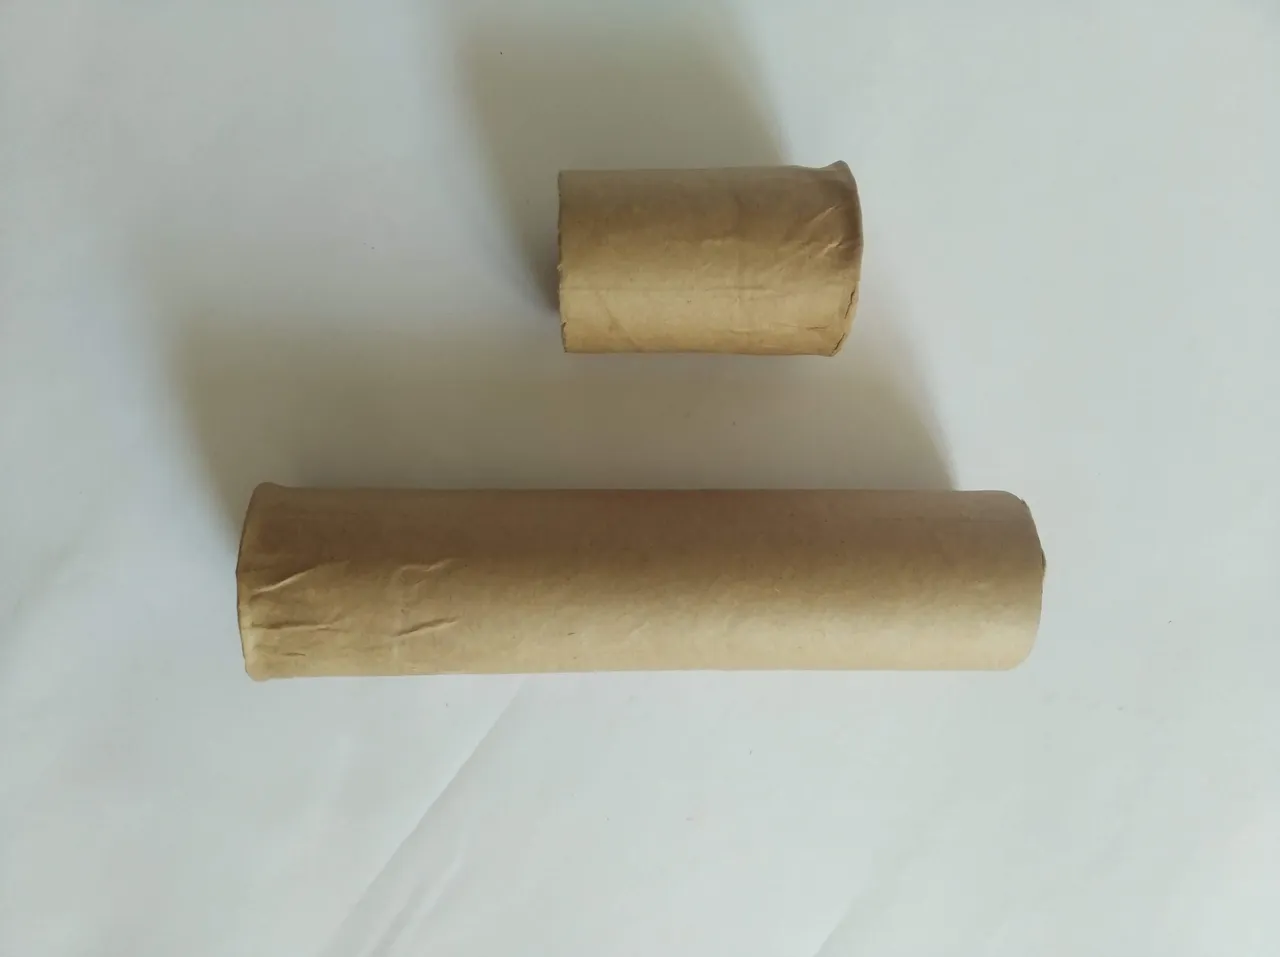
- Rollo de cartón reciclado de toallas absorbentes de cocina (Toallin)
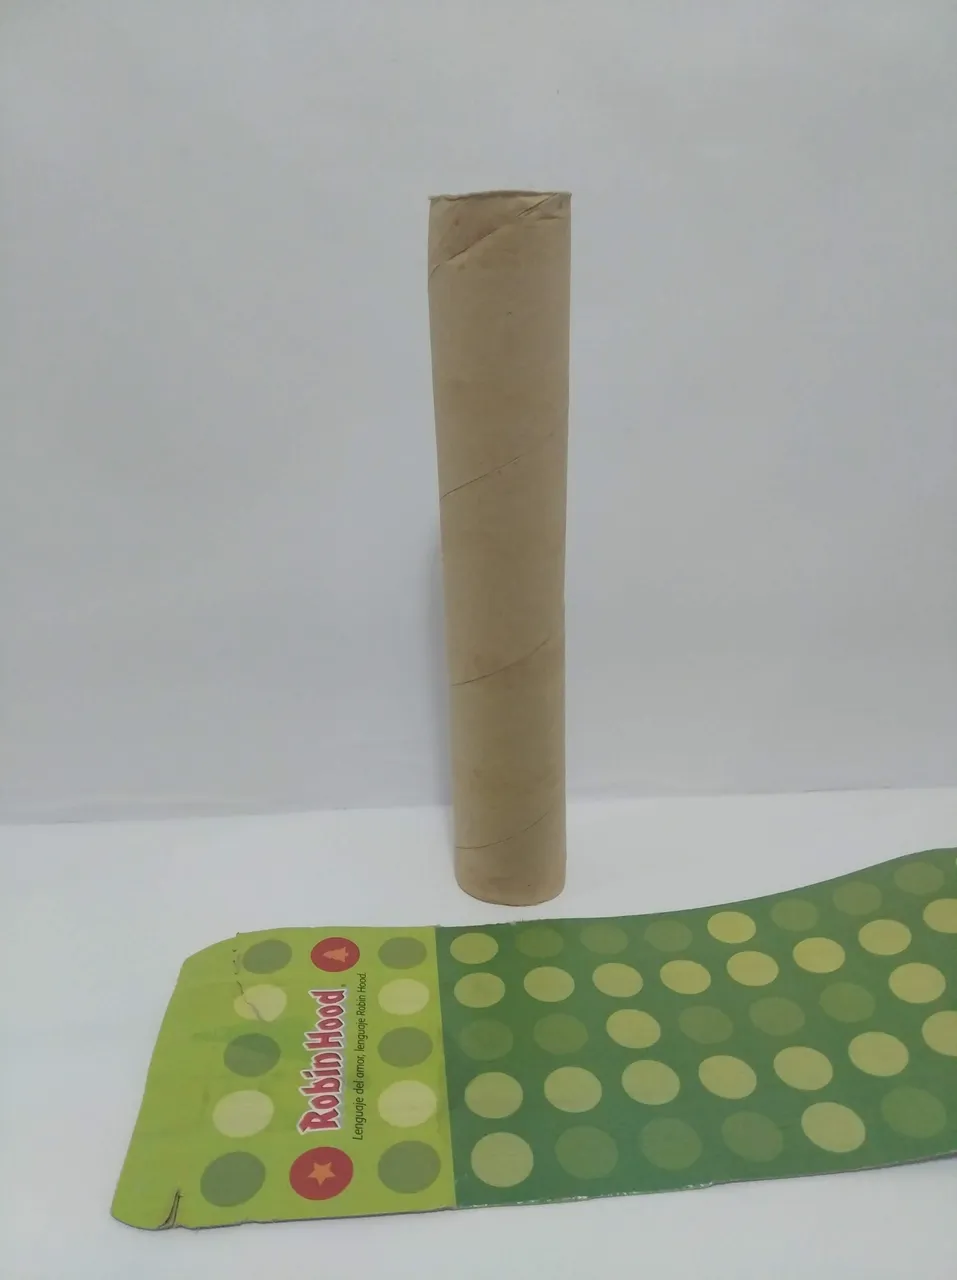
- Rollo de cartón reciclado de papel Higiénico
- Cartón resistente reciclado (para sellar los lados del cilindro)
- Papel Craf de bolsa reciclado
- Foami Verde Grama (goma eva)
- Foami Amarilla
- Foami Marrón
- Engrudo/ pega casera a base de almidón
- Silicón Frio.
- Perforador de huecos
- Cutter.
- Tijera.
- Regla.
- Lápiz.
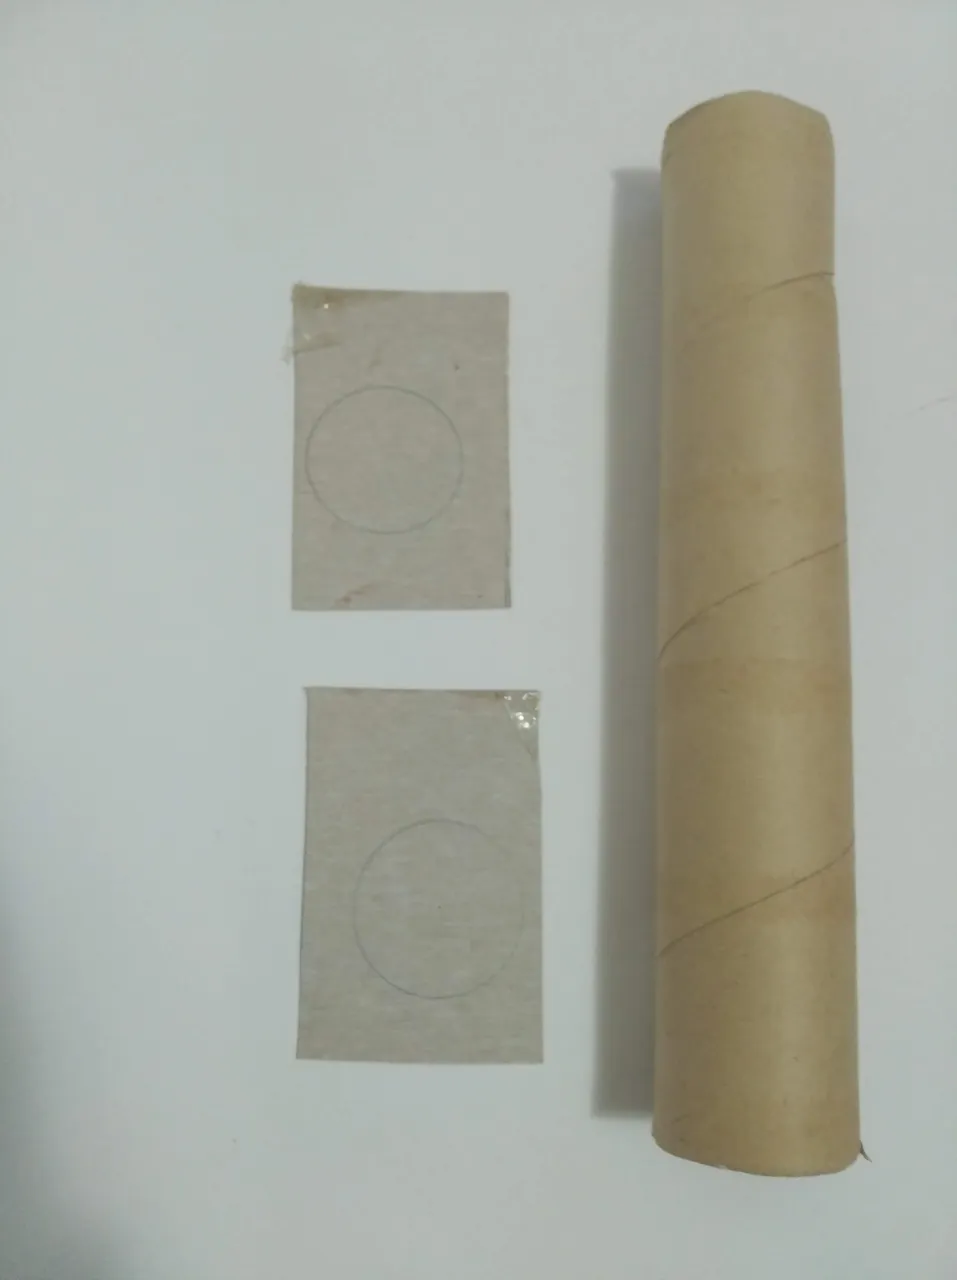
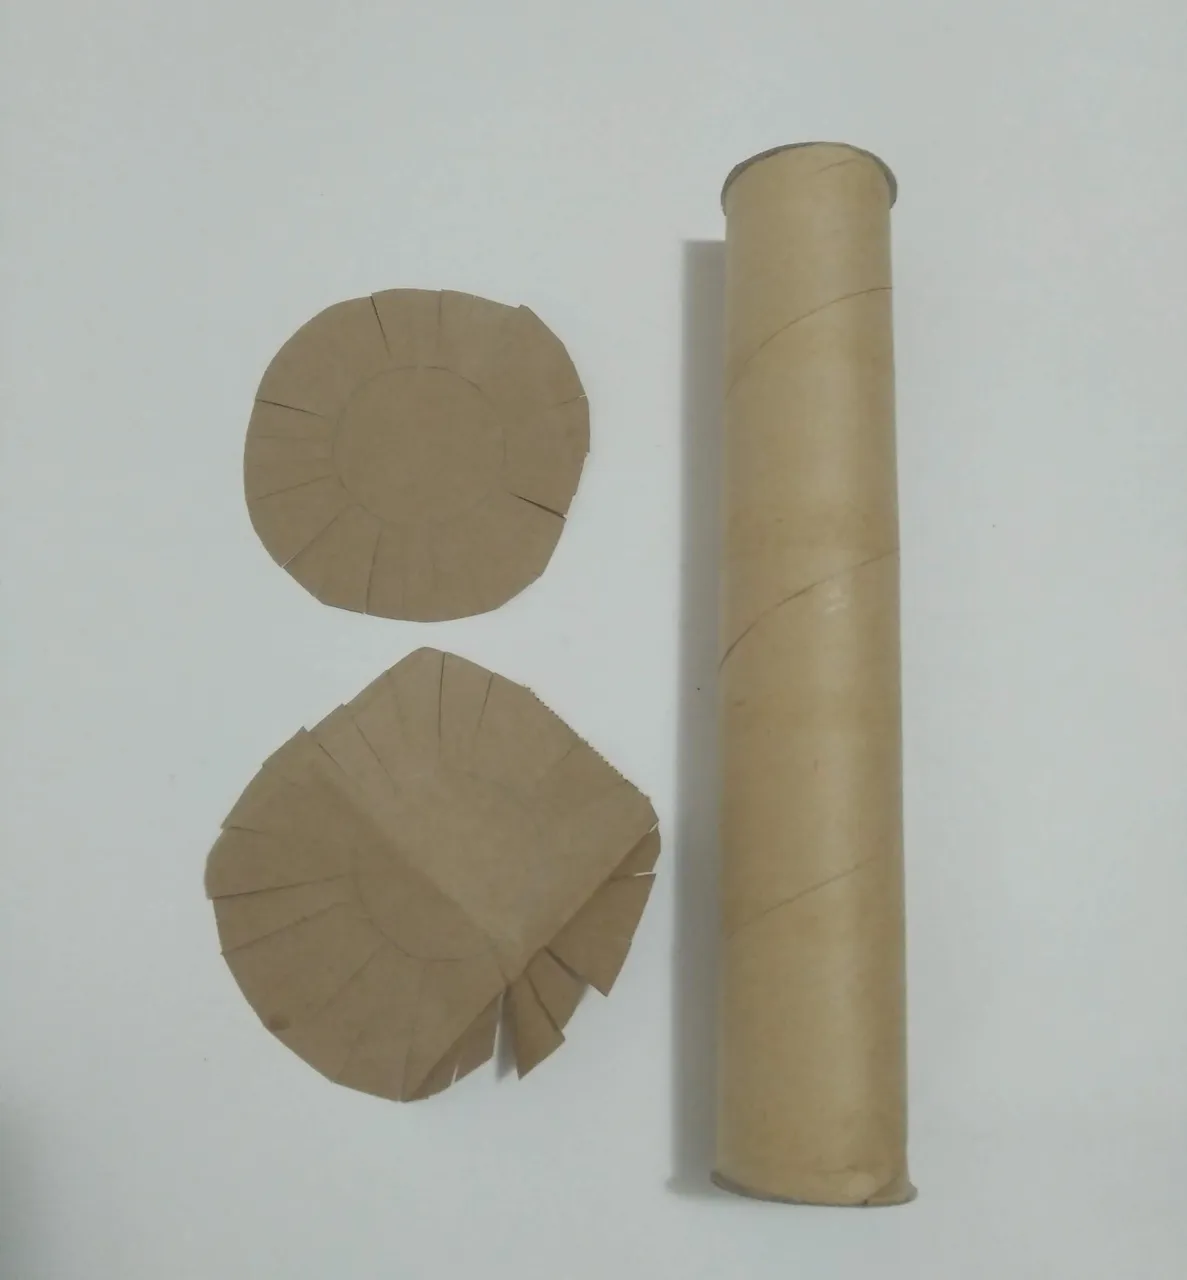
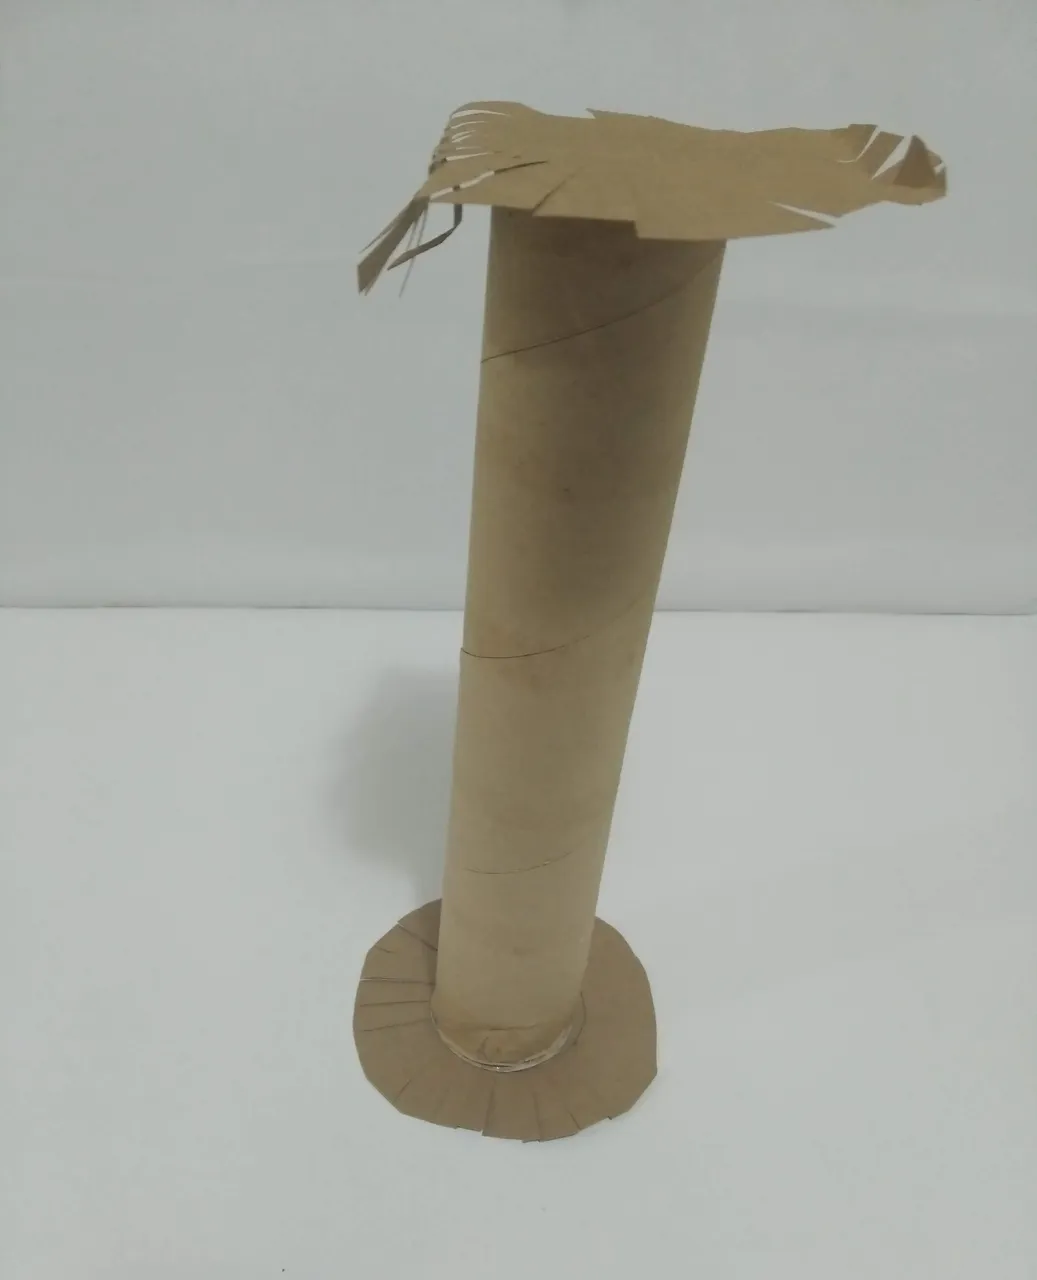
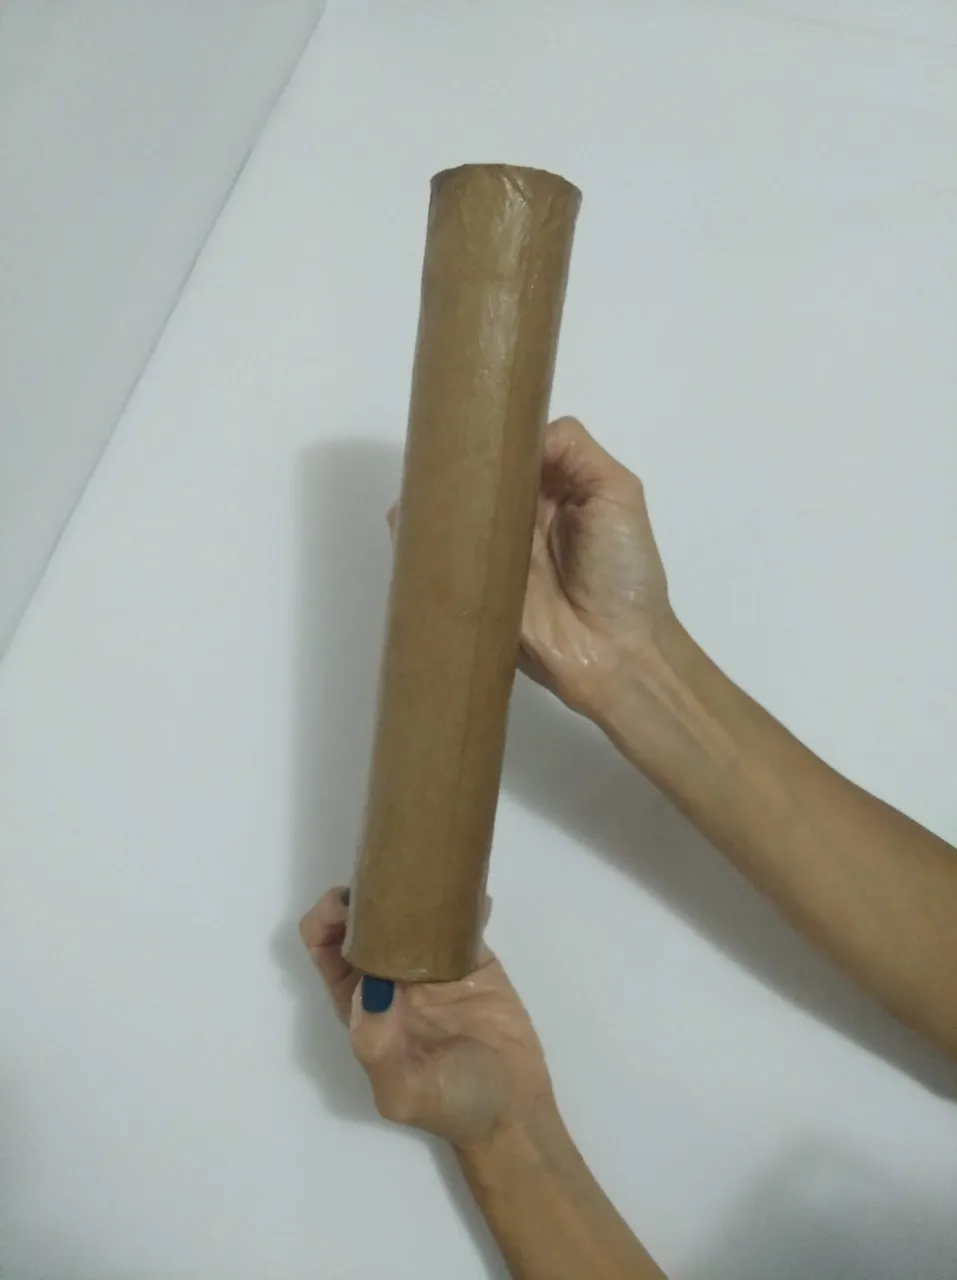
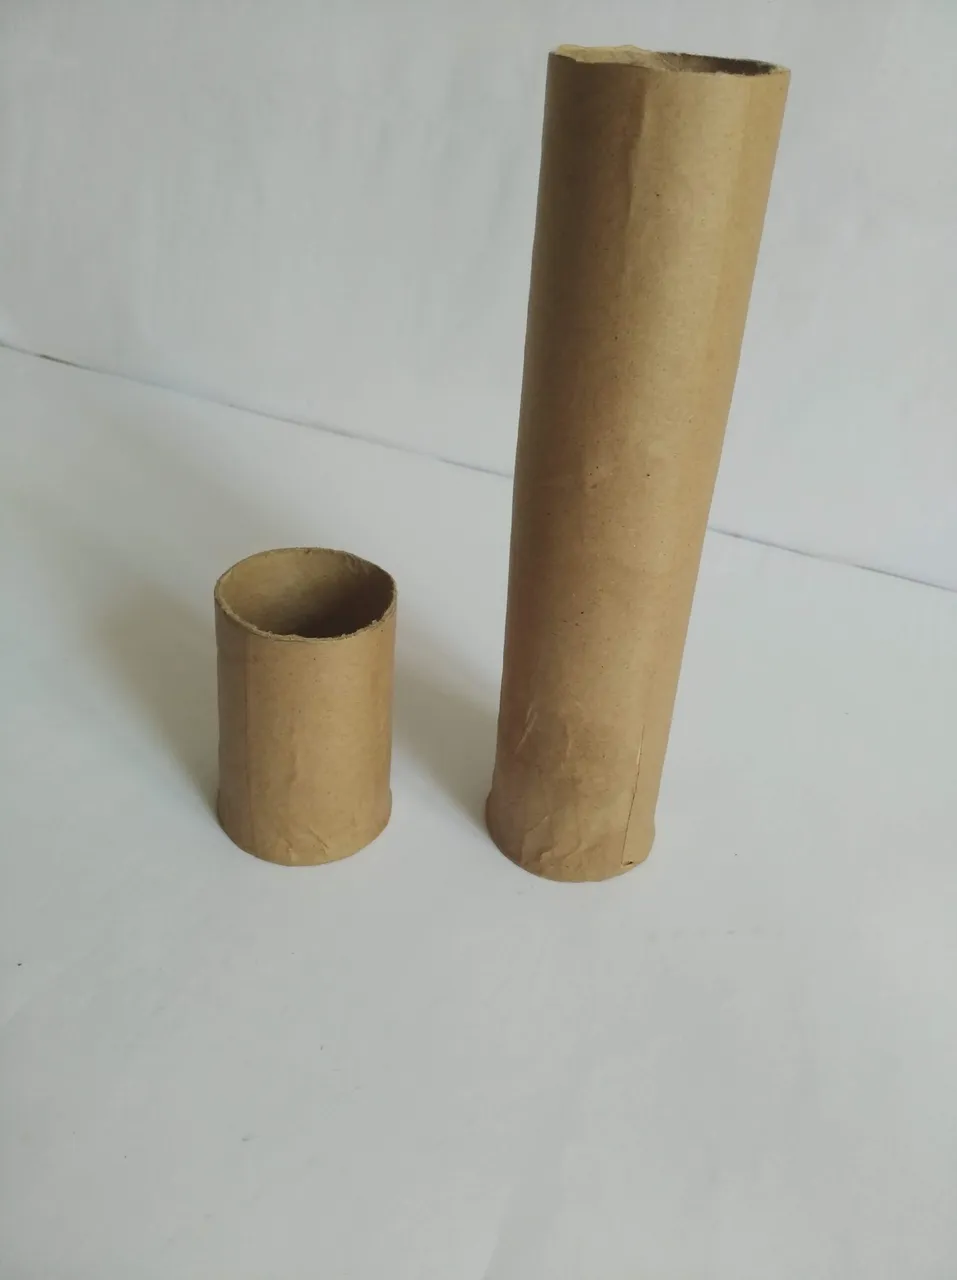
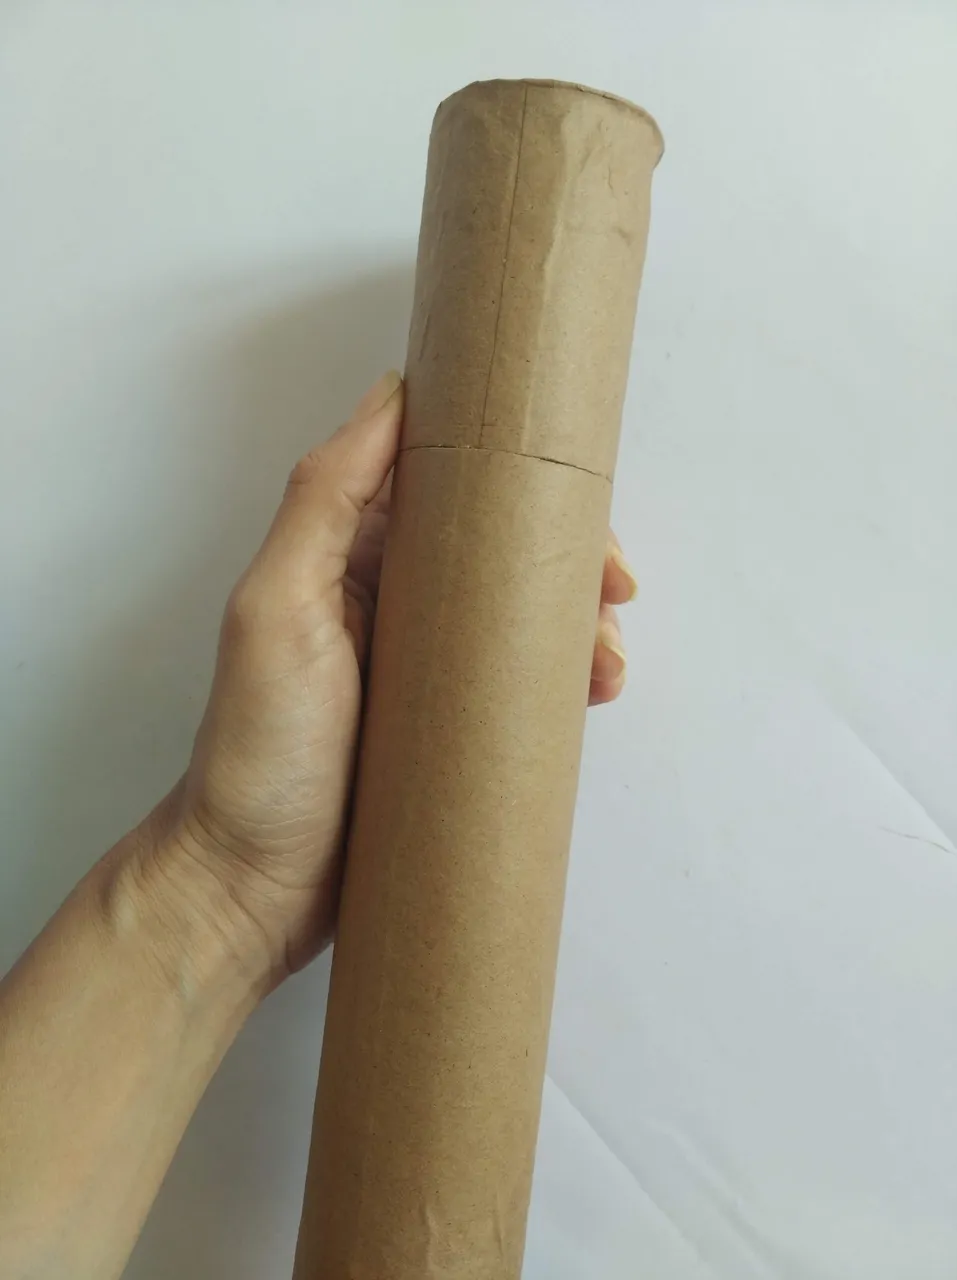
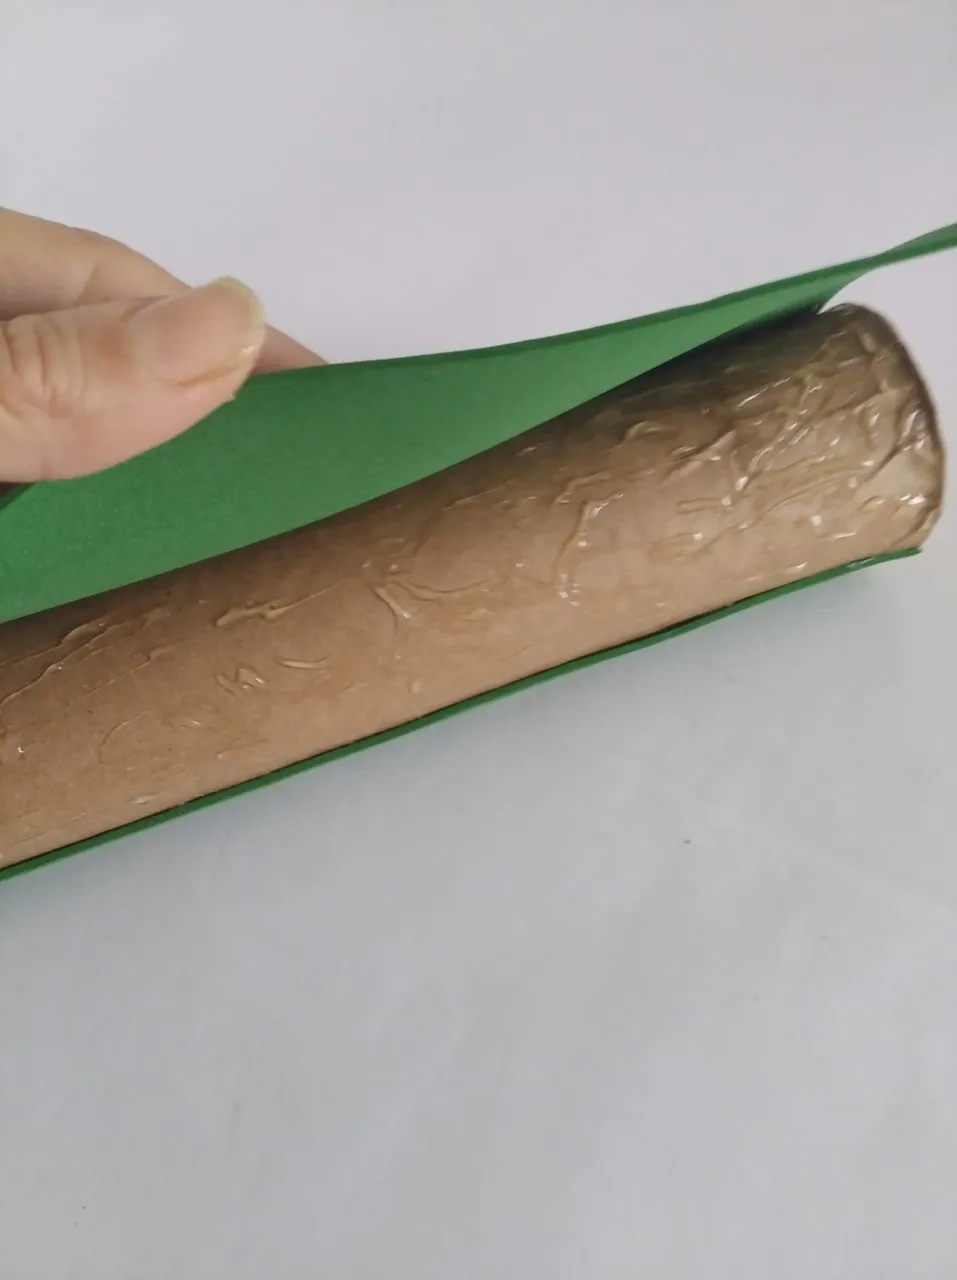
- Tomar el cilindro de cartón y hacerle dos tapas con el cartón resistente pegando en ambos extremos con silicón frio.
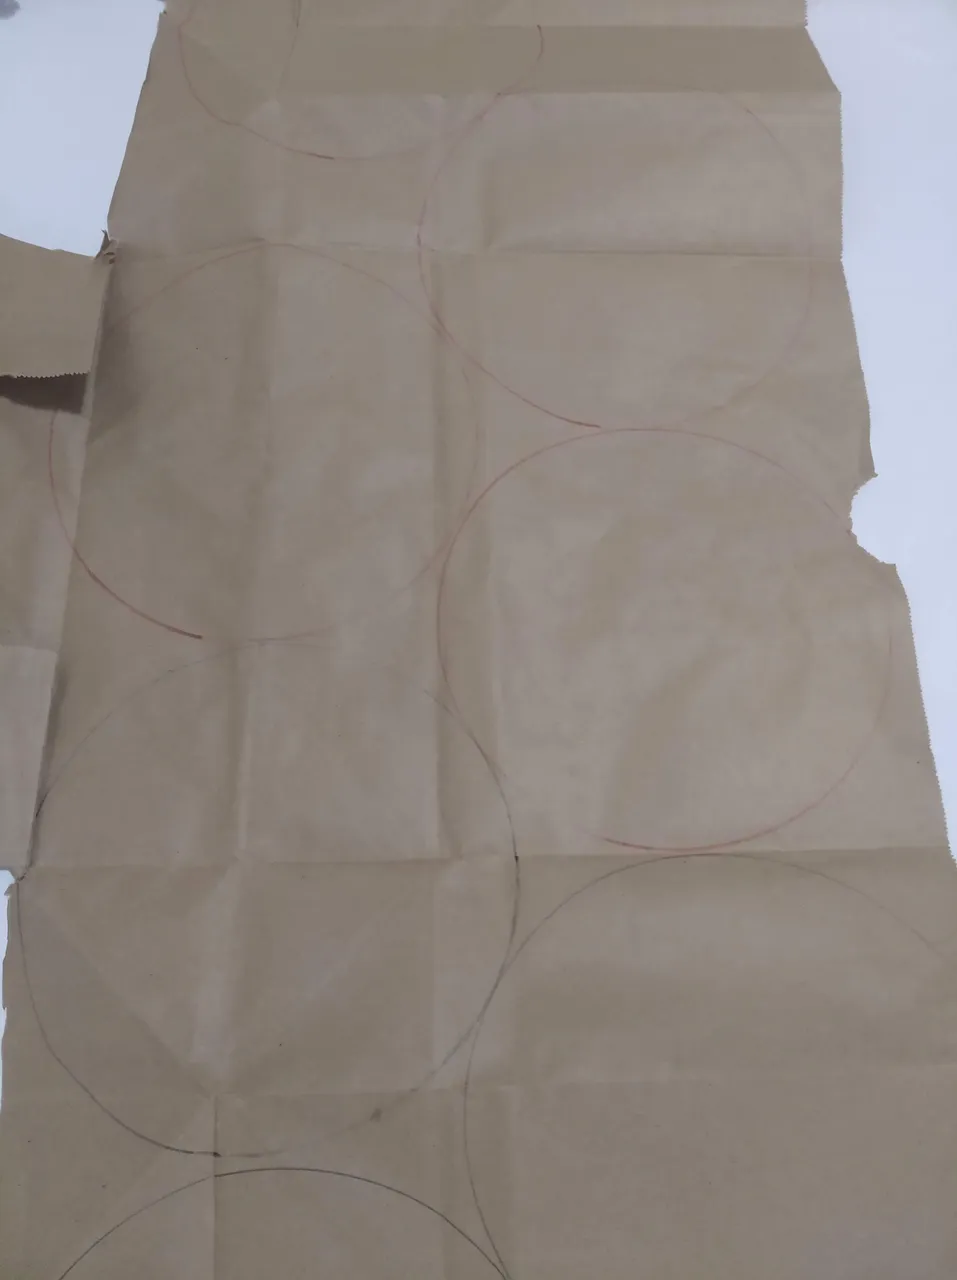
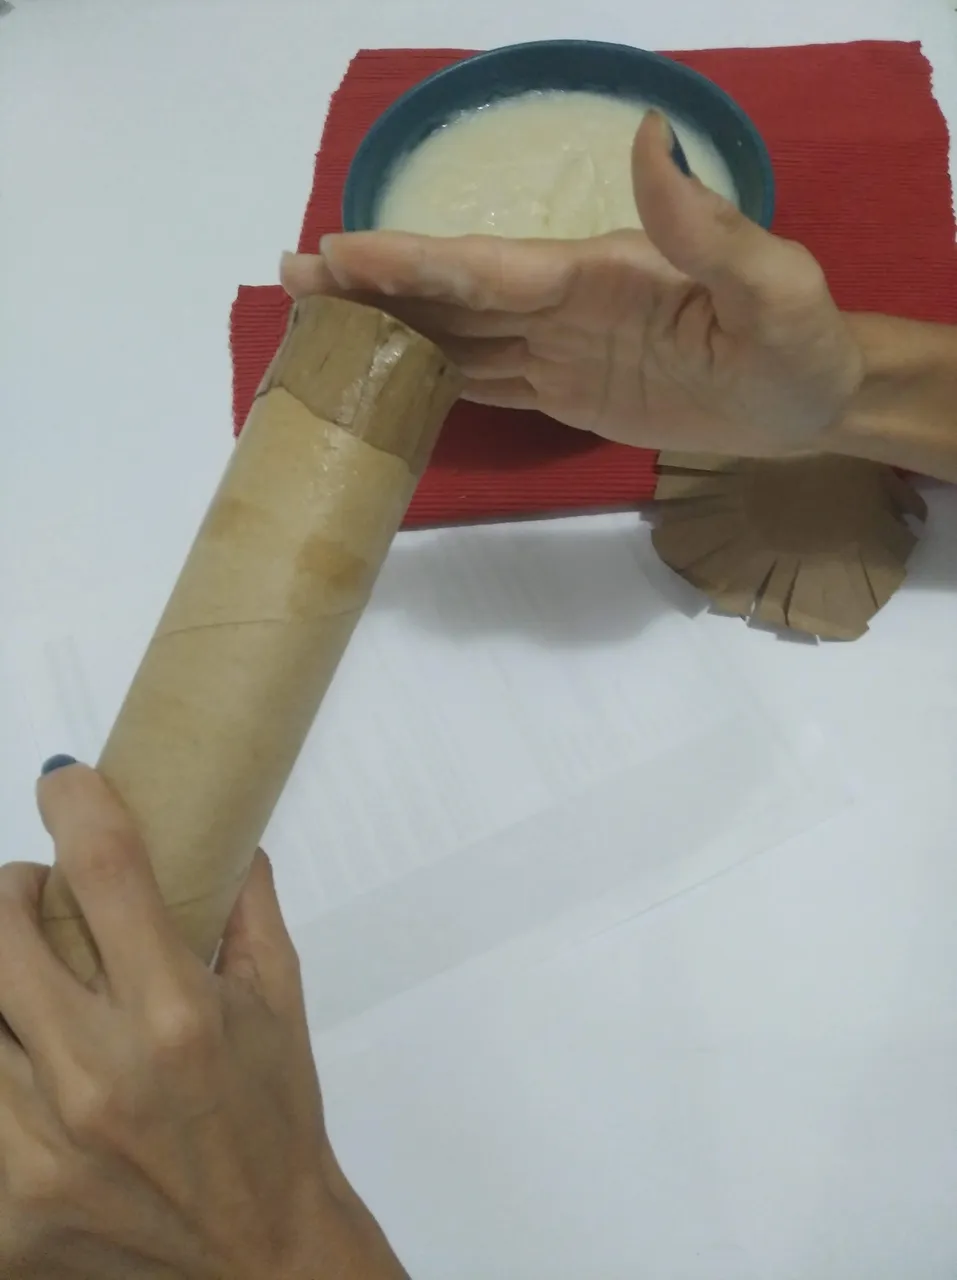
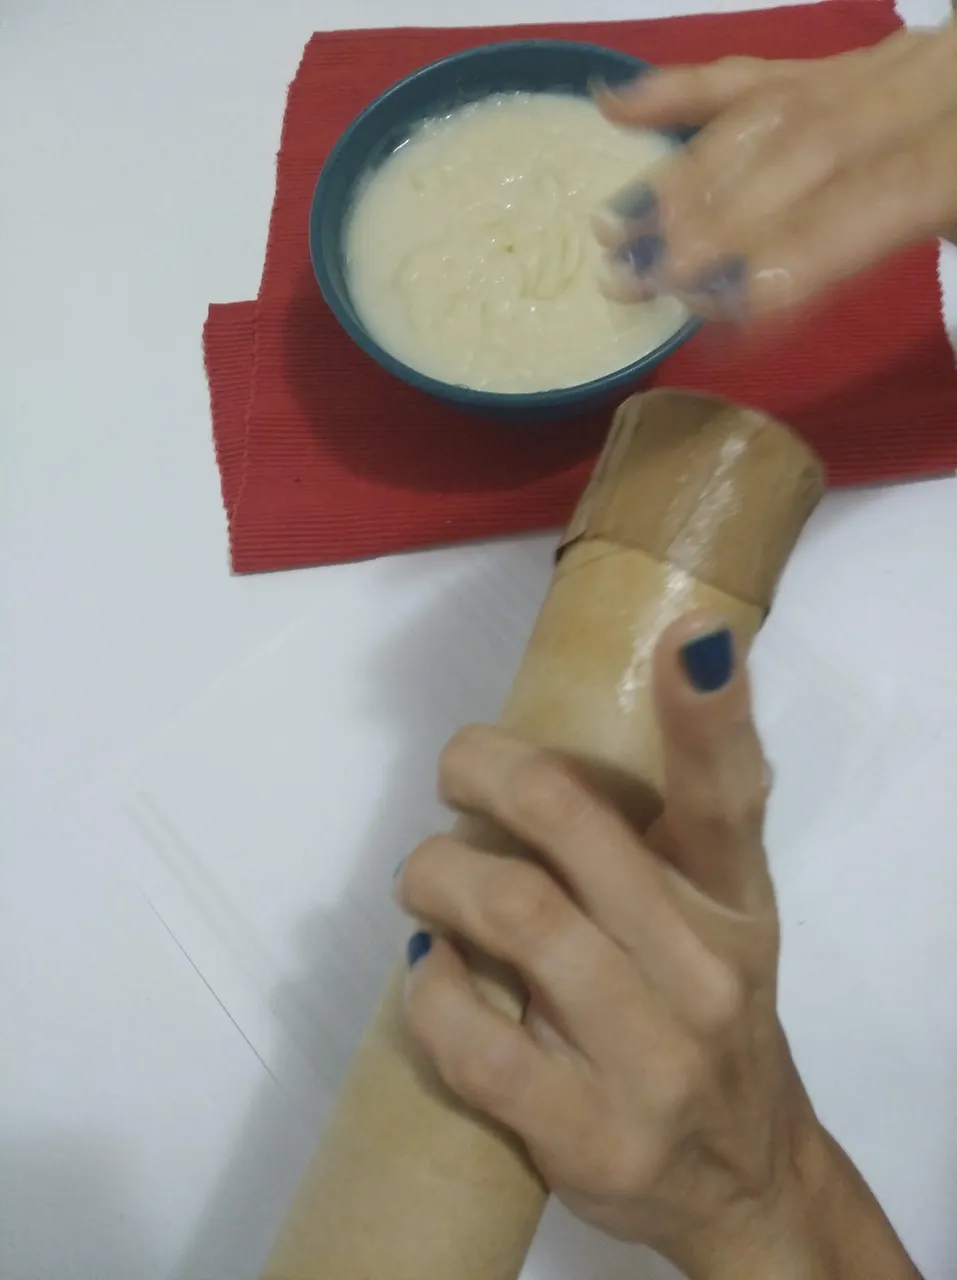
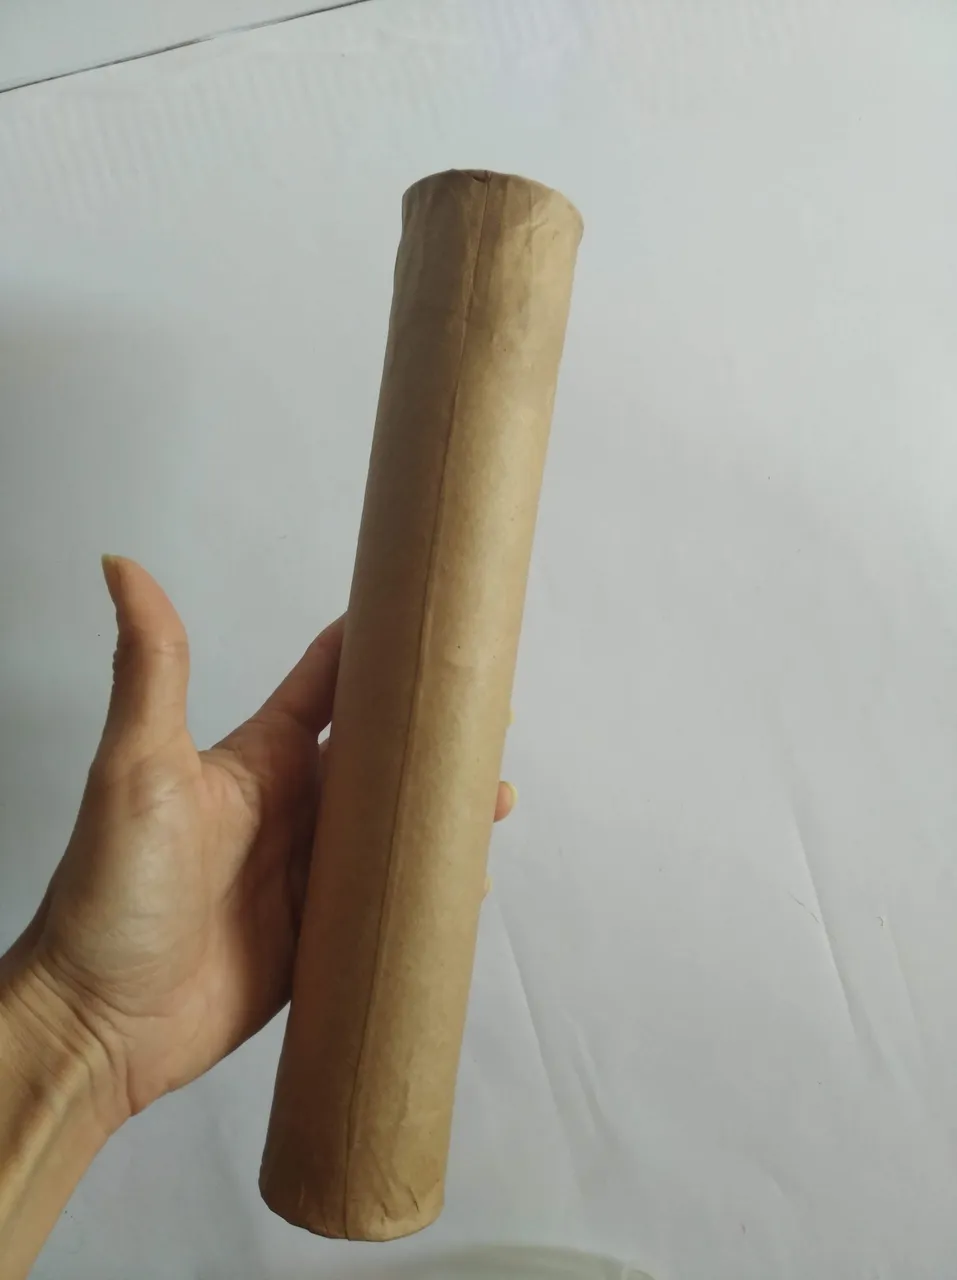
- Cortar en forma circular dos pedazos papel de bolsa que cubran ambos extremos y pegar con el engrudo casero, el papel debe cubrirse con suficiente engrudo por todos lados. La función del papel y del engrudo es fortalecer el cilindro de cartón y darle la dureza necesaria para que resista en el tiempo.
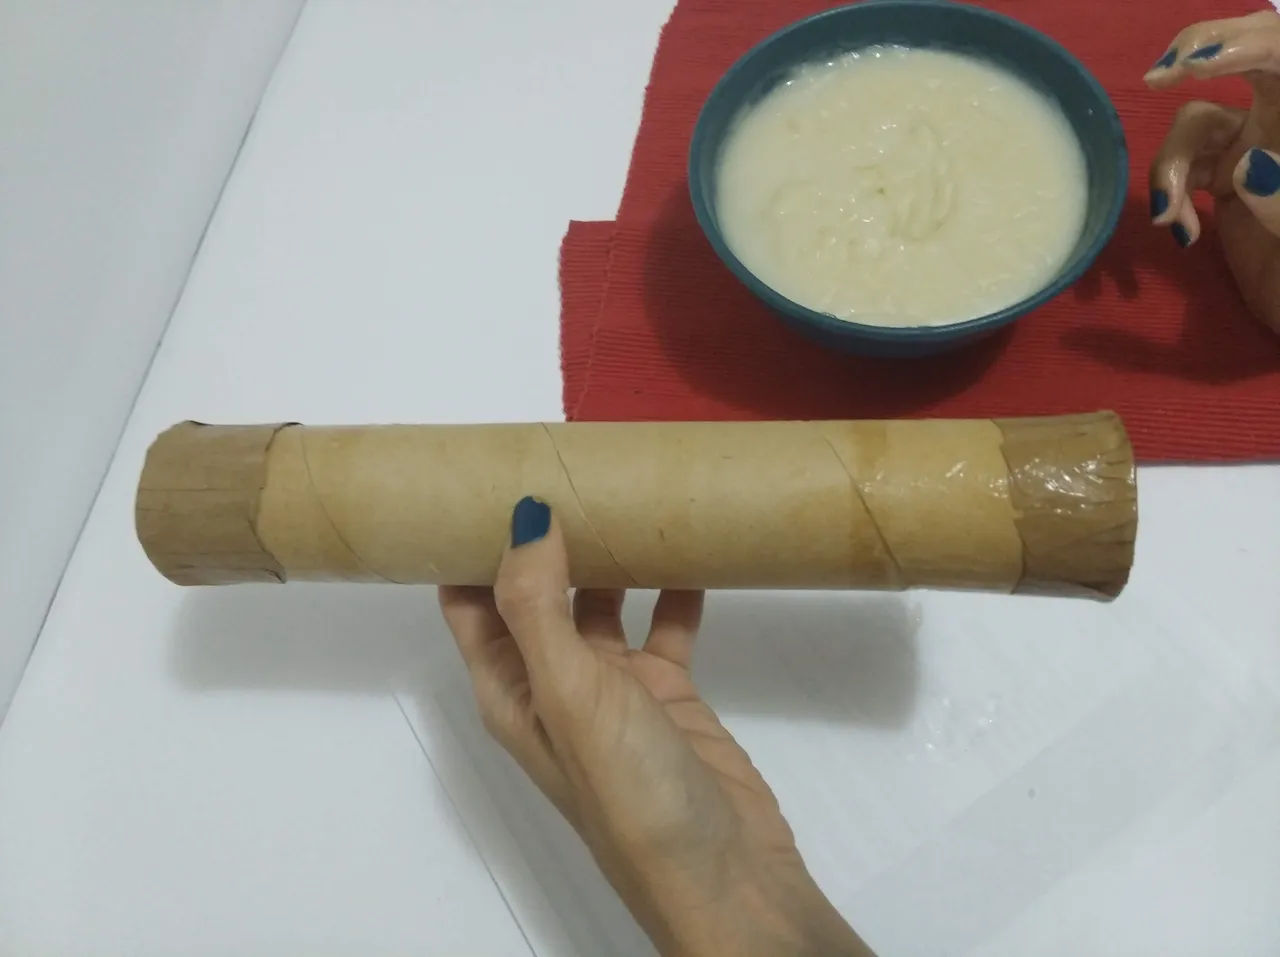
- Cortar un rectángulo de papel de bolsa y pegar en todo el cilindro de cartón, el papel debe cubrirse con suficiente engrudo por todos lados.
- Dejar secar por al menos 24 horas ya que el engrudo casero requiere de suficiente tiempo para secar y endurecer.
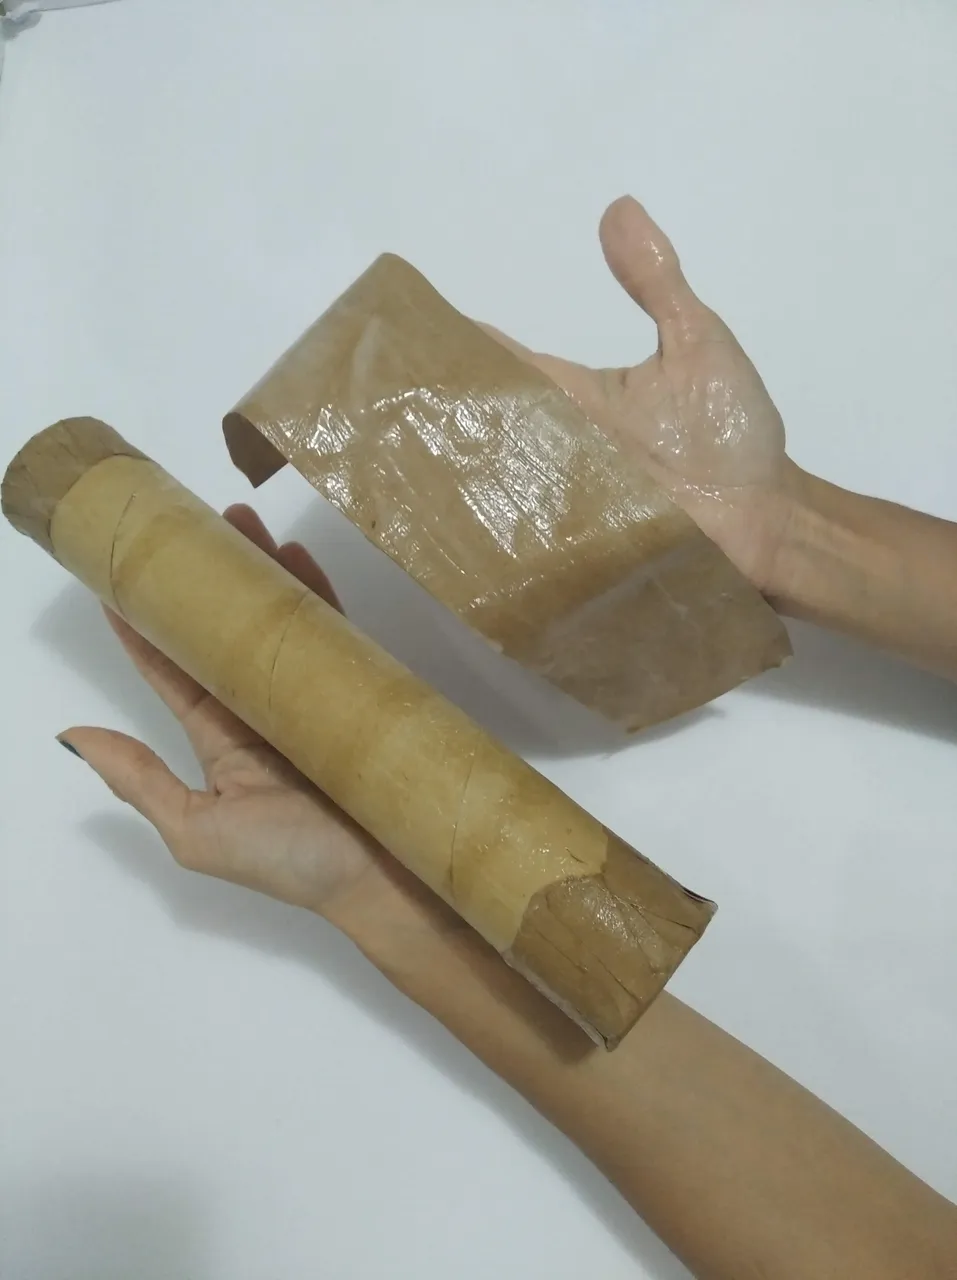
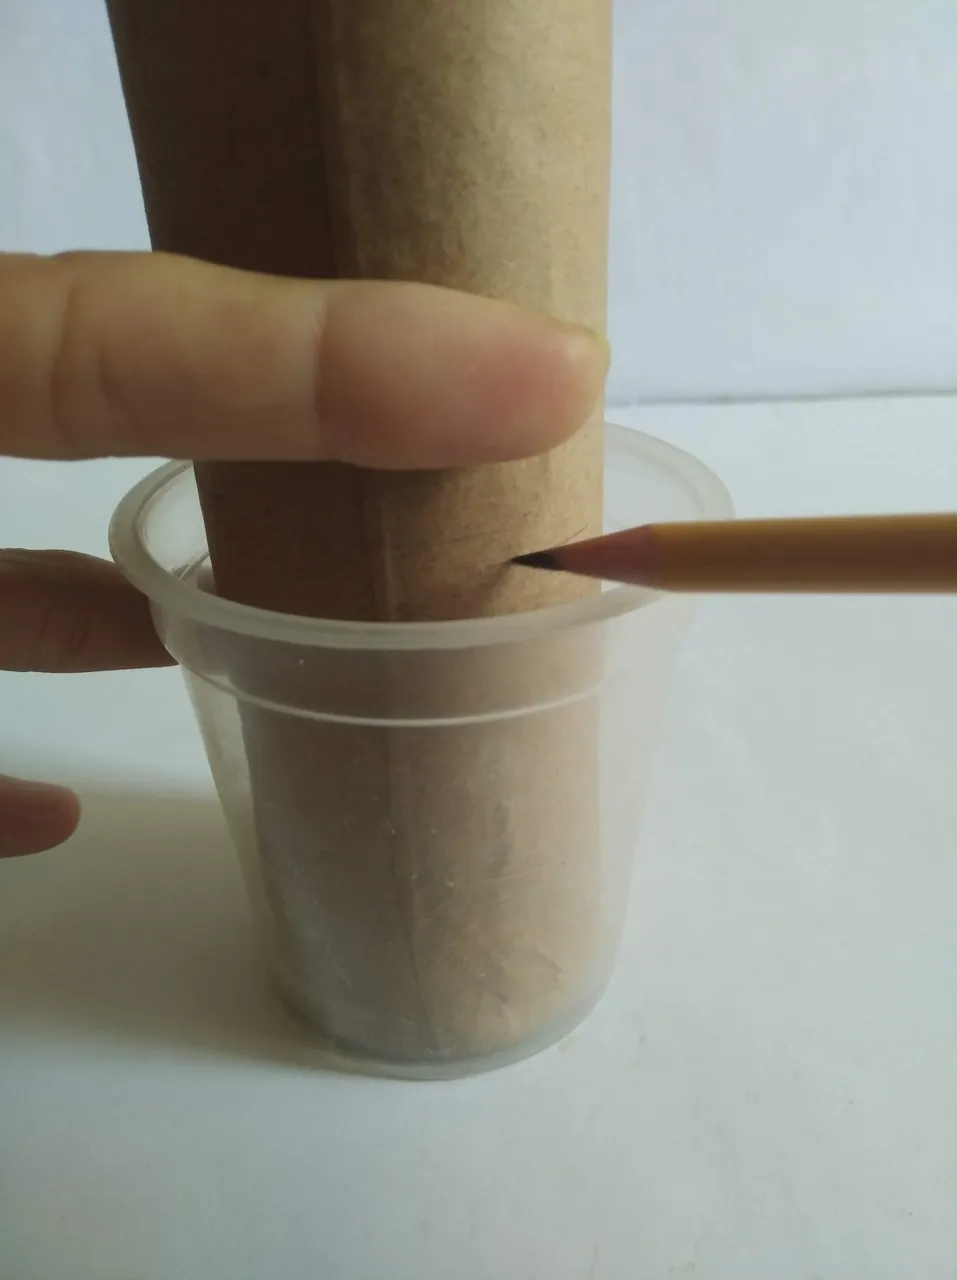
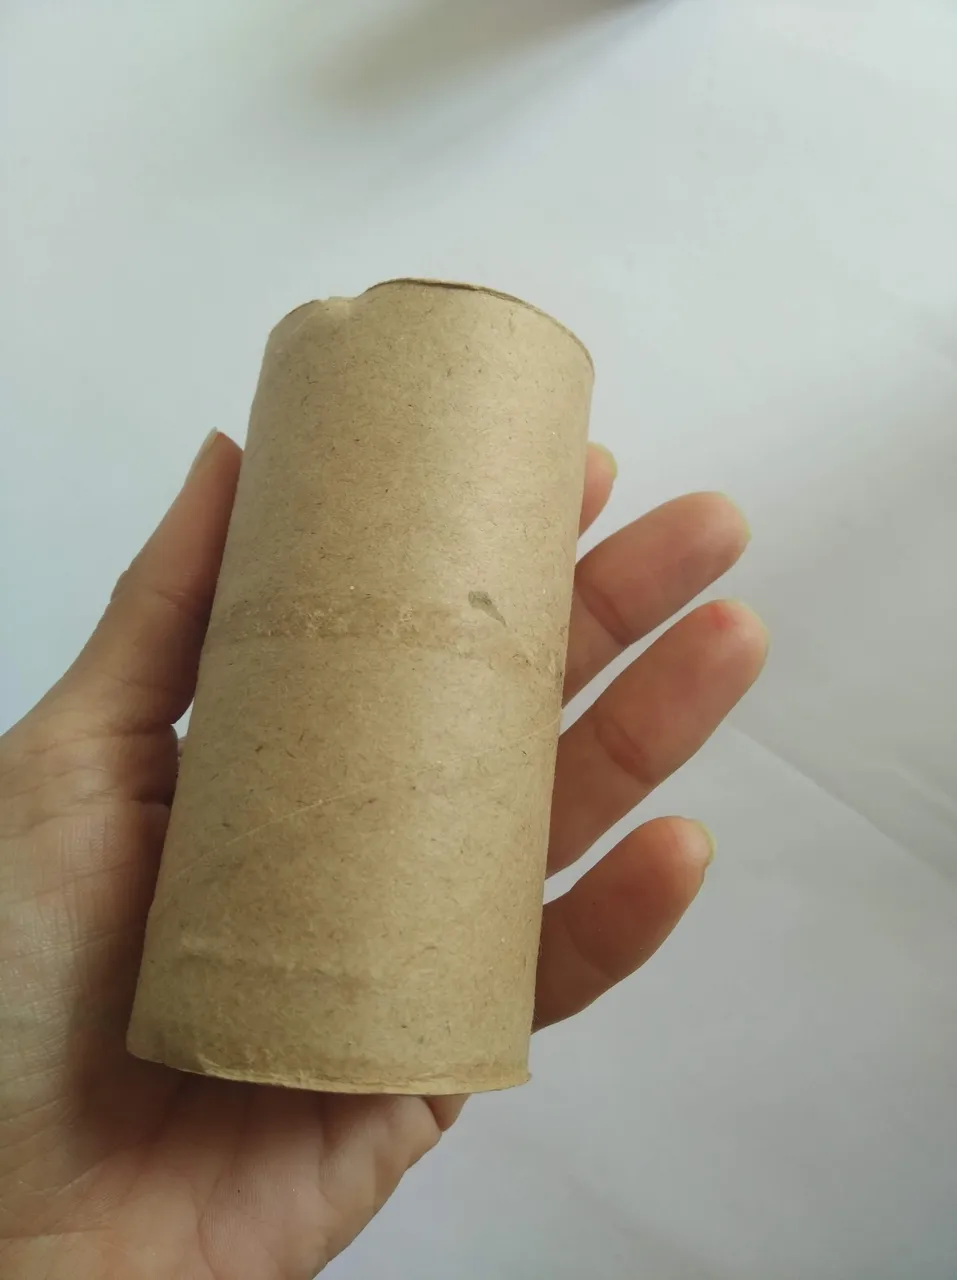
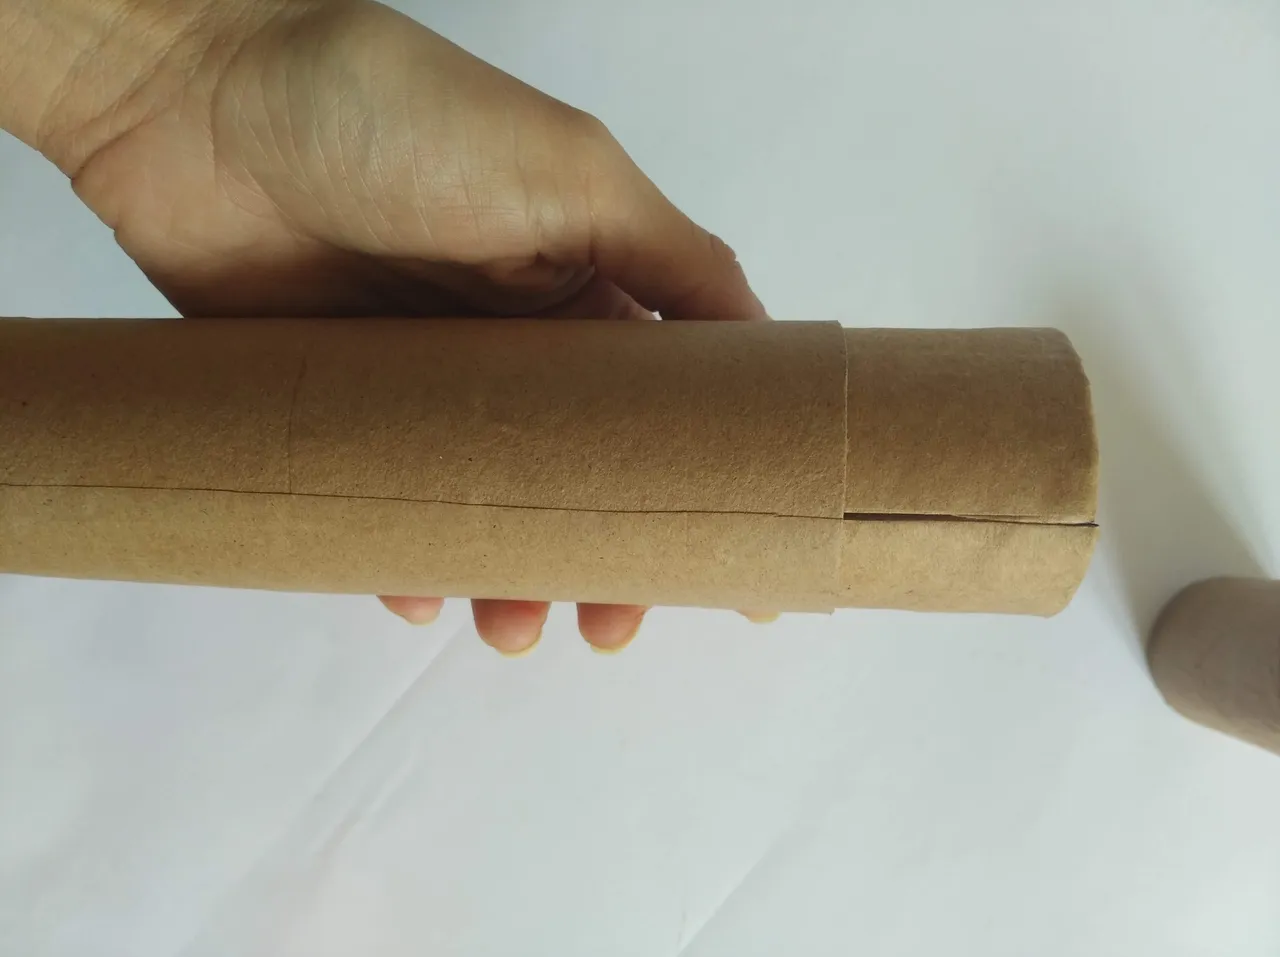
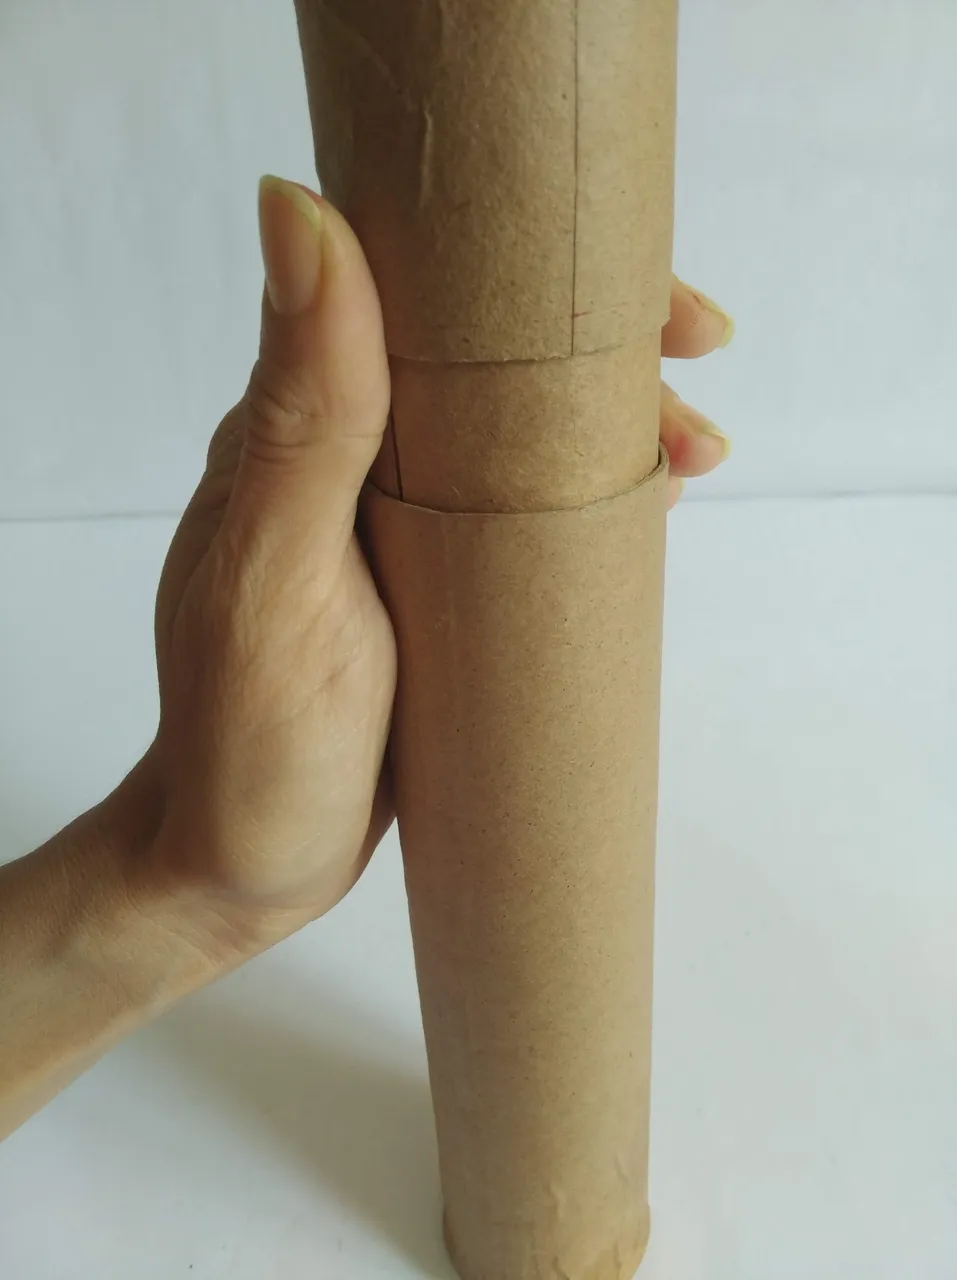
- Un vez seco, marcar lo que será la tapa del estuche, para ésta marca yo utilicé un vaso plástico, introduje el cilindro y con la ayuda del borde del vaso marque todo el cilindro y así obtener una marca completa y pareja en el cilindro.
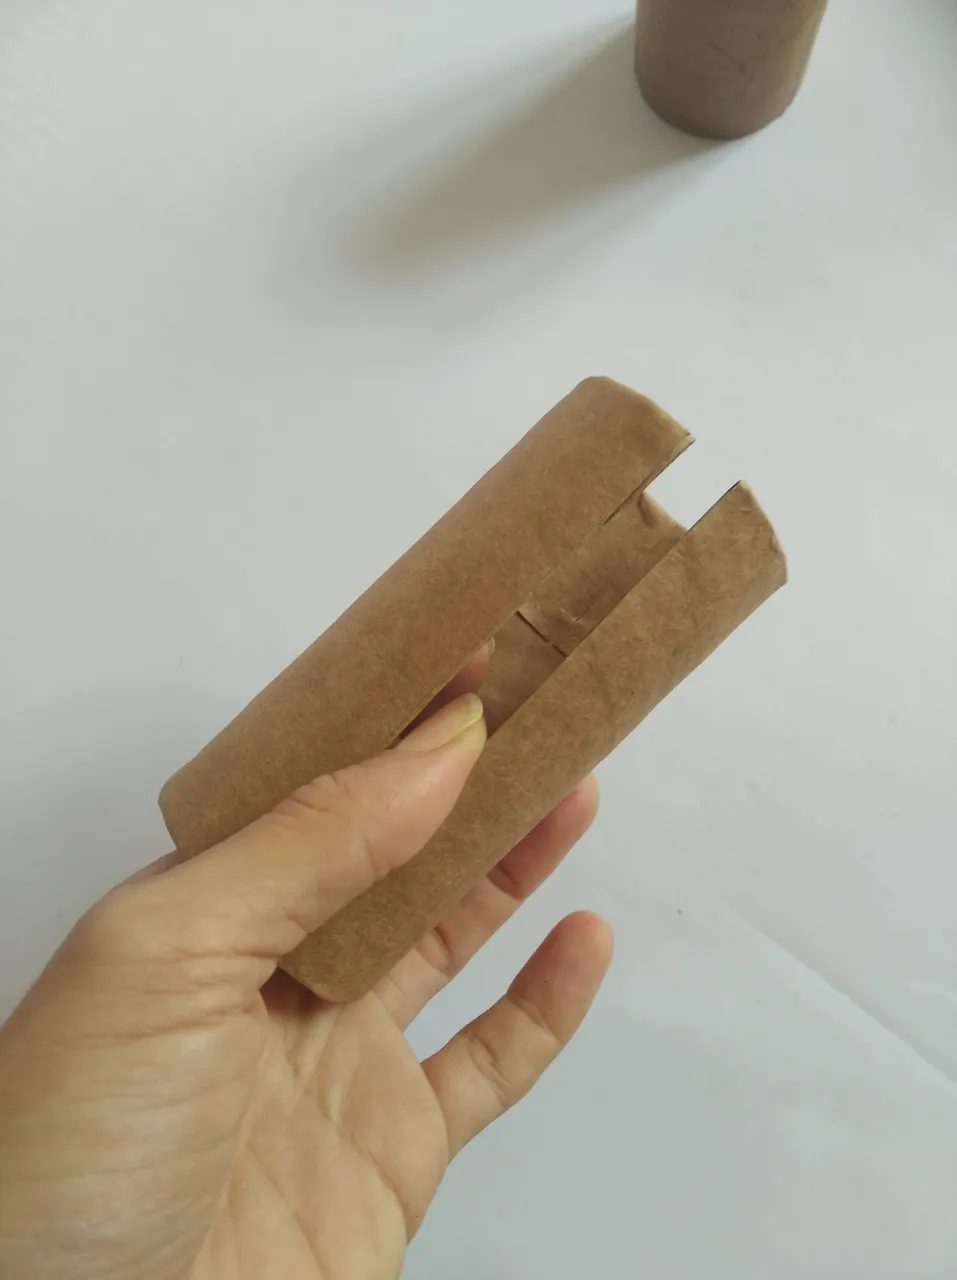
- Cortar el cilindro por la marca realizada. Para que el corte quede bien recomiendo hacerlo con un cutter de buen filo, cortando poco a poco para evitar dañar el cilindro.
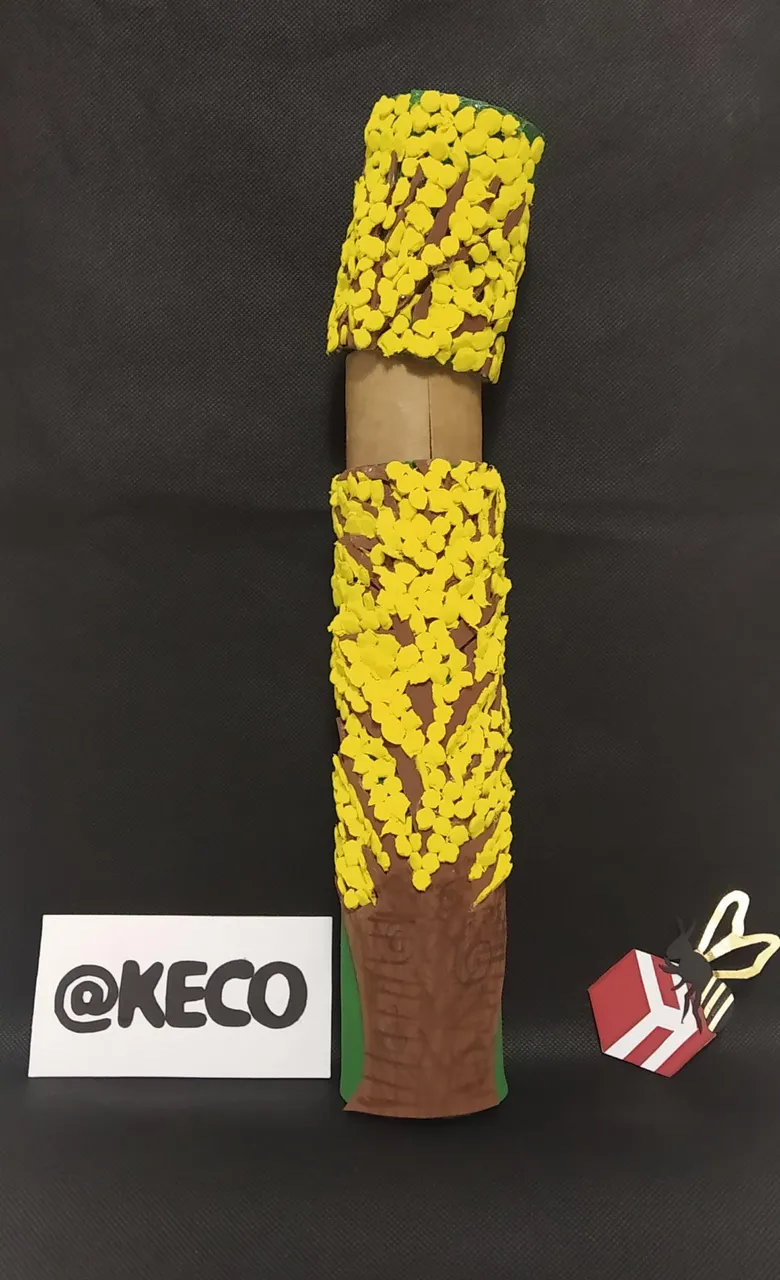
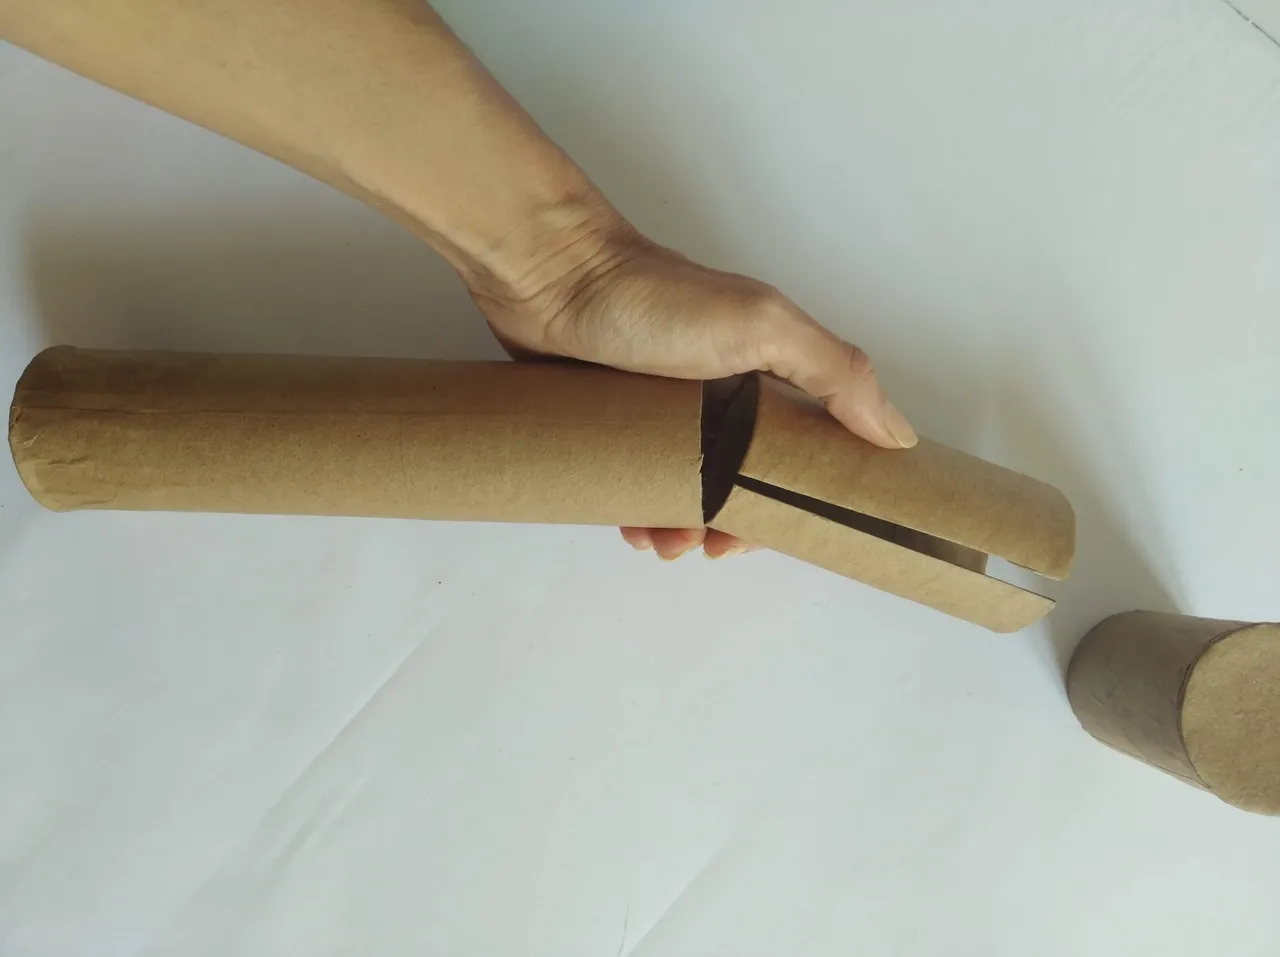
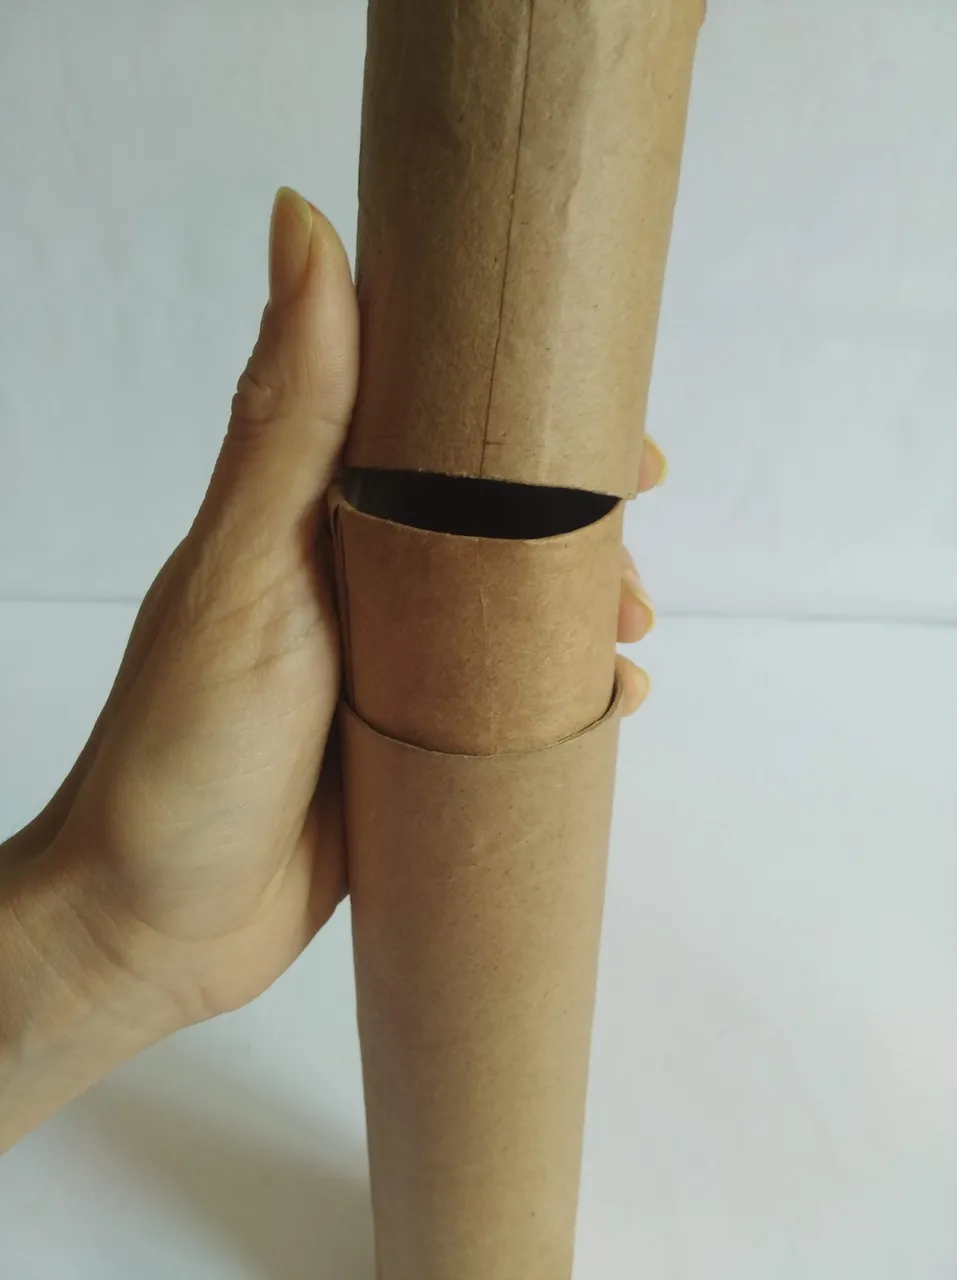
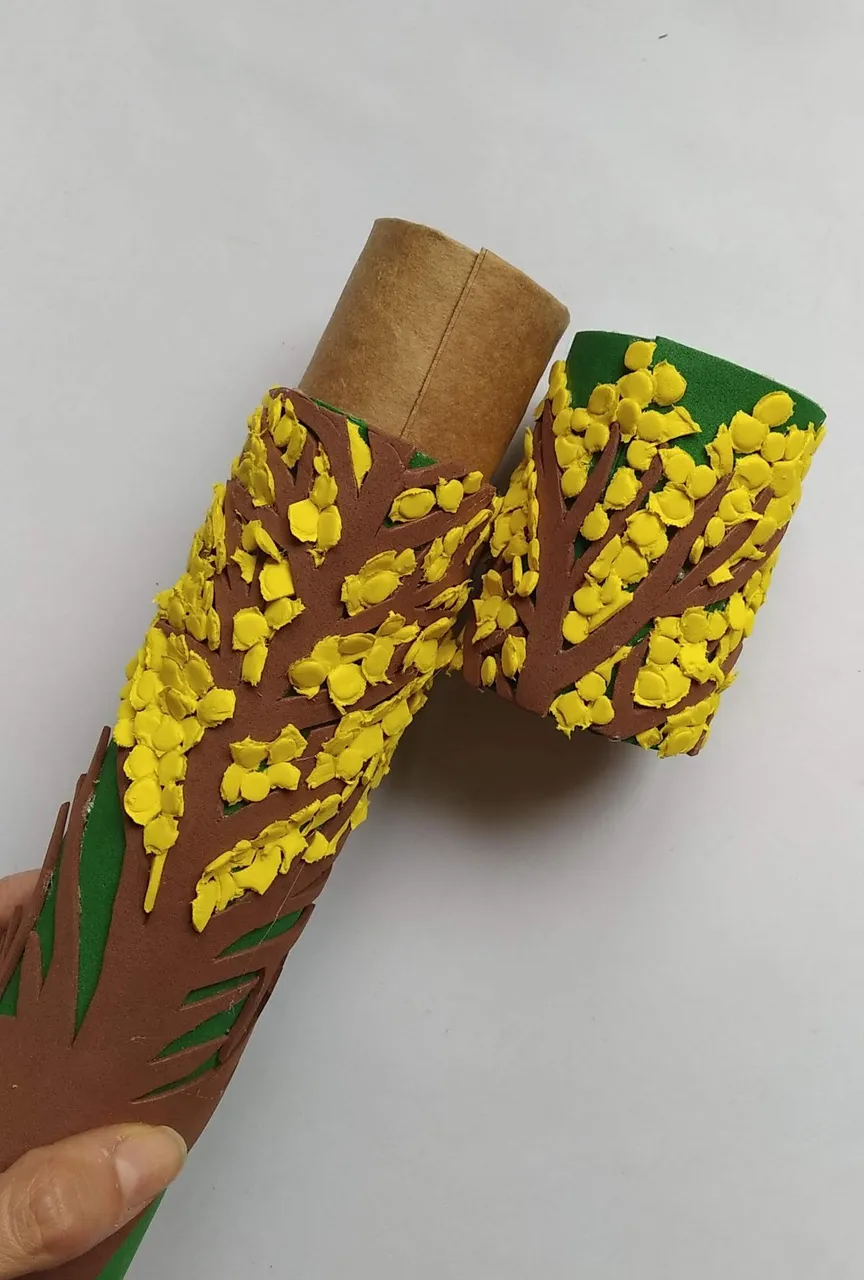
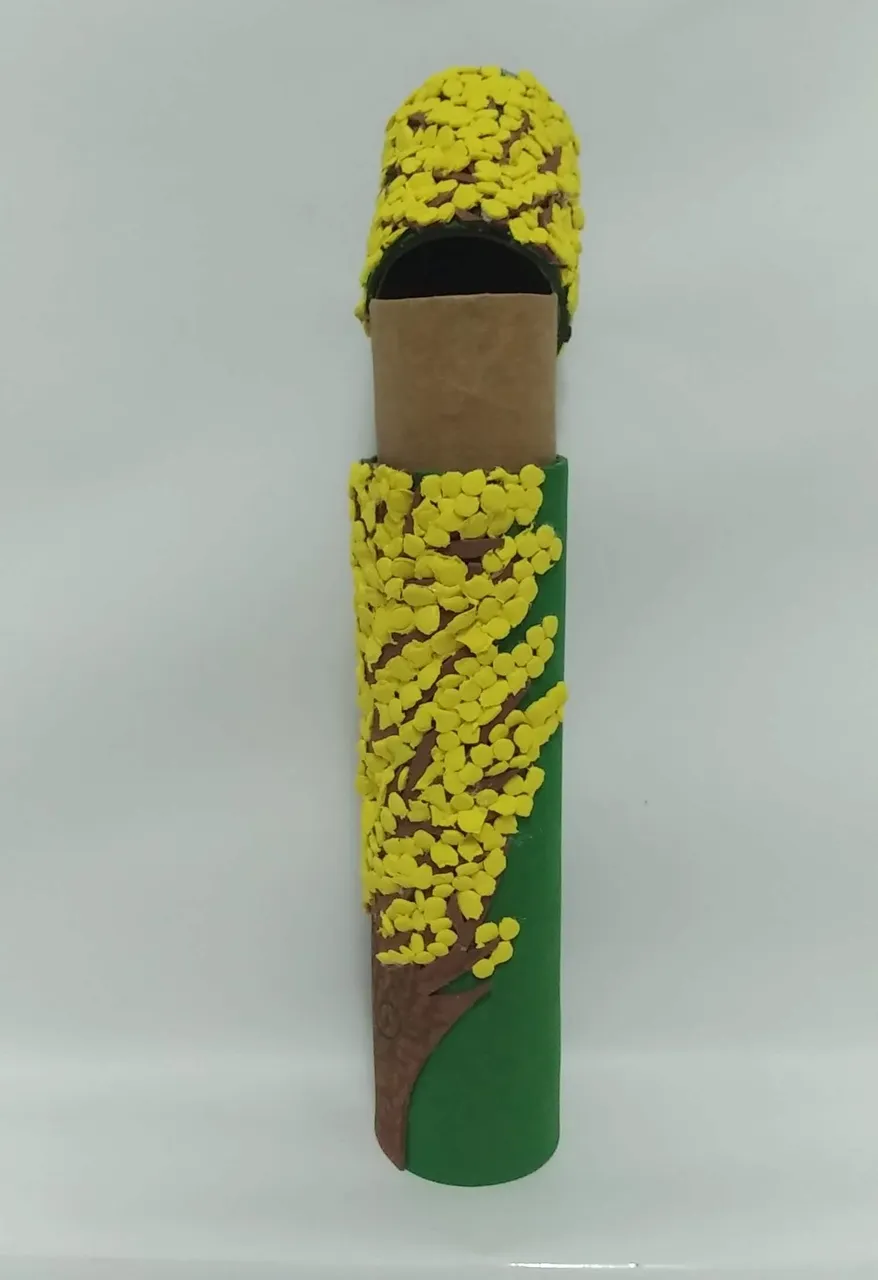
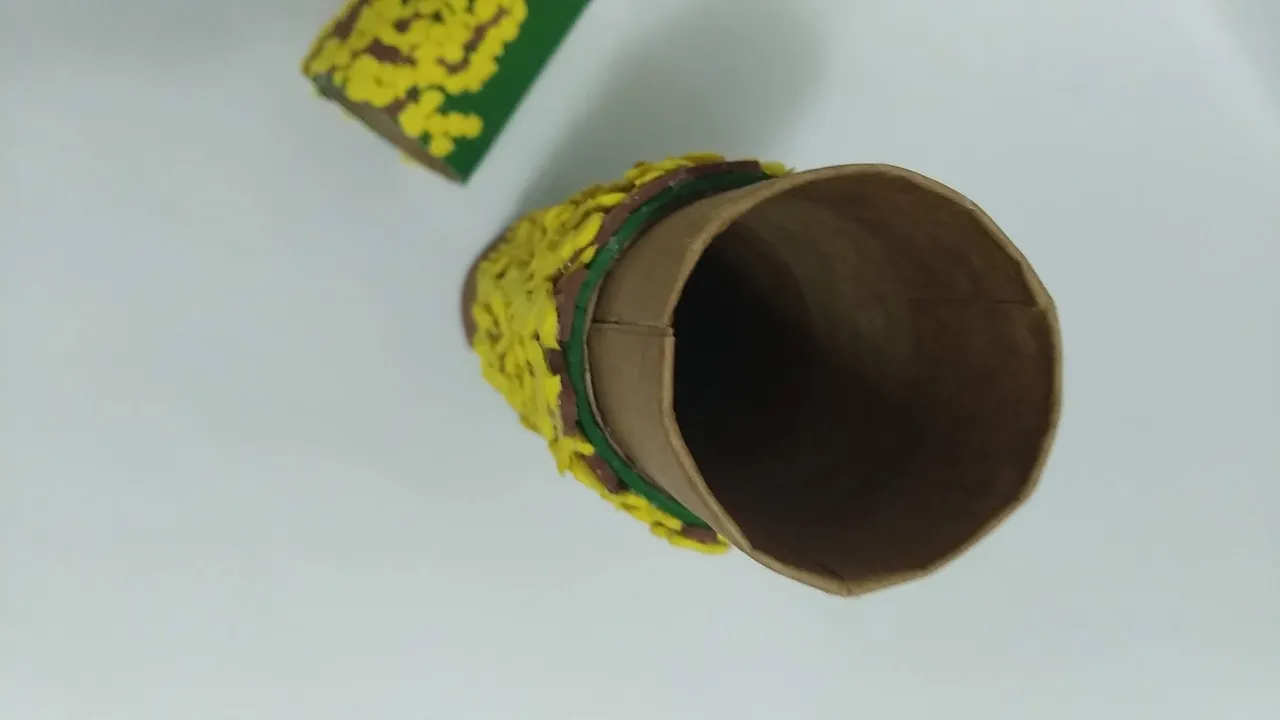
- El rollo de papel higiénico (también fortalecido con papel y engrudo) cortarlo a la mitad en forma vertical del tubo.
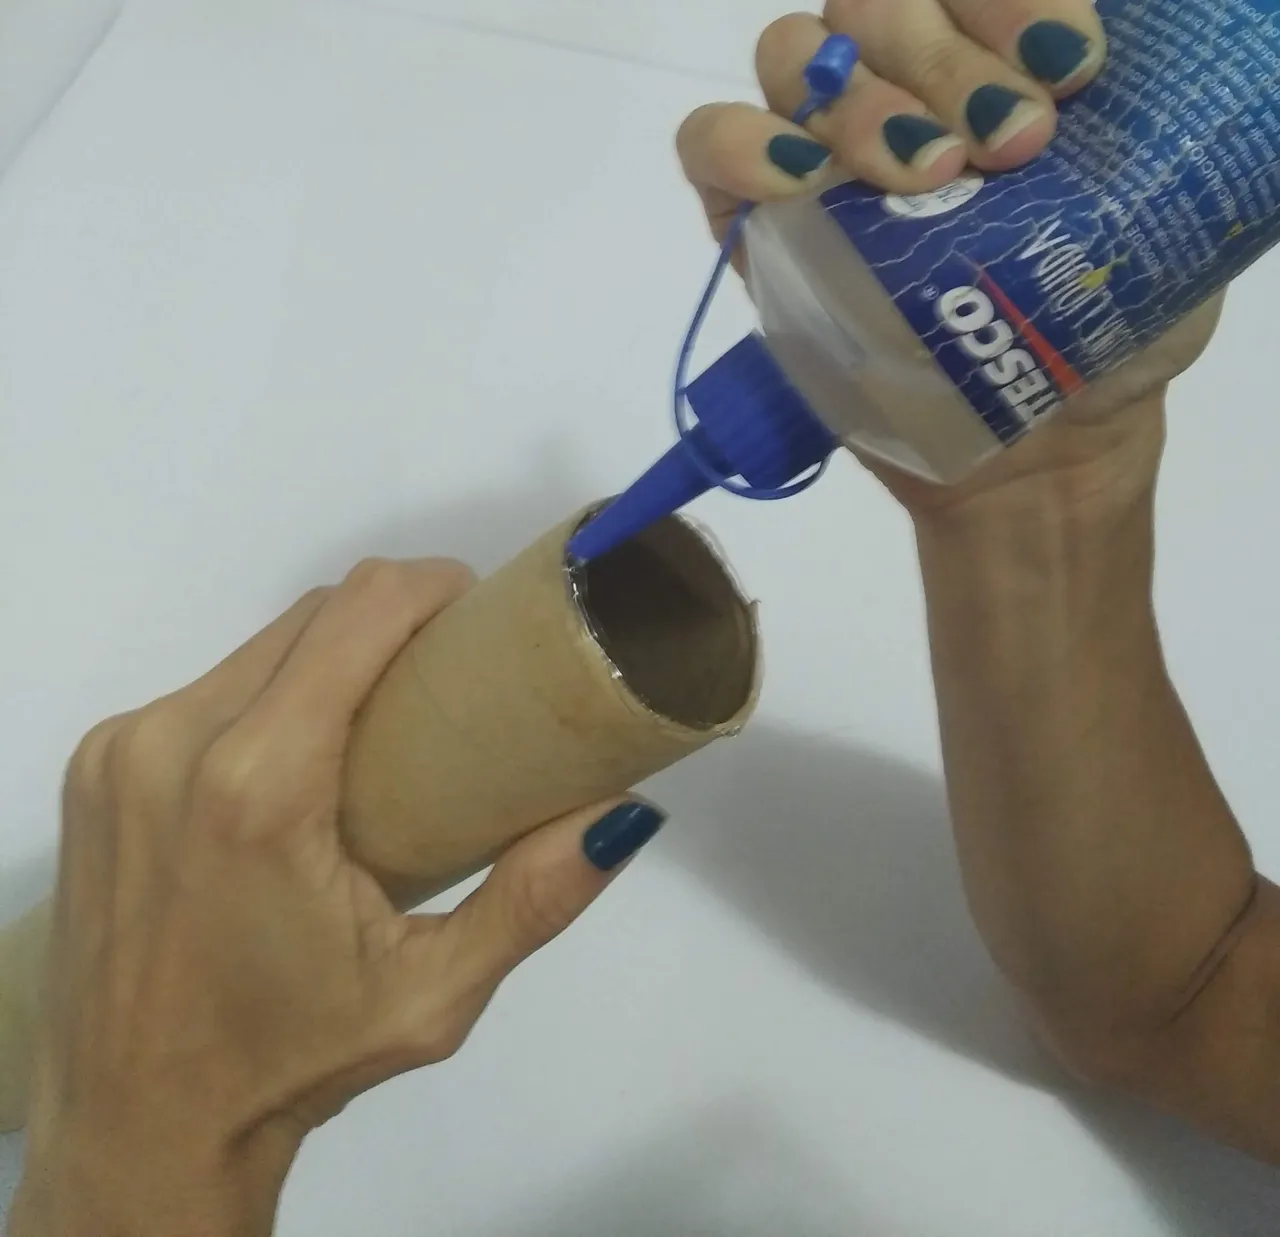
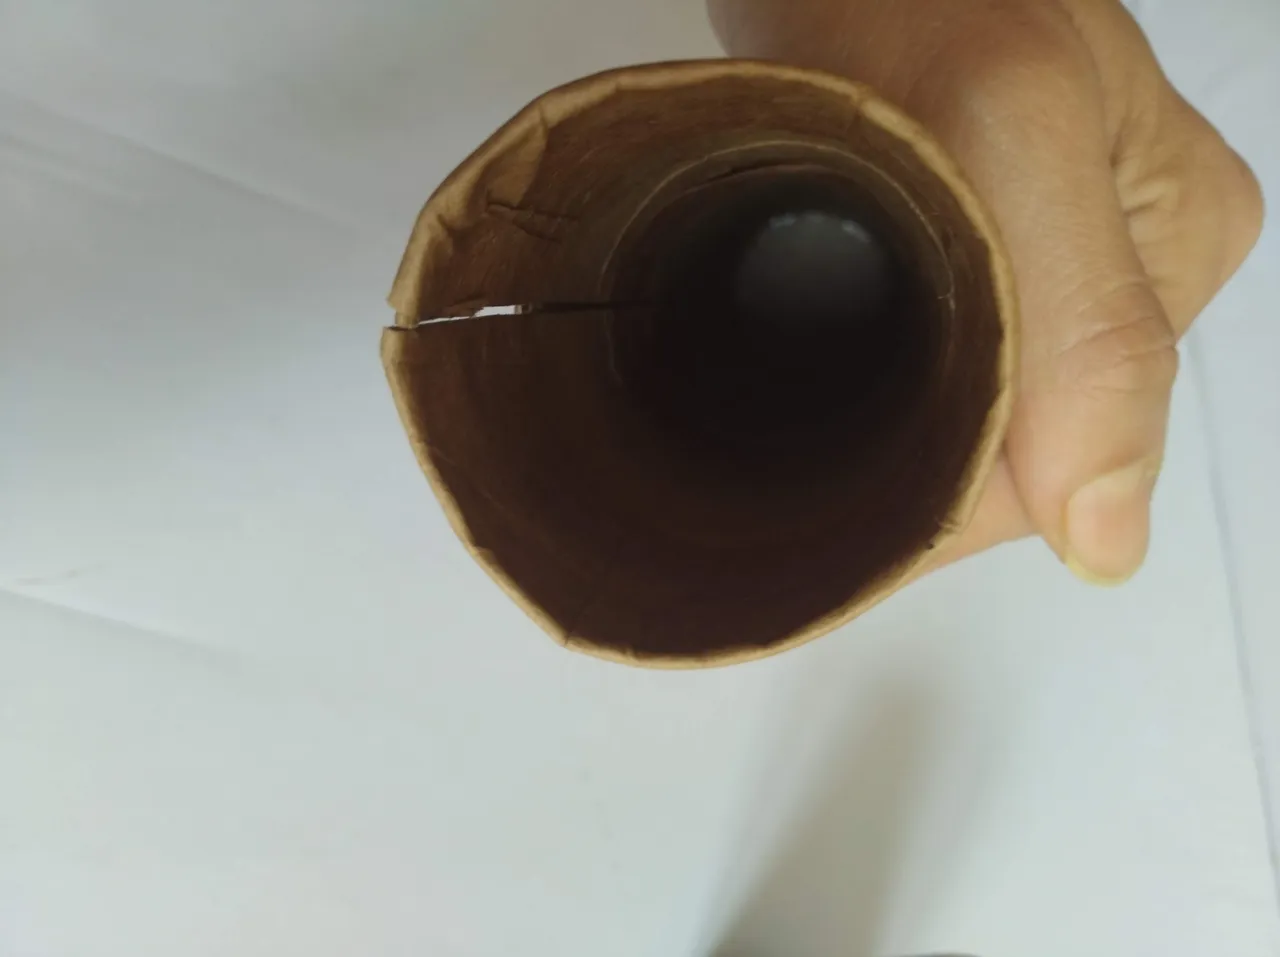
- Meter y pegar con silicón frio el rollo de papel dentro del cilindro grande, dejando la mitad del tubo hacia adentro y la mitad del tubo hacia afuera. Esta parte que sobresale será la que permitirá conectar la base a la tapa a presión.
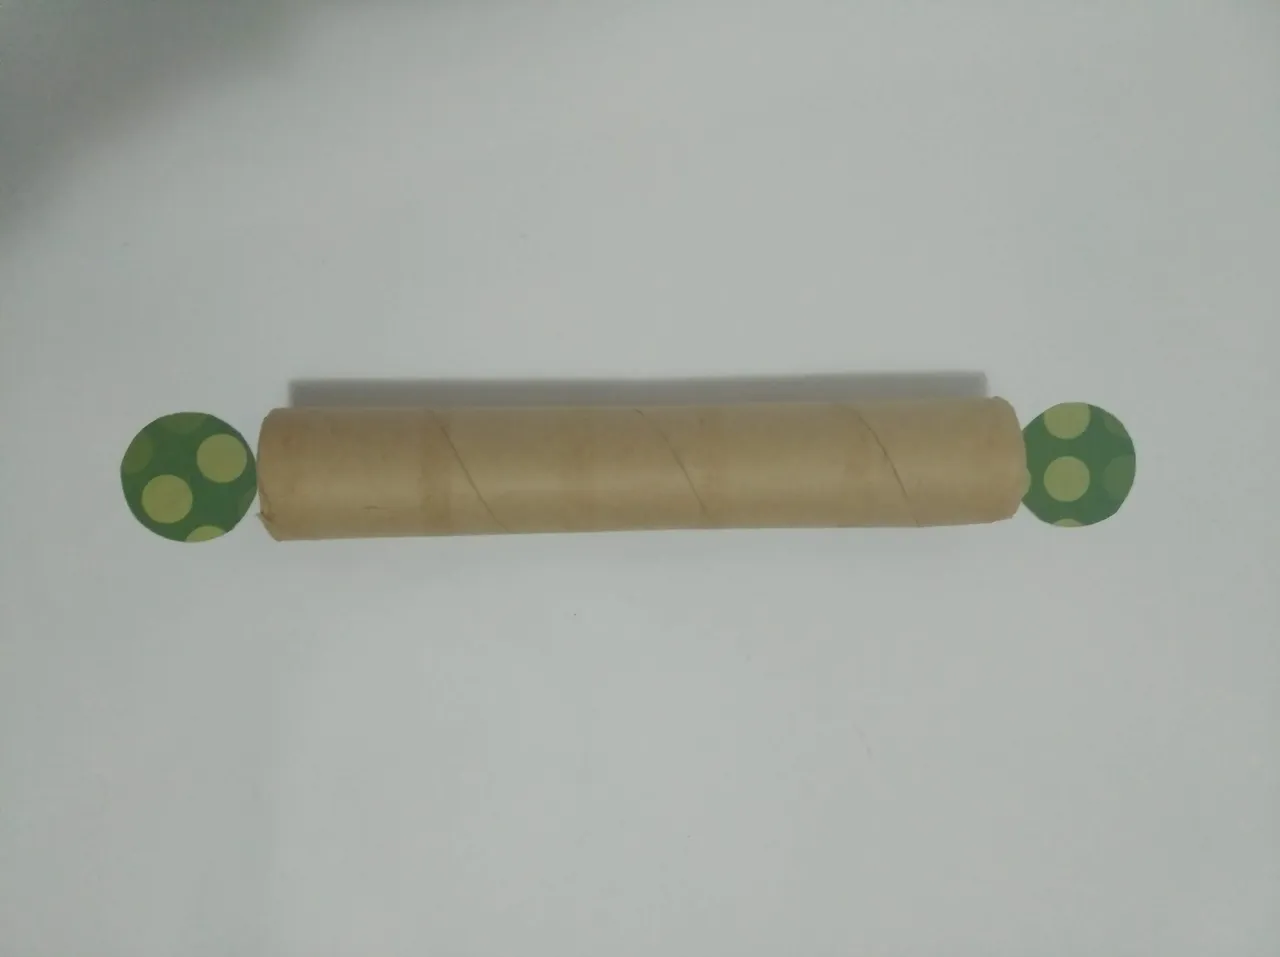
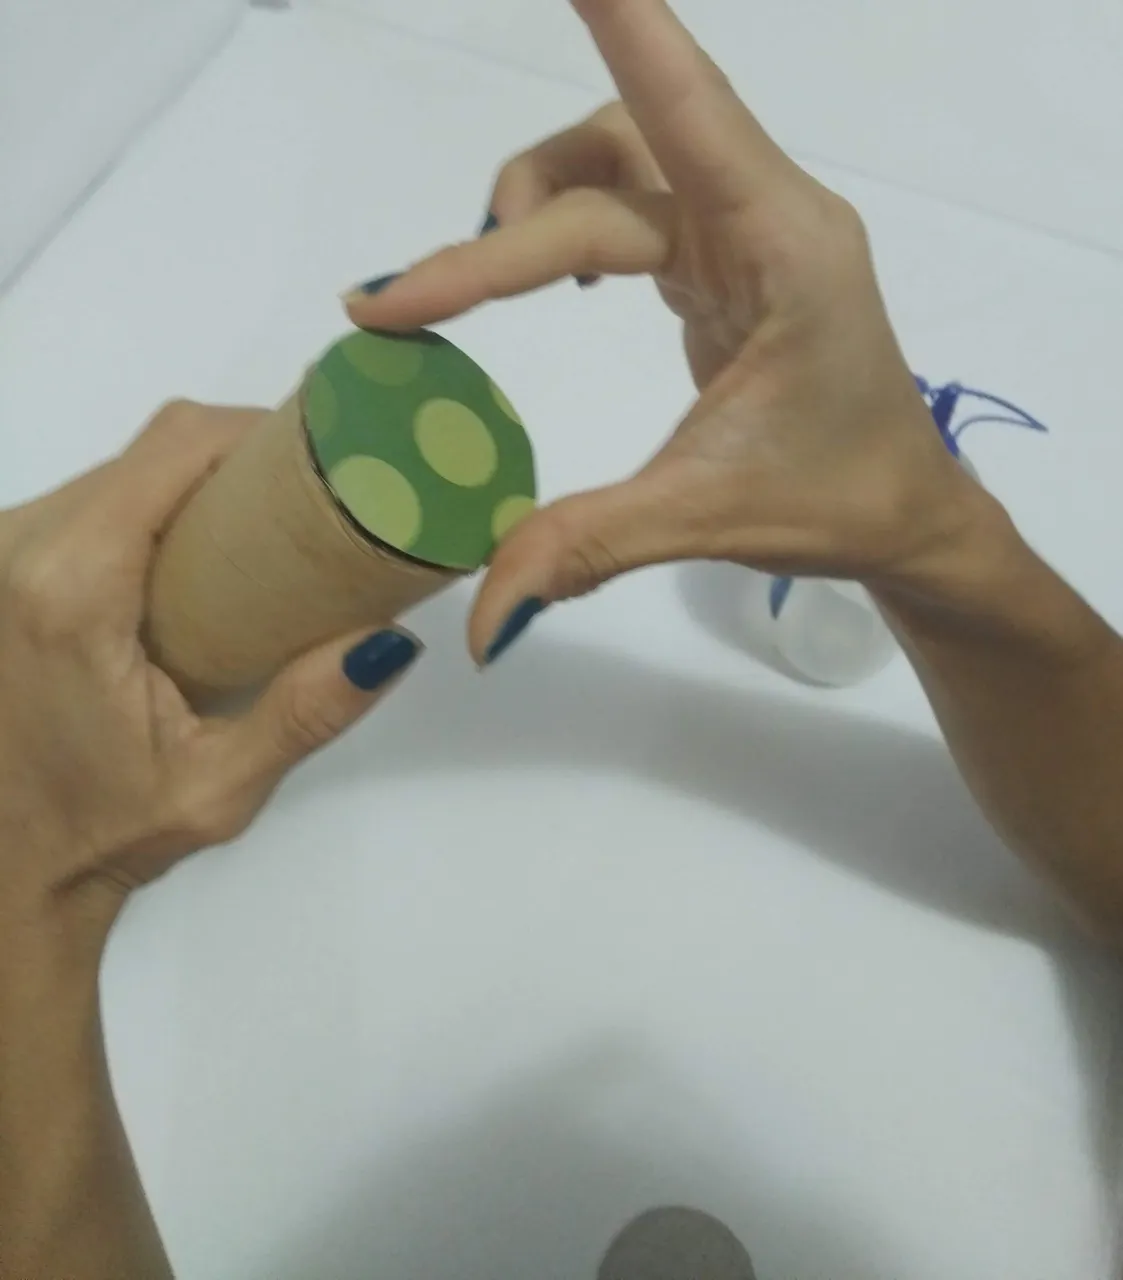
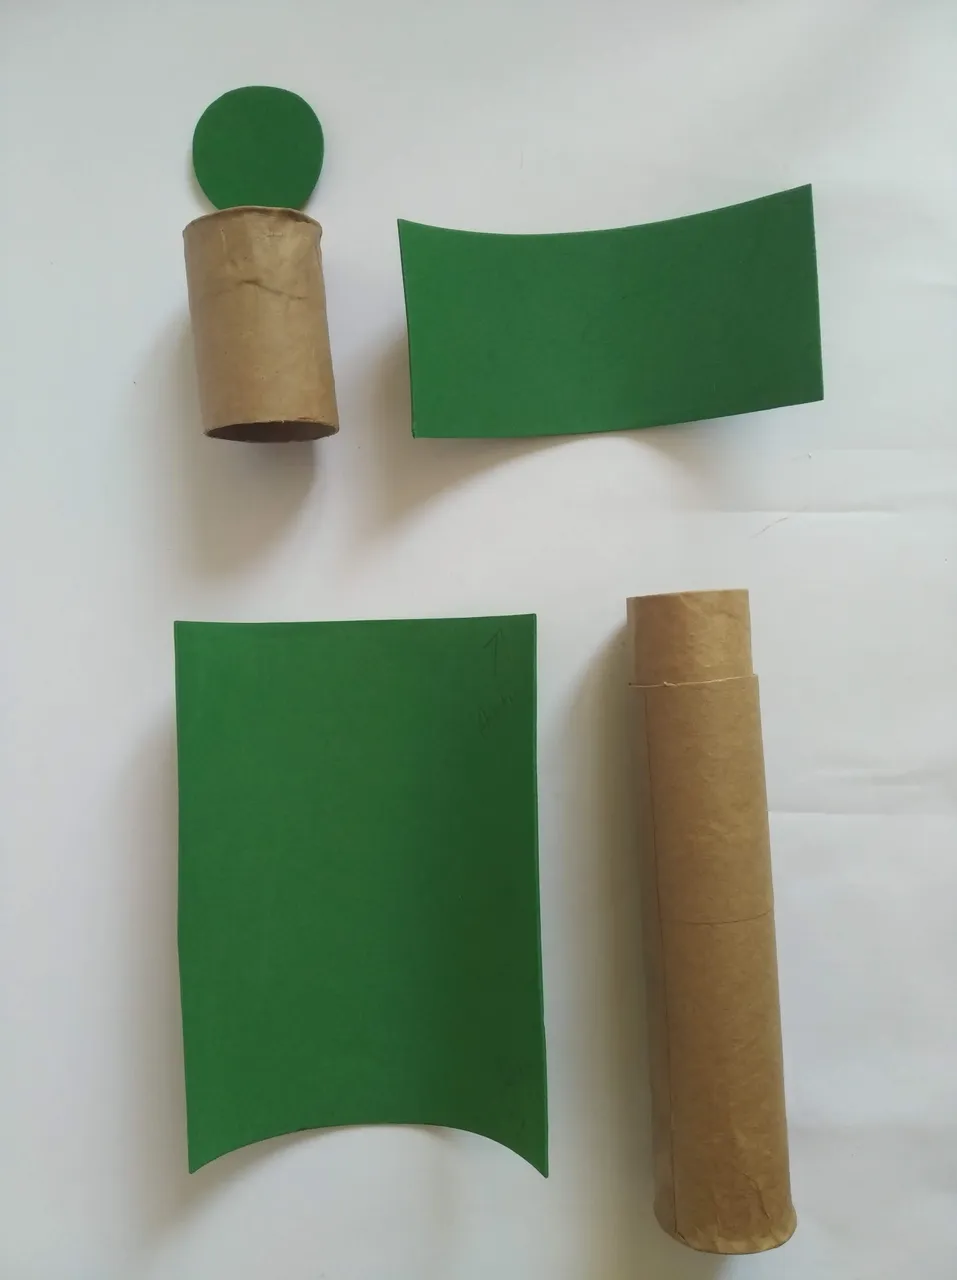
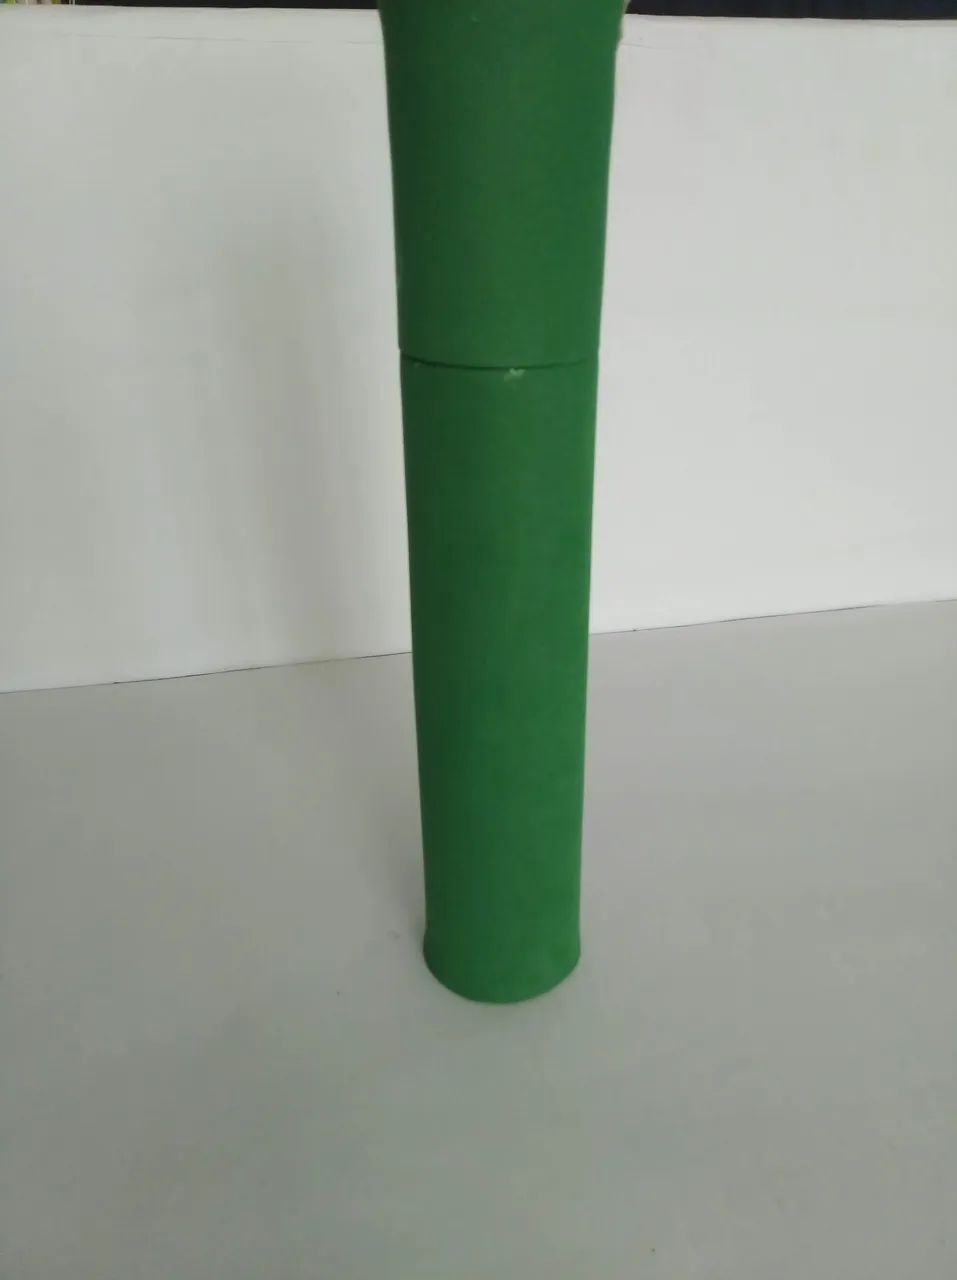
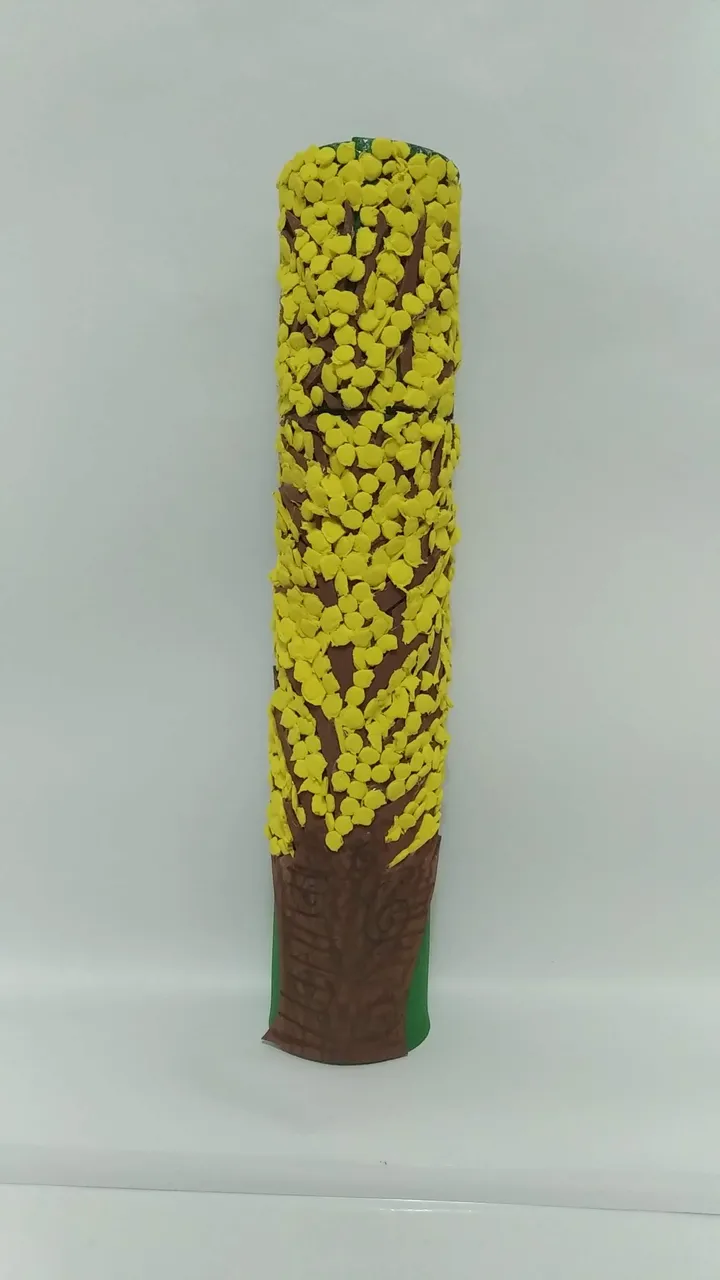
- Forrar ambas partes, base y tapa, con foami verde utilizando silicón frio.
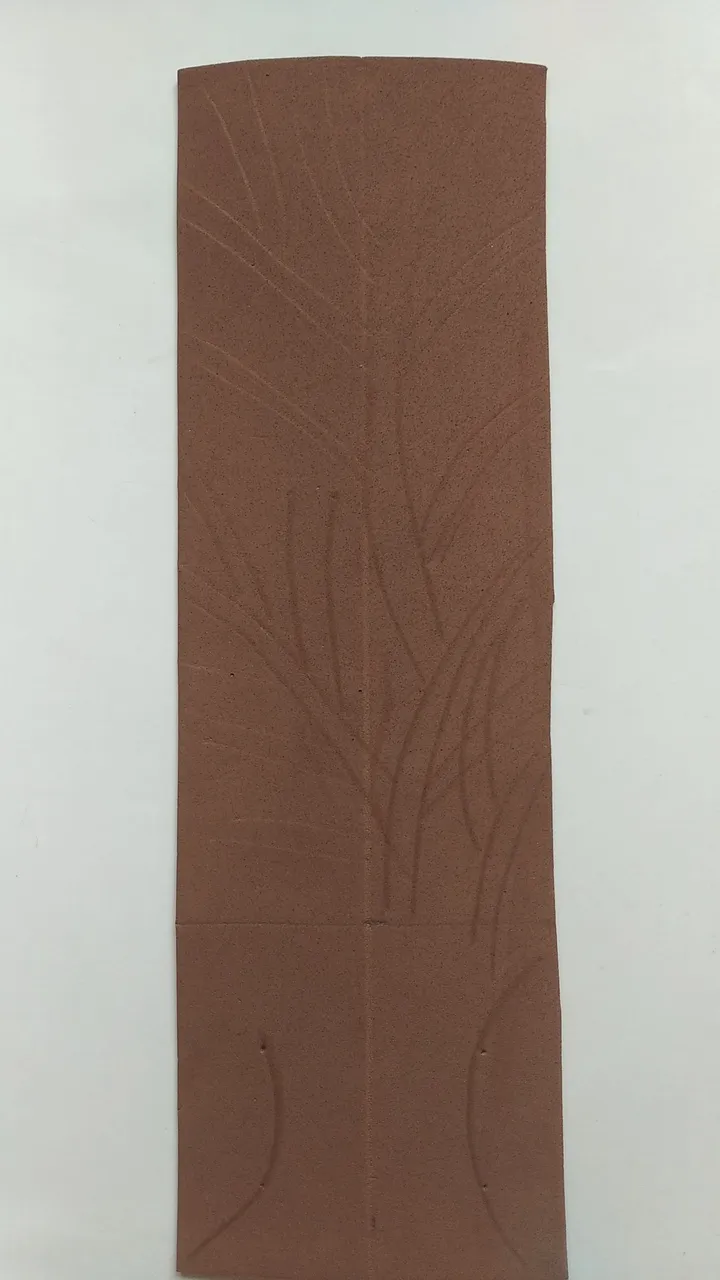
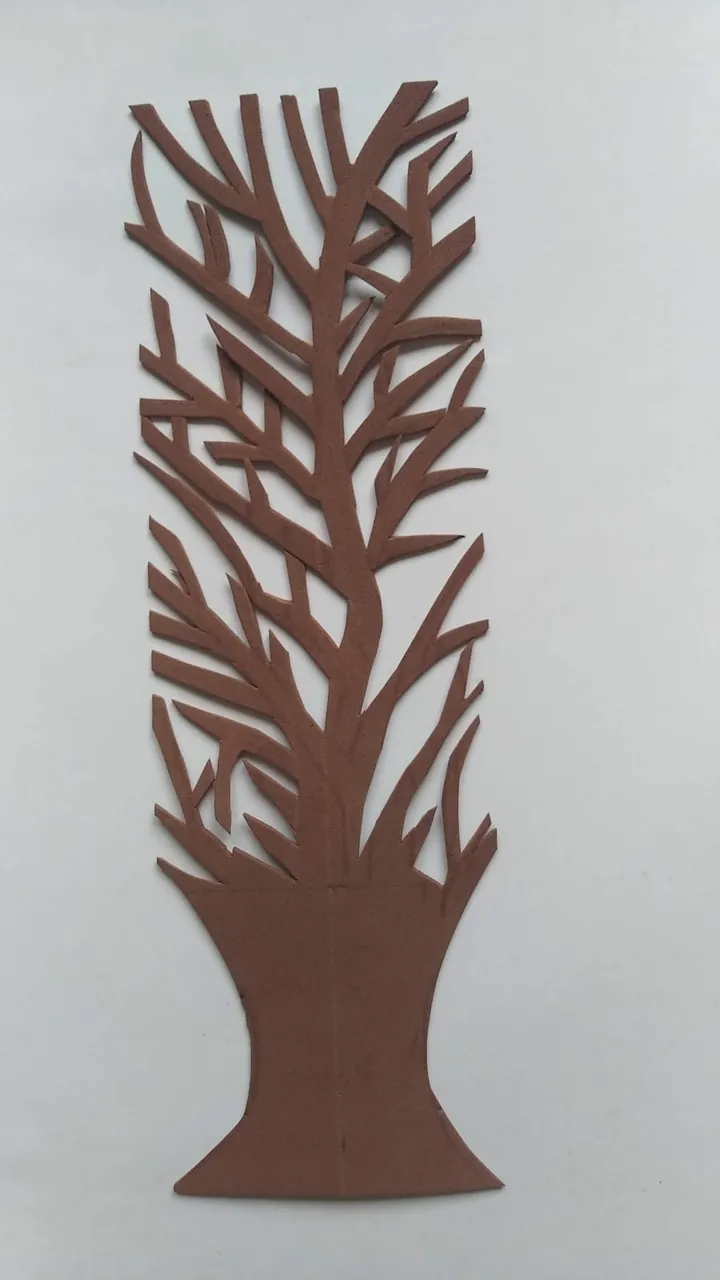
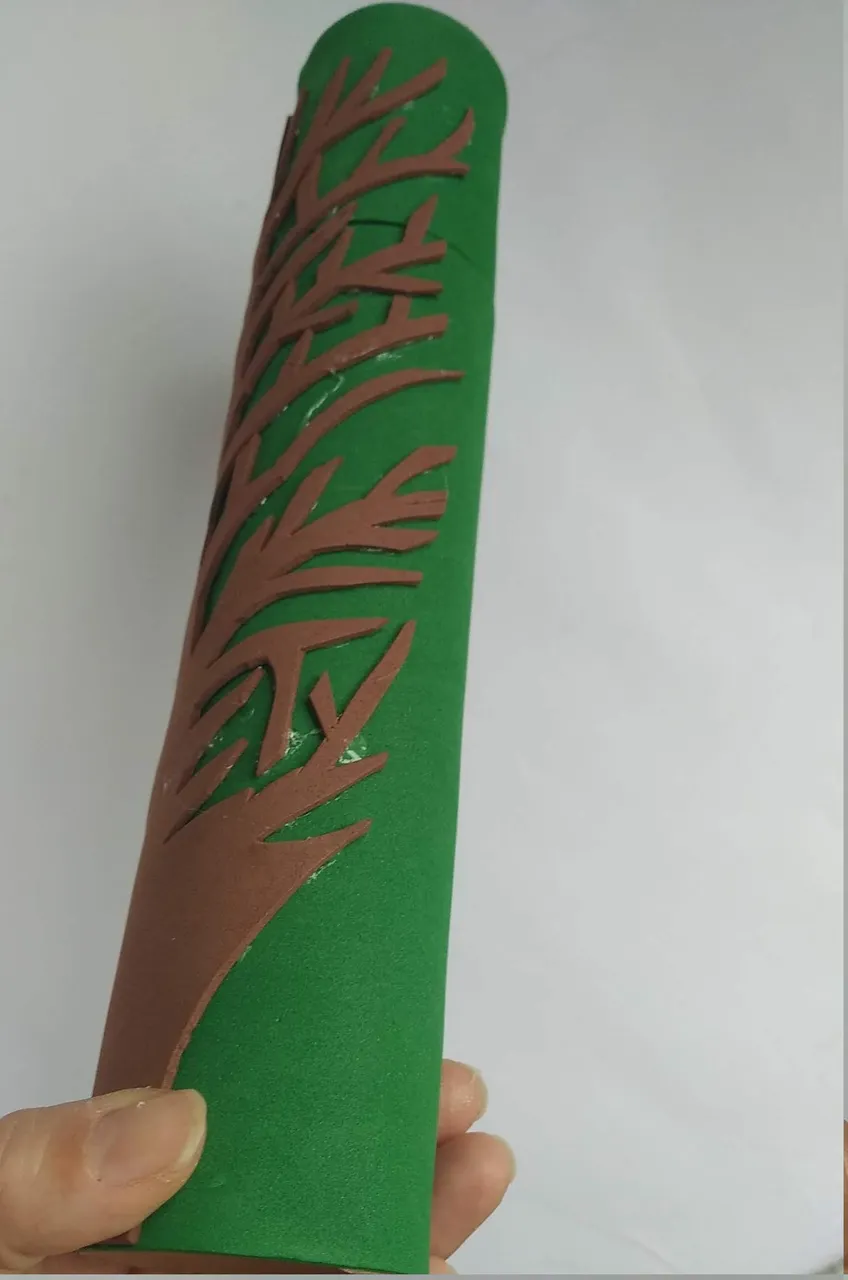
- Cortar un rectángulo de foami marrón del tamaño del cilindro y formar un tronco con ramas. Para esto marcar con lápiz y luego recortar.
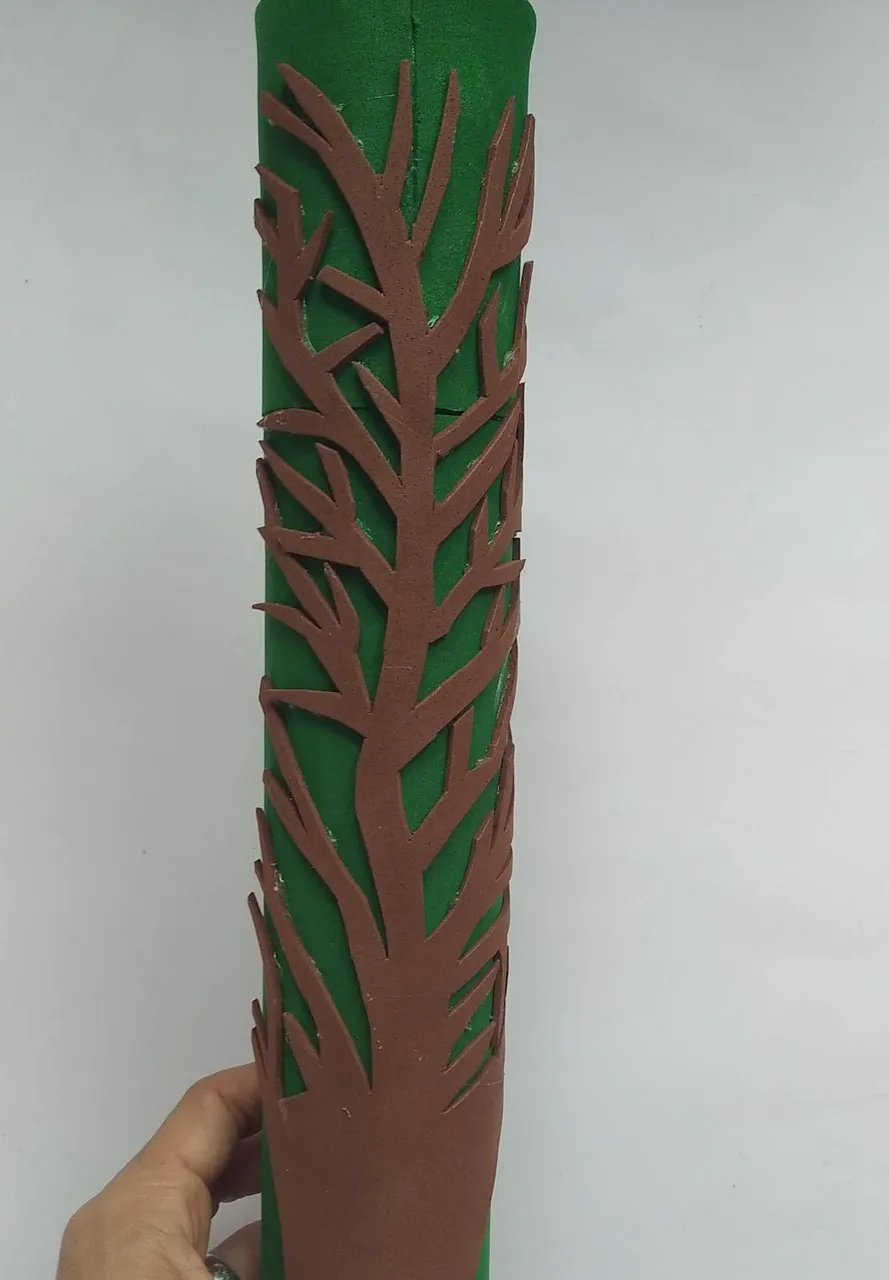
- Pegar el tronco con ramas a la base verde, el cilindro debe estar tapado para pegar completo y luego donde se separa la tapa de la base cortar con un cutter.
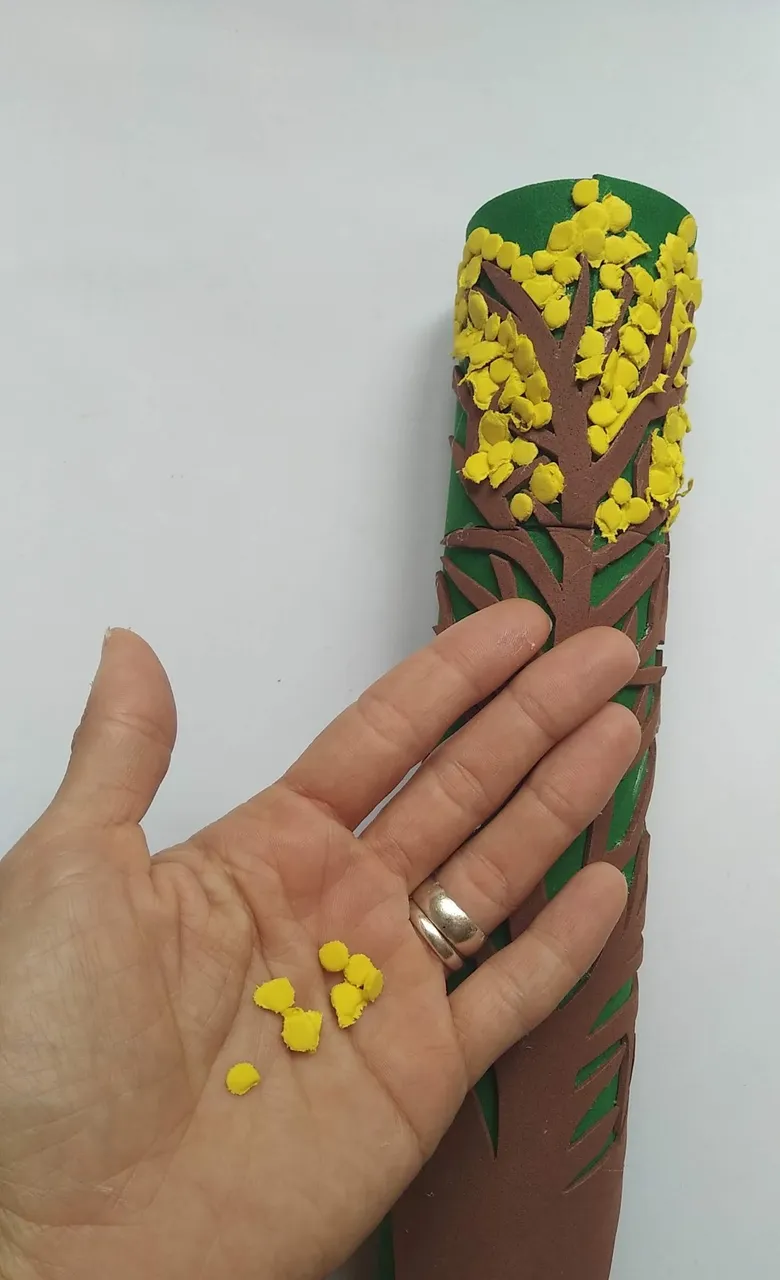
- Tomar el foami amarillo (pueden ser pedazos sobrantes) y cortar con la ayuda de un perforador de huecos. Hacer muchos círculos que simularan las hojas y conservar en un envase.
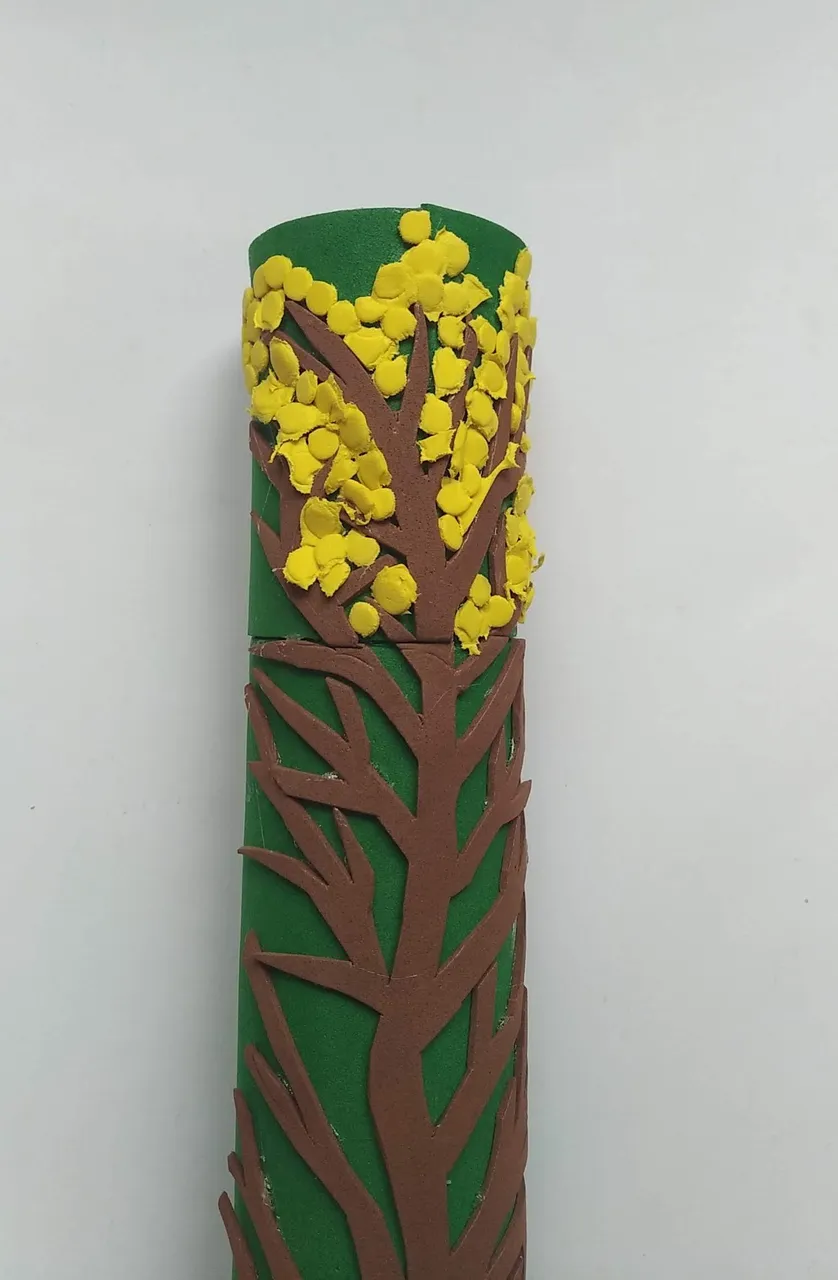
- Pegar con silicón frio cada uno de los círculos amarillos entre las ramas creadas con el foami marrón. Cubrir por completo y luego donde se separa la tapa de la base cortar con un cutter.
- ¡Listo!, a disfrutar de la magia de lo creado en casa con material reciclado.
English
Hello everyone, happy and blessed day.
Betting on the good and necessary cause of recycling, today I join the creative recycling challenge promoted by our fellow hiver @jennyzer , thanking of course @fixie who let me know about this nice challenge.
In my daily life the theme of reusing things is very present, in my house everywhere you look there is a useful object created mostly from a reused item. Every day I work with many materials and pencils and brushes are always present. I don't know if it happens to all of us who do crafts, but when I have to look for a specific brush I never get it (laughs), that's why I decided to make some cardboard roll cases to store my brushes and keep them in one place so they don't get lost.
How many times have you thrown a cardboard roll in the trash? Maybe many times, but today I want to show you an idea of how to creatively reuse a cardboard roll that comes with kitchen paper towels (known in my country as "Toallin") and make a pencil or brush case out of it.
The case that I show you today I have decorated with our national tree, the Araguaney, I really love this tree and I love to put it in everything I do, even in the houses for the nativity scene; near our house we have one and I love its splendor, even when it is not flowered in yellow. Decorating these types of cardboard cylinders can be done with any material, even hand painting them with acrylic paint is great. The Invitation is to reuse as much as we can and help to give new life to what many consider "waste".
Without further ado and hoping you enjoy the work done with love, I leave you the materials used, the process and images of the work.
- Recycled cardboard roll of absorbent kitchen towels (Toallin).
- Recycled cardboard roll of toilet paper (toilet paper)
- Recycled sturdy cardboard (for sealing the sides of the cylinder)
- Recycled Craf paper bag
- Green Grama Foami (eva rubber)
- Yellow Foami
- Brown Foami
- Paste/starch based homemade glue * Cold Silicone.
- Cold Silicone.
- Hole punch
- Cutter.
- Scissors.
- Ruler.
- Pencil.
- Take the cardboard cylinder and make two covers with the sturdy cardboard gluing at both ends with cold silicone.
- Cut in circular form two pieces of paper of bag that cover both ends and glue with the homemade paste, the paper must be covered with enough paste on all sides. The function of the paper and the paste is to strengthen the cardboard cylinder and to give it the necessary hardness so that it resists in the time.
- Cut a rectangle of paper bag and glue it all over the cardboard cylinder, the paper should be covered with enough paste on all sides.
- Let it dry for at least 24 hours since the homemade paste requires enough time to dry and harden.
- Once dry, mark what will be the lid of the case, for this mark I used a plastic cup, I introduced the cylinder and with the help of the edge of the cup mark the entire cylinder and thus obtain a complete and even mark on the cylinder.
- Cut the cylinder by the mark made. To make the cut well I recommend to do it with a cutter of good edge, cutting little by little to avoid damaging the cylinder.
- The roll of toilet paper (also strengthened with paper and paste) cut it in half vertically to the tube.
- Put and glue with cold silicone the roll of paper inside the big cylinder, leaving half of the tube inside and half of the tube outside. This protruding part will allow the base to be connected to the snap-on lid.
- Line both parts, base and lid, with green foami using cold silicone.
- Cut a rectangle of brown foami the size of the cylinder and form a trunk with branches. Mark it with a pencil and then cut it out.
- Glue the trunk with branches to the green base, the cylinder must be covered to glue completely and then where the lid is separated from the base cut with a cutter.
- Take the yellow foami (can be leftover pieces) and cut with the help of a hole puncher. Make many circles to simulate the leaves and keep in a container.
- Glue with cold silicone each of the yellow circles between the branches created with the brown foami. Cover completely and then cut with a cutter where the lid is separated from the base.
- Ready, enjoy the magic of what you have created at home with recycled material.
Translated with www.DeepL.com/Translator (free version)
IMÁGENES / IMAGES


SALUDOS / REGARDS
Todas las Fotos fueron tomadas con mi teléfono Redmi 7A.
Contenido original de @keco (fotos y texto) - Todos los derechos reservados Publicado en HIVE así como en mi instagram : http://instagram.com/carton_pintura_algo_mas
All Photos were taken with my Redmi 7A phone.
Original content from @keco (photos and text) - All rights reserved Posted on HIVE as well as on my instagram: http://instagram.com/carton_pintura_algo_mas