

Hola mis queridos lectores, espero que se encuentren bien y que tengan o hayan tenido un excelente día!
Es la primera vez que participo en un concurso de esta comunidad en Plantillas y moldes para cajas de obsequios, Concurso: Diseña tu plantilla y decora a tu gusto y me gustaría compartir con todos ustedes, la creación de una cajita de regalo, fuera de la típica caja cuadrada de siempre.
Quiero tambien aprovechar el momento de saludar a @gaboamc2393 por esta iniciativa y para invitar a @canirove14 a participar.
Hello my dear readers, I hope you are well and that you have or have had an excellent day!
It is the first time that I participate in a contest of this community in Templates and molds for gift boxes, Contest: Design your template and decorate to your liking and I would like to share with all of you, the creation of a gift box, out of the typical square box as usual.
I would also like to take this opportunity to salute @gaboamc2393 for this initiative and to invite @canirove14 to participate.
Es bastante interesante el reto que nos hacen con este concurso, porque nos pone a pensar, a querer ser más creativos y eso es muy bueno para nosotros porque así no nos quedamos enfrascados con las mismas ideas de siempre. Sin más preámbulos les comento con detalles de como la realice.
It is quite interesting to be challenged with this contest, because it makes us think, to want to be more creative and that is very good for us because we do not get stuck with the same ideas as always. Without further ado, I'll tell you in detail how I did it.
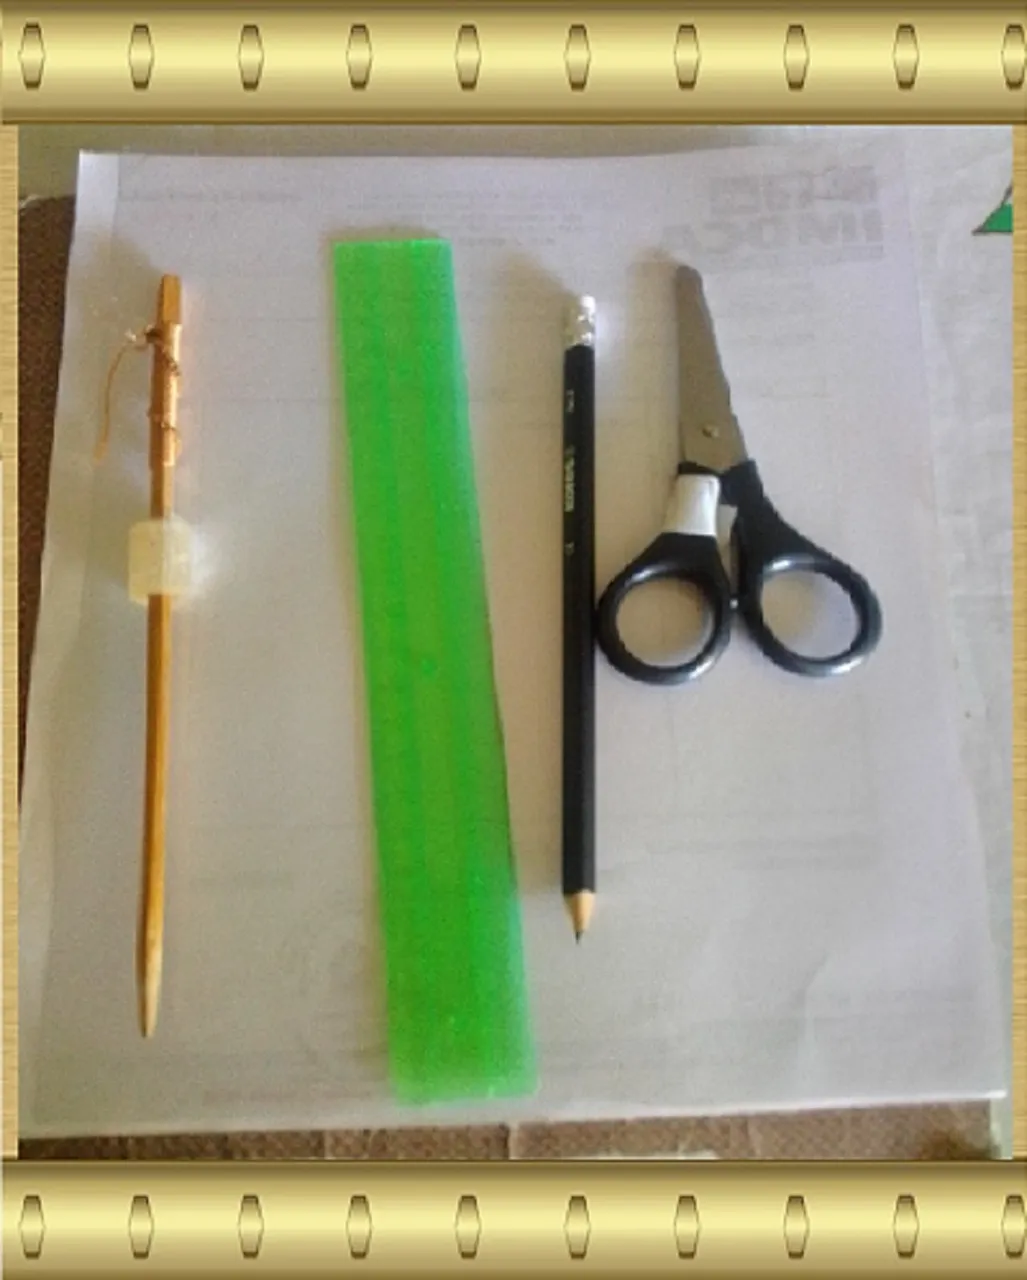
Materiales:
- Regla
- Hoja reciclada tamaño carta
- Lámina de acetato tamaño carta
- Lápiz
- Tijera
- Cinta adhesiva transparente
Materials
- Ruler
- Letter size recycled sheet
- Letter size acetate sheet
- Pencil
- Scissors
<* Transparent adhesive tape
Pasos a seguir para realizar la plantilla y la caja:
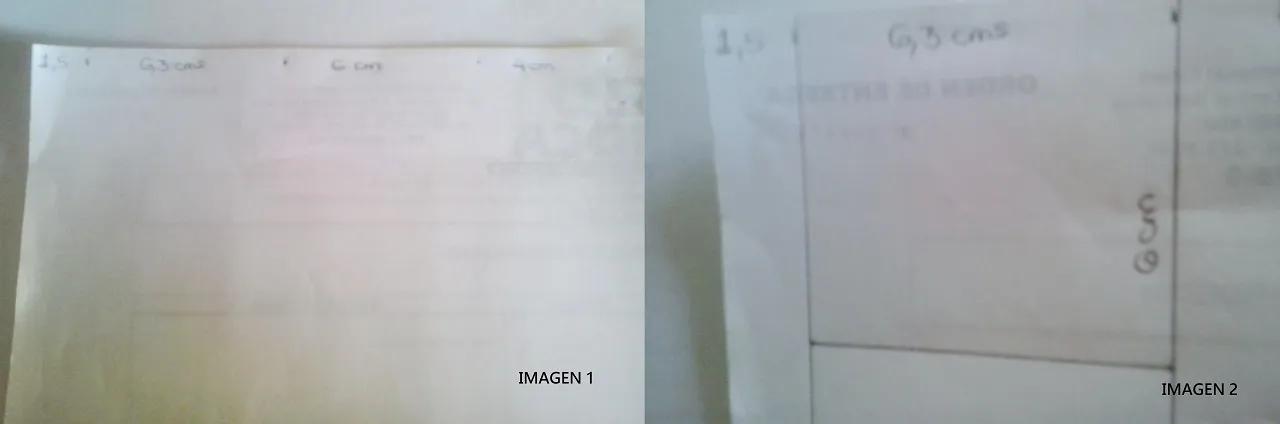
Tomamos la hoja reciclada y en la forma vertical trazaremos una línea 4 columnas con las siguientes medidas: 1,5 cm, 6,3 cm, 6 cm y 4 cm, tal como lo muestra la imagen 1.
En la 2.ª columna formaremos un cuadrado de 6,3 x 6 cm, como lo indica la imagen 2.
Steps to follow to make the template and the box:.
We take the recycled sheet and in the vertical form we will draw a line 4 columns with the following measures: 1.5 cm, 6.3 cm, 6 cm and 4 cm, as shown in image 1.
In the 2nd column we will form a square of 6.3 x 6 cm, as shown in image 2.
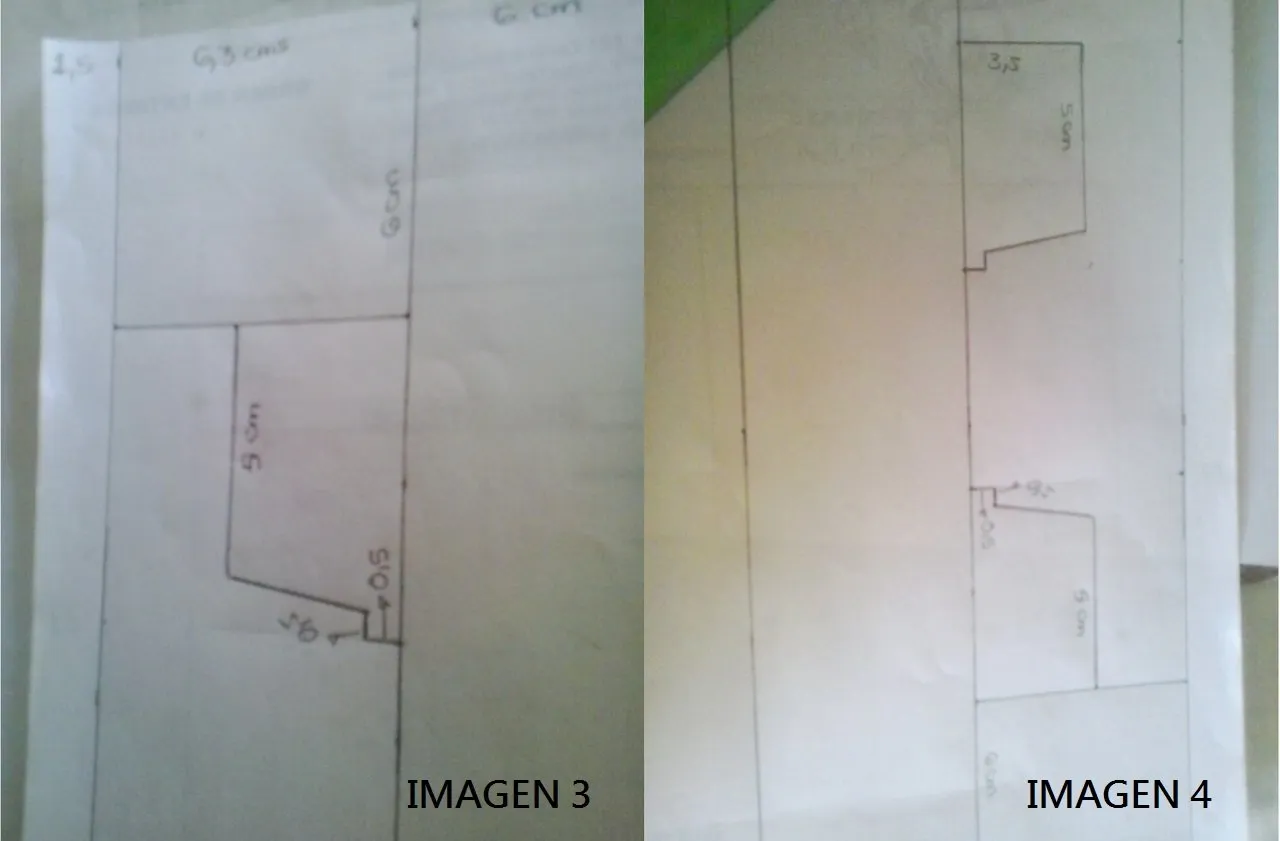
Debajo de ese cuadrado haremos una aleta con las siguientes medidas especificadas en la imagen 3. Y realizaremos la misma aleta, con las mismas medidas, 6 cm más abajo de esta, como lo indica la imagen 4.
Under that square we will make a flap with the following measures specified in image 3. And we will make the same flap, with the same measures, 6 cm below this one, as shown in image 4.
Realizado esos pasos procedemos a trazar los triángulos que miden 6 cm en su base, empezamos midiendo 3 cm y luego vamos marcando de 6 en 6 cm y vamos uniendo las líneas, nos quedara así:
After these steps we proceed to draw the triangles that measure 6 cm at its base, we start measuring 3 cm and then we will mark 6 by 6 cm and we will join the lines, it will look like this:
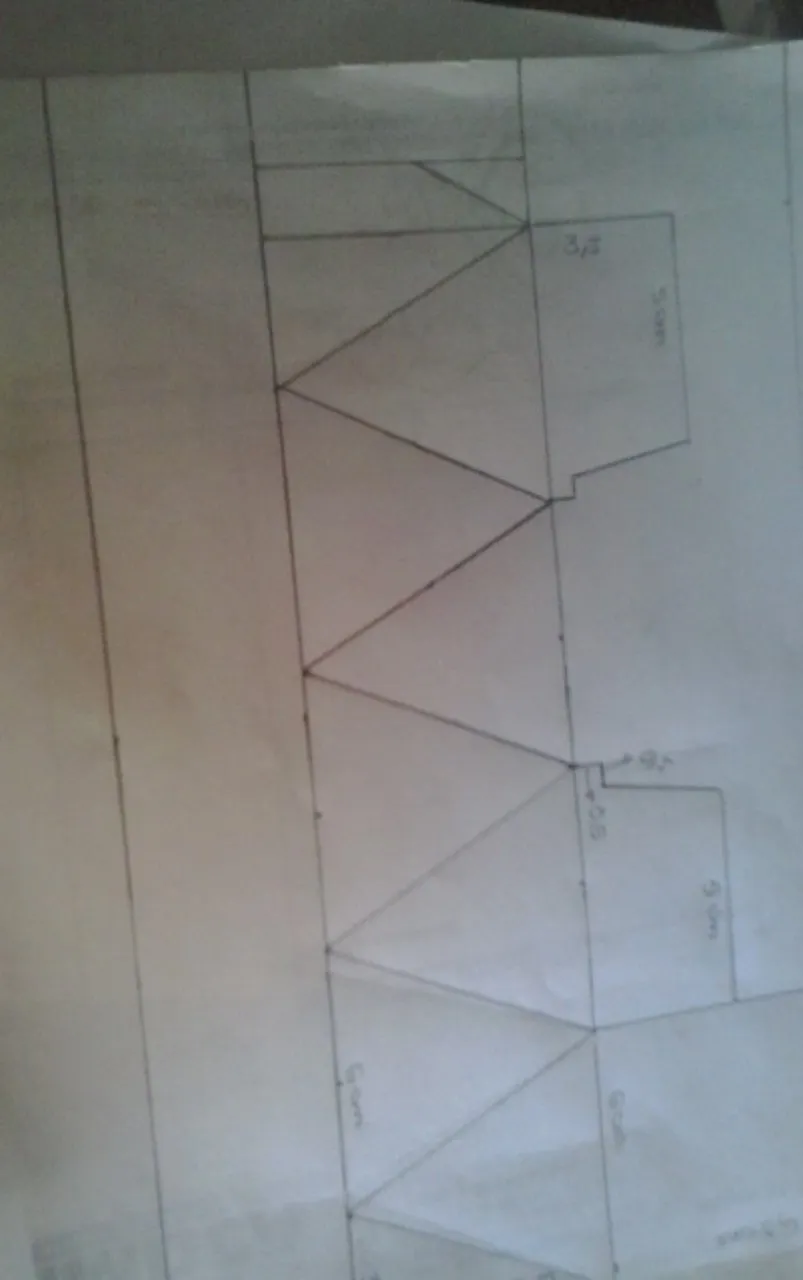
En la cuarta columna realizaremos las aletas siguientes que nos ayudaran a formar la base de la cajita, las medidas son como se especifican en la imagen.
In the fourth column we will make the following fins that will help us to form the base of the box, the measures are as specified in the image.
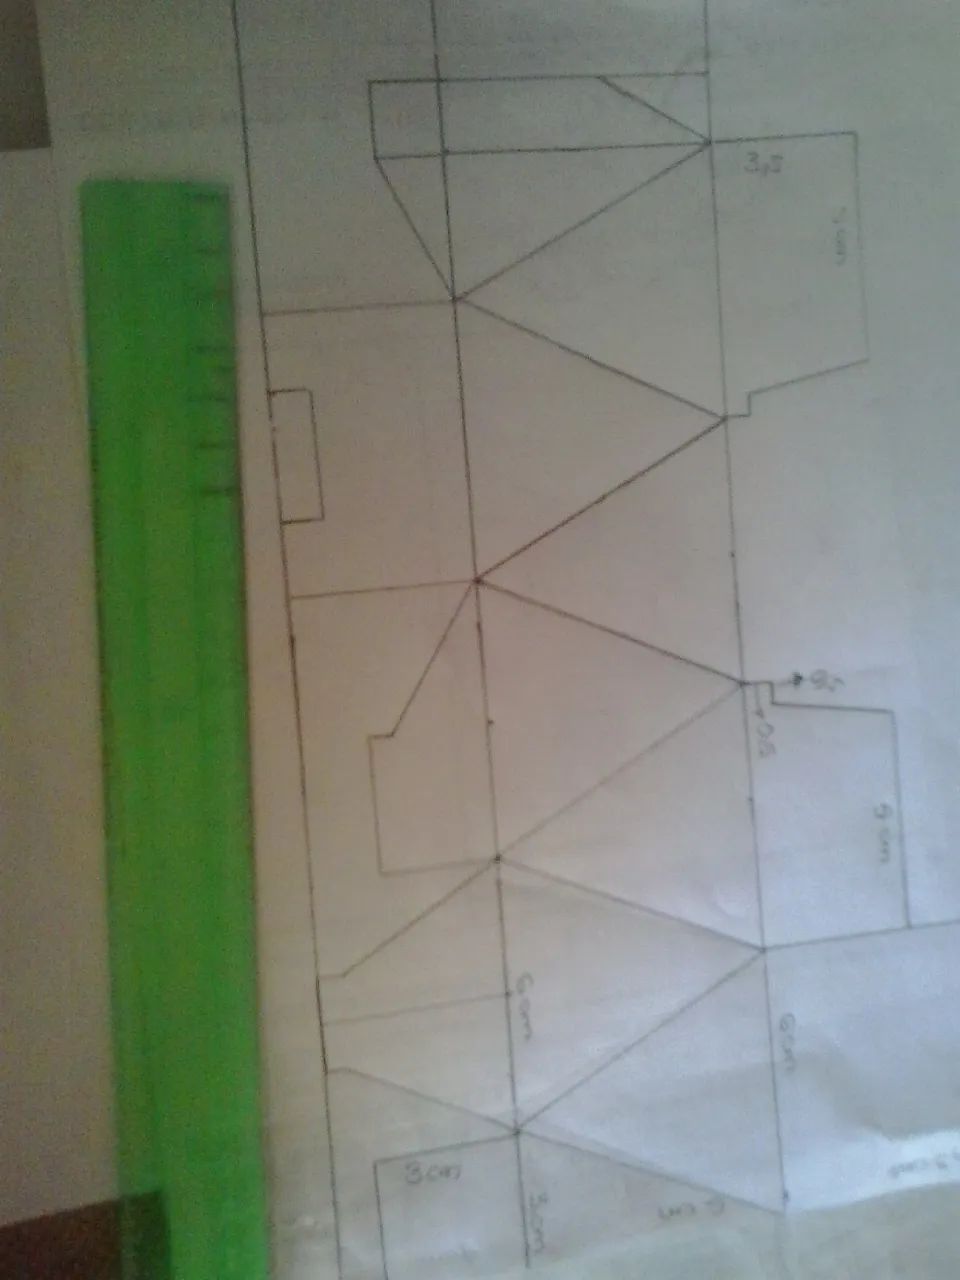
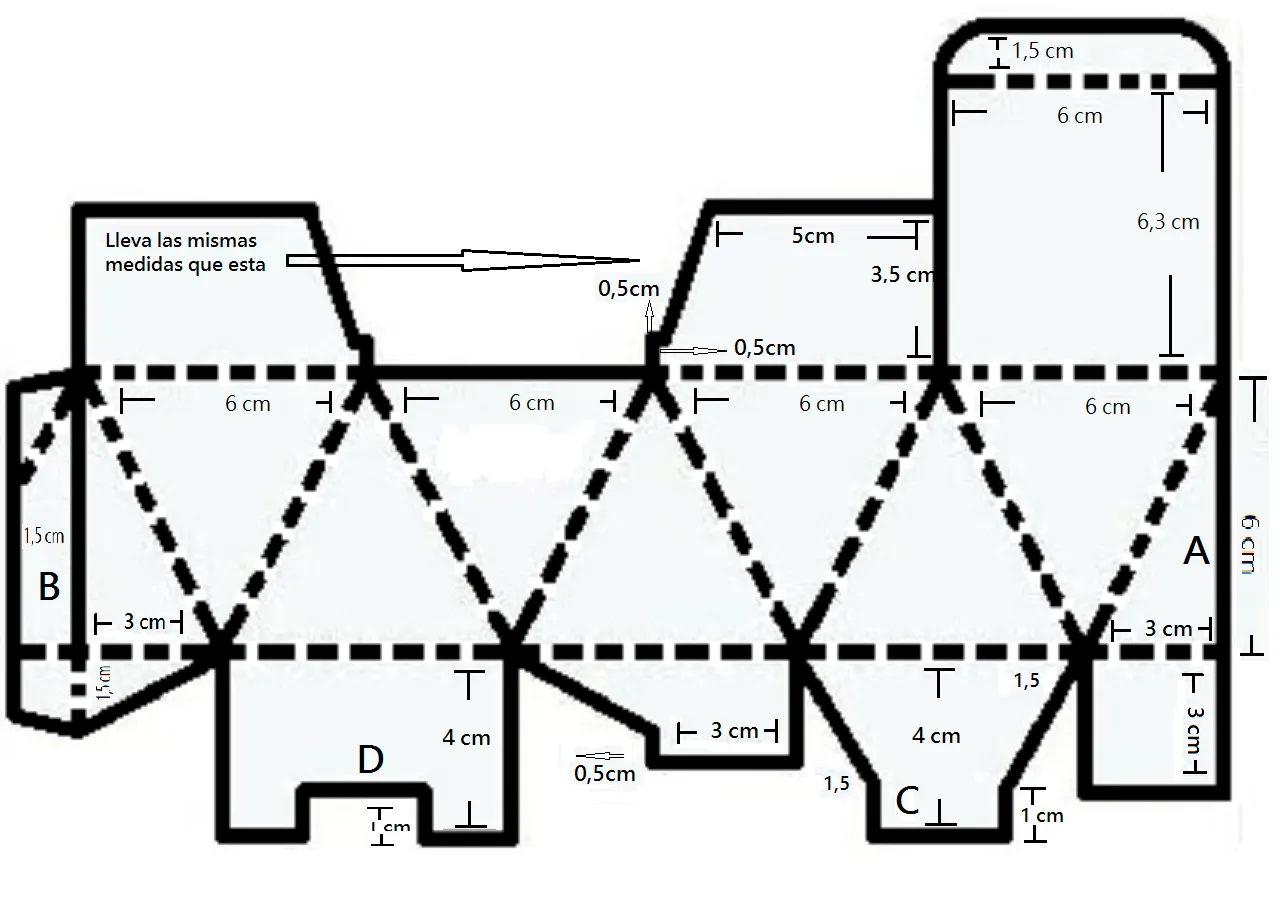
Como la cámara de mi teléfono no tiene Autofoco, los números y letras salen un poco borrosas, por lo tanto, acá les dejo la plantilla que realice en el programa Paint, con sus medidas específicas y donde se detalla mejor. Las líneas totalmente negras es por donde se va a cortar y las líneas punteadas, es por donde se va a realizar el doblez para poder formar la plantilla.
As the camera of my phone does not have autofocus, the numbers and letters come out a little blurry, therefore, here is the template that I made in Paint, with its specific measures and where it is better detailed. The black lines are where the template will be cut and the dotted lines are where the fold will be made to form the template.
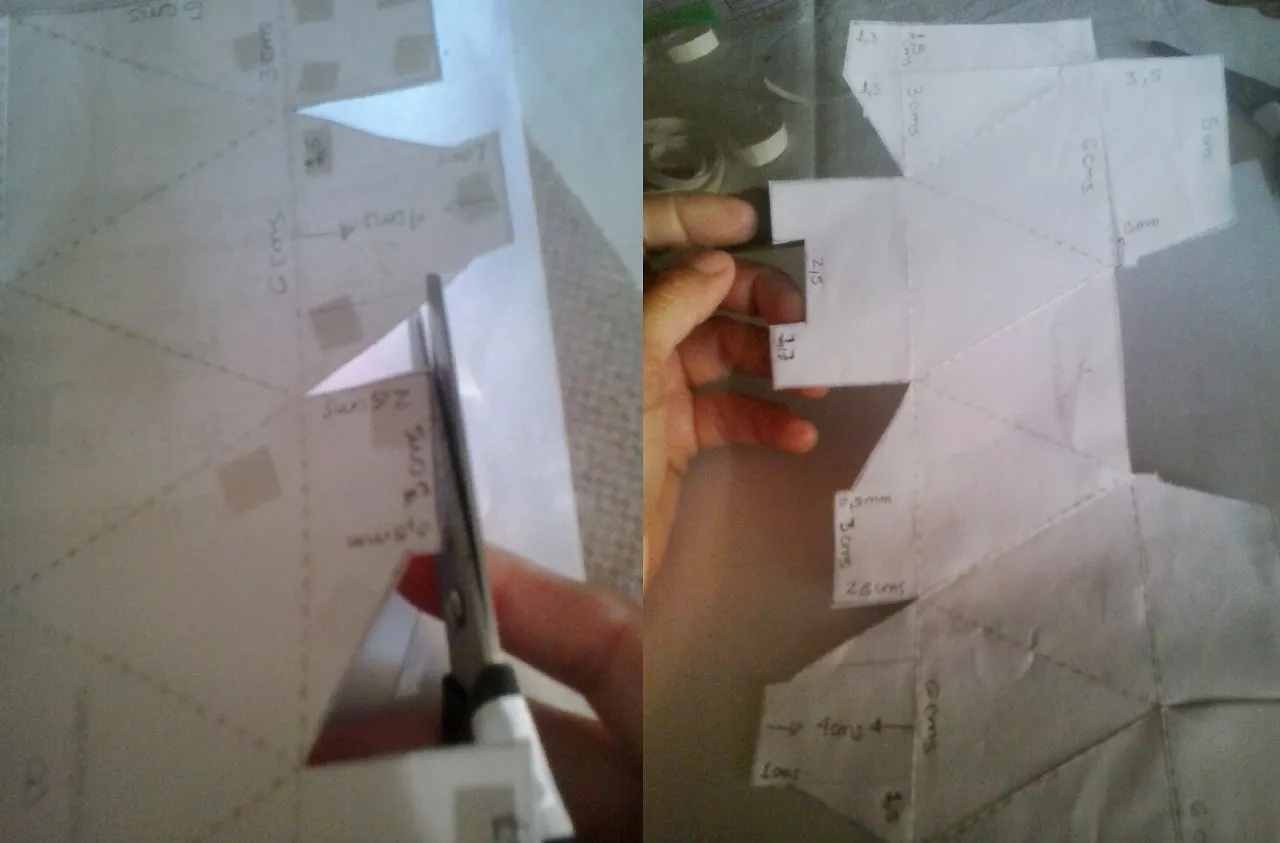
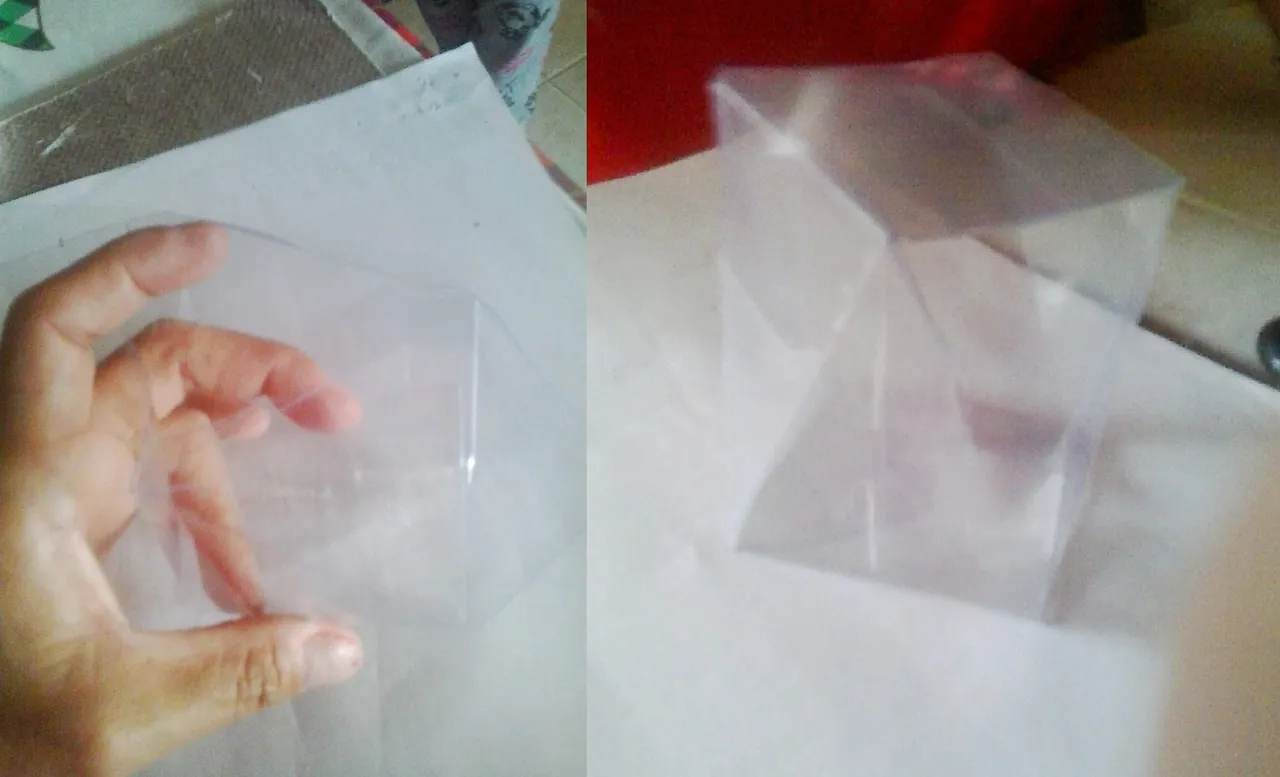
Una vez que ya hayamos realizado nuestra plantilla, procedemos a recortarla, para luego con la ayuda de la cinta adhesiva, fijarla al acetato y recórtalo, como les muestro en la siguiente imagen.
Once we have made our template, we proceed to cut it out, and then with the help of the adhesive tape, fix it to the acetate and cut it out, as I show you in the following image.
Después de haber recortado el acetato, sin quitar la plantilla aun, vamos a proceder a hacer el doblez y para ello utilizaremos la regla, así el doblez nos quedara parejo.
After cutting out the acetate, without removing the template yet, we will proceed to make the fold and for this we will use the ruler, so the fold will be even.
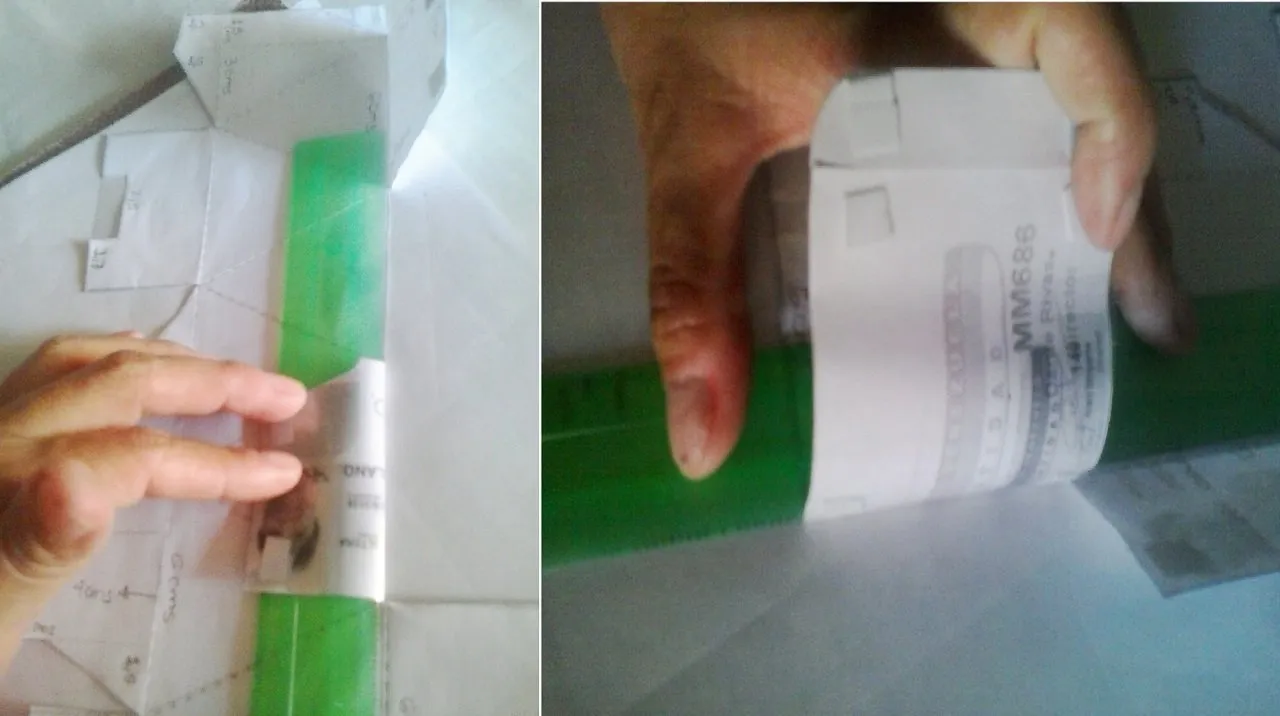
Ahora que ya hemos realizado todos los dobleces necesarios, retiramos la plantilla y procedemos a armar la cajita.
Solo vamos a unir la parte A con la parte B y la fijaremos con la cinta transparente, cuidando de que quede bien pareja.
Para formar la base únicamente la cerraremos, entrelazando las aletas C y D y listo, ya tenemos nuestra cajita armada.
Now that we have made all the necessary folds, we remove the template and proceed to assemble the box.
We are only going to join part A with part B and fix it with the transparent tape, making sure it is even.
To form the base, we will only close it, intertwining the flaps C and D and that's it, we have our little box assembled.
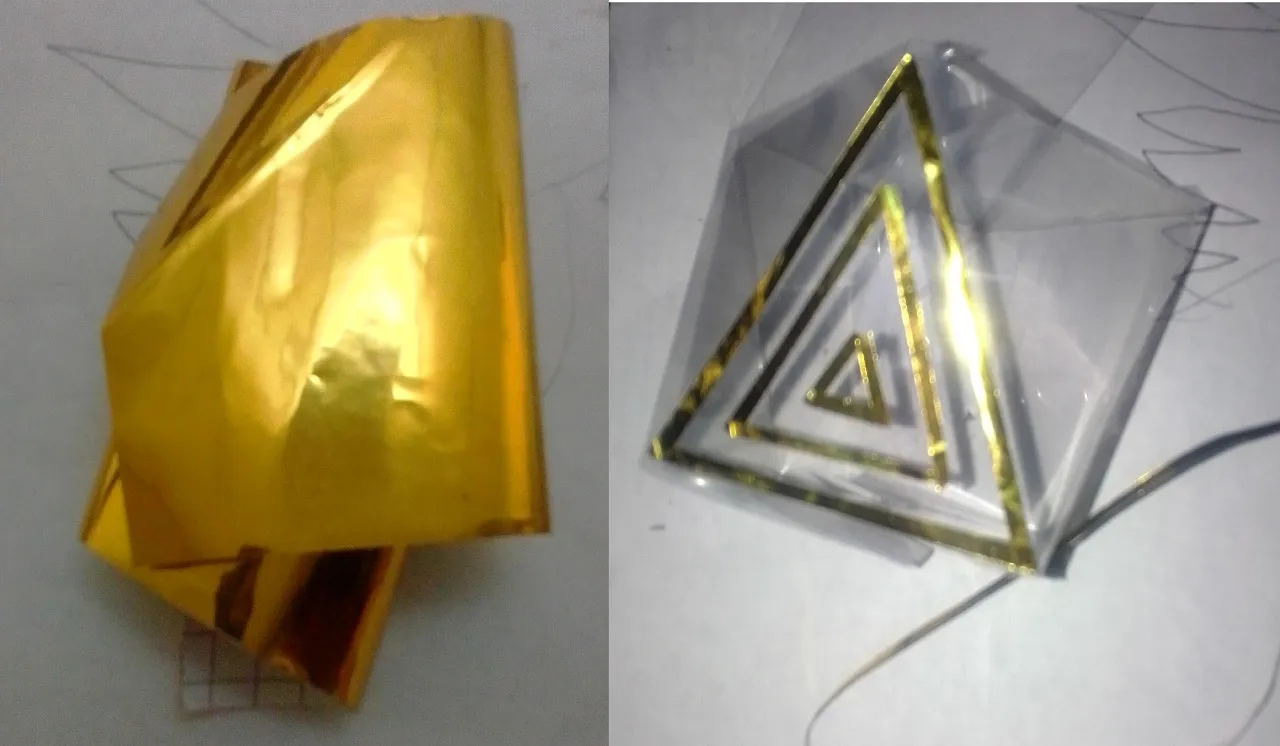
Para la decoración, tome un pedazo de vinil dorado (para los que no saben que es vinil, es un papel autoadhesivo que se usa más que todo en imprenta digital, para crear diseños e imágenes) y pique tiritas finas y las pegue por todo el borde de la caja, formando triángulos para que se pudiera apreciar mejor la forma de la caja.
For the decoration, I took a piece of gold vinyl (for those who don't know what vinyl is, it is a self-adhesive paper used mostly in digital printing, to create designs and images) and cut thin strips and glued them all around the edge of the box, forming triangles so that the shape of the box could be better appreciated.
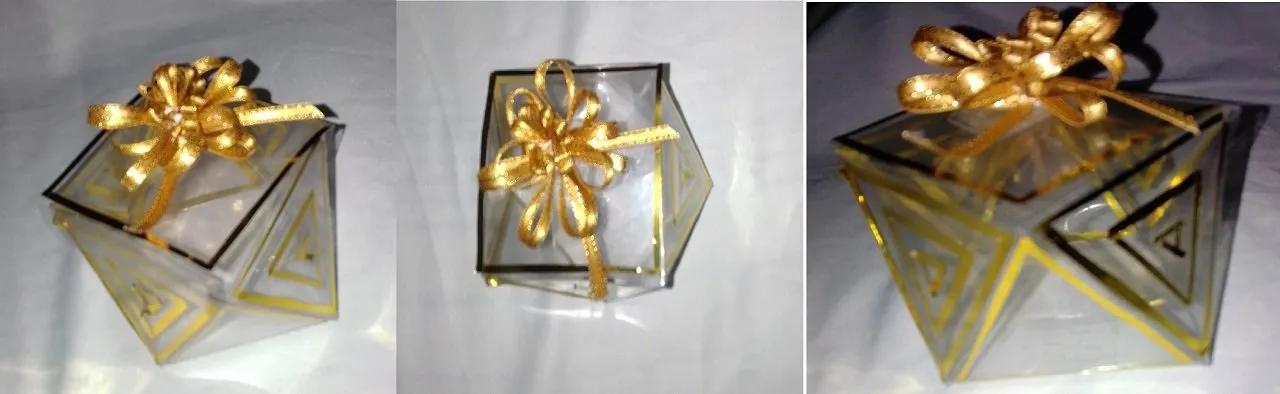
Coloque un lazo en la parte de la tapa para poder abrir más fácil la caja.
Y ya tenemos nuestra cajita armada, lista para obsequiar, bien sea chocolates, caramelos, un anillo, cadena, dinero o lo que guste agregar allí.
O como decimos en Venezuela cuando damos una invitación y esperamos que nos den un regalo, "Si algo me quieres obsequiar, en dólares te lo sabré apreciar".
Place a ribbon on the lid to make it easier to open the box.
And now we have our little box ready to give as a gift, either chocolates, candies, a ring, a chain, money or whatever you like to add there.
Or as we say in Venezuela when we give an invitation and expect a gift, "If you want to give me something as a gift, I will appreciate it in dollars".
Espero que les haya gustado, que la realicen y puedan sorprender a esa persona especial con una cajita realizada por ustedes mismo.
Me despido no sin antes agradecer a todos por leerme y dedicarme un poquito de su valioso tiempo, los espero en mi próxima publicación, cuídense mucho y pórtense bien.
I hope you liked it, that you make it and that you can surprise that special person with a little box made by yourself.
I say goodbye before thanking you all for reading me and giving me a little bit of your valuable time, I hope to see you in my next publication, take care of yourselves and behave yourselves.
Contenido de creación original:
✔️ Todas las fotos son de mi propiedad tomadas con mi celular Alcatel.
✔️ La traducción al idioma inglés fue realizada con ayuda de DeepL
✔️ El separador y el marco de la foto fue tomada de la pagina Pixabay y editada por mi.
Original creation content:
✔️ All photos are my property taken with my Alcatel cell phone.
✔️ The English translation was made with the help of DeepL.
✔️ The separator and the frame of the photo was taken from the Pixabay page and edited by me.