

Hello my dear readers, I hope you are well and that you have or have had an excellent and wonderful day. On the day of love and friendship, we always try to give a detail, no matter how small, to that special person who fills us with love, whether it is a friend, a partner or our children. Although the day has already passed, I still want to invite @eylis and all those who are interested and are encouraged to participate in the contest offered by this community.
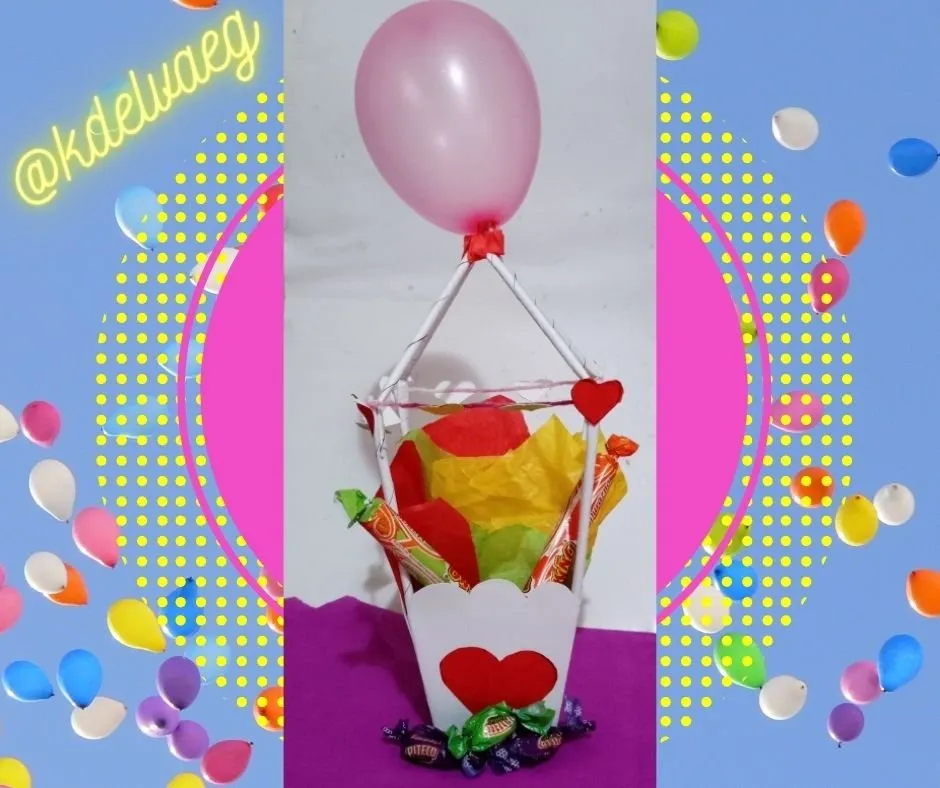
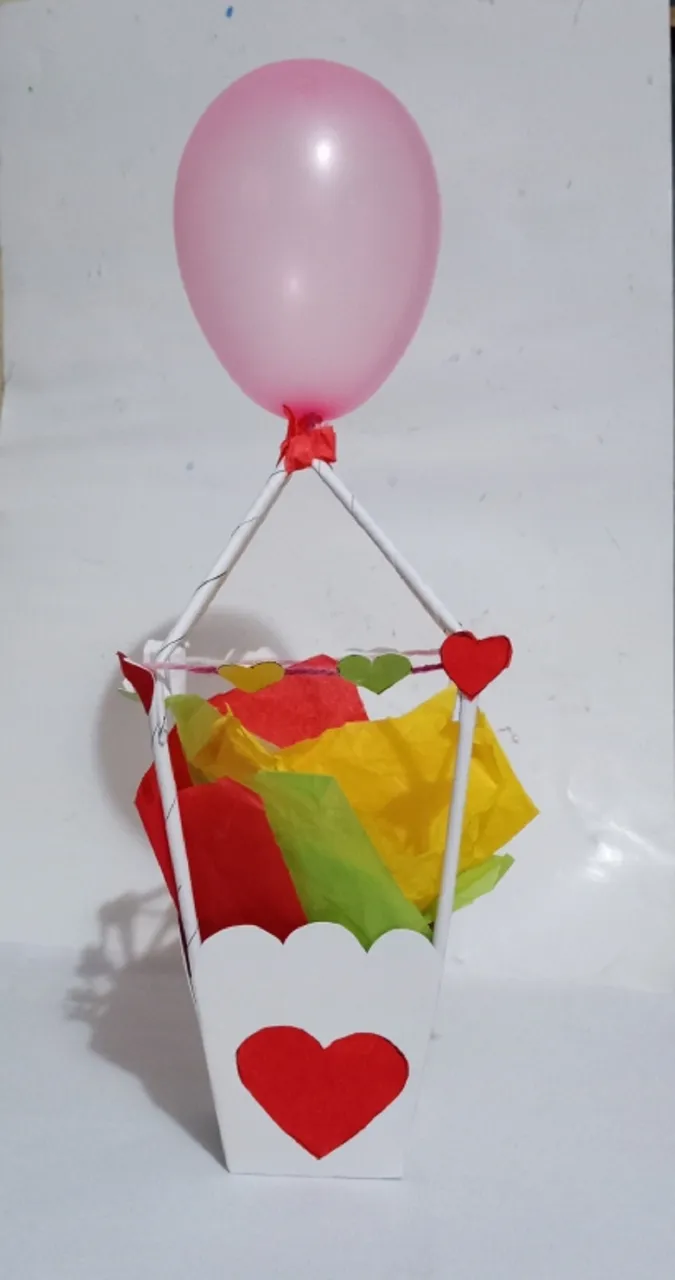
Here I want to share with you how I made a cotillion to give that special gift, in this case I gave it to my daughter with lots of candy that she loves so much. This cotillion is easy to make and does not need a lot of materials, so without further ado I show you the step by step.

STEP BY STEP:
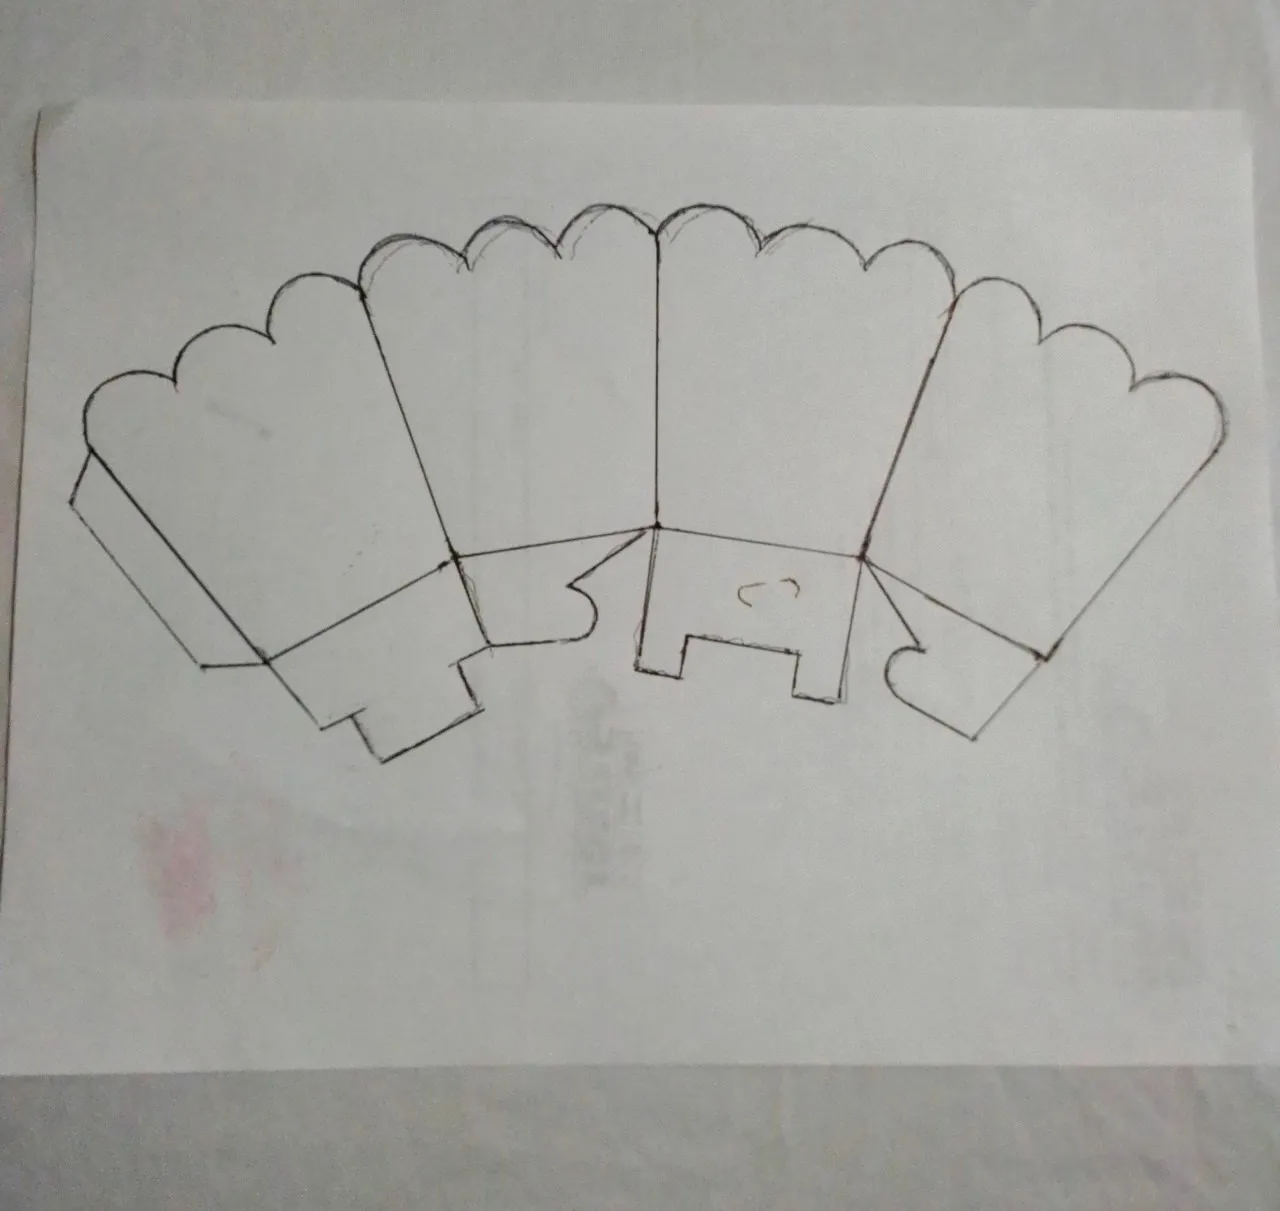
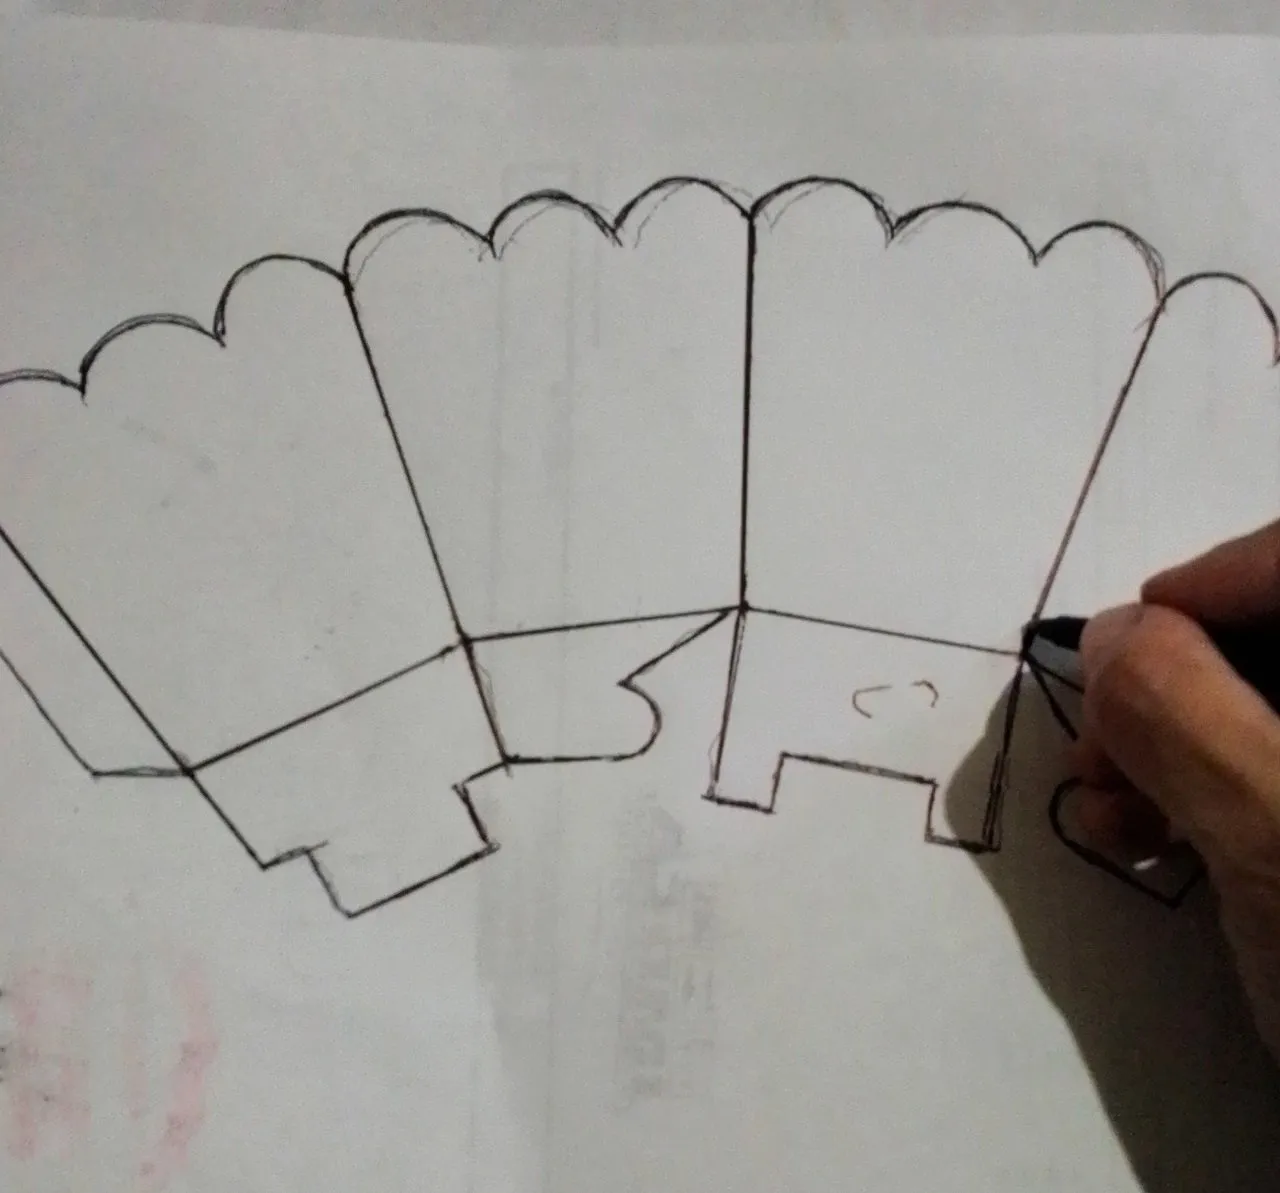
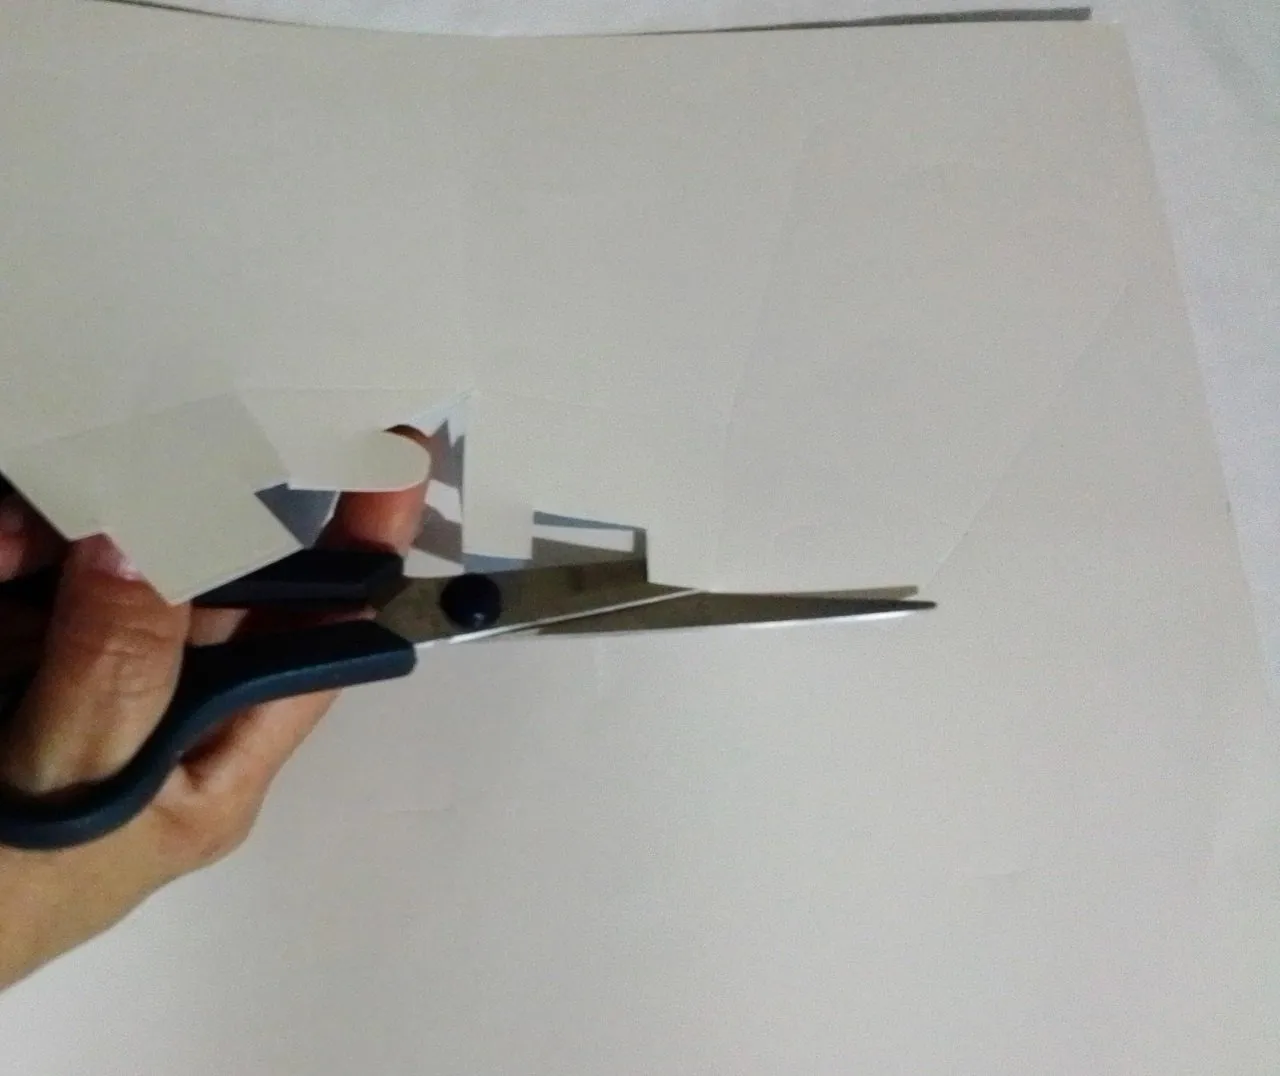
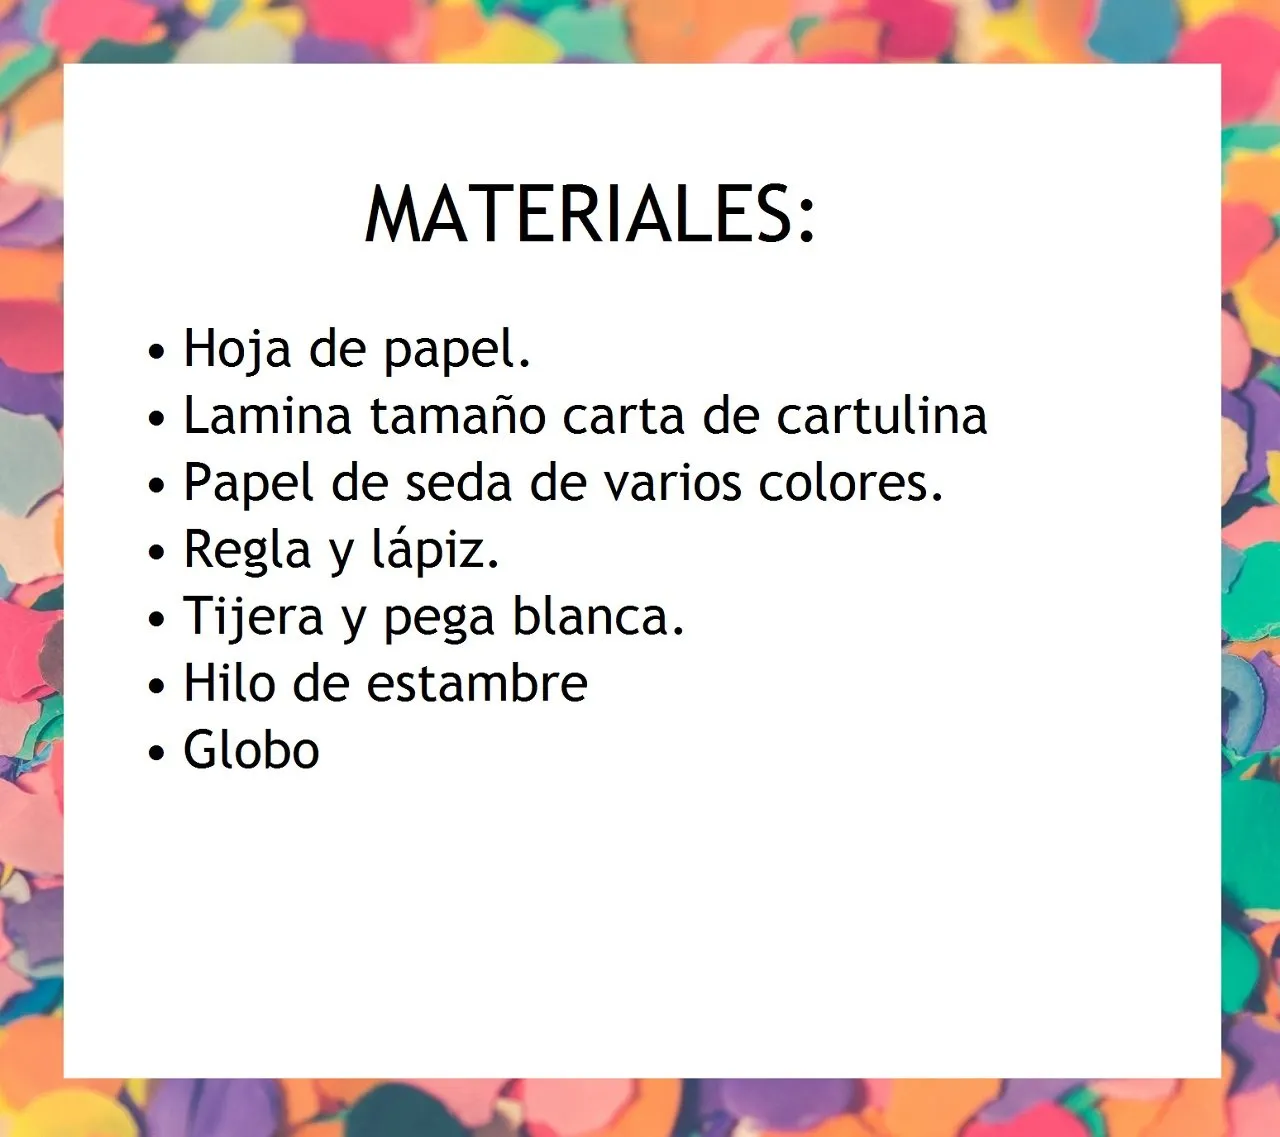
On the sheet of paper I have drawn a pattern to make the box where we will place what we are going to give as a gift. I will take the cardboard and I will place the pattern on top of it and with the pencil I will go over all the lines of the pattern so that it will be marked on the cardboard.
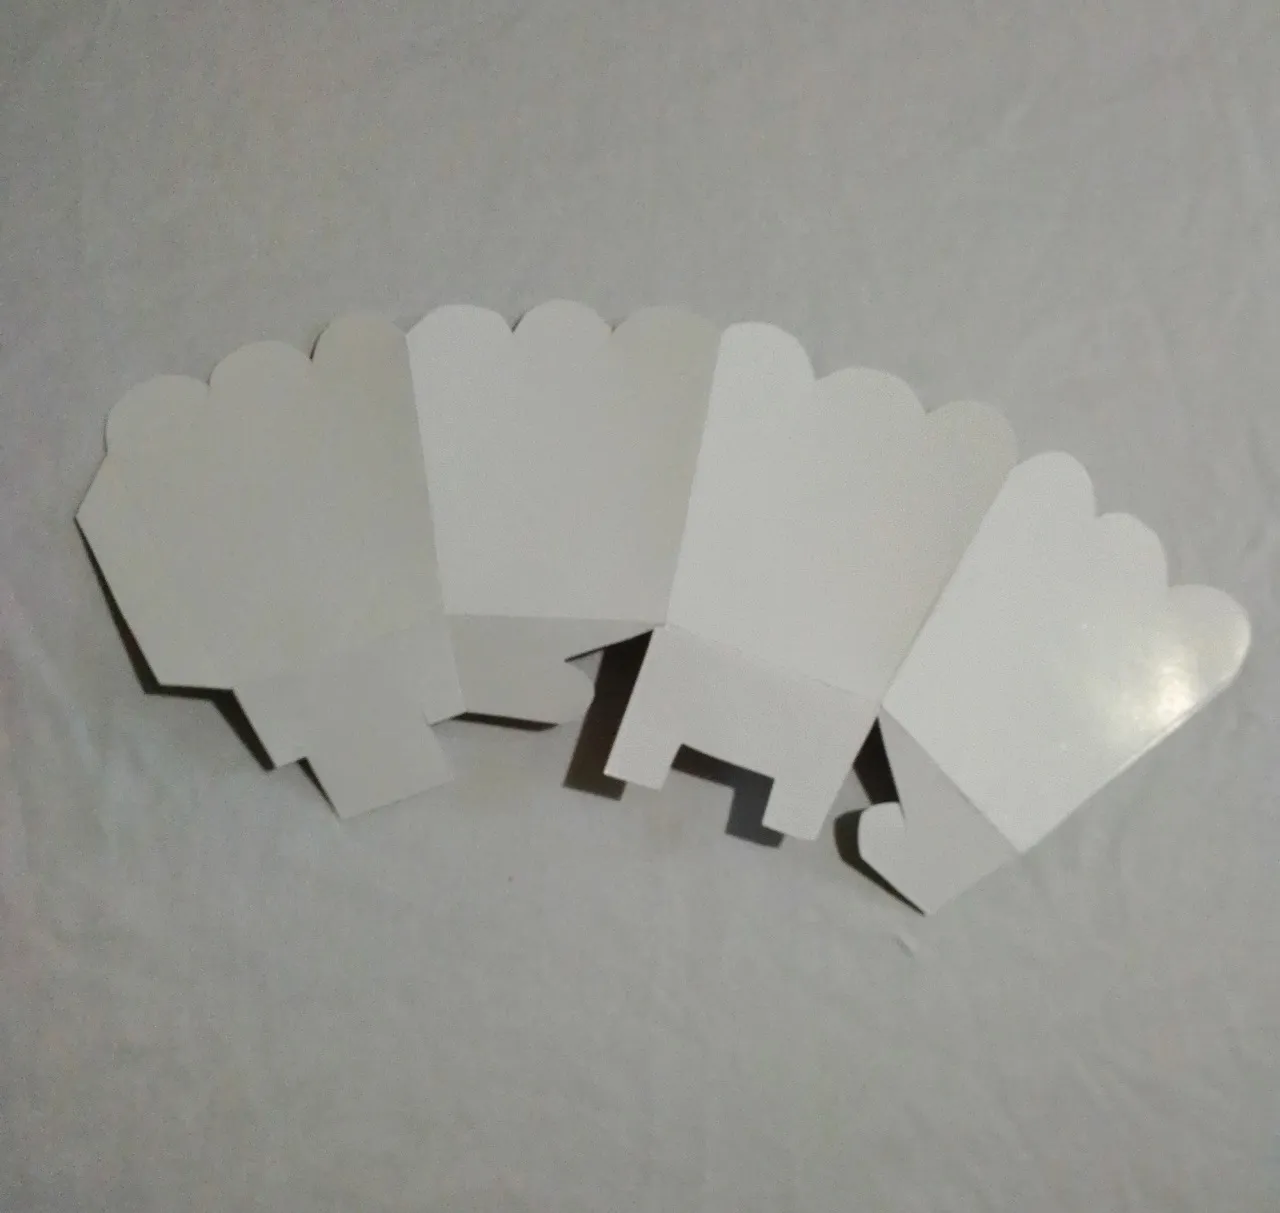
As you can see, once I mark all the lines of the pattern, you can see the lines on the cardboard. Then I will cut along all the edges and make the corresponding fold, as you can see in the images.

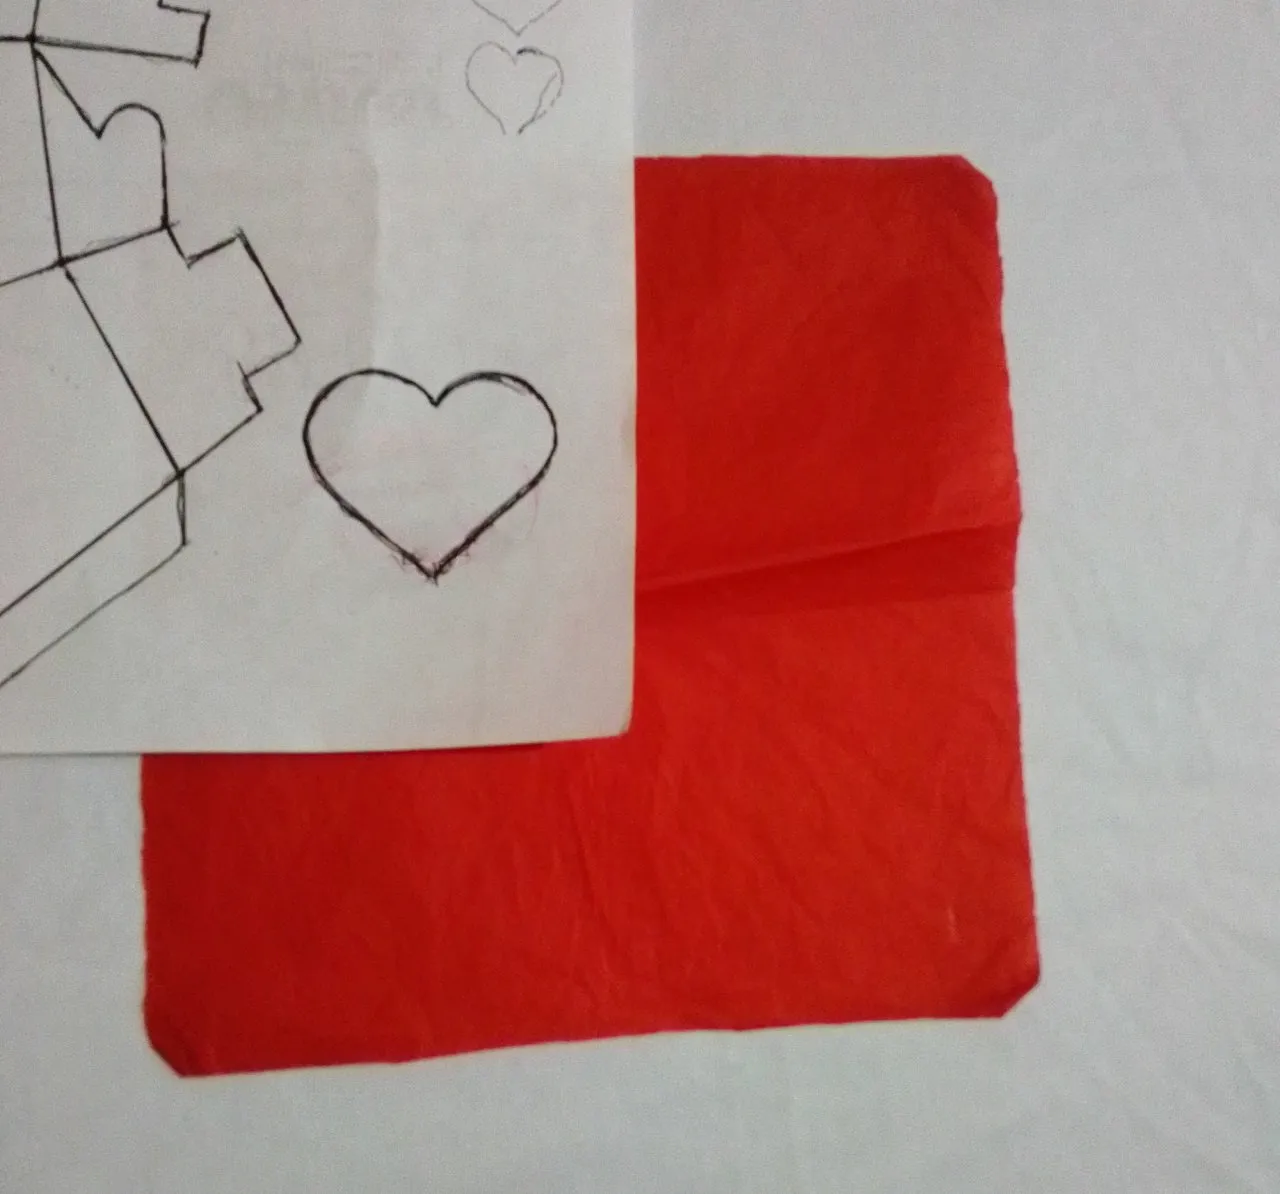
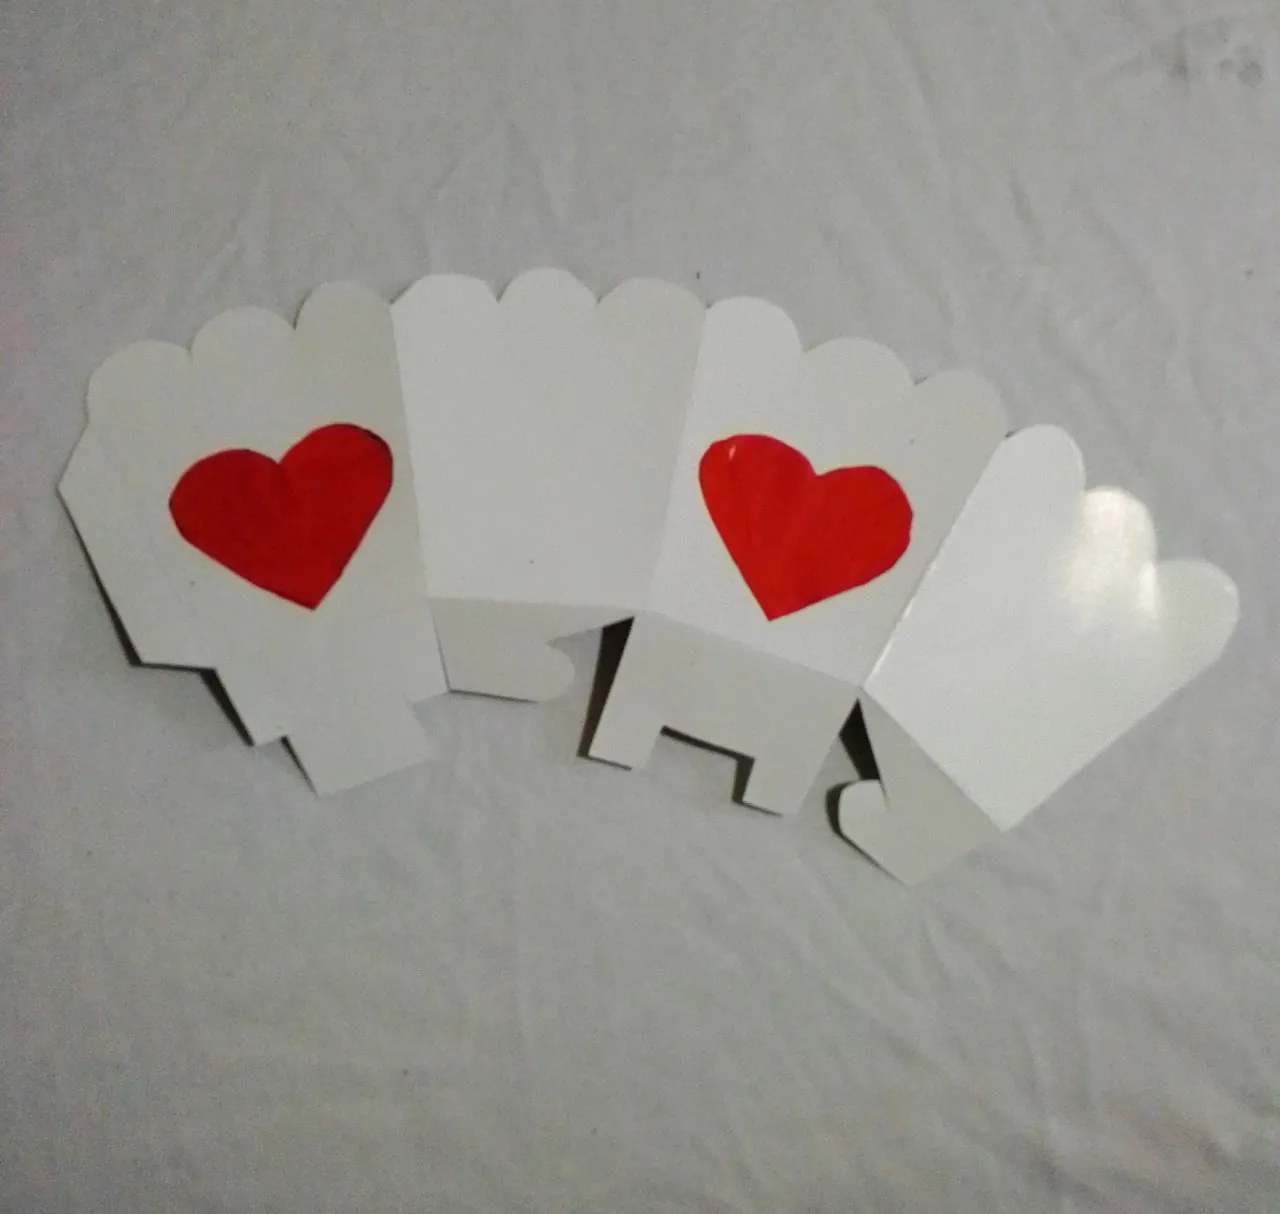
On the red tissue paper, I will cut out 2 hearts and then glue them with the white glue to one of the sides of the box.
 |  |  |
|---|
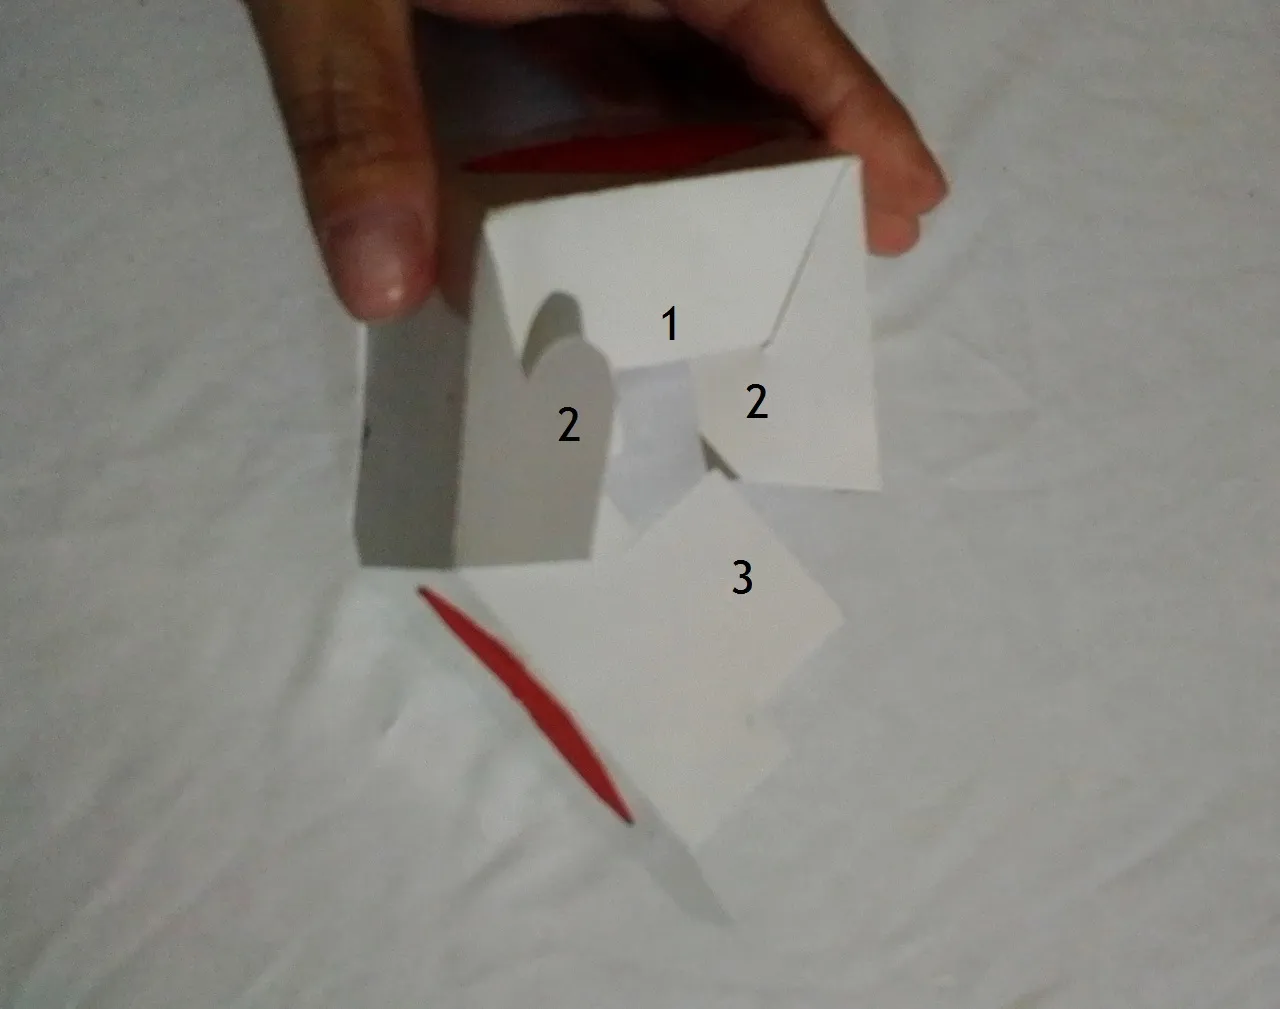
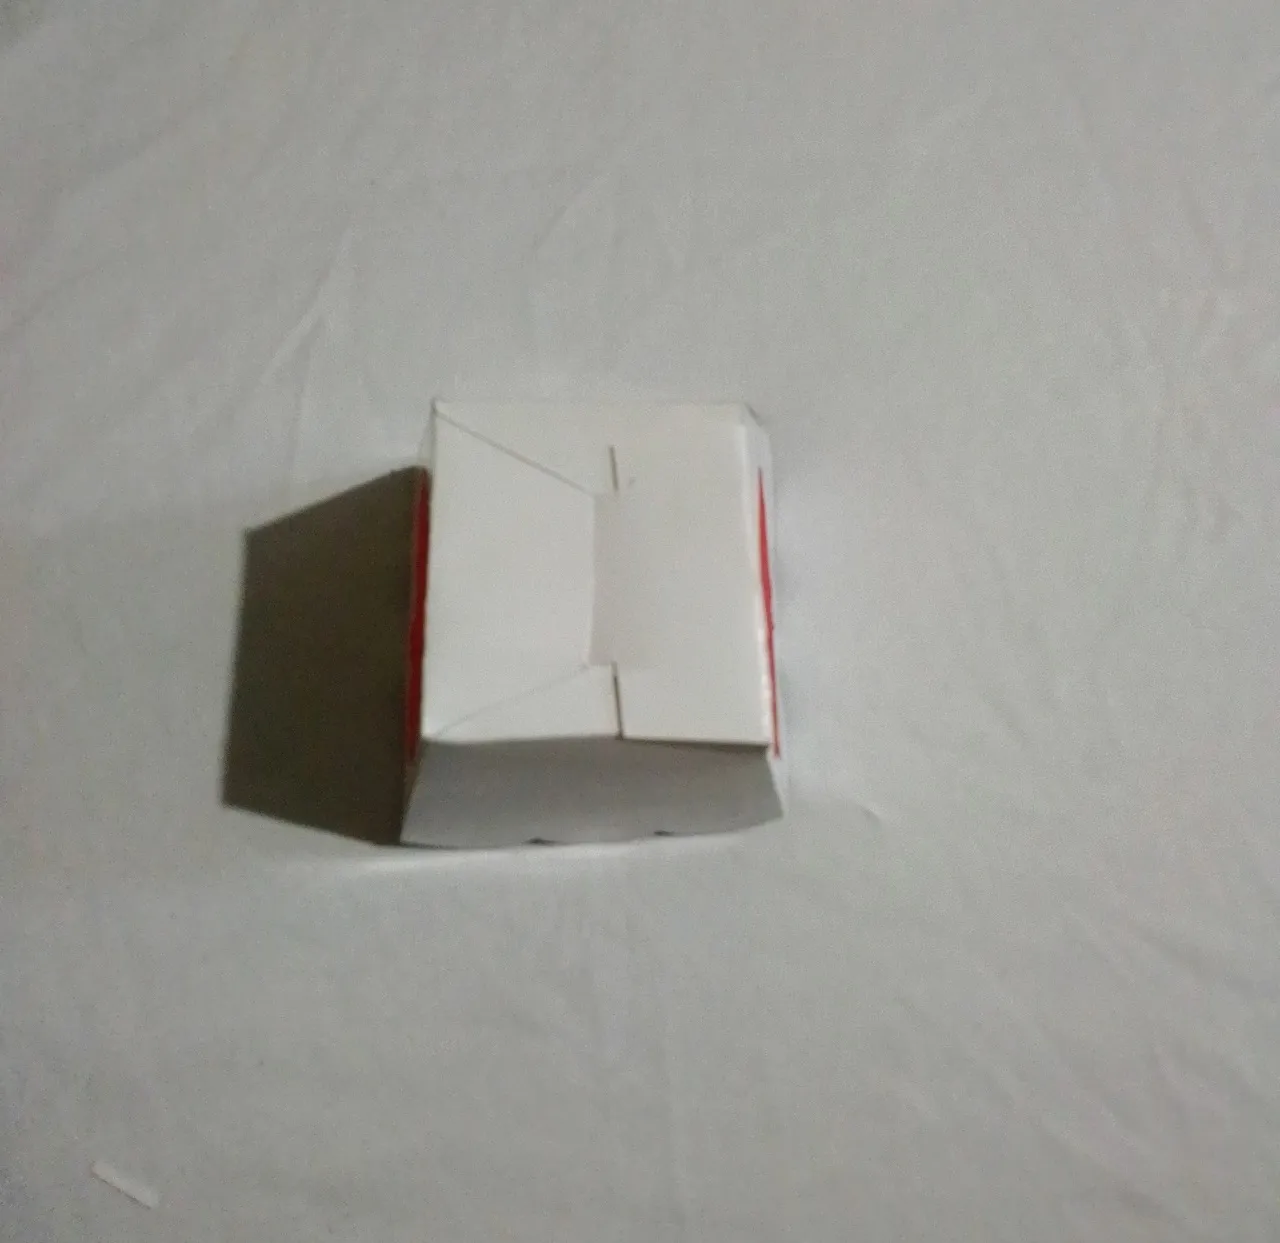
Now I will close the box, the bottom fins will fit very well so no glue will be needed for the bottom. We will place the rounded fins (2) we will put them below the straight fin (1) and then the other fin (3), we introduce it above the others.
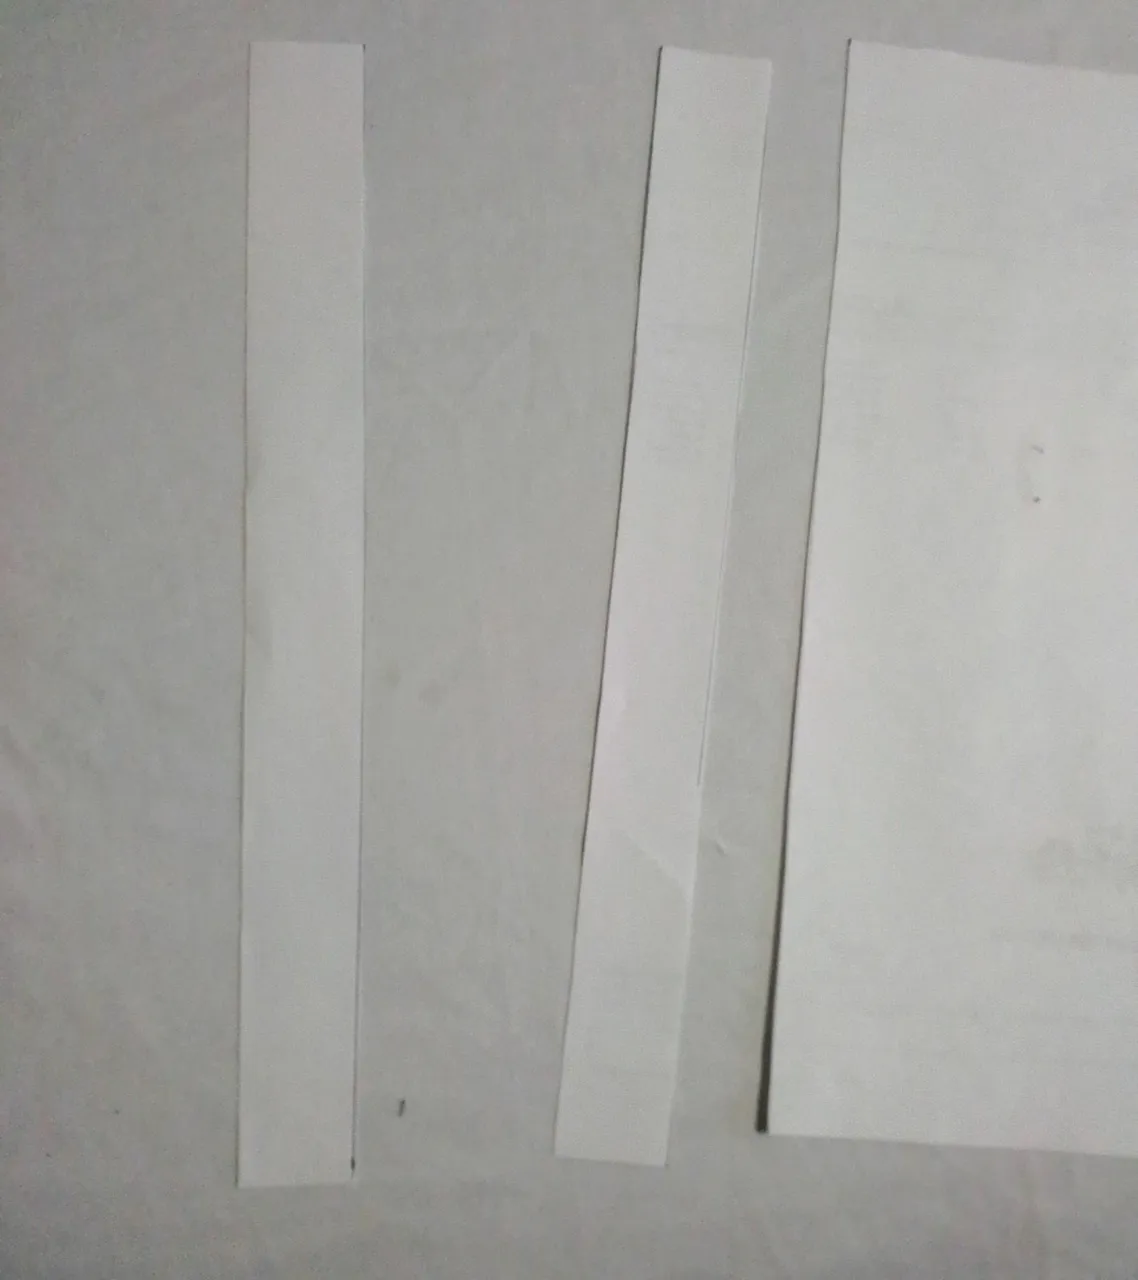
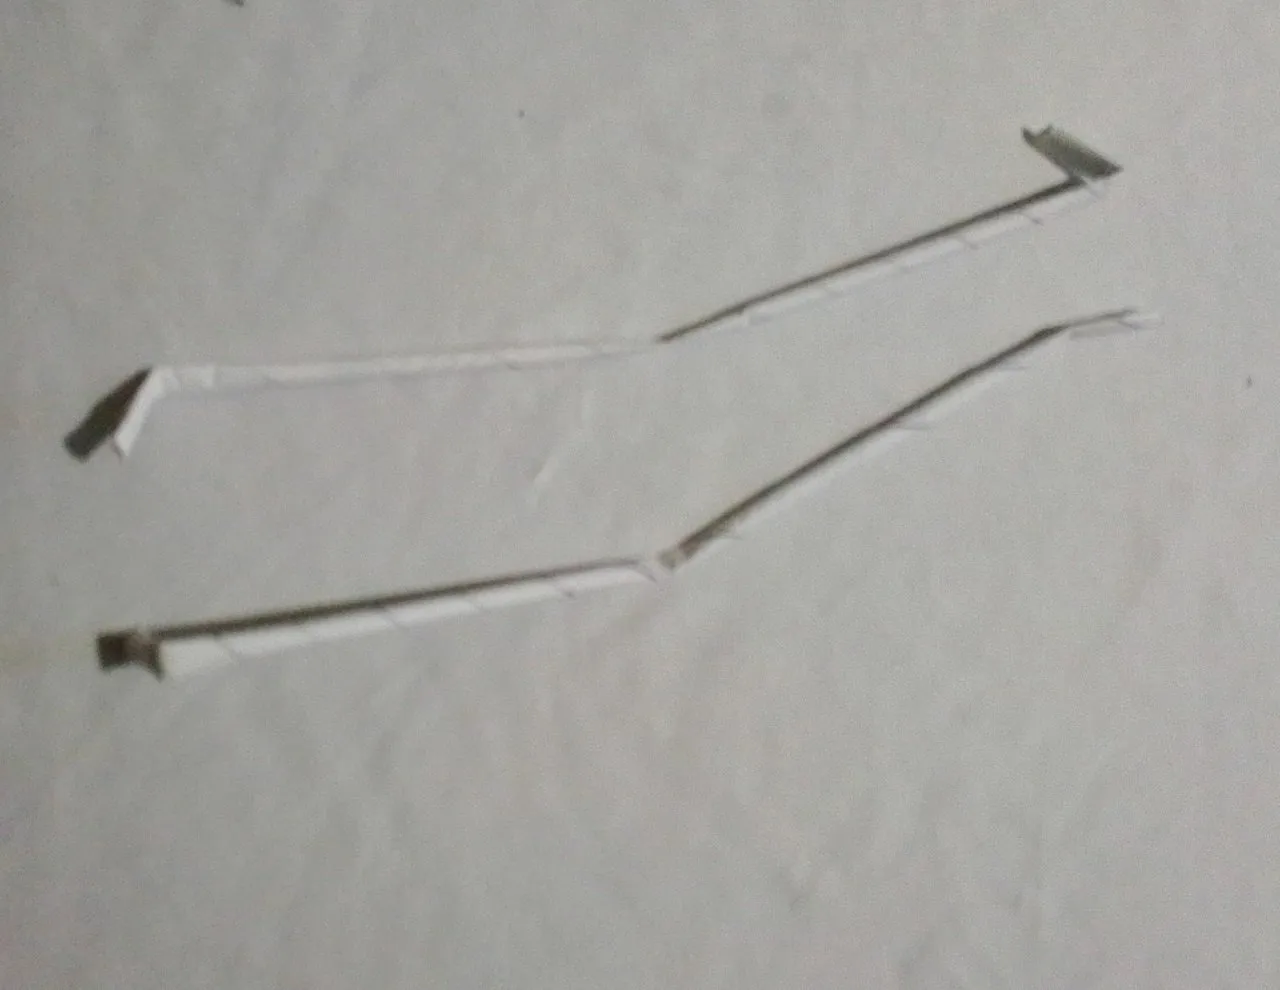
From the sheet of paper, I cut two strips the length of the sheet and about 3 cm wide. With a height stick, I went around it in a spiral, then I took out the height stick and I got a paper stick, as you can see in the picture.

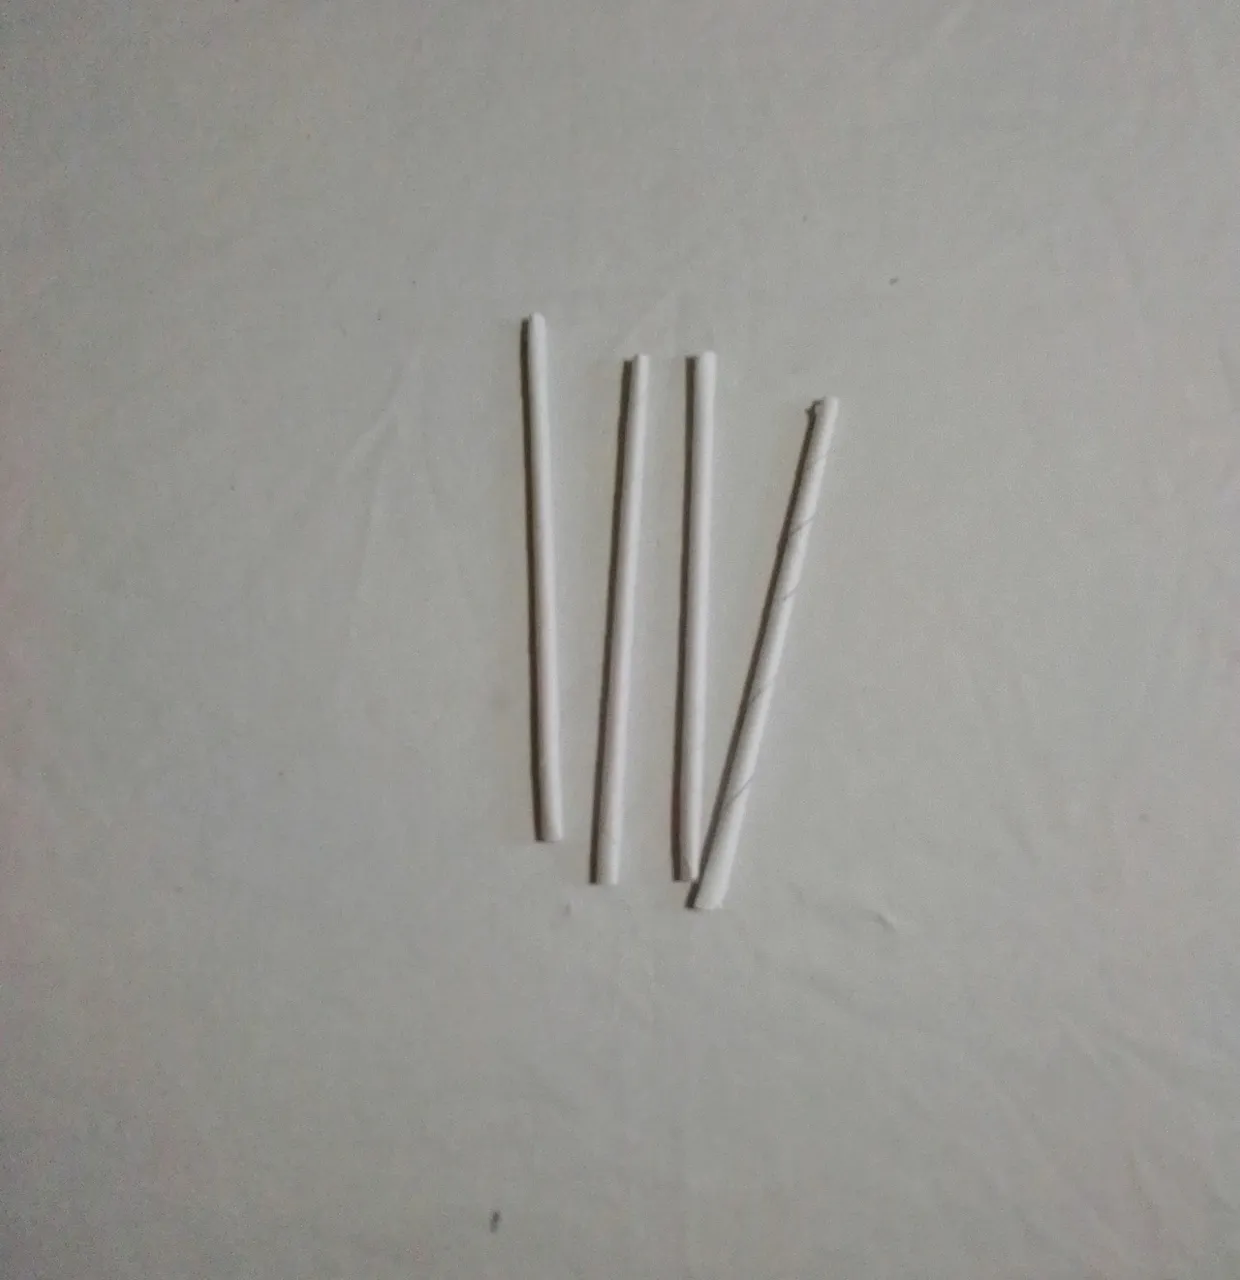
Cut the sticks into 4 equal sized sticks and glue them to each end of the box.
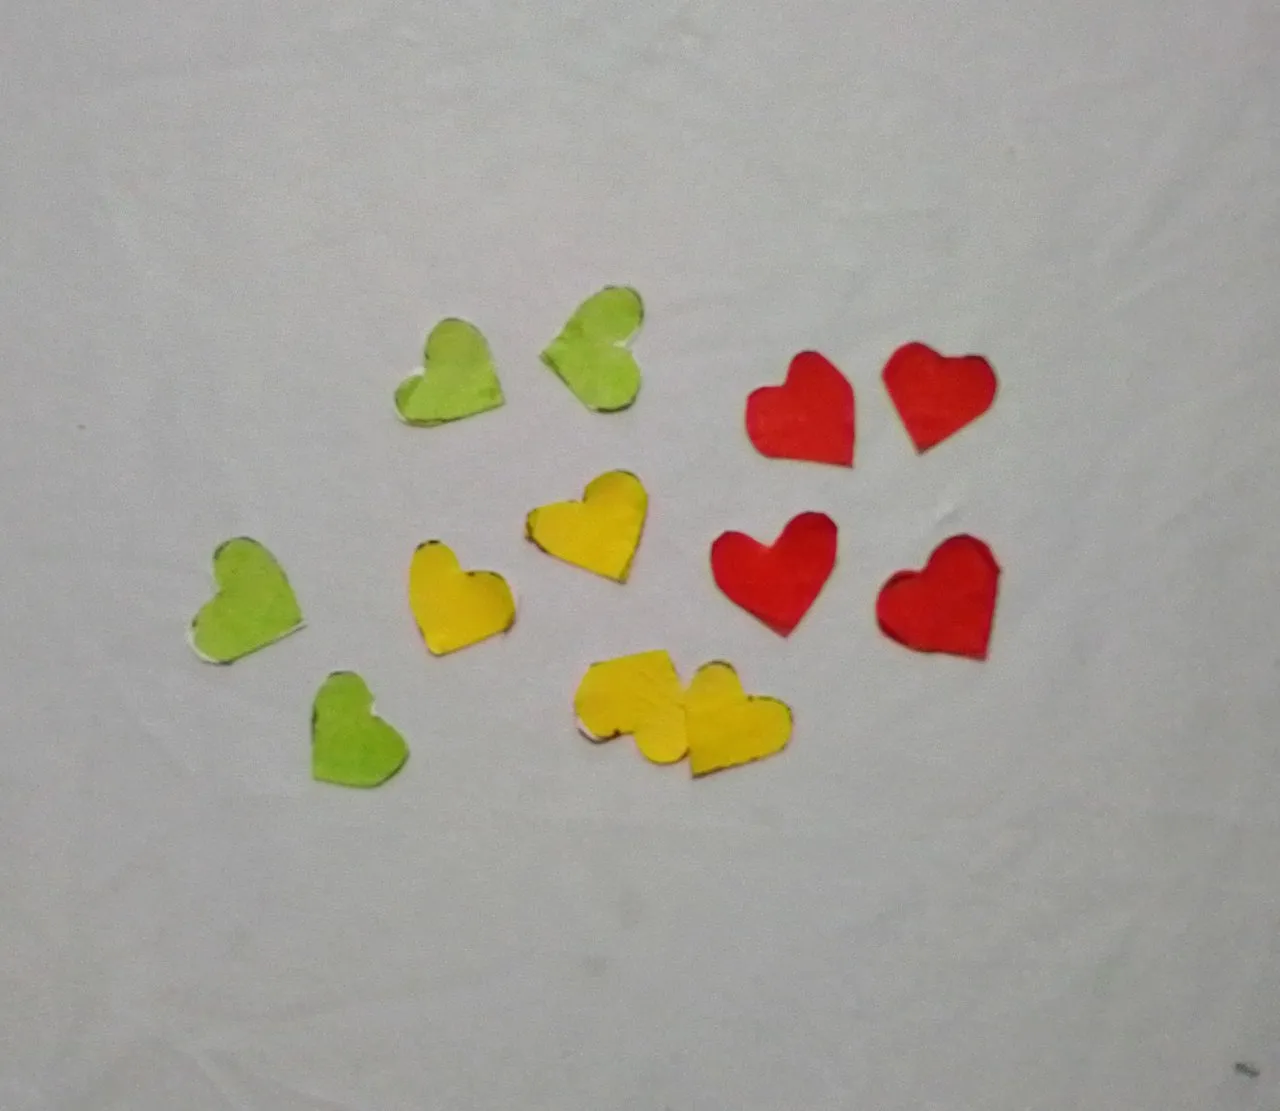
I will cut out 4 small hearts of different colors with the tissue paper and glue them to the cardboard to make them harder. And I will cut out each one.

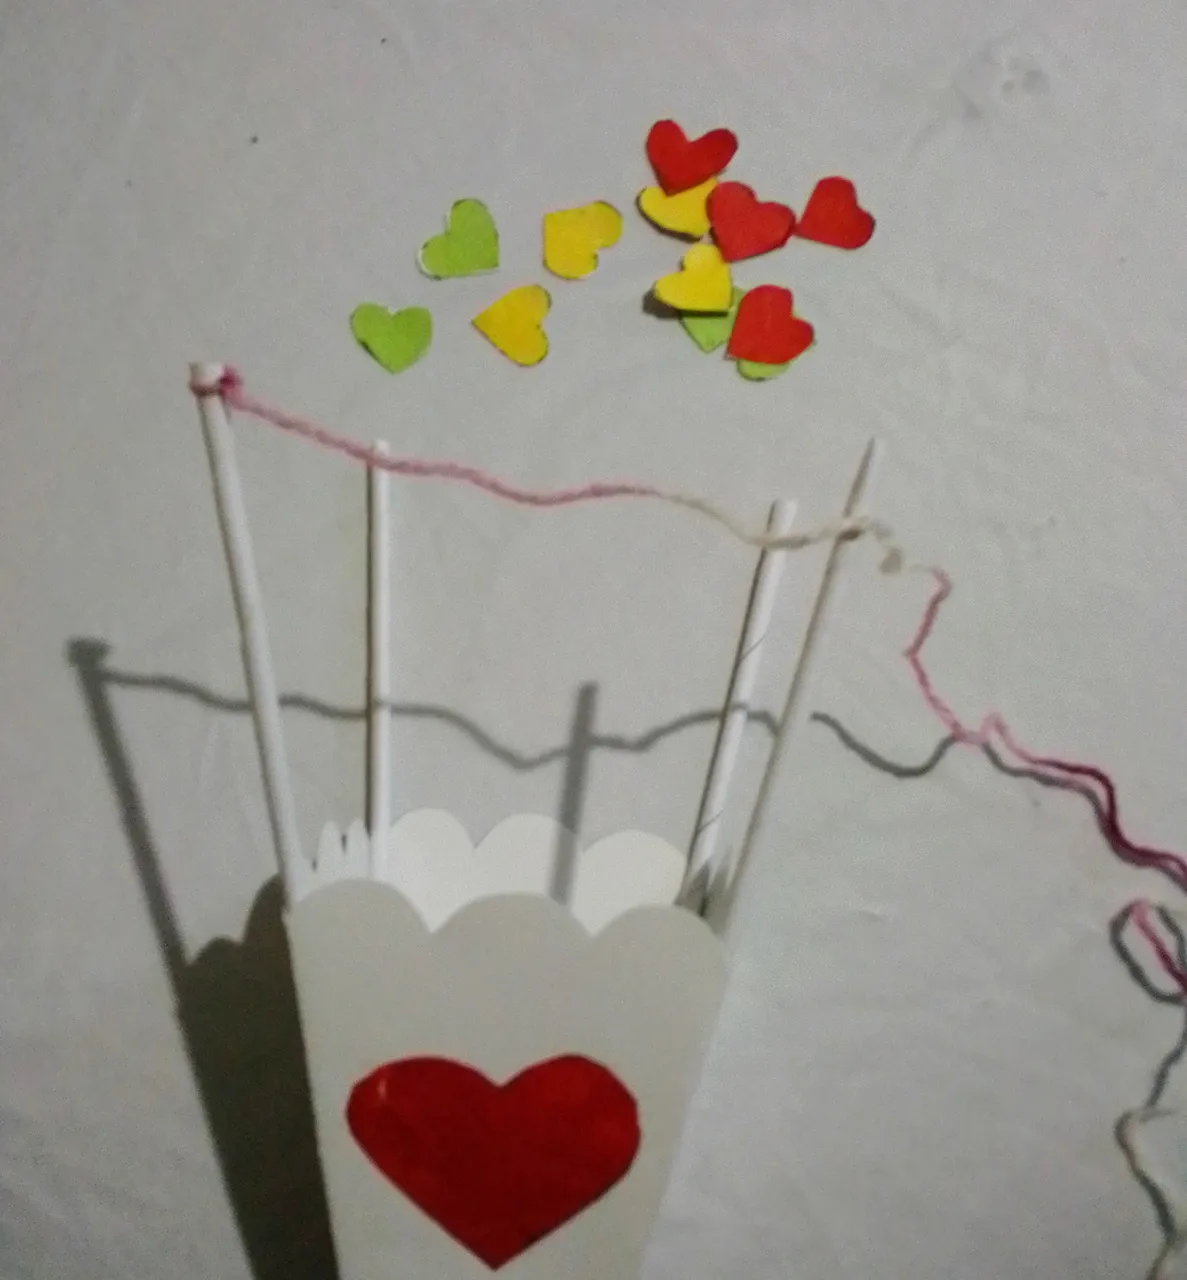
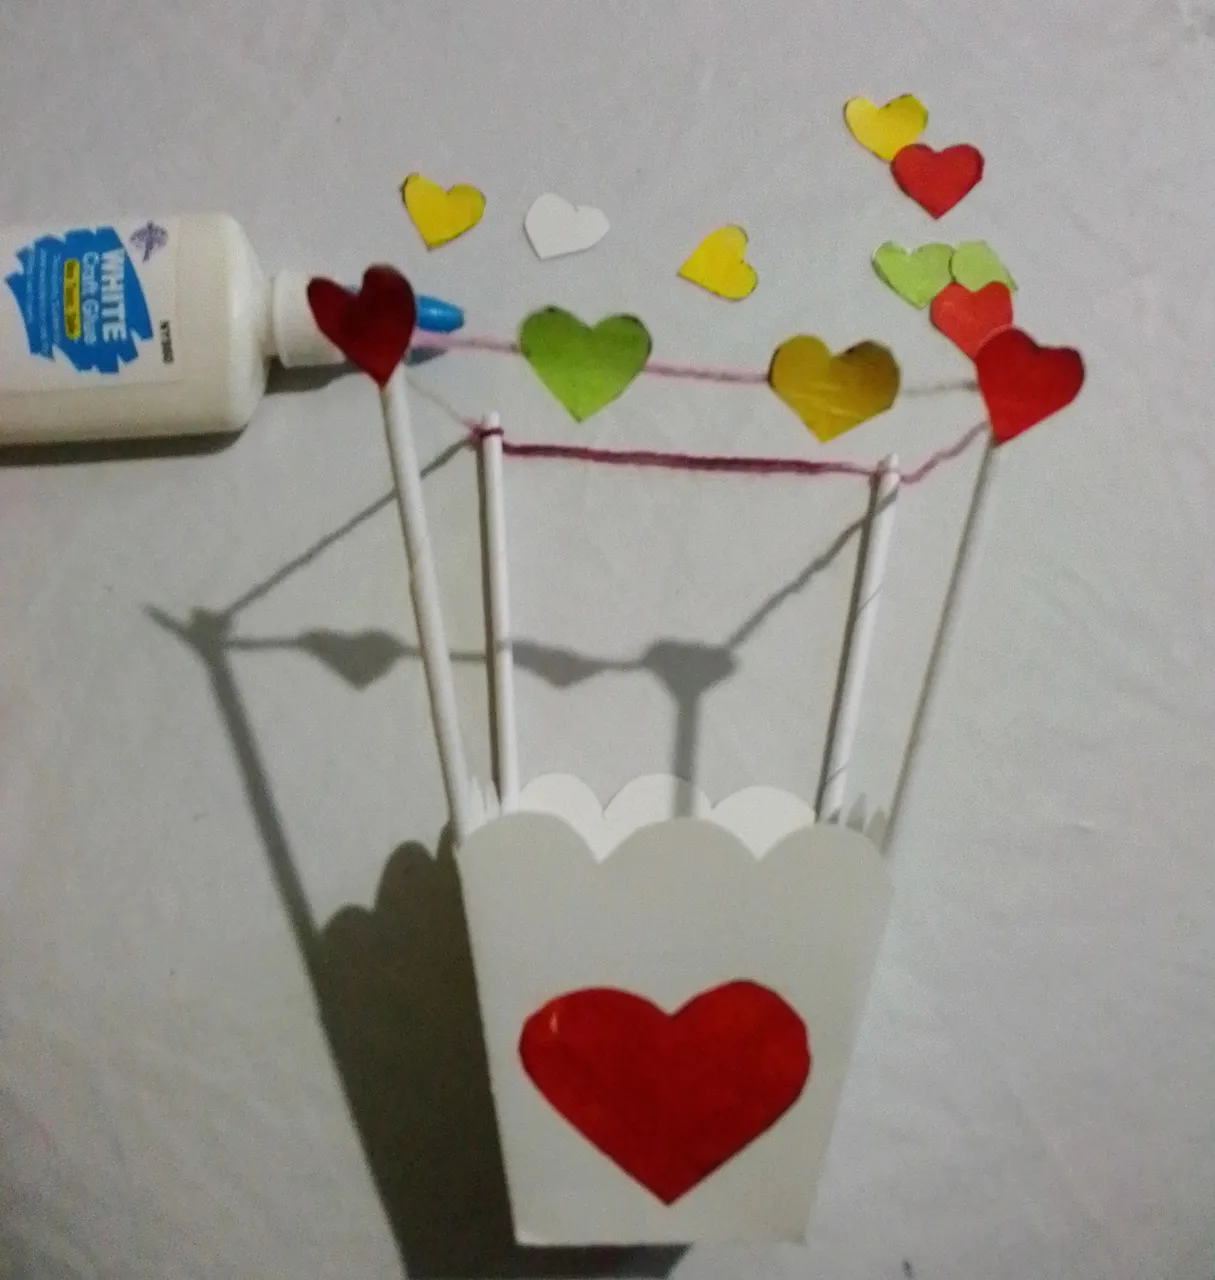
With the help of the glue, I will glue the red hearts on each end of the box, and the other hearts I will glue to the hanging thread.
 |  |  |
|---|
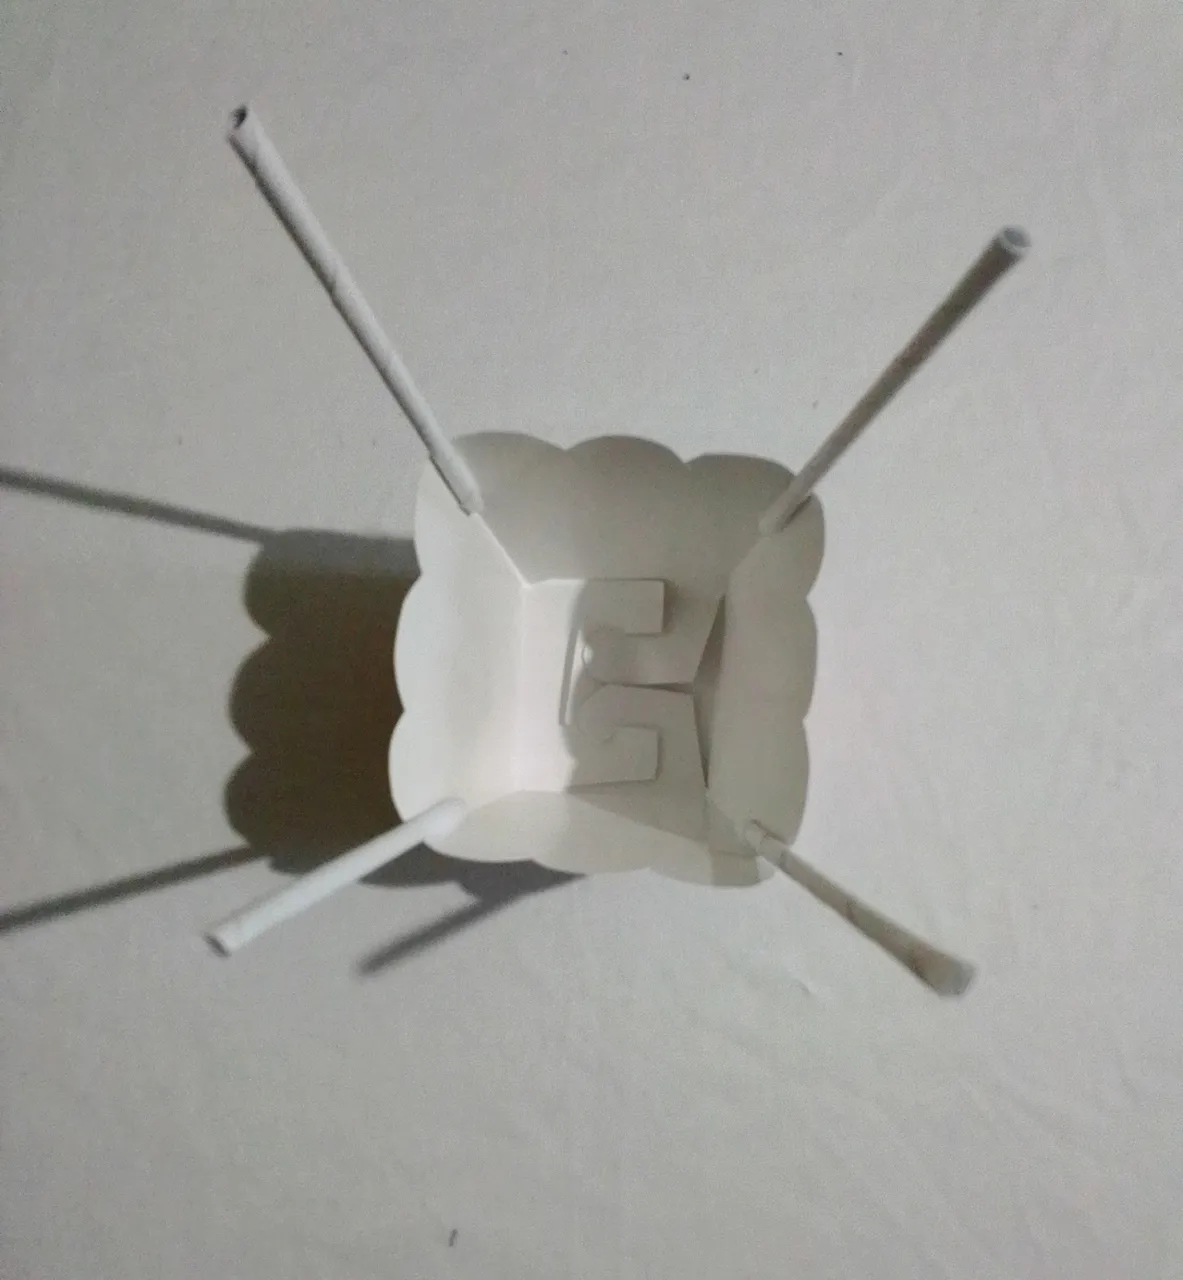
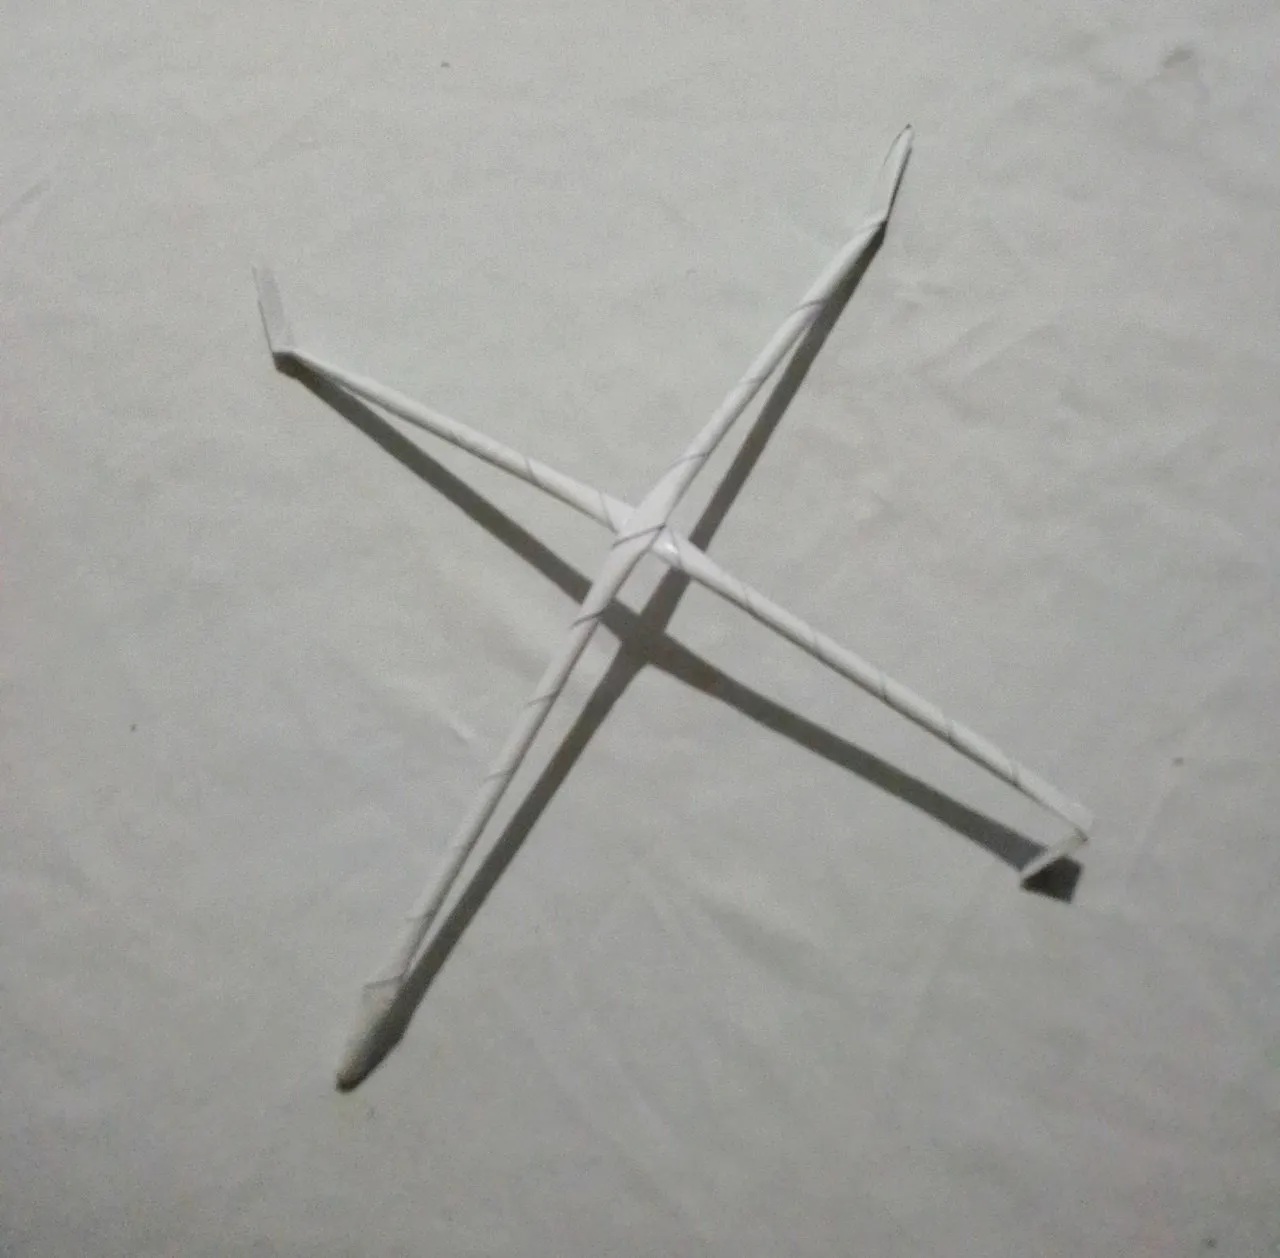
I made two more paper sticks and glued them in the center making an "X" and glued it to each end of the sticks I had previously glued.
 |  |
|---|
 |  |
|---|
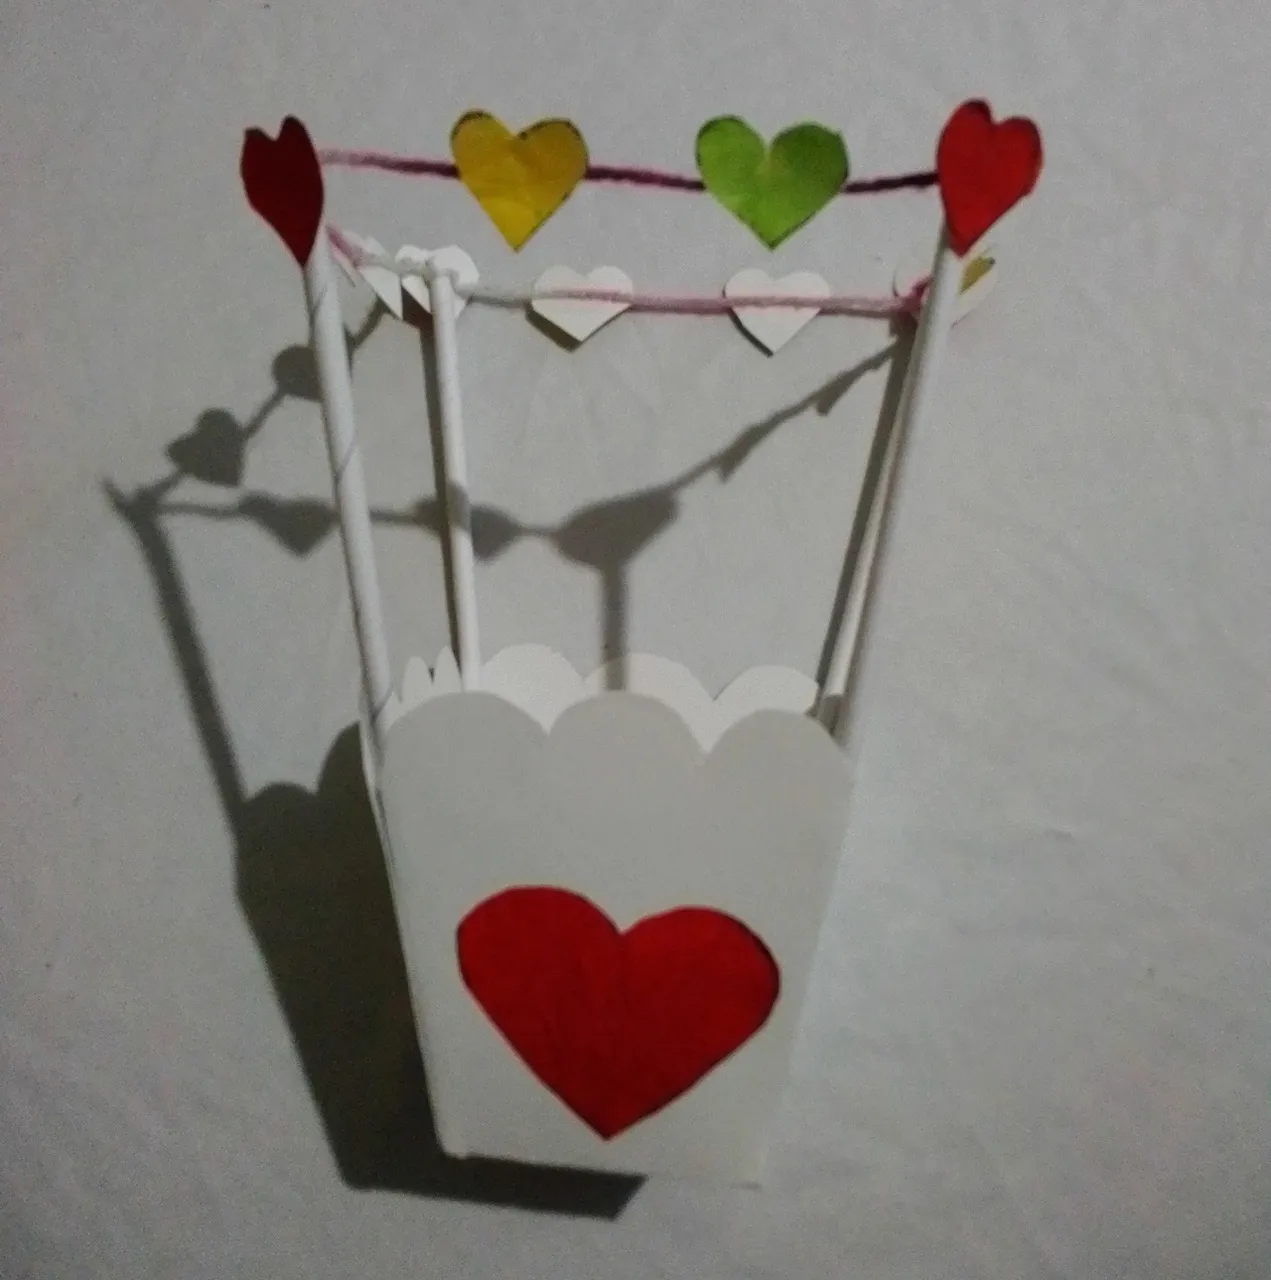
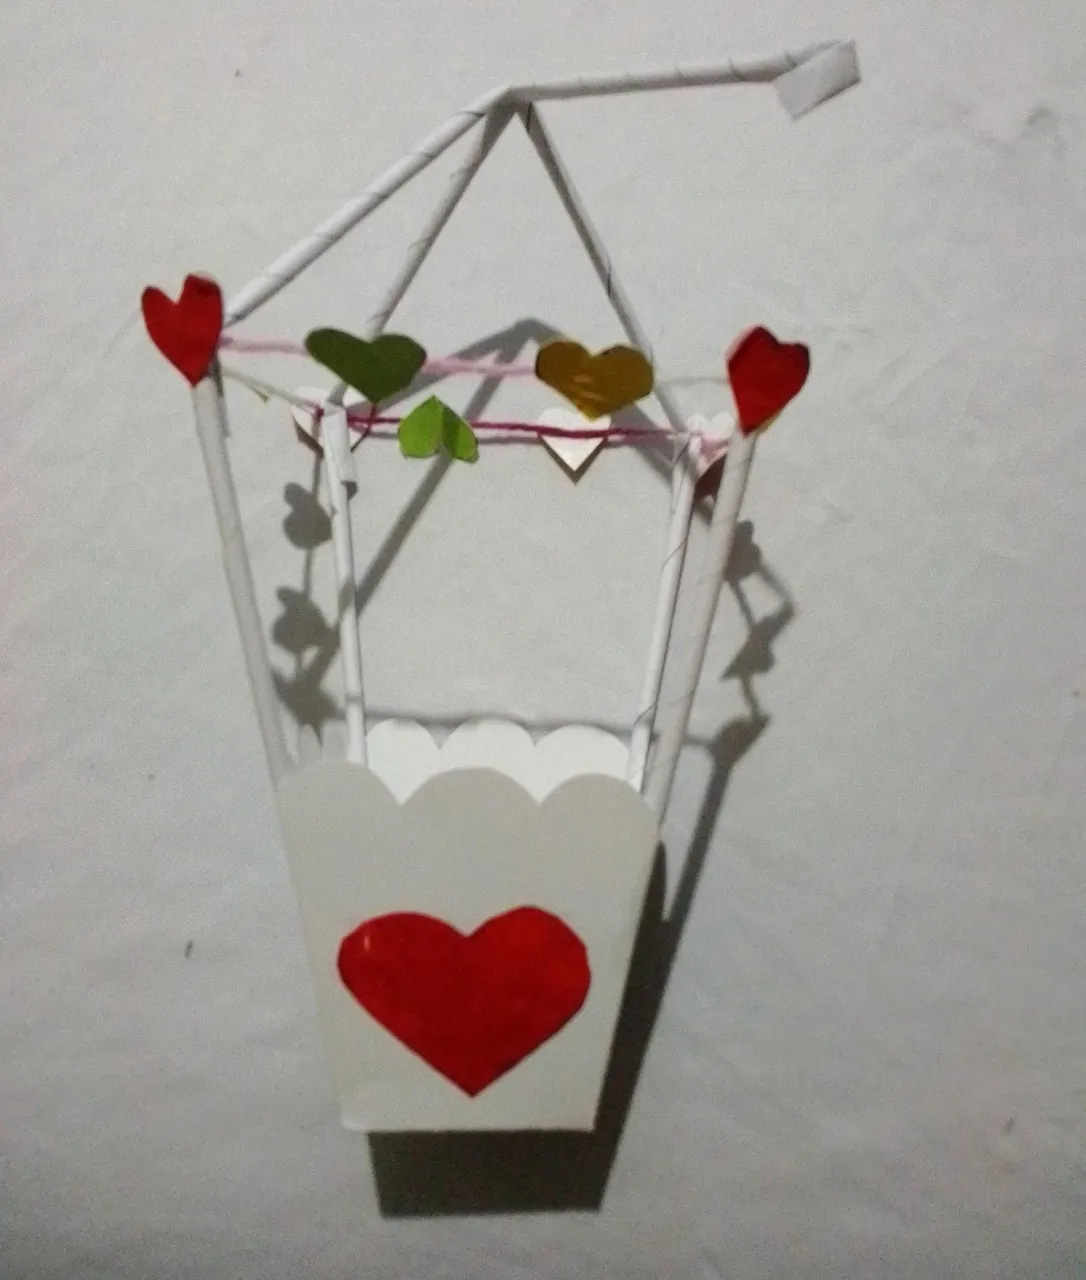
At the top, I will tie the balloon with the worsted thread. And now I have my cotillion ready to give as a gift. I will place inside the box, the rest of the tissue paper, just to decorate and so when I place the candies inside, they will not fall and will remain in plain sight.
I hope you liked it and that you can make it too. I say goodbye as always, but not before thanking you for giving me a little bit of your valuable time. I hope to see you in my next publication, be good and take care of yourselves.
Original creation content:
🍬 All photos are my property taken and edited with my Alcatel cell phone.
🍭 Cover image was made with Canva application and edited by me.
🎈 The divider images were taken from the Canva page and edited by me in Paint.
🍬 The English translation was done with the help of DeepL.
🍭 The letters indicating the languages, were taken from the Cooltext page.

Hola mis queridos lectores, espero que se encuentren bien y que tengan o hayan tenido un excelente y maravilloso día. En el día del amor y la amistad, siempre buscamos darle un detalle por muy pequeño que sea a esa persona especial que nos llena de amor, bien sea un amigo(a), una pareja o nuestros hijos. A pesar de que ya paso el dia, aun quiero invitar a @eylis y a todos los que esten interesados y se animen a participar en el concurso que nos ofrece esta comunidad.
Aquí les quiero compartir como realice un cotillón para obsequiar ese regalo especial, en este caso lo obsequie a mi hija con muchos dulces que a ella tanto le encanta. Este cotillón es fácil de hacer y no necesita de mucho materiales, así que sin más preámbulos le muestro el paso a paso.
PASO A PASO:
En la hoja de papel tengo dibujado un patrón para hacer la caja donde colocaremos lo que vamos a obsequiar. Tomaré la cartulina y le colocaré encima el patrón y con el lapicero repasare por todas las líneas del patrón para que así se marque en la cartulina.
Como pueden ver, una vez que marque por todas las líneas del patrón, se pueden apreciar las líneas en la cartulina. Luego recortaré por todos los bordes y haré el doblez correspondiente, como pueden apreciar en las imágenes.
En el papel de seda de color rojo, recortaré 2 corazones para luego pegarlo con la pega blanca a uno de los lados de la caja.
| | |
|---|
Ahora cerrare la caja, las aletas de abajo encajaran muy bien por lo tanto no se necesitará pega para la parte de abajo. Colocaremos las aletas redondeadas (2) las pondremos por debajo de la aleta recta (1) y luego la otra aleta (3), la introducimos por encima de las demás.
De la hoja de papel, recortaré dos tiras del largo de la hoja y de 3 cm de ancho aproximadamente. Con un palito de altura, lo fui dando vueltas en espiral, luego saque el palito de altura y me quedo un palito de papel, tal como aprecian en la imagen.
Recorte los palitos en 4 palos de tamaños iguales y los pegaré en cada punta de la caja.
Recortaré 4 corazones pequeños de diferentes colores con el papel de seda y los pegaré a la cartulina para que queden más duros. Y recortaré cada uno.
Con la ayuda de la pega, pegaré los corazones rojos en cada punta de la caja, y los demás corazones los pegare el hilo que queda colgando.
| | |
|---|
Hice dos palos más de papel y los pegaré en el centro haciendo una “X” y lo pegare en cada punta de los palitos que había pegado anteriormente.
| |
|---|
| |
|---|
En la parte arriba, amarrare con el hilo de estambre, el globo. Y ya tengo listo mi cotillón para obsequiar. Le colocaré dentro de la caja, el resto de los papeles de seda, solo para decorar y así cuando coloque dentro los caramelos, no se caigan y queden a simple vista.
Espero que les haya gustado y que lo puedan realizar también. Me despido como siempre, no sin antes agradecerles, por dedicarme un poquito de su valioso tiempo. Los espero en mi próxima publicación, pórtense bien y cuídense mucho.
Contenido de creación original:
🍬 Todas las fotos son de mi propiedad tomada y editadas con mi celular Alcatel.
🍭 La imagen de portada fue realizada con la aplicación Canva y editada por mi.
🎈 Las imágenes del separador fueron tomadas de la página Canva y editado por mí en Paint.
🍬 La traducción al idioma inglés fue realizada con ayuda de DeepL.
🍭 Las letras de indicación de los idiomas, fueron tomadas de la página Cooltext.