


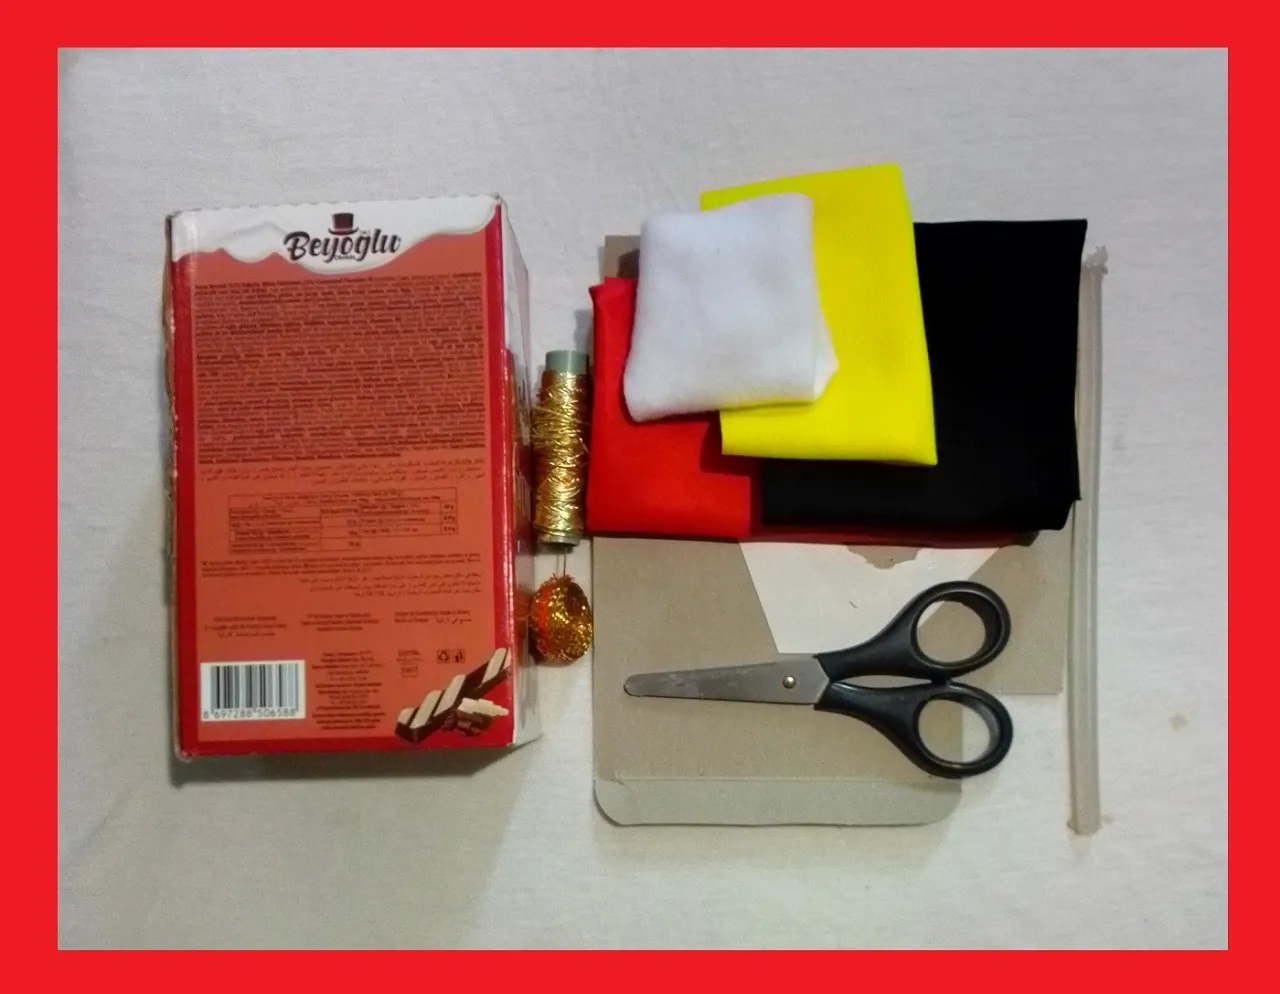
Hello my dear readers, I hope you are well and that you have or have had an excellent and wonderful day. Always in this Christmas season we want to give gifts to the people we love and sometimes we go crazy buying expensive gift bags or wrapping paper, but what if we make a gift bag with disposable materials that will look great or will have nothing to envy to those expensive ones sold in stores. Today I want to share with you how I turned a simple box into a nice Christmas box ideal to keep a special gift.

STEP BY STEP:
With the red fabric line the entire box, I will glue with the silicone all around the edge of the box, making sure that it is not wrinkled and everything is smooth.


To line it without showing the tie, try to leave the union of the two fabrics just in one corner of the box, and very carefully, I folded the fabric a little and glued it, as shown in the image.

With the black fabric I cut out a strip about 4 cm long which I will glue all around the bottom of the box. And with the cardboard cut out and line a rectangle piece, the size of the bottom of the box, to glue it and cover the joints of the red fabric underneath.


I will make a buckle, with the cardboard I will cut out a square of 5 x 5 cm approximately and I will line it with the yellow fabric as shown in the image. Then I will glue it with the silicone in the center of the black strip.


With the white fabric, I will cut a strip the width of the box and give it a rounded shape as shown in the image and glue it on the top of the box. I will also cut out two circles that will be the buttons and glue them on top of the strap buckle.


I will decorate the buckle with the gold ribbon, glue it all around.

Now cut out two long strips of cardboard, approximately 1.5 x 15 cm. I lined them with the red fabric and decorated them with the golden thread, and then glued them as the handle of the box.


And I have my little decorated box ready, waiting to hold any special gift.

I hope you liked it and that you can make it too, I loved the final result.
I say goodbye as always, but not before thanking you for giving me a little bit of your valuable time. I hope to see you in my next publication, be well and take care of yourselves.
Original creation content:
🎄 All photos are my own taken and edited with my Alcatel cell phone.
🎅 The cover image was made with the Canva application and edited by me.
🎁 The divider images were taken from Canva and edited by me in Paint.
🌠 The English translation was done with the help of DeepL.
⛄️ The letters indicating the languages, were taken from the Cooltext page.

Hola mis queridos lectores, espero que se encuentren bien y que tengan o hayan tenido un excelente y maravilloso día. Siempre en estas navideñas les queremos hacer obsequios a las personas más queridas y a veces nos volvemos locos comprando costosas bolsas de regalo, o papel para envolverlos, pero que tal si hacemos una bolsa de regalo con materiales desechables que quedara muy bien o no tendrá nada que envidiarle a esas costosas que venden en las tiendas. Hoy les quiero compartir como convertí una simple caja en una linda caja navideña ideal para guardar algún regalo especial.

PASO A PASO:
Con la tela roja forre toda la caja, pegaré con el silicón por todo el borde de la caja, cuidando de que no quede arrugada y quede todo liso.
Para forrarla sin que se vea el empate, trate de que quede la unión de las dos telas justo en una esquina de la caja, y con mucho cuidado, fui doblando un poco la tela y pegándola, tal como se muestra en la imagen.
Con la tela negra recorte una tira larga de 4 cm aproximadamente la cual pegaré en la parte baja de la caja por todo el alrededor. Y con el cartón recorte y forre una pieza en rectángulo, del tamaño del fondo de la caja, para pegárselo y tapar las uniones de la tela roja por debajo.
Realizaré una hebilla, con el cartón recortaré un cuadrado de 5 x 5 cm aproximadamente y la forraré con la tela amarilla tal como se muestra en la imagen. Luego la pegaré con el silicón en el centro de la tira negra.
Con la tela blanca, recortaré una tira del ancho de la caja y le daré forma redondeada tal como se muestra en la imagen y la pegaré en la parte de arriba de la caja. También recorte dos círculos que serán los botones y los pegaré encima de la hebilla de la correa.
Decoraré la hebilla con la cinta dorada, la pegaré por todo el alrededor.
Ahora recorte dos tiras largas en cartón, de 1,5 x 15 cm aproximadamente. Las forre con la tela roja y las decore con el hilo dorado, para luego pegarlas como asa de la caja.
Y ya tengo lista mi cajita decorada, esperando para guardar cualquier regalo especial.
Espero que les haya gustado y que ustedes también puedan realizarlo, a mí me encanto el resultado final.
Me despido como siempre, no sin antes agradecerles, por dedicarme un poquito de su valioso tiempo. Los espero en mi próxima publicación, pórtense bien y cuídense mucho.
Contenido de creación original:
🎄 Todas las fotos son de mi propiedad tomada y editadas con mi celular Alcatel.
🎅 La imagen de portada fue realizada con la aplicación Canva y editada por mi.
🎁 Las imágenes del separador fueron tomadas de la página Canva y editado por mí en Paint.
🌠 La traducción al idioma inglés fue realizada con ayuda de DeepL.
⛄️ Las letras de indicación de los idiomas, fueron tomadas de la página Cooltext.