Hola Amigos de Hive!
Hoy quiero compartir con ustedes esta hermosa manualidad, cuyo resultado me encantó y además con esto participar en el concurso de "Reciclaje Creativo" auspiciado por la amiga @jennyzer. Espero también les guste la idea y se animen a realizar esta linda casita de cartón y revistas.
Today I want to share with you this beautiful craft, whose result I loved and also with this to participate in the "Creative Recycling" contest sponsored by my friend @jennyzer. I hope you also like the idea and are encouraged to make this cute little house out of cardboard and magazines.
Los materiales a utilizar son los siguientes
The materials to be used are the following
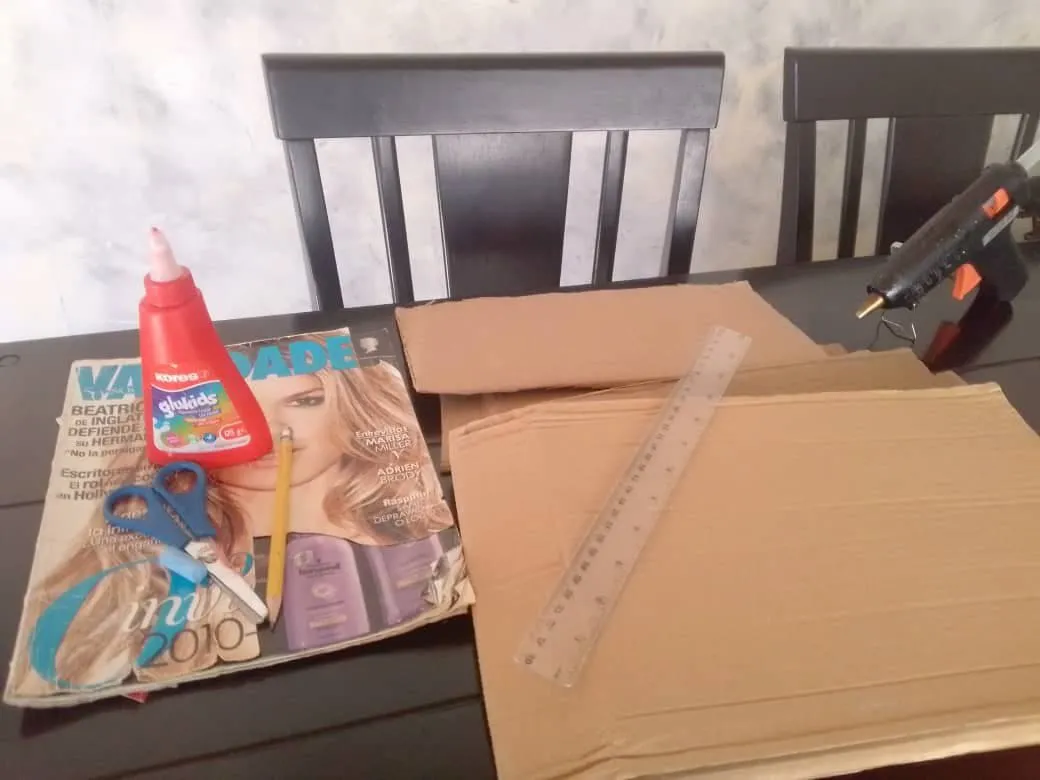
- Cartón de cajas.
- Revistas viejas.
- Pega.
- Silicón.
- Tijera.
- Regla.
- Lápiz.
- Tiza azul.
- Cardboard boxes.
- Old magazines.
- Glue.
- Silicone.
- scissors.
- Ruler.
- Pencil.
- blue chalk.
Paso a paso || Step by step
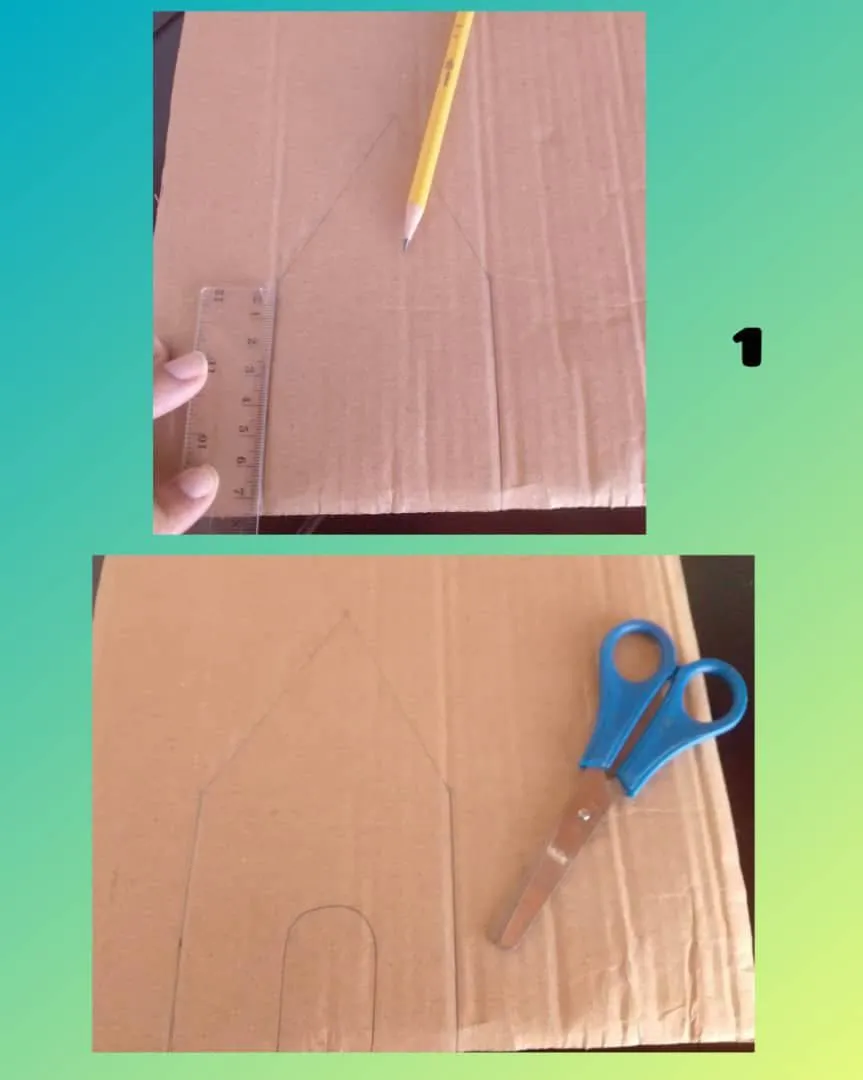
1.- Lo primero que debemos hacer es formar el patrón de la casita sobre el cartón. Para ello mediremos con la regla 8 cm de altura y de ancho. Para el techo mediremos 7 cm de altura.
1.- The first thing to do is to form the pattern of the little house on the cardboard. To do this we will measure with the ruler 8 cm in height and width. For the roof we will measure 7 cm in height.
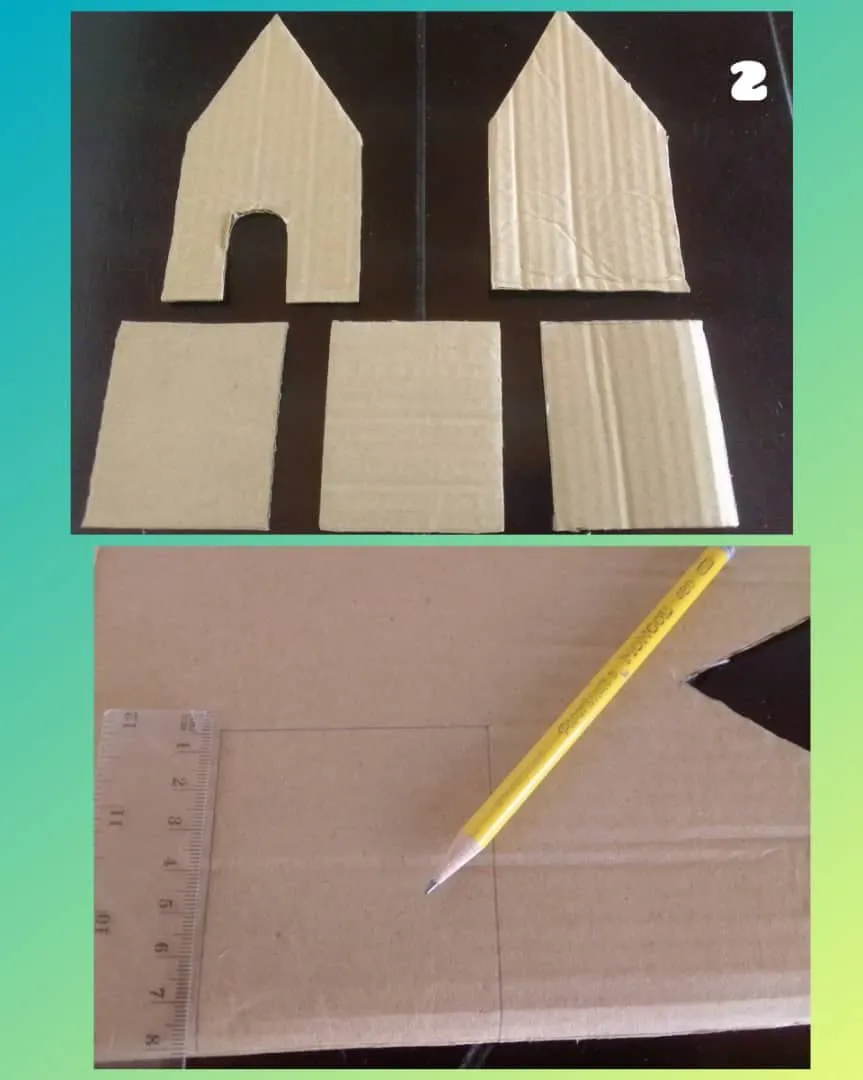
2.- Debemos sacar dos partes iguales que representan el frente de la casita y la parte trasera. También sacaremos 3 cuadrados de igual medida que representan los lados y el piso de la misma.
2.- We must draw two equal parts that represent the front of the house and the back. We will also take out 3 squares of the same size that represent the sides and the floor of the house.
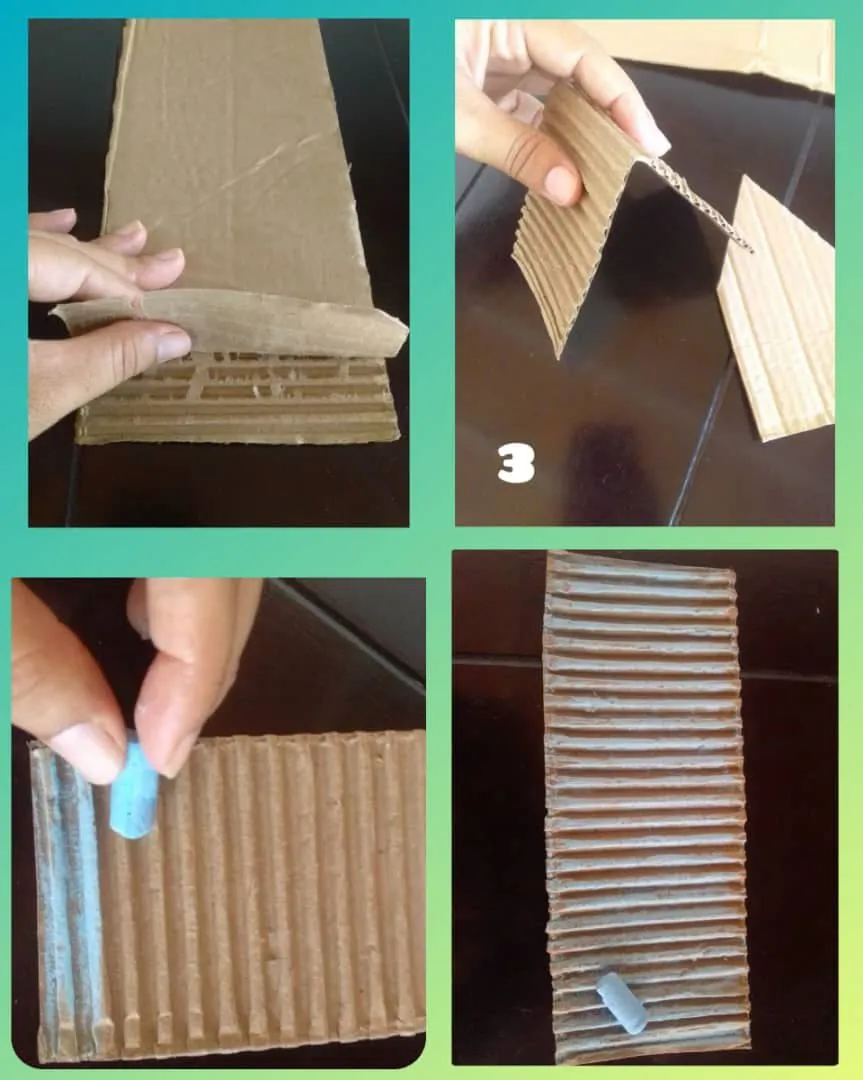
3.- Luego para formar el techo despegaremos la primera capa del cartón, para que quede corrugado y así simule una mejor apariencia. Teñiremos de azul con la tiza.
3.- Then, to form the roof, we will peel off the first layer of cardboard, so that it is corrugated and thus simulates a better appearance. We will dye it blue with the chalk.
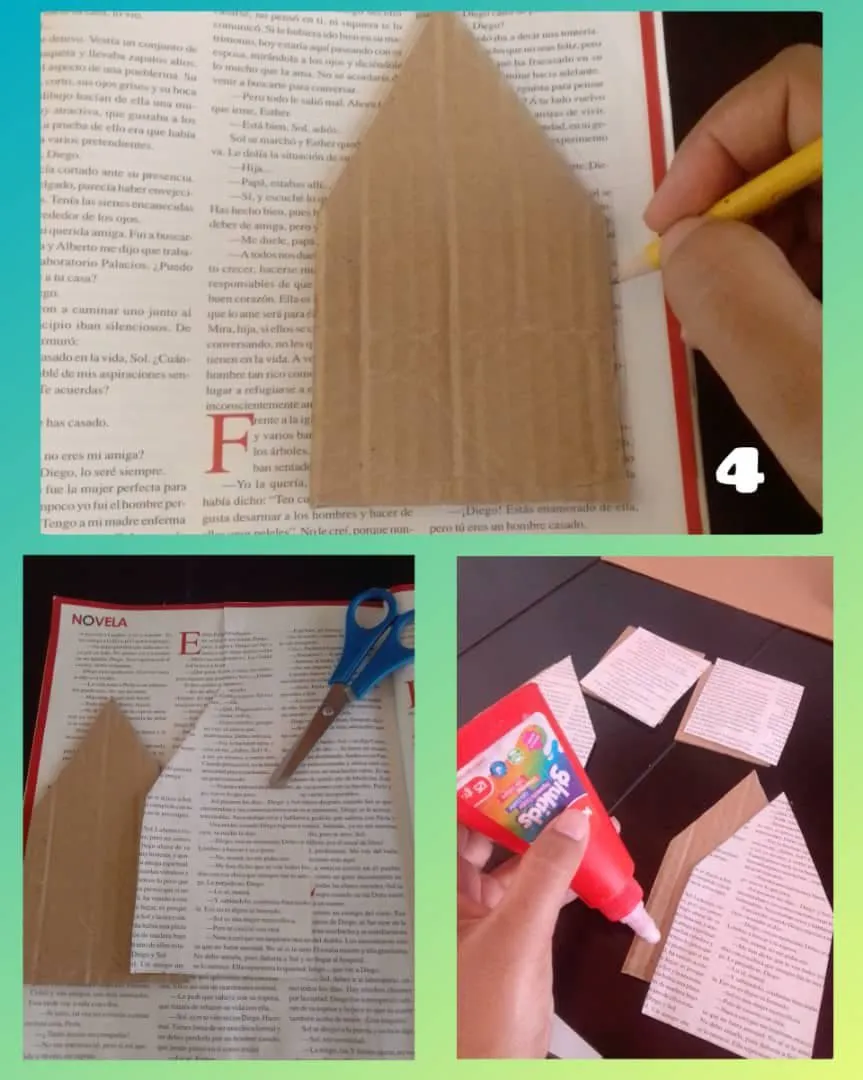
4.- Seguidamente marcaremos y recortaremos en el papel de revista cada parte de la casita, excluyendo el techo y pegaremos en el cartón.
4.- Next we will mark and cut out each part of the little house on the magazine paper, excluding the roof, and we will glue it on the cardboard.
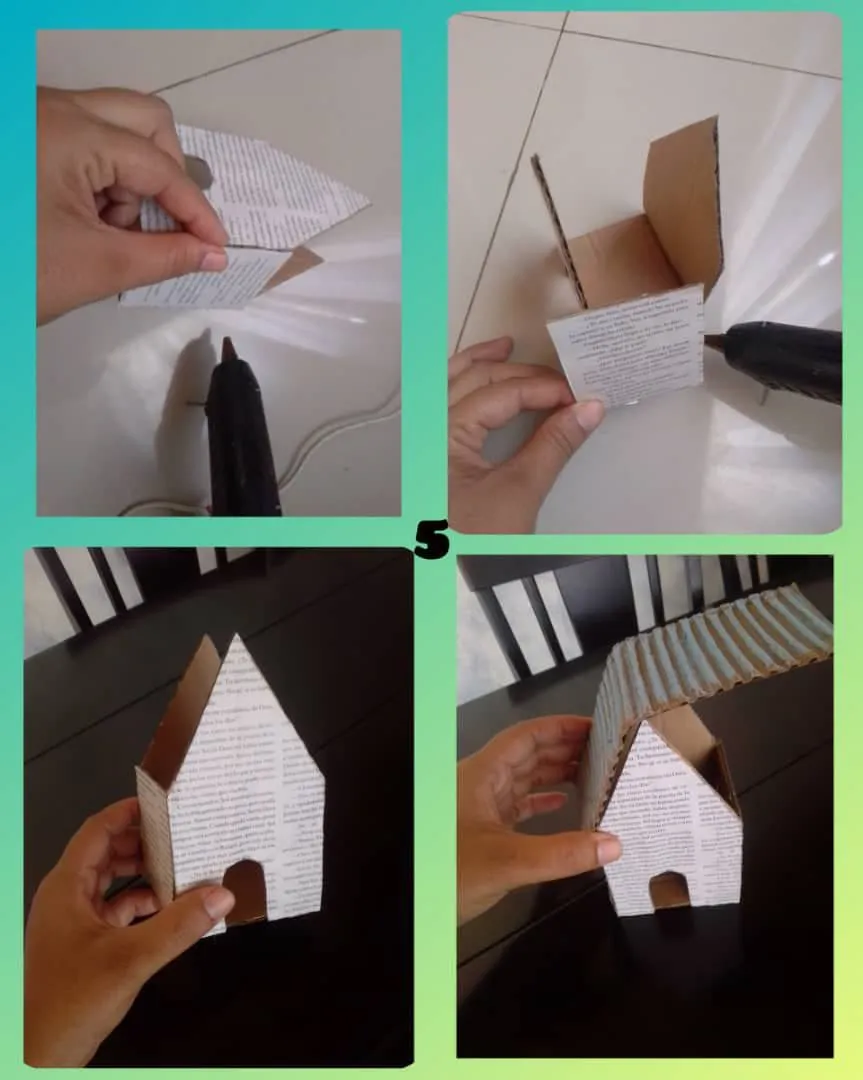
5.- Pegaremos con el silicón cada parte de la casita hasta lograr ensamblarla toda. Como se evidencia en las fotos.
5.- We will glue each part of the house with the silicone until the whole thing is assembled. As shown in the pictures.
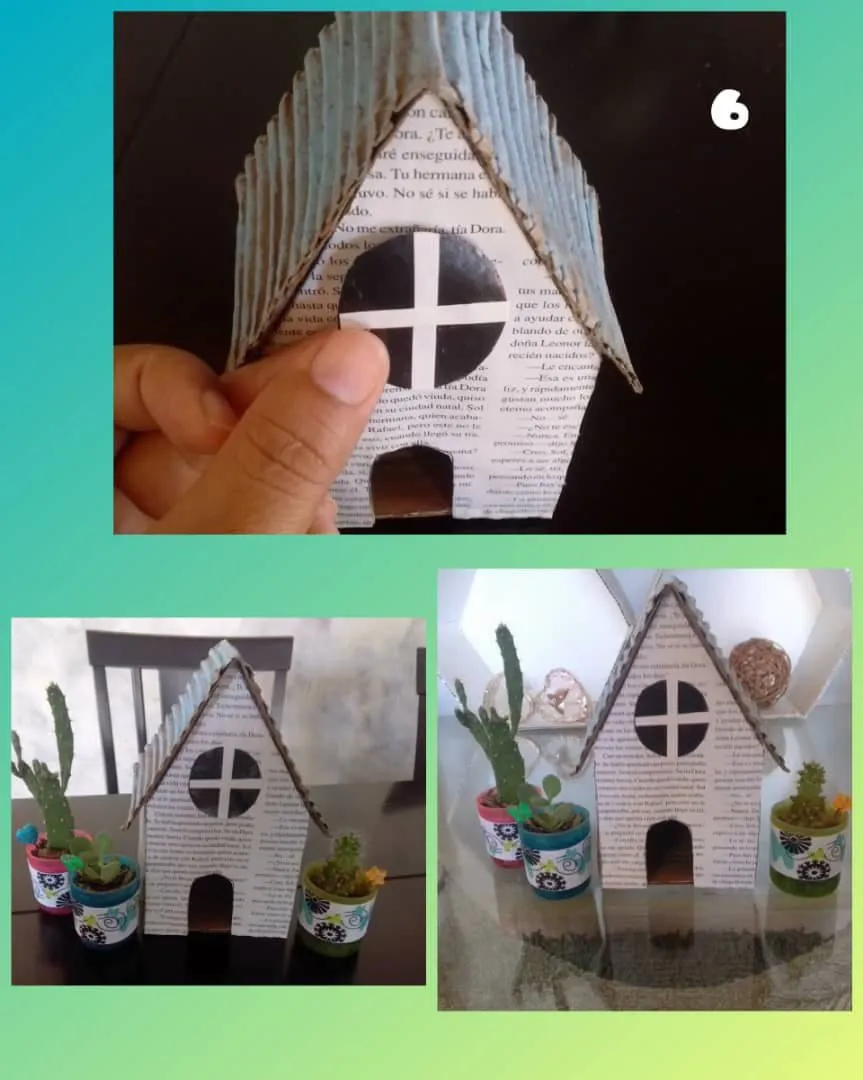
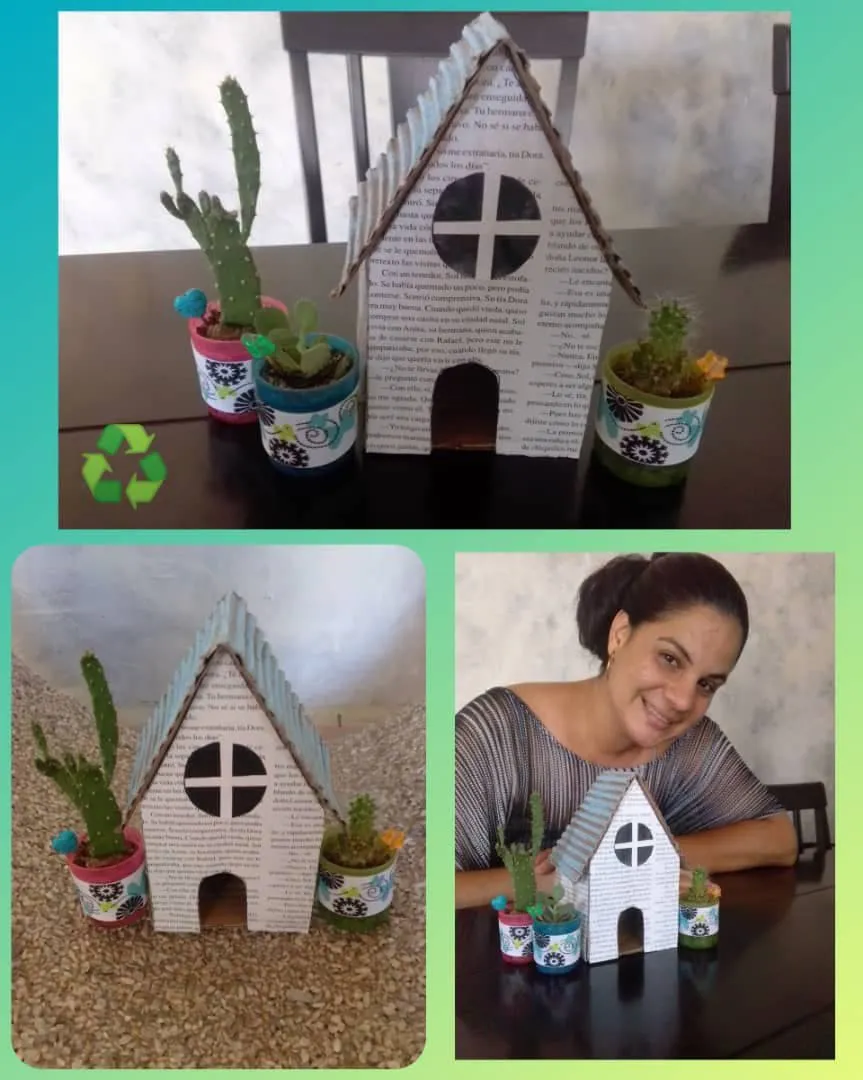
6.- Agregaremos detalles como una ventana redonda hecha del mismo papel de revista y añadiremos para decorar algunas mini cactus para terminar de embellecer donde colocaremos esta hermosa manualidad.
6 .- Add details such as a round window made of the same magazine paper and add to decorate some mini cactus to finish beautifying where we will place this beautiful craft.
Espero haya sido de su agrado. Demostrando una vez más que reciclando logramos trabajos maravillosos. I hope you enjoyed it. Demonstrating once again that by recycling we can achieve wonderful works.

¡Bendiciones infinitas!
Fotos de mi propiedad.
Tomadas con mi Celular BLU G5