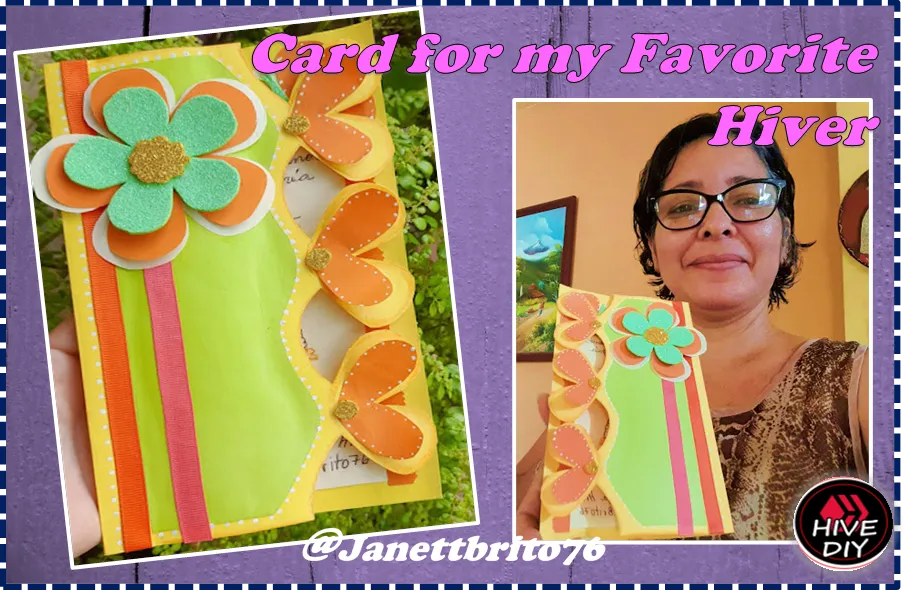

Greetings to my dear community of #HiveDiy I hope you are doing well and that you are having a happy weekend with your loved ones and God bless you all. I am very happy to be part of this wonderful contest, which is called "Give a card to a Hiver" which this time is moderated by our colleague @gaboamc2393, he invites us to create a beautiful card with love to a Hiver admirer. I take this opportunity to invite @kathelopez77 to share with us who is his favorite Hiver through a beautiful card.
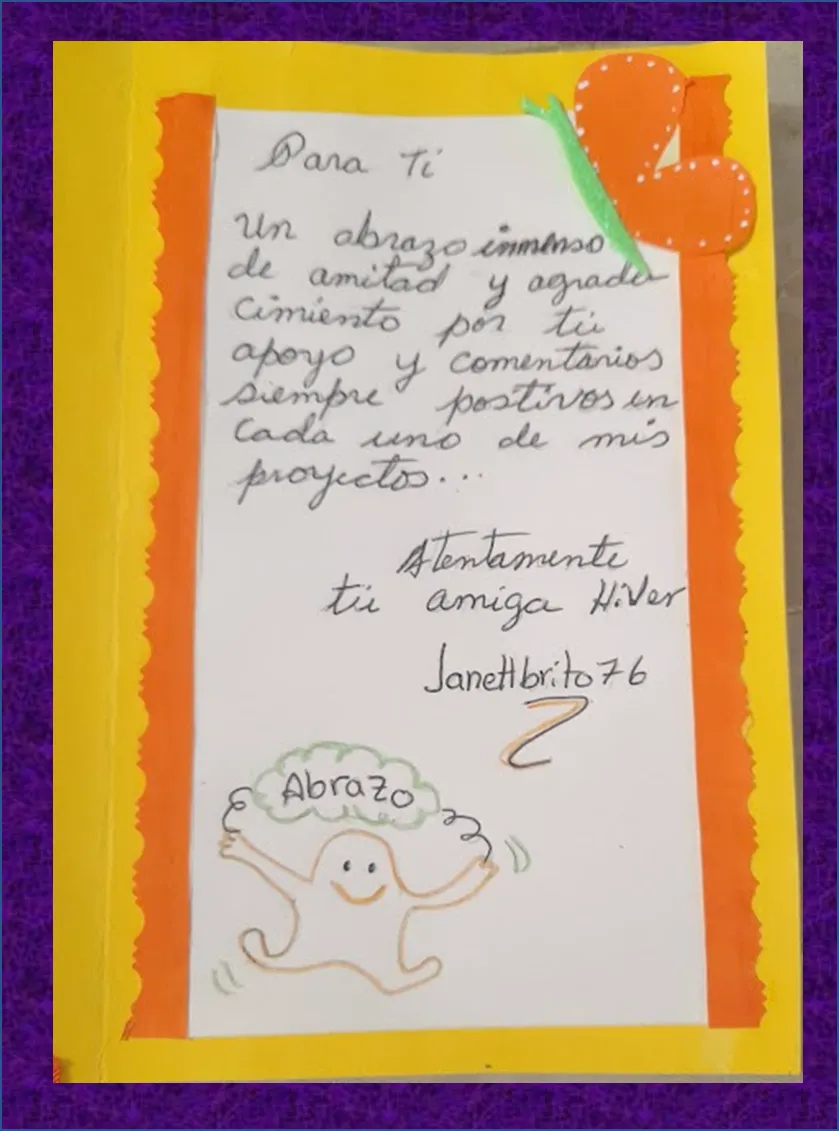
My dear friends, I tell you that it was not easy to decide my favorite hiver, because for me there are many people in this great community that I admire for their excellent work and dedication when it comes to show us their quality posts, many of them I consider my friends although we do not see each other physically, but you really feel that affection for each of them in their comments, well but I had to decide and that person I chose as my favorite hiver is a person who for me and I think for many always shares quality content, I also consider her a simple and charismatic person, not only that but also she has been one of many people who has always given me support in my projects since I started on this platform with her messages of encouragement and happiness, that wonderful person to whom I dedicate my beautiful card is a girl who is now dedicated more to the sport, even so she continues to publish quality content. My favorite hiver friend to whom I made my card with much affection is my dear mili2801, For you "A huge hug of friendship and gratitude for your support and always positive comments on each of my projector ... I hope you like hiver friend!
So my dear friends do not miss the step by step of how I made my beautiful card to my favorite hiver, let's get to work!

Saludos para mi querida comunidad de #HiveDiy espero se encuentren muy bien y que estén pasando un feliz fin de semana al lado de sus seres queridos y que Dios los bendiga a todos. Me siento muy contenta de formar parte de este maravilloso concurso, el cual lleva por nombre “Regala una Tarjeta a un Hiver” el cual en esta ocasión esta moderado por nuestro compañero @gaboamc2393, él nos invita a crear una hermosa tarjeta con mucho cariño a un admirador Hiver. Aprovecho la oportunidad para invitar a @kathelopez77 para que nos comparta quien es su Hiver favorito a través de una hermosa tarjeta.
Mis queridos amigos, les cuento que no fue fácil decidir a mi hiver favorito, ya que para mi existen muchas personas en esta gran comunidad que admiro por sus excelentes trabajos y dedicación a la hora de mostrarnos sus post de calidad, muchos de ellos los considero mis amigos aunque no nos vemos físicamente, pero realmente se siente ese afecto por cada uno de ellos en sus comentarios, bueno pero me toco decidir y esa persona que escogí como mi hiver favorita es una persona que para mí y creo que para muchas siempre comparte contenidos de calidad, ademas la considero una persona sencilla y carismática, no solamente eso sino que además ella ha sido una de tantas personas que siempre me ha brindado su apoyo en mis proyectos desde que empecé en esta plataforma con sus mensajes de aliento y felicidad, esa persona maravillosa a quien le dedique mi hermosa tarjeta es una chica que ahorita esta dedicada mas al deporte, aun así sigue publicando sus contenidos de calidad. Mi amiga hiver favorita a quien le elabore mi tarjeta con mucho cariño es a mi estimada mili2801,Para ti ”Un abrazo inmenso de amistad y agradecimiento por tu apoyo y comentarios siempre positivos en cada uno de mis proyector...¡Espero que te guste amiga hiver¡
Entonces mis queridos amigos no se pierdan el paso a paso de como elabore mi hermosa tarjeta a mi hiver favorito. ¡¡Manos a la obra!!


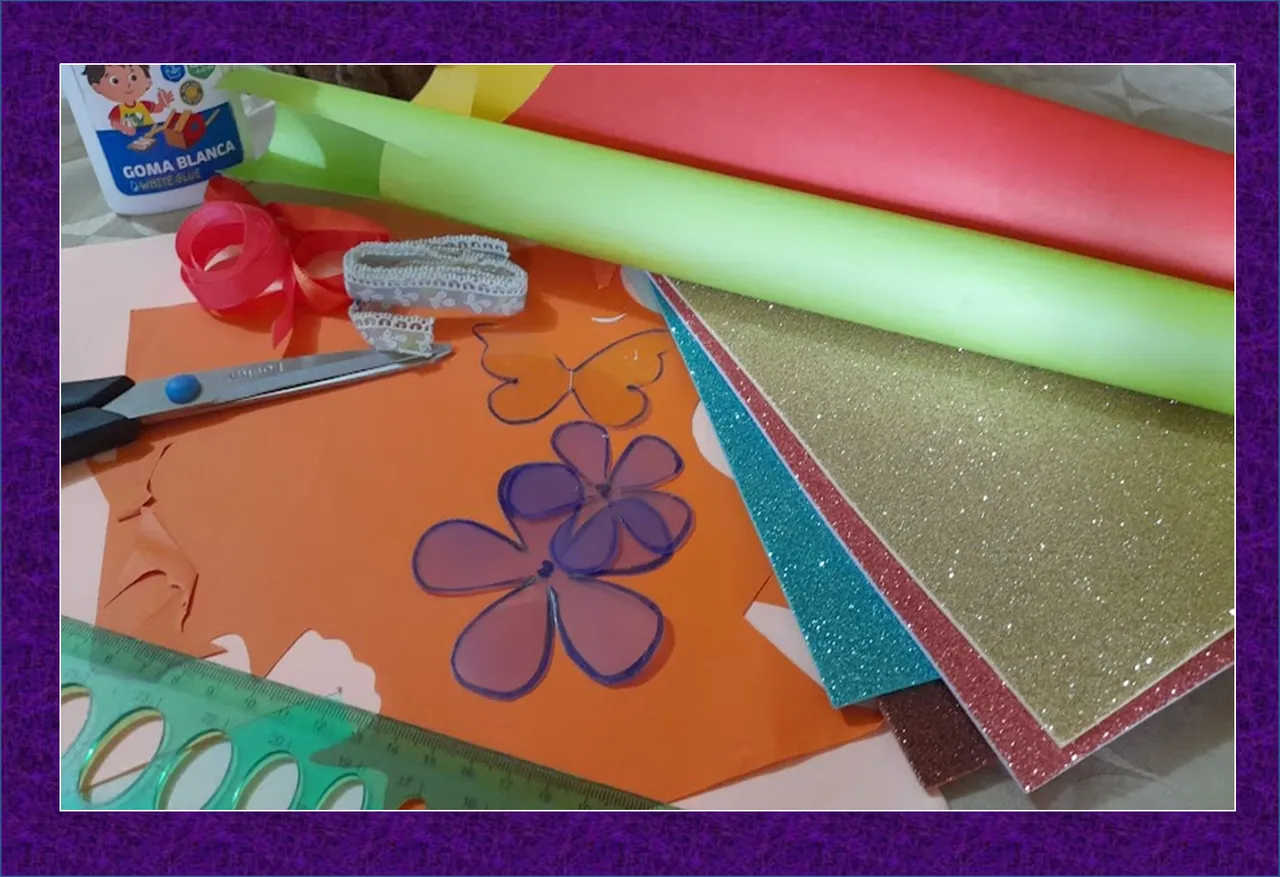
- Cardboard (yellow, green, orange)
- Glue
- Scissors
- Orange and pink cross ribbon
- Green and gold Foami
- Blue and pink ribbon
- White paint
- Orange creyon
- Cartulina ( amarilla, verde, naranja)
- Pega
- Tijera
- Cinta cross naranja y rosada
- Foami verde y dorado
- Cinta azul y rosada
- Pintura blanca
- Creyon naranja

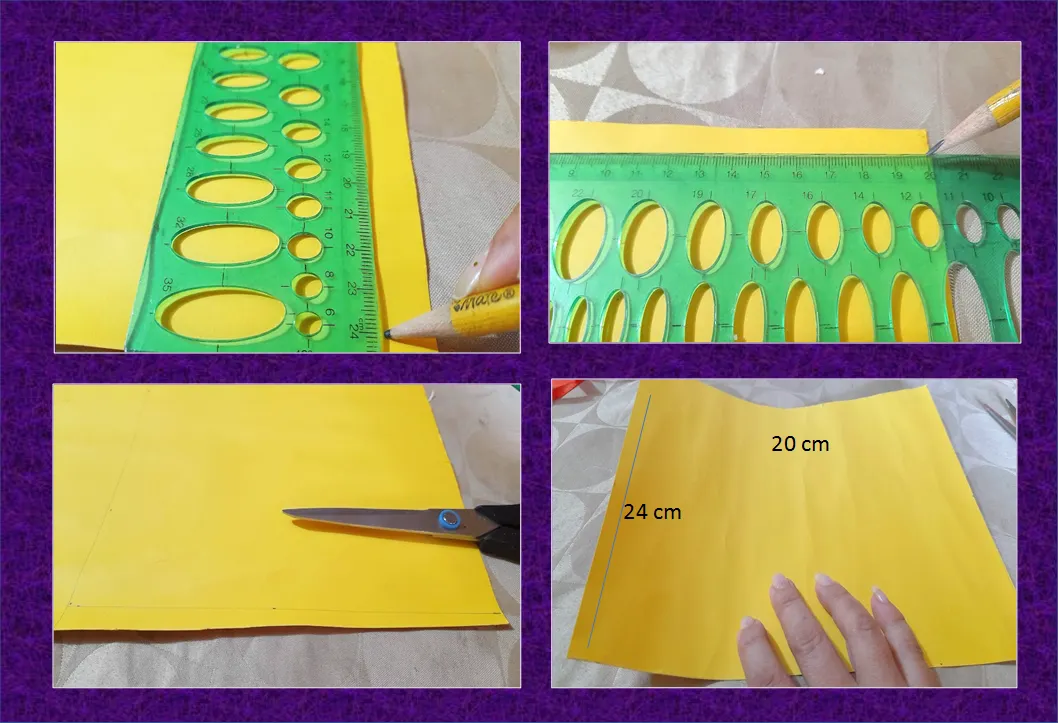
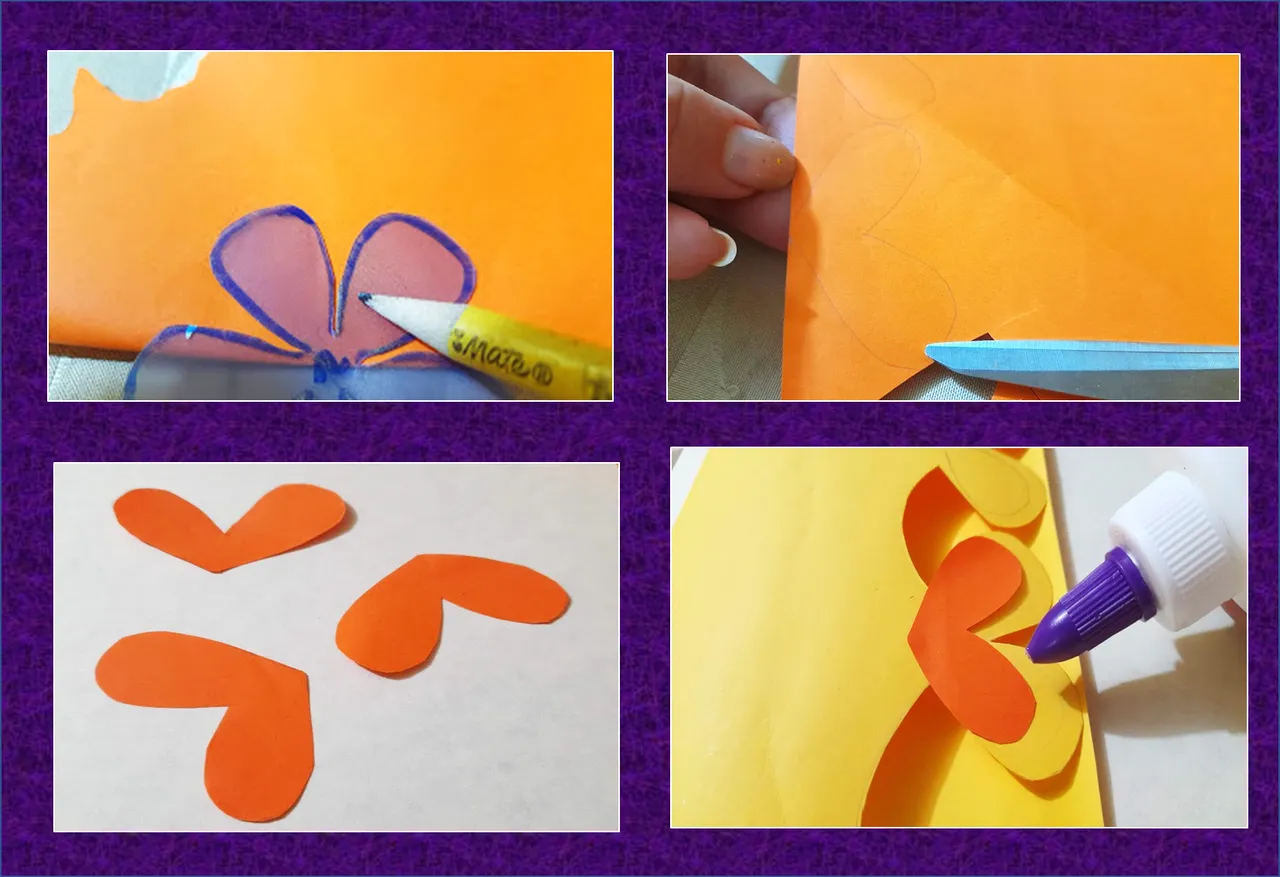
1: We start by making a rectangle on the yellow cardboard 24 centimeters high and 20 centimeters wide, then we cut it out.
1: Iniciamos realizando un rectángulo en la cartulina amarilla de 24 centímetro de alto por 20 centímetro de ancho , luego recortamos.
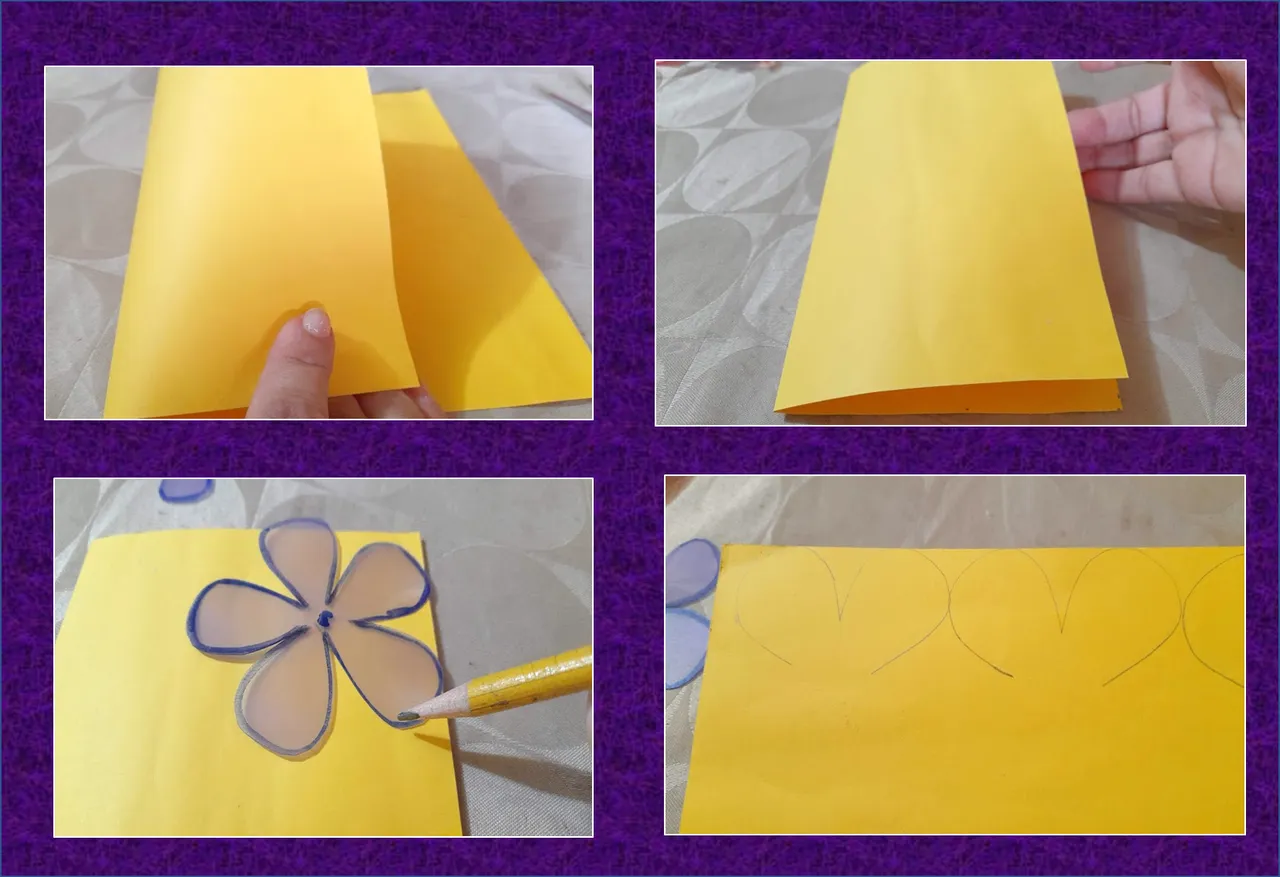
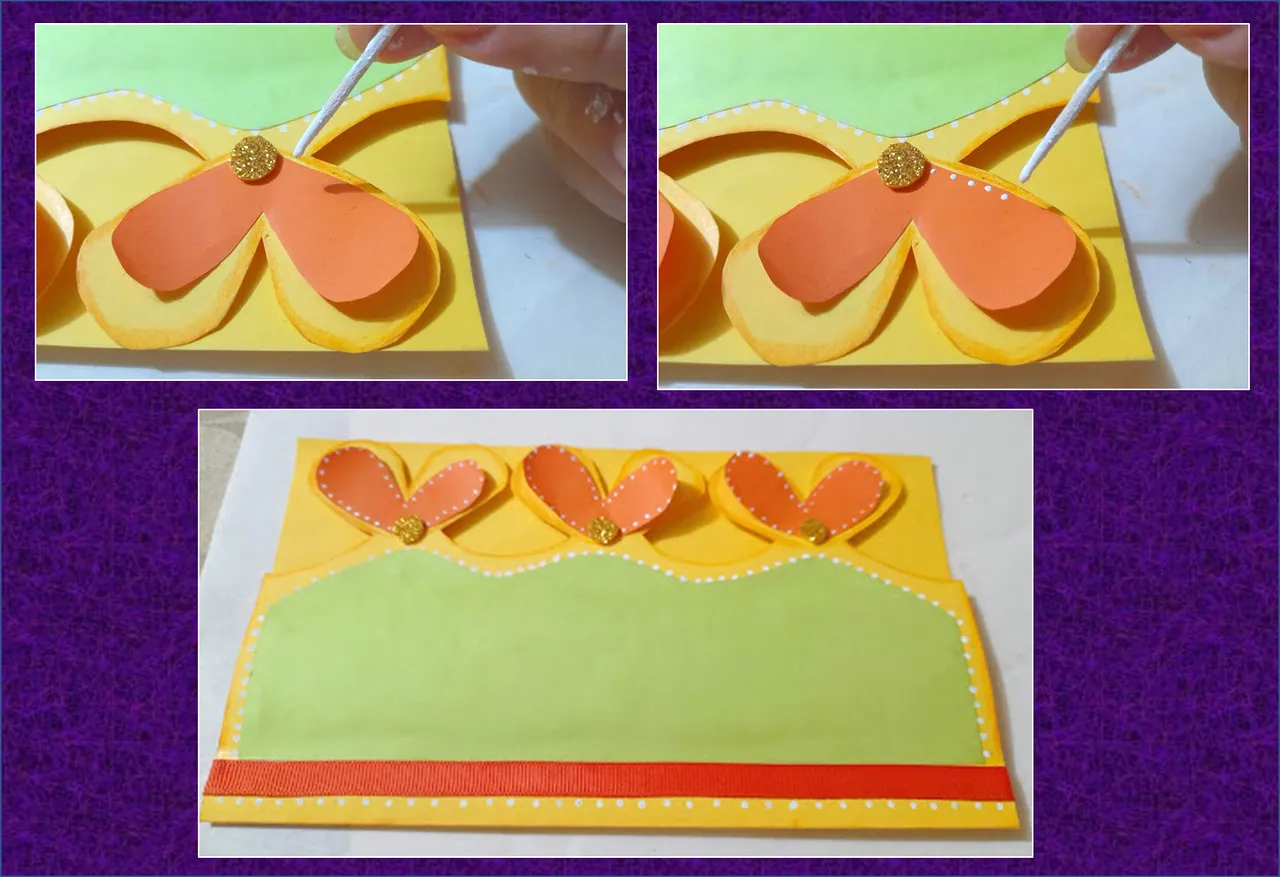
2: We fold our rectangle in half, then with the mold of a flower, we draw two petals on the edge of the cover of the card, we repeat three times, then we mark again other petals inside the ones already made but a little smaller, then we make some small curves between the separation of each petal forming butterfly wings and cut, as you can see in the images.
2: Doblamos nuestro rectángulo a la mitad, luego con el molde de una flor, dibujamos dos pétalos en el borde de la portada de la tarjeta repetimos tres veces, después marcamos nuevamente otros pétalos dentro de los ya realizados pero un poco mas pequeños,seguidamente realizamos unas pequeñas curvas entre la separación de cada pétalos formando unas alas de mariposas y recortamos, como pueden ver en las imágenes.

3: Then on the orange cardboard we mark two small petals of the ones we drew in the previous step, cut them out and then proceed to glue them on top of the yellow petals only gluing them in the center and with a pencil we proceed to give them a little movement as you can see in the images.
3: Luego en la cartulina naranja marcamos dos pétalos pequeños de los que dibujamos en el paso anterior, recortamos y luego procedemos a pegarlos encima de los pétalos amarillos solo pegándolos en el centro y con un lápiz procedemos a darle un poco de movimiento como pueden observar en las imágenes.

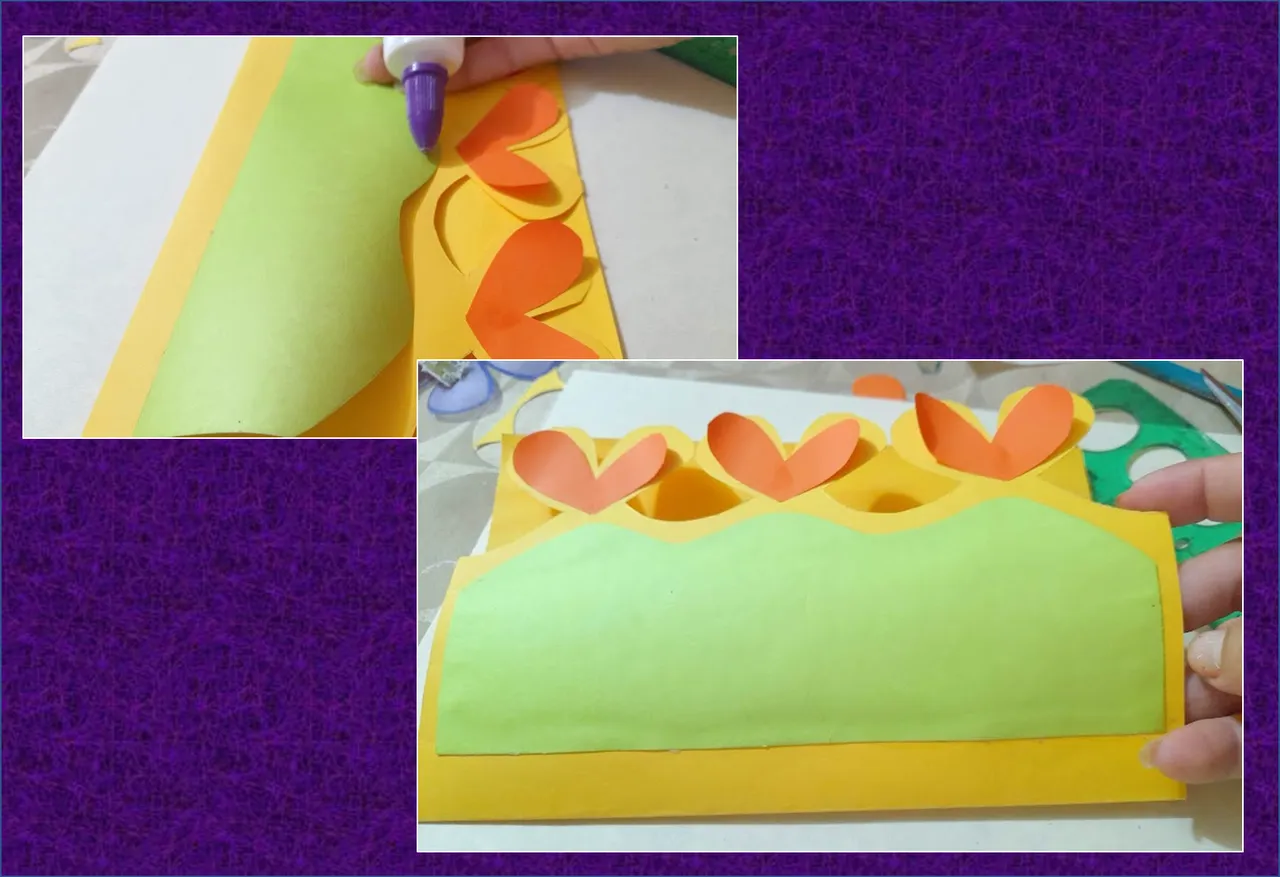
4: Now we mark on the green cardboard a rectangle 18 cm high by 6.5 cm wide, then we draw a curve on it, cut it out and then glue it on the cover, leaving 3 cm of separation from the card's folds.
4: Ahora marcamos en la cartulina verde un rectángulo de 18 cm de alto por 6,5 cm de ancho, luego les dibujamos una curvas, recortamos y seguidamente lo pegamos en la portada dejando 3 cm de separación del dobles de la tarjeta.

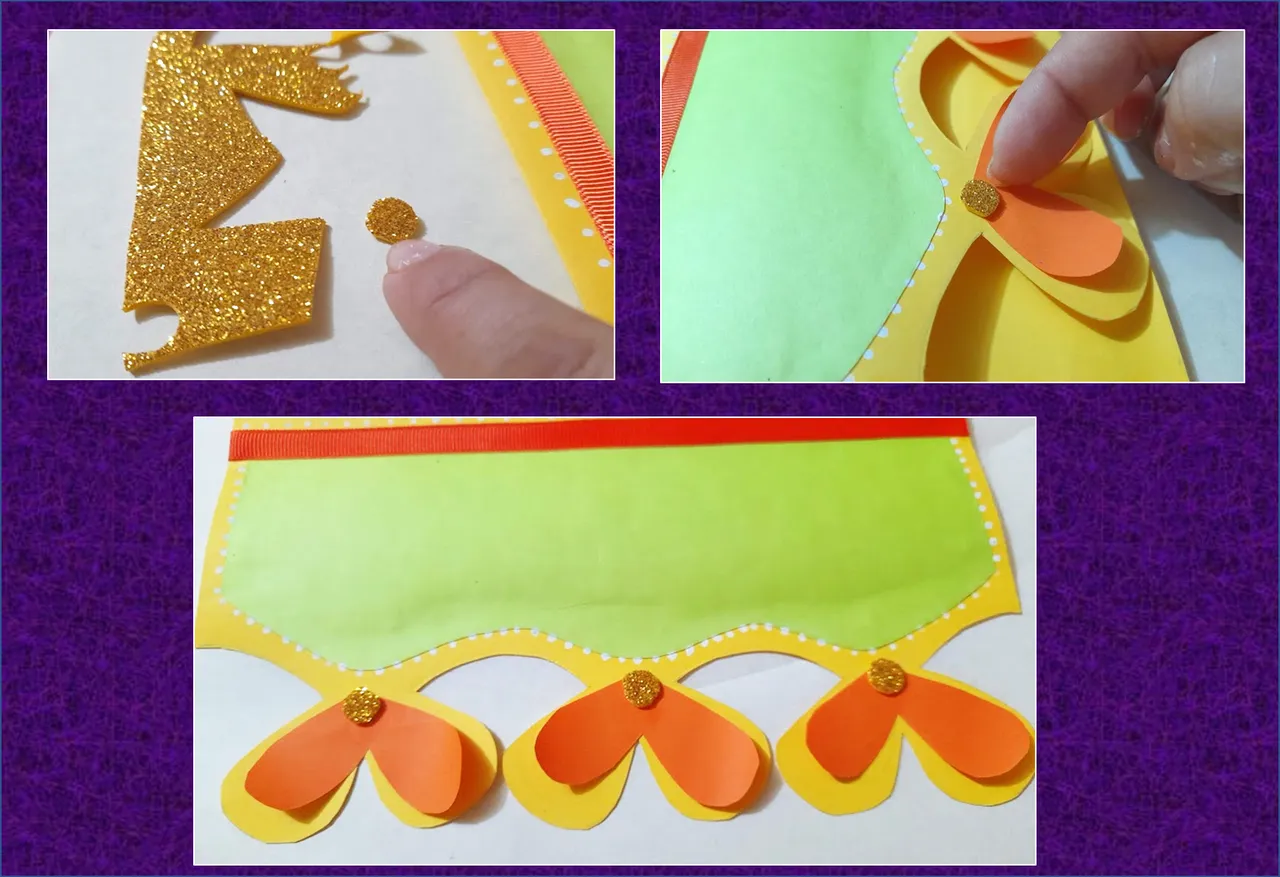
5: Then we proceed to glue the orange ribbon around the edge of the green rectangle, then with the help of a toothpick and white paint we make a series of dots all around the edge of the green rectangle. Then we make three small circles of gold foami and glue them on each of the butterflies.
5:Seguidamente procedemos a pegar la cinta naranja por la orilla del rectángulo verde, después con la ayuda de un palillo y pintura blanca le realizamos una serie de puntos por todo el borde del rectángulo verde. Luego realizamos tres pequeños círculos de foami dorado y los pegamos en cada una de las mariposas.

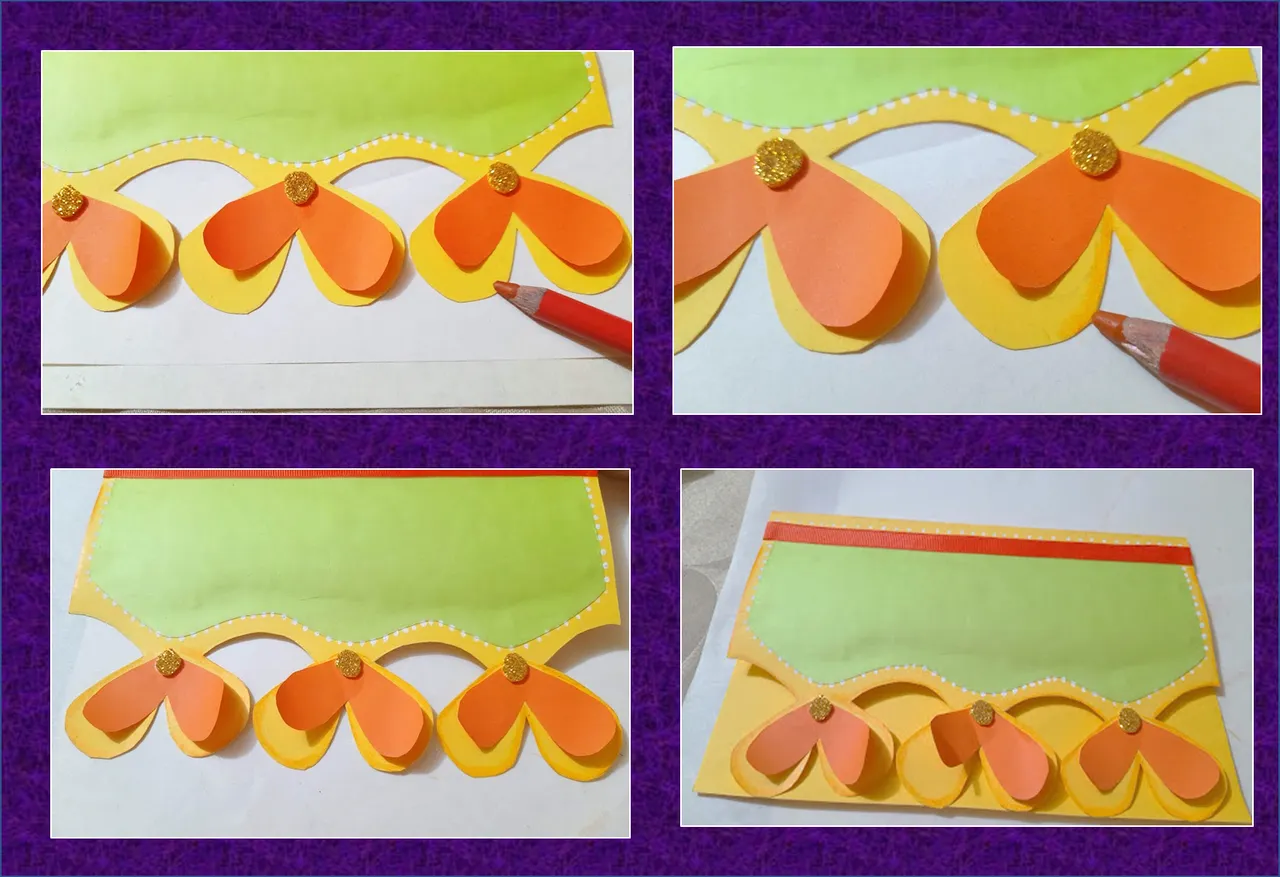
6:To highlight a little the wings of the butterflies, we take the orange creyon and shade along the edge, then with the toothpick and the white paint we make some dots along the edge of the orange wings.
6: Para resaltar un poco las alas de las mariposas, tomamos el creyon naranja y sombreamos por la orilla, seguidamente con el palillo y la pintura blanca le realizamos unos puntos por el borde de las alas naranjas.
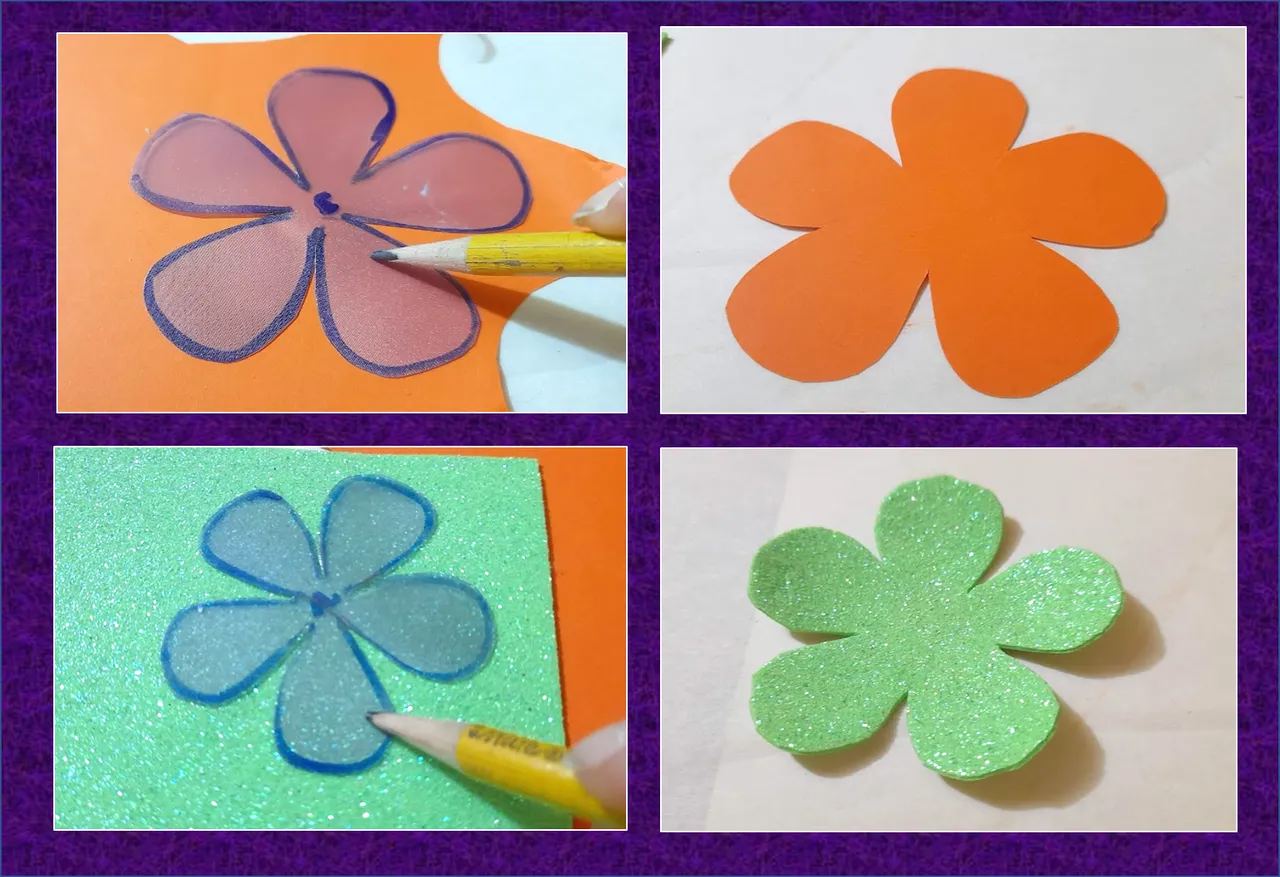
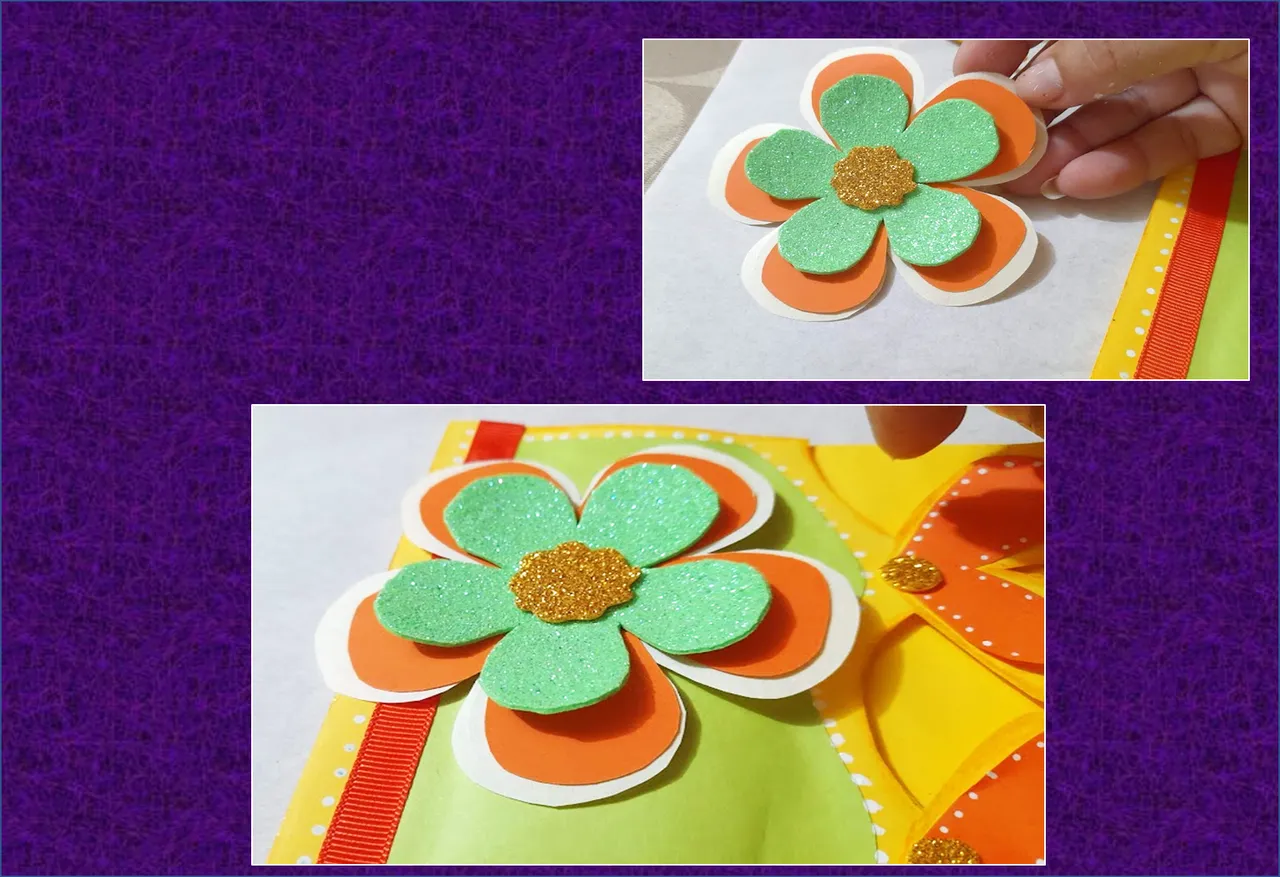
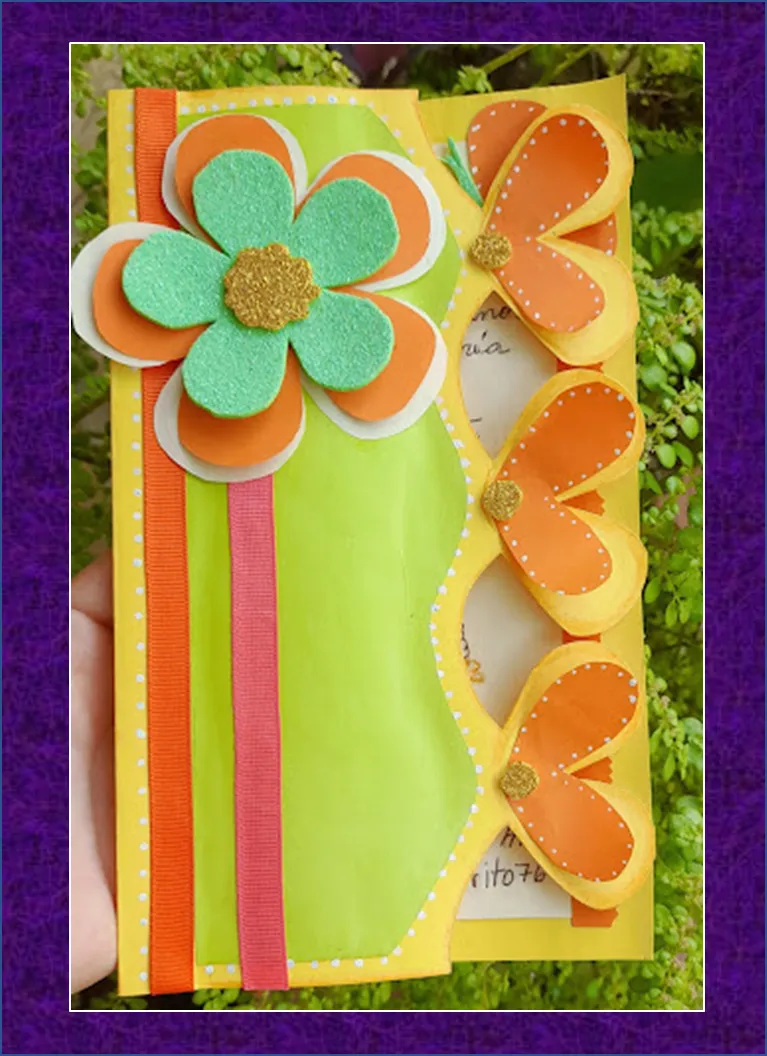
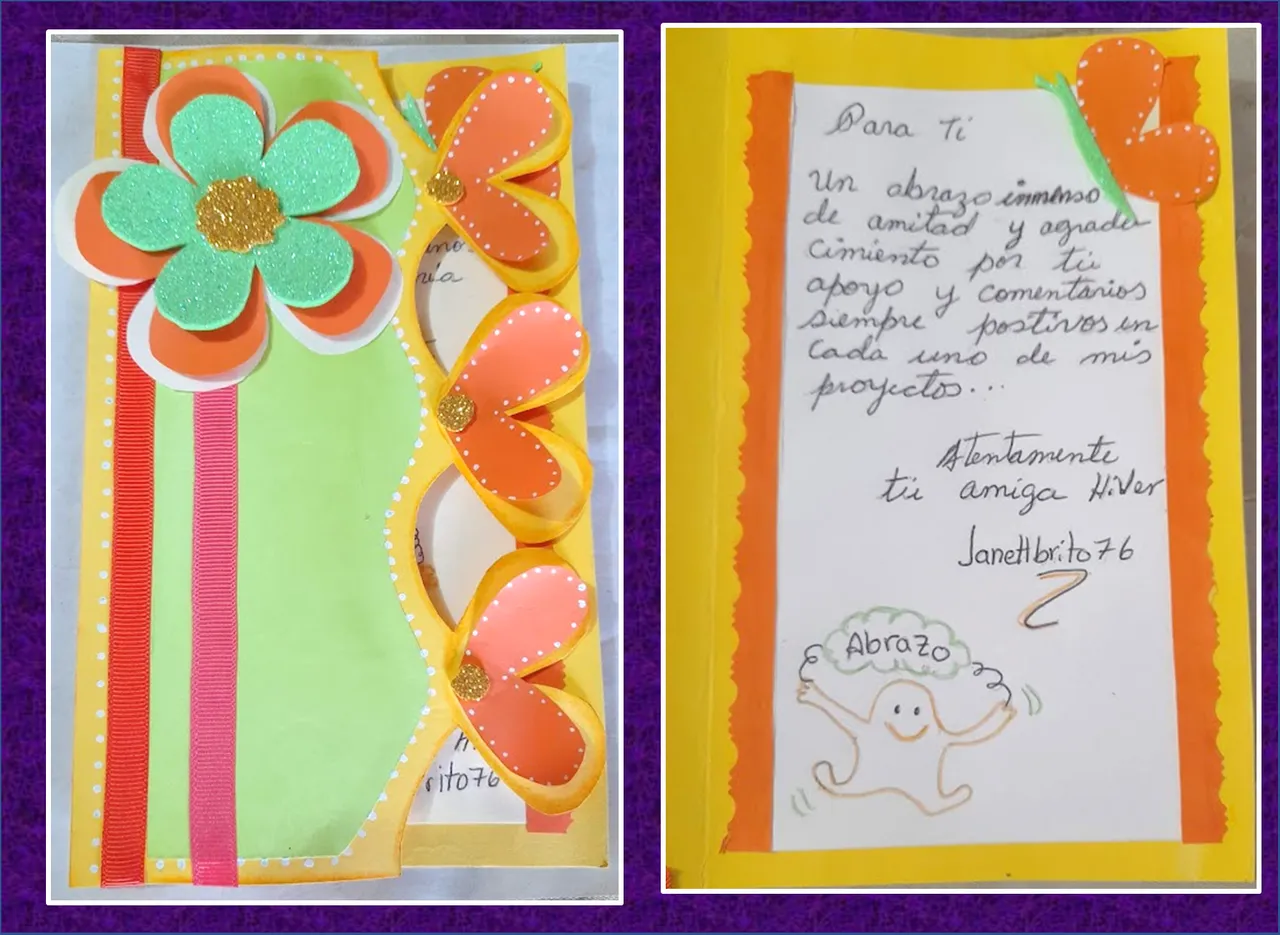
7:To finish the decoration of my card holder, we took the orange cardboard and marked a large flower and on the green foami a slightly smaller flower and in the center we glued a circle of gold foami, then we proceeded to paste it on the top left of the card.
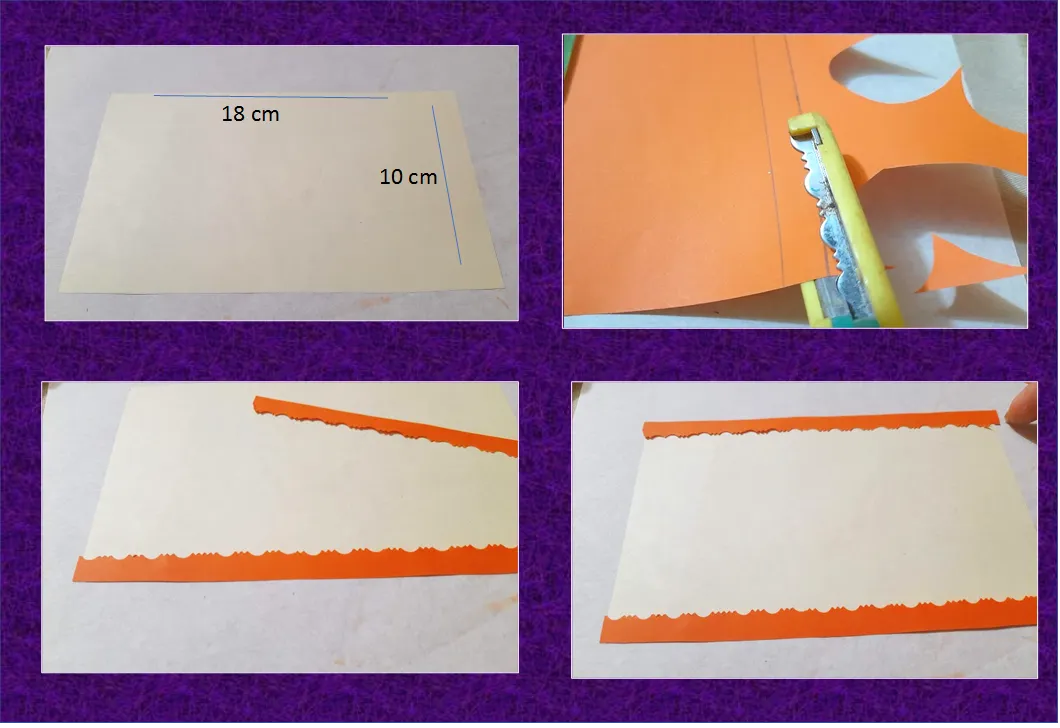
Finally I made a rectangle 18 cm wide by 10 cm high on a yellow sheet and then I decorated the edges with orange cardboard and then proceeded to make my message.
7: Para finalizar la decoración de la porta de mi tarjeta, tomamos la cartulina naranja y marcamos una flor grande y en al foami verde una flor un poco mas pequeña y en el centro le pegamos un circulo de foami dorado, luego procedemos a pegarla en la parte superior izquierda de la tarjeta.
Por ultimo realice un rectángulo 18 cm de ancho por 10 cm de alto en una hoja amarilla y luego lo decore por las orillas con cartulina naranja y luego procedí a realizar mi mensaje.
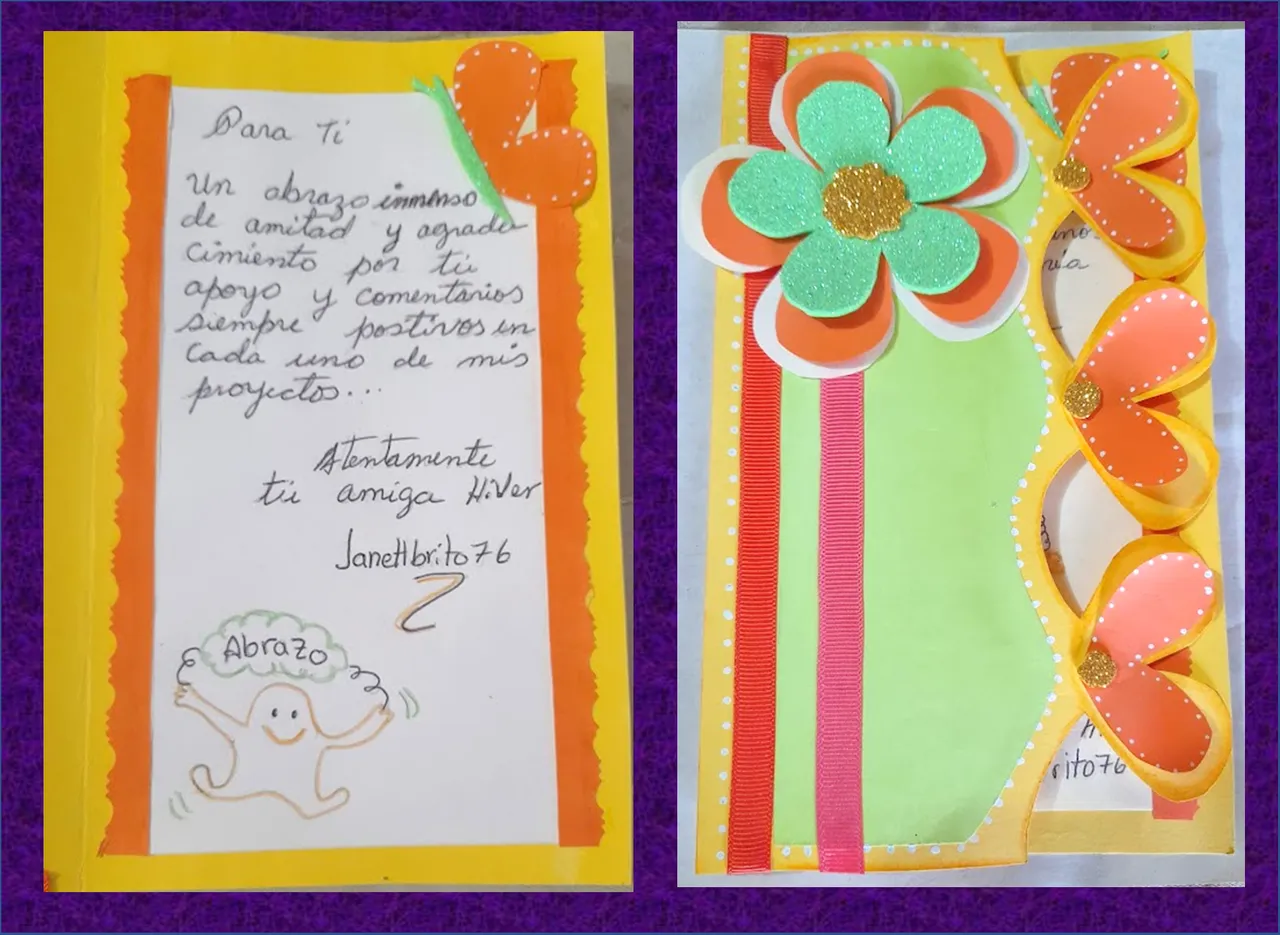
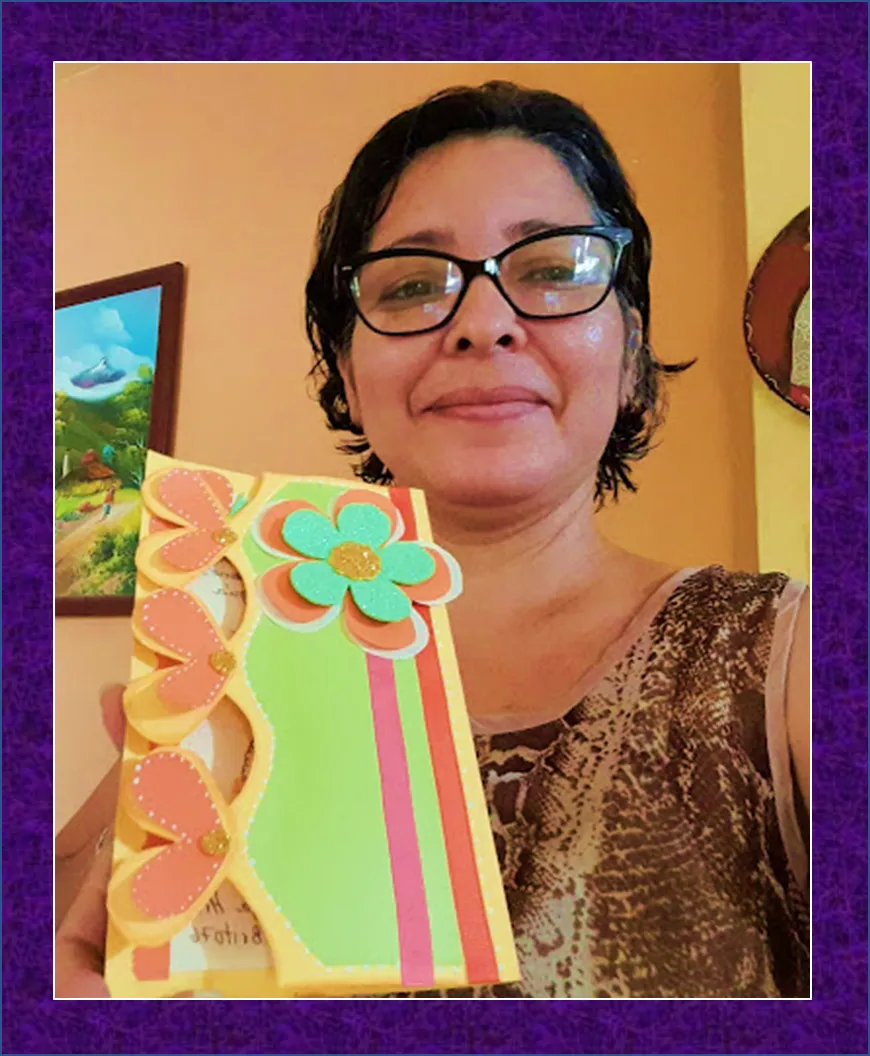
There, that's how beautiful and cute my card is for my favorite hive, I hope you like it Hiveamiga !
Listo, así de hermosa y linda me quedo mi tarjeta para mi hive favorita.¡Espero que te guste Hiveamiga !

Fuente portada
Fuente Separador


The photographs were taken with a Samsung A12 smartphone, the text was translated into English with the Google translator.link
The banner was designed on canvas link
Las fotografías fueron tomadas con un teléfono inteligente Samsung A12, el texto fue traducido al ingles con el traductor de Google.link
El banner fue diseñado en canvas link