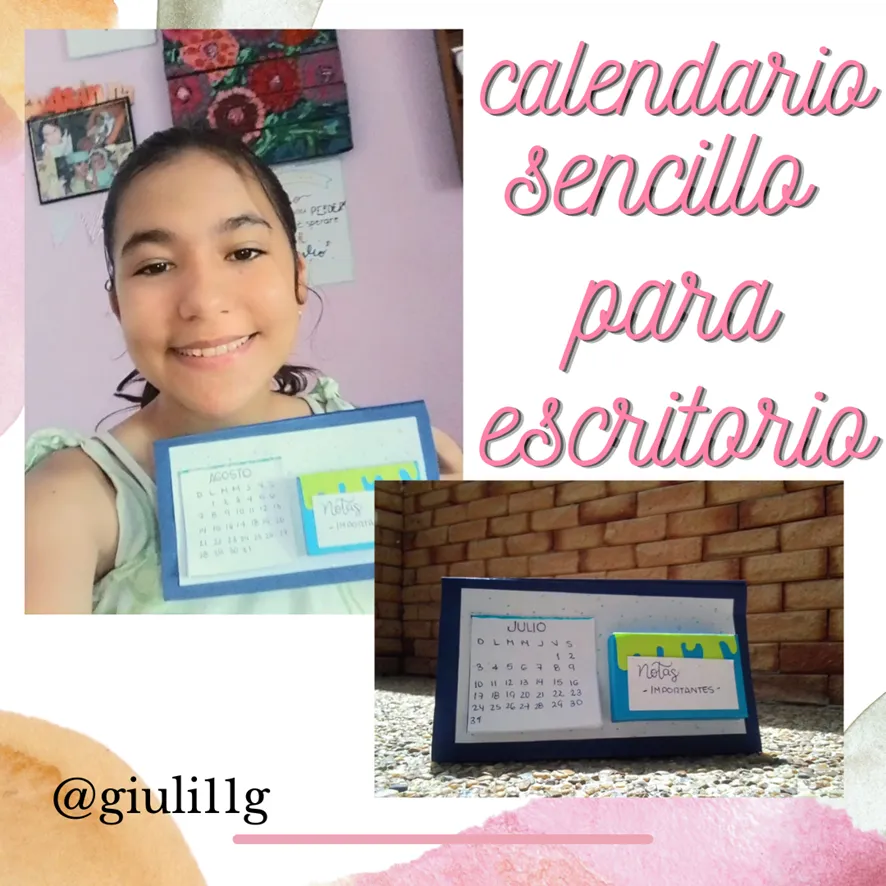
Hola amigos de HIVE Dime alegro mucho de seguir compartiendo con ustedes mis manualidades, el día de hoy les muestro como elaborar este sencillo pero hermoso calendario para escritorio, espero que les sirva y lo puedan elaborar.
Hello friends of HIVE DIY I am very happy to continue sharing with you my crafts, today I show you how to make this simple but beautiful desk calendar, I hope you find it useful and you can make it.

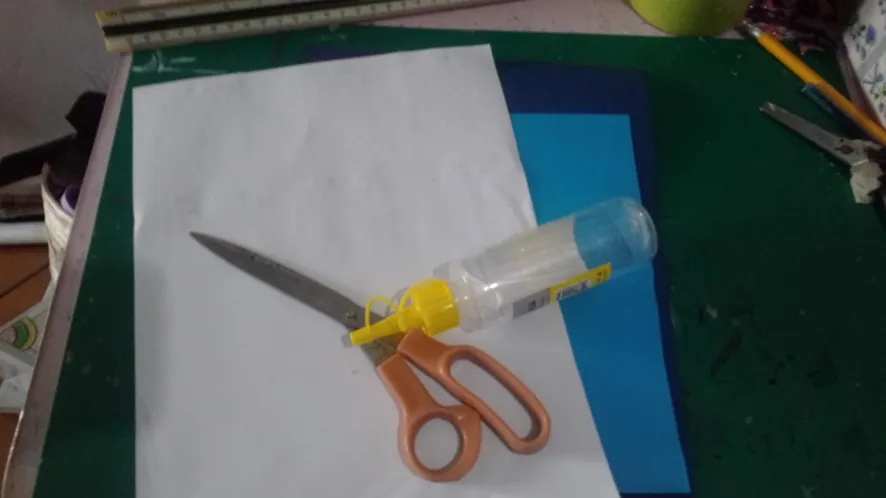
Utilice los siguientes materiales:
Cartulina A4 (21cm x 29.7cm)
Trozos de cartulina azul claro
Hojas blancas
Marcadores
Silicona liquida
Tijeras
Regla
Use the following materials:
A4 card stock (21cm x 29,7cm).
Pieces of light blue cardboard
White sheets
Markers
Liquid silicone
Scissors
Ruler
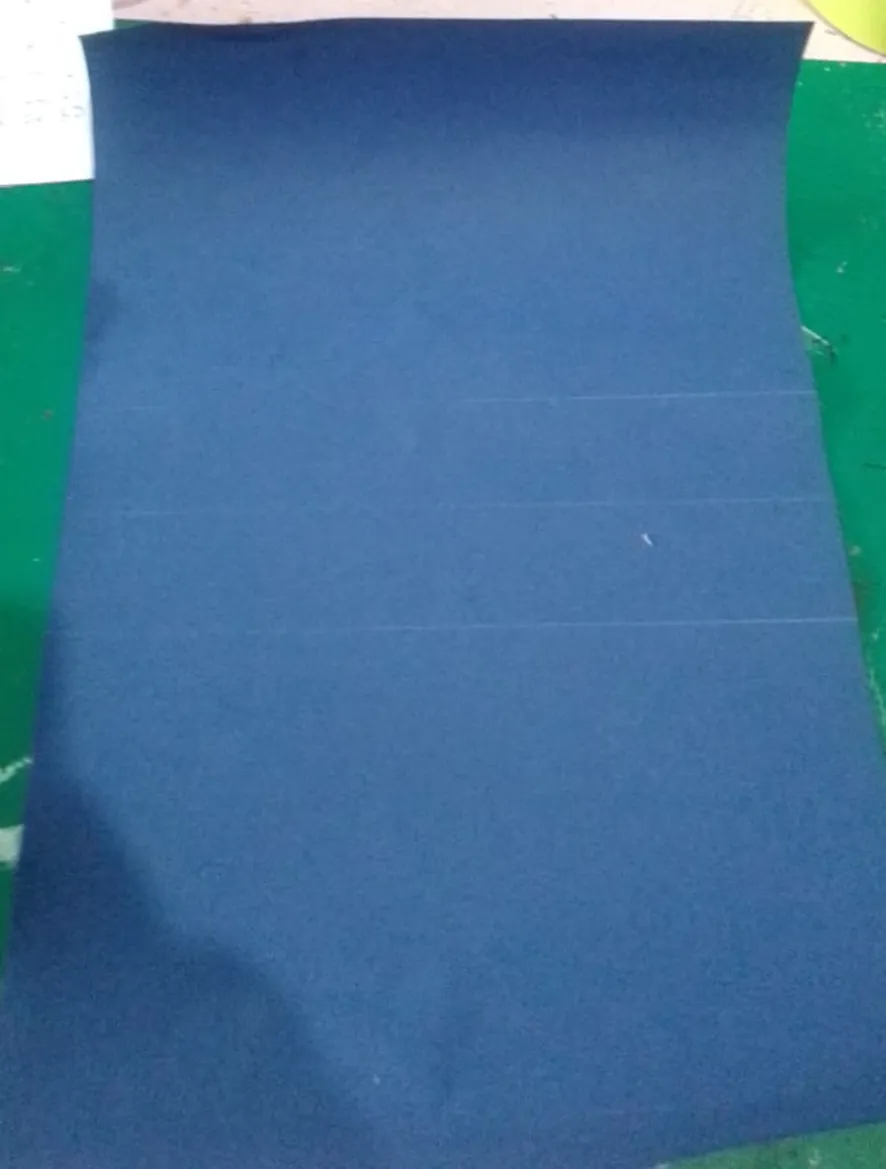
Paso 1
Dividí la Cartulina A4, en 11cm, 14,17 y 28 centímetros, como se muestra en la imagen. Luego las marque con la tijera he hice el doblés.
Step 1
I divided the A4 cardboard into 11cm, 14,17 and 28 centimeters, as shown in the image. Then I marked them with the scissors and made the folding.
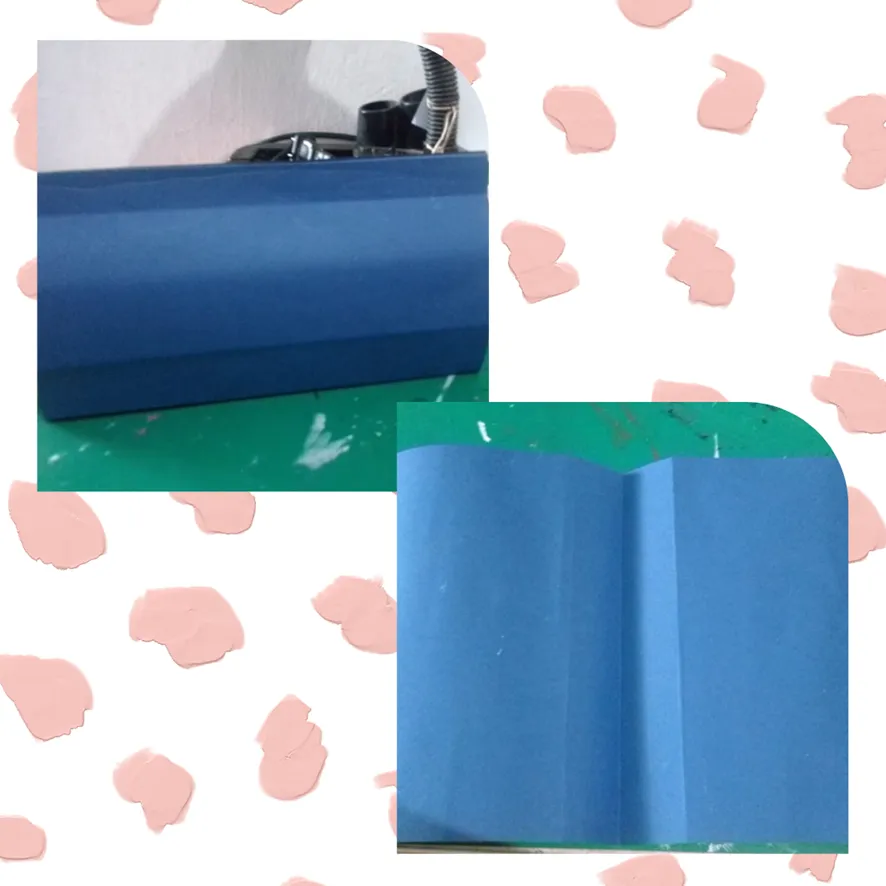
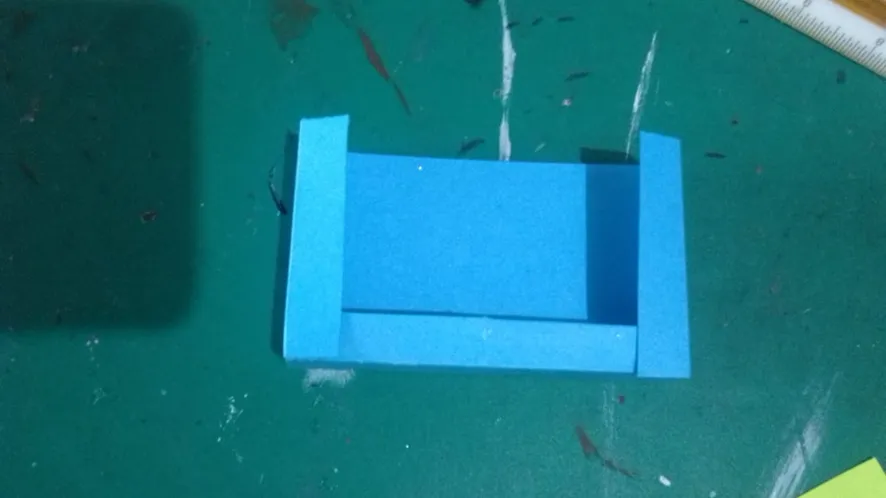
Paso 2
Posteriormente, lo pegue como muestro en la imagen
Step 2
Afterwards, paste it as shown in the image below
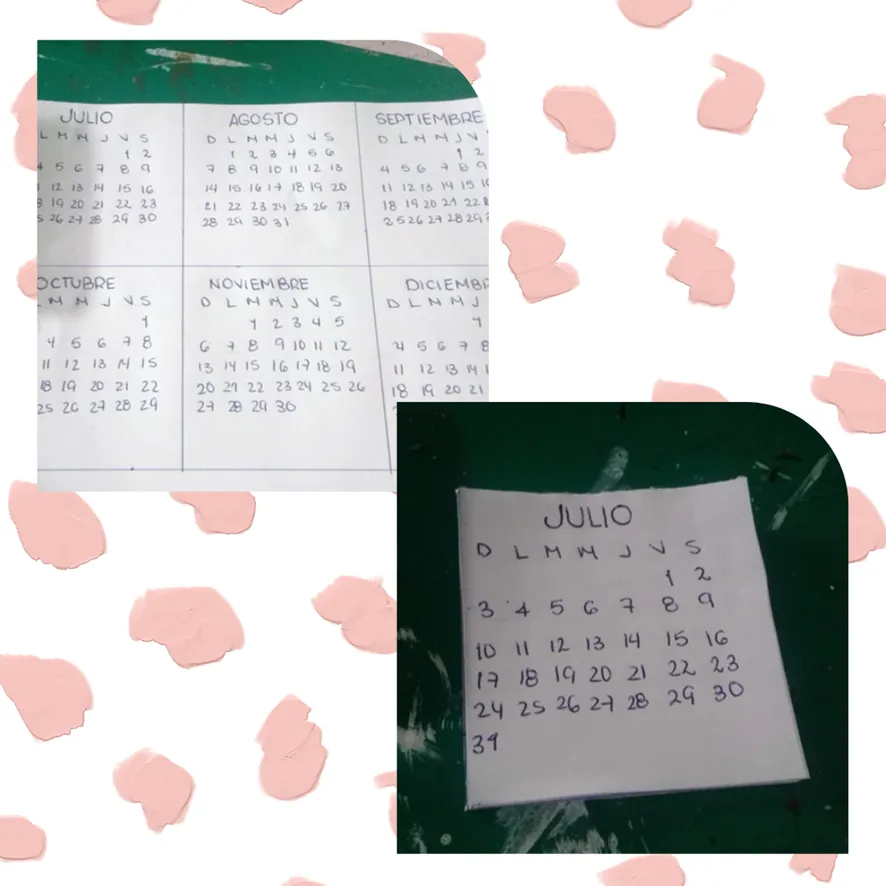
Paso 3
En una hoja blanca coloque los meses restantes a este año, los recorte y pegue en orden.
Step 3
On a white sheet of paper place the remaining months of this year, cut them out and paste them in order.
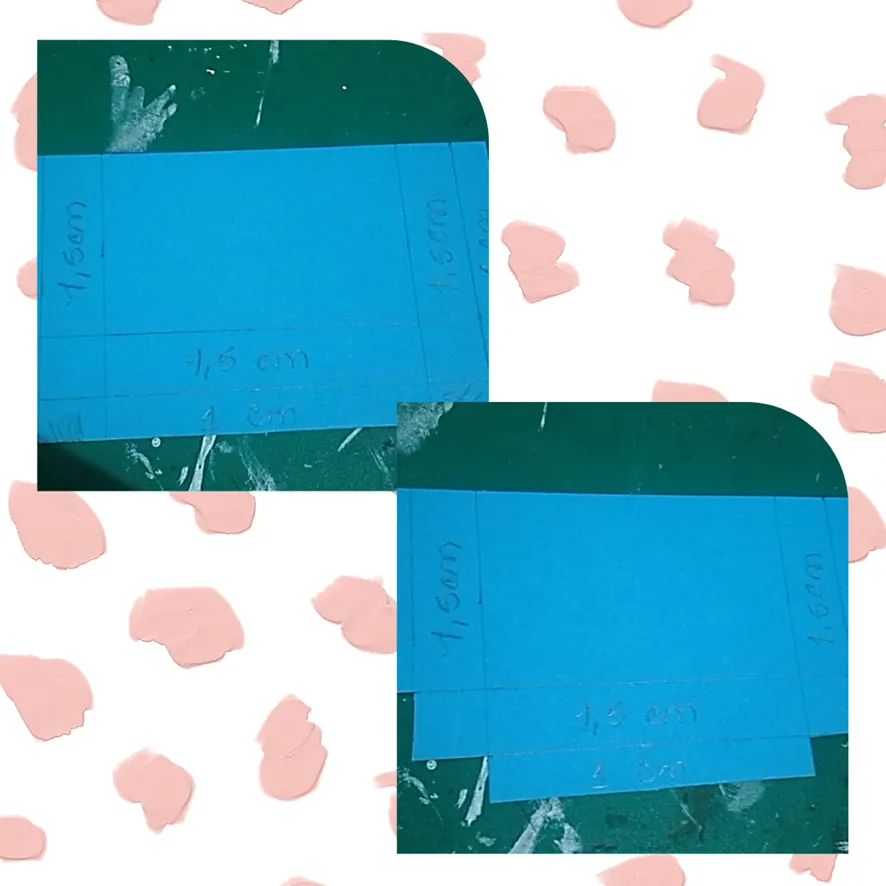
Paso 4
Tome un trozo de cartulina de 13cm x 7,5cm lo dividí en trozos de 1cm y 1,5 cm para formar una cajita, que iría al lado de los meses del año y servirá para colocar notas
Step 4
Take a piece of cardboard 13cm x 7.5cm and divide it into pieces of 1cm and 1.5cm to form a little box, which would go next to the months of the year and serve to place notes.
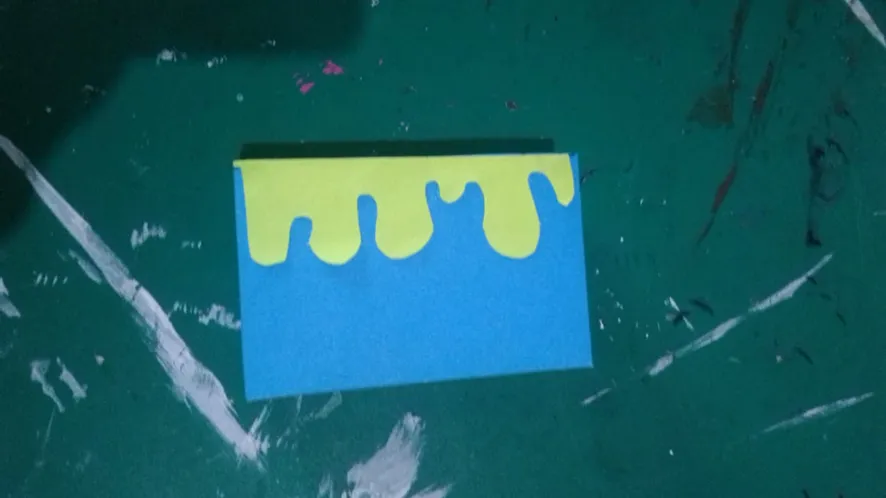
Paso 5
Le coloque un detalle con cartulina verde en la parte de arriba
Step 5
Place a detail with green cardboard on the upper part of the top.
**Paso 6 **
con hojas blanco y marcadores hice un diseño y lo pegue en la cartulina principa,luego pegue la cajita y los meses del año.
Step 6
With white paper and markers I made a design and glued it on the main cardboard., then I glued the box and the months of the year.
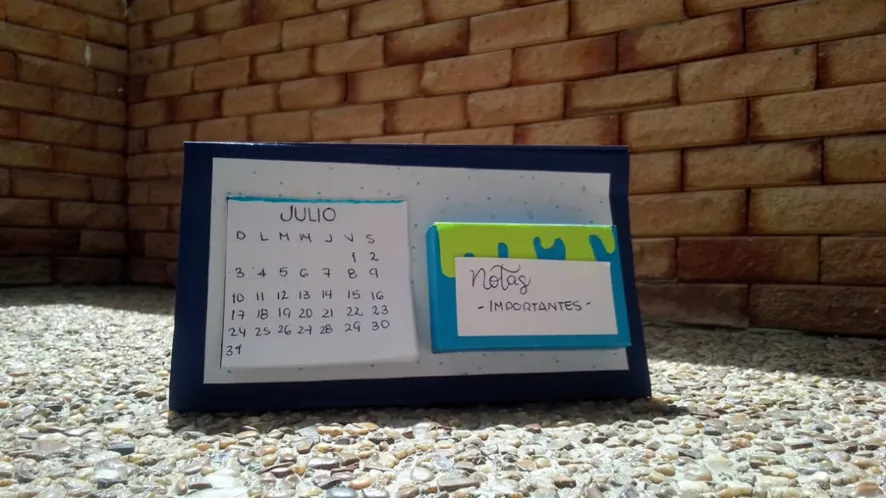
¡Y listo!
Así ha quedado nuestro calendario de 2022, espero te haya gustado, nos vemos en el próximo blog
Todas las fotos fueron tomadas con el smooth 5.5, editadas en Canva y editadas en DeepL.
And that's it!
This is how our 2022 calendar looks like, I hope you liked it, see you in the next blog.
All photos were taken with smooth 5.5, edited in Canva and edited in DeepL.
