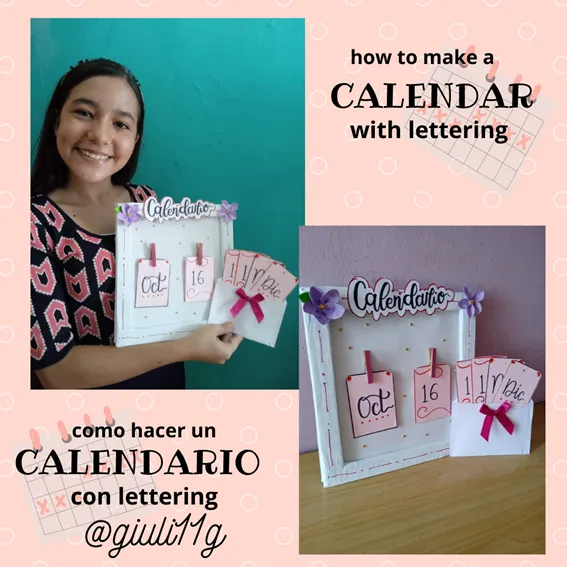
¡Hola amigos de esta apreciada comunidad!, hoy les muestro como hacer un calendario con pocos materiales y muy fácil de elaborar.
Aquí te dejo los materiales que utilicé:
• Un cuadro de cartón de 25x25 cm
• Foami blanco y morado extra fino
• Bordado liquido
• Cartulina rosada(o el color de tu preferencia)
• Marcador negro punta fina
• Marcador rojo punta fina
• Silicón
• Pintura blanca al frío
• Mini ganchos de madera
Hello friends of this appreciated community, today I show you how to make a calendar with few materials and very easy to make.
Here are the materials I used:
- A 25x25 cm cardboard square.
- Extra thin white and purple Foami
- Liquid embroidery
- Pink cardboard (or the color of your choice)
- Black fine tip marker
- Red fine tip marker
- Silicone
- Cold white paint
- Mini wooden hooks

Procedimiento:
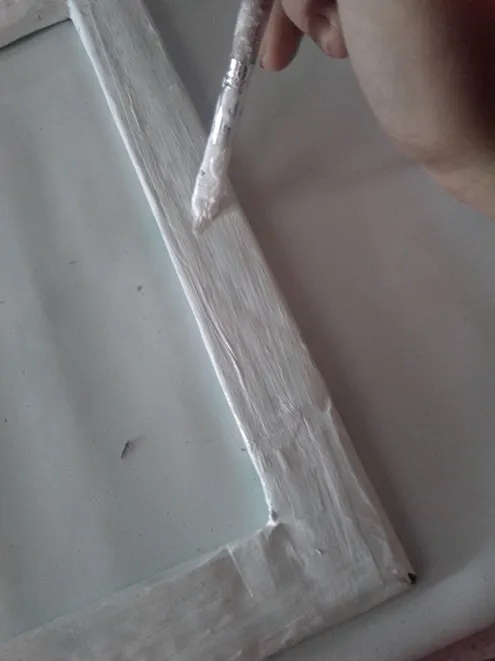
Comencé pintando mi cuadro de color blanco , le di dos capas de pintura para tener una mejor cobertura.
Procedure:
I started by painting my painting white , I gave it two coats of paint to have a better coverage.
Mientras se secaba el cuadro, corte pequeños rectángulos de cartulina de 6cm x 8,3cm donde colocare la fecha. Luego de haberlos cortado, escribí los meses y números del mes, y les coloque algunos detalles.
While the picture was drying, I cut small rectangles of cardboard 6cm x 8.3cm where I will place the date. After cutting them, I wrote the months and numbers of the month, and put some details on them.

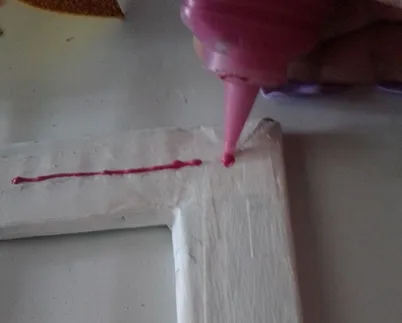
Después de tener bien seco mi cuadro con el bordado liquido comencé a hacerles líneas y puntos para darle carácter al cuadro y más color.
After having my painting well dried with the liquid embroidery I started to make lines and stitches to give character to the painting and more color.
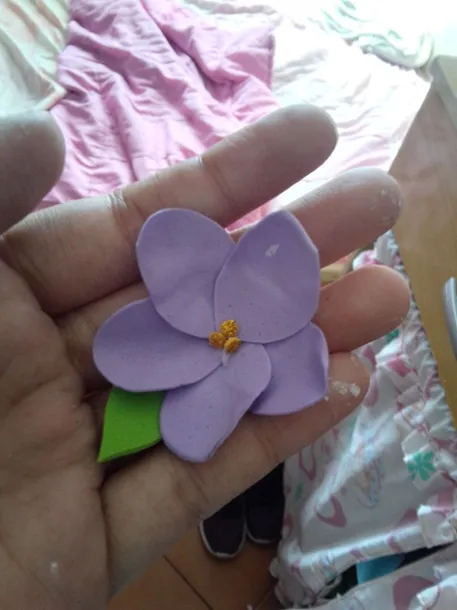
Decidi con el foami morado hacer algunes flores para decorar el cuadro, tiene 5 petalos y con foami dorado coloque algunos puntos en el centro.
I decided with the purple foami to make some flowers to decorate the picture, it has 5 petals and with gold foami I placed some dots in the center.
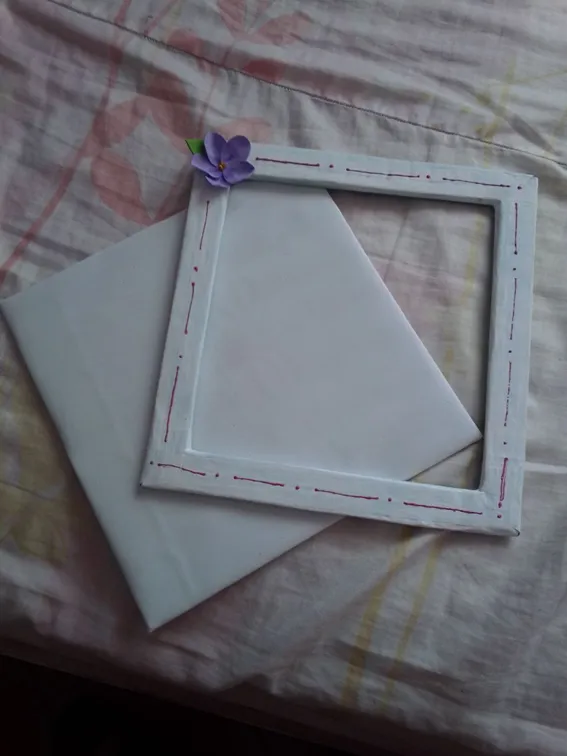
luego corte un cuadrado del mismo tamaño ,lo forre con foami blanco y lo pegue al cuadro.
then cut a square of the same size, line it with white foami and glue it to the frame.
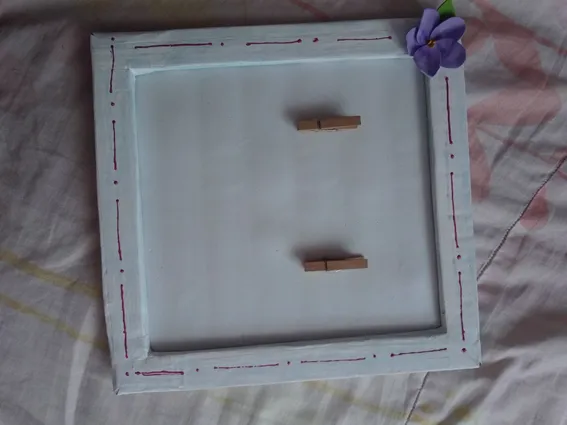
Le pegue los dos ganchos,los pinte y con una hoja hice la palabra “calendario” en lettering,la recorte y pegue en la superior del cuadro.
I glued the two hooks, painted them and with a sheet of paper I made the word "calendar" in lettering, cut it out and glued it on the top of the frame.
hice un pequeño sobre para guardar el resto de cartulinas con los meses y los días y finalice colocando unos pequeños puntos de foami dorado.
I made a small envelope to keep the rest of the cardboard with the months and days and I finished by placing some small gold foami dots.
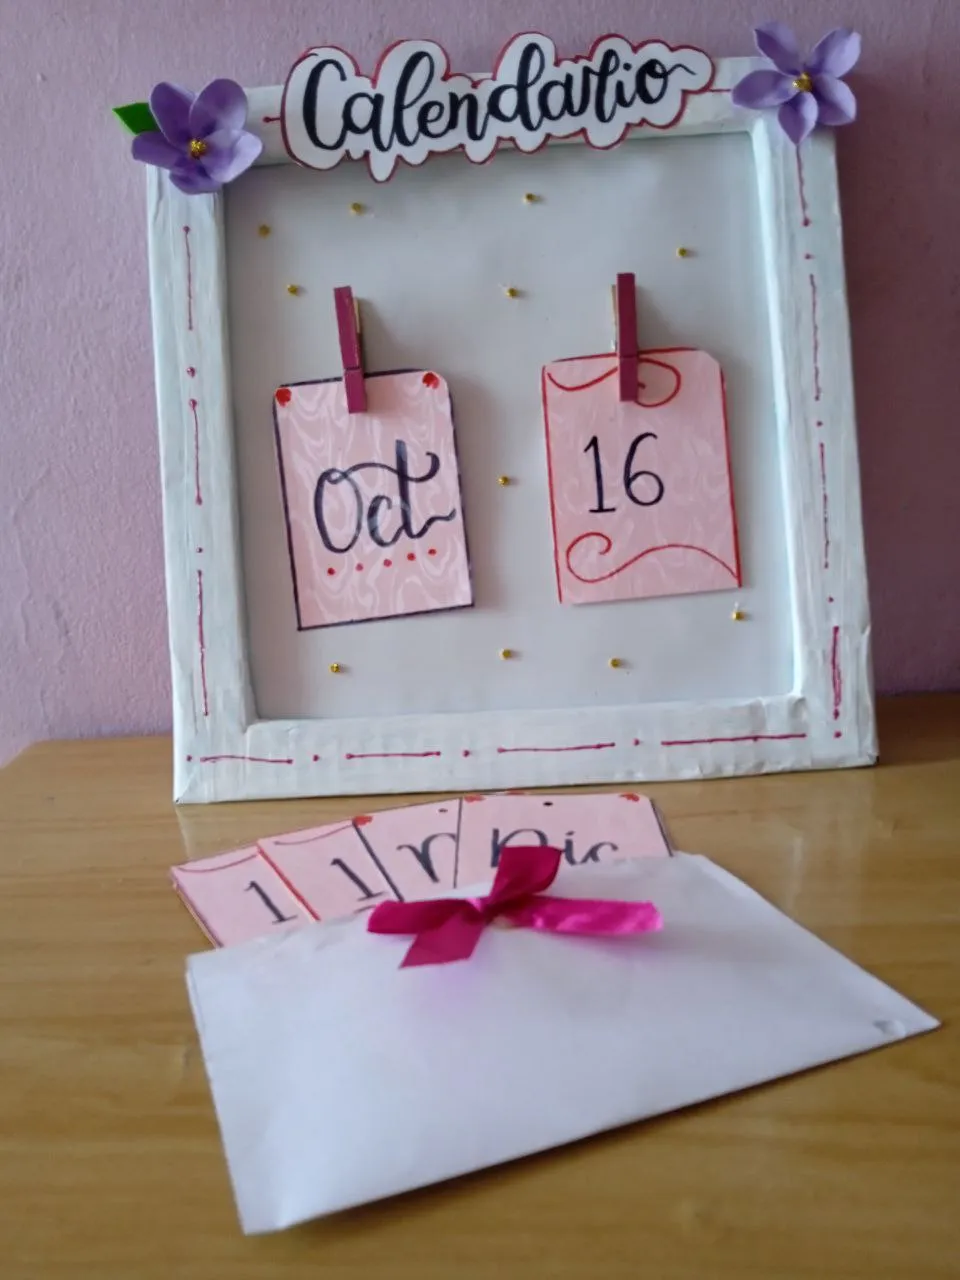
¡Y asi hemos culminado nuestro calendario!, Espero que te haya gustado esta idea, hasta el próximo blog.
Todas las fotos fueron tomadas con mi telefono smooth 5.5 y un redmi 9A.
And so we have completed our calendar, I hope you liked this idea, see you next blog.
All photos were taken with my smooth 5.5 phone and a redmi 9A.