English version
It's no secret that I like crafts. Doing this kind of work demands creativity and patience, but they can also be good methods to distract the mind and have a nice time, while giving free rein to creativity and ingenuity.
On this occasion I would like to share with you my participation in a craft contest called World of Felt.
You can read more about the contest by following this link:
@hive-130560/new-contest-felt-world-winners-of-the-previous-contest
Felt is a material I have worked with before, so I found the idea of the contest interesting and wanted to make my contribution with a nice craft. Having said all this, I present my creation, a teddy bear made of felt.

Although the main material for this teddy bear is felt, I used tools such as scissors, glue, paints, silicone gun, buttons, thread and needle.

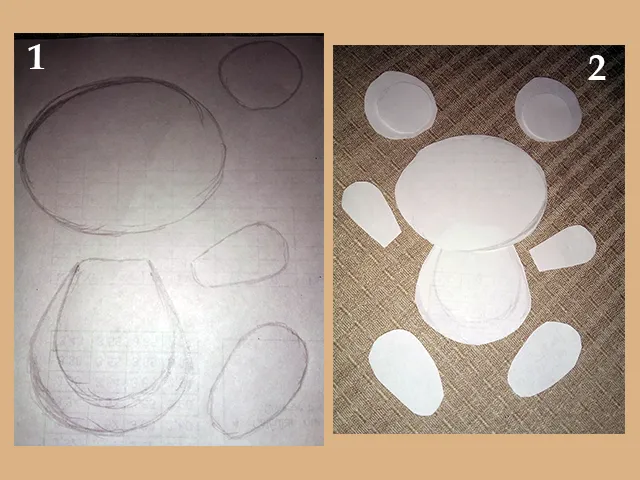
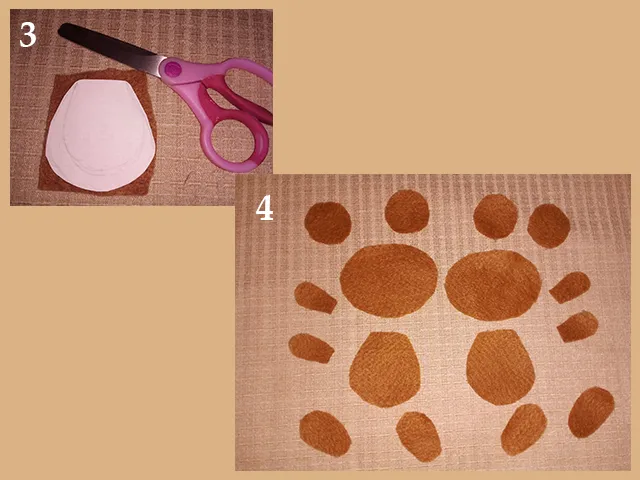
The first thing I did was to make the patterns that I would follow to cut the felt and assemble the bear. First I drew the patterns on a piece of paper (1) and then I cut them out (2). I made the pattern on paper for each and every one of the pieces I would use to make the bear.
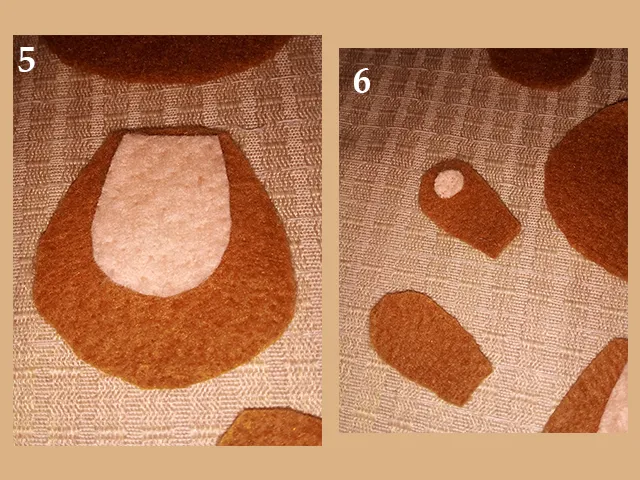
With the patterns ready, I cut small pieces of felt and cut them with the shape marked by the paper pattern I made before (3). I did the same with each pattern, until I had all the felt pieces I would use for the bear (4).
I also cut small pieces of light-colored felt for the bear's belly (5) and for the paws, ears and other details (6).
There were a lot of felt cuttings left over that I obviously couldn't use; however, I found a good use for them, stuffing for the teddy bear (7). With my stuffing ready I started sewing each pattern using thread and needle, then stuffed it with the felt (8). It doesn't matter if you can see the seams, this gives it a more "handmade" touch that I like so much in this type of work.

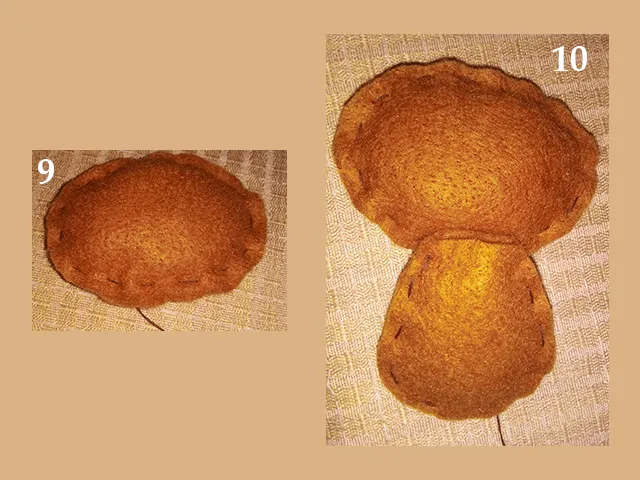
The first parts of the teddy bear I sewed was the torso, so I continued with the head (9) and then sewed it to the torso, leaving the joints to the back (10).
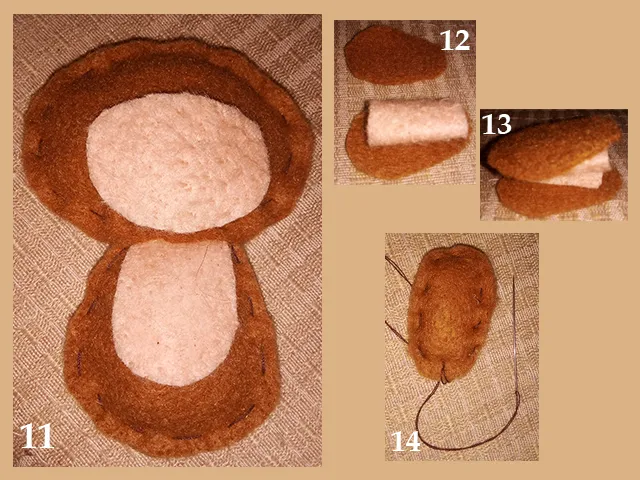
Once the torso was attached to the head, I measured to make sure the pieces of clear felt were the right size for the bear (11). After that, I used clear felt to fill in the patterns for the paws (12). I placed each part of the bear's paws on top of each other (13) and then sewed them together (14).
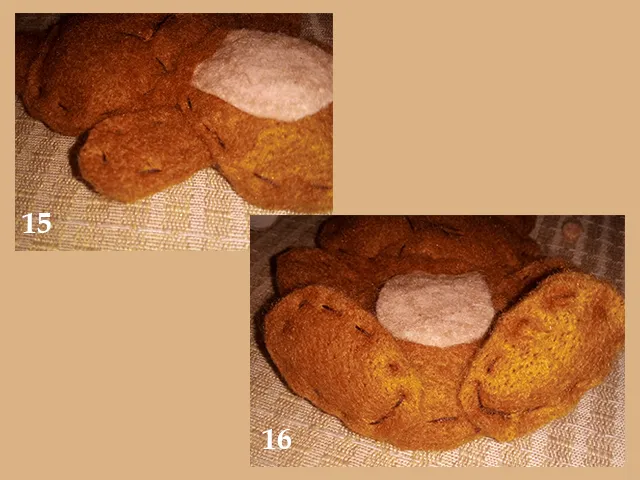
With the legs ready, I placed each one in its place. The front legs at the top of the torso (15) and the back legs at the bottom of the torso (16).
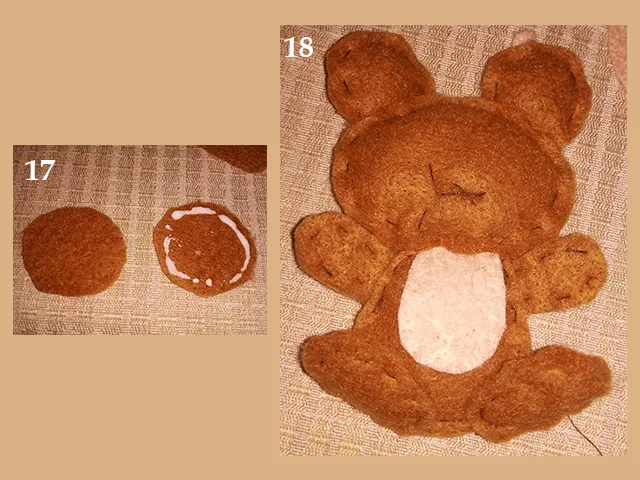
As a parenthesis, I used glue on each part of the bear to help the thread and needle to strengthen the felt bond. In the image below you can see the ears of the bear before sewing them, only with glue on the edges (17). Once sewn and stuffed, I attached them to the bear's head (18).
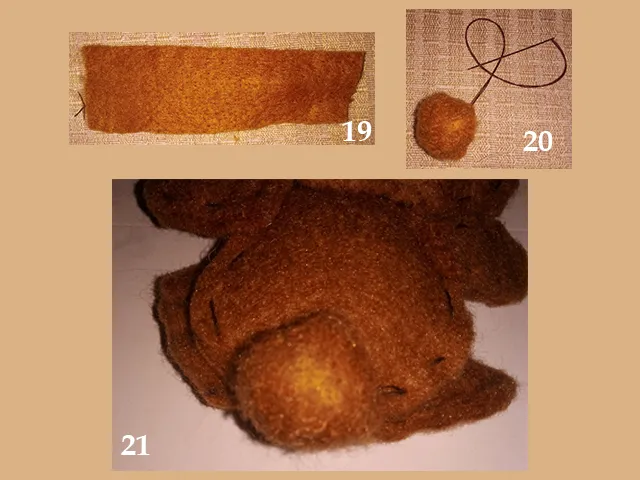
A final detail for the bear was a tail. For this I used a long piece of felt (19), made a little ball and sewed this little ball with thread and needle to keep the shape (20). Next I sewed this felt sphere to the back of the torso (21).
I also wanted to give this bear a detail, a bow to identify her as a female bear. To make this bow I cut a piece of light felt (22), fastened it with thread in the middle (23) and dipped it in water with red paint to dye it red (24). Then I let it dry for a few minutes (25).
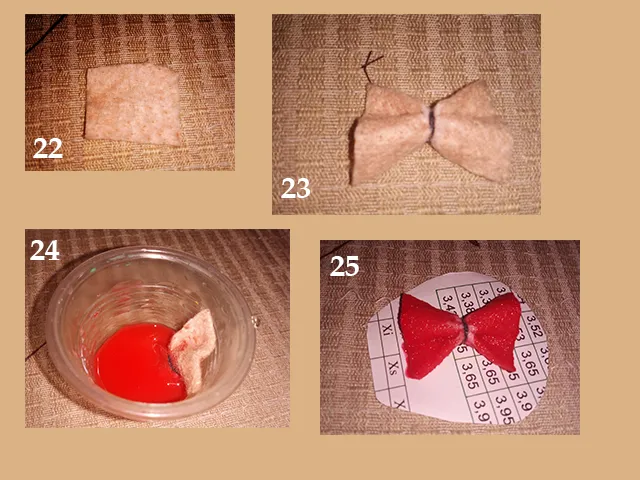
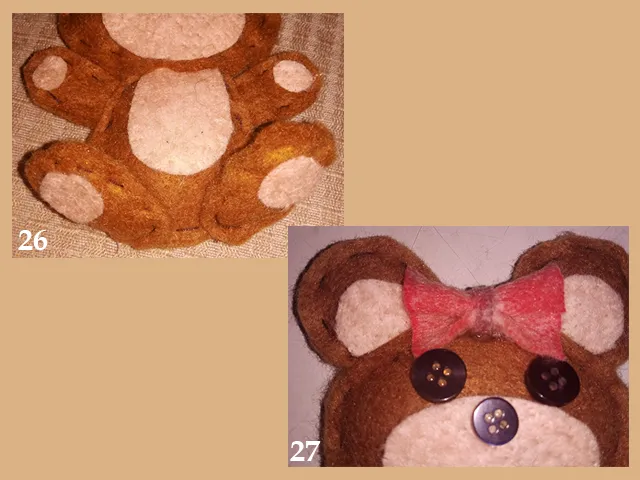
With everything ready, I began to glue the light felt patterns where the bear's belly, paws and mouth would go. I used the silicone gun for this purpose (26). I also used silicone to glue buttons for the eyes, the nose and to glue the bear's bow (27).
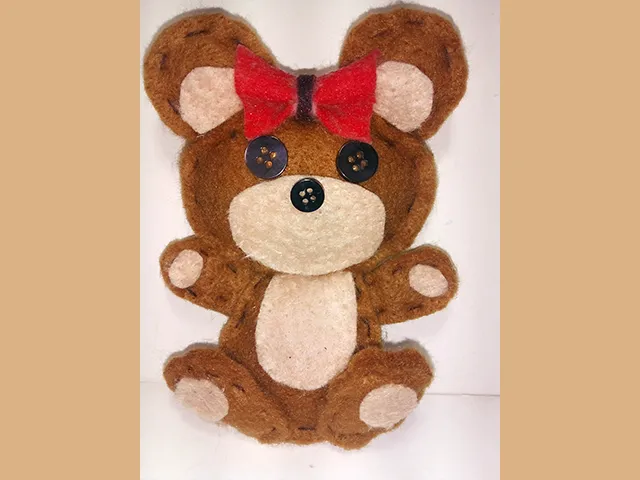
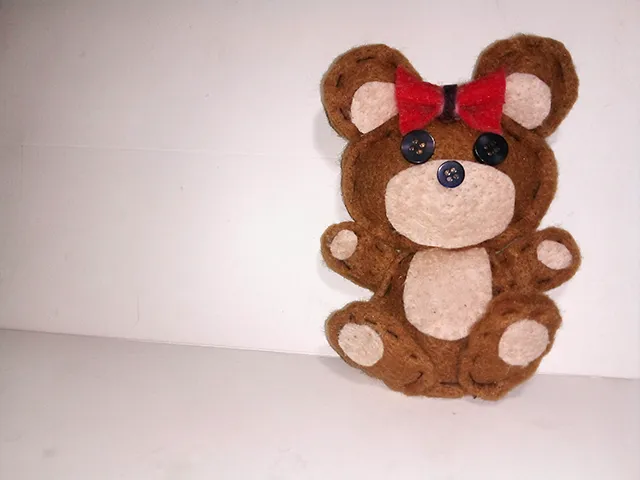
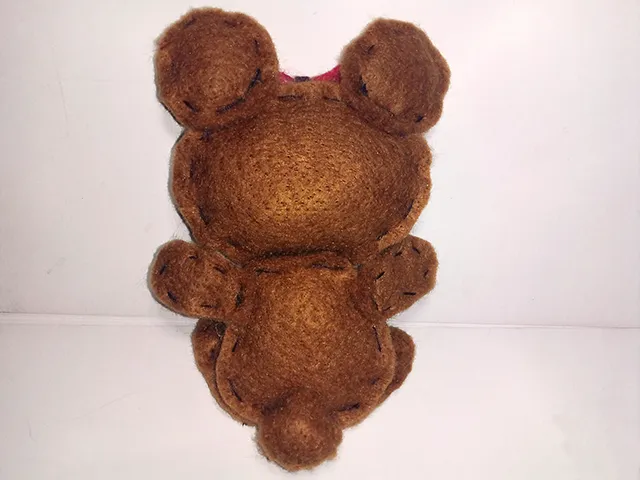
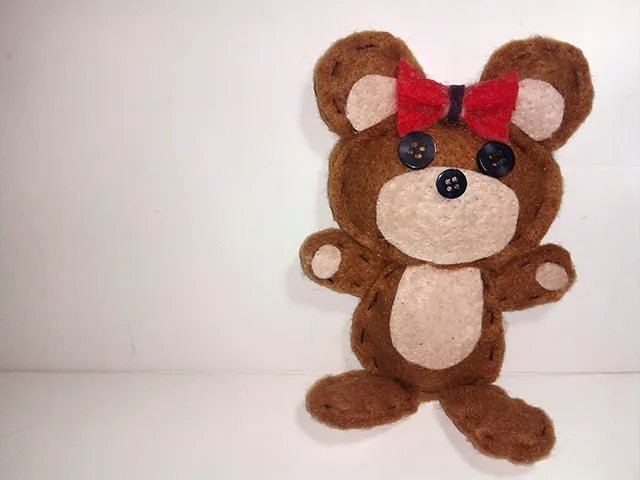
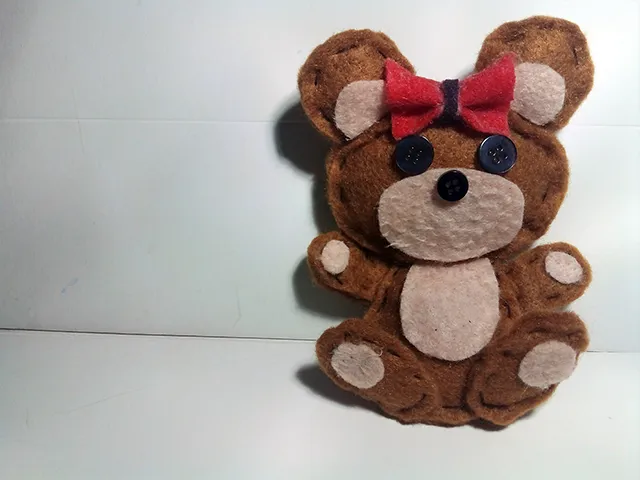
This is how the teddy bear was finished. Here is a series of photos from different angles:
Well friends, this has been all. I confess that I had a hard time finding this color of felt, as I wanted to make a teddy bear. I kept telling myself that if I didn't find the color, I wouldn't do it, but I'm glad I found it to make this beautiful teddy bear.
I would like to invite some users to participate while there is still time. @Kellyrsa cheer up there is still time. @Sarix I know you are good with crafts. @loboblanco I once saw you made something in the electronic parts contest, so maybe you could try something with felt. Friend @numa26 might also come up with an interesting creation. And I won't miss the opportunity to invite friend @elemarg25 who has a lot of creativity as well. If you decide to participate, I will be happy to see your participation.
To finish, I would like to invite you to leave your opinions about this craft below in the comments, I will be happy to read them. With nothing more to add, I'll say goodbye then....
See you next time!
Versión en español
Para nadie es un secreto que me gustan las manualidades. Hacer este tipo de trabajos demanda creatividad y paciencia, pero también pueden ser buenos métodos para distraer la mente y pasar un rato agradable, mientras se da rienda suelta a la creatividad y el ingenio.
En esta ocasión me gustaría compartir con ustedes mi participación en un concurso de manualidades llamado Mundo de fieltro.
Pueden leer más sobre el concurso siguiendo este enlace:
@hive-130560/new-contest-felt-world-winners-of-the-previous-contest
El fieltro es un material con el que he trabajado antes, así que me pareció interesante la idea del concurso y quise hacer mi aporte con una bonita manualidad. Dicho todo esto, les presento mi creación, un osito de peluche hecho de fieltro.
Aunque el material principal para este osito es el fieltro, usé herramientas como tijera, pegamento, pinturas, pistola de silicón, botones, hilo y aguja.
Lo primero que hice fue hacer los patrones que seguiría para cortar el fieltro y armar el oso. Primeramente dibujé dichos patrones en un trozo de papel (1) y luego los corté (2). Hice el patrón en papel de todas y cada una de las piezas que usaría para armar al osito.
Con los patrones listos, corté trocitos de fieltro y los corté con la forma marcada por el patrón de papel que hice antes (3). Hice lo mismo con cada patrón, hasta tener todas las piezas de fieltro que usaría para el osito (4).
También corté pequeños trocitos de fieltro de color claro para la panza del osito (5) y para las patitas, orejas, entre otros detalles (6).
Quedaron muchos cortes de fieltro que evidentemente no podría usar; sin embargo, les encontré un buen uso, relleno para el osito (7). Con mi relleno listo comencé a coser cada patrón usando hilo y aguja, luego lo rellené con el fieltro (8). No importa que se vean las costuras, esto le da un toque más "hecho a mano" que tanto gusta de este tipo de trabajos.
Las primeras partes del osito que cosí fue el torso, así que continué con la cabeza (9) y luego la cosí al torso, dejando las uniones hacia atrás (10).
Una vez unido el torso con la cabeza, hice medidas para asegurarme de que las piezas de fieltro claro estuviesen del tamaño adecuado para el oso (11). Luego de esto, usé fieltro claro para rellenar los patrones de las patitas (12). Coloqué cada parte de las patas del oso uno encima del otro (13) y luego los cosí (14).
Con las patitas listas, coloqué cada una en su lugar. Las patas delanteras en la parte superior del torso (15) y las traseras en la parte de abajo del torso (16).
Haciendo un paréntesis, usé pegamento en cada parte del oso para ayudar al hilo y a la aguja a fortalecer la unión del fieltro. En la imagen de abajo pueden ver las orejas del oso antes de coserlas, solamente con pegamento en las orillas (17). Una vez cosidas y con su relleno, las uní a la cabeza del oso (18).
Un último detalle para el oso fue una colita. Para esto usé un trozo largo de fieltro (19), hice una bolita y cosí esta bolita con hilo y aguja para que mantuviese la forma (20). Lo siguiente fue coser esta esfera de fieltro en la parte trasera del torso (21).
También quise darle un detalle a este osito, un moño para identificarla como un osito hembra. Para hacer este moño corté un trozo de fieltro claro (22), lo sujeté con hilo en el medio (23) y lo sumergí en agua con pintura roja para teñirlo de dicho color (24). Luego lo dejé secar por unos minutos (25).
Con todo listo, comencé a pegar los patrones de fieltro claro en el lugar donde iría la panza, las patitas y la boca del oso. Usé la pistola de silicón para este fin (26). También usé silicón para pegar botones para los ojos, la naríz y para pegar el moño del osito (27).
De esta manera quedó terminado el osito de peluche. Les dejo a continuación una serie de fotos desde distintos ángulos:
Bien amigos, esto ha sido todo. Confieso que me fue difícil encontrar este color de fieltro, pues deseaba hacer un osito. Me decía a mi mismo que si no encontraba el color, no lo haría, pero estoy contento de haberlo encontrado para hacer este hermoso osito de peluche.
Me gustaría invitar a algunos usuarios a participar mientras aún hay tiempo. @Kellyrsa anímate que aún hay tiempo. @Sarix sé que eres buena con las manualidades. @loboblanco una vez vi que hiciste algo en el concurso de piezas electrónicas, así que tal vez podrías intentar algo con fieltro. A la amiga @numa26 también se le podría ocurrir una interesante creación. Y no desaprovecharé la oportunidad de invitar a la amiga @elemarg25, que tiene mucha creatividad también. Si deciden participar, estaré encantado de ver sus publicaciones.
Para terminar, me gustaría invitarlos a dejar sus opiniones sobre esta manualidad abajo en los comentarios, yo estaré encantado de leerlos. Sin más que agregar, me despido entonces...
¡Hasta la próxima!

Imagenes editadas con Photoshop
Traducido con DeepL
Photos edited with Photoshop
Translated with DeepL
Gabo Play Megaman x4 #3
"I Love Ecency" Sculpture
Passion Fruit Cake