English
Greetings, fellow creatives. I recently started working again with flexible dough. Some time ago, I'm talking about years ago, I used to make figures with flexible dough of 30 cm and up; that is to say, big sculptures.
Since a couple of years ago I have been making much smaller figures, only with plasticine as base material. Recently I decided to buy flexible dough to see what things I could do and thus resume some practice with this material.
Well, recently I decided to make a figurine of Jack Skellington (The Strange World of Jack, 1993), but with flexible dough instead of plasticine. Next, I will show you the creative process of this interesting figurine, I hope you like it.
Español
Saludos, compañeros creativos. Hace poco comencé a trabajar otra vez con masa flexible. Tiempo atrás, les hablo de años, hacía figuras con masa flexible de 30 cm en adelante; es decir, esculturas grandes.
Desde hace un par de años he estado haciendo figuras mucho más pequeñas, solo que con plastilina como material base. Hace poco me animé a comprar masa flexible para ver qué cosas podía hacer y así retomar un poco de práctica con este material.
Pues bien, hace poco me decidí en hacer una figurita de Jack Skellington (El Extraño Mundo De Jack, 1993), pero con masa flexible en lugar de plastilina. A continuación, les mostraré el proceso creativo de esta interesante figurita, espero que les guste.


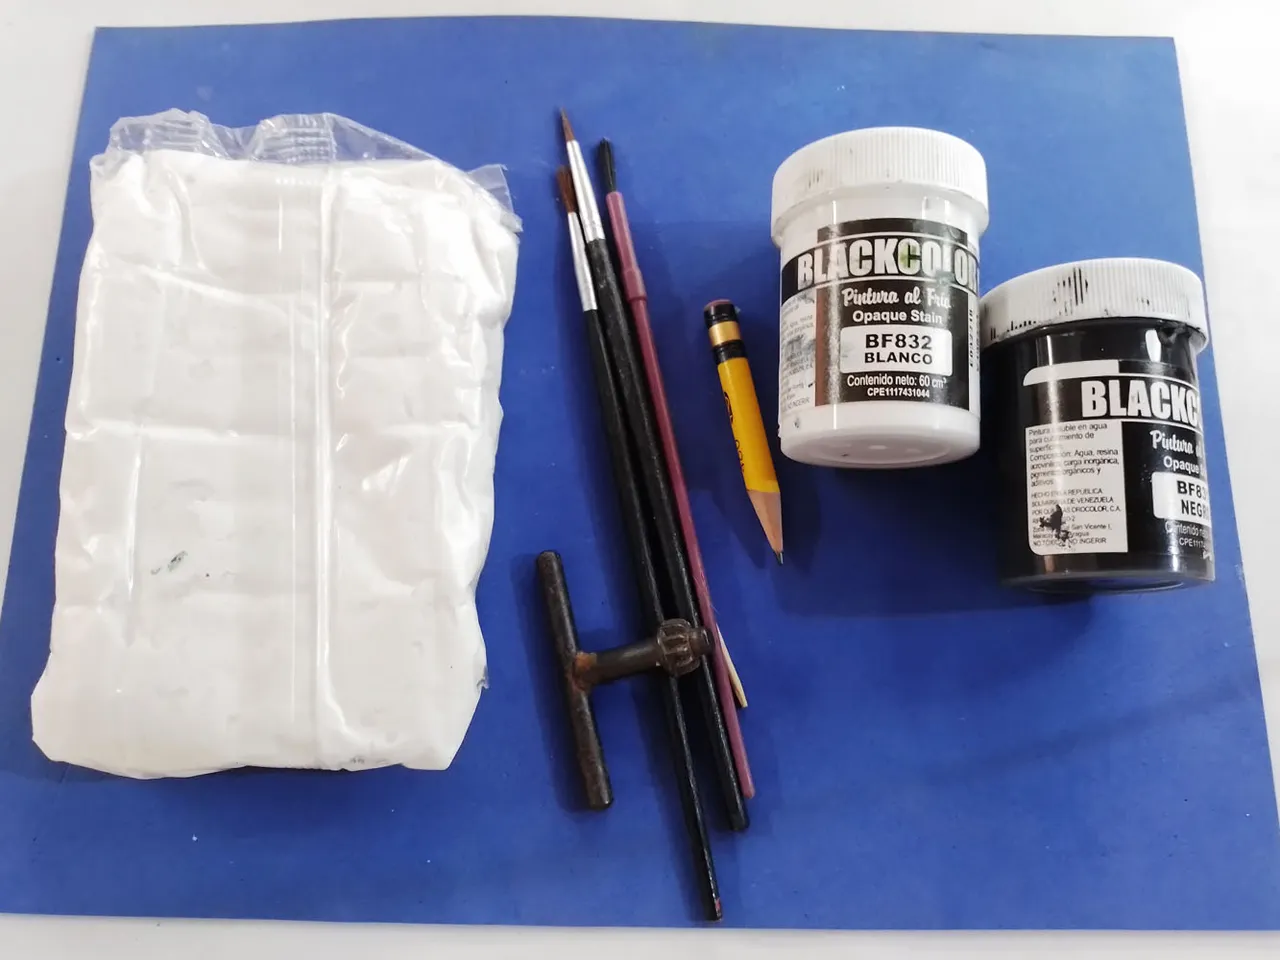
Before I begin I should tell you about the materials I used to make this figurine:
- Flexible dough, black and white paint, pencil, brushes, knitting and sewing needles, wooden sticks and glue.
In the picture below you can see a small wrench from a drill, as it has a shape I found it useful to make the eye socket of the figure, so I used it. We will not always have all the necessary tools to do things, but the important thing is to do what we can with what we do have.
Antes de comenzar debo comentarles los materiales que utilicé para hacer esta figurita:
- Masa flexible, pintura negra y blanca, lápiza, pinceles, agujas de tejer y coser, palillos de madera y pegamento.
En la fotografía de abajo pueden ver una pequeña llave de un taladro, pues tiene una forma me pareció útil para hacer la cuenca de los ojos de la figura, así que la utilicé. No siempre tendremos todas las herramientas necesarias para hacer las cosas, pero lo importante es hacer lo que se pueda con lo que sí se tiene.
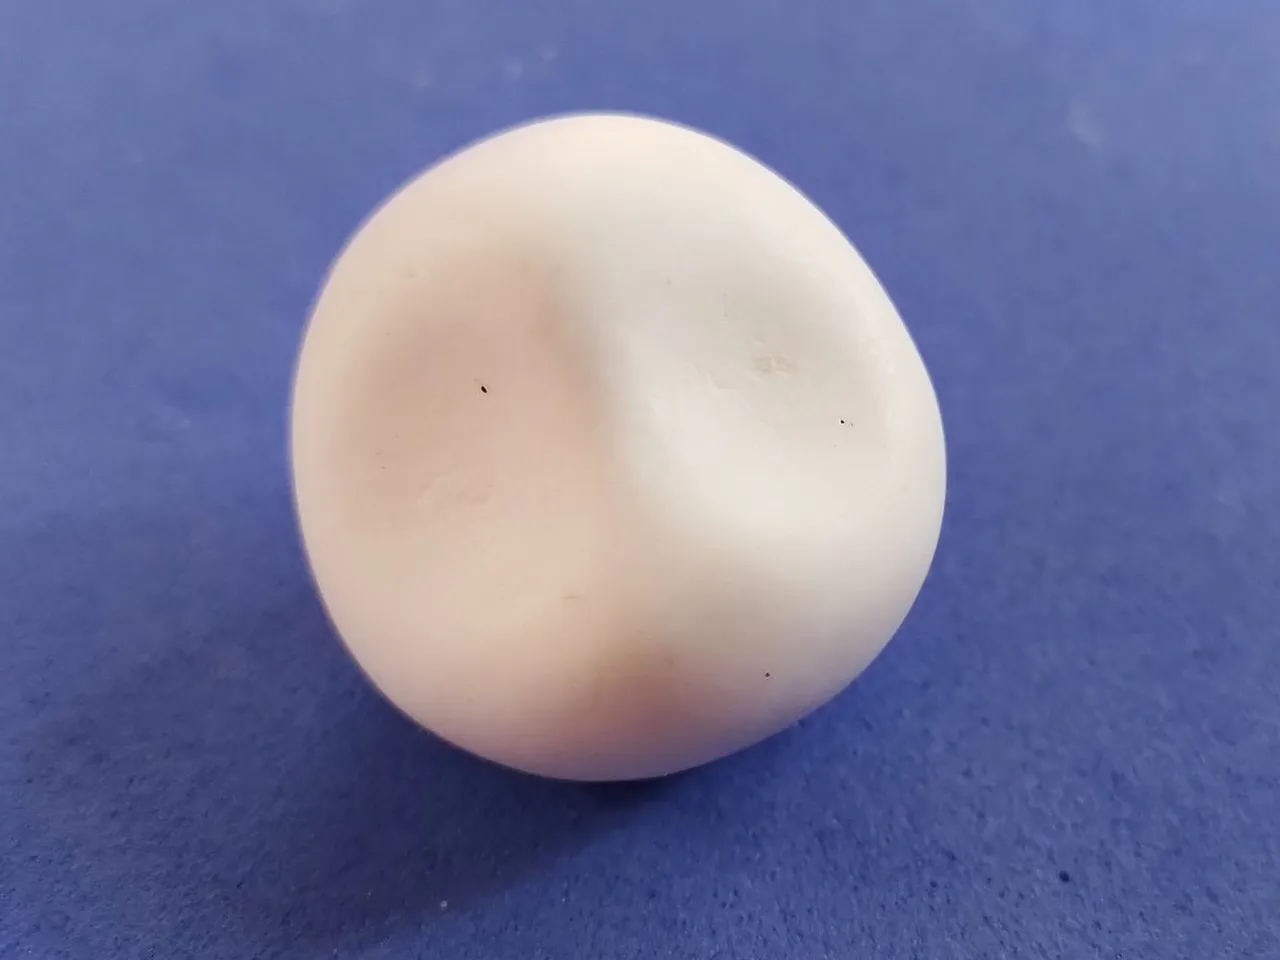
Well, the first thing I did was to make a sphere of flexible dough. As I have already explained in many of my tutorials, almost all shapes to start making figures start with a sphere and from this base shape, you can mold more complex shapes.
If you like to see more tutorials, you can find them with the hashtag #lwgabo or by following this link:
/created/lwgabo
Bien, lo primero que hice fue hacer una esfera de masa flexible. Como ya les he explicado en muchos de mis tutoriales, casi todas las formas para comenzar a hacer figuras comienzan con una esfera y a partir de esta forma base, se pueden moldear formas más complejas.
Si gustan ver más tutoriales, pueden encontrarlos con la etiqueta #lwgabo o siguiendo este enlace:
/created/lwgabo

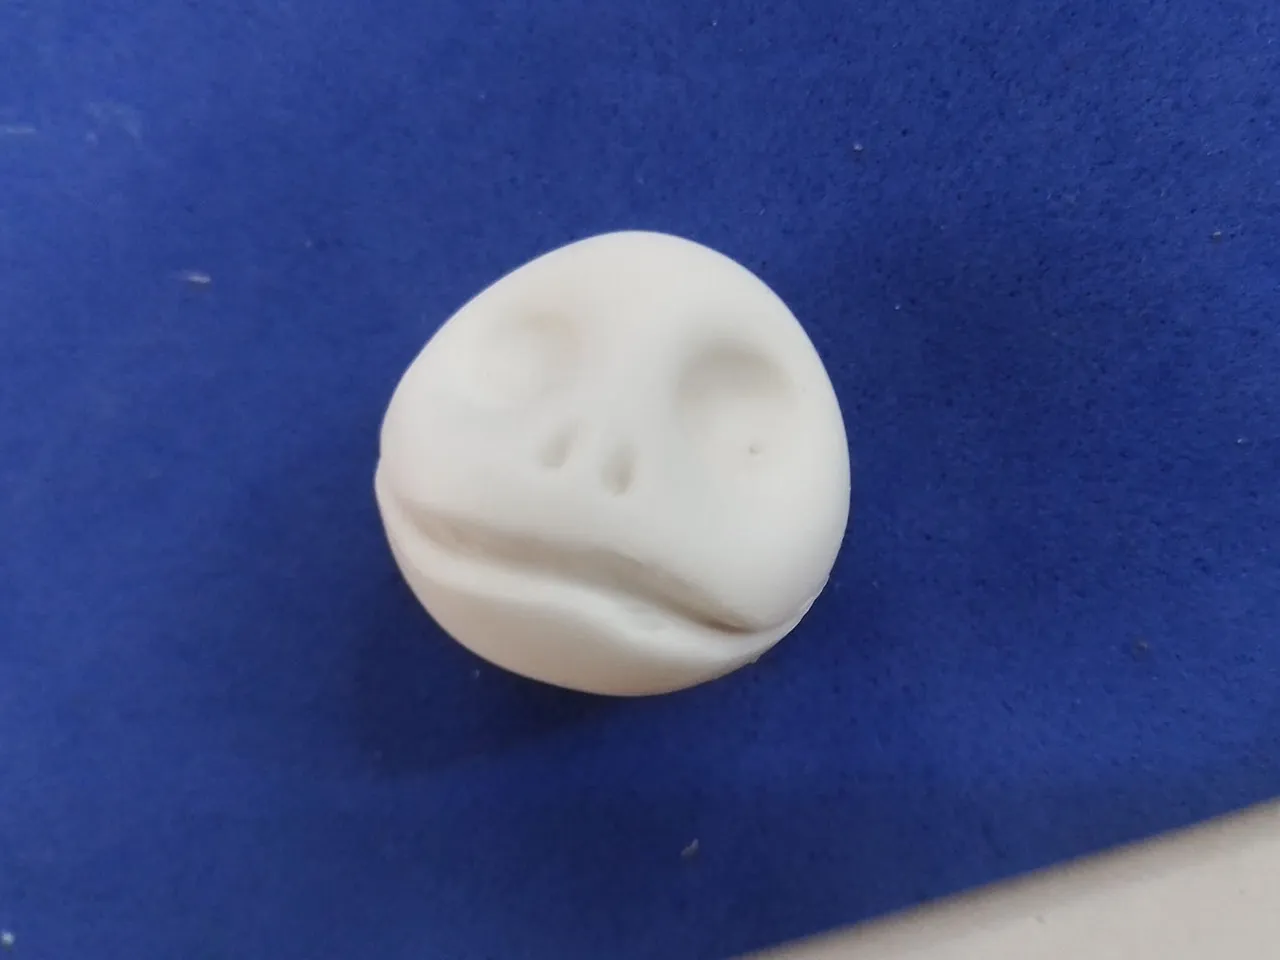
From this sphere, press with your thumbs on the upper part of the sphere to create large sockets for the eyes.
The flexible dough has the peculiarity that it returns to the shape it had while it is drying, so we must make the sockets a little bigger than we wanted, but just a little, do not overdo it.
A partir de esta esfera, se debe presionar con los pulgares en la parte superior de la esfera para crear unas cuencas grandes para los ojos.
La masa flexible tiene la peculiaridad de que vuelve a la forma que tenía mientras se esta secando, así que debemos hacer las cuencas un poco más grandes de lo que queríamos, pero solo un poco, no se pasen.
From this sphere, press with your thumbs on the upper part of the sphere to create large sockets for the eyes.
The flexible dough has the peculiarity that it returns to the shape it had while it is drying, so we must make the sockets a little bigger than we wanted, but just a little, do not overdo it.
Después de hacer estas cuencas, hice unas líneas con el lápiz para saber donde quedaría la boca, luego, con la punta redondeada de la aguja de tejer comencé a hundir la masa para crear una suerte de canal.
Con mis manos alisé los bordes de la boca, para que no quedaran feos, luego, con la misma punta de la aguja continué agudizando la profundidad de la boca.
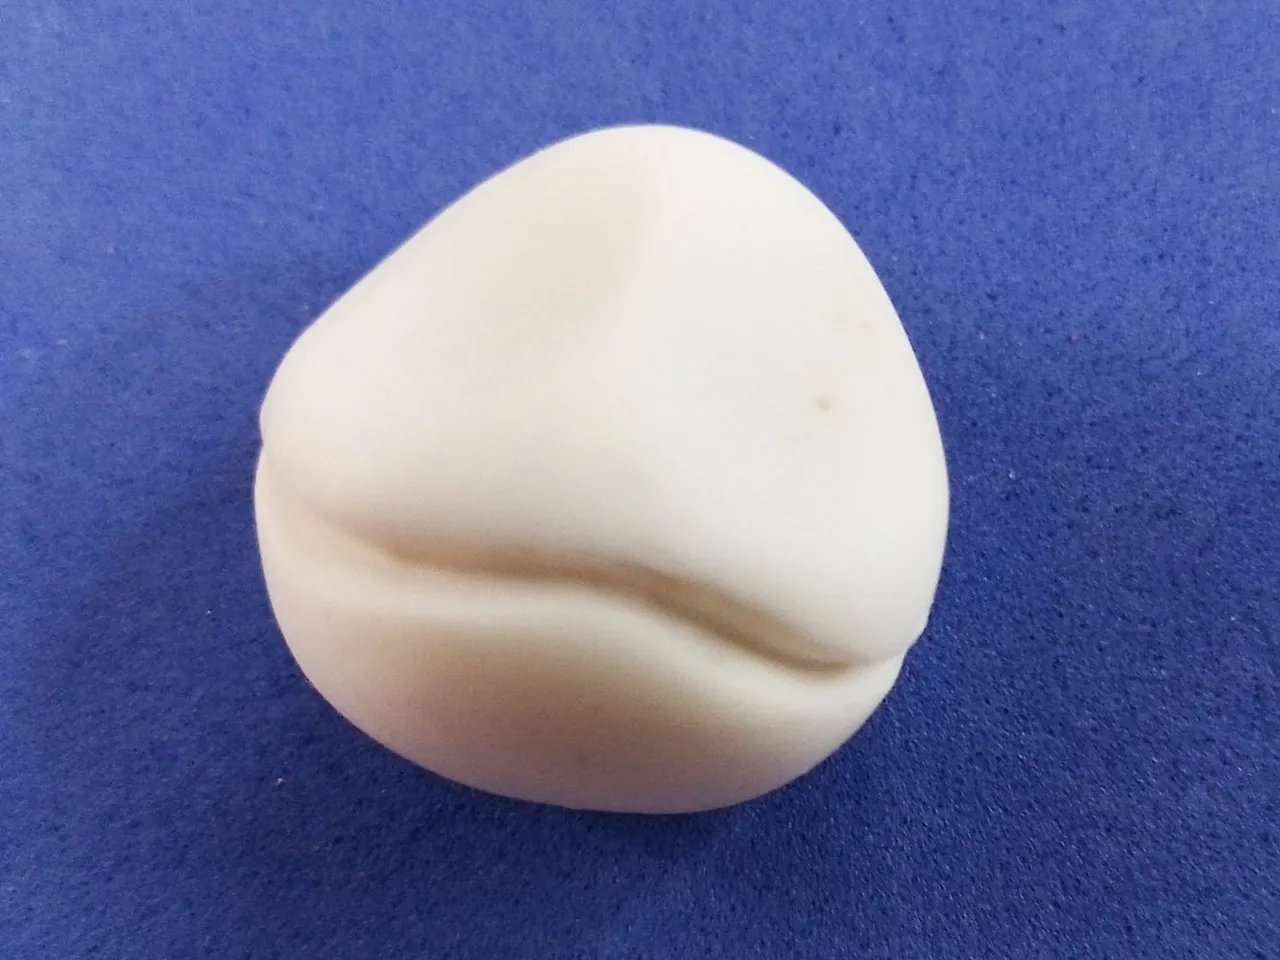
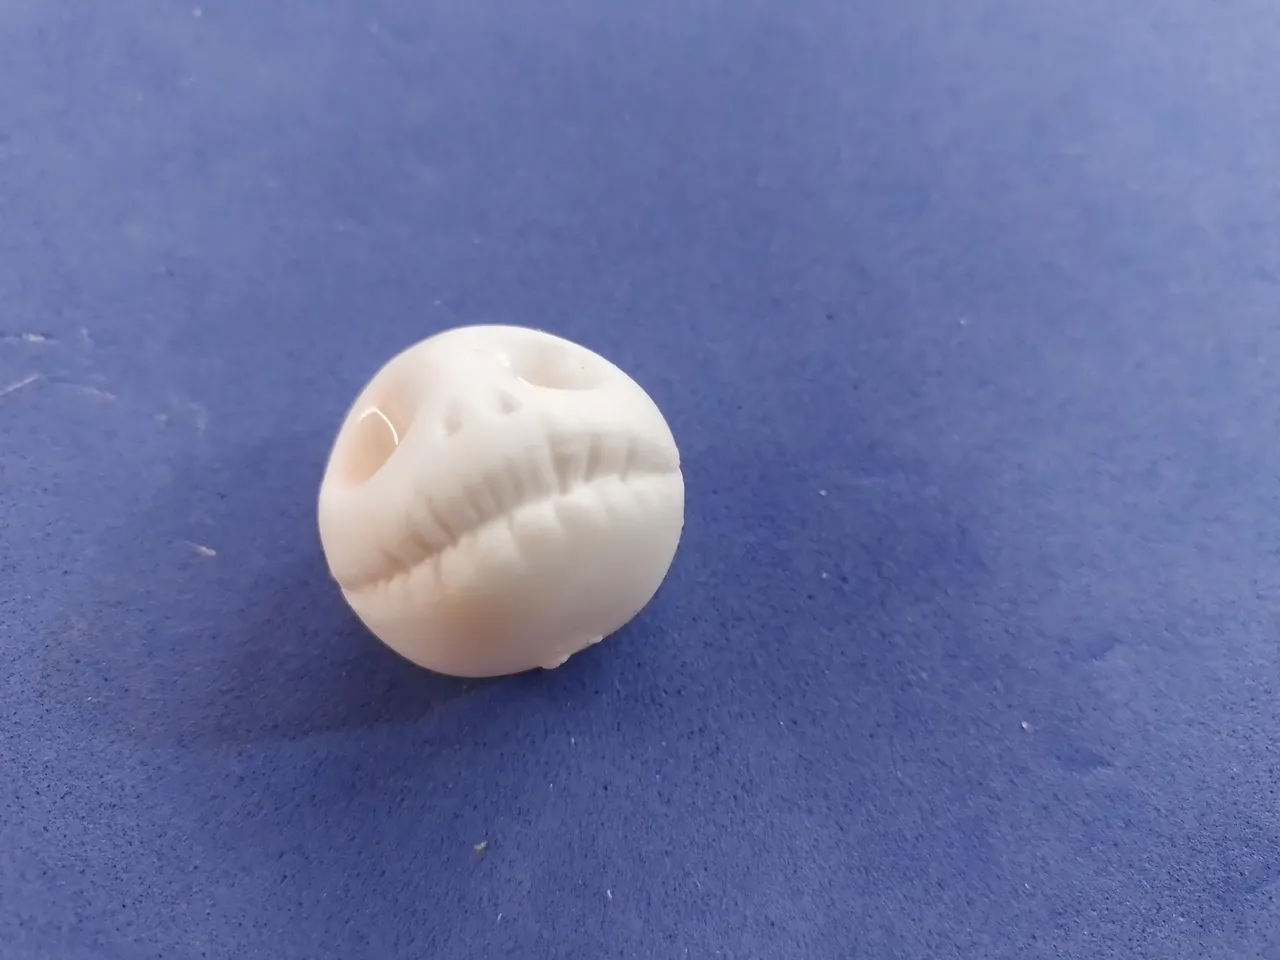
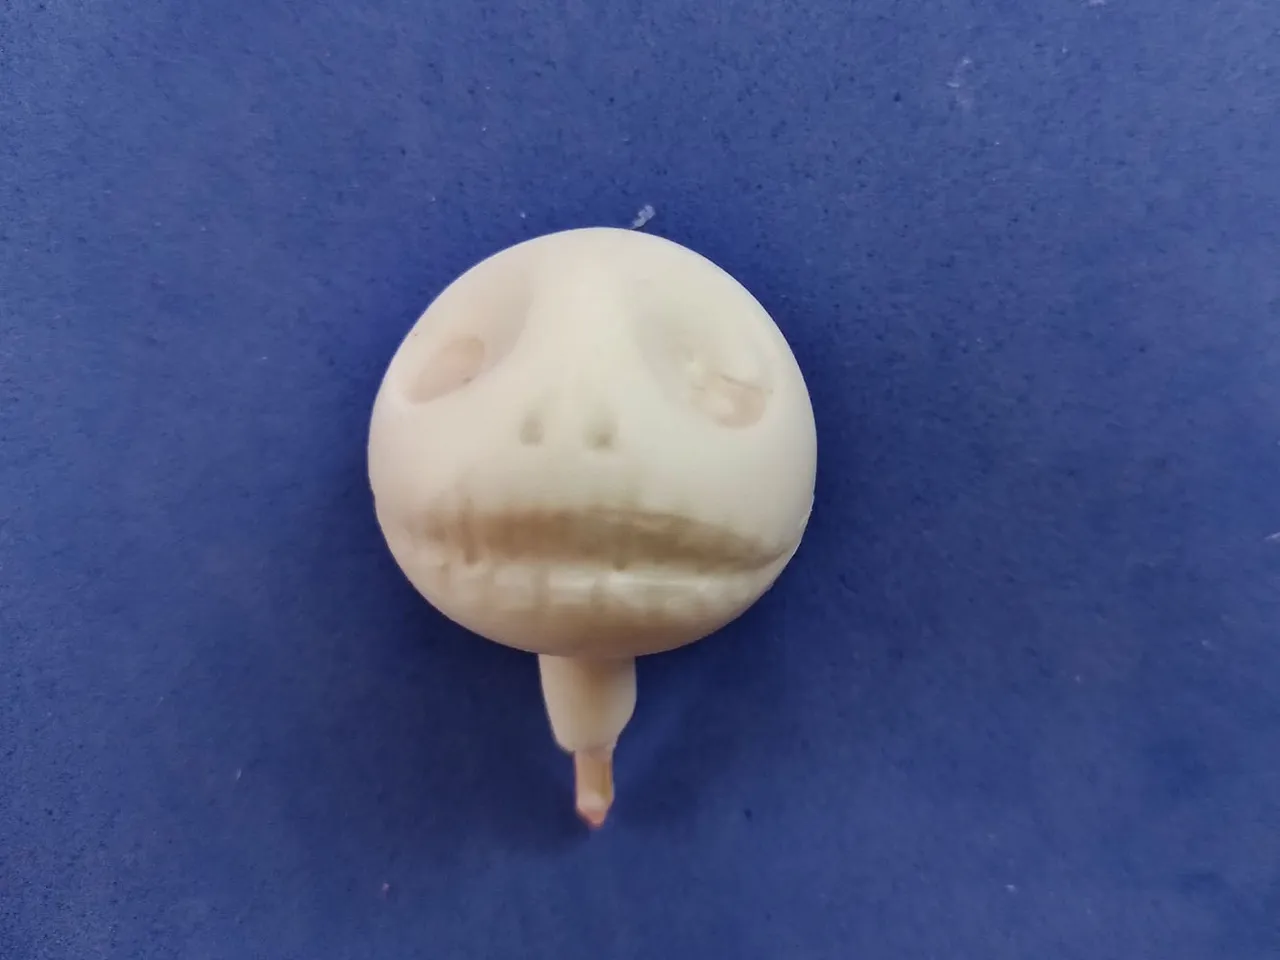
I use the knitting needle a lot, because it is a tool with a fine and rounded tip, I like what can be done with this one. Precisely, with this same needle I made the holes of the nose.
On the other hand, it was at this point that I used the drill key that I mentioned above. With one of its ends I deepened the eye sockets. Below you can see how they looked like after sinking them a little bit with that wrench:
Uso mucho la aguja de tejer, porque es una herramienta con una punta fina y redondeada, me gusta lo que se puede hacer con esta. Precisamente, con esta misma aguja hice los agujeros de la nariz.
Por otra parte, en este punto fue que usé la llave del taladro que les mencioné más arriba. Con una de sus extremos hice más profundas las cuencas de los ojos. A continuación pueden ver cómo quedaron después de hundirlas un poco con esa llave:
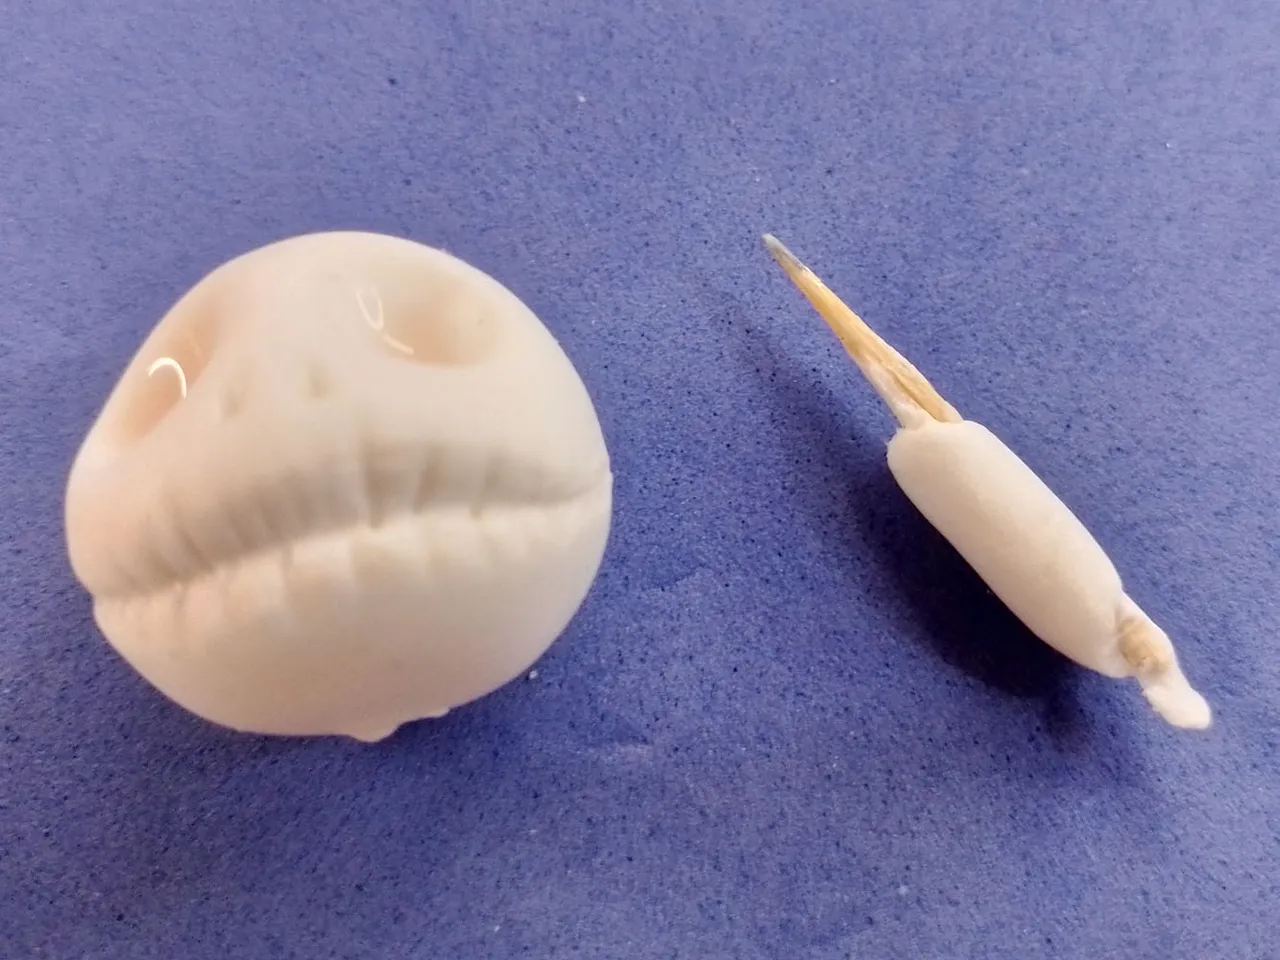
Finally, to finish with this part of the figure, I used the wooden stick to make those vertical lines on the mouth. I also used the sewing needle to make thinner lines between the thick lines.
You can use just the wooden stick or the needle for this purpose, depending on whether you have one or the other. If you have both, perfect.
Por último, para terminar con esta parte de la figura, usé el el palillo de madera para hacer esas líneas verticales en la boca. También usé la aguja de coser para hacer líneas más delgadas entre las líneas gruesas.
Para este propósito, ustedes pueden usar solo los palillos de madera o la aguja, dependiendo de su tienen una cosa o la otra. Si tienen ambas, perfecto.
Finally I cut a small piece of wooden stick for the neck, then covered it with flexible dough and placed it on the lower part of the head, i.e. in place.
After this I placed this piece to dry in the open air.
Finalmente corté un trocito de palillo de madera para el cuello, luego lo cubrí con masa flexible y se lo coloqué en la parte baja de la cabeza, es decir, en su lugar.
Después de esto coloqué esta pieza a secar al aire libre.
 |  |
|---|

As I told you, every complete shape starts from a sphere, so to make the body we make a small sphere, smaller than the one we made for the head.
Once the sphere is ready, it is lengthened a little and flattened, until it has a shape similar to a rectangle, with rounded edges and the lower part a little thinner.
This would be the torso of the character. It's certainly a little thinner in the movie, but here I'm doing it in a chibi style.
Como les dije, toda forma completa parte de una esfera, por esto, para hacer el cuerpo se hace una pequeña esfera, más pequeña que la que se hizo para la cabeza.
Una vez lista la esfera, se alarga un poco y se aplasta, hasta que tenga una forma parecida a la de un rectángulo, con los bordes redondeados y la parte inferior un poco más delgada.
Este sería el torso del personaje. Ciertamente es un poco más delgado en la película, pero aquí lo estoy haciendo con un estilo chibi.

Continuing with the geometric shapes, you must draw a triangle on the upper part of the torso and then sink it with the knitting needle.
Be careful not to break the dough, but sink it and make lines, but always without breaking, because breaking the surface of the dough will create lumps and it will be difficult to make again the smooth surface you already had.
Siguiendo con las formas geométricas, se debe dibujar un triángulo en la parte superior del torso y luego hundirlo con la aguja de tejer.
Hay que tener cuidado de no romper la masa, sino hundirla y hacer líneas, pero siempre sin romper, porque al romper la superficie de la masa se crearán grumos y será difícil volver a hacer la superficie suave que ya se tenía.
Jack has some "triangles" hanging on the back of his suit, there are 4 of them, but to start with I made only two triangles and glued them to the edge of the torso that I had already made.
With the very tip of the knitting needle I continued shaping the surface until it was completely smooth.
A Jack le cuelgan unos "triángulos" en la parte trasera de su traje, son 4, pero para empezar yo hice solo dos triángulos y los pegué en el borde del torso que ya había hecho.
Con la propia punta de la aguja de tejer continué moldeando al superficie hasta dejarla completamente lisa.
 |  |
|---|
To finish this part, I used the scissors to cut down the middle of each triangle, creating four triangles in total.
I also placed the flaps of the suit around the triangle I had previously made on the torso.
Para finalizar esta parte, usé la tijera para cortar por el medio a cada triángulo, creando cuatro triángulos en total.
También coloqué las solapas del traje alrededor del triángulo que antes había hecho en el torso.

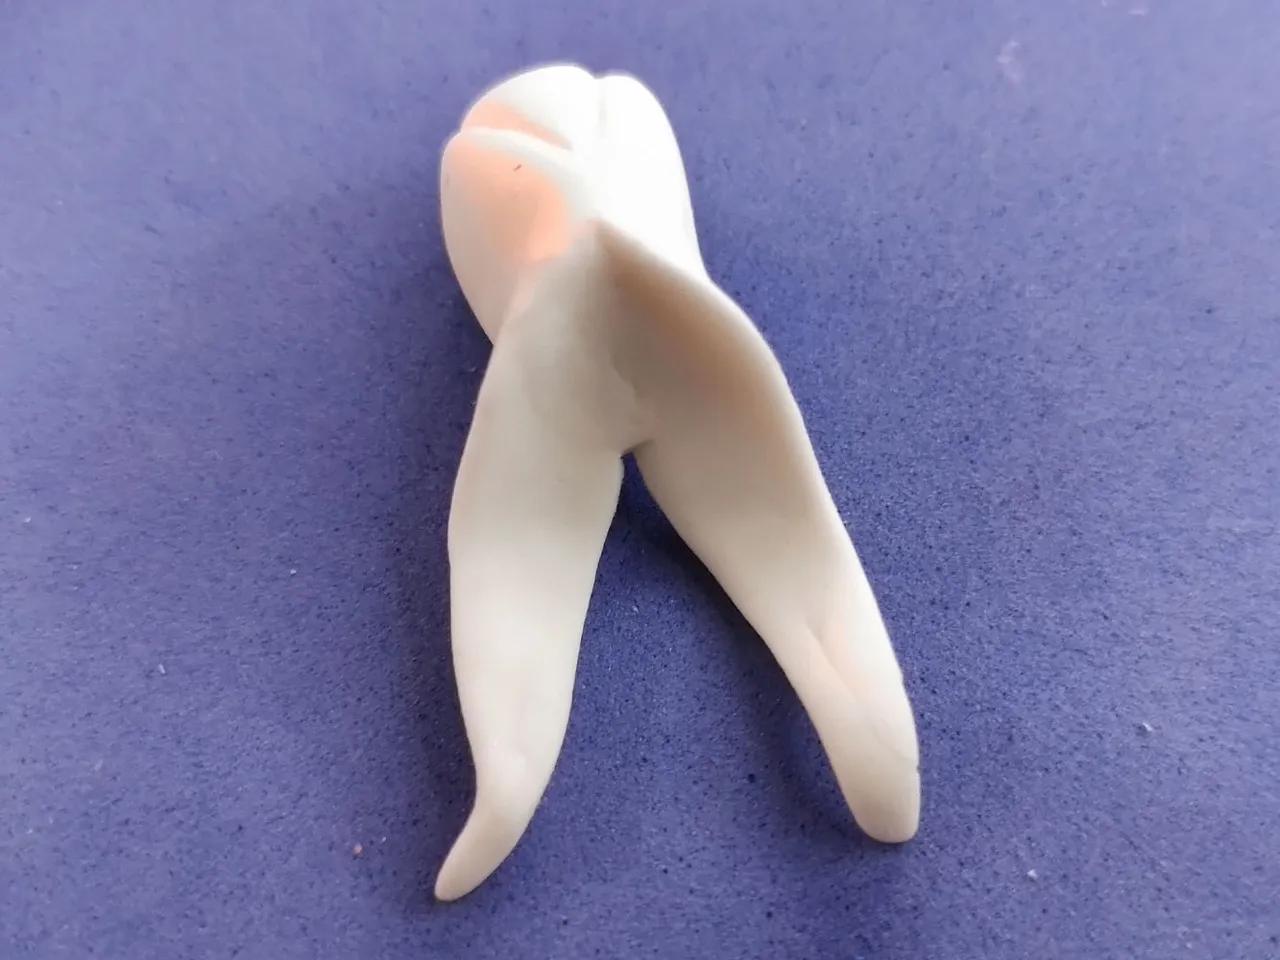
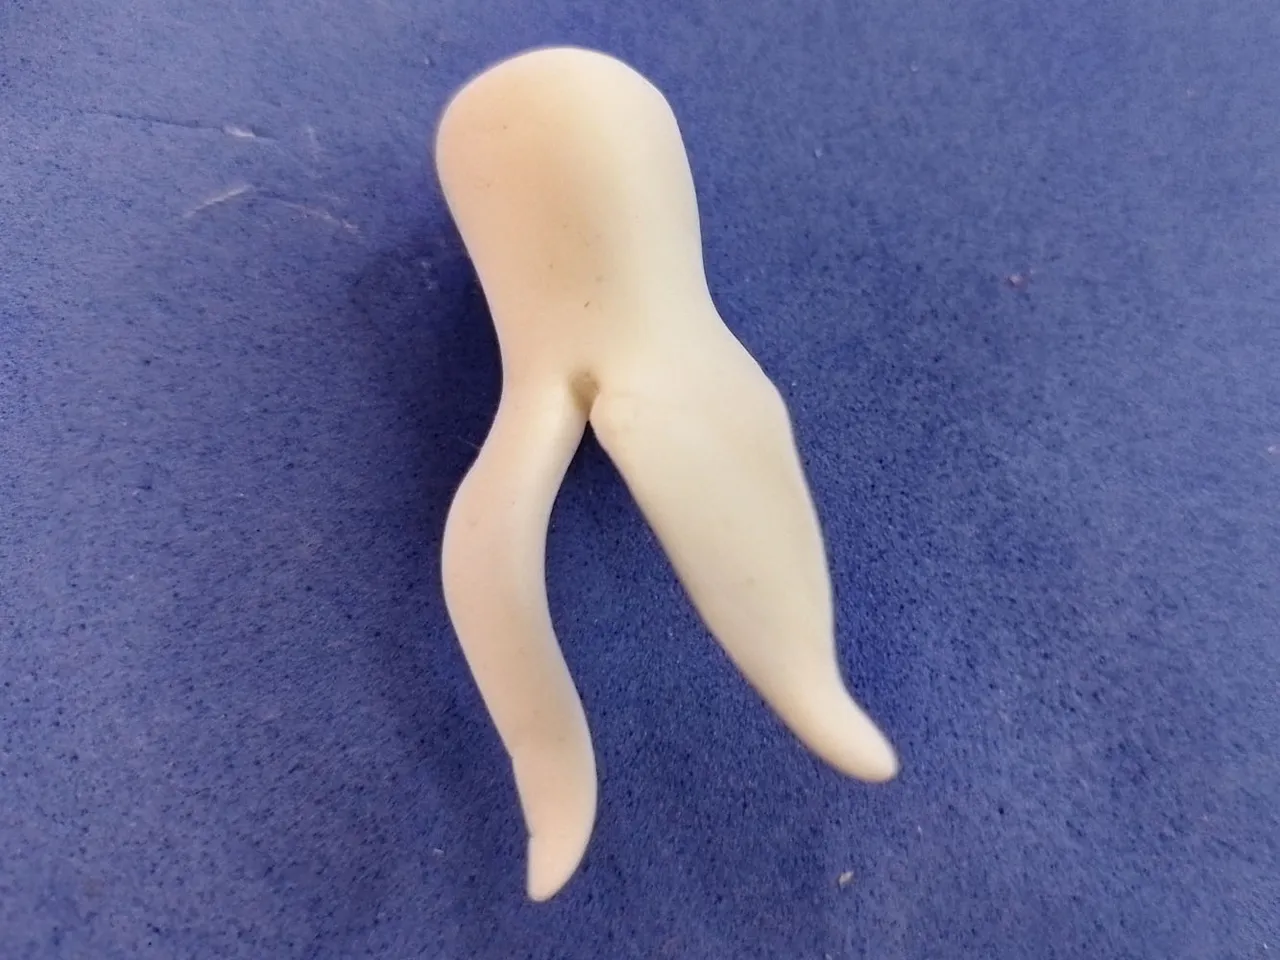
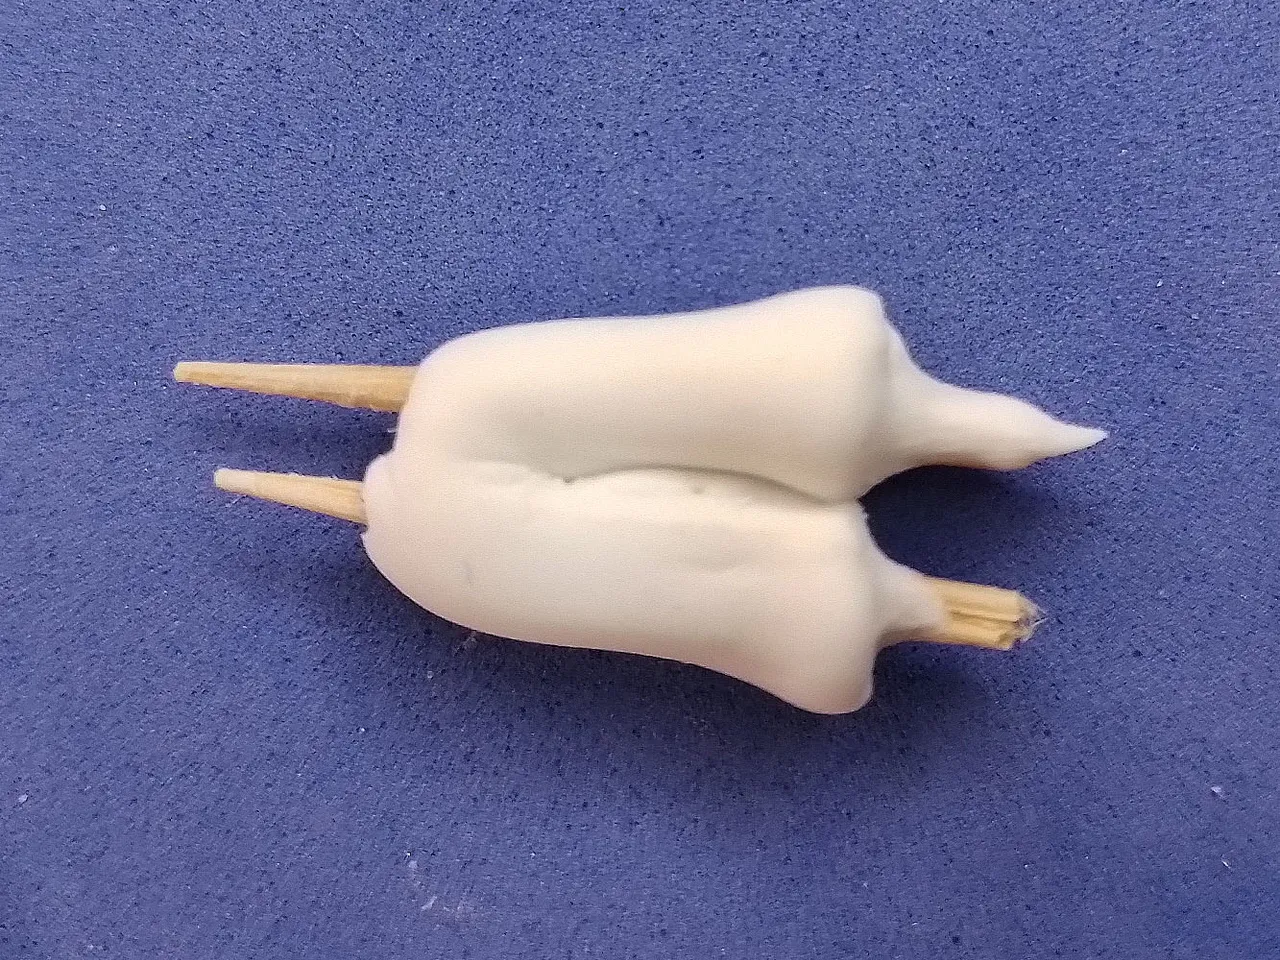
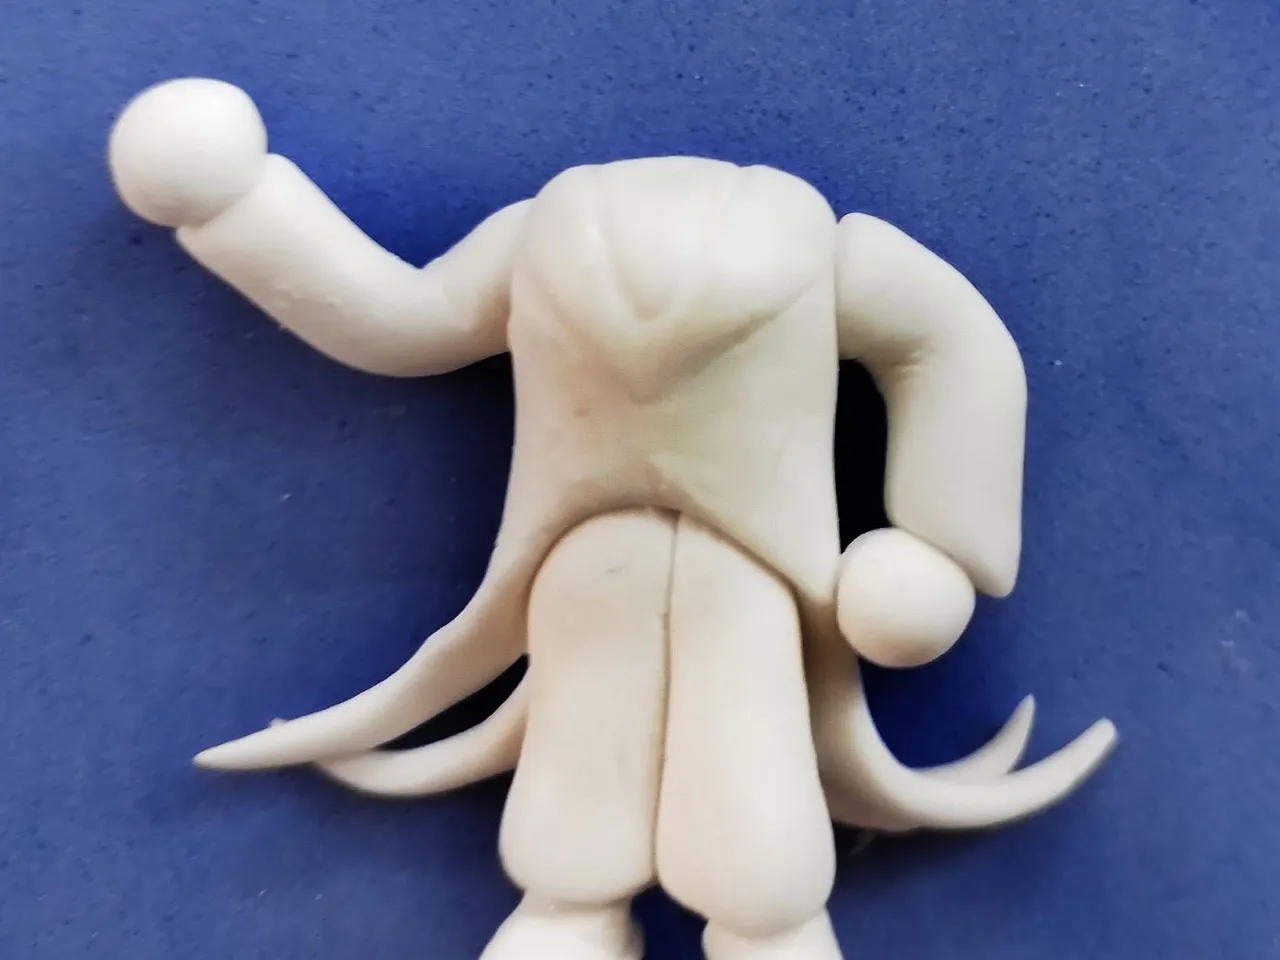
For the legs I made two small cylinders with toothpicks inside and put them in place. I did the same with the arms, only I used wires as support instead of toothpicks. On the hands I placed two spheres of flexible dough.
Para las piernas hice dos pequeños cilindros con palillos dentro y los coloqué en su lugar. De igual manera hice con los brazos, solo que usé alambres como soporte en lugar de palillos. En las manos le coloqué dos esferas de masa flexible.
 |  |
|---|
Once the jack body was dry, I started to paint it. It should be noted that you have to use at least two coats of paint to get a good result.
You must wait until both the figure and the paint itself are dry for each process. If the figure is painted while it is wet, cracks will appear. On the other hand, if a second coat of paint is applied while the first coat is still wet, you run the risk of knocking off the paint from the first coat.
Una vez que estuvo seco el cuerpo de jack, comencé a pintarlo. Cabe destacar que hay que usar mínimo dos capas de pintura para que quede bien.
Se debe esperar que tanto la figura como la propia pintura esten secas para cada proceso. Si se pinta la figura mientras esta está húmeda, aparecerán grietas. Por otra parte, si se punta una segunda capa de pintura mientras la primera capa está húmeda todavía, se corre el riesgo de tumbar la pintura de la primera capa.
 |  |
|---|
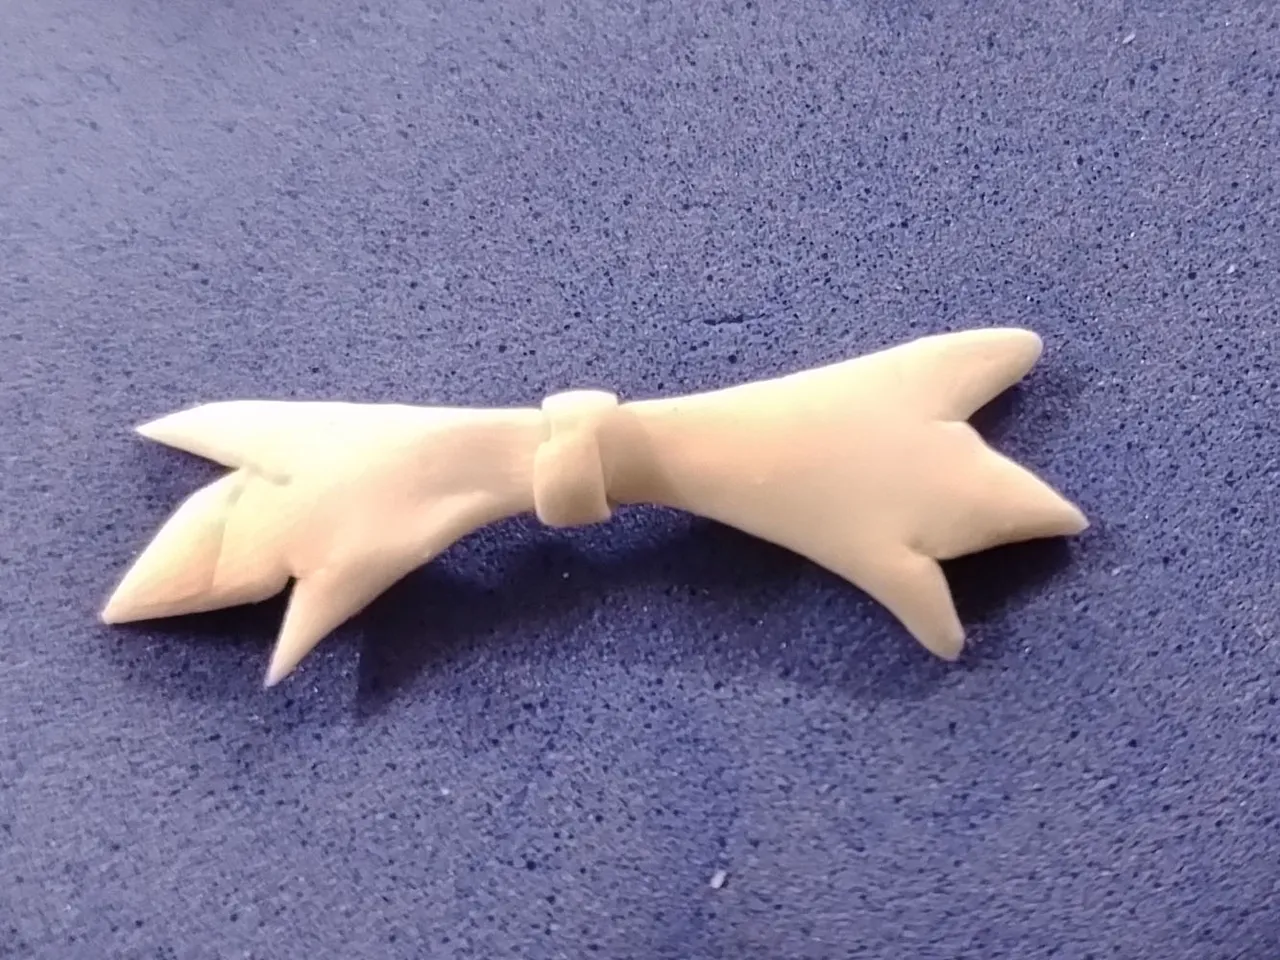
Another detail that Jack has on his suit is a bow with similar points to the ones he has on the bottom of his suit. I made this one with only 3 triangles.
To make it first cut a completely flat base triangle out of flexible dough, as if it were fabric. Then, with a scissors, cut out the wide part, like paper, to leave three triangles on that side.
You should make a couple of these and then join them with a little more flexible dough, so that the character's bow is complete.
Otro detalle que jack tiene en su traje es un moño con puntas similares a las que tiene en la parte baja de su traje. Yo le hice esta solo con 3 triángulos.
Para hacerla primero se corta un triángulo base completamente plano de masa flexible, como si fuera tela. Luego, con una tijera, se recortan la parte ancha, cual papel, para dejar tres triángulos de ese lado.
Se deben hacer un par de estos y luego unirlos con un poco más de masa flexible, para que quede completo el moño del personaje.
 |  |
|---|
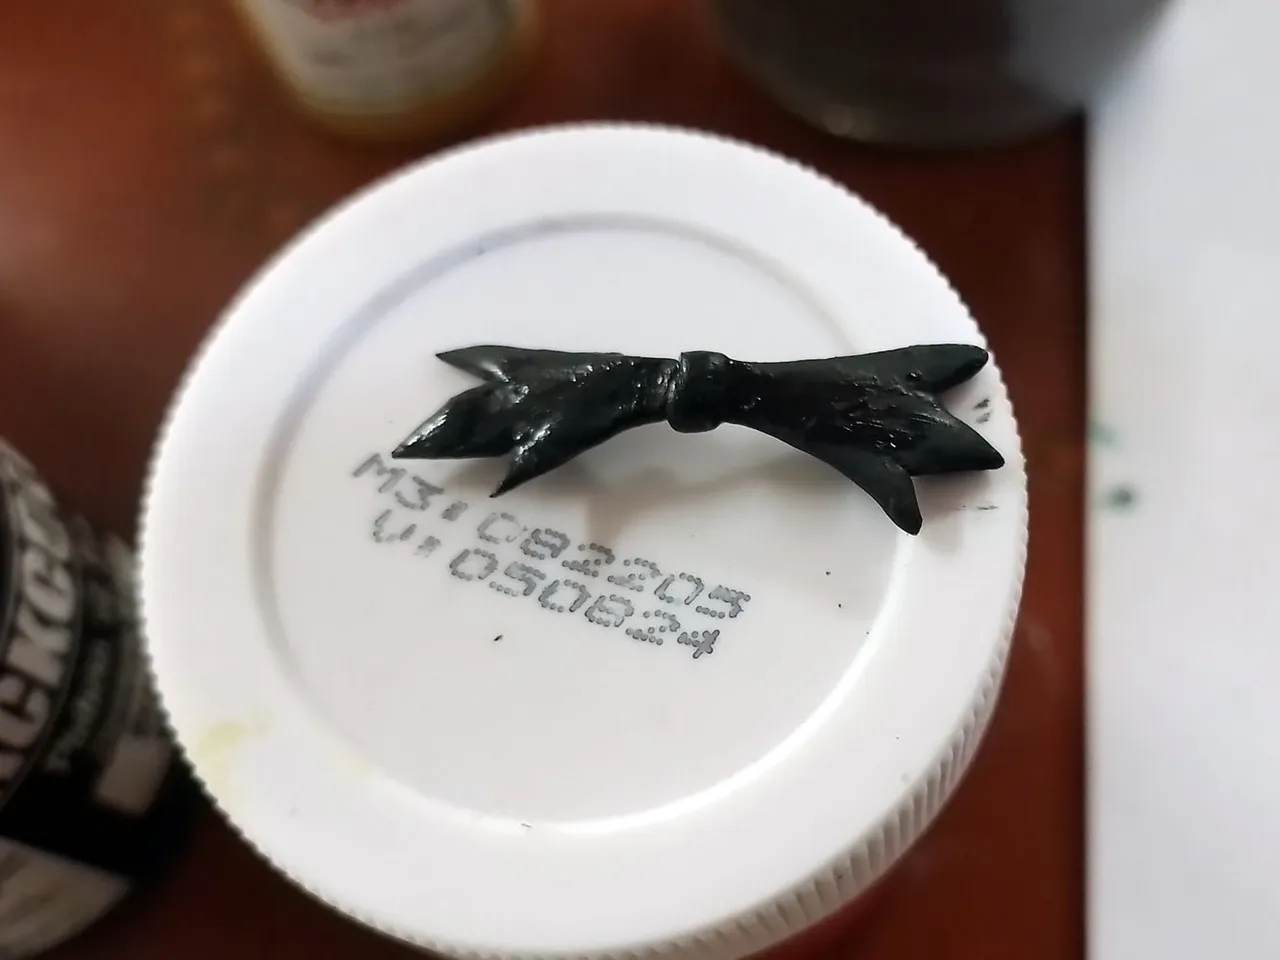
The last thing to do, after it has dried, is to paint it black as well and let it dry very well before gluing it on the whole piece.
Lo último que se debe hacer, después de que haya secado,es pintarlo de negro también y dejar que seque muy bien antes de pegarlo en la pieza completa.
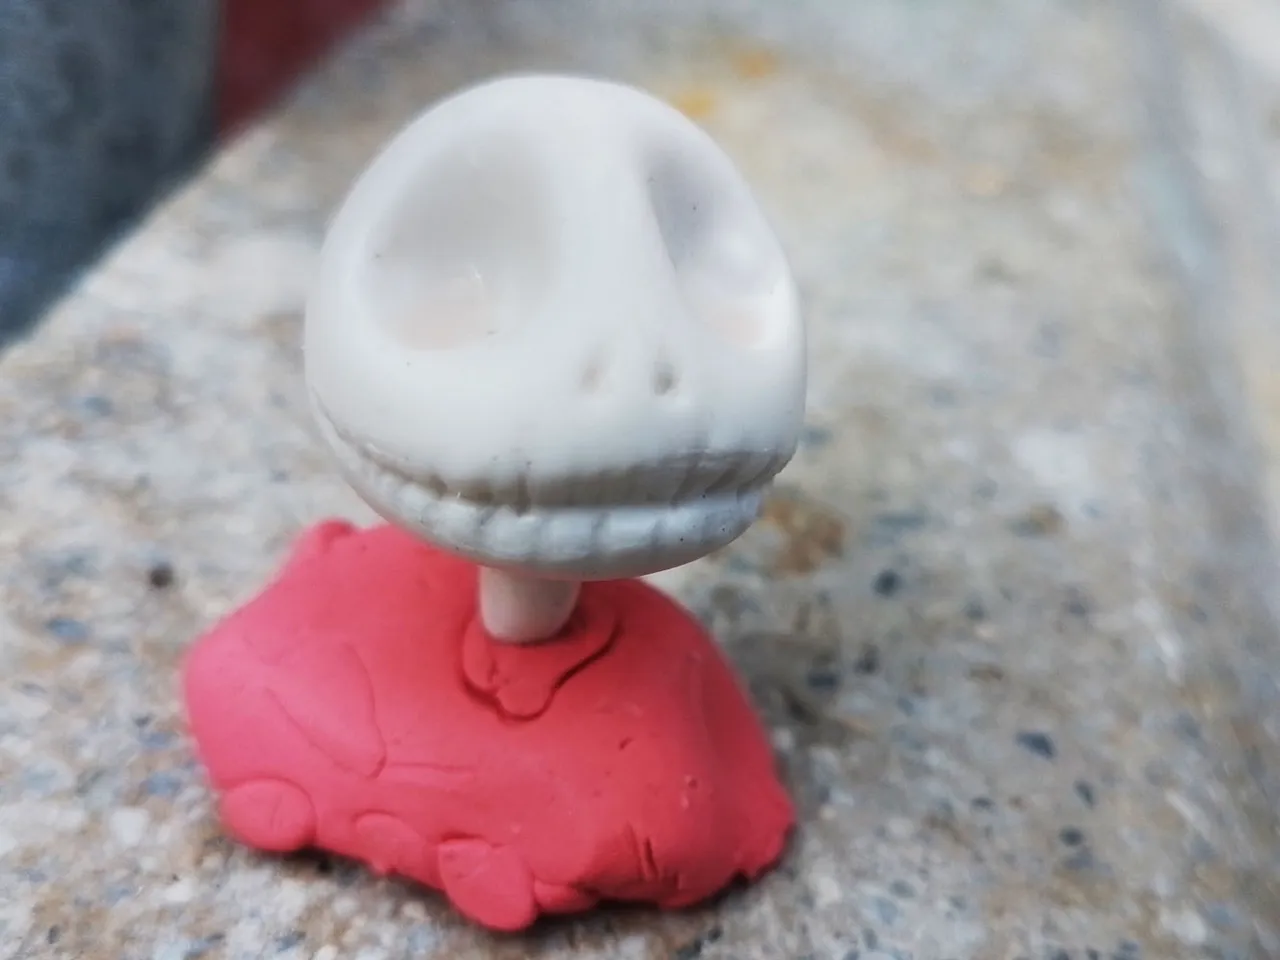
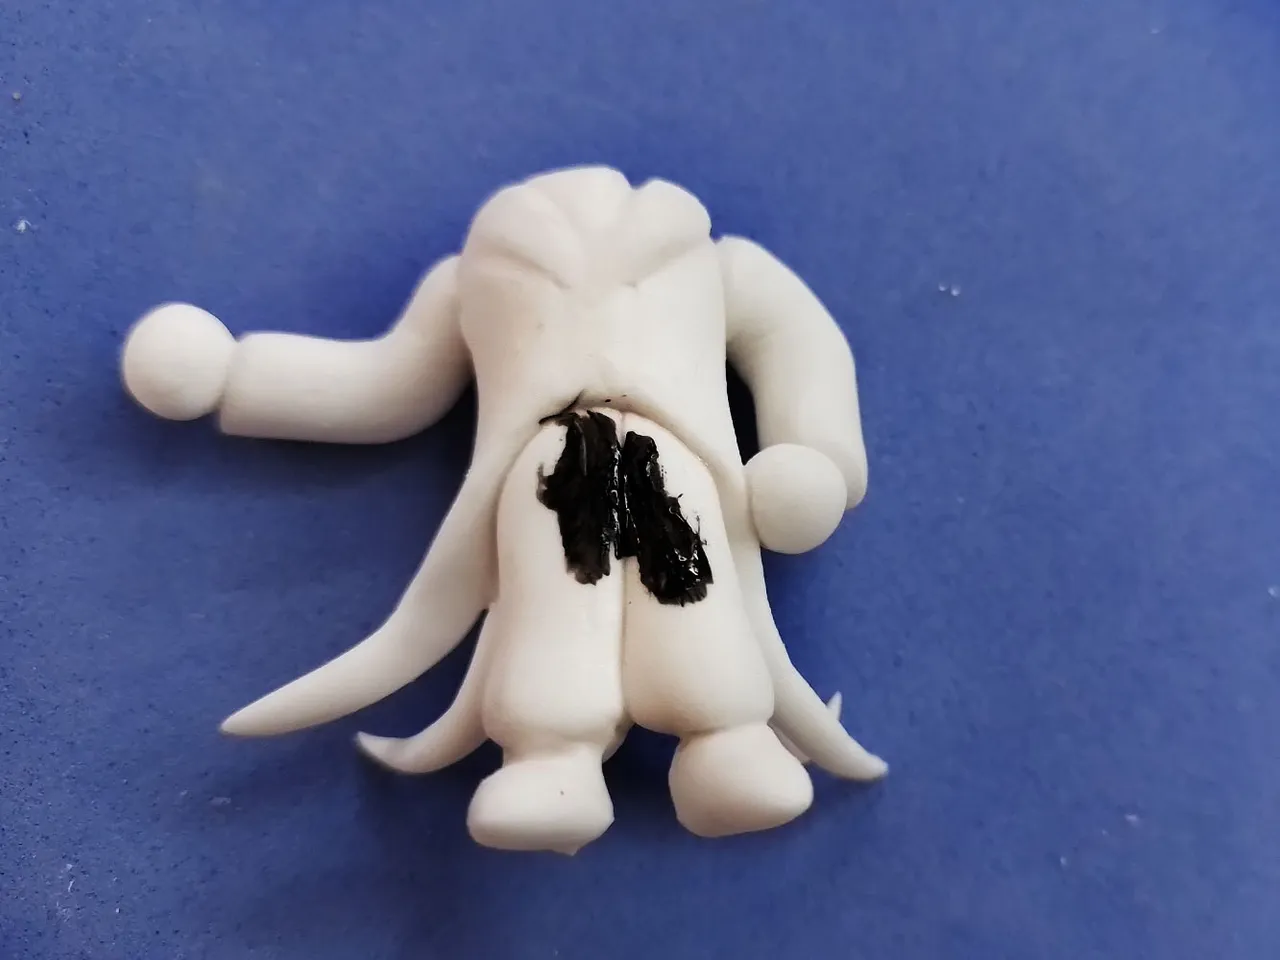
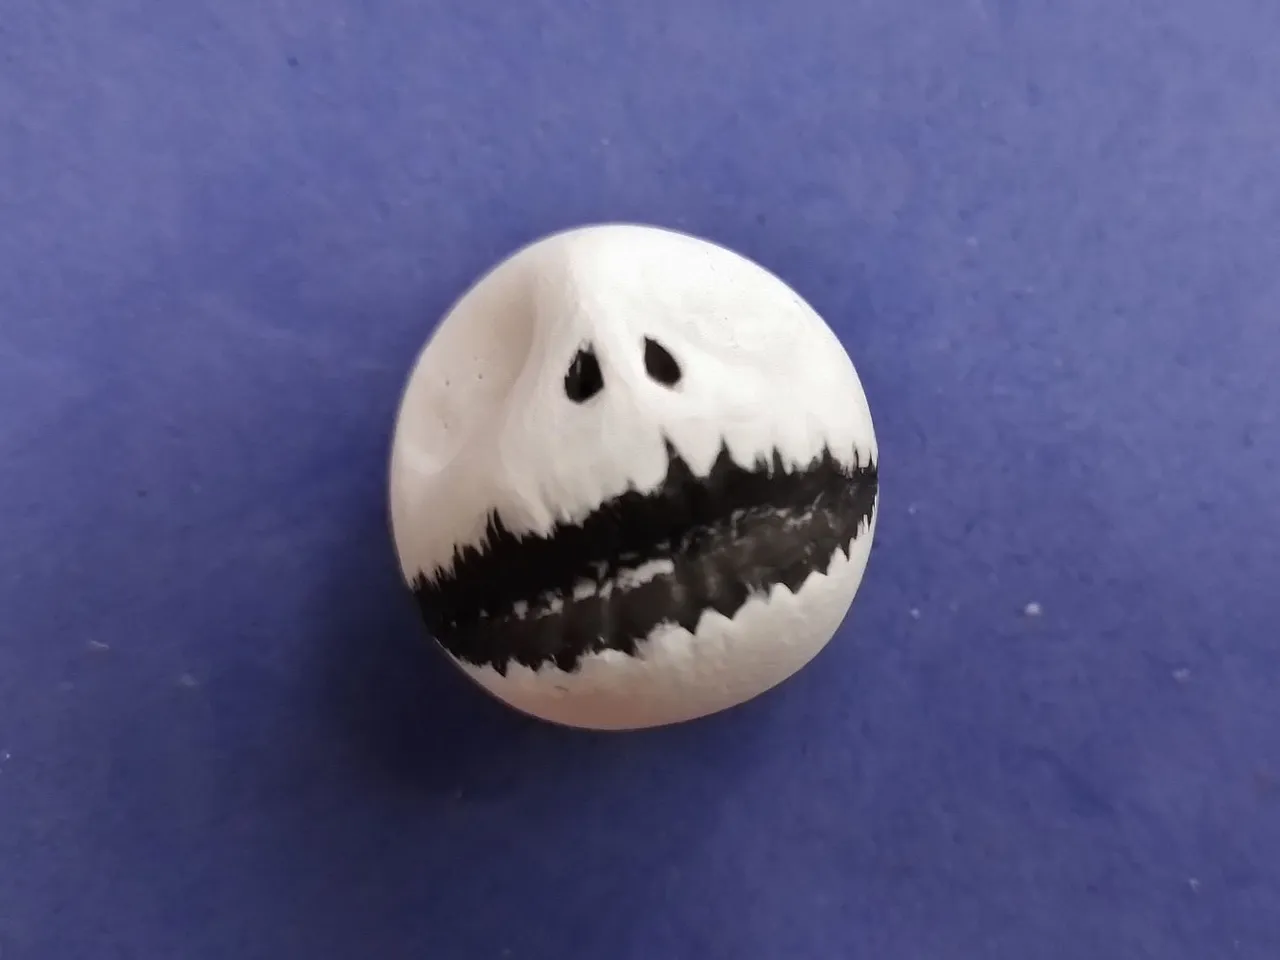
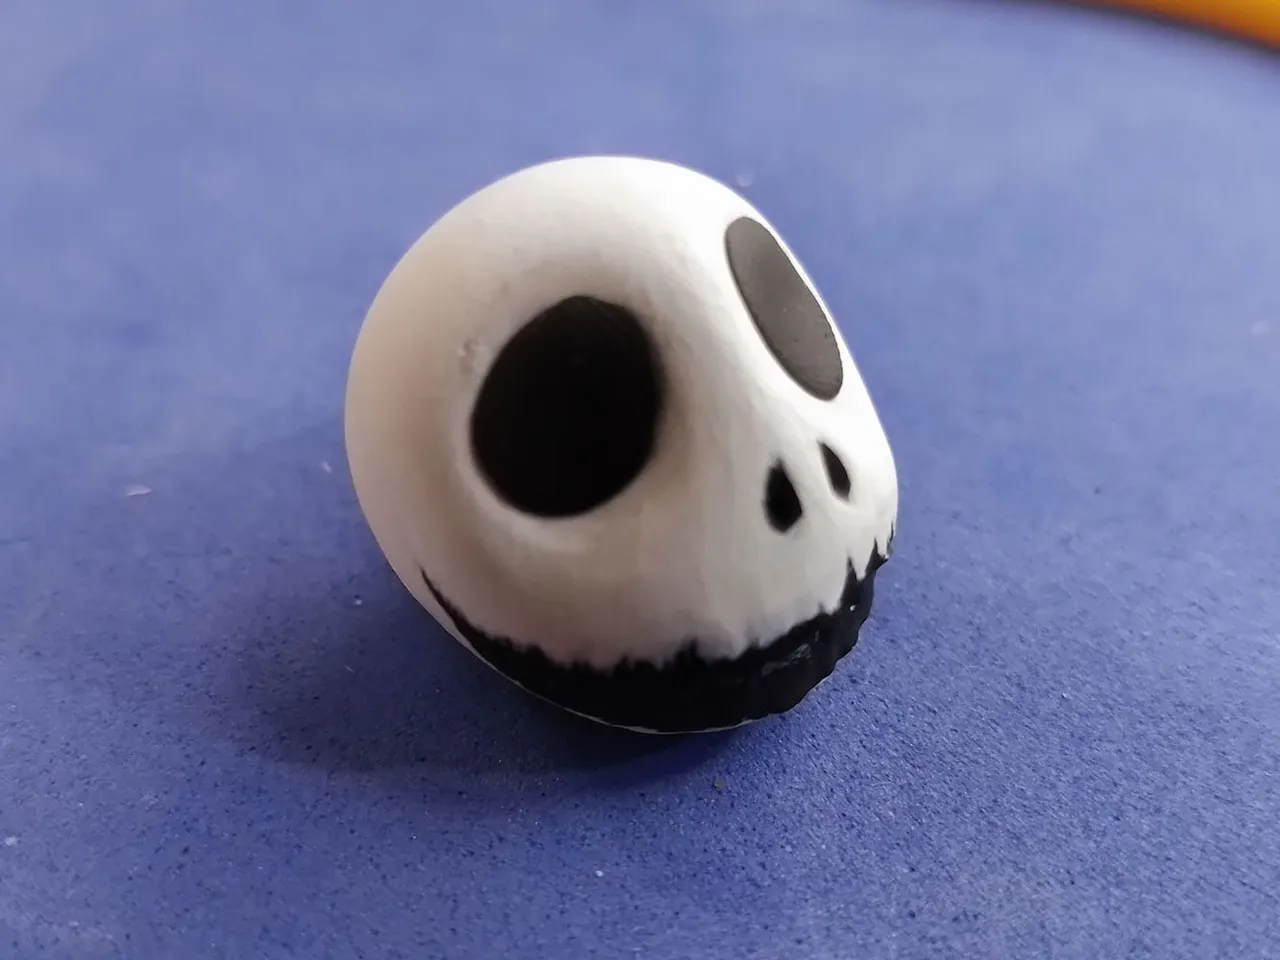
Time to paint Jack's face. He's a skull, so you pretty much only have to paint his mouth, nostrils and eyes. In this case I didn't paint the eyes, but put two black flexible dough tortillas in their place.
Below you can see pictures of the process.
Hora de pintar la cara de Jack. Es una calavera, así que prácticamente hay que pintar solamente su boca, los orificios de su nariz y sus ojos. En este caso los ojos no los pinté, sino que coloqué dos tortillas de masa flexible negra en su lugar.
A continuación pueden ver imágenes del proceso.
 |  |  |
|---|
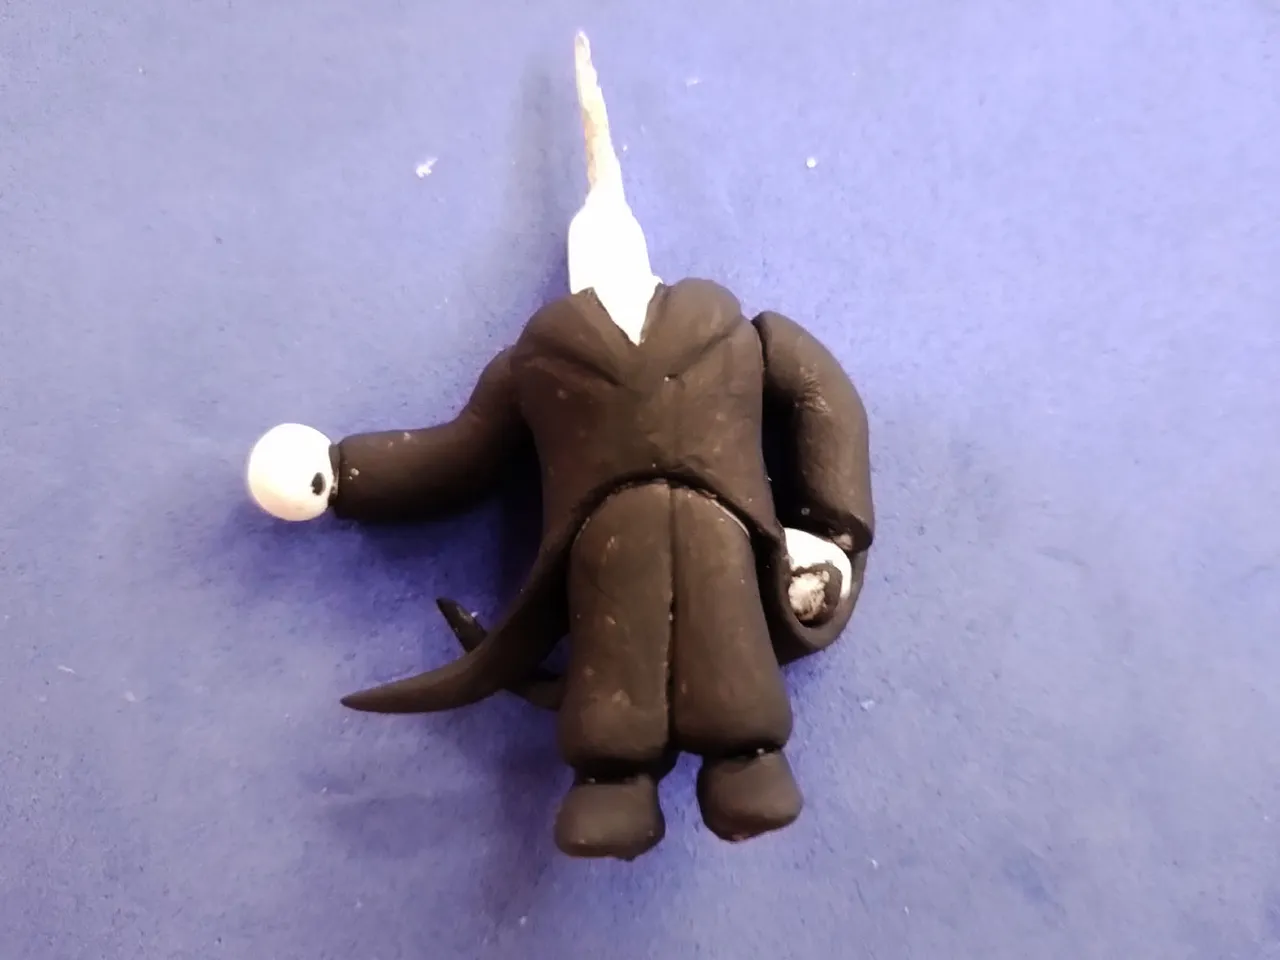
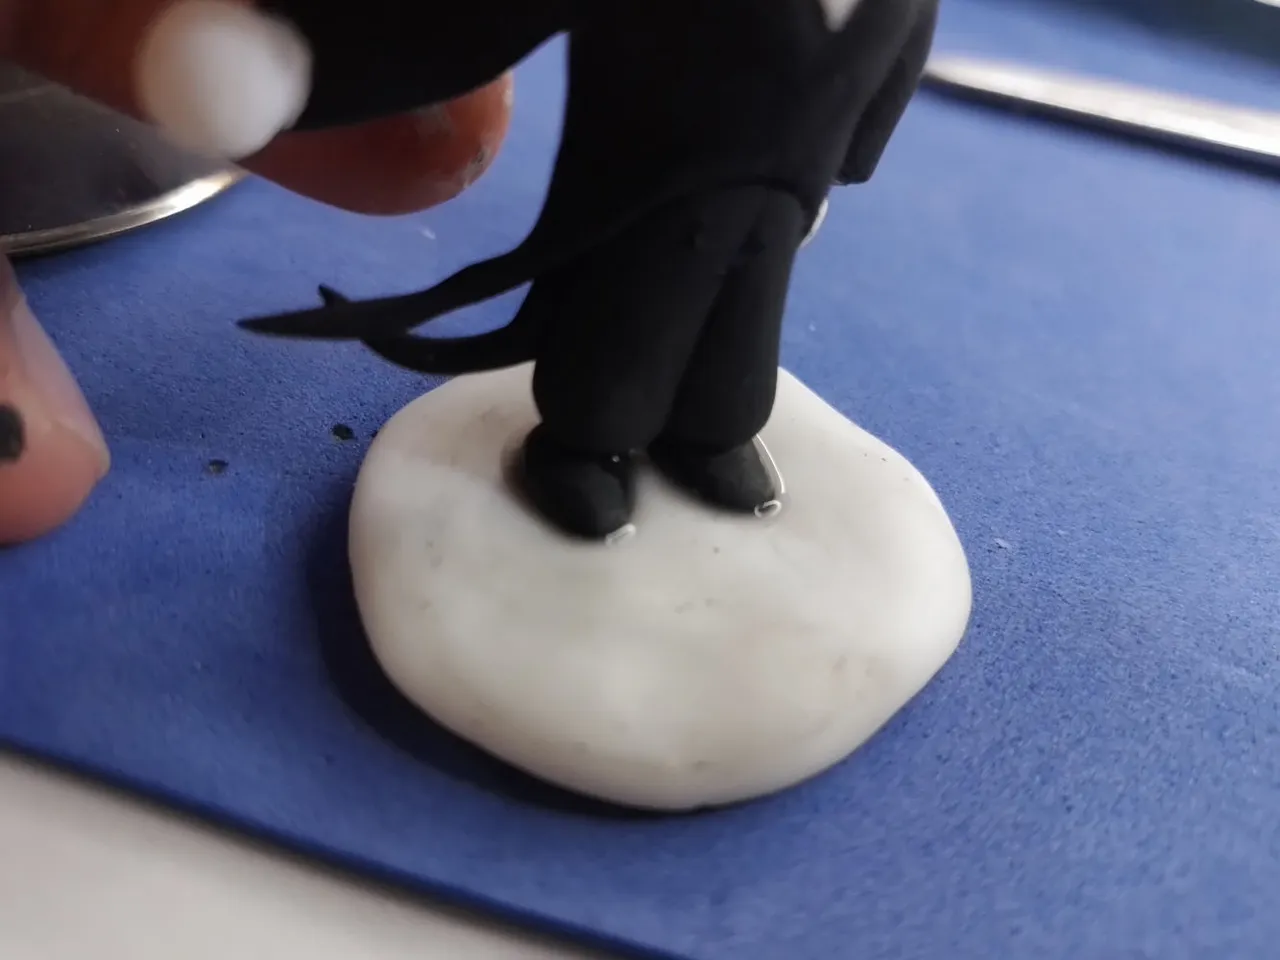
Once the skull is finished, all the pieces are joined together: the head, the neck and the body.
Una vez terminada la calavera, se unen todas las piezas: la cabeza, el cuello y el cuerpo.

It is also necessary to place a base. In this case I just flattened a sphere of flexible dough and fixed Jack's body on it with glue, while the dough was still fresh.
También hay que colocarle una base, en este caso solo aplasté una esfera de masa flexible y sobre esta fijé el cuerpo de Jack con pegamento, mientras la masa aún estaba fresca.
 |  |
|---|
Do not forget also to place the character's bow, this can be fixed with glue or with the same flexible dough.
No olviden también colocar el moño del personaje, este se puede fijar con pegamento o con la misma masa flexible.

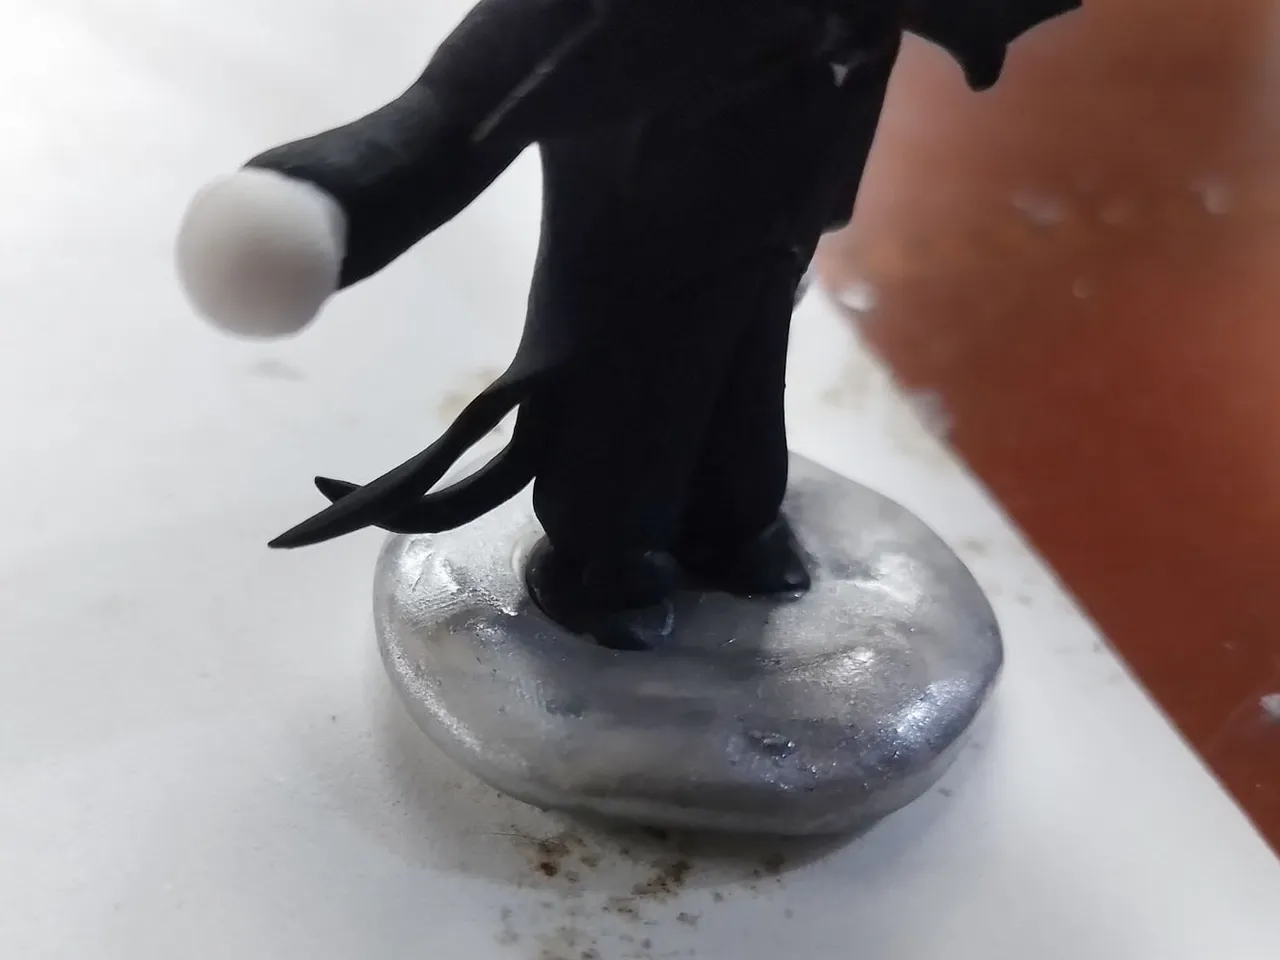
As a last detail, you can paint the base or leave it in its original color. I personally painted it with silver mixed with water, to give it a metallic effect, but not to stand out too much.
Ya como último detalle, pueden pintar la base o dejarla de su color original. Yo personalmente la pinté con plateado mezclado con agua, para darle un efecto metálico, pero que no resalte demasiado.
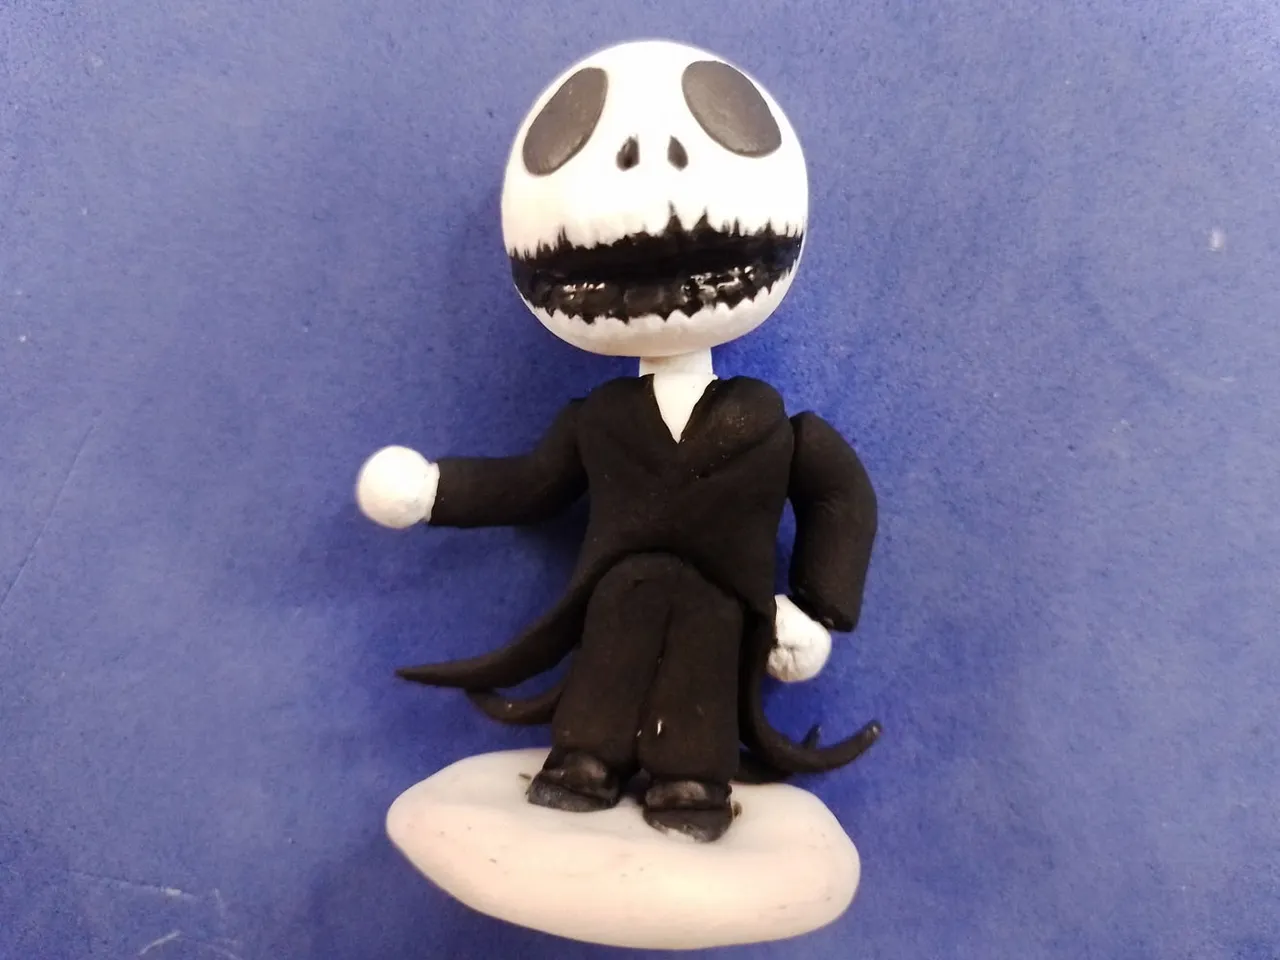
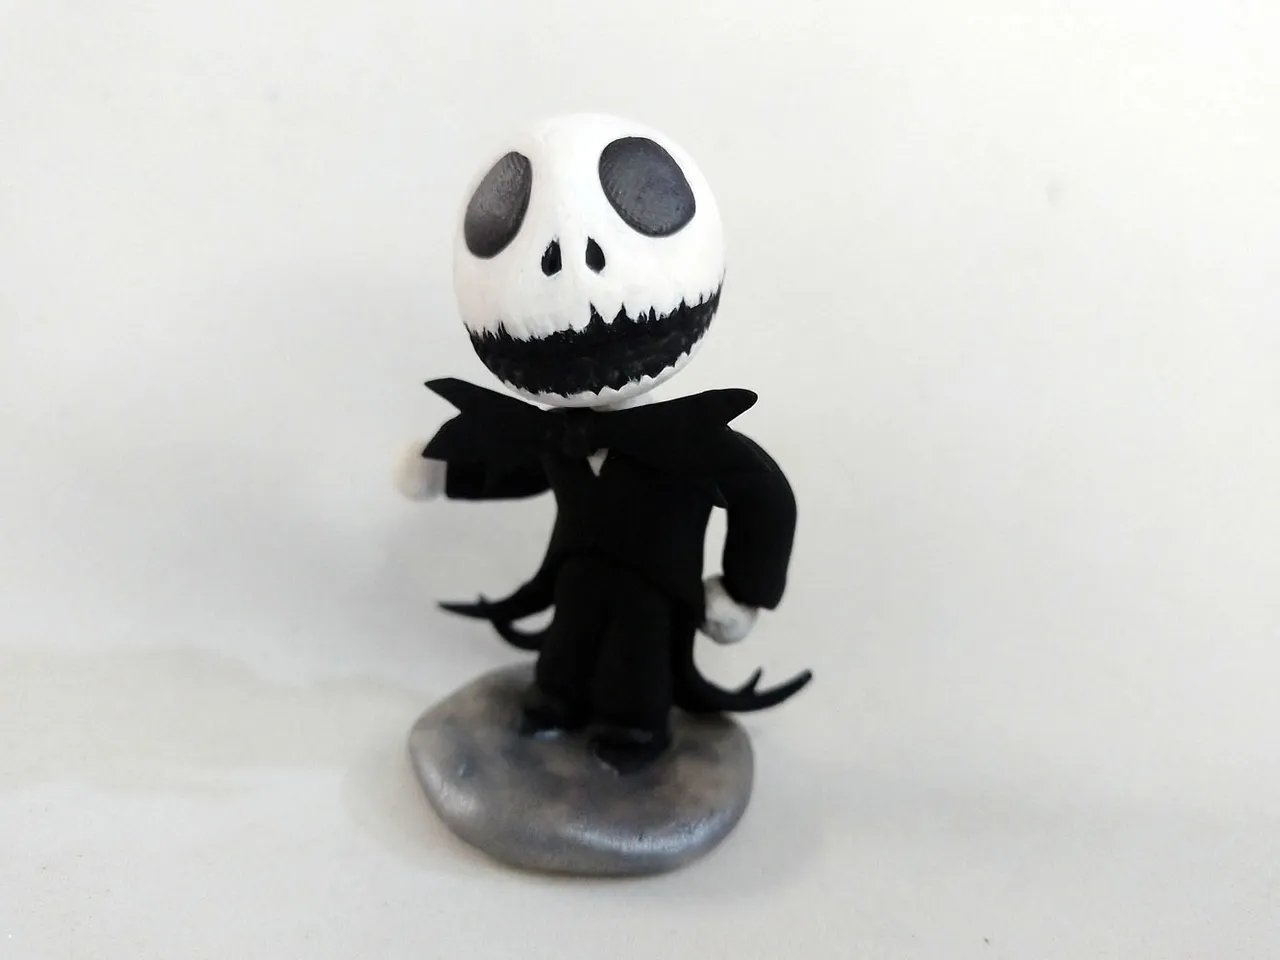
This way the figurine was finished. I leave below a series of photographs of the final result:
De esta manera la figurita quedó terminada. Dejo a continuación una serie de fotografías del resultado final:


Well friends, that's all for now, what do you think of this little sculpture of Jack Skellington? I invite you to leave your opinions below in the comments, as always I will be happy to read them.
Thank you very much for visiting and reading my publication. With nothing more to add, I'll say goodbye then....
See you next time!
Bien amigos, esto ha sido todo por ahora. ¿Qué les ha parecido esta pequeña escultura de Jack Skellington? Los invito a dejar sus opiniones abajo en los comentarios, como siempre estaré encantado de leerlos.
Les agradezco mucho por visitar y leer mi publicación. Sin más que agregar, me despido entonces...¡Hasta la próxima!