Español
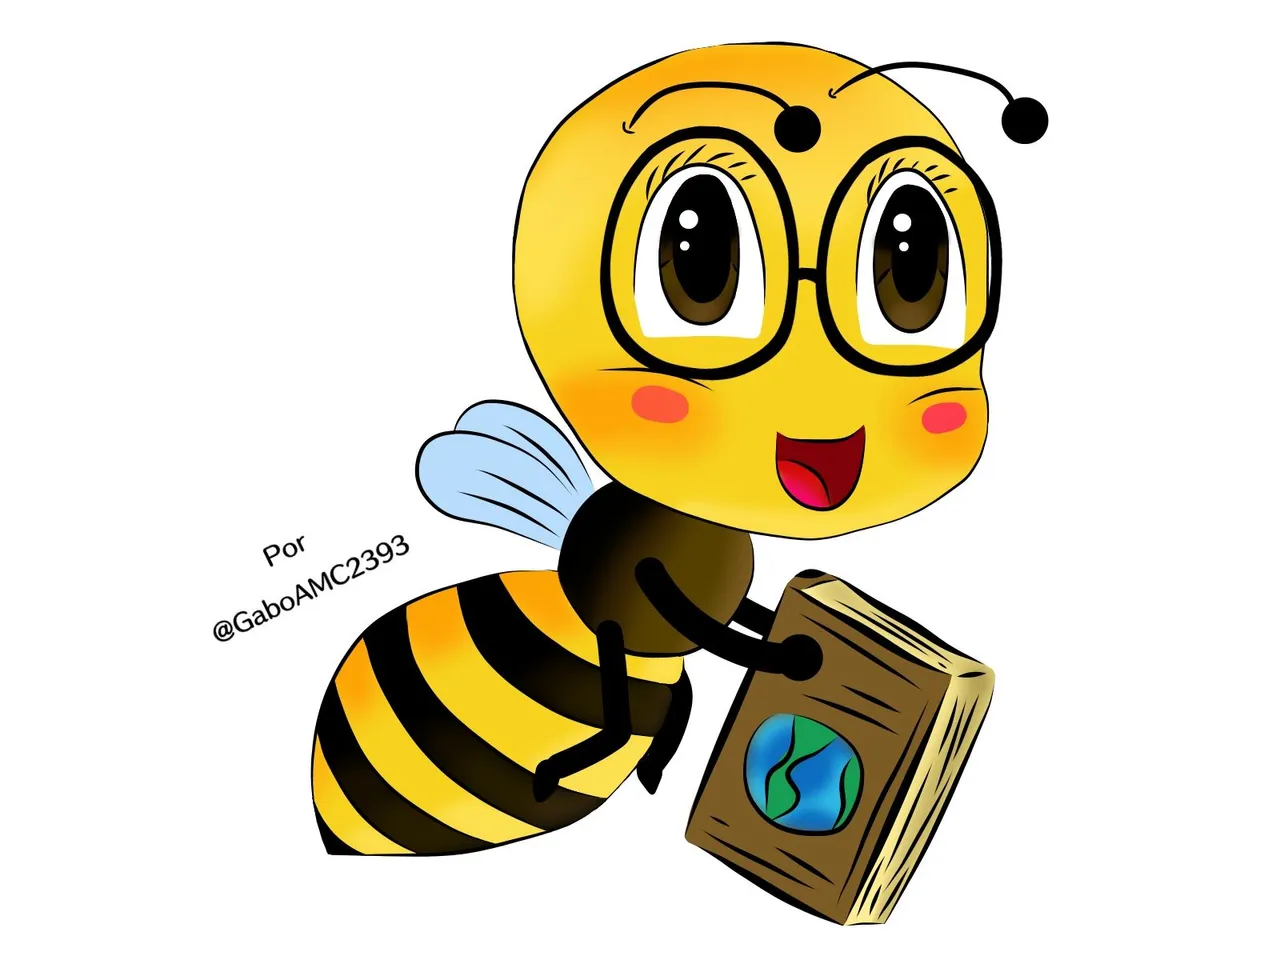
Como muchos saben, me encanta dibujar. Hace poco me encargaron hacer una abejita y no dudé en sentarme en hacer una a ver que tal quedaba.
La verdad que me gustó bastante el dibujo porque no pensé que me quedarían tan adorable, así que me gustaría compartir con ustedes el paso a paso de este dibujo. Espero que les guste.
Debo mencionar que este dibujo es para un proyecto de aquí de hive, lo que le da mas valor al dibujo, así que hice todo lo posible por darle buenos detalles y hacerlo de tal manera que fuese agradable y le gustase a todos los que la vieran.
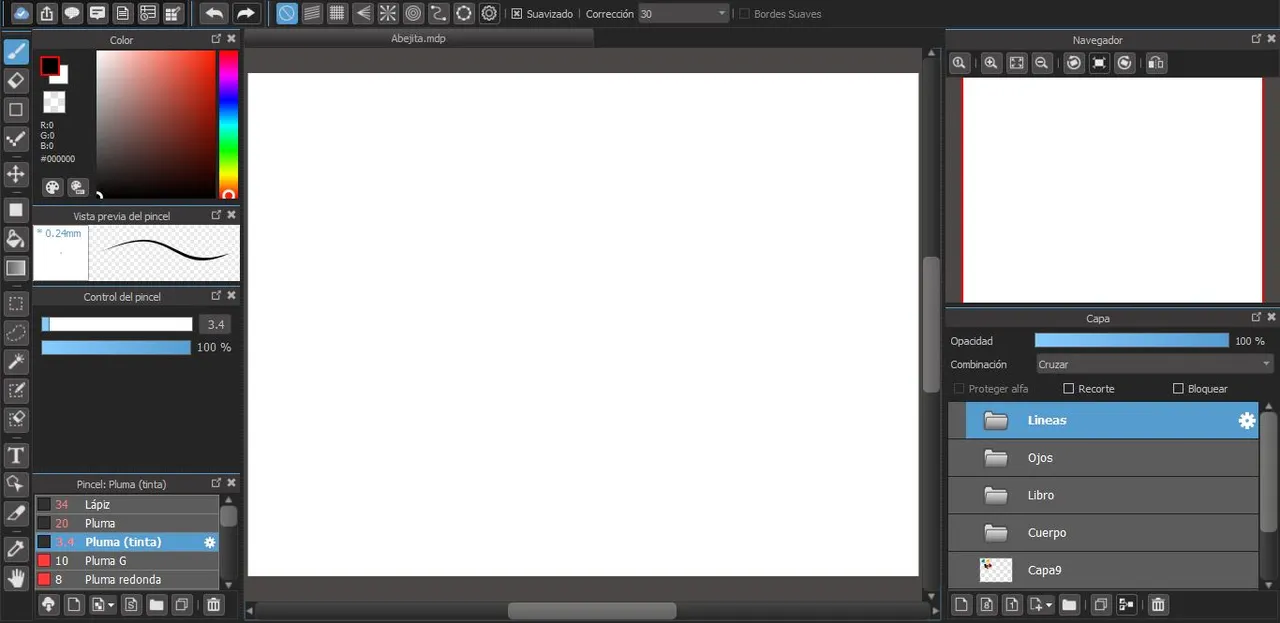
Lo primero que hice fue preparar el espacio de trabajo. Como siempre, hice este dibujo en Medibang Paint Pro. Aunque me recomendaron otro programa para dibujar, incluso desde el cel, decidí ir por lo seguro y dejar la experimentación para otro día...
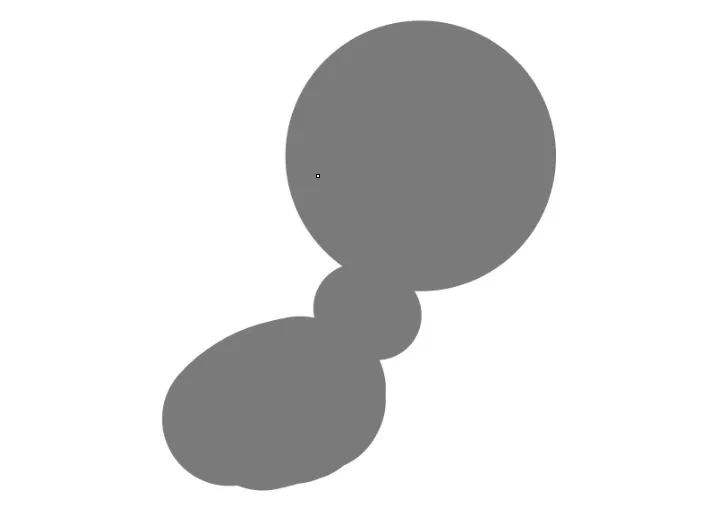
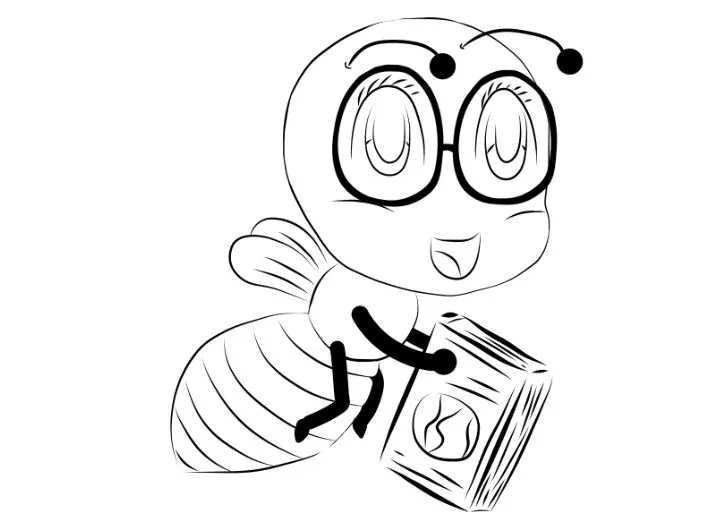
Aquí comencé con el dibujito. Lo primero que hice fue crear esa suerte de silueta, que me sirviera de guía para lo que planeaba hacer. A la derecha está las líneas que hice para luego pintarlas.
 |  |
|---|
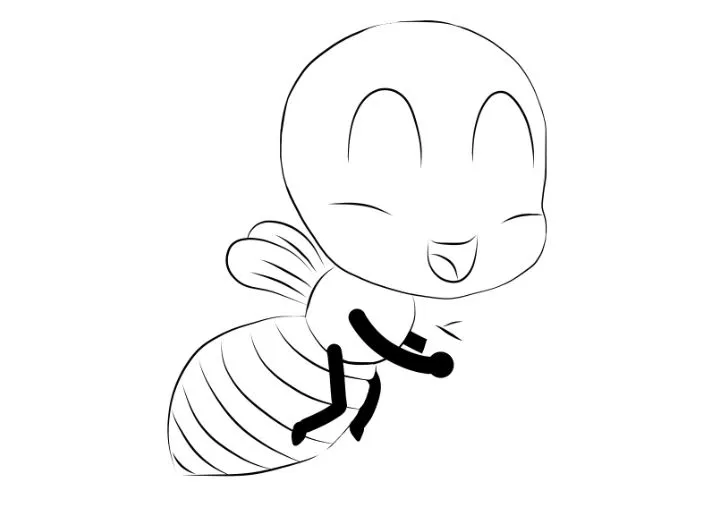
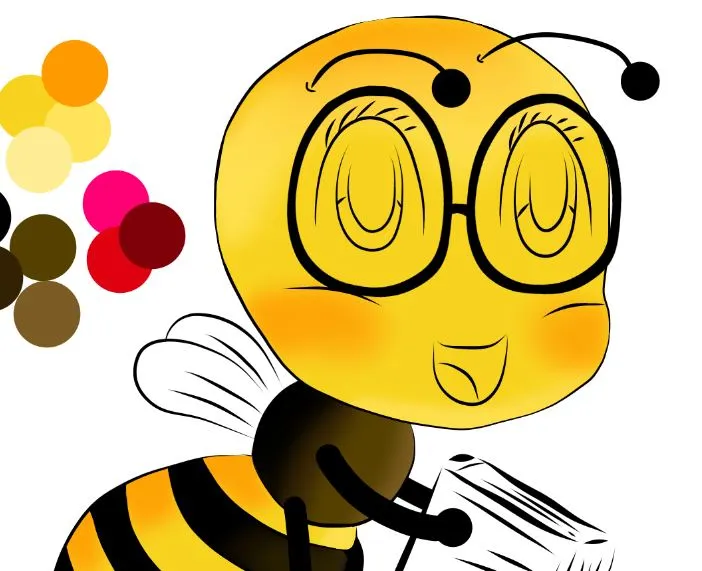
Como pueden ver, es un dibujo bastante sencillo, estilo chibi, con facciones y rasgos que pueden agradar a muchos. Le hice también unos anteojos y un libro, pues era una de las cosas con las que guarda relación lo que me encargaron.
Hora de pintar. ¿Qué paletas de colores usar? Pues bien, los colores habituales de una abeja. Uno podría decir que para que quede bien solo se necesita el negro y amarillo pollito, pero no.
Para este dibujo usé colores como mostaza, un color parecido a beige, amarillo claro y anaranjado. Para otros detalles como la boca, el rosado, carmesí y rojo. Para otros colores pueden ver la imagen a continuación:
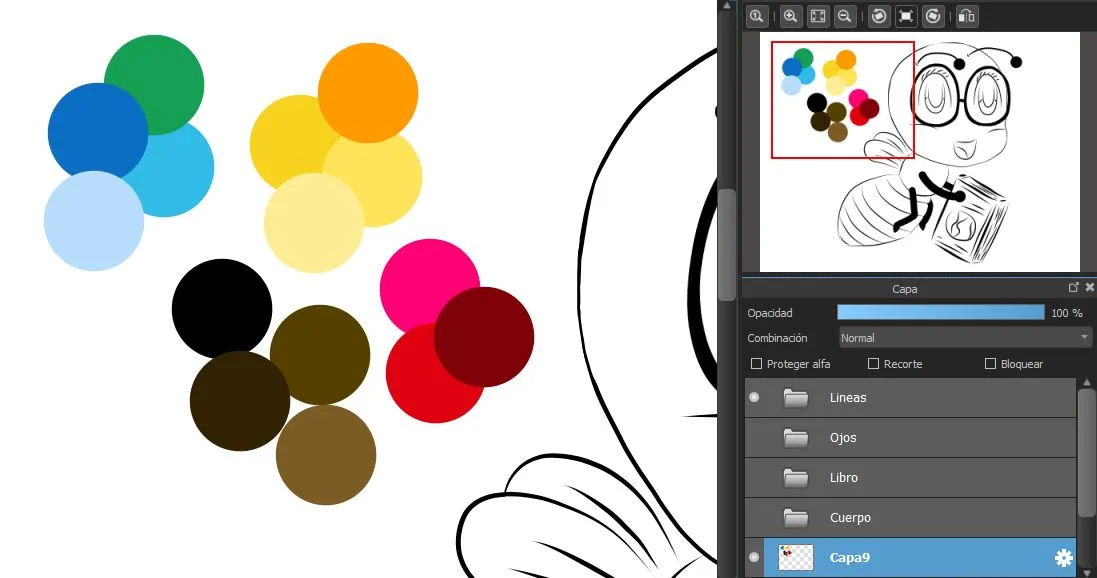
El color que usé como base fue el mostaza, los otros colores de esta escala la usaría como sombra, como les mostraré más adelante.
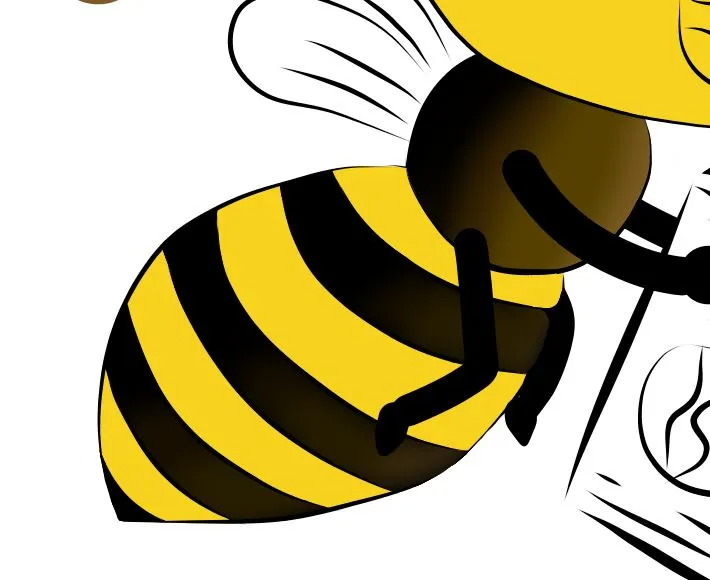
El negro lo usé para las líneas del trasero de la abeja y el cuerpo.
 |  |
|---|
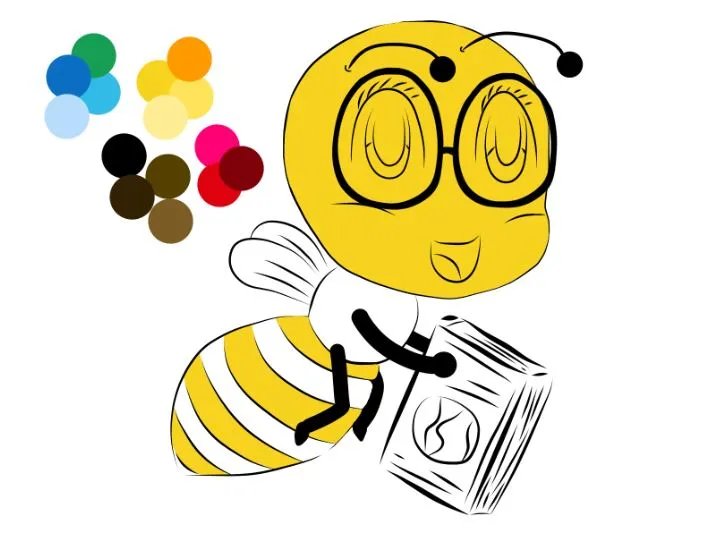
Como la idea no es hacer un dibujo plano, sino uno que tenga profundidad y sombras, usé los otros colores para crear ese efecto de sombras en todo el cuerpo de la figura.
A la izquierda pueden ver como usé las distintas tonalidades de marrón para crear ese efecto curvilíneo a las líneas negras del trasero de la abeja.
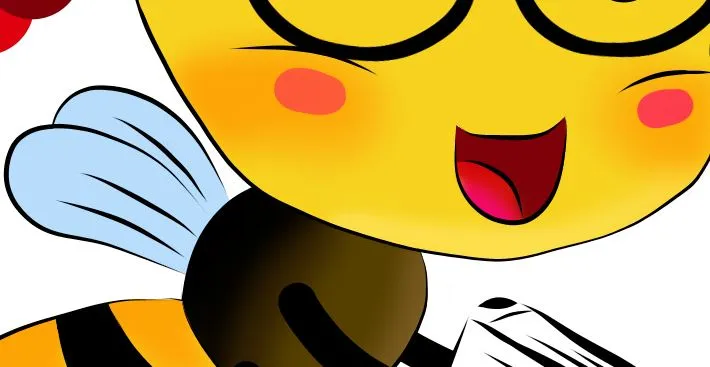
A la derecha también pueden ver las sombras y otras tonalidades que apliqué al rostro de la abejita.
 |  |
|---|
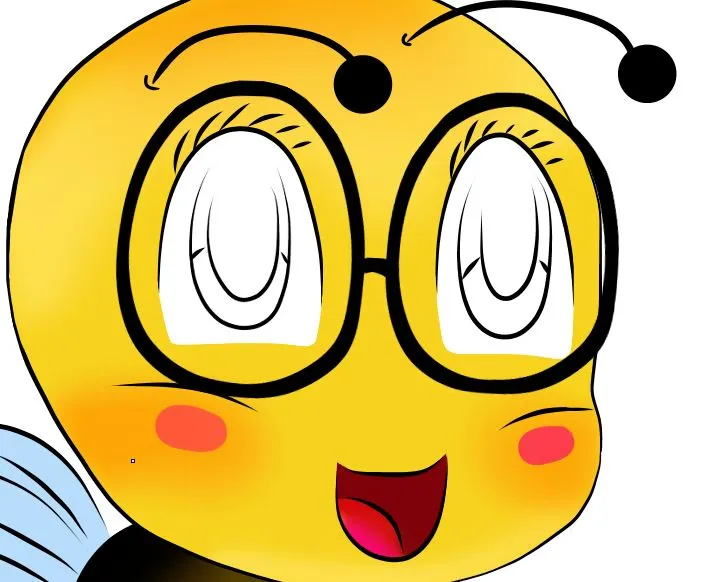
En las mejillas apliqué un poco de naranja para ruborizar las mejillas y les dibujé dos puntos rosados para enfatizar el rubor.
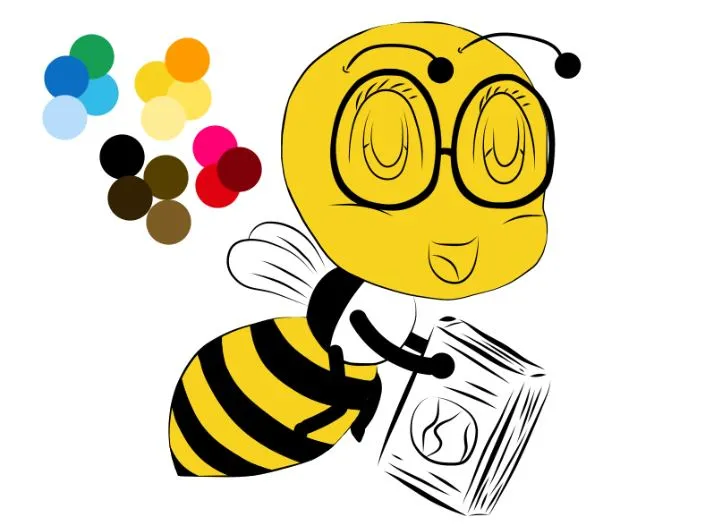
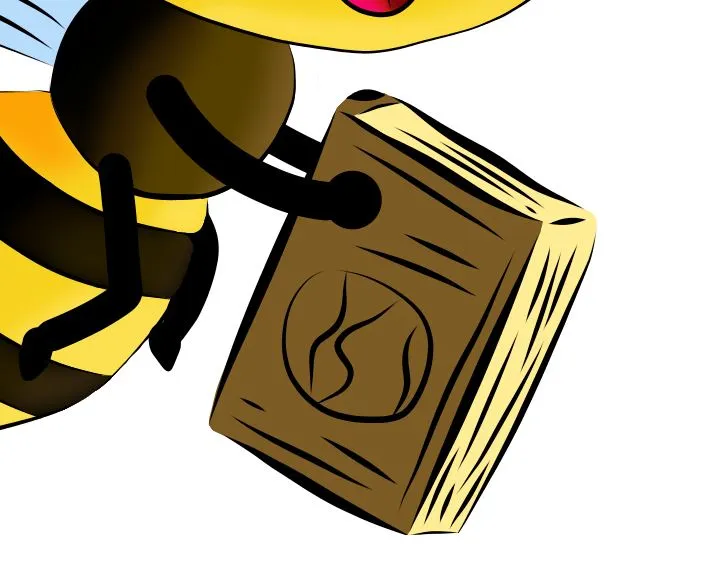
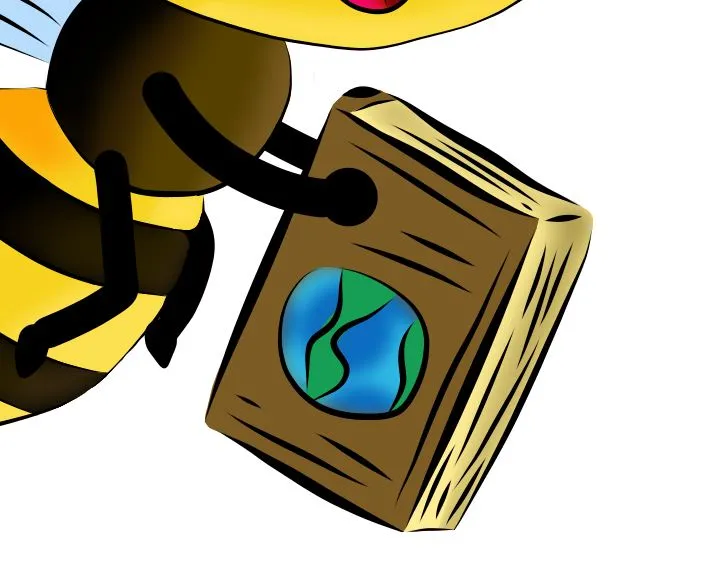
Otro detalle que agregué al dibujo fue el de un libro, porque guarda mucha relación con lo que quería hacer. Le apliqué como color base el marrrón, para portada y lomo del libro, además de las hojas. Hice un dibujito de una tierra en el centro.
 |  |
|---|
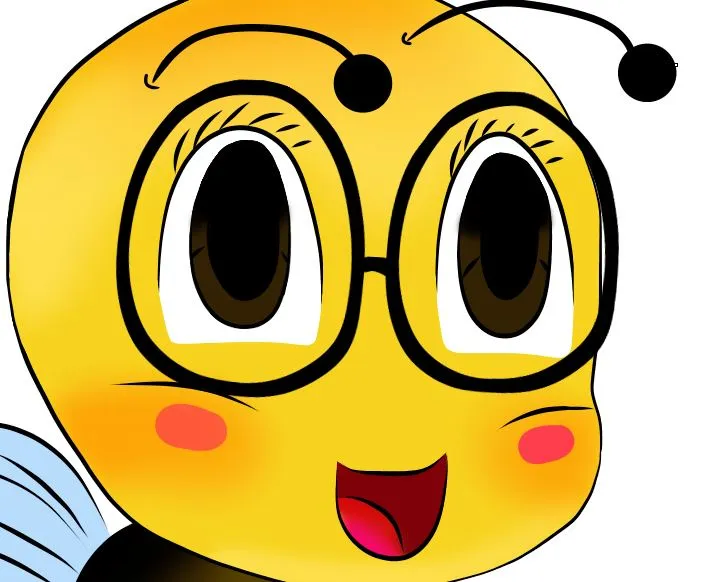
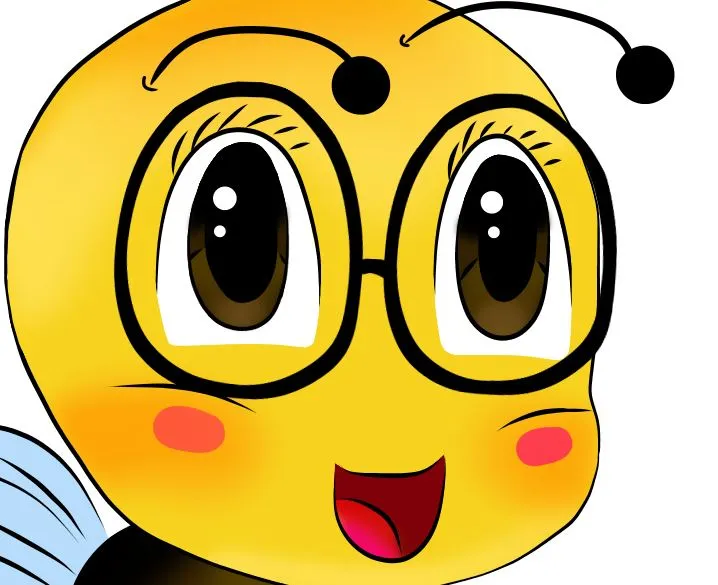
Finalmente, dicen que los ojos son el espejo del alma, así que los ojos de esta abejita deberían expresar ternura y es algo que quise hacer. Así que los hice grandes y brinllantes, cual dibujo de un anime. A continuación pueden ver el proceso de la realización de los ojos.
 |  |  |
|---|
De esta manera quedó terminada esta adorable abejita. Aunque planeaba grabar el proceso en video, lo cierto es que no me dio tiempo de hacerlo; sin embargo, logré capturar a través de imágenes el proceso creativo.
Me gusta mucho hacer esta clase de dibujos y creo que aquí he puesto en práctica algunas cosas que he aprendido durante el tiempo que he estado practicando.
De corazón espero que les haya gustado y que aprecien todo el proceso creativo del dibujo. Los invito a dejar sus opiniones abajo en los comentarios, como siempre estaré encantado de leerlos. Sin más que agregar, me despido entonces...
¡Hasta la próxima!
English
As many of you know, I love to draw. Recently I was asked to make a little bee and I didn't hesitate to sit down and make one to see how it would look like.
The truth is that I really liked the drawing because I didn't think it would look so adorable, so I would like to share with you the step by step of this drawing. I hope you like it.
I should mention that this drawing is for a project here at hive, which gives more value to the drawing, so I did my best to give it good details and make it in such a way that it would be pleasant and liked by everyone who saw it.
The first thing I did was to prepare the workspace. As usual, I did this drawing in Medibang Paint Pro. Although I was recommended another program to draw, even from my cell phone, I decided to play it safe and leave the experimentation for another day...
Here I started with the drawing. The first thing I did was to create this sort of silhouette, which served as a guide for what I planned to do. On the right are the lines I made to paint them later.
| |
|---|
As you can see, it's a pretty simple drawing, chibi style, with features and features that may please many. I also made some glasses and a book, since it was one of the things related to what I was asked for.
Time to paint. What color palettes to use? Well, the usual colors of a bee. One might say that to make it look good you only need black and chick yellow, but nope.
For this drawing I used colors like mustard, a color similar to beige, light yellow and orange. For other details like the mouth, pink, crimson and red. For other colors you can see the image below:
The color I used as a base was mustard, the other colors of this scale I would use as shadows, as I will show you later.
The black I used for the lines of the bee's backside and the body.
| |
|---|
As the idea is not to make a flat drawing, but one that has depth and shadows, I used the other colors to create that effect of shadows all over the body of the figure.
On the left you can see how I used the different shades of brown to create that curvilinear effect to the black lines of the bee's butt.
On the right you can also see the shadows and other shades I applied to the bee's face.
| |
|---|
On the cheeks I applied a little orange to blush the cheeks and drew two pink dots on them to emphasize the blush.
Another detail I added to the drawing was a book, because it is closely related to what I wanted to do. I applied brown as a base color for the cover and spine of the book, as well as the pages. I made a little drawing of an earth in the center.
| |
|---|
Finally, they say that the eyes are the mirror of the soul, so the eyes of this little bee should express tenderness and that's something I wanted to do. So I made them big and bright, like an anime drawing. Below you can see the process of making the eyes.
| | |
|---|
This is how this adorable little bee was finished. Although I planned to record the process on video, the truth is that I didn't have time to do it; however, I managed to capture the creative process through images.
I really like doing this kind of drawings and I think that here I have put into practice some things that I have learned during the time I have been practicing.
I sincerely hope you liked it and that you appreciate the whole creative process of drawing. I invite you to leave your opinions below in the comments, as always I will be happy to read them. With nothing more to add, I'll say goodbye then...
See you next time!
Traducido con DeepL
Gabo Vacaciones: a la playa con amigos
Audiorelato: El Fruto Rojo
Gabo Drawing: Rainforest