English
Greetings to all, fellow Hive members. As many of you know, I love the challenges you give me because they give me ideas of things I can do for my figure collection. Recently I was challenged to make a Spiderman so I put my hands to work and this was the result.
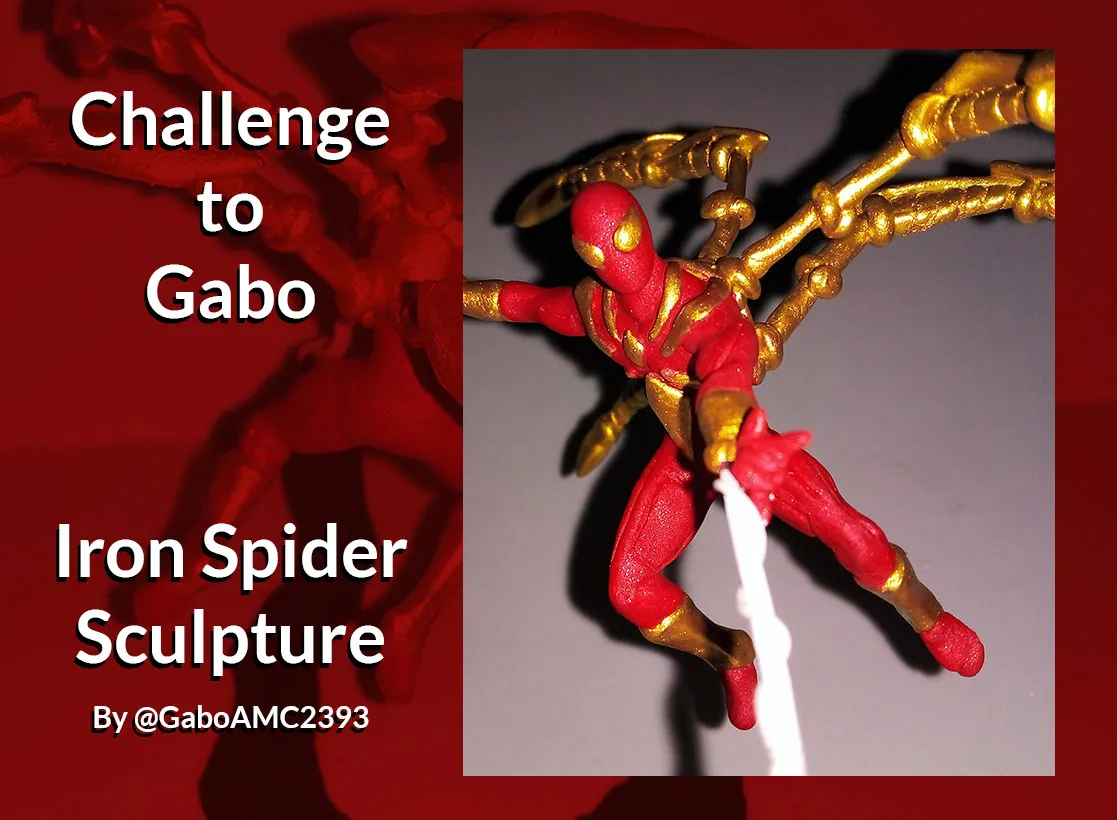
I present to you the Challenge to Gabo #8, where I will show you how I made an Iron Spider.
Español
Saludos a todos, compañeros de Hive. Como muchos saben, me encantan los retos que me hacen porque me dan ideas de cosas que puedo hacer para mi colección de figuras. Hace poco me retaron a hacer un Spiderman así que puse manos a la obra y este fue el resultado.
Les presento el Challenge to Gabo #8, donde les mostraré cómo hice un Iron Spider.
The person who gave me this challenge told me something very interesting, that I had not made any Spiderman figurine. I have made figurines of many characters and the truth is that Spiderman, thinking about it, is one of my favorite characters.
Quien me hizo este reto me comentó algo muy interesante, que no había hecho ninguna figurita de Spiderman. He hecho figuritas de muchos personajes y la verdad es que Spiderman, pensándolo bien, es uno de mis personajes favoritos.
Now there is the question, which Spiderman am I going to do? There are many to choose from, but for me it wasn't so hard to choose because one of the coolest designs of the character, at least for me, is the classic Iron Spider design, the one he used in the Civil War comics.
Ahora está la duda, ¿cual Spiderman voy a hacer? Hay muchos de donde escoger, pero para mi no fue tan difícil escoger pues uno de los diseños más geniales del personaje, al menos para mi, es el diseño de Iron Spider clásico, el que usó en los comics de la Civil War.
 |  |
|---|
Step by step
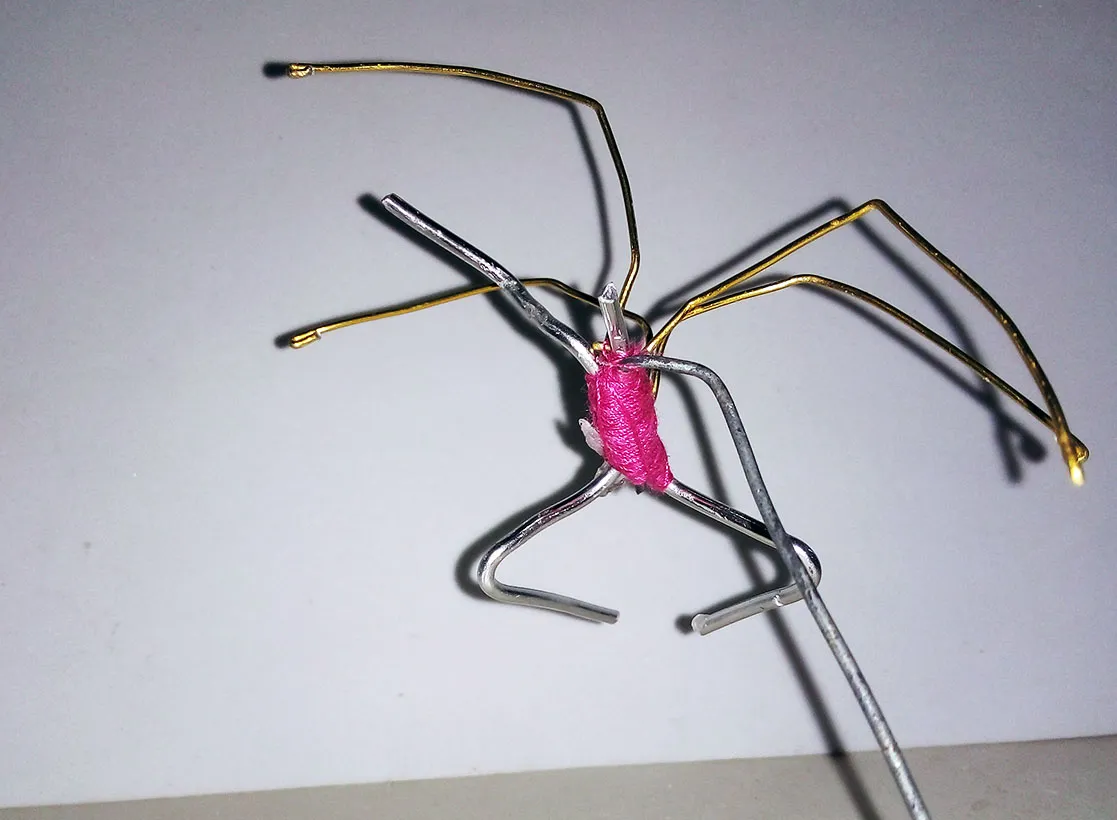
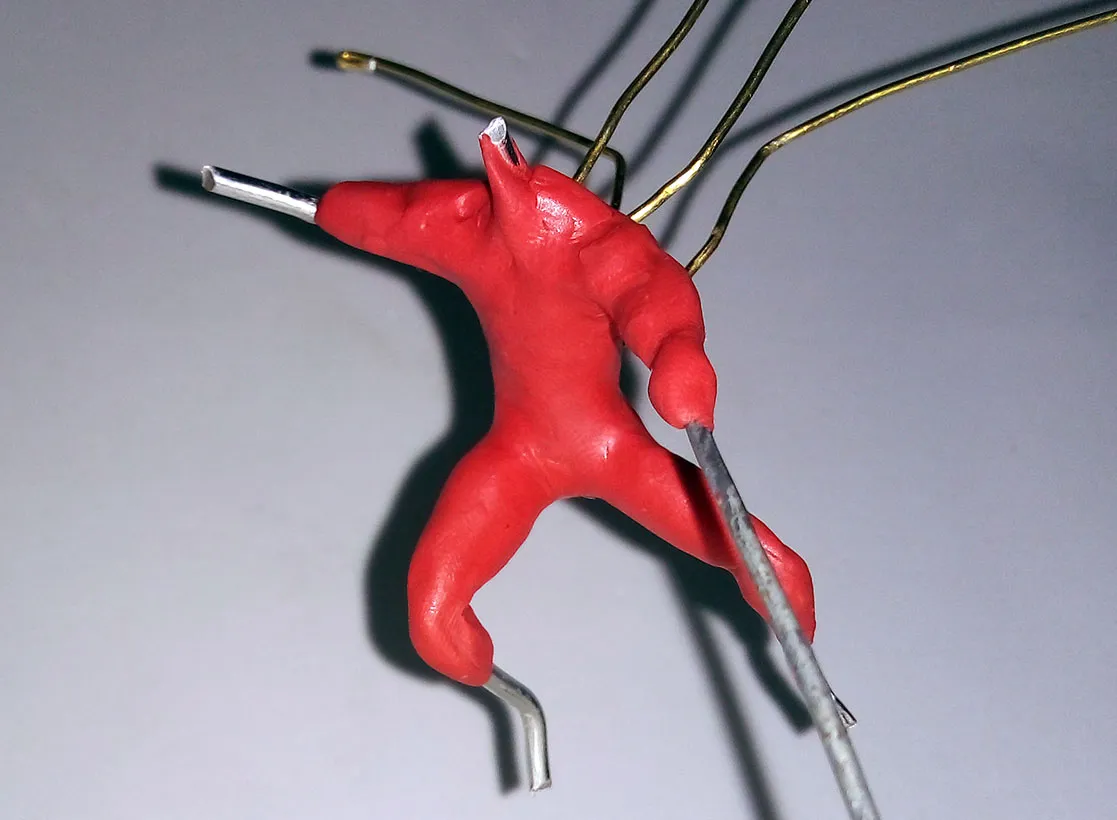
Once I chose the character, I started to think about the pose. The one I imagined would need a somewhat complicated skeleton, but in the end I was able to come up with something for the figurine to stand on. Here are a couple of pictures of this skeleton:
Paso a paso
Una vez que elegido el personaje, me puse a pensar en la pose. La que imaginé necesitaría un esqueleto un poco complicado, pero al final pude idear algo para que la figurita pudiera sostenerse. A continuación un par de fotos de este esqueleto:
 |  |
|---|
As you could see, it is a skeleton for a dynamic pose, as if the character was jumping with his four metallic arms.
Now, with the skeleton ready I started to apply the plasticine over it. At first I didn't plan to paint it, so I used the red color that characterizes this armor, like the red of Iron Man's armor.
Como pudieron observar, es un esqueleto para una pose dinámica, como si el personaje estuviese saltando con sus cuatro brazos metálicos.
Ahora bien, con el esqueleto listo comencé a aplicar la plastilina sobre este. En un cominzo no planeaba pintarlo, así que usé el color rojo que caracteriza a esta armadura, como el rojo de la armadura de Iron Man.
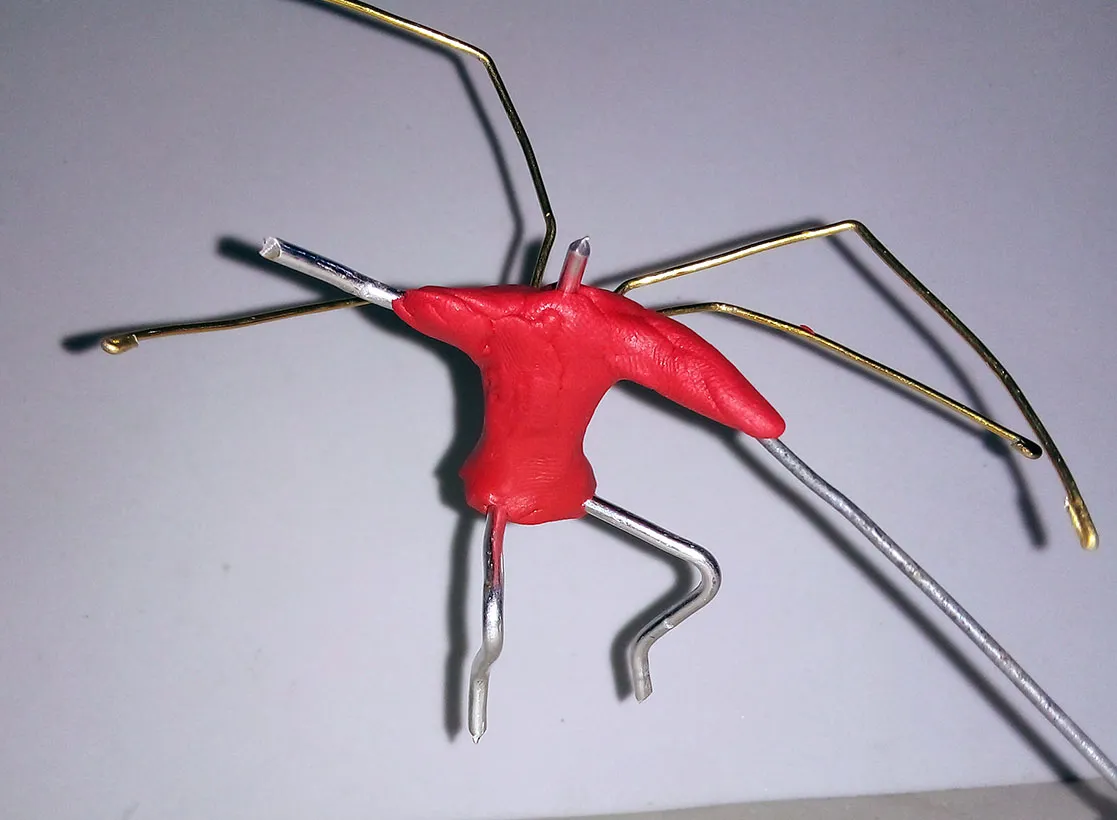
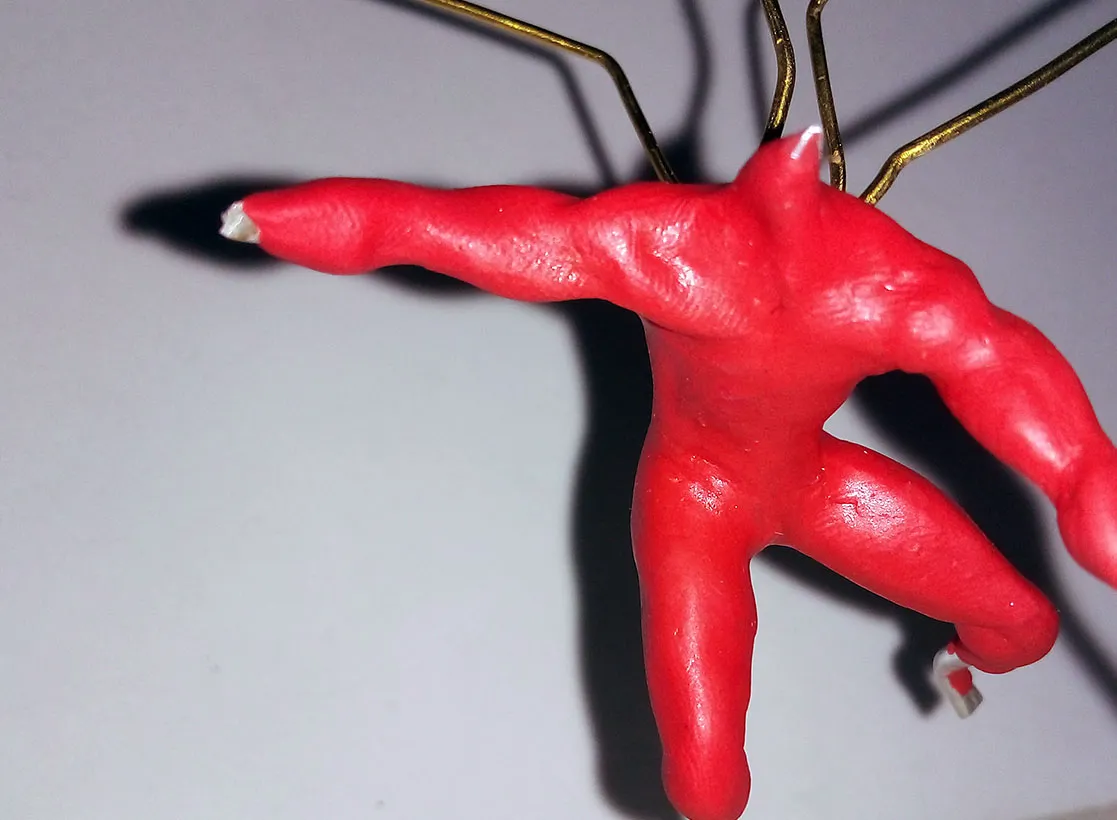
I started to mold the torso, the men and finally the legs, trying to create the musculature more in accordance with the character, considering that it is not a very muscular character but with well defined muscles.
Comencé a moldear el torso, los hombres y finalmente las piernas, tratando de crearle la musculatura más acorde a la del personaje, considerando que no es un personaje muy musculoso pero sí con los músculos bien definidos.
 |  |
|---|
As I did with the legs, I also did with the arms. I applied enough plasticine and molded them until I defined them in the best way using a knitting needle (I also helped myself with a wooden stick).
Así como hice con las piernas, también hice con los brazos. Apliqué suficiente plastilina y los moldeé hasta definirlos de la mejor manera usando una aguja de tejer (también me ayudé con un palillo de madera).
 |  |
|---|
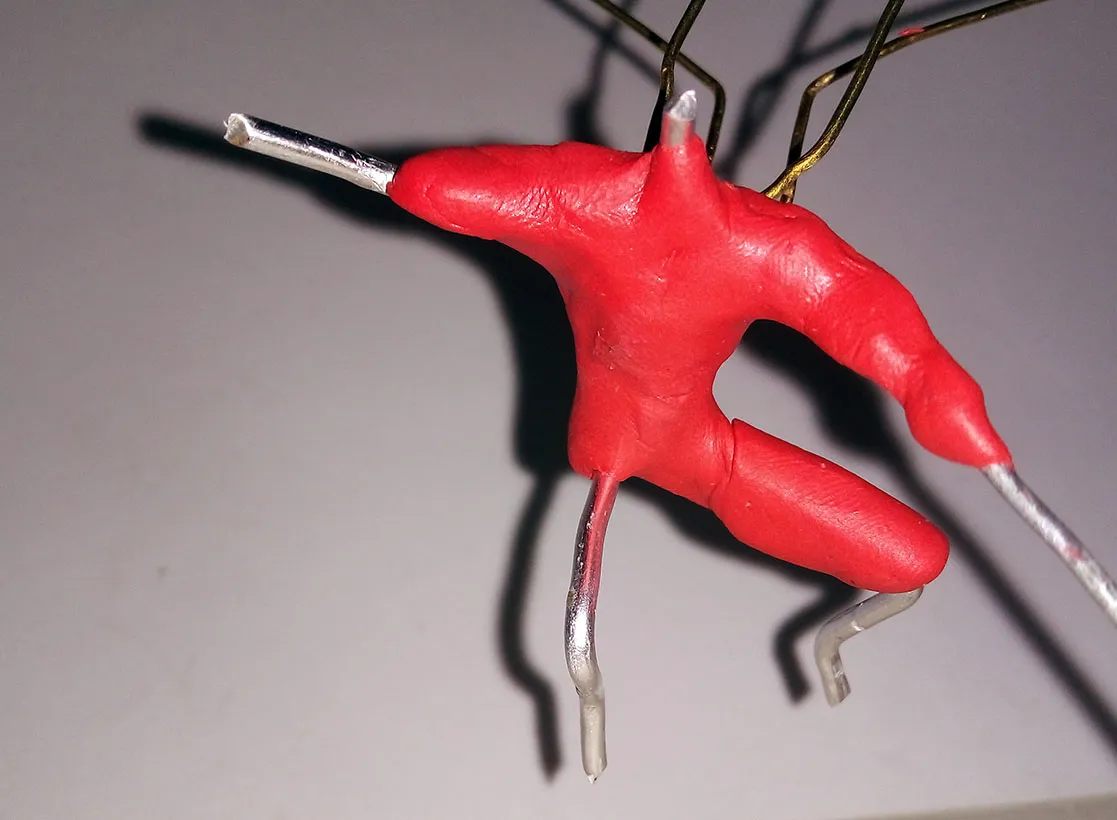
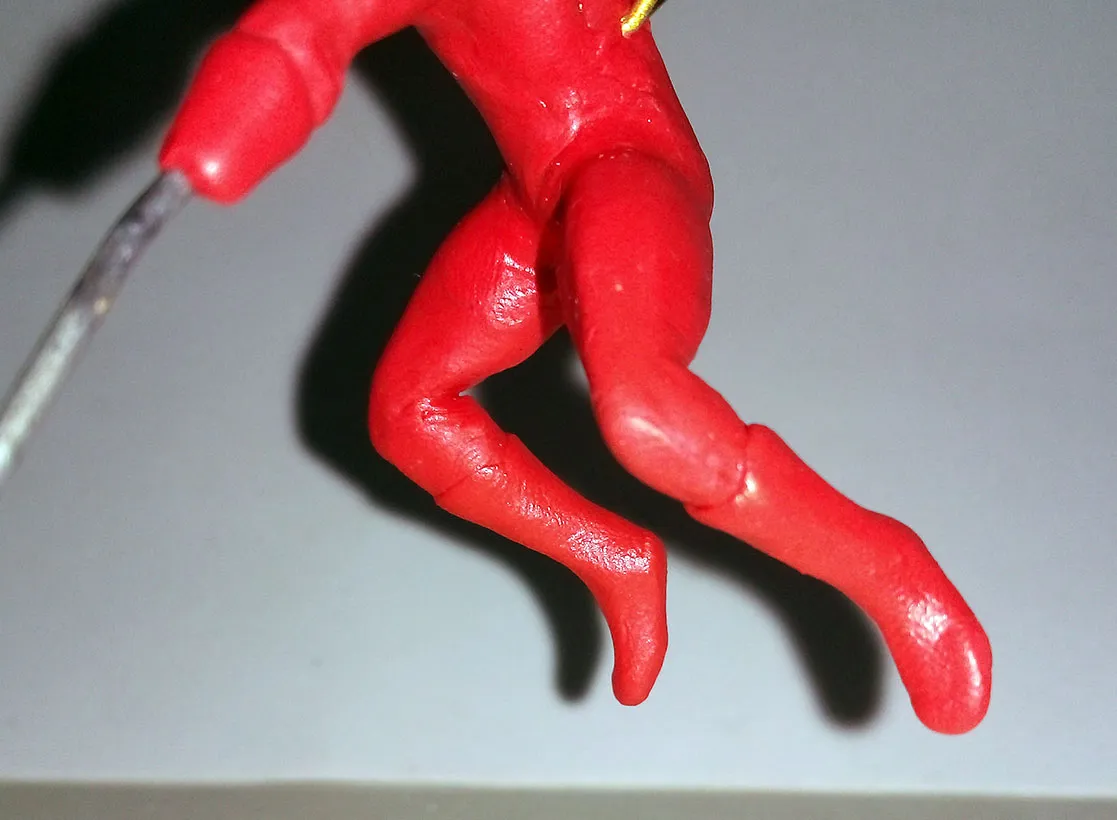
I continued adding more plasticine to the torso for the pectorals and for the abdomen. Although it was a little thick at the beginning I tried to remove the excess until it was with the correct proportions.
Continué agregando más plastilina al torso para los pectorales y para el abdomen. Aunque me quedó un poco grueso al comienzo traté de quitar los excesos hasta que quedó con las proporciones correctas.

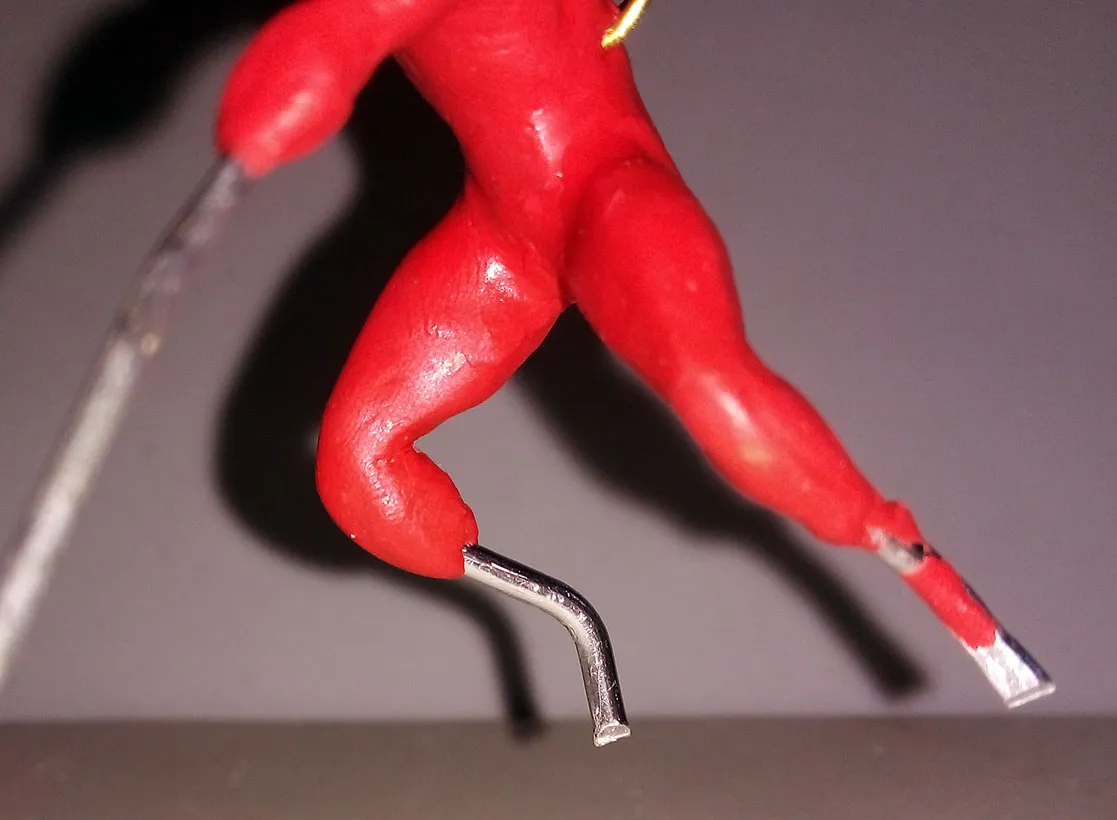
The boots were also made with red clay. At first I planned to use only unpainted clay; however, it occurred to me to paint it with gold paint and it was not a bad decision.
That's why I made the boots and forearms with red clay and not with one that resembles the yellow one.
Las botas también las coloqué con plastilina roja. En un principio planeaba usar solo plastilina sin pintar; sin embargo, se me ocurrió pintarla con pintura dorada y no fue una mala decisión.
Fue por esto que hice las botas y los antebrazos con plastilina roja y no con una que se asemejase a la amarilla.
 |  |
|---|
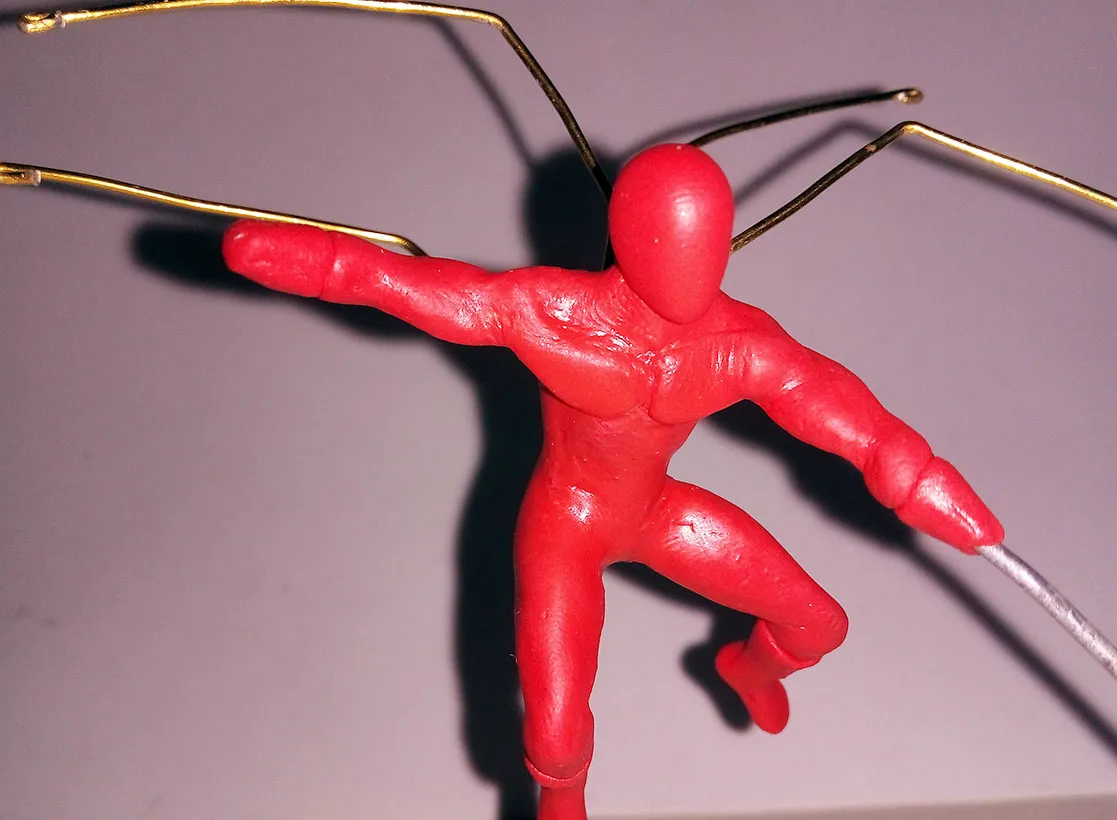
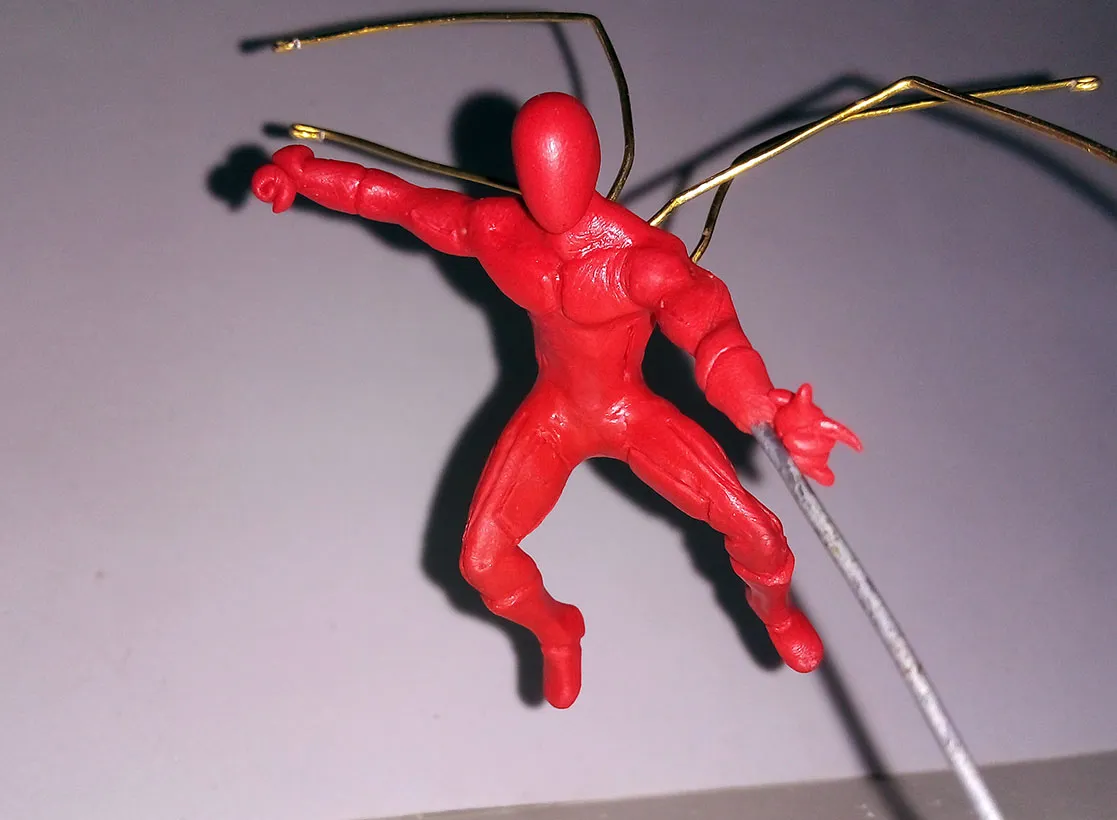
The head was one of the last things I did. The truth was not easy to do because sometimes it was too big or it just looked like a biker helmet and not spiderman's head; even so I managed to do it with the right proportion after several attempts.
The hands were another suffering of this figure. Below you can see how it looked once finished all the part I would do with red plasticine:
La cabeza fue una de las últimas cosas que hice. La verdad no fue fácil de hacer porque a veces quedaba demasiado grande o simplemente parecía un casco de motociclista y no la cabeza de spiderman; aún así logré hacerlo con la proporción adecuada después de varios intentos.
Las manos fue otro sufrir de esta figura. A continuación pueden ver cómo quedó una vez terminada toda la parte que haría con plastilina roja:
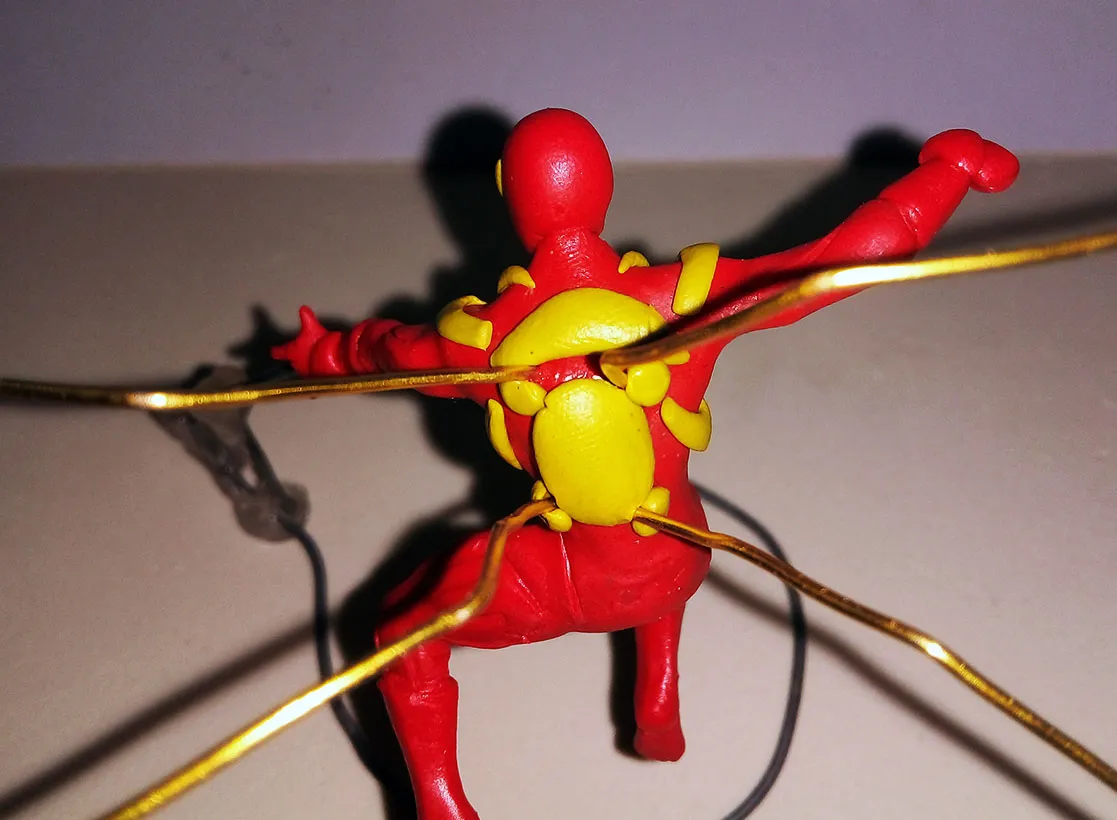
Although I would paint the golden areas, I had to make them with yellow color so that it would be easier to know which parts I would paint with gold and which ones I would not. That's why I used this plasticine of a different color to place details on the chest and back.
Aunque las áreas doradas las pintaría, me vi en la obligación de hacerlas con color amarillo para que me fuese más fácil saber qué partes pintaría con dorado y cuales no. Por eso usé esta plastilina de otro color para colocar detalles en el pecho y en la espalda.
 |  |
|---|
I also used yellow plasticine for the metal arms, because I ran out of red plasticine. F for the red clay.
También usé plastilina amarilla para los brazos metálicos, porque la plastilina roja se me acabó. F por la plastilina roja.

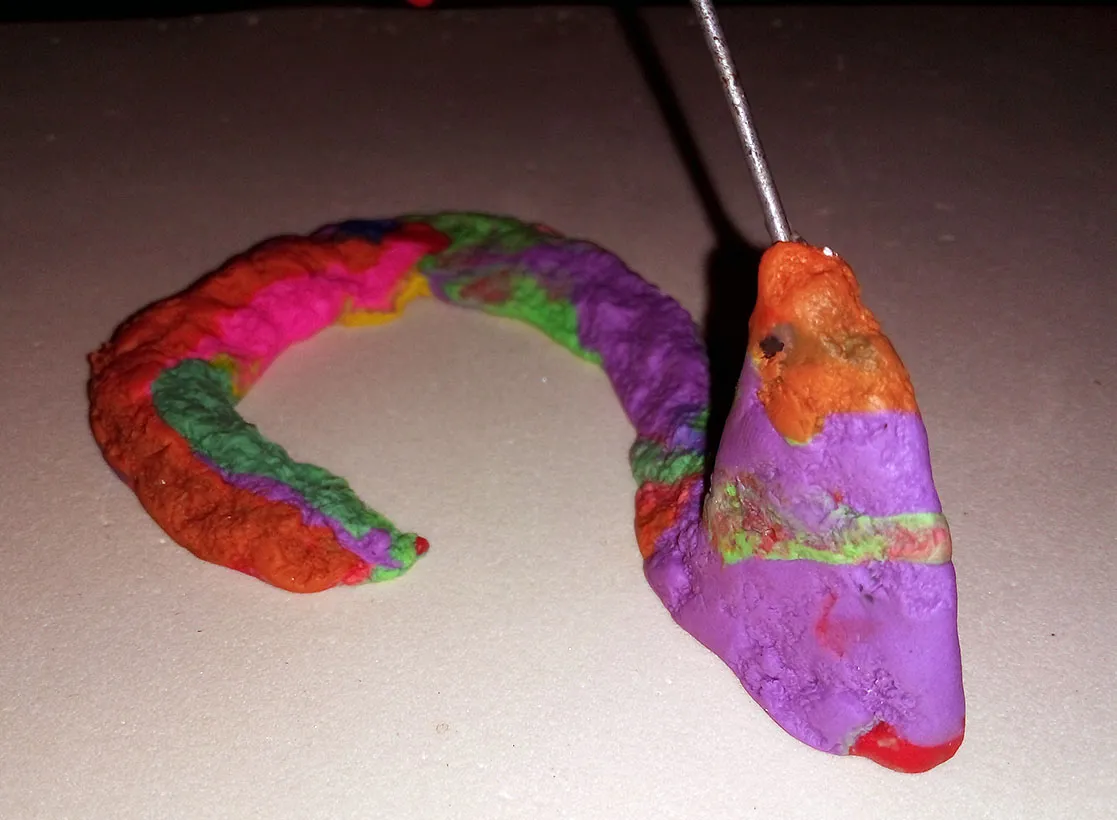
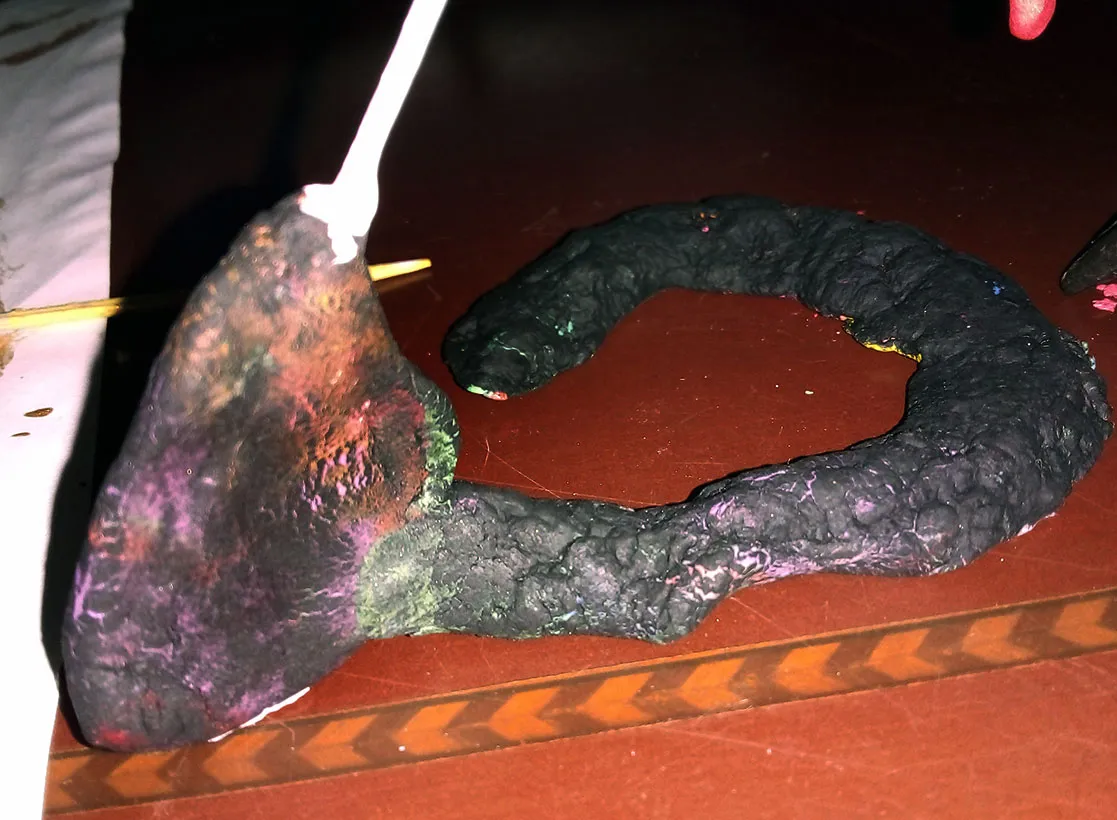
As far as the base is concerned I didn't concentrate much, because the main character of this is the spiderman, not the scenery he is in. I simply covered the wire of the base with plasticine of different colors, then painted it with black.
En lo que respecta a la base no me concentré mucho, pues la protagonista de esto es el spiderman, no el escenario en el que está. Simplemente cubrí el alambre de la base con plastilina de distintos colores, luego la pinté con negro.
 |  |
|---|
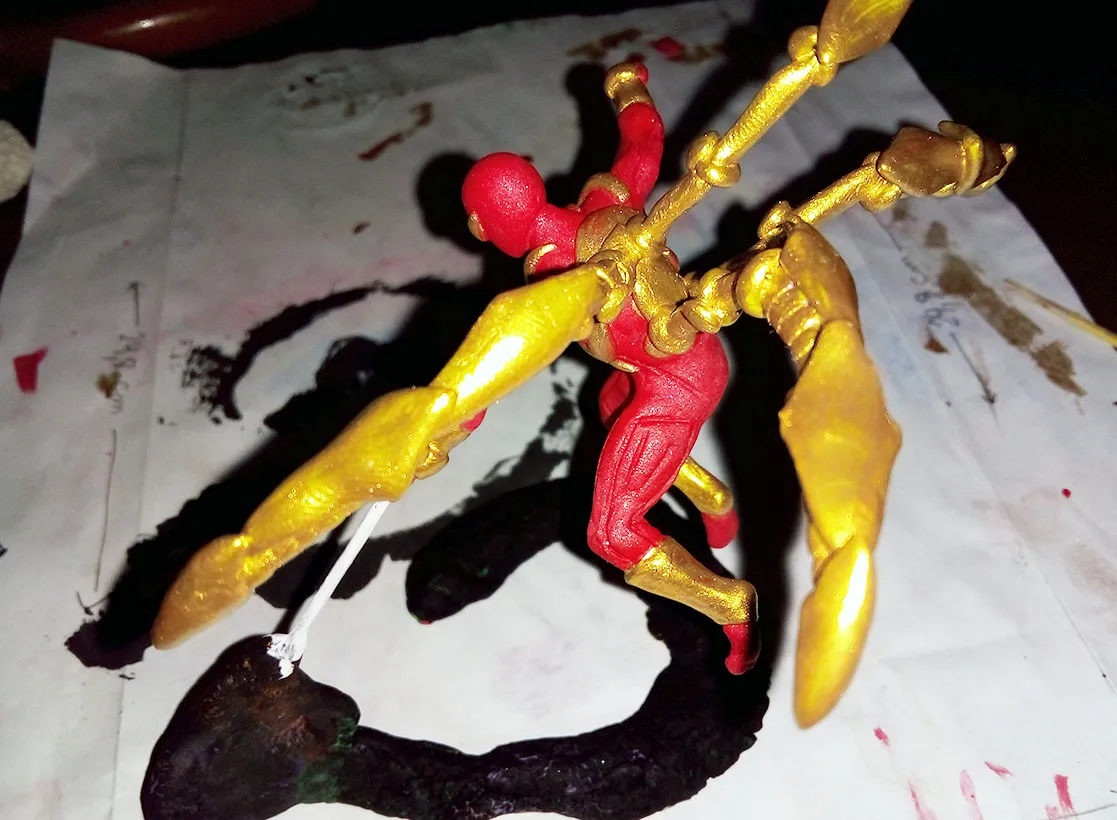
I must confess that there is a before and after when the gold paint is added, certainly the figure is something else with this color, that's why I say that it was a wise decision to have painted it.
Below you can see a couple of pictures of the painting process:
Debo confesar que hay un antes y un después cuando se le agrega la pintura dorada, ciertamente la figura es otra cosa con este color, por eso digo que fue una decisión acertada el haberla pintado.
A continuación pueden ver un par de fotos del proceso de pintura:
 |  |
|---|
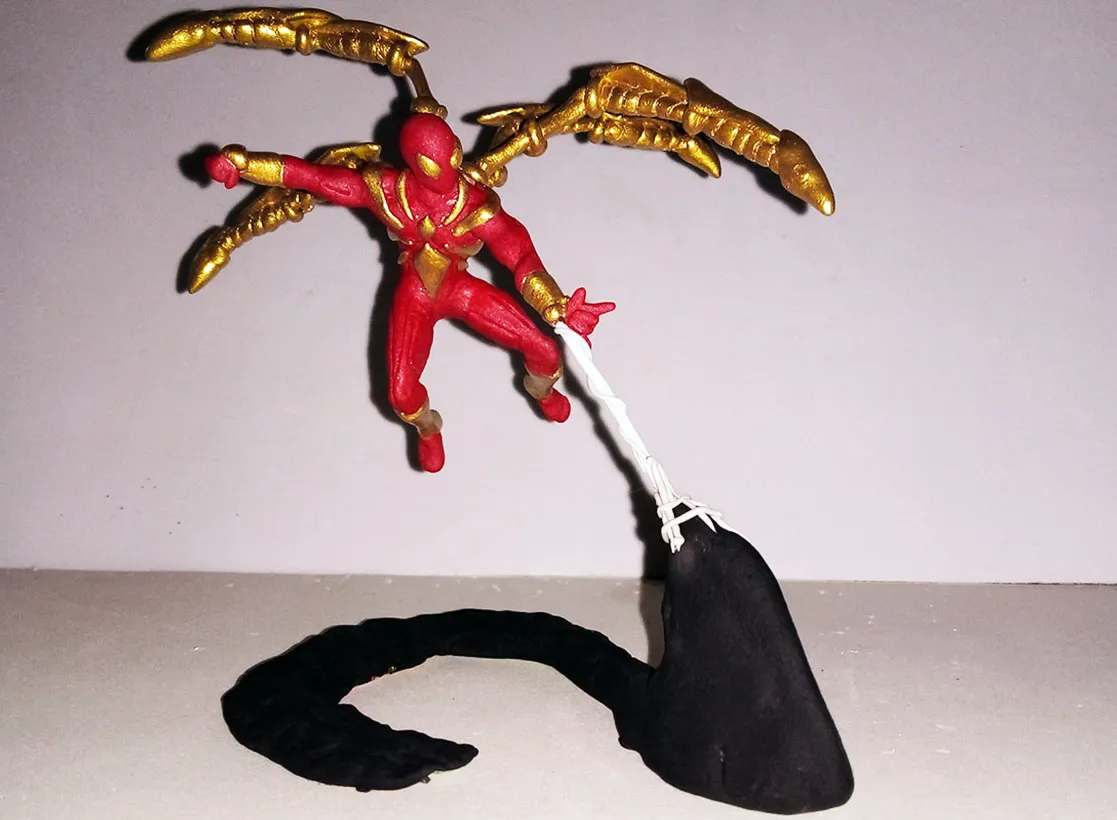
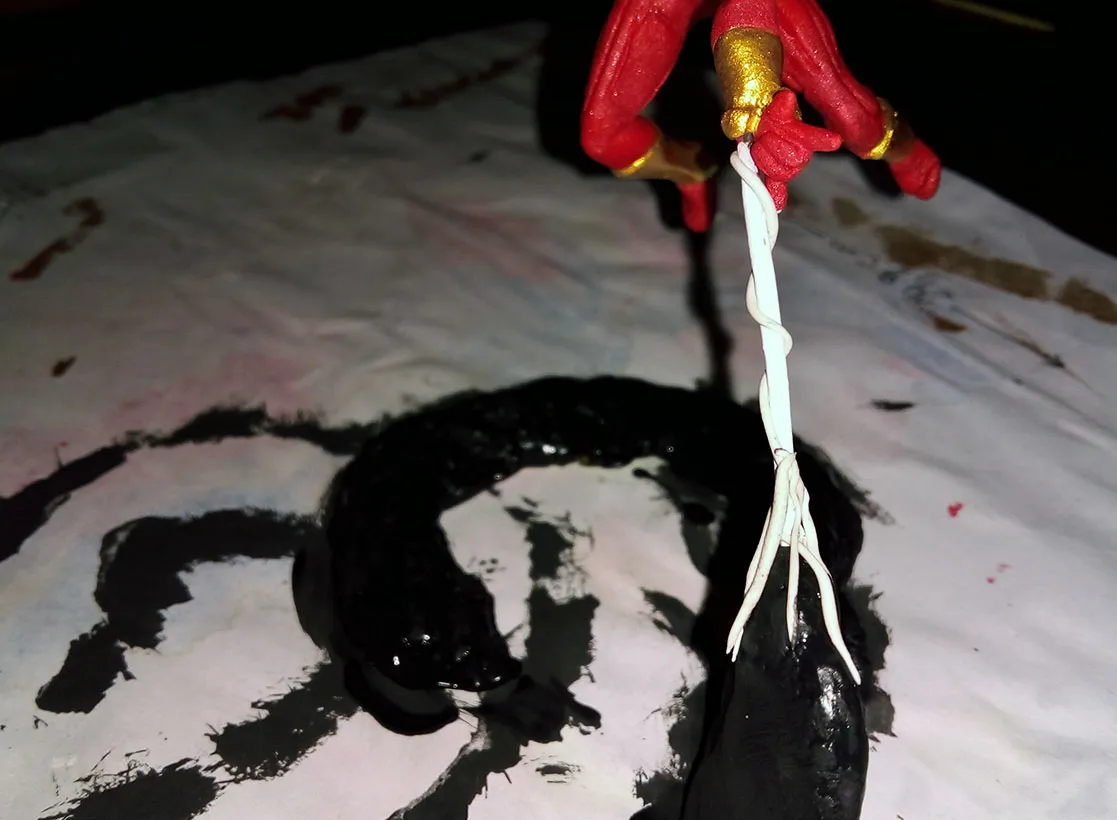
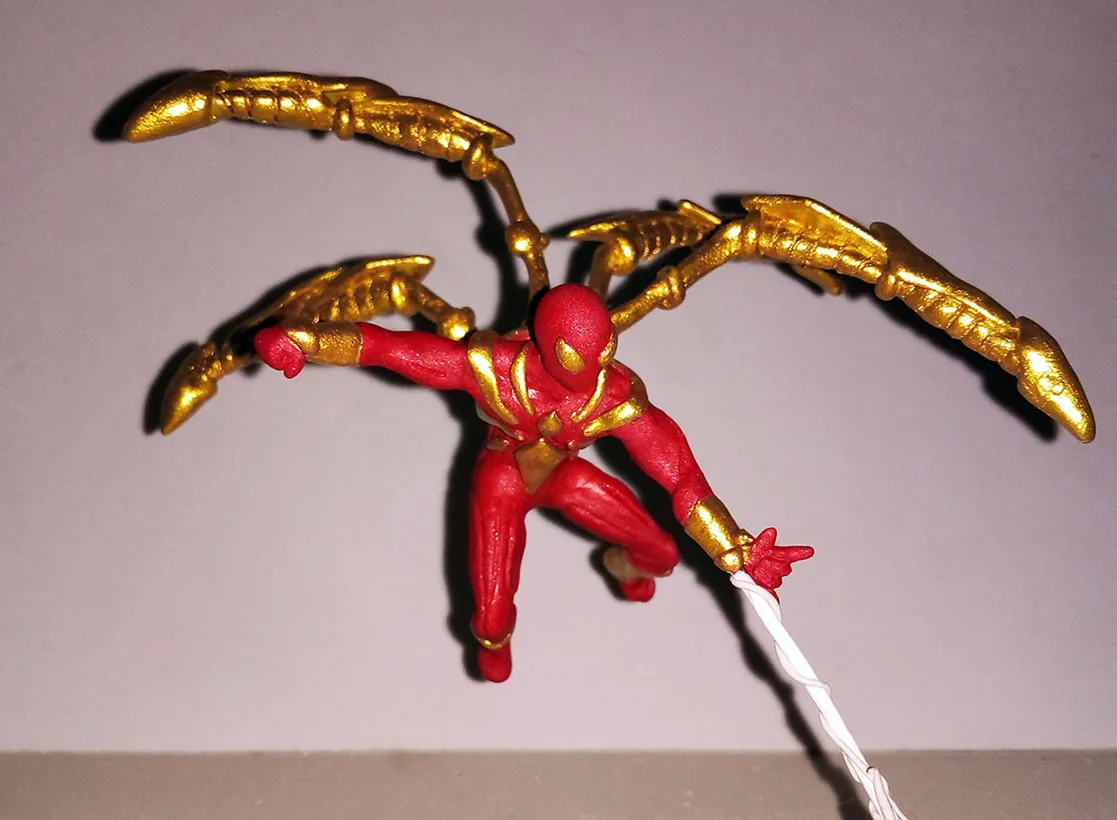
As an additional detail, I painted the wire coming out of Spiderman's hand white and added some strips of soft plastic to make it look as much like a spider web as possible.
Como detalle adicional, pinté el alambre que salía de la mano de spiderman de color blanco y le agregué unas tiras de plastilian blanda, para que se pareciera lo más posible a una telaraña.
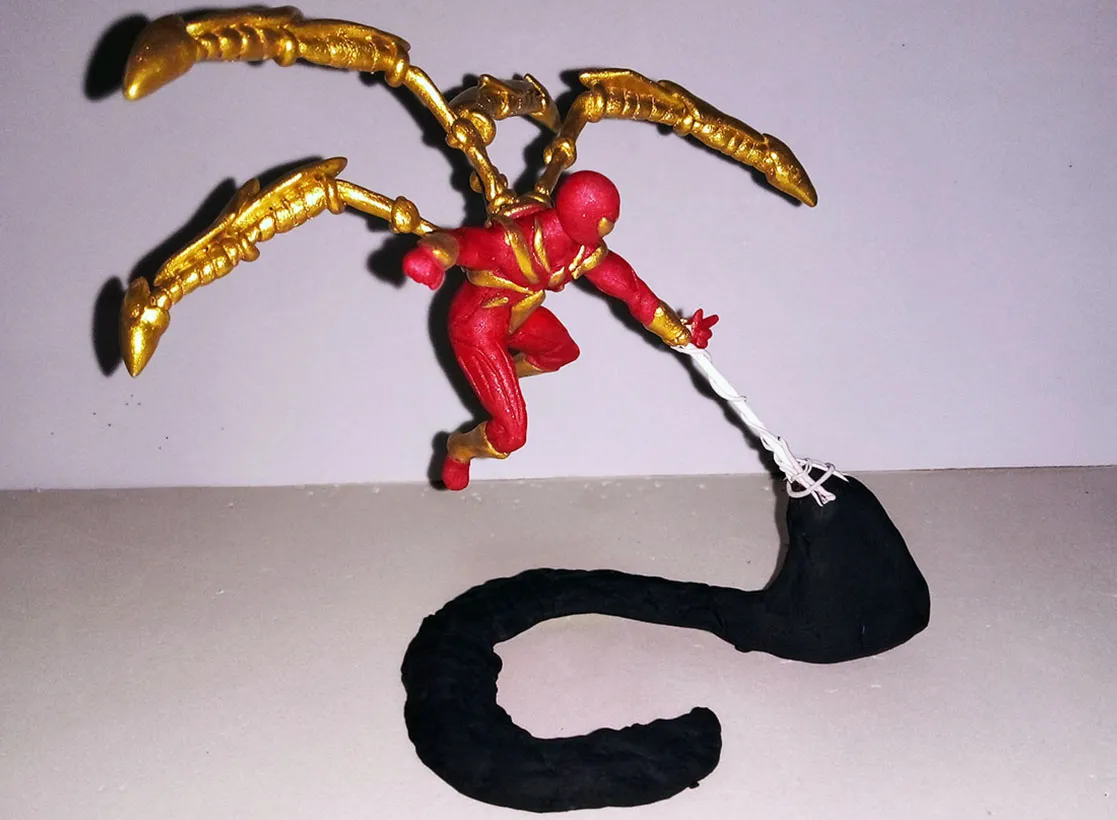
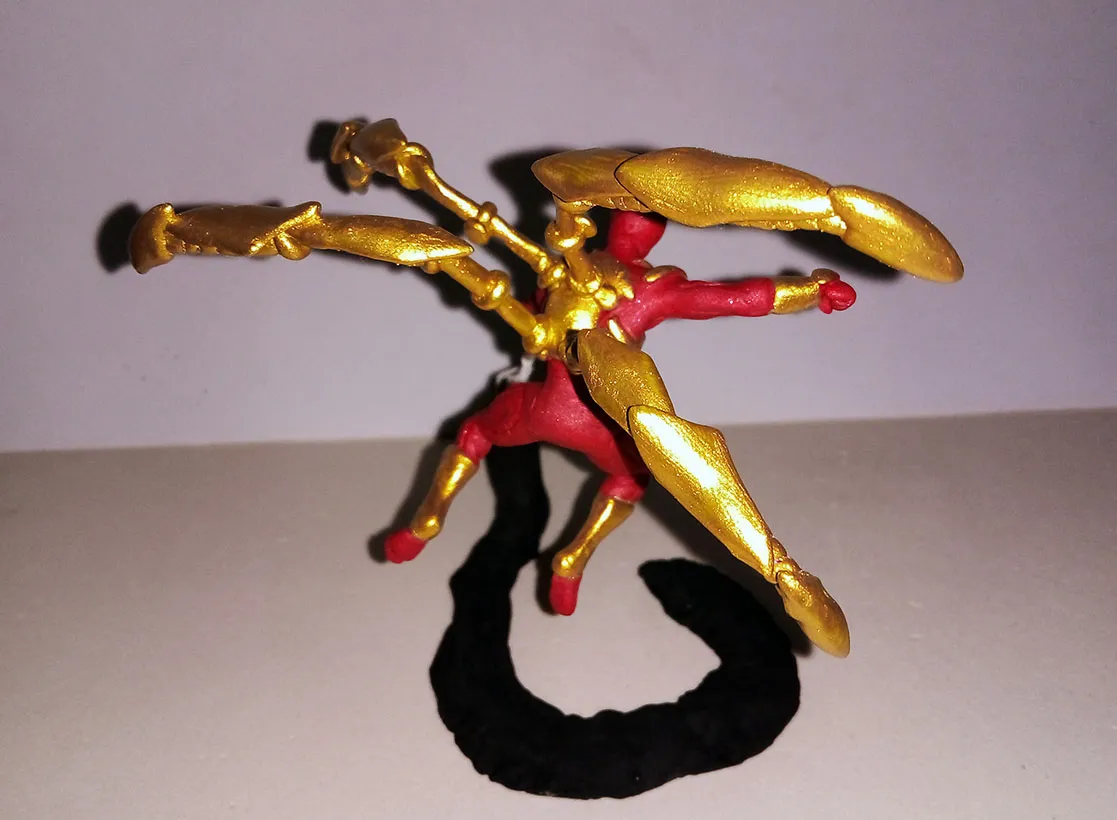
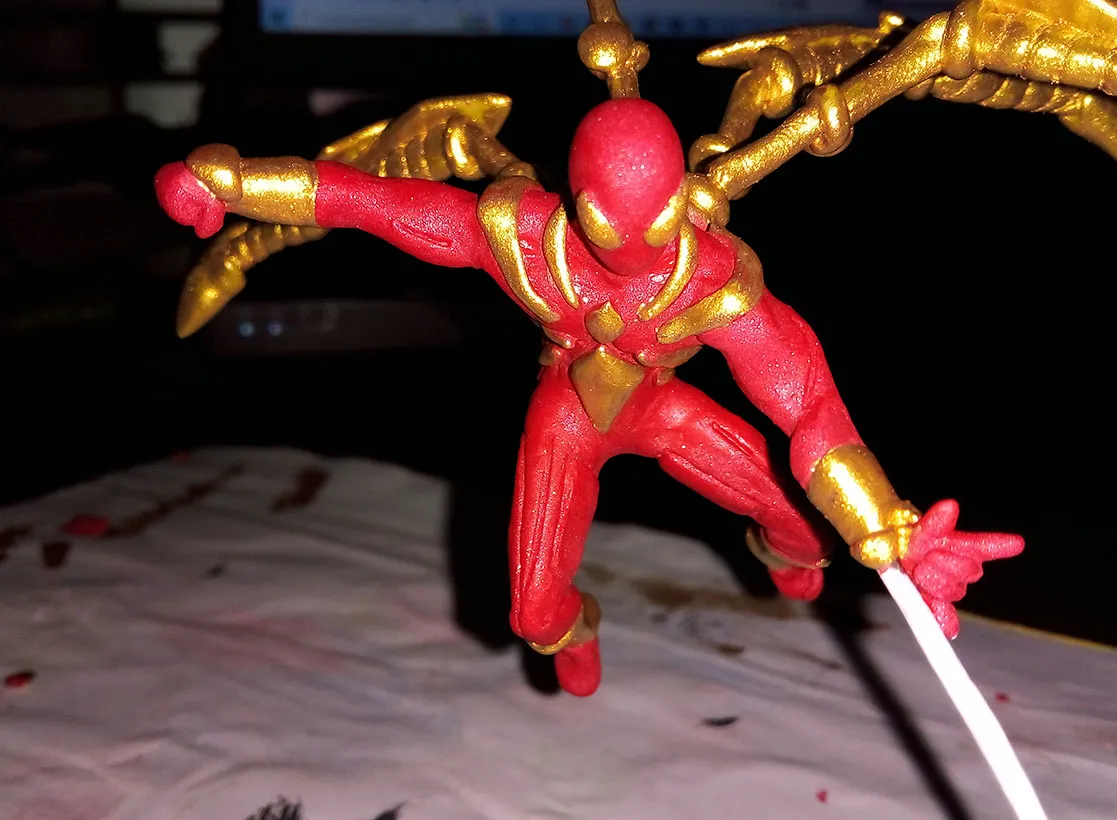
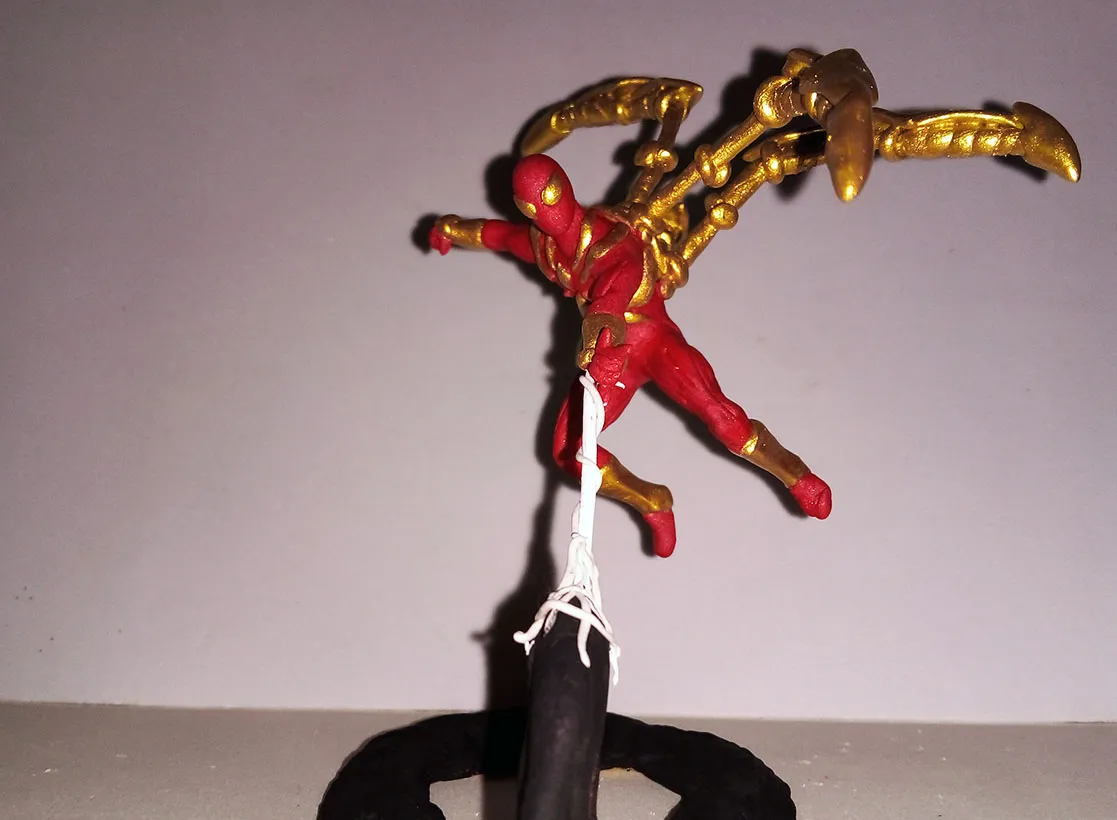
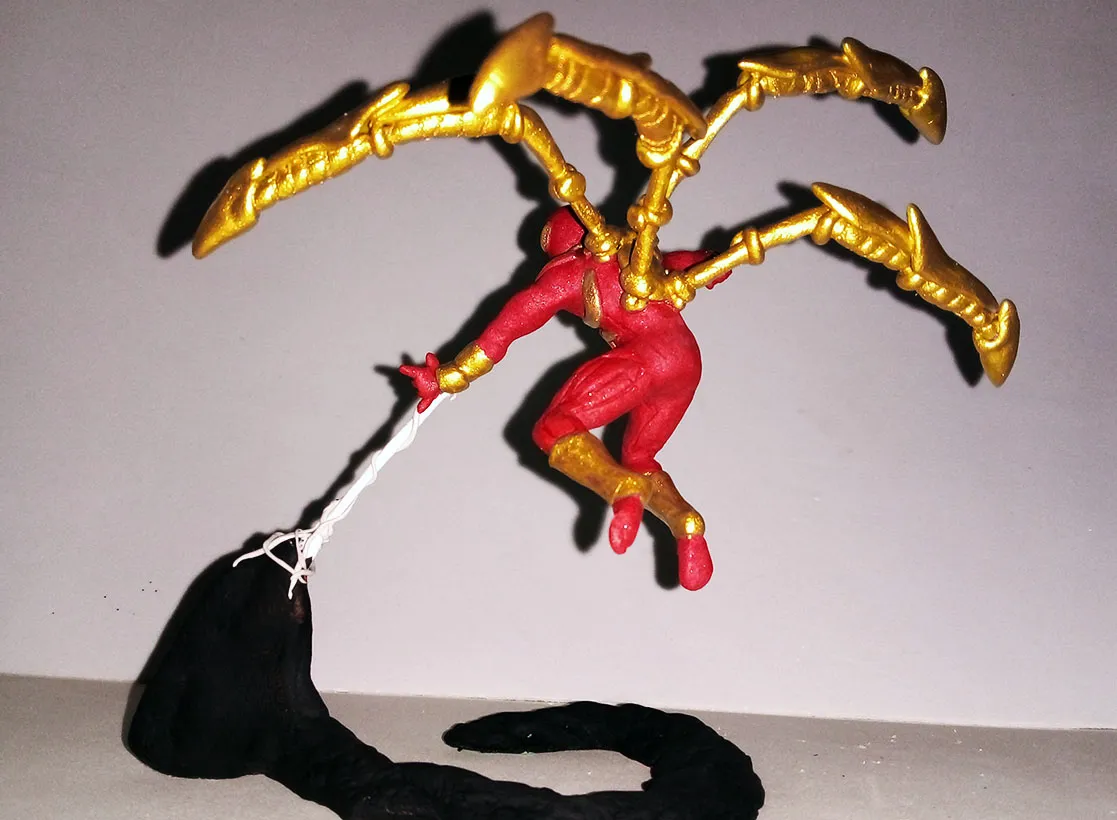
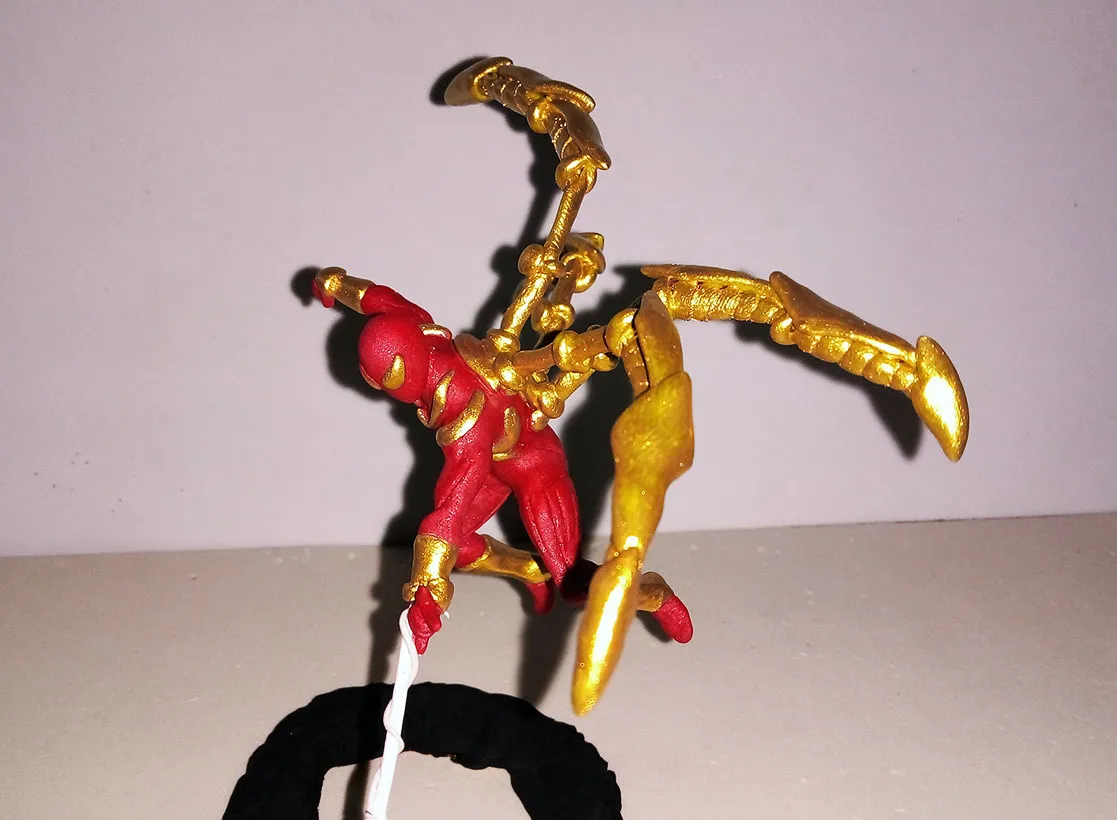
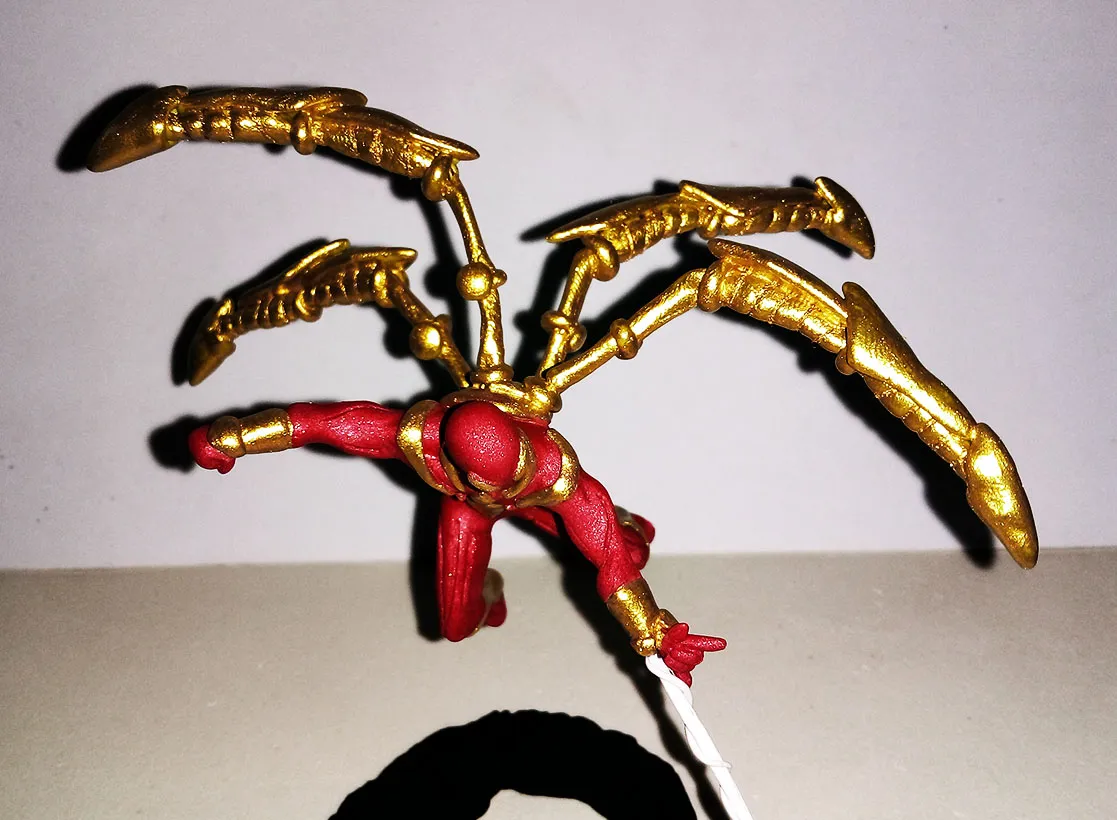
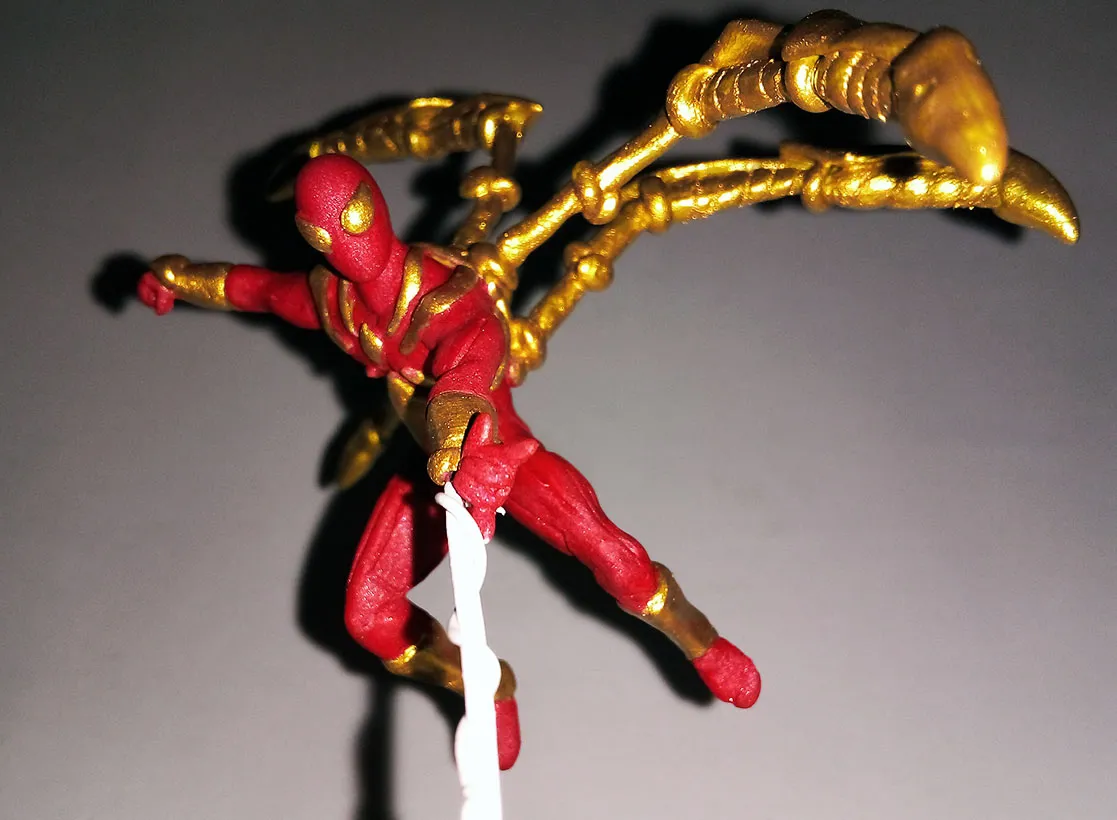
This is how the figurine was finished. Below you can see a series of photographs of the final result:
De esta manera quedó terminada la figurita. A continuación pueden ver una serie de fotografías del resultado final:
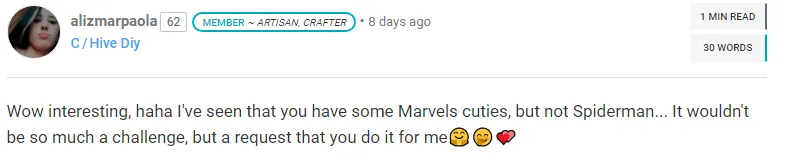
Who challenged me to make this figure was @alizmarpaola. I fell in love with the figure, so this time I will keep it for myself. Alizmar, for her part, will receive a small percentage of the rewards of the publication for her great idea.
Below you can see the comment where he made the challenge:
Quien me retó para hacer esta figura fue @alizmarpaola. Quedé enamorado de la figura, así que esta vez me la quedaré para mi. Alizmar, por su parte, recibirá un pequeño porcentaje de las recompensas de la publicación por su genial idea.
A continuación pueden ver el comentario donde hizo el reto:
English
Español

Link to the comment:
@alizmarpaola/re-gaboamc2393-202261t18317216z
Well friends, that's all for now, what did you think of the figure? I really enjoyed making it, I sincerely hope you liked it.
I invite you to leave your opinions below in the comments. If you want me to make a figurine you can challenge me to do it by leaving a message in the comments as well. As always, I will be happy to read them. With nothing more to add I'll say goodbye then...
See you next time!
Bien amigos, esto ha sido todo por ahora. ¿Qué les ha parecido la figura? He disfrutado mucho haciéndola, espero de corazón que les haya gustado.
Los invito a dejar sus opiniones abajo en los comentarios. Si quieren que haga alguna figurita pueden retarme a hacerla dejando un mensaje también en los comentarios. Como siempre, estaré encantado de leerlos. Sin más que agregar me despido entonces...
¡Hasta la próxima!
Traducido con DeepL
Continúa la historia: No deberías...
Unboxing: New Headphones
Challenge To Gabo #7