English
Greetings to all my fellow creatives. This time I bring you the third installment of the section of my blog called Challenge to Gabo, where you challenge me to make a figure and I show you how to do it.
In the previous installment I showed you how to make the Star Lord figure, proposed by my colleague ismaelrd04.
You can see the publication by following this link:
@gaboamc2393/challenge-to-gabo-stard-lord
In that installment I received many challenges, such as Princess Peach, Axie teams and anime characters like Sasuke Uchiha and Sakura Haruno from Naruto. Well, they were all challenges that I liked and that I will try to do later; however, for this installment I decided on Rocket Raccoon, proposed by friend marylucy.
I didn't decide for this challenge just because it was related to the Star Lord figurine I had already made, no; what influenced the decision to make this figurine was that another user supported this challenge by leaving a comment about it. As I said in the first installment of this section, if other users support a challenge, I will take it into account. Besides, nobody can deny that the character is an interesting challenge to fulfill.
Well, having said all this, join me to see the step by step of this cool Rocket Raccoon figure.
Saludos a todos compañeros creativos. En esta ocasión les traigo la tercera entrega de la sección de mi blog llamada Challenge to Gabo, en donde ustedes me retan a hacer una figura y yo les muestro cómo hacerla. Español
En la entrega anterior les enseñé cómo hacer la figura de Star Lord, propuesta por el compañero ismaelrd04
Pueden ver la publicación siguiendo este enlace:
@gaboamc2393/challenge-to-gabo-stard-lord
En esa entrega recibí muchos retos, como la princesa Peach, equipos de Axie y personajes de anime como Sasuke Uchiha y Sakura Haruno, de Naruto. Pues bien, todos fueron retos que me gustaron y que intentaré hacer más adelante; sin embargo, para esta entrega me decidí por Rocket Raccoon, propuesto por la amiga marylucy.
No me decidí por este reto solo porque guarde relación con la figura de Star Lord que ya había hecho, no; lo que más influyó en la decisión de hacer esta figurita fue que otro usuario apoyó este reto dejando un comentario al respecto. Como dije en la primera entrega de esta sección, si otros usuarios apoyan un reto, lo tomaré en cuenta. Además, nadie podrá negar que el personaje es un reto interesante para cumplir.
Pues bien, dicho todo lo anterior, acompañenme a ver el paso a paso de esta genial figura de Rocket Raccoon.

English
Firstly to detail the materials used:
*Plastilinas of colors
*Wire
*Liquid silicone or glue
*Paints
*Anime/polystyrene (although in the end I didn't use it)
*Tools: wooden sticks, sewing and knitting needles, paintbrushes, scissors and pliers.
Español
Primeramente a detallar los materiales utilizados:
*Plastilinas de colores
*Alambre
*Silicón líquido o pegamento
*Pinturas
*Anime/poliestireno (aunque al final no lo usé)
*Herramientas: palillos de madera, agujas de coser y tejer, pinceles, tijera y alicate.

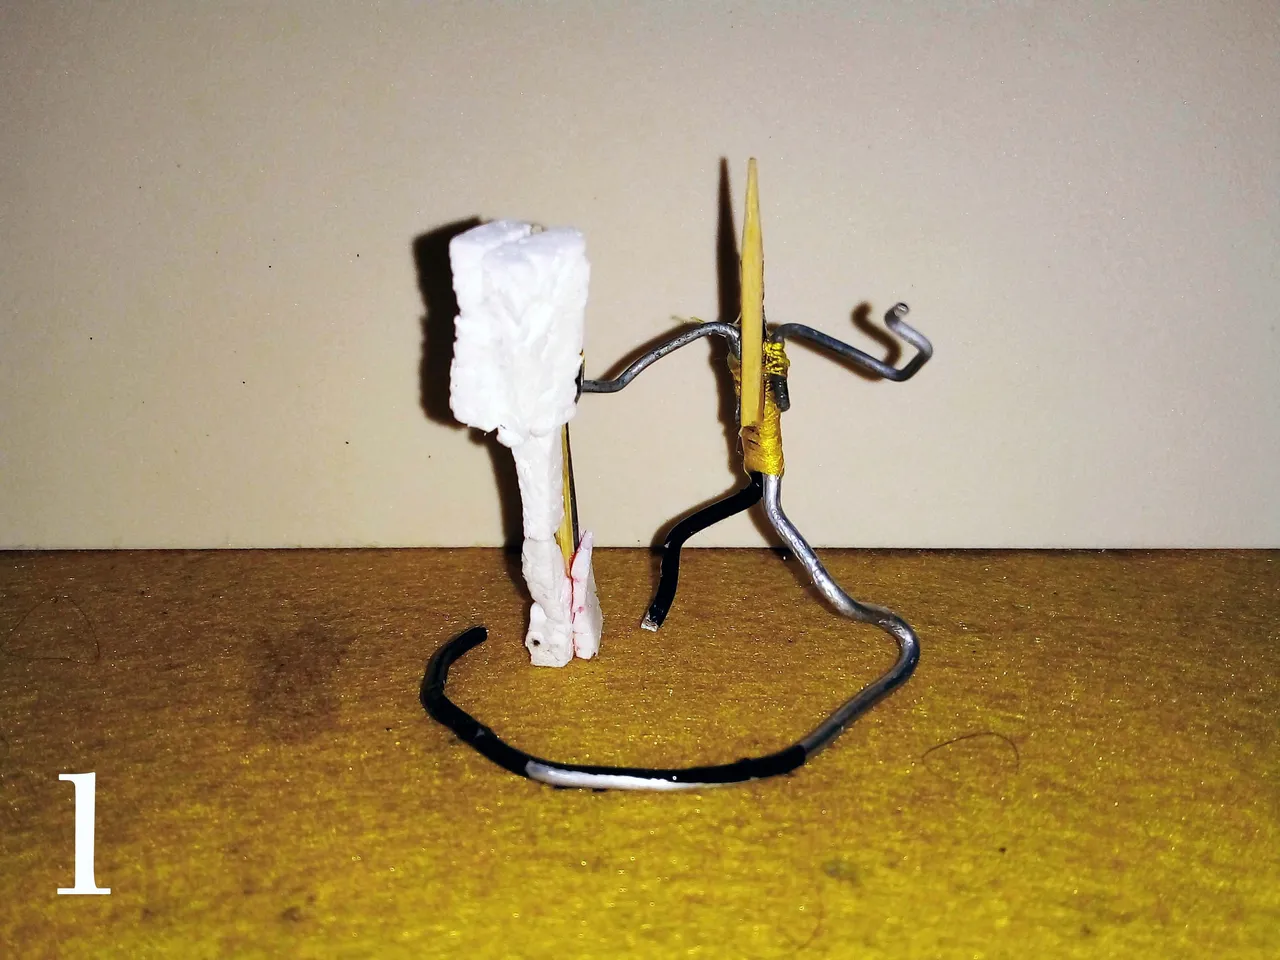
One of the first things I always start my figures with is the skeleton, or support, that the figure will have.
Una de las primeras cosas con las que siempre comienzo mis figuras es con el esqueleto, o soporte, que esta tendrá.
 |  |
|---|
To the right of the skeleton you can see something like a thick pillar; at first I planned to make the giant rocket weapon with that, but the way I made the skeleton it wouldn't work, so later I removed it, as you will see later.
You can read a guide where I explain how I make these skeletons by following this link:
@gaboamc2393/learn-with-gabo-4-learn-with-gabo-4-speng
A la derecha del esqueleto pueden ver algo parecido a un pilar grueso; en un comienzo planeaba hacer el arma gigante de rocket con eso, pero por la forma en que hice el esqueleto no serviría, así que después la quité, como ya verán más adelante.
Pueden leer una guía en donde explico cómo hago estos esqueletos siguiendo este enlace:
@gaboamc2393/learn-with-gabo-4-aprende-con-gabo-4-espeng
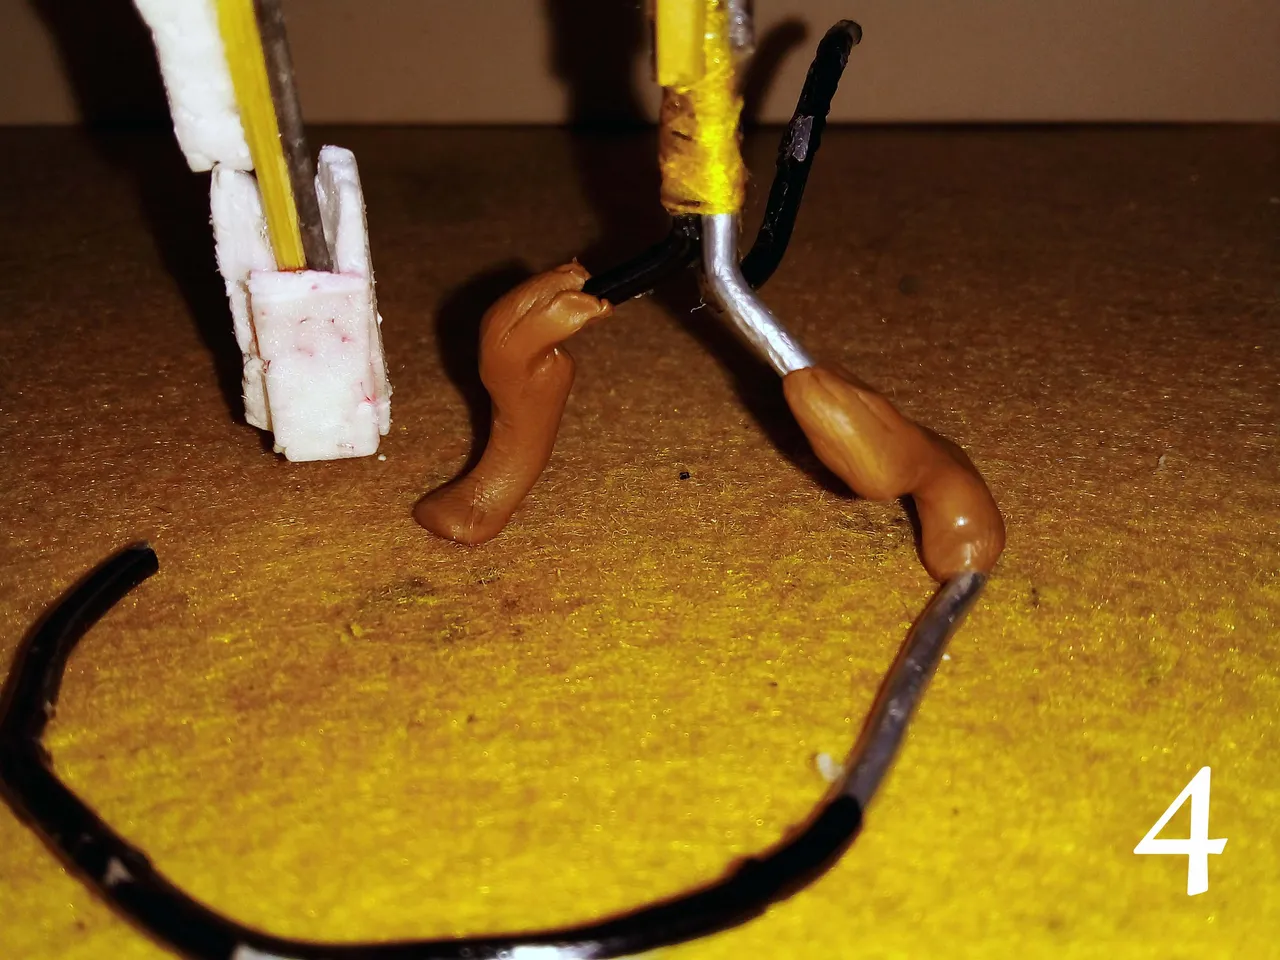
Well, once the skeleton was ready, I started to cover the area of the legs to make the rocket legs (3). Then I molded the plasticine to give it the right shape, as if they were dog legs (4).
Pues bien, una vez listo el esqueleto comencé a cubrir el área de las piernas para hacer las patitas de rocket (3). luego moldeé la plastilina para darle la forma correcta, como si fuesen patitas de perro (4).
 |  |
|---|
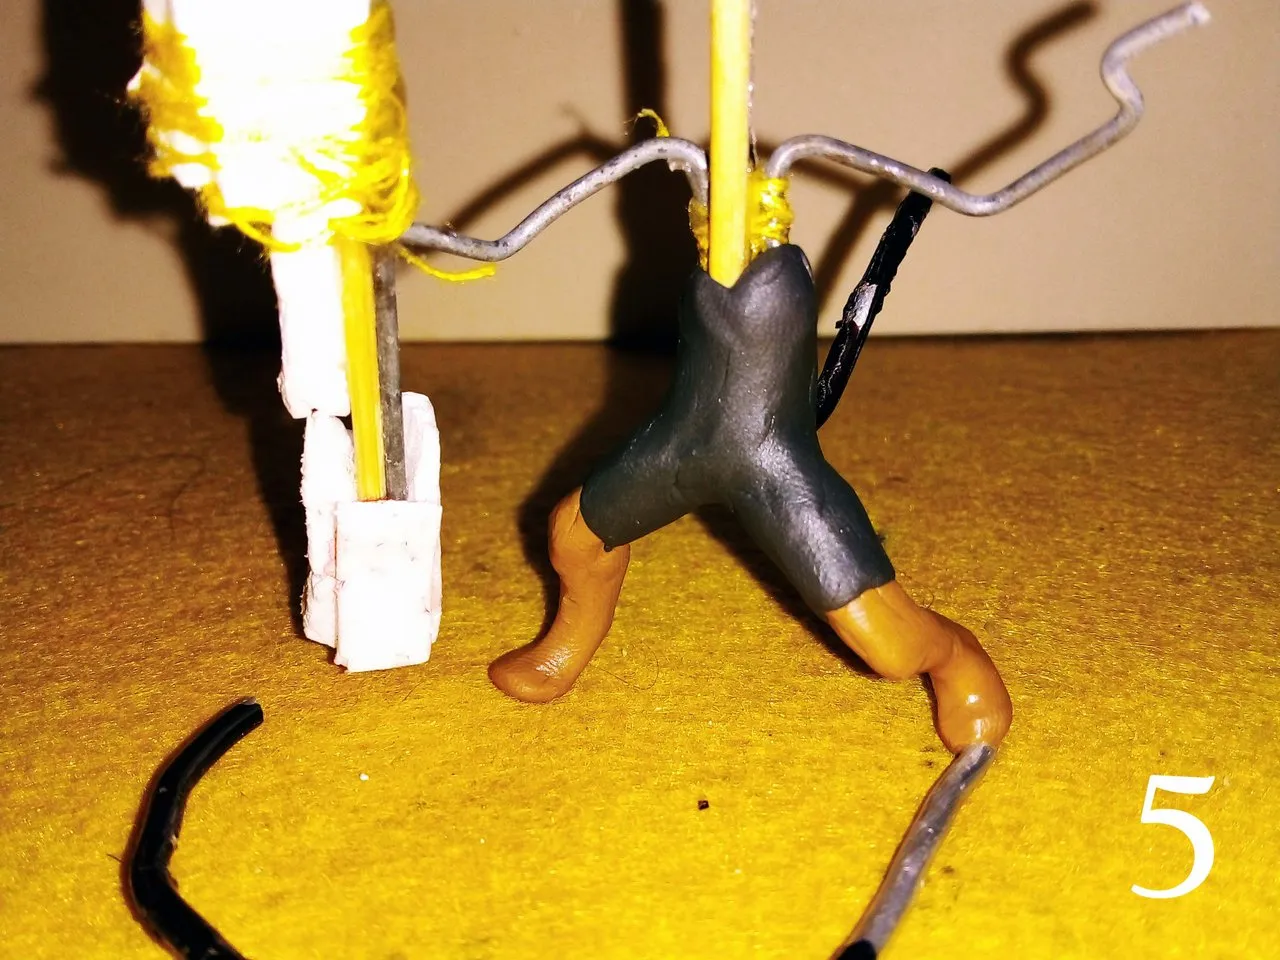
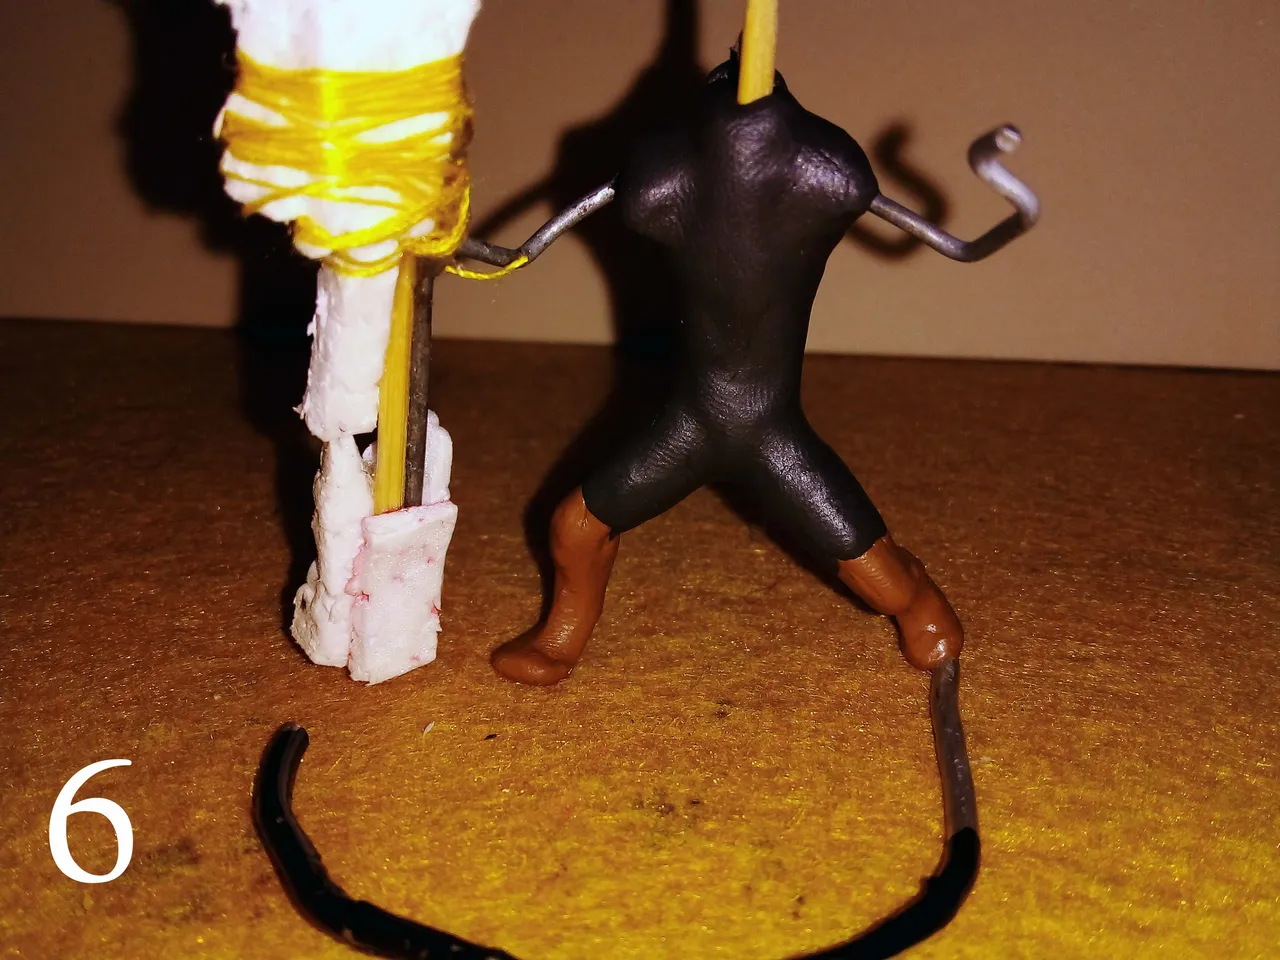
For the unclothed body of the figure I used brown, but for the body I used black plasticine, so with this plasticine I started to cover the legs (5), then the torso (6).
Para el cuerpo sin ropa de la figura usé marrón, pero para el cuerpo usé plastilina negra, así que con esta plastiina comencé a cubrir las piernas (5), luego el torso (6).
 |  |
|---|
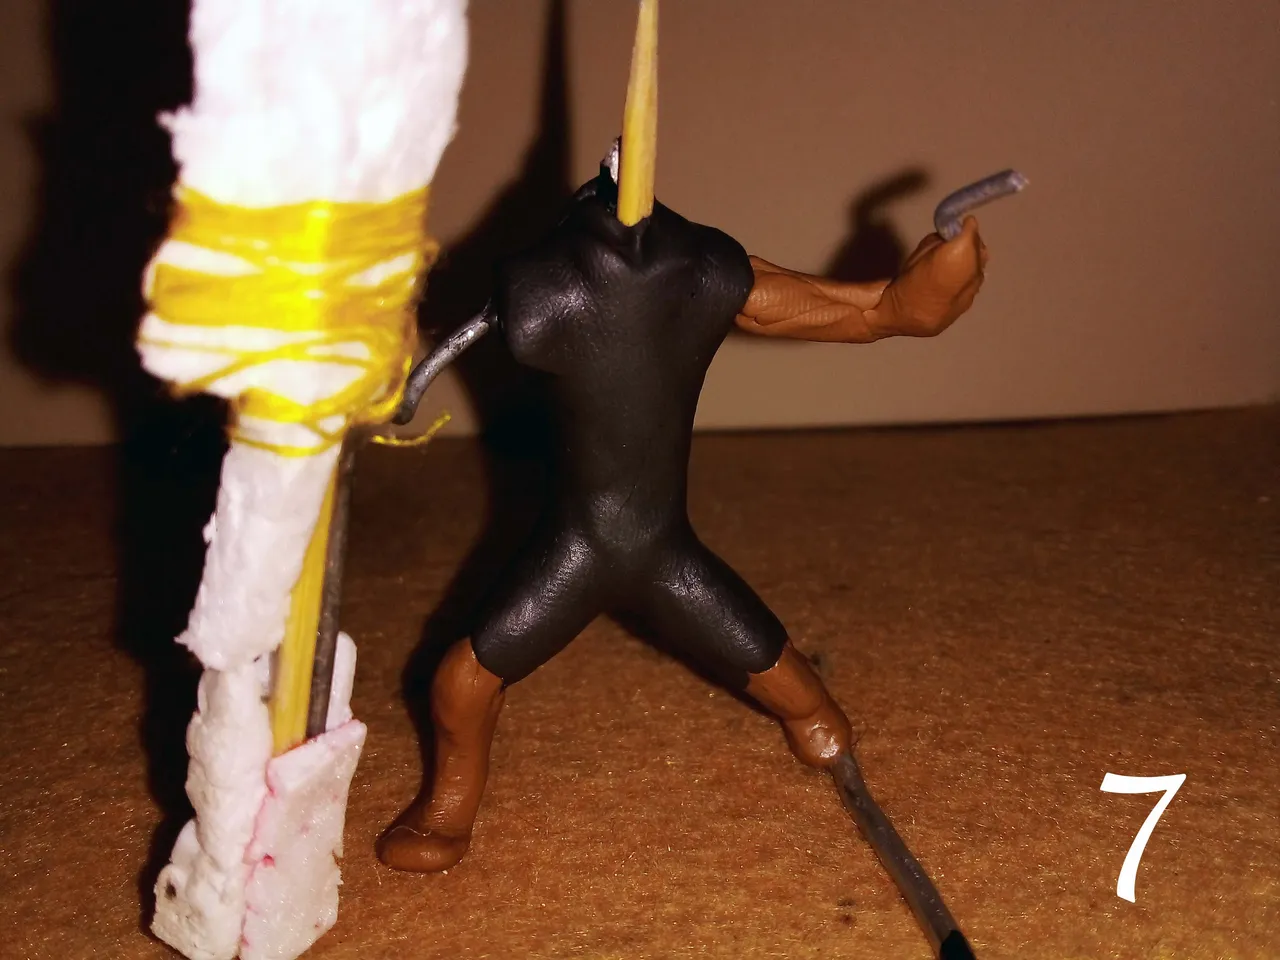
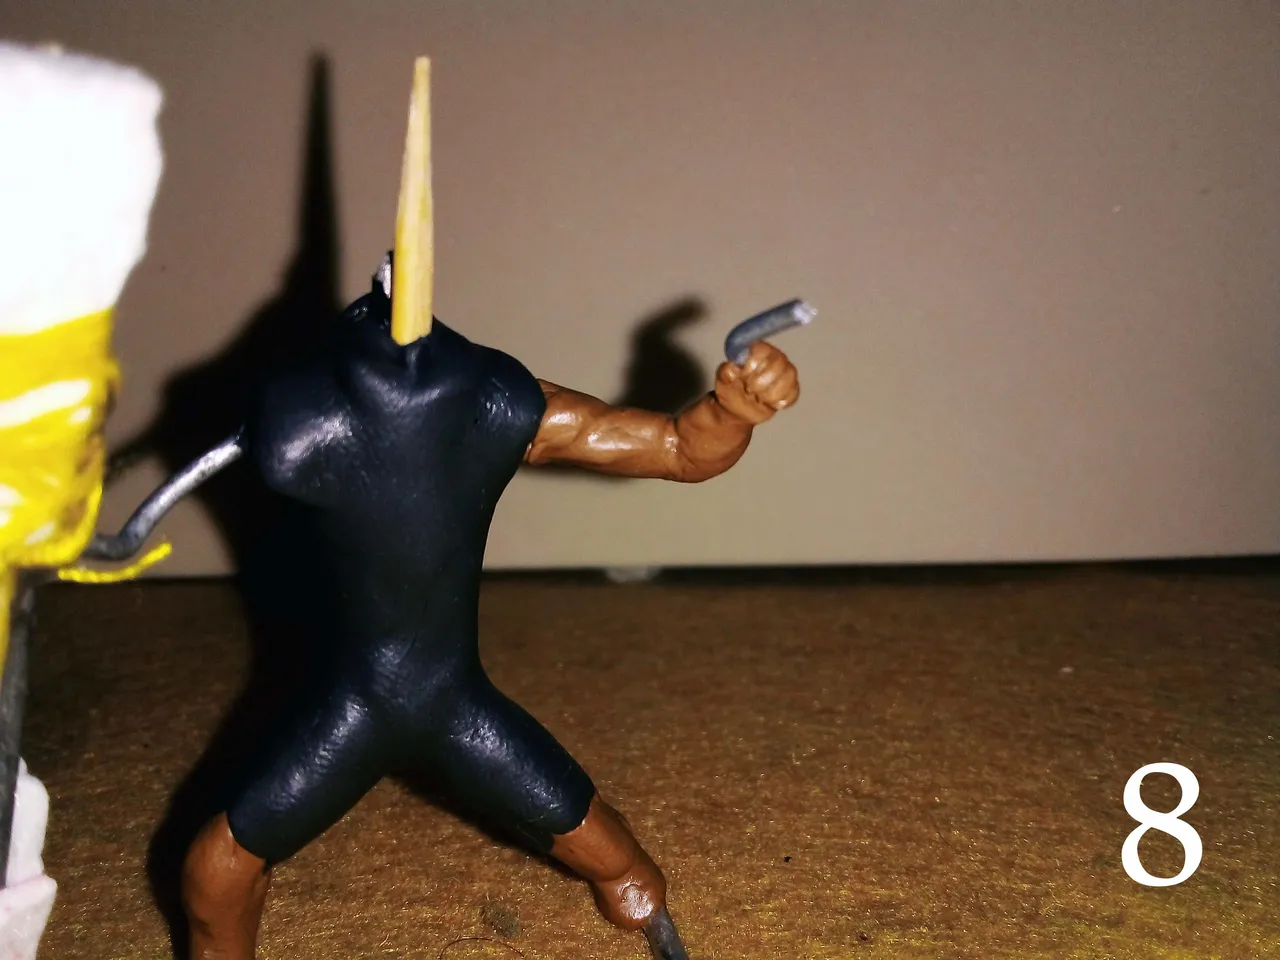
Once I completed the torso, I started to add brown plasticine where Rocket's arms will be (7), then I started to shape the arm using a toothpick; the hand I made that shape using the sharp point of a needle (8).
Una vez que completé el torso, comencé a agregar plastilina marrón en donde estarán los brazos de Rocket (7), luego comencé a moldear el brazo ayudándome con un palillo; la mano le hice esa forma usando la punta afilada de una aguja (8).
 |  |
|---|
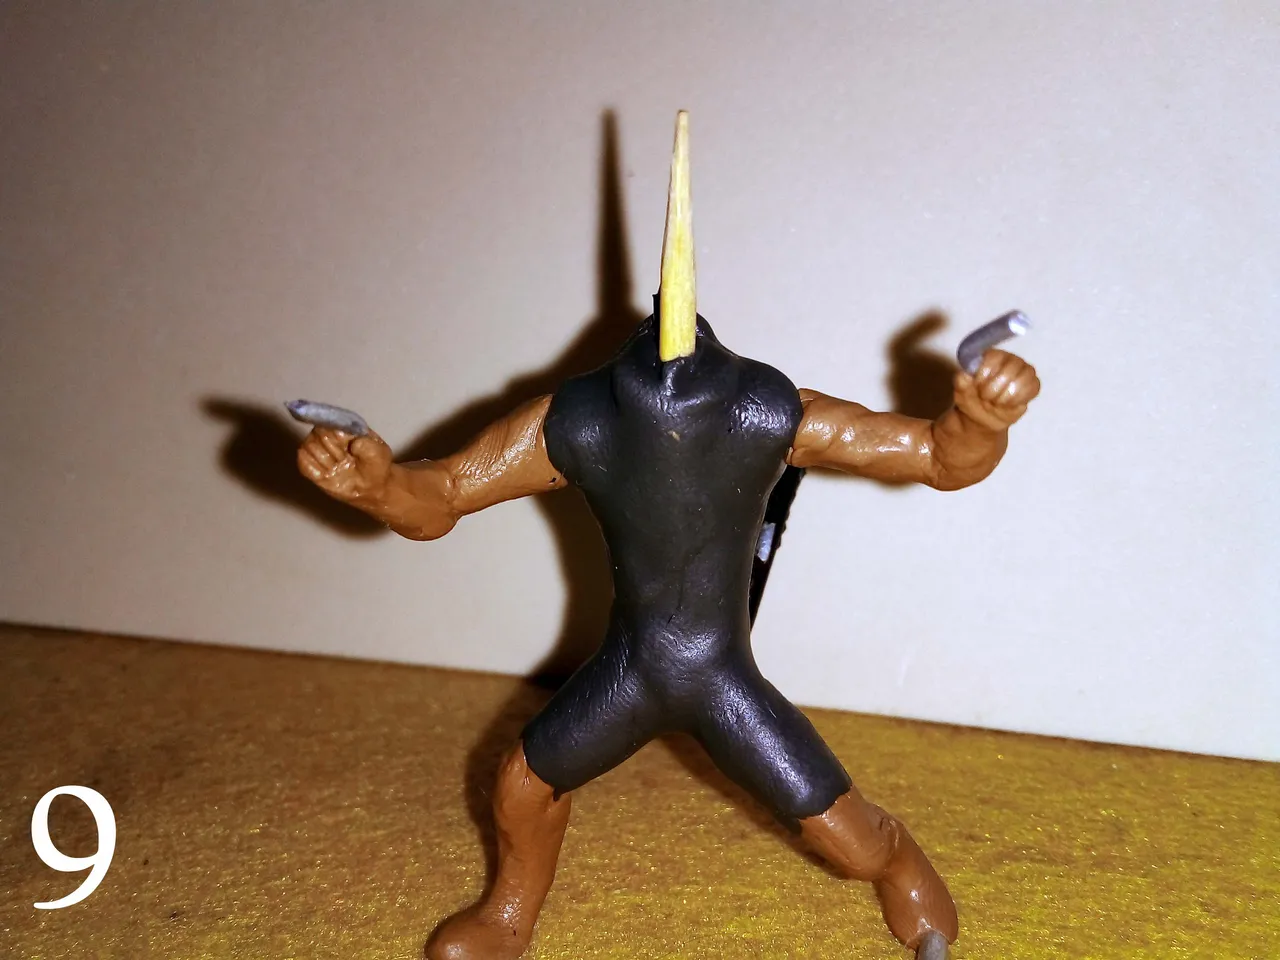
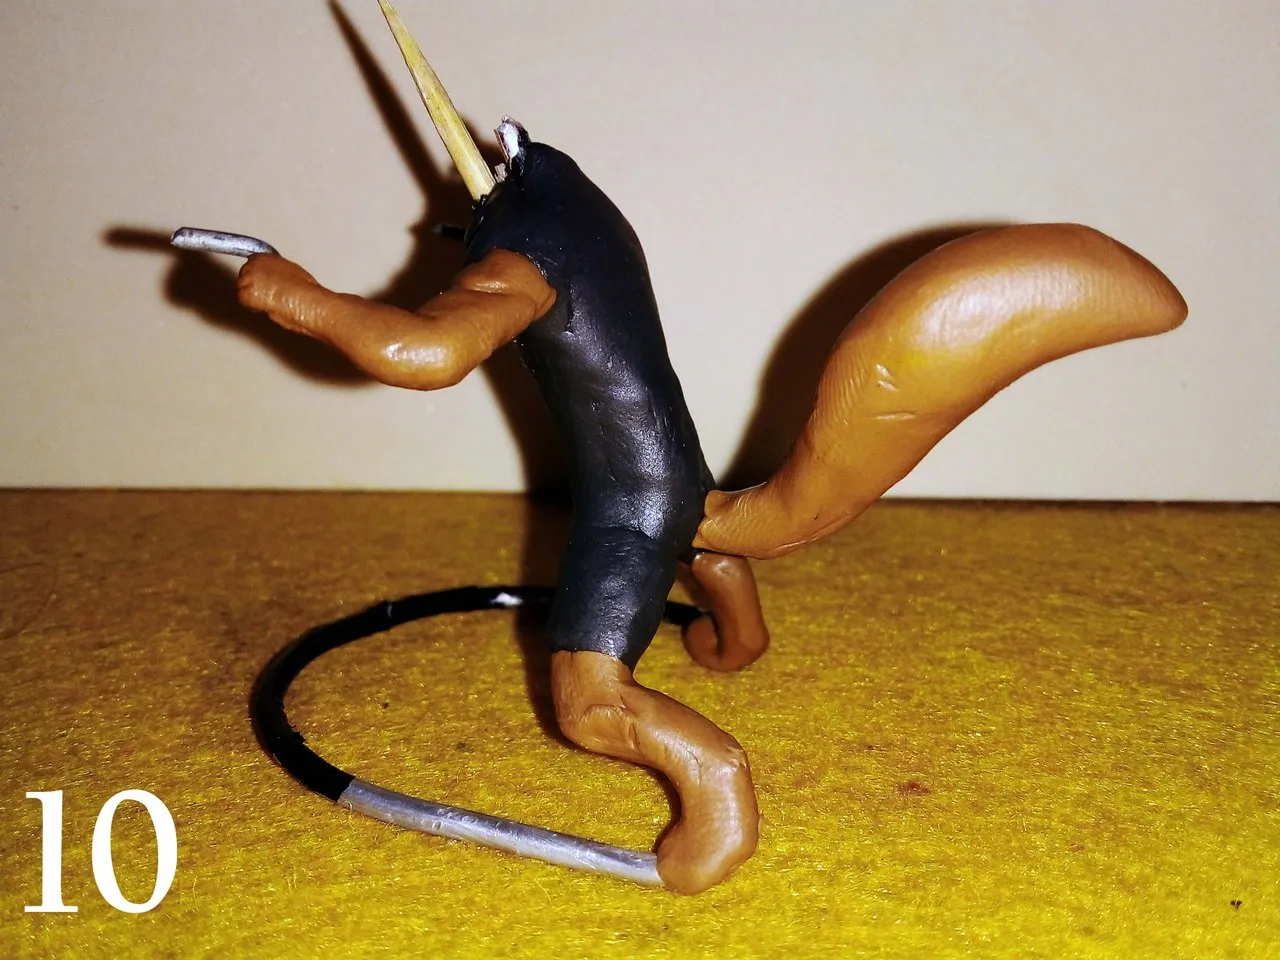
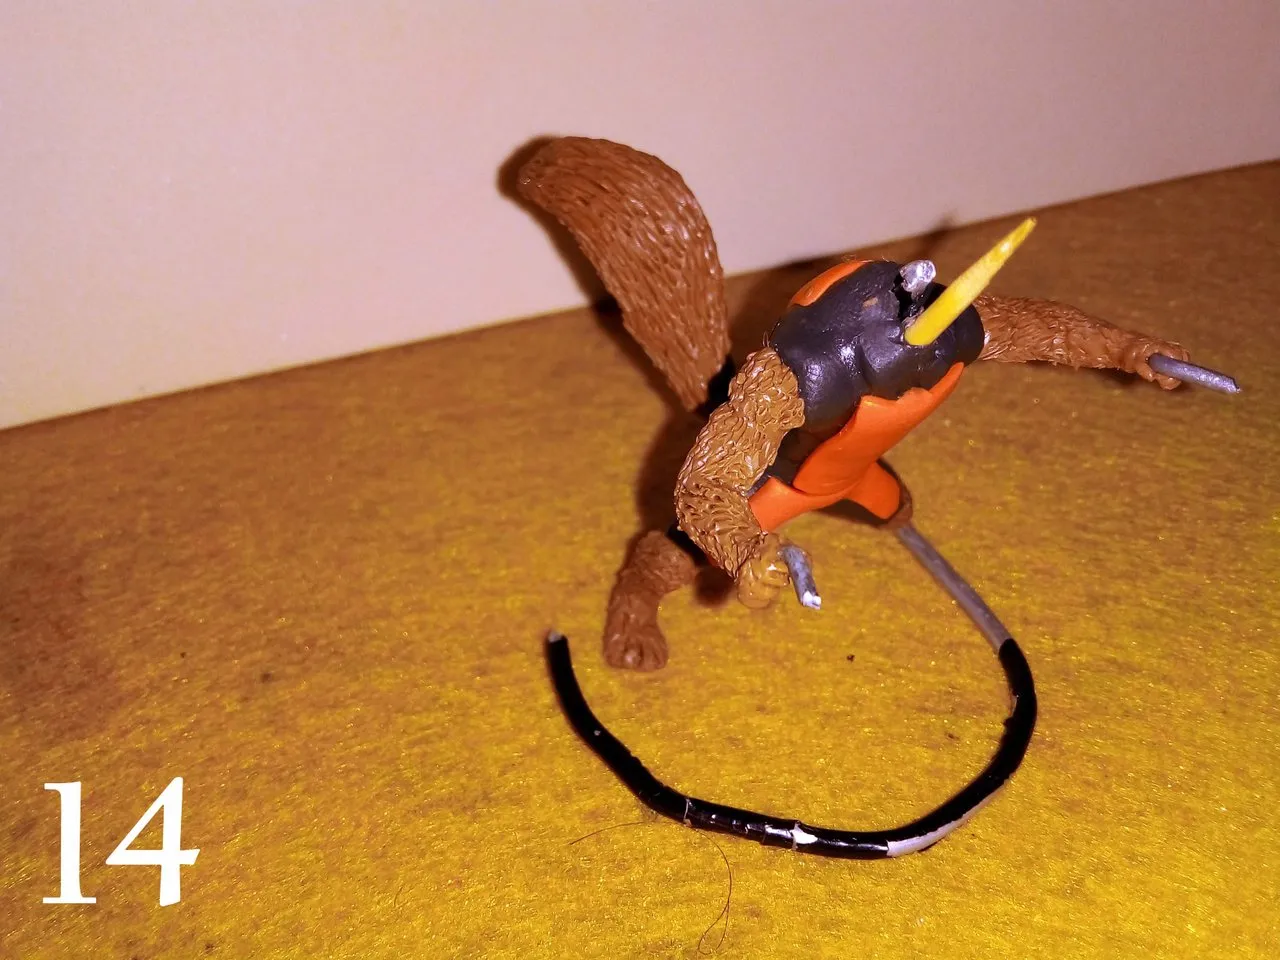
I finished one arm, continue with the other. As I mentioned before, I had to remove a part of the skeleton with which I was planning to make the giant rocket weapon, because it was too big and needed a much bigger support than the one I had already made.
So I only left the two arms free to hold a couple of small weapons.
At this point the figure was looking like this:
Terminé un brazo, seguír con el otro. Como ya comenté anteriormente, tuve que retirar una parte del esqueleto con la que pensaba hacer el arma gigante de rocket, porque era demasiado grande y necesitaba un soporte mucho más grande que el que ya había hecho.
Asi que solo le dejé los dos brazos libres para que sostenga un par de armas pequeñas.
En este punto la figura iba quedando de la siguiente manera:
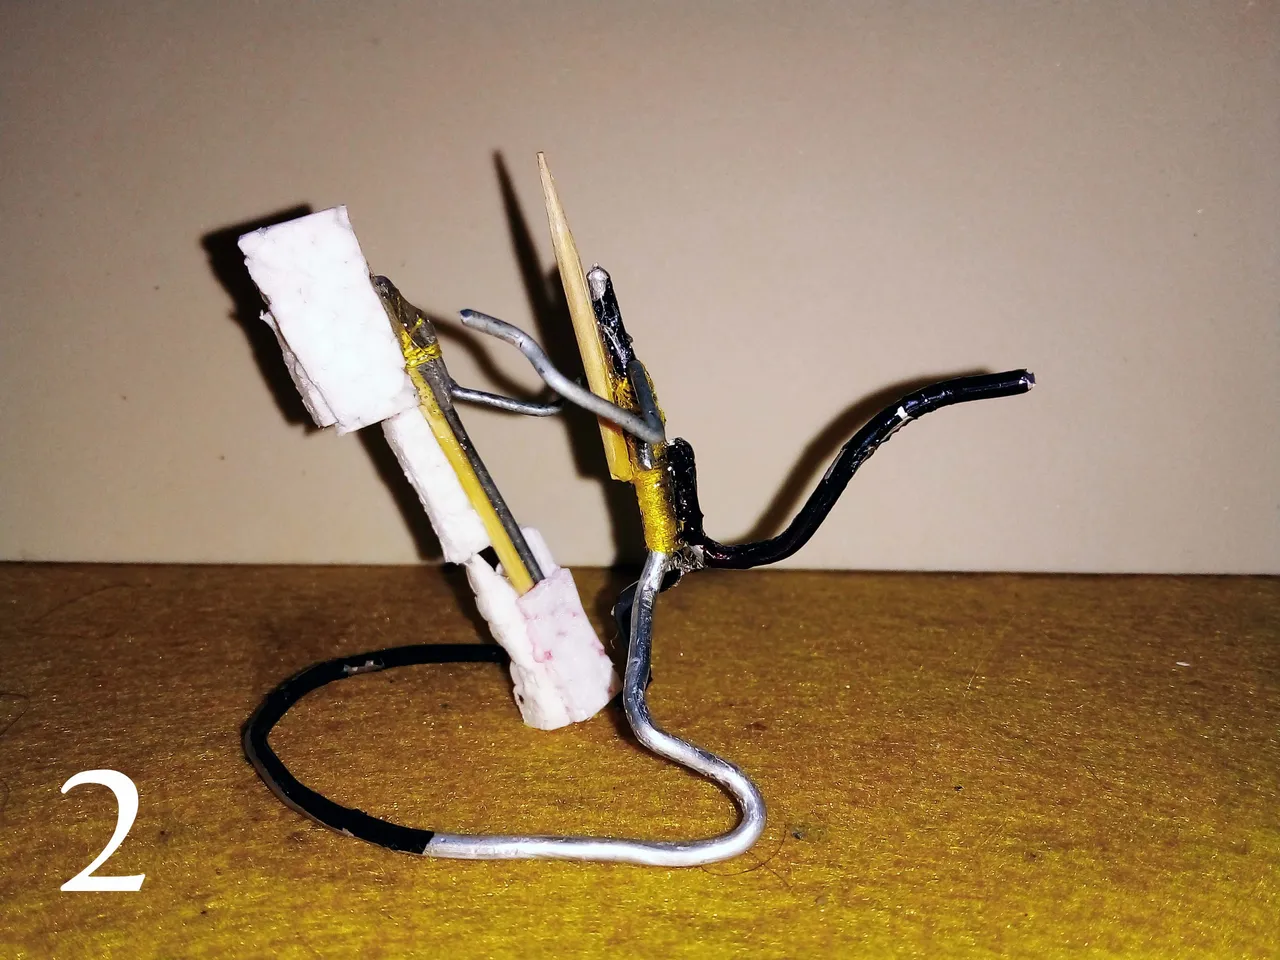
At the beginning, in the image number 2, you can see the tail support. To make the tail of the character it should be thin at the base and bulging towards the end, as shown in the image below:
Al comienzo, en la imagen número 2, se aprecia el soporte de la cola. Para hacer la cola del personaje esta debe ser delgada en la base y abultada hacia el final, tal como se aprecia en la imagen a continuación:
The Rocker costume has some orange parts. To make it I cut the patterns as shown below:
El traje del Rocker tiene unas partes naranjas. Para hacerla yo corté los patrones como se observa a continuación:
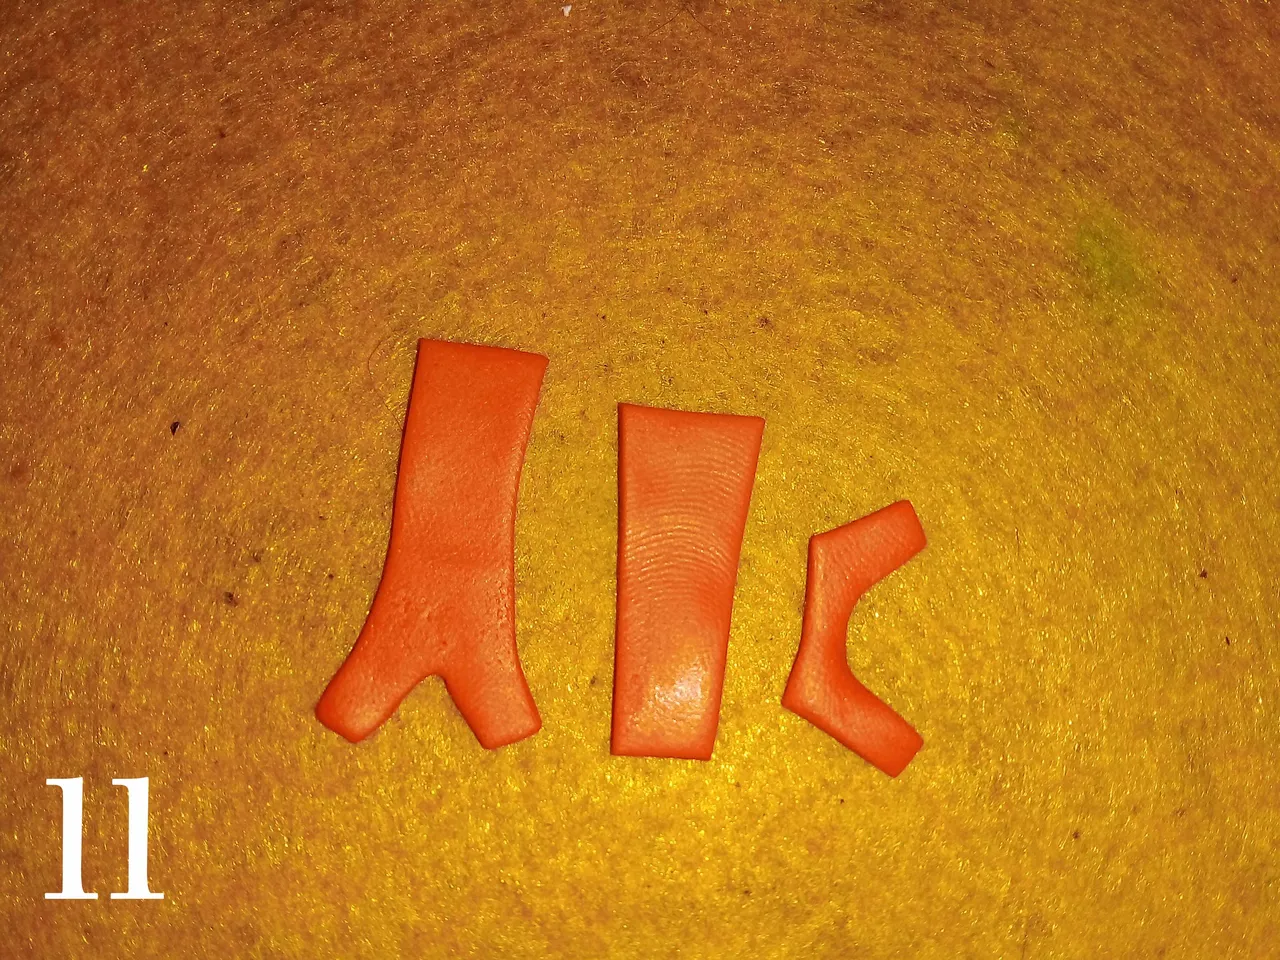
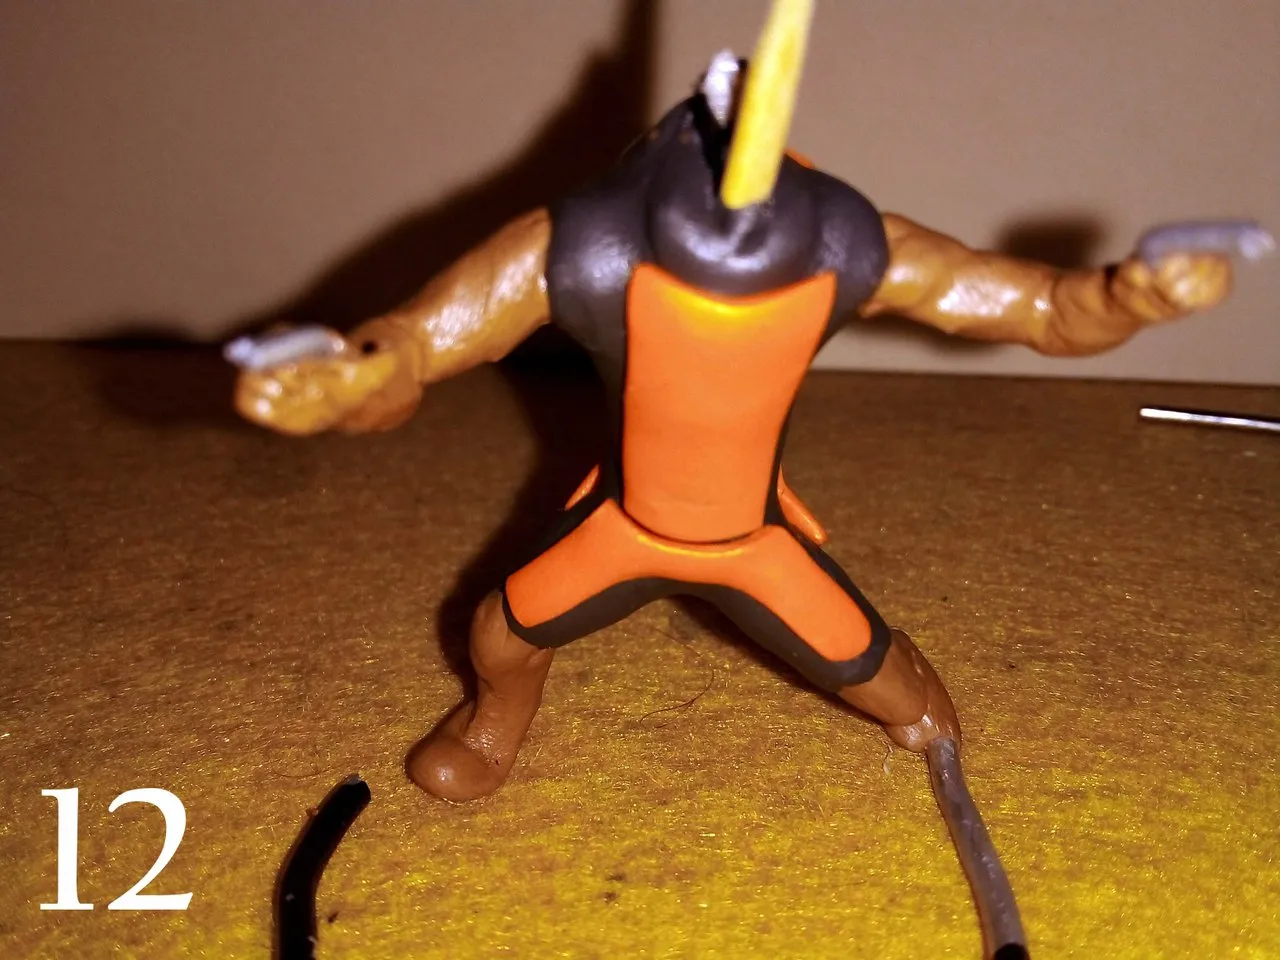
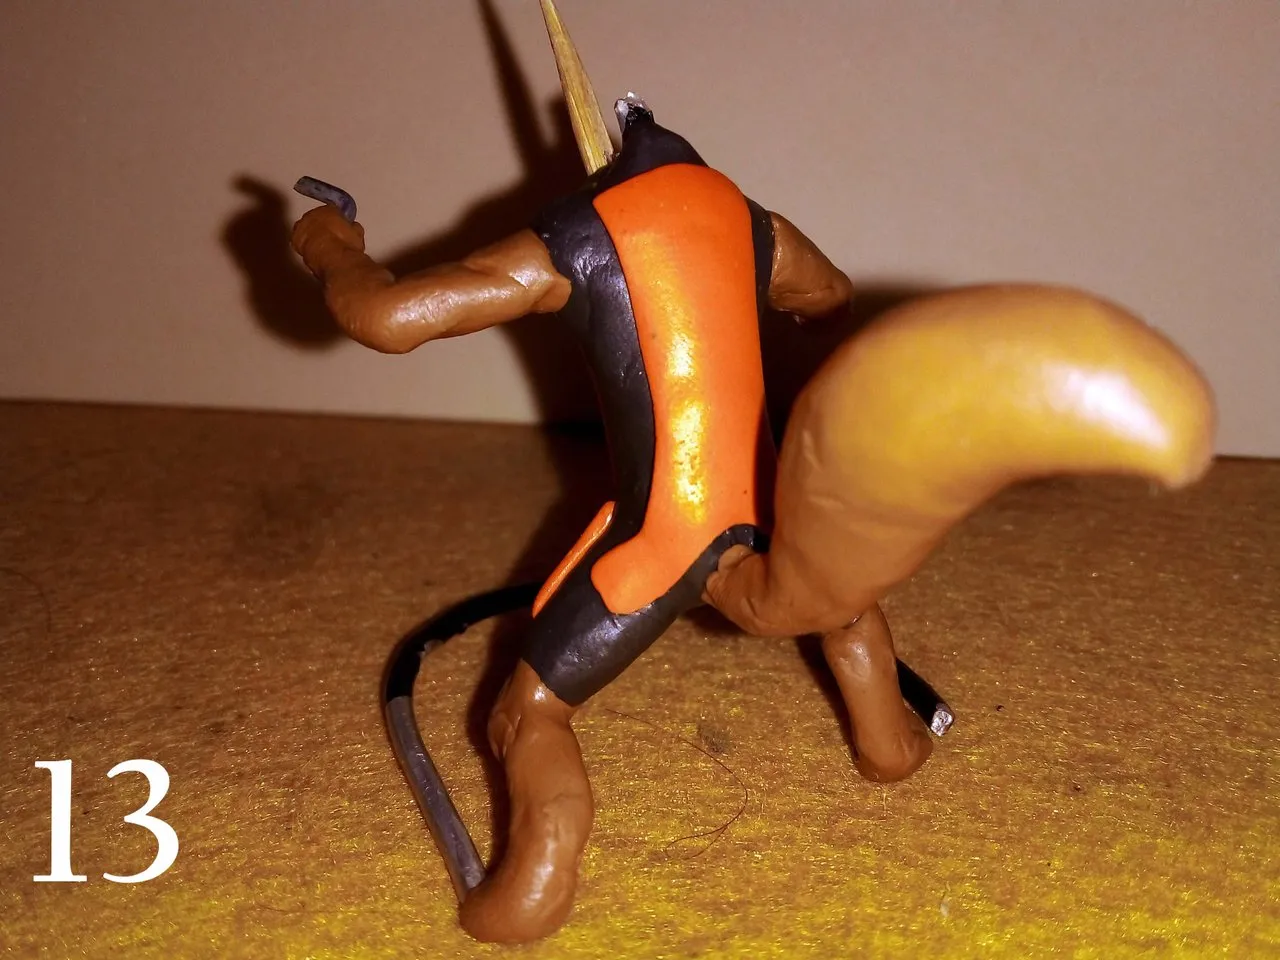
The one on the left, the longer one, will be for the back; while the two smaller sections will be for the front. Below you can see what these patterns look like once they are in place; on the front (12) and on the back (13).
El de la izquiera, el más largo, será el de la espalda; mientras que las dos secciones más pequeñas serán para la parte frontal. A continuación pueden ver como se ven estos patrones una vez colocados en su lugar; en la parte frontal (12) y en la parte trasera (13).
 |  |
|---|
Already at this point you can say that rocket's body is ready, but no, the details need to be added.
I remember that when Marylucy proposed the challenge, she said that she would like to see how she would do the fur effect. Well now I'm going to show you. It's not that difficult, but it does take quite a bit of work to achieve a fur-like effect.
Although I won't explain it in detail in this post, as I have done it in others, I will tell you that it is as simple as taking a needle and starting to make very thin lines all over the area where you want to simulate fur.
You can see a post where I explain this topic by following this link:
@gaboamc2393/learn-with-gabo-5
Ya en este punto se puede decir que el cuerpo de rocket está listo, pero no, hay que agregarle los detalles.
Recuerdo que cuando Marylucy propuso el reto, dijo que le gustaría ver cómo haría el efecto del pelaje. Pues bien ahora le voy a mostrar. No es tan difícil, pero sí que lleva bastante trabajo lograr un efecto parecido al pelaje.
Aunque no lo explicaré en detalle en esta publicación, pues lo he hecho en otras, sí les comentaré que es tan sencillo como tomar una aguja y comenzar a hacer líneas muy delgadas en toda el área en la que se desea simular el pelaje.
Pueden ver una publicación donde explico ese tema siguiendo este enlace:
@gaboamc2393/learn-with-gabo-5
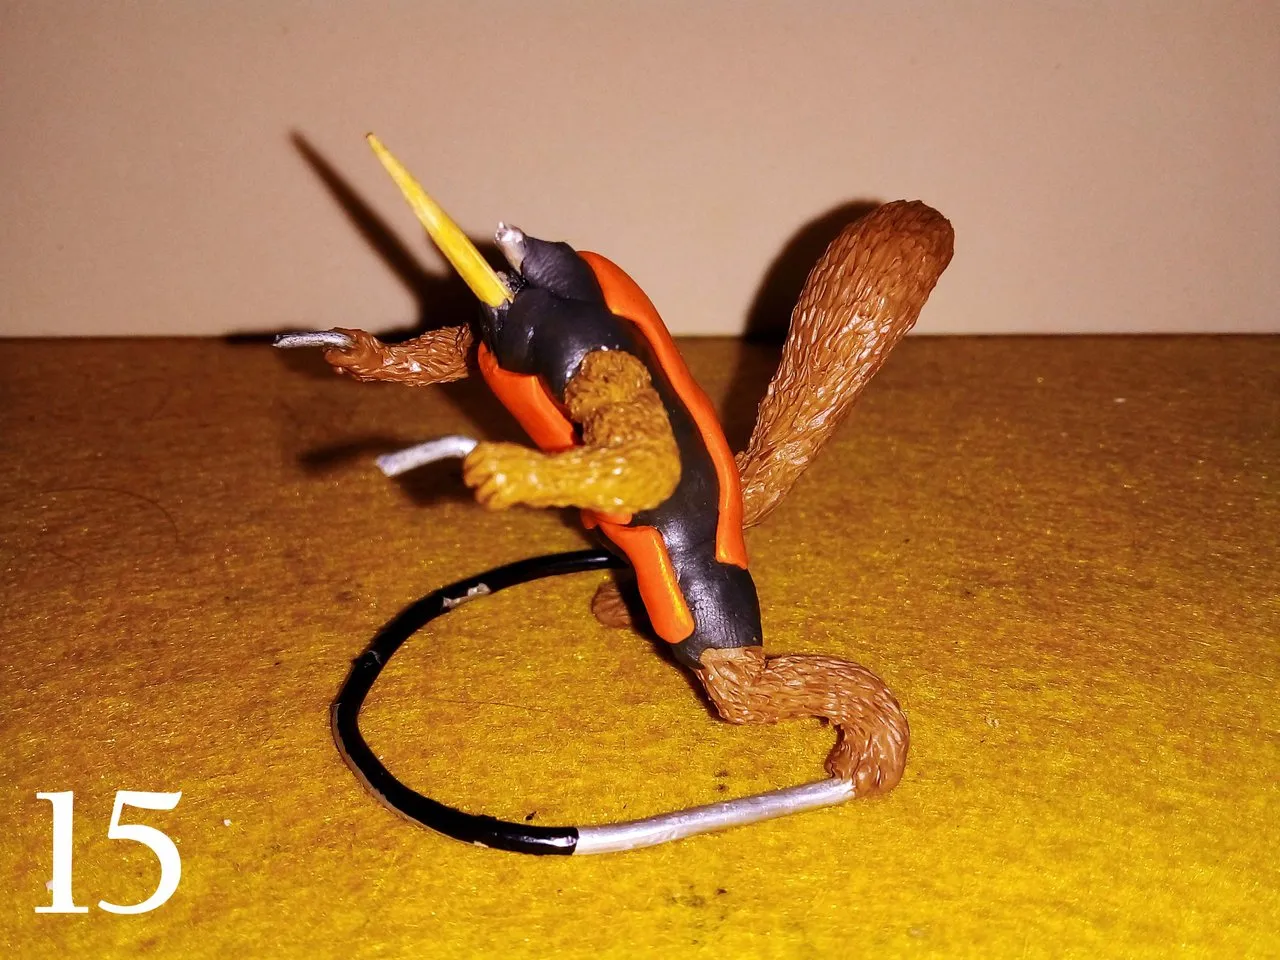
Below you can see how the limbs and tail look like once I applied this effect with the needle, making a bunch of thin lines on the plasticine:
A continuación pueden ver cómo se ven las extremidades y la cola una vez que apliqué este efecto con la aguja, haciendo un montón de líneas delgadas sobre la plastilina:
 |  |
|---|
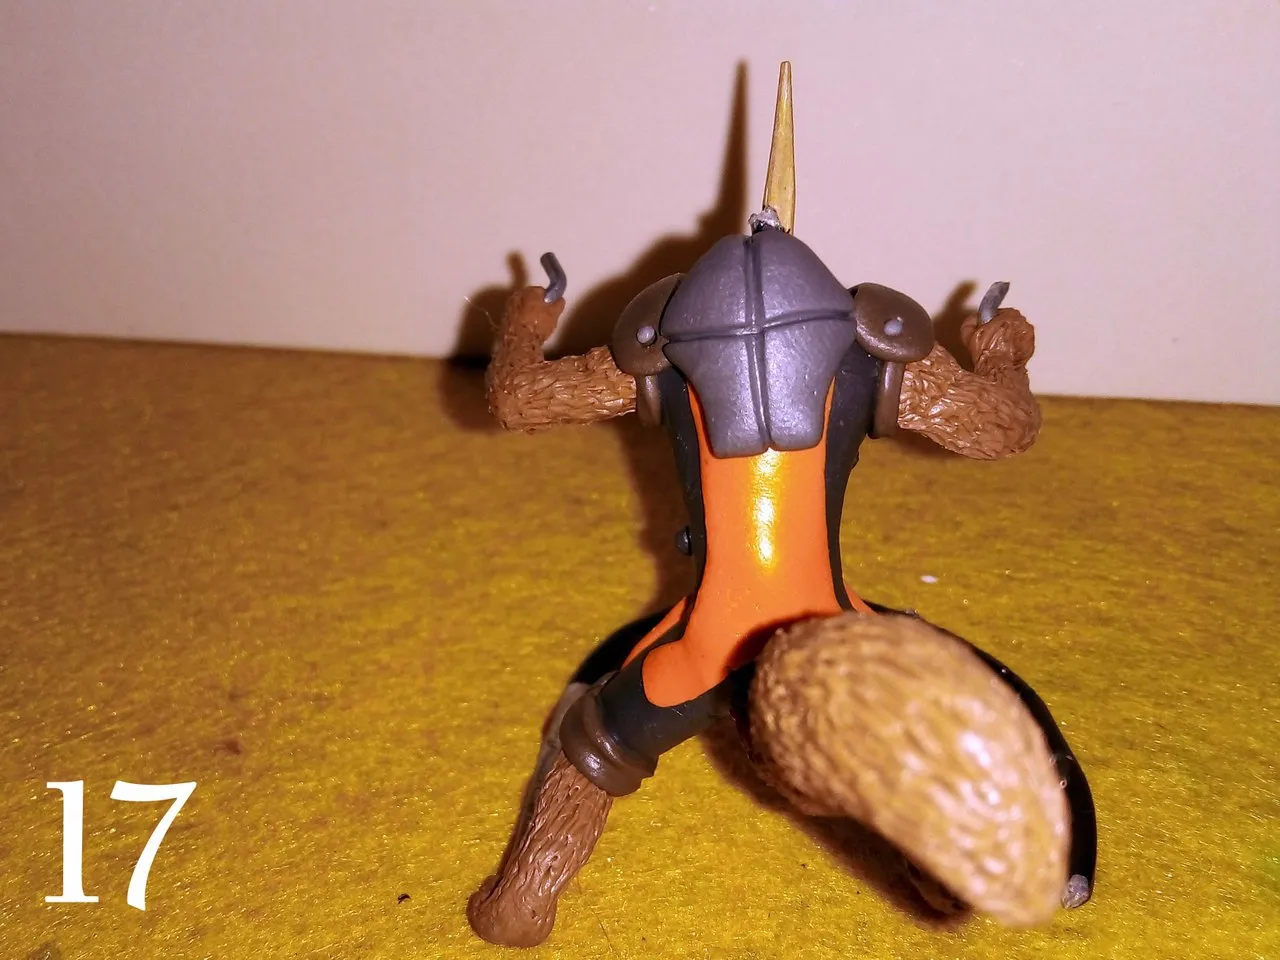
After the fur effect, it's time to make more details of the suit, such as some shoulder protectors, knee pads and chest ornaments (16), as well as a flying backpack located on the back (17).
Después del efecto del pelaje, toca hacer más detalles del traje, como algunos protectores en los hombros, rodilleras y adornos del pecho (16), así como también una mochila voladora ubicada en la espalda (17).
 |  |
|---|
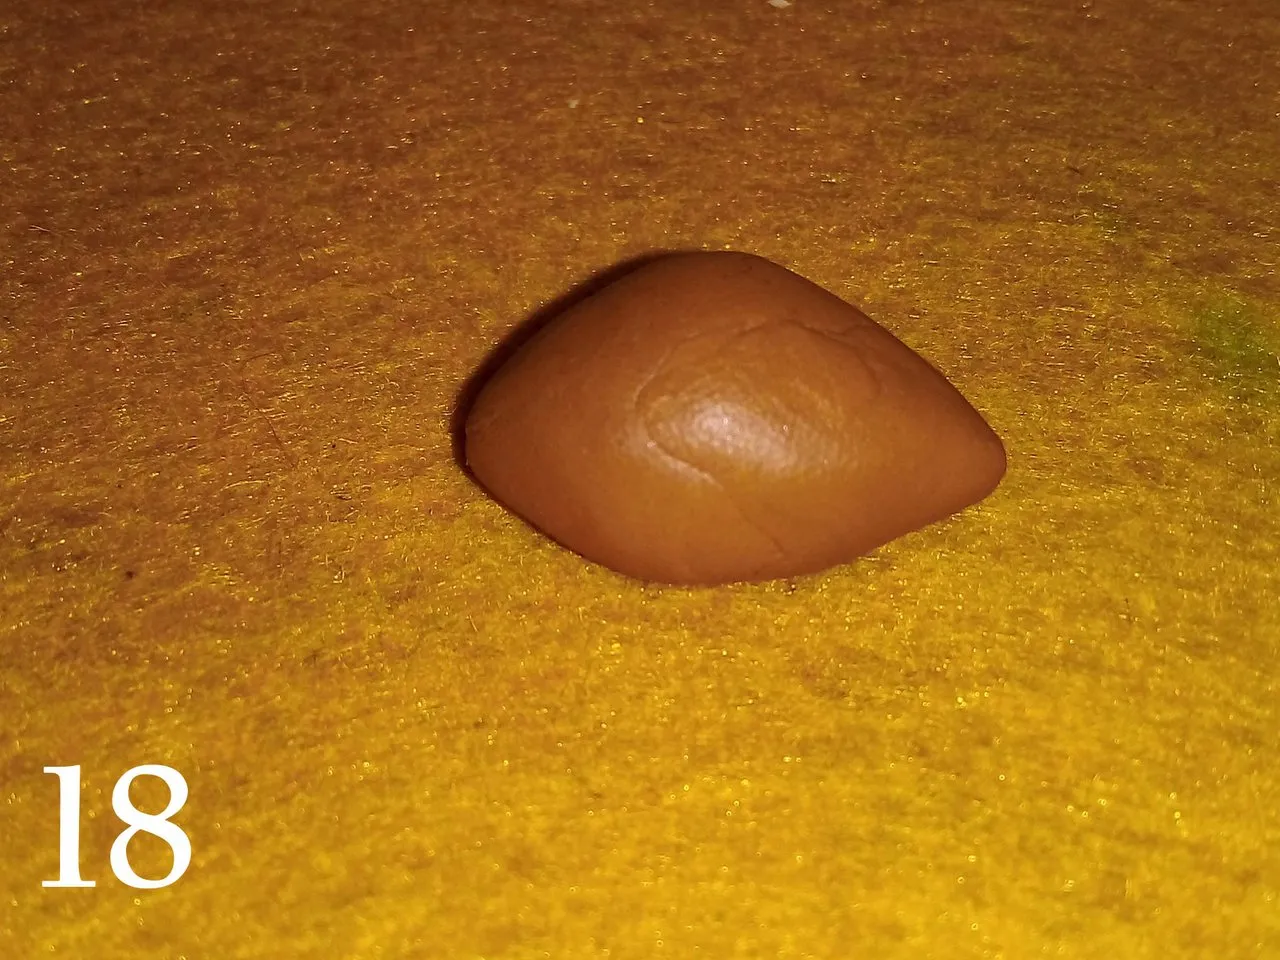
Now the body is ready except for a couple of details that I finished later. The next thing I did was the head.
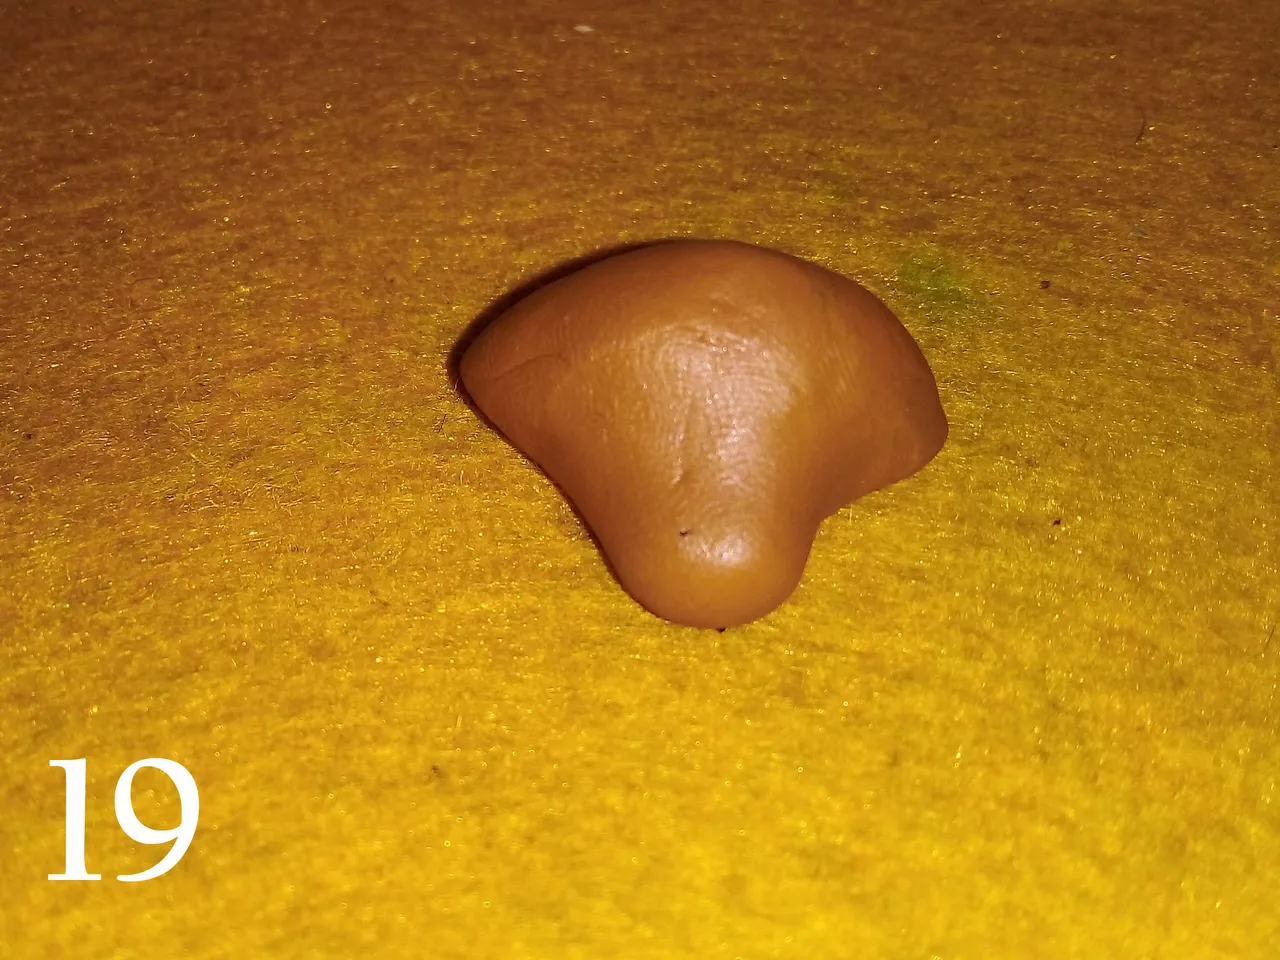
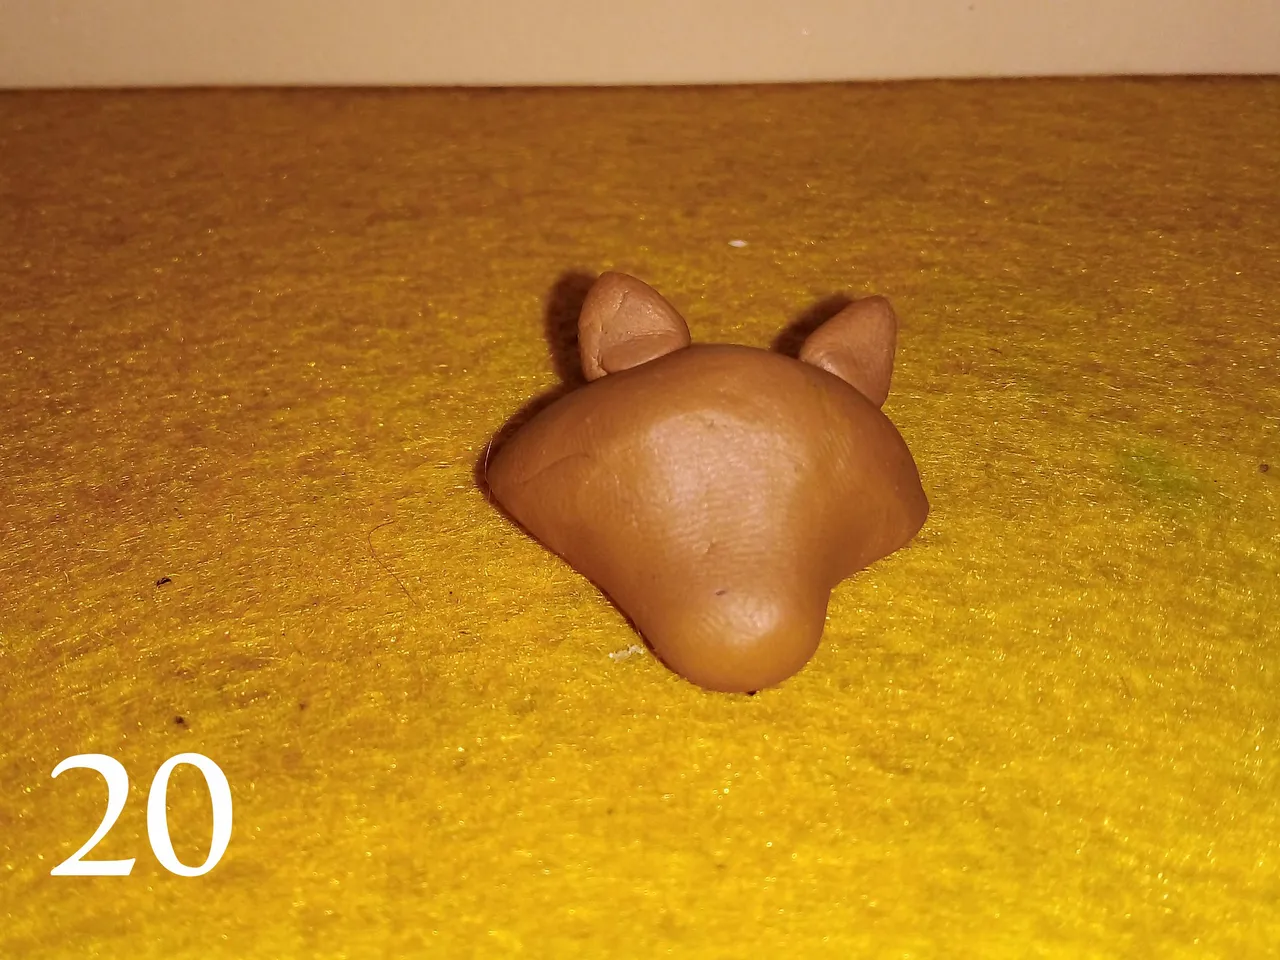
To make it you have to follow some relatively simple steps. First we make a shape similar to that of a soccer (18), then we place a piece of plasticine in the middle that sticks out, this will be the nose (19); next are the ears (20).
Ahora sí que está listo el cuerpo salvo por un par de detalles que terminé más adelante. Lo siguiente que hice fue la cabeza.
Para hacerla se deben seguir unos pasos relativamente sencillos. Primero hacemos una forma parecida a la de una balón de futbol americano (18), luego le colocamos un pezado de plastilina en el medio que sobresalga, esta será la nariz (19); lo siguiente son las orejas (20).
 |  |  |
|---|
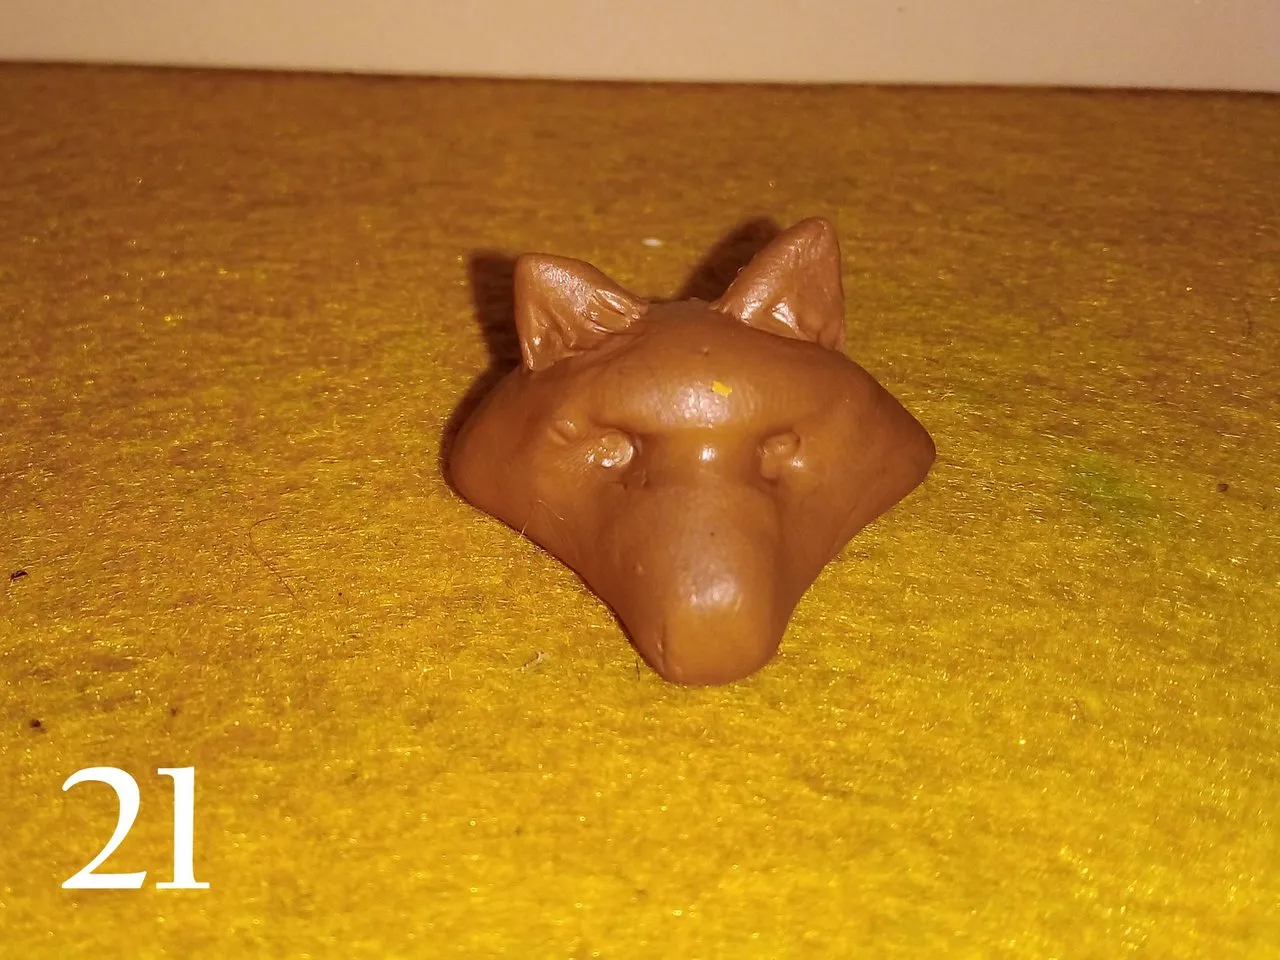
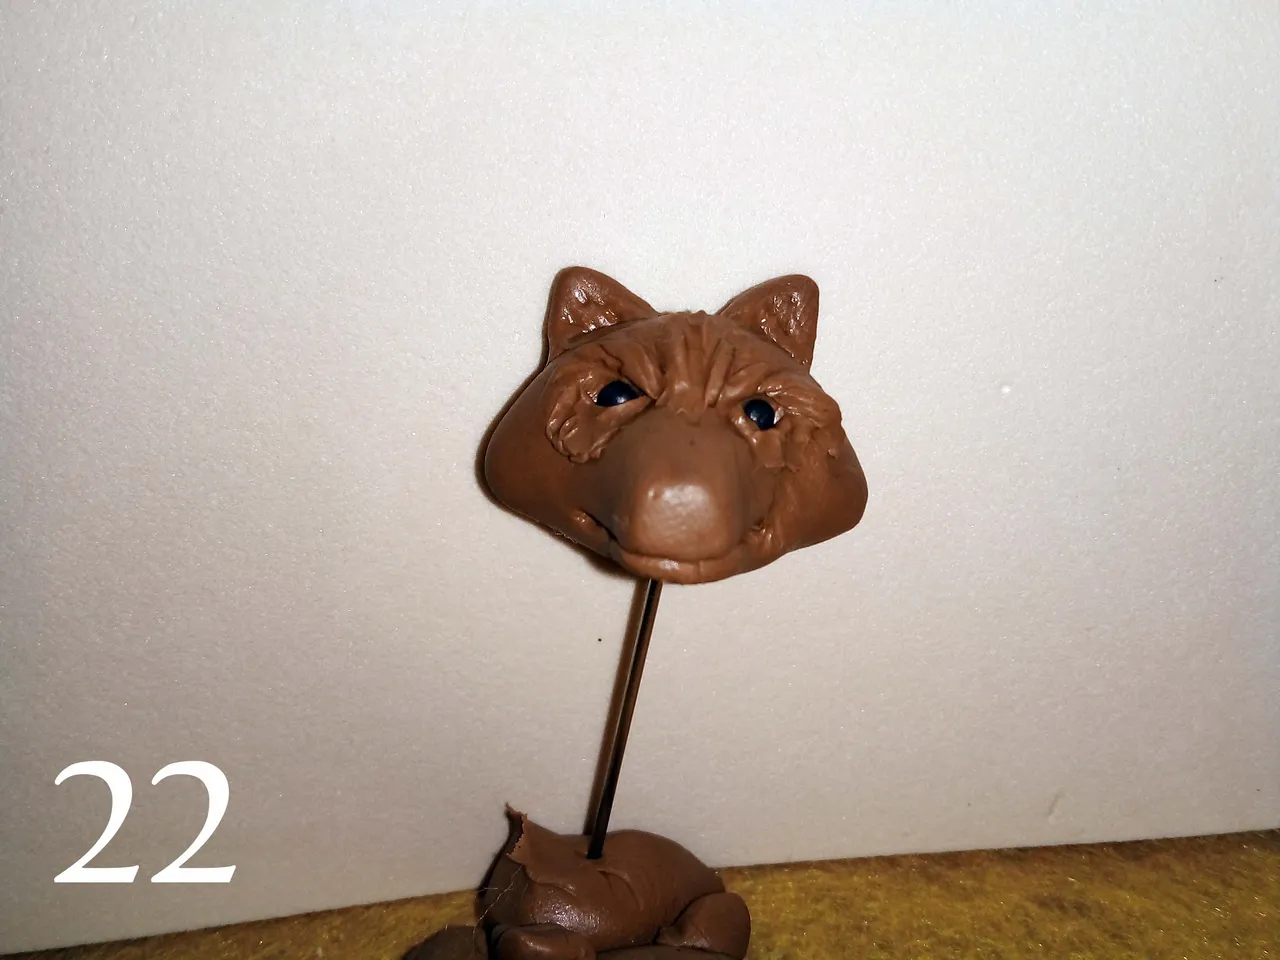
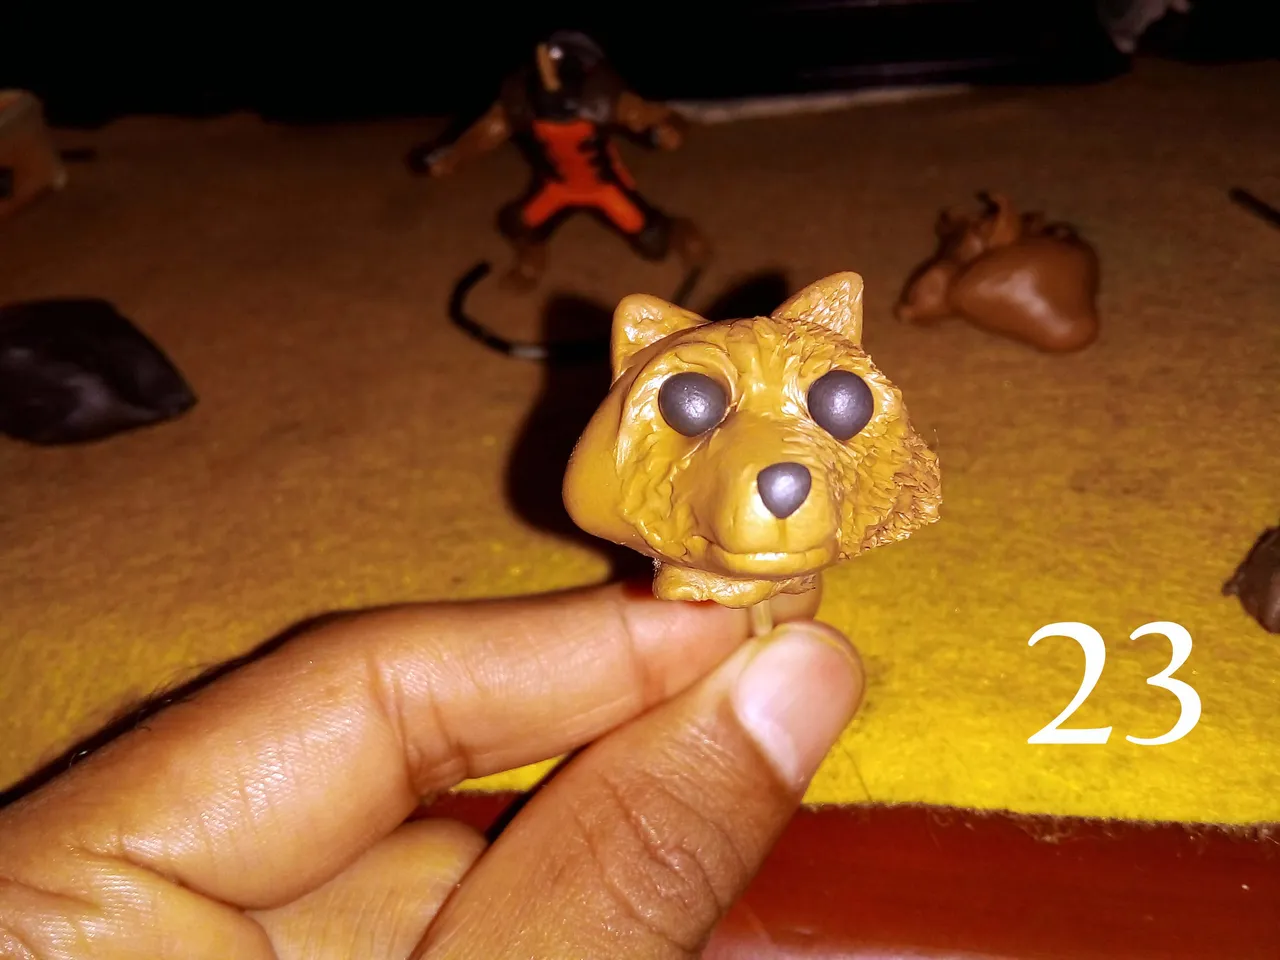
Once the base shape is ready, the eye area is sunk a little and the holes are made (21). Make a couple of black spheres for the eyes and place them in the sockets, then follow the same technique to simulate the fur (22).
Notwithstanding the above, I realized that the eyes were too small, as shown in image 22, so I replaced them, made larger sockets and placed larger eyes (23).
Una vez lista la forma base, se hunde un poco el área de los ojos y se hacen los agujeros (21). Se hace un par de esferas negras para los ojos y se colocan en las cuencas, luego se sigue la misma técnica para simular el pelaje (22).
No obstante a lo dicho anteriormente, me di cuenta que los ojos eran muy pequeños, como se ve en la imagen 22, así que los reemplacé, hice cuencas más grandes y coloqué ojos de mayor tamaño (23).
 |  |  |
|---|
Finally I finished making the lines with the needle on the plasticine to simulate the fur and so I gave the figure with the head in place:
Finalmente terminé de hacer las líneas con la aguja sobre la plastilina para simular el pelaje y así que dó la figura con la cabeza puesta en su lugar:
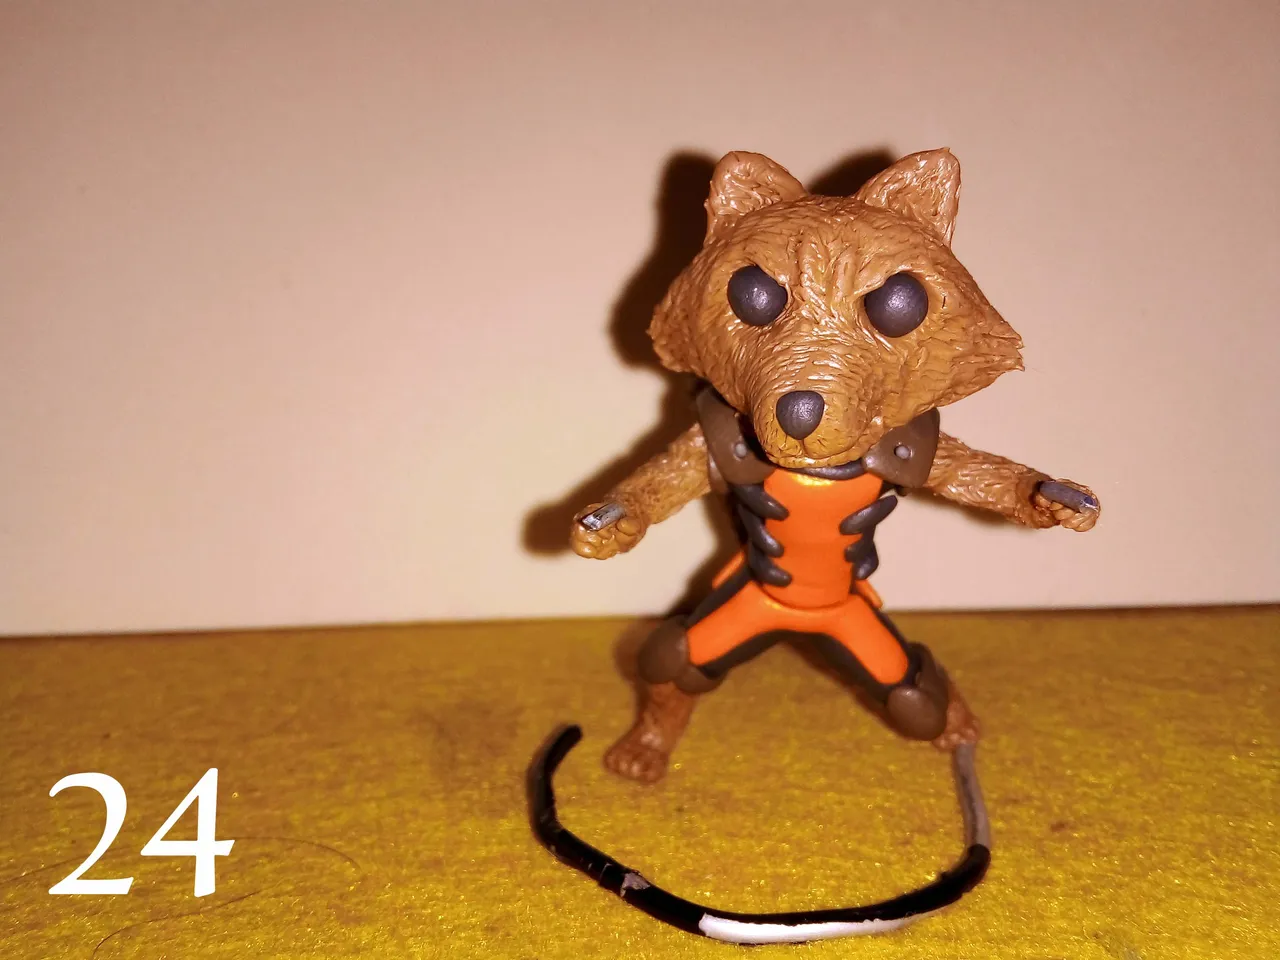
Again, you could say that the figure is ready, but you can add more details that will allow everyone to identify Rocket when they see the figure.
The first detail is to darken the fur and give more relief. To achieve this, paint with a wet brush on the surface.
The paint will remain in the tiny lines we made with the needle, but then the excess should be removed with the same wet brush.
For this technique to work you should use a water-based paint.
Nuevamente, se podría decir que la figura está lista, pero se pueden agregar más detalles que permitirán que todos puedan identificar a Rocket al ver la figura.
El primer detalle es ocurecer el pelaje y dar mayor relieve. Para lograr esto se debe pintar con un pincel húmedo sobre la superficie.
La pintura se quedará en las diminutas líneas que hicimos con la aguja, pero luego se debe retirar el exceso con el mismo pincel húmedo.
Para que esta técnica funcione de debe usar una pintura a base de agua.
You can learn more about this technique by following this link:
@gaboamc2393/yvbcnyzi
Pueden ver más sobre esta técnica siguiendo este enlace:
@gaboamc2393/yvbcnyzi
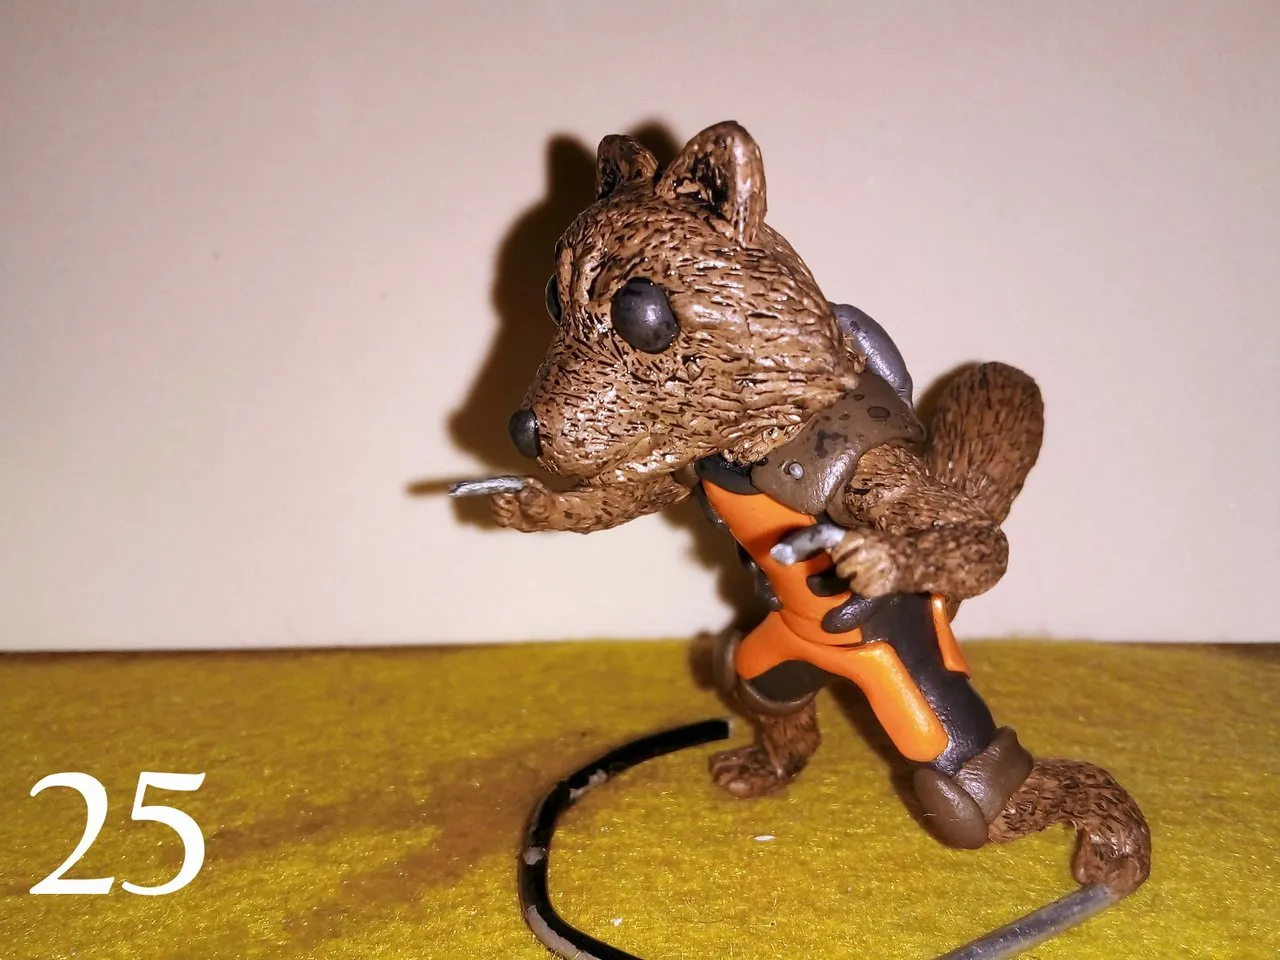
Once the paint was dry, I used white paint to make the white marks on the raccoon's fur. In this case I used the dry brush technique.
Una vez seca la pintura, usé pintura blanca para hacer las marcas blancas en el pelaje del mapache. En este caso usé la técnica del pincel seco.
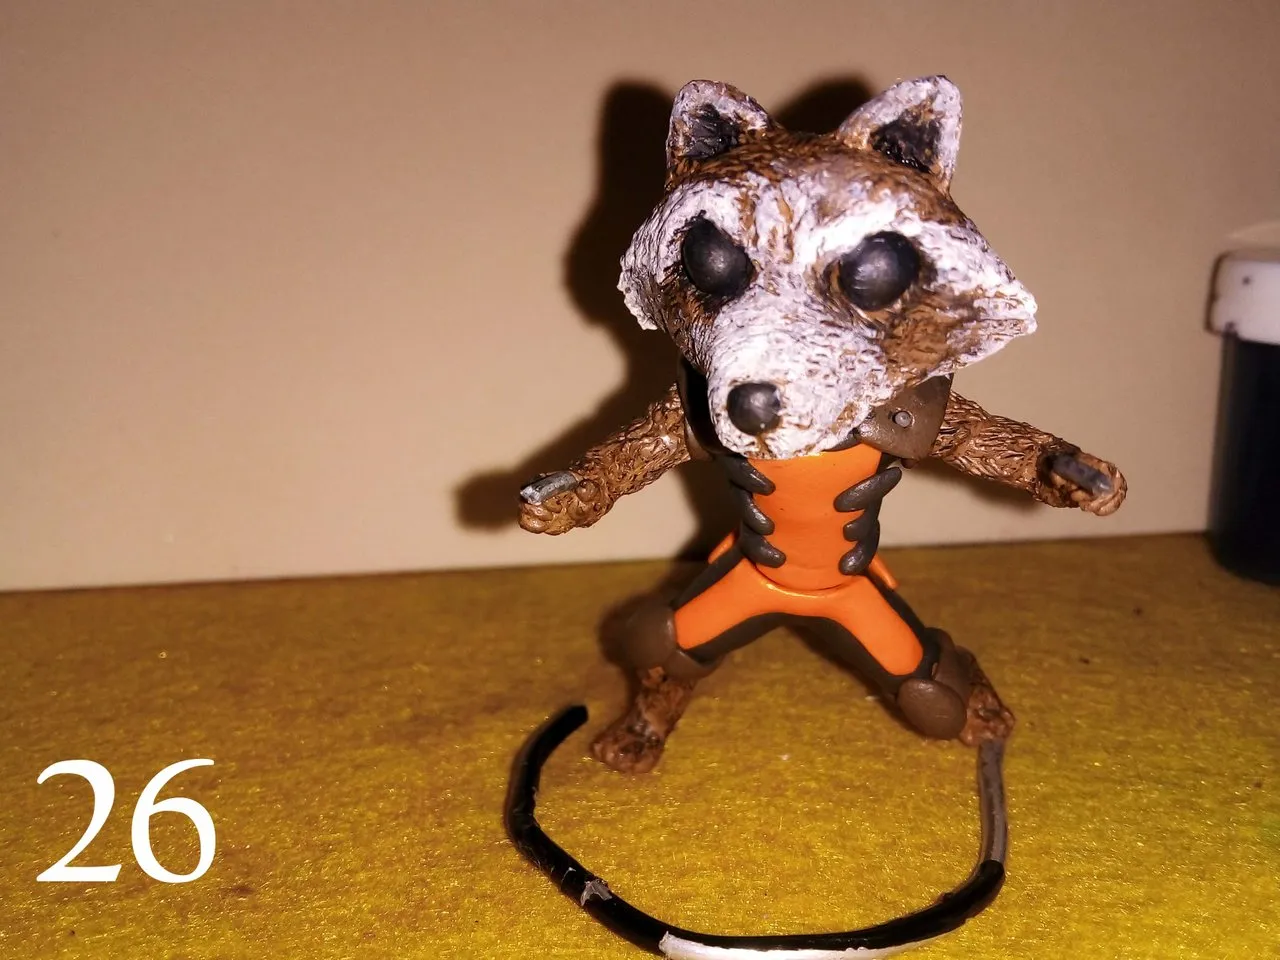
In addition to the markings on the face, I did the white lines that Rocket (and any raccoon) has on the tail:
Además de las marcas de la cara, hice las líneas blancas que tiene Rocket (y cualquier mapache) en la cola:
The last thing was to make the weapons. Making them is very easy, I simply made the pieces that you see in the image below and placed them on the wire supports that are near the hands of the figure:
Lo último fue hacer las armas. Hacerlas es muy sencillo, simplemente hice las piezas que ven en la imagen de abajo y las coloqué sobre los soportes de alambre que estan cerca de las manos de la figura:

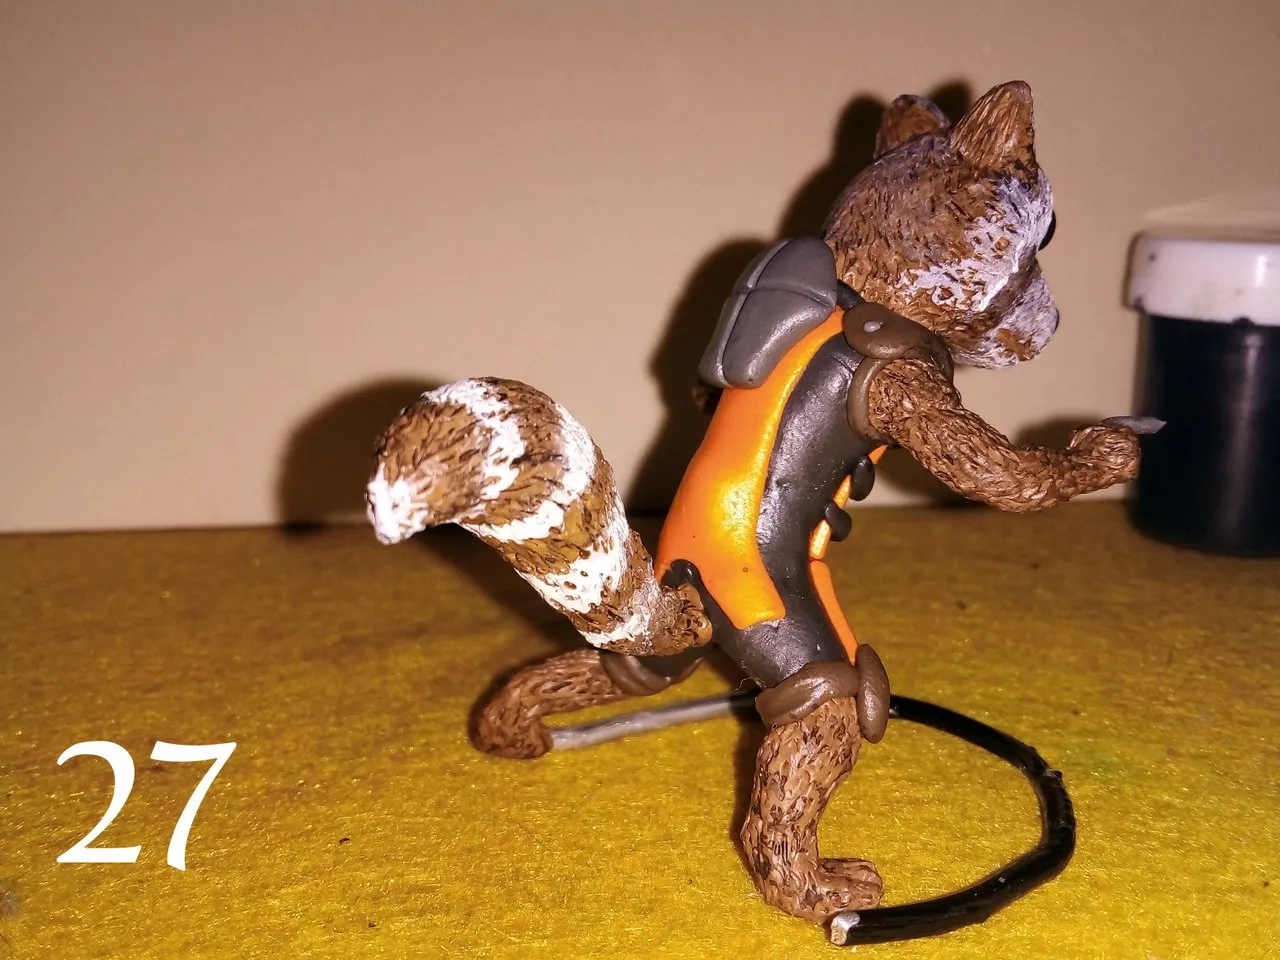
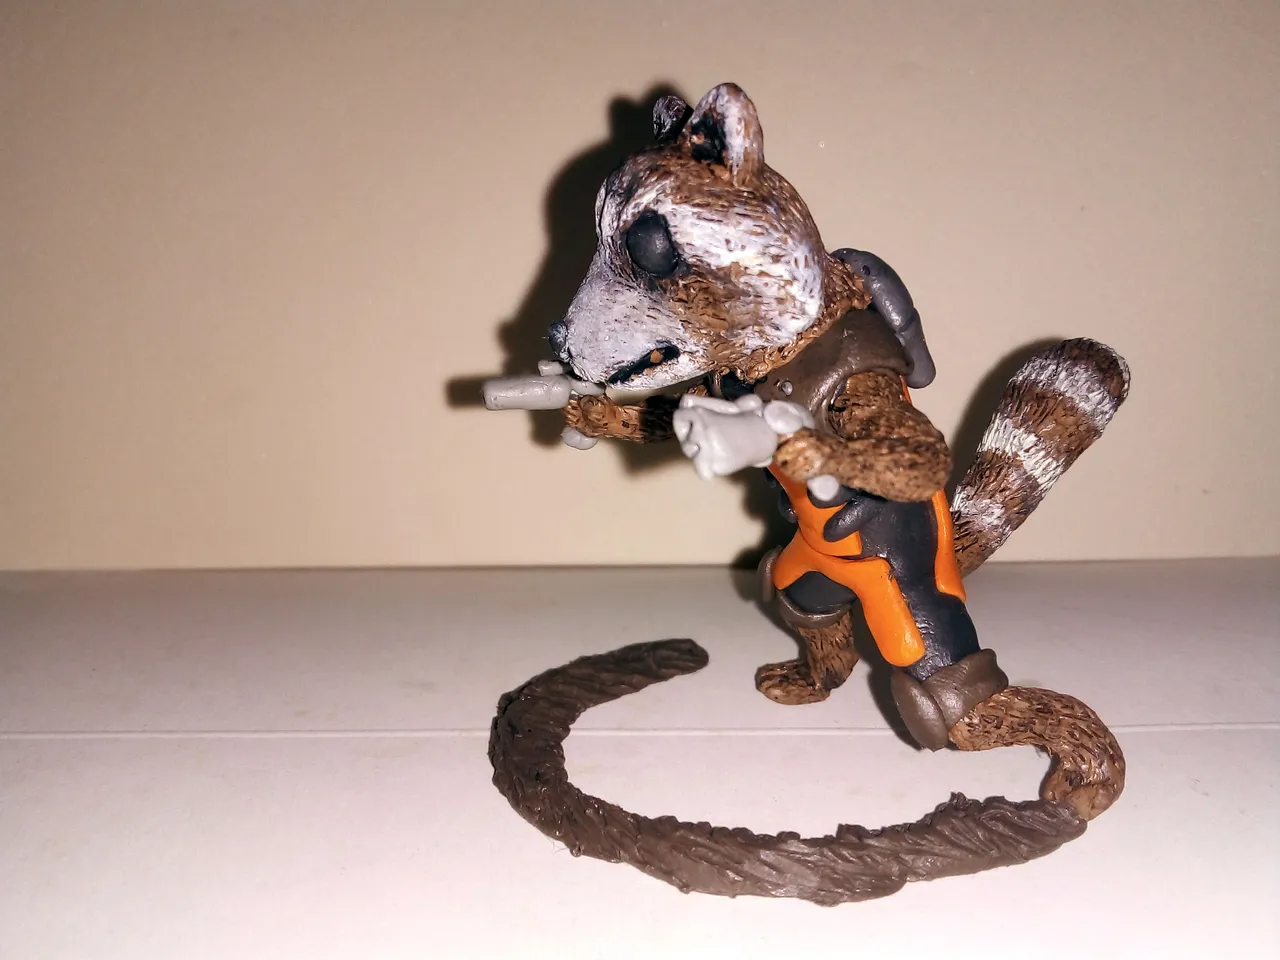
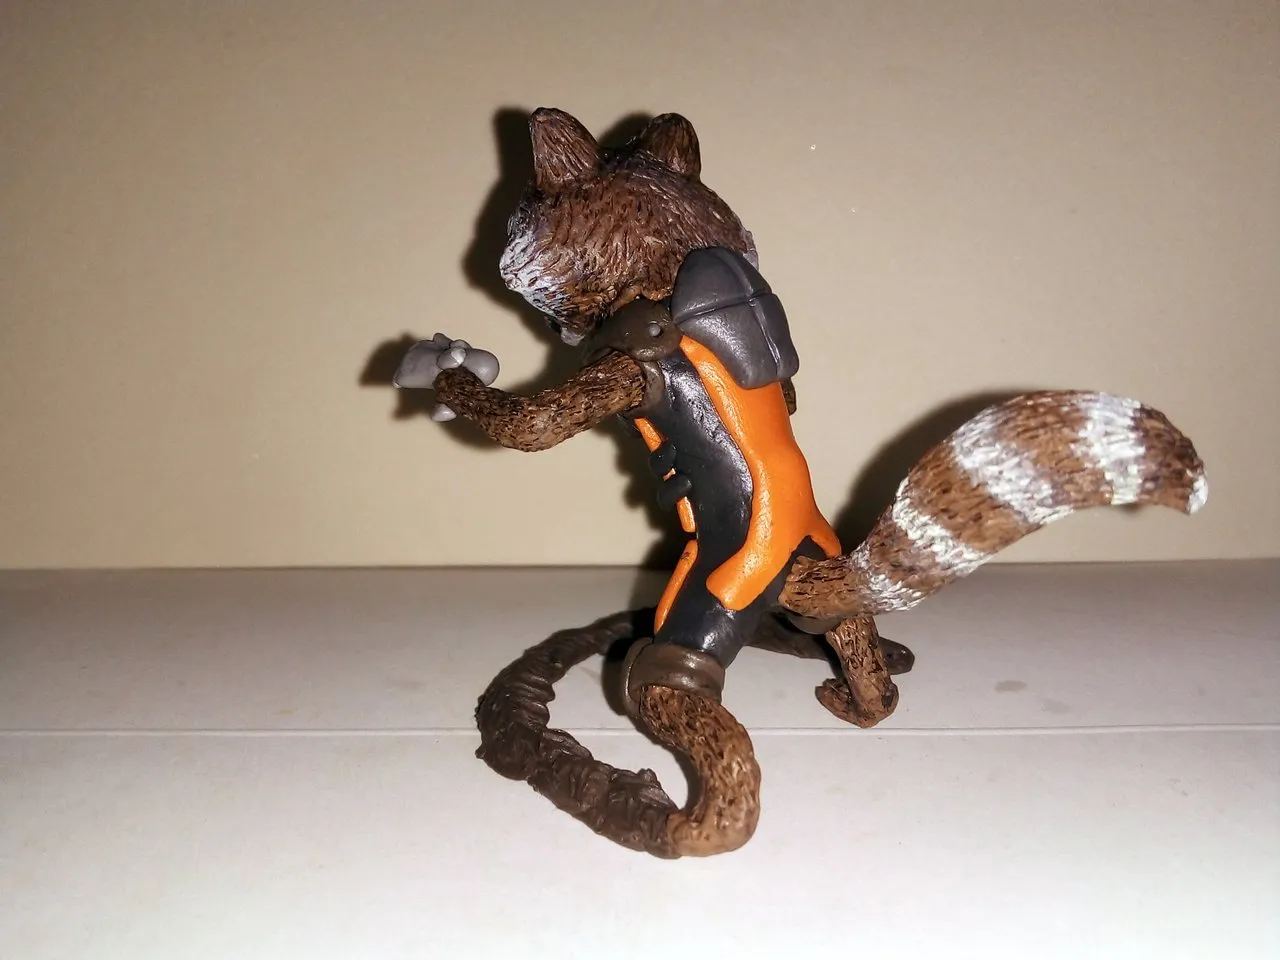
And so, after making the weapons and decorating the wire base with more plasticine, the figure was finished.
Y así, tras hacer las armas y decorar la base de alambre con más plastilina, la figura quedó terminada.
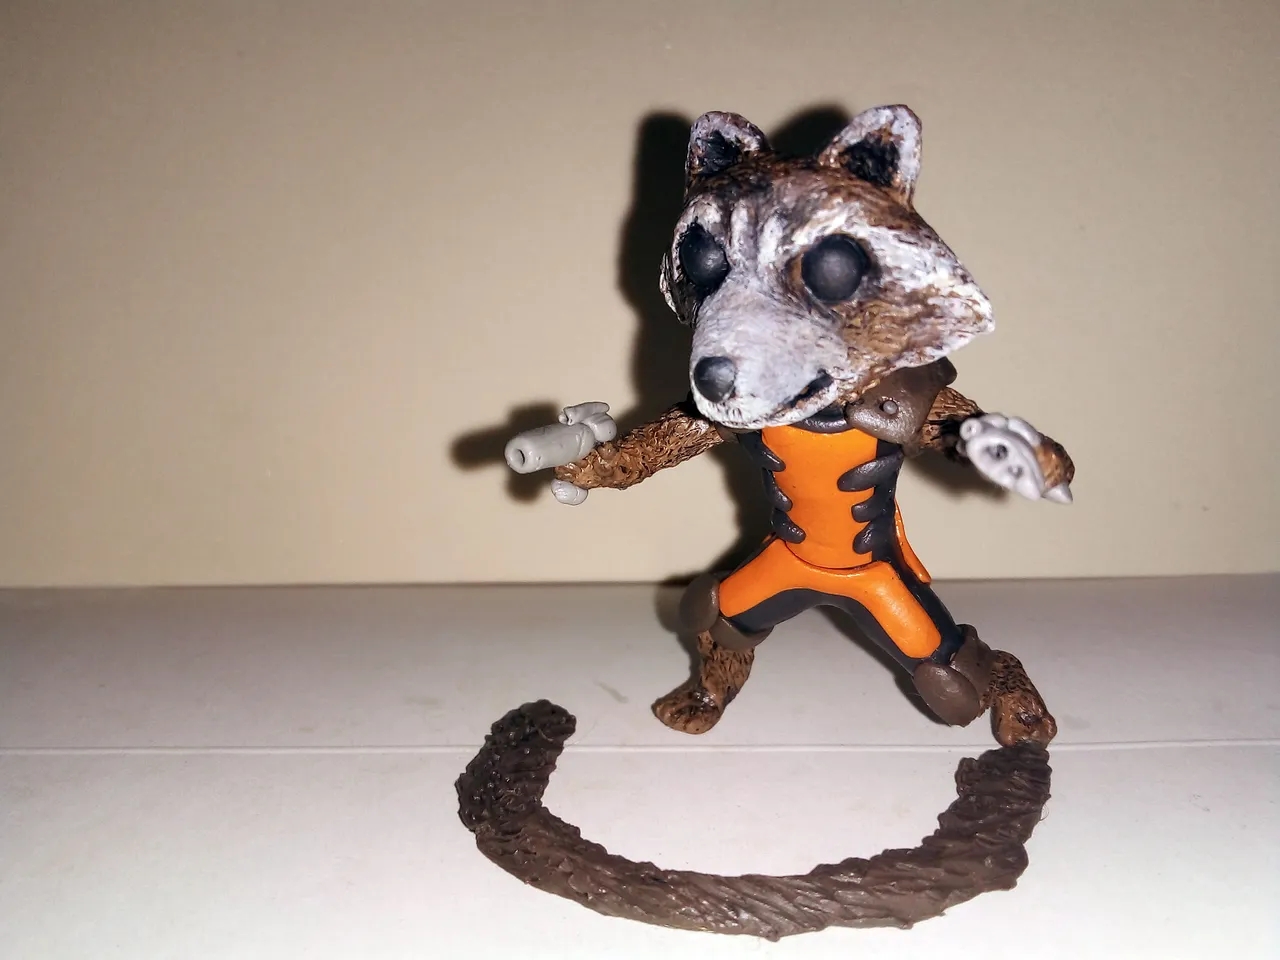
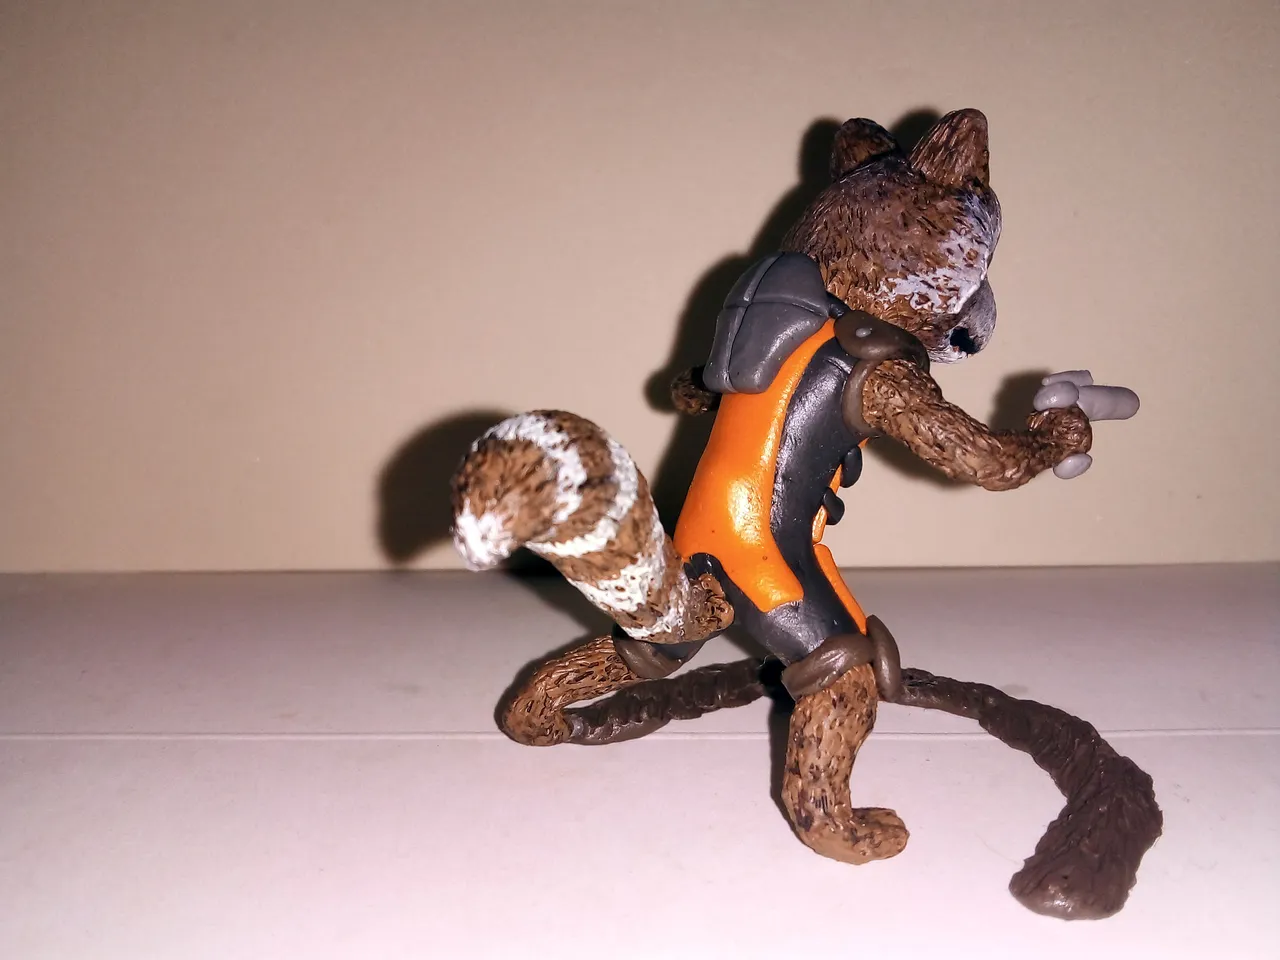
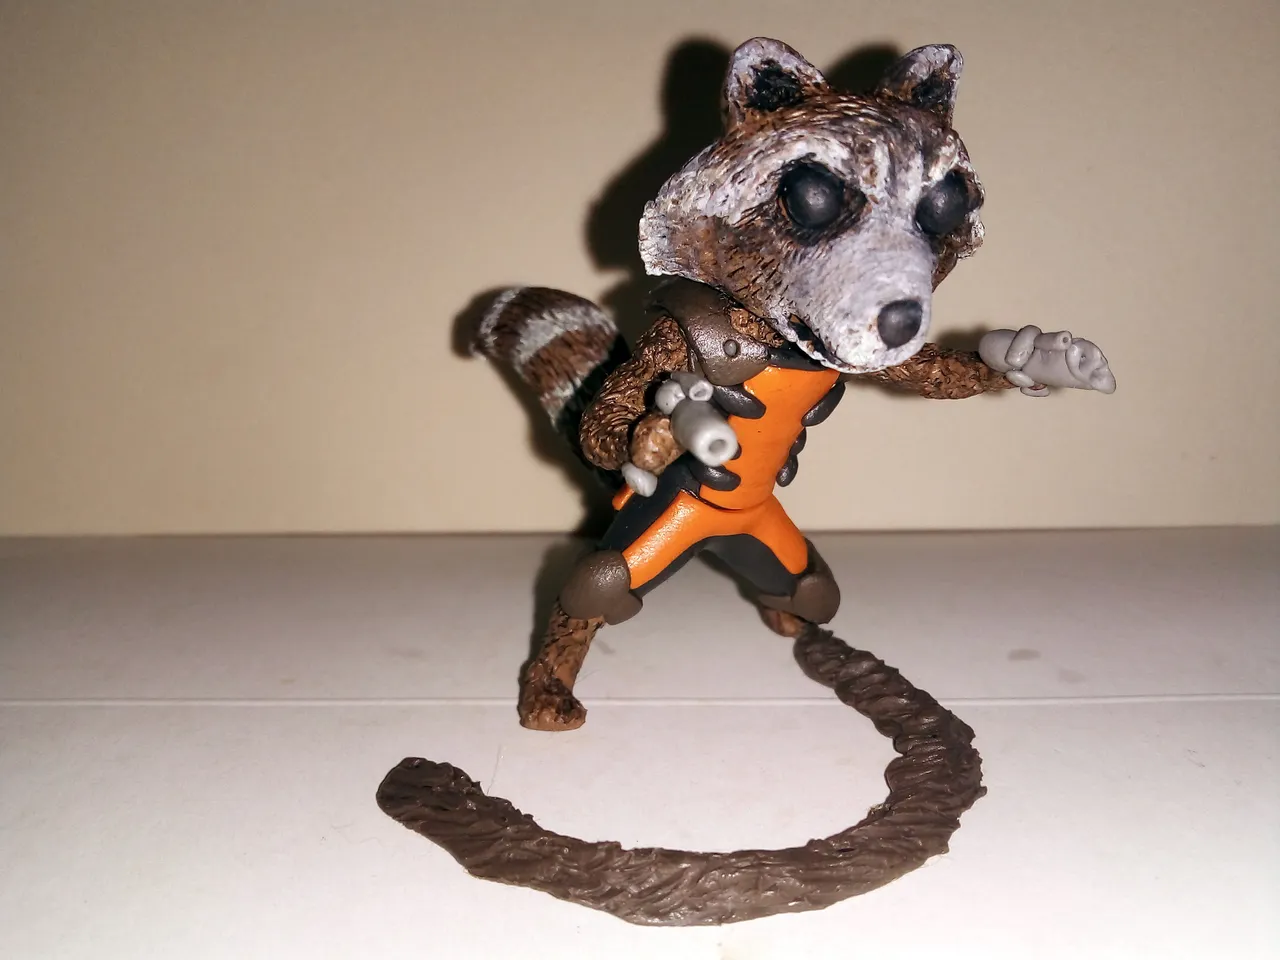
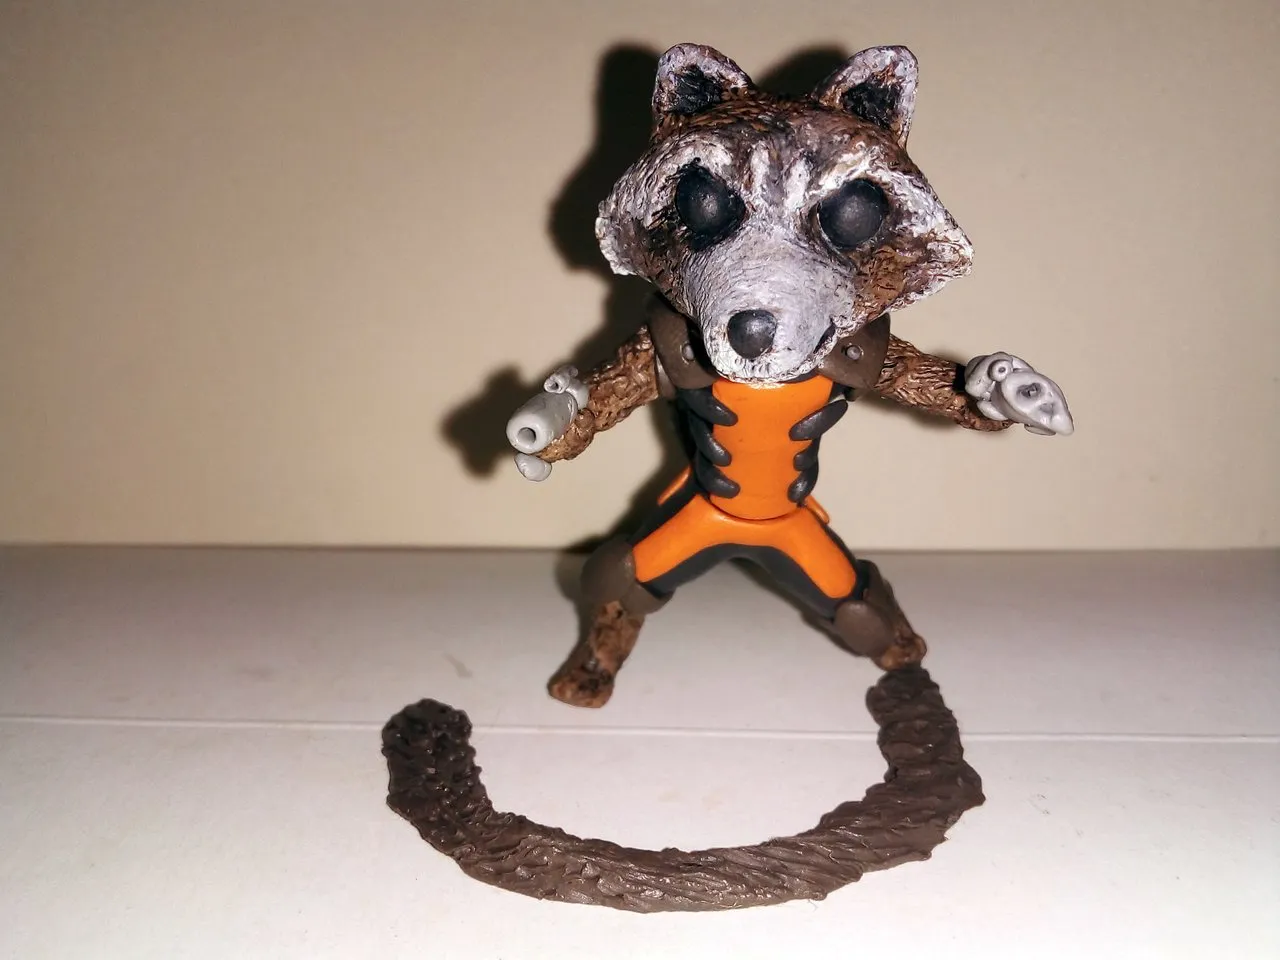
Here are a couple of pictures of the final result from different angles.
A continuación les dejo un par de fotografías del resultado final desde distintos ángulos.
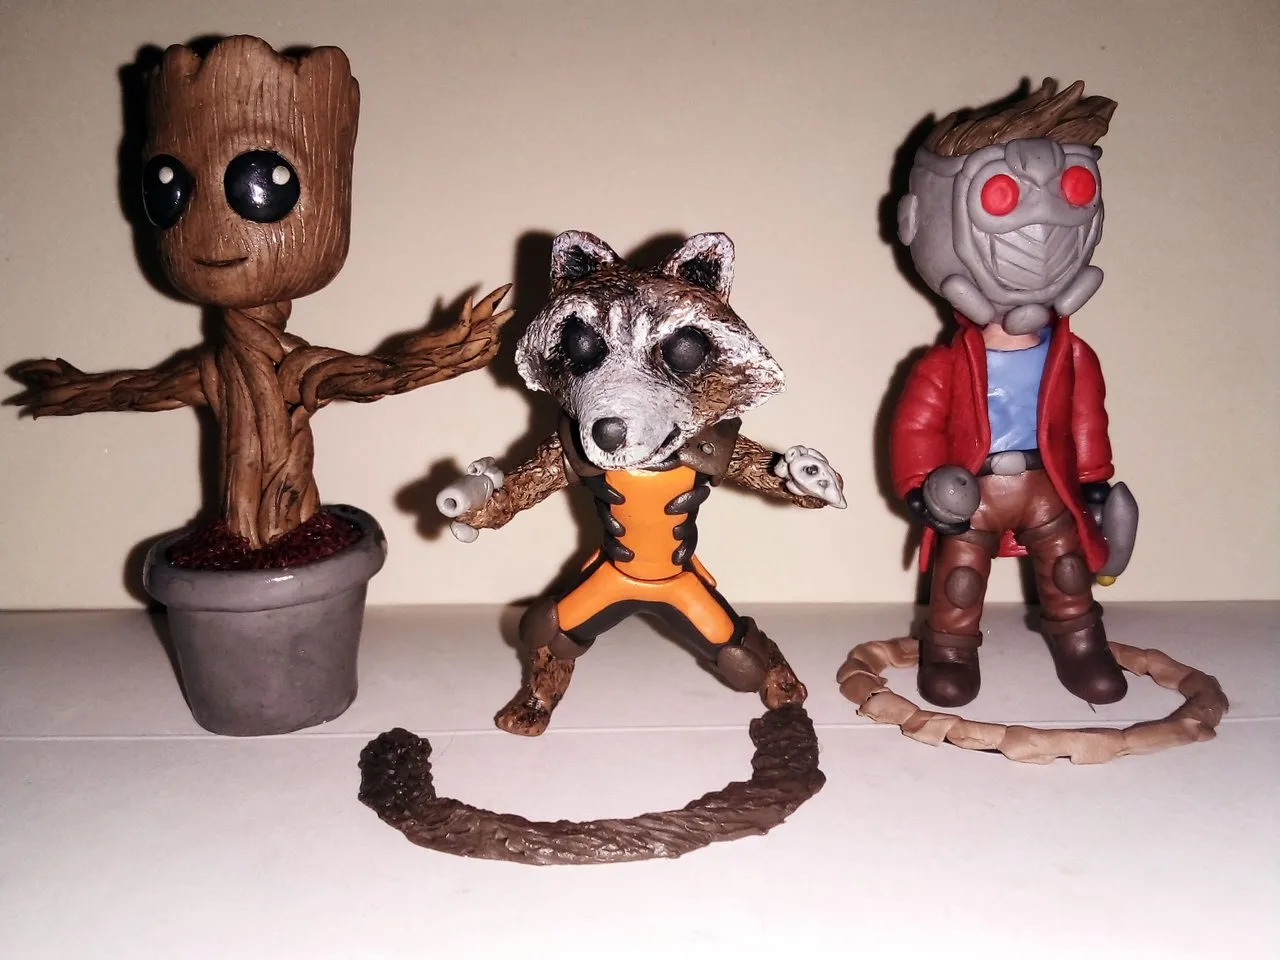
And of course, a group photo of the members so far:
Y no podía faltar, una foto grupal de los integrantes que van hasta ahora:
How did you like it? Do you think I met the challenge? You will tell if it was achieved or not.
Now, the previous challenge was proposed by ismaelrd04, so a percentage of the profits from the previous delivery goes to him. Below is a screenshot of the transaction:
¿Qué les ha parecido? ¿Creen que cumplí el reto? Ustedes dirán si se logró o no.
Ahora bien, el reto anterior lo propuso ismaelrd04, así que un porcentaje de las ganancias de la entrega anterior van para él. A continuación muestro un capture de la transacción:

Thank you for proposing Star Lord.
Marylucy, on the other hand, will receive her percentage in the next installment.
Gracias por proponer a Star Lord.
Marylucy, por otra parte, recibirá su porcentaje en la entrega que viene.
What other challenge would you like to propose? I'm all ears, or eyes in this case because I'm going to read them. I've always said that ideas have a lot of value, especially here at HIVE, so the challenge i select for the next installment will receive a percentage of the rewards. Feel free to leave your challenges in the comments, I will be very attentive to what you propose.
Well friends, this has been all, I hope you enjoyed the publication and that you enjoyed it as much as I enjoyed making it. With nothing more to add, I'll say goodbye then....
See you next time!
¿Qué otro reto desean proponer? Soy todo oidos, o ojos en este caso porque los voy a leer. Siempre he dicho que las ideas tienen mucho valor, más aquí en HIVE, así que el reto que seleccione para la siguiente entrega recibirá un porcentaje de las recompenzas. Anímense a dejar sus retos en los comentarios, estaré muy atento a lo que propongan.
Bien amigos, esto ha sido todo, espero que la publicación haya sido de su agrado y que la hayan disfrutado, tanto como yo disfruté haciéndola. Sin más que agregar, me despido entonces...¡Hasta la próxima!

Traducido con DeepL
Unboxing - Router Mercusys
Alto's Odyssey: Modo Zen - Sandboard
Colors

The Terminal

HiveDIY