Bienvenidos Queridos Amantes de la Artes Manuales
Welcome Dear Manual Arts Lovers

En estos tiempos de encierro, siempre es bueno tener opciones económicas y divertidas para distraer a nuestros hijos, por ello, hoy les quiero compartir este sencillo proyecto con cartón reciclado. Se tratan de unas lindas flores realizadas con rollo de papel higiénico, verán que sus hijos se divertirán mucho pintando, además armarlas es muy fácil. Pero, no los distraeré más, es momento de poner manos a las obra pero antes le mostraré los materiales que necesitaran para trabajar, solo necesitaran:
In these times of confinement, it is always good to have economic and fun options to distract our children, so today I want to share this simple project with recycled cardboard. These are cute flowers made with toilet paper rolls, you will see that your children will have a lot of fun painting them, and it is very easy to assemble them. But, I won't distract you anymore, it's time to get down to work, but first I'll show you the materials you will need to work, you will only need:

Paso 1:
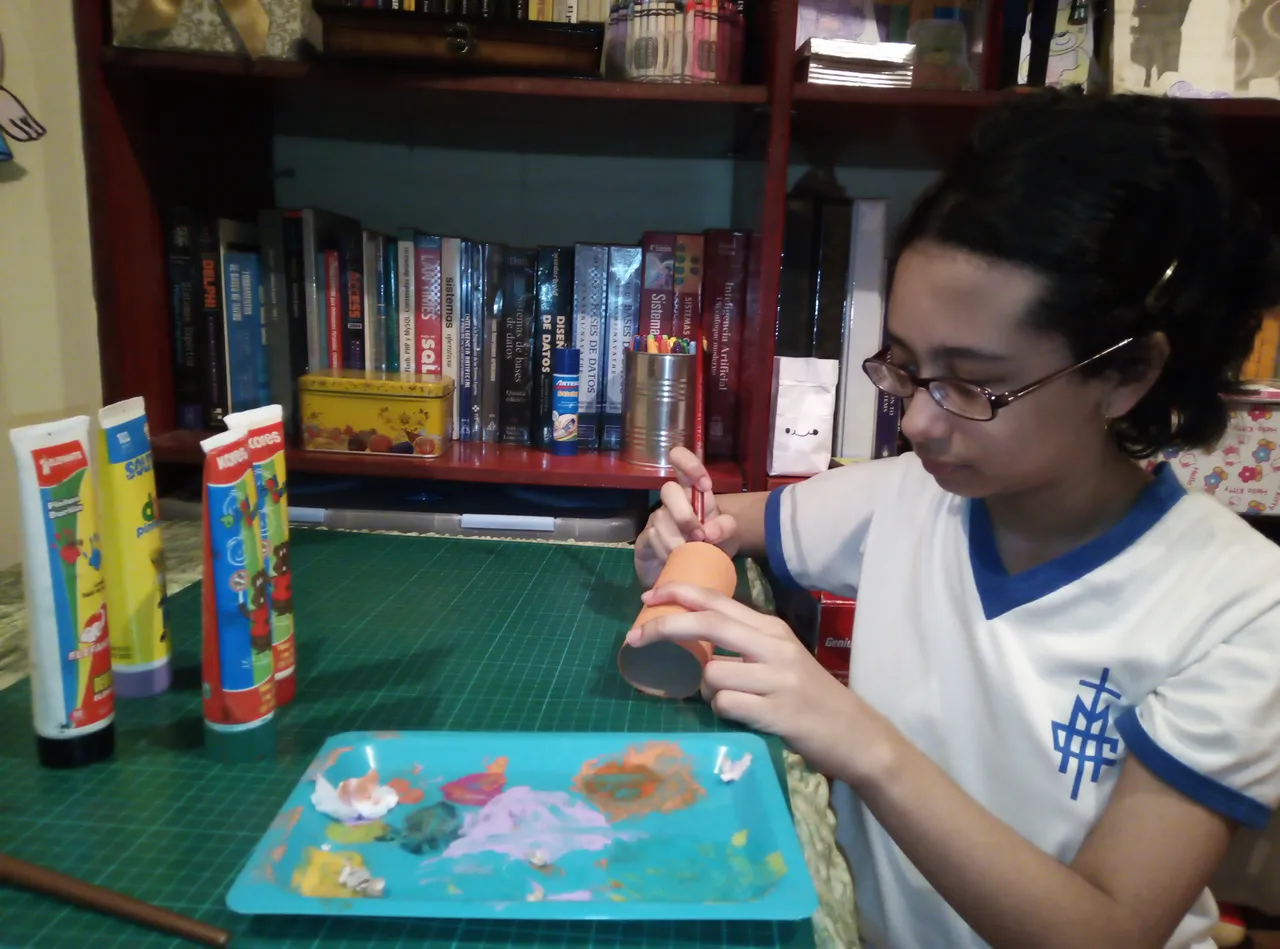
Primeramente, tomaremos los rollos de papel higiénico y los pintaremos de los colores que queramos, pero recuerden que, al menos un rollo lo debemos pintar en verde, para poder realizar las hojas de las flores. Una vez que hemos pintado, lo debemos reservar para que se seque la pintura.
Step 1:
First, we will take the toilet paper rolls and paint them in the colors we want, but remember that at least one roll must be painted in green, to be able to make the leaves of the flowers. Once we have painted it, we must set it aside for the paint to dry.
Paso 2:
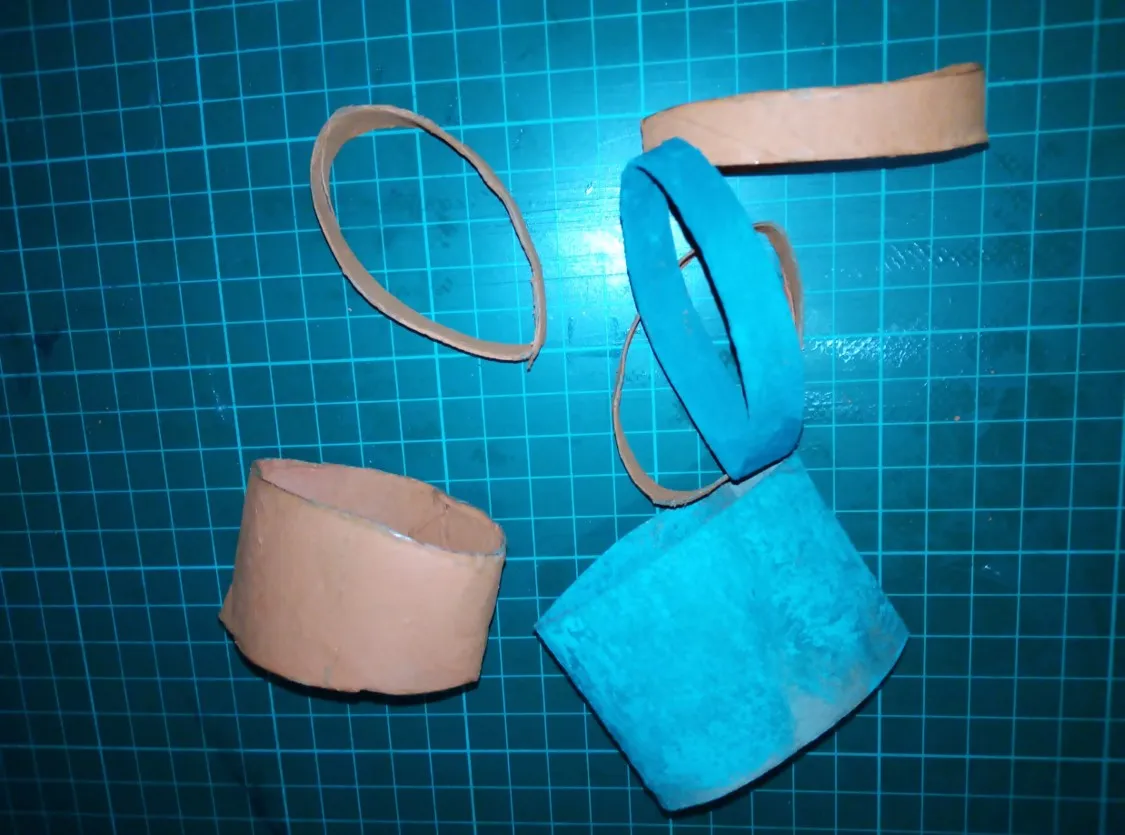
Una vez que nuestros rollos ya están secos llego el momento de cortar los pétalos y hojas de las flores. Este paso es muy sencillo, simplemente, tomaremos los rollos de papel higiénico y cortaremos anillos de 1,5 centímetros de ancho aproximadamente. También necesitaremos cortar unos pequeños círculos para colocar en el centro de las flores lo que además nos permitirá mantener unidos los pétalos. Por último, tomaremos una cartulina tamaño carta y contaremos tiras de 2 centímetros de ancho por el largo de la hoja, esto serán nuestros tallos.
Step 2:
Once our rolls are dry, it is time to cut the petals and leaves of the flowers. This step is very simple, just take the toilet paper rolls and cut rings of about 1.5 centimeters wide. We will also need to cut some small circles to place in the center of the flowers, which will also allow us to keep the petals together. Finally, we will take a letter size cardboard and count strips of 2 centimeters wide by the length of the sheet, this will be our stems.
Paso 3:
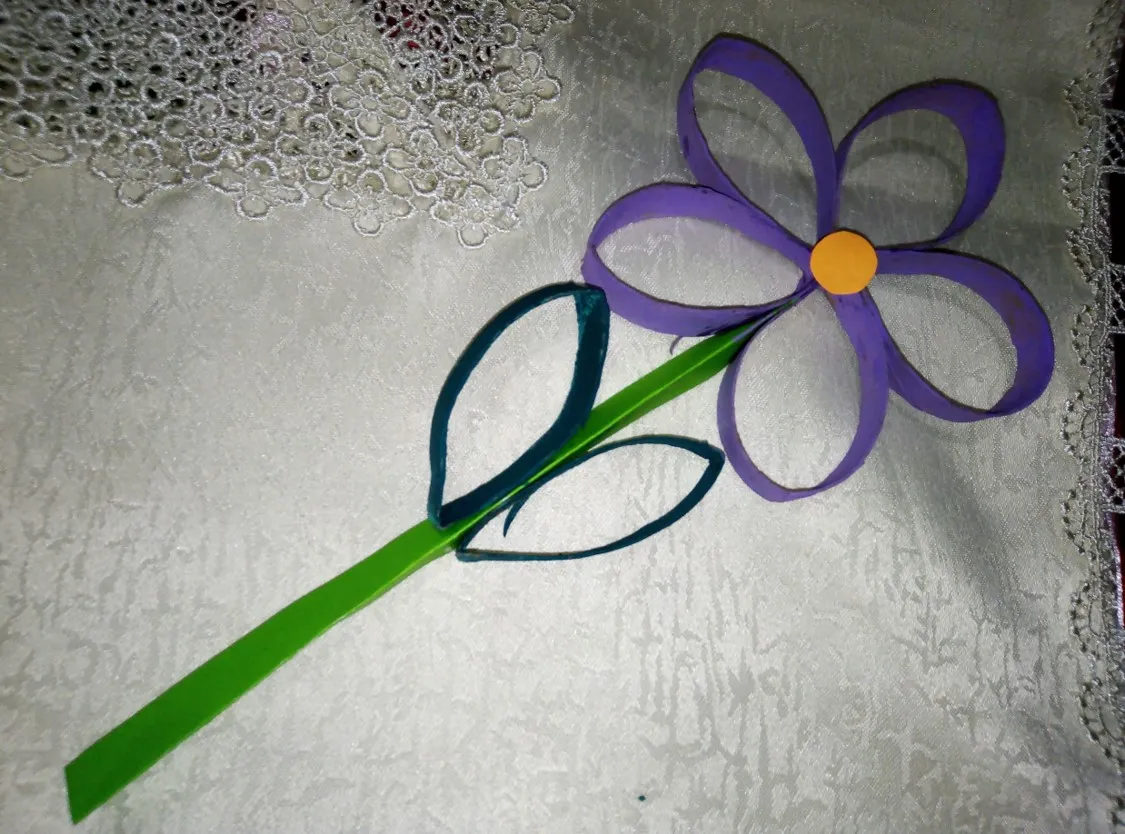
Ya con todas nuestras piezas cortadas, llego el momento de armar nuestras flores, para ello primero doblaremos las tiras de cartulina que cortamos para los tallos por la mitad, ahora tendremos tiras de un centímetro de ancho. Ahora tomaremos dos anillos color verde y formaremos las hojas, simplemente doblamos el anillo por la mitad y lo marcamos bien por los dobleces. De esta forma obtendremos la forma de una hoja, y solo nos queda pegarlas al tallo que ya realizamos.
Step 3:
Now that we have all our pieces cut, it is time to assemble our flowers, to do this we will first fold the cardboard strips that we cut for the stems in half, now we will have strips of one centimeter wide. Now we will take two green rings and form the leaves, simply fold the ring in half and mark it well by the folds. In this way we will get the shape of a leaf, and we just have to glue them to the stem that we have already made.
Paso 4:
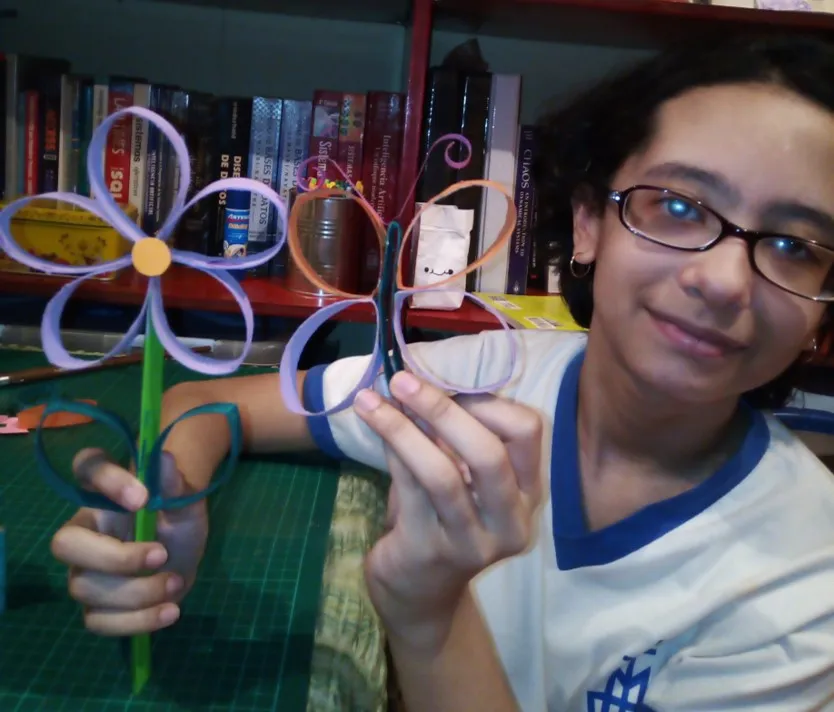
Para armar las flores, tomaremos cinco anillos de un mismo color o si prefieren pueden combinar colores igualmente quedaran hermosas nuestras flores. Seguidamente haremos el mismo procedimiento que ya hicimos con las flores y que les escribo en el paso anterior, con ello obtendremos la forma de los pétalos. Ya con los pétalos los uniremos con pegamento por uno de los extremos que hemos doblados y luego le colocaremos en medio uno de los pequeños círculos que ya habíamos cortado. Esto ayudará a mantener unido los pétalos, trate de colocar el centro de la flor de un color distinto al de los pétalos para que de esta forme resalte. Lo siguiente será esperar el pegamento de nuestras lindas flores seque y nuestras flores estarán lista, muy sencillo verdad, pero, ya verán que sus hijos quedaran muy orgullosos de su trabajo. Y además habrán estado distraídos sanamente un buen rato, jugando de forma creativa, y lo mejor alejados un rato de la tecnología que irremediablemente los adsorbe, aunque no queramos.
Step 4:
To assemble the flowers, we will take five rings of the same color or if you prefer you can combine colors, our flowers will also be beautiful. Then we will do the same procedure that we did with the flowers and that I wrote in the previous step, with this we will get the shape of the petals. Now with the petals we will glue them together at one of the ends that we have folded and then we will place in the middle one of the small circles that we had already cut. This will help to keep the petals together, try to place the center of the flower in a different color than the petals to make it stand out. The next thing to do is to wait for the glue to dry and our flowers will be ready, very simple, but you will see that your children will be very proud of their work. And besides, they will have had a good time of healthy distraction, playing in a creative way, and best of all, away from the technology that inevitably absorbs them, even if we don't want it to.
Bueno amigos, por ahora me despido de ustedes, esperando que les gustara este sencillos proyecto y que se animen a disfrutar realizándolo junto a sus hijos. Por favor no olviden seguir cuidándose y cuidando a los suyos, poniendo en práctica las medidas de bioseguridad.
Well friends, for now I say goodbye to you, hoping that you will like this simple project and that you will enjoy doing it with your children. Please do not forget to continue taking care of yourselves and your children, putting into practice the biosecurity measures.
Contenido y fotografías de mi propiedad intelectual
Información Técnica
| Cámara | Pentax * istDL |
|---|---|
| Lente | * Pentax 18-55 |
| Iluminación | Luz Natural |
| Locación | Barcelona, Estado Anzoátegui, Venezuela |
Content and photographs of my intellectual property
Technical information
| Camera | Pentax * istDL |
|---|---|
| Lens | * Pentax 18-55 |
| Lighting | Natural Light |
| Location | Barcelona, Anzoátegui State, Venezuela |