
Hello friends of the community, I hope you are very well, in this new opportunity I want to share with you my latest recycling work. The last time I made a model of the Star Wars droid, I made the R2Q5 model and they had suggested that I do it with lights, well, here I bring our friend R2D2 converted into an LED light lamp. I hope you like it and share the construction process once again.

We use two cans of this drink that is white, although later to achieve a better finish I will paint it with white paint. As always, we remove the upper part that we will then seal with the lower part of the can.
Utilizamos dos latas de esta bebida que es de color blanco, aunque luego para lograr un mejor acabado la pintaré con pintura de color blanco. Retiramos como siempre la parte superior que luego sellaremos con la parte inferior de la lata.
We make a template for the droid's limbs, we can make them out of cardboard. When we have done it, we take out these two models, put the template on top of the can and cut out. We put together two pieces for each limb as seen in the photos.
Hacemos una plantilla para las extremidades del droide, podemos hacerlas con cartulina. Cuando la haramos hecho sacamos estos dos modelos, ponemos la plantilla encima de la lata y recortamos. Armamos dos piezas para cada extremidad así como se ve en las fotos.
Then we do the part that makes the droid move. We also make a small model in cardboard and from there we extract 6 parts. Then we will do the other 6 parts that go along the sides so we will have completed each of the pieces. We make the front limb that comes out of the inner part of the robot, this helps us to give the robot the perfect height compared to the extremities on the sides.
Luego hacemos la parte que hace que el droide pueda desplazar. hacemos un pequeño modelo tambien en cartulina y de ahí extraemos 6 partes. Luego haremos las otras 6 partes que van por los costados así habremos completado cada una de las piezas. Hacemos la extremidad frontal que sale de la parte interior del robot, esto nos sirve para darle la altura perfecta al robot en comparación con las extremidades de los costados.
The next step to finish with the extremities of the sides is to make these rectangles, then glue them in part that we did previously. Then in the part that goes on the ground we place the other two pieces. We also make some openings to the can because the led lights will go on the inside of the can. We make the cuts following the model of the accessories that the robot has, finally we paint with white spray paint.
El siguiente paso para terminar con las extremidades de los costados es hacer estos rectángulos, luego pegarlos en parte que hicimos anteriormente. Entonces en la parte que va en el suelo colocamos las otras dos piezas. Tambien realizamos unas aberturas a la lata porque las luces leds irán en la parte interior de la lata. Hacemos los cortes siguiendo el modelo de los accesorios que posee el robot, por último pintamos con pintura blanca en aerosol.
With transparent plastic we cover the openings we made, some of them are painted with blue using permanent marker, the purpose is that the illuminated parts can be seen in various colors, with blue predominating. With a blue tin we make these little rods that go on the extremities.
Con plastico transparente cubrimos las aberturas que hicimos, algunas las pintamos con color azul utilizando marcdor permanente, el propósito es que las partes iluminadas puedan verse de varios colores predominando el azul. Con una lata de color azul hacemos estas pequeñas baras que van en las extremidades.
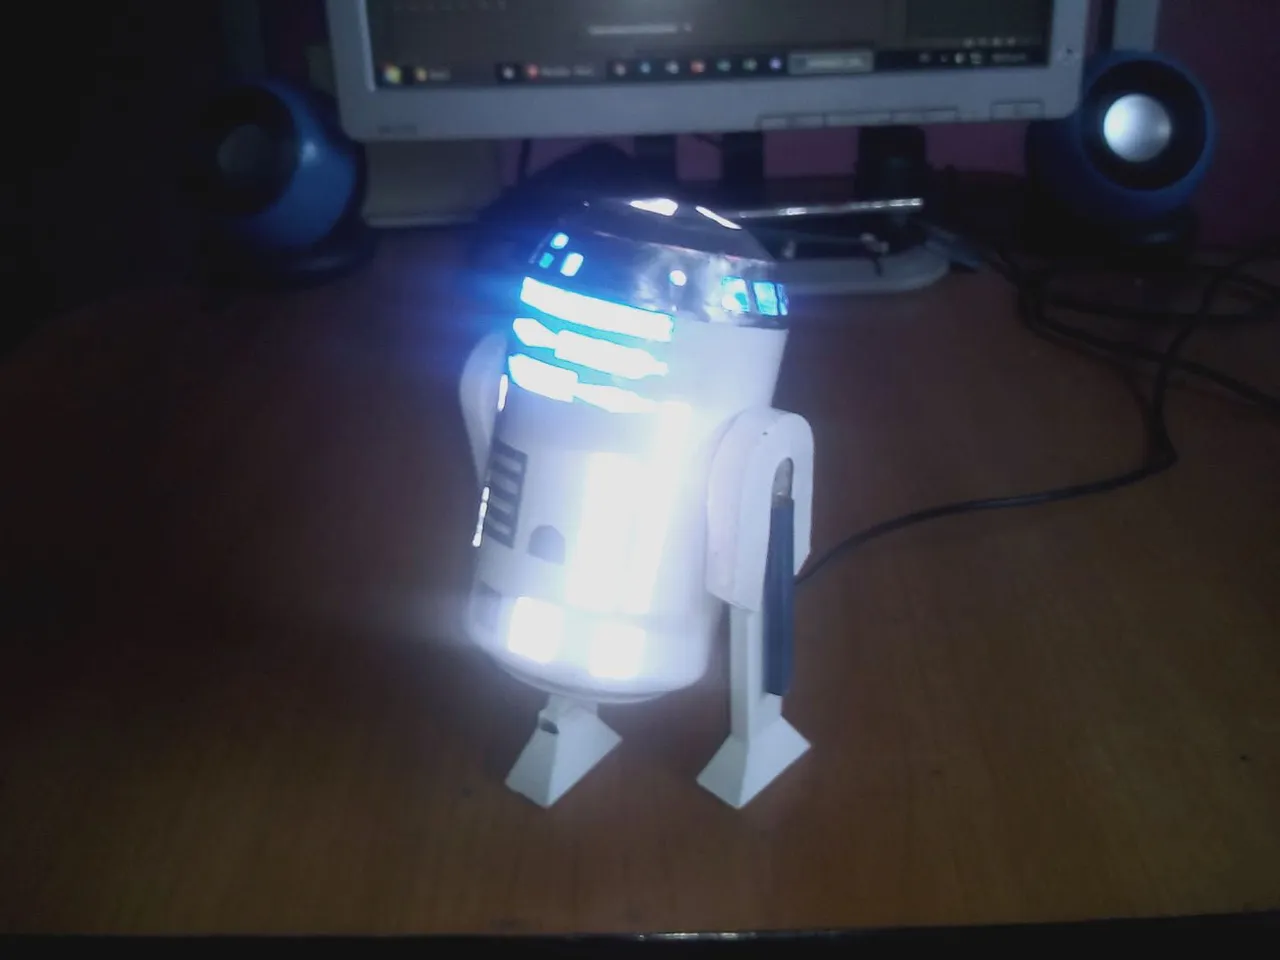
Finally we place the main attraction: the LED lights. These lights belonged to a lamp that was damaged, so I took out the lights that were in good condition and I put this USB cable that has a very simple command, it is used to turn off and on and change the lights and also change the intensity of the same. We open a hole in the lower rear part and put the cable in, we take it out through the part that is exposed of the can and we solder the cables with tin. Negative black, positive red and the white wire also negative. We make a weld and introduce the lights. Finally we put the cover of the robot and we will have finished.
Por {ultimo colocamos la principal atracción: las luces LEDS. Estas luces pertenecían a una lámpara que se daño, así que le saqué las luces que estaban en buen estado y le puse este cable USB que posee un comando muy sencillo, sirve para apagar y encender y hacer cambio de luces y también cambiar la intensidad de las mismas. Abrimos un agujero por la parte inferior trasera y metemos el cable, lo sacamos por la parte que esta descubierta de la lata y soldamos los cables con estaño. Negro negativo, rojo positivo y el cable blanco tambíén negativo. Hacemos una soldadura e introducimos las luces. Por último colocamos la cubierta del robot y ya habremos terminado.
This is how our friend R2D2, Anakin's companion droid and then Luke, one of my favorites, has finished. If I had had LED lights but RGB colors I think it would have been impressive, however I am very satisfied, those who recommended me in my last publication were very right, so I dedicate this work to them for giving me great ideas. they liked and appreciated the step by step, my interest is always to share and teach. I say goodbye to you soon, do not forget to comment what you think. Greetings to all.
Así ha quedaod terminado nuestro amigo R2D2 el droide compañero de Anakin y luego de Luke, uno de mis preferidos. Si hubiera tenido luces LEDS pero de colores RGB creo que hubiera quedado impresionant, sin embargo estoy muy satisfecho, tuvieron mucha razón quienes me hicierone sa recomendación en mi última publiación, así que a ellos les dedico este trabajo por darme grandiosas ideas.. Espero que les haya gustado y hayan apreciado el paso a paso, mi interés siempre es compartir y enseñar. Me despído hasta pronto, no olviden comentar que les ha parecido. Saludos para todos.