
Hello friends of Hive I hope you are very well. This week we have started working on something new, so I want to show you what it is all about. I made a miniature Buggy style race car using kitchen lighters as the main material, the process was very fun and easy. Hope you like.
Hola amigos de Hive espero que esten muy bien. Esta semana hemos comenzado trabajando en algo nuevo, asi que quiero mostrarles de que se trata. Hice un carro de carrera esilo Buggy en miniatura utilizando como materia principar encendedores de cocina, el proceso fue muy divertido y facil. Espero que les guste.

For this work we will use about 6 lighters that are already spent. We take it apart in all its parts to see what we can use. Then we take the one that will be last for the bodywork and with a ruler we measure and cut the part where the seats will go.
PAra ete trabajo utilizaremos unos 6 encendedores que ya esten gastados. Lo desarmamos en todas sus partes para ver que podemos usar. Luego tomamos el que será últi para la carrocería y con una regla medimos y cortamos la parte donde irán los asientos.
Then we make the roof of our car using a transparent plastic, we fold it and in the part of the roof we place a piece of foam rubber. We also make the car seats using the cigarette lighter button that is used to light the fire, we paint them black and place them inside where we made the previous opening, and finally we place the windshield, we can glue it with silicone.
Luego hacemos el techo de nuestro carro utilizando un plástico transparente, lo doblamos y en la parte del techo colocamos un trozo de goma foami. También hacemos los asientos del auto utilizando el boton del encendedor que sirve para encender el fuego, los pintamos de color negro y los colocamos dentro donde hicimos la abertura anterior, y por último colocamos el parabrisas, podemos pegarlo con silicón.
The next step is to make the area where the axles go for the wheels. For that we use the plastic part that comes in the head of the lighters. Inside it has a circle that is where the gas passes. We paint them black and we camos placing each one in the lower part of the car and that each piece is well aligned.
El siguiente paso es hacer la zona donde van los ejes para las ruedad. Para eso utilizamos la parte de plástico que vienen en la cabeza de los encendedores. Por dentro trae un circulo que es por donde pasa el gas. Los pintamos de color negro y camos colocando cada uno en la parte inferior del auto y que cada pieza nos quede bien alineada.
With a copper rod we make the protective rails of the bodywork, we measure well and bend where we deem necessary. We will also make the front fender using one of the same plastic pieces crossed by the gas pipes of the cigarette lighter and we will place them in the front part.
Con una varilla de cobre hacemos las barandas protectoras de la carroceria, medimos bien y doblamos donde creamos necesario. También haremos la defensas delantera utilizando una de las mismas piezas de plastico atravesadas por los conductos de gas del ecendedor y las colocamos en la parte frontal.
Now we take these pieces that work as the expeller of the gas. We take them apart one by one and reverse their order to make the shock absorbers for the car. We place each one in each part where each wheel will go.
Ahora tomamos estas piezas que funcionan como el expulsor del gas. Las desarmamos una a una y e invertimos su orden para hacer los amortiguadores del auto. Colocamos cada uno en cada parte donde irá cada rueda.
To make the wheels we use a PVC tube, we cut them into 4 parts. Then we make the axles using the plastic parts that were left over from the shock absorbers and also with a small spring. To each plastic part we put 3 pieces of springs that we will then glue on the inside of each wheel. To make the tires we use foam rubber and cover it very well, to finish with a hot soldering iron we use the tip to give detail to the tires and make it look like this.
Para hacer las ruedas utilizamos un tubo PVC, los cortamos en 4 partes. Después hacemos los ejes utilizando las partes de plástico que nos sobraron de los amortiguadores y también con un resorte pequeño. A cada parte de plástico le colocamos 3 trozos de resortes que luego los pegaremos en la parte interior de cada rueda. Para hacer los neumáticos utilizamos goma foami y recubrimos muy bien, para finalizar con un cautín caliente utilizamos la punta para dar detalle a los neumáticos y que nos quede así.
We finish by placing the wheels each in its place, as an axis we can use a small circular stick or a plastic tube in which we insert through the holes and place each wheel, we also put the fenders that go to the sides and put the piece that gives the spark to the lighter. We glue it on to serve as a base for the last railings on the sides and we will be done.
Finalizamos colocando las ruedas cada una en su sitio, como eje podemos usar un palo circular pequeño o un tubo de plástico en introducimos por los agujeros y colocamos cada rueda, también ponemos las defensas que van a los lados y ponemos la pieza que da la chispa al encendedor. La pegamos con pegamento para que nos sirva de base para las últimas barandas de los lados y así habremos terminado.
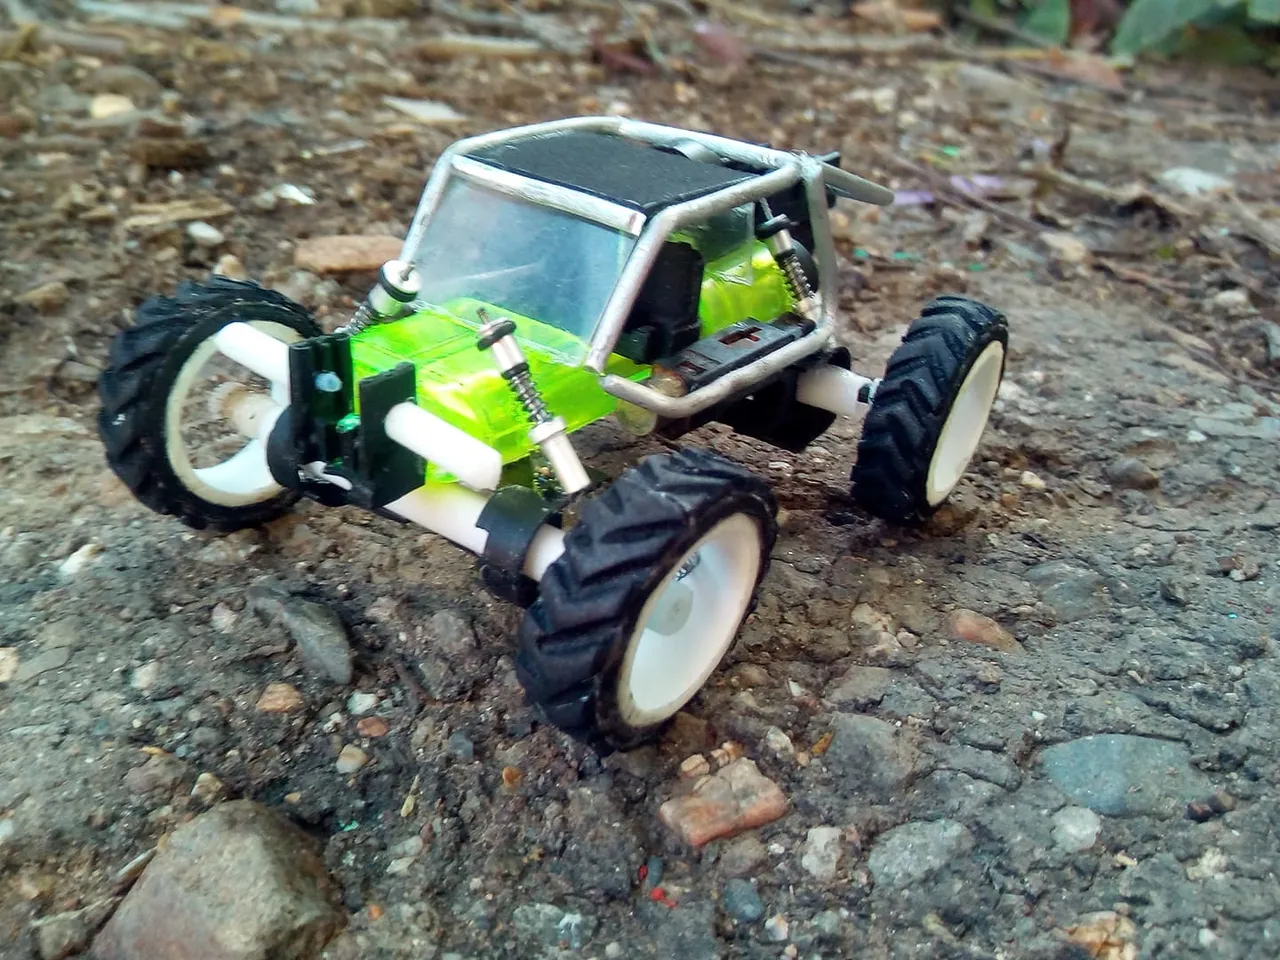
This is the final work. I was able to make the details as precise as possible. The internet abounds with many real models and they are so beautiful that it is difficult to choose one so I tried to do something hybrid lol. If I add more materials I think it would look more futuristic. I am going to give this small miniature car to a child I know and who will soon be his birthday, I hope he likes it. I say goodbye to you soon, do not forget to comment that it is always important to know his opinion. Greetings to all.
Así ha quedado el trabajo final. Pude hacer los detalles más precisos posible. En internet abundan muchos modelos reales y son tan hermosos que es dificil escoger uno así que trate de hacer algo híbrido jejeje. Si le agrego más materiales creo que se vería más futurista. Este pequeño carro en miniatura se lo voy a regalar a un niño que conozco y que pronto será su cumpleaños, espero que le guste.. Me despido hasta pronto, no olvides comentar que siempre es importante conocer su opinión. Saludos para todos.