

[Esp]
¡Saludos artesana, bienvenidos sean visitantes!.
Hoy empieza una nueva etapa en manualidades, hay muchas cosas que podemos hacer, me quedaron muchos proyectos con temática de diciembre que quise hacer y presentar, al menos ya se que para este año, debo empezar a principios de noviembre si es que quiero que todo esté más decorado y bonito o tan solo ser una inspiración para los demás.
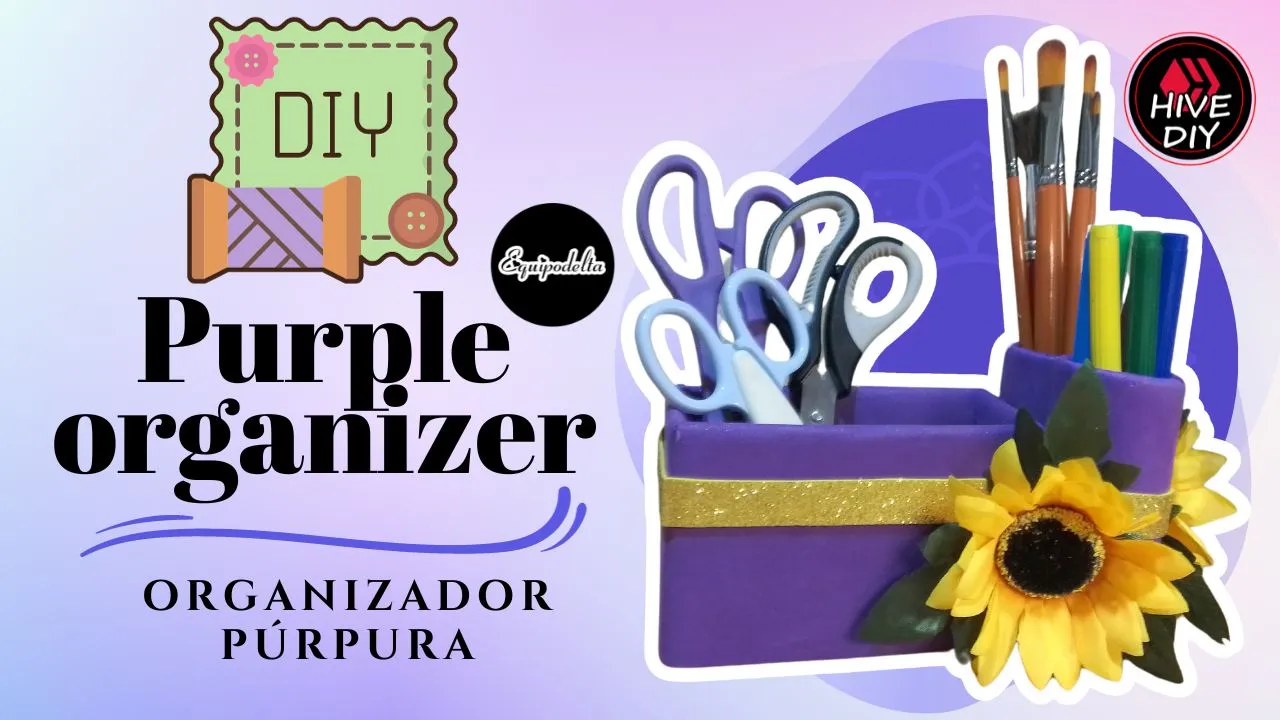
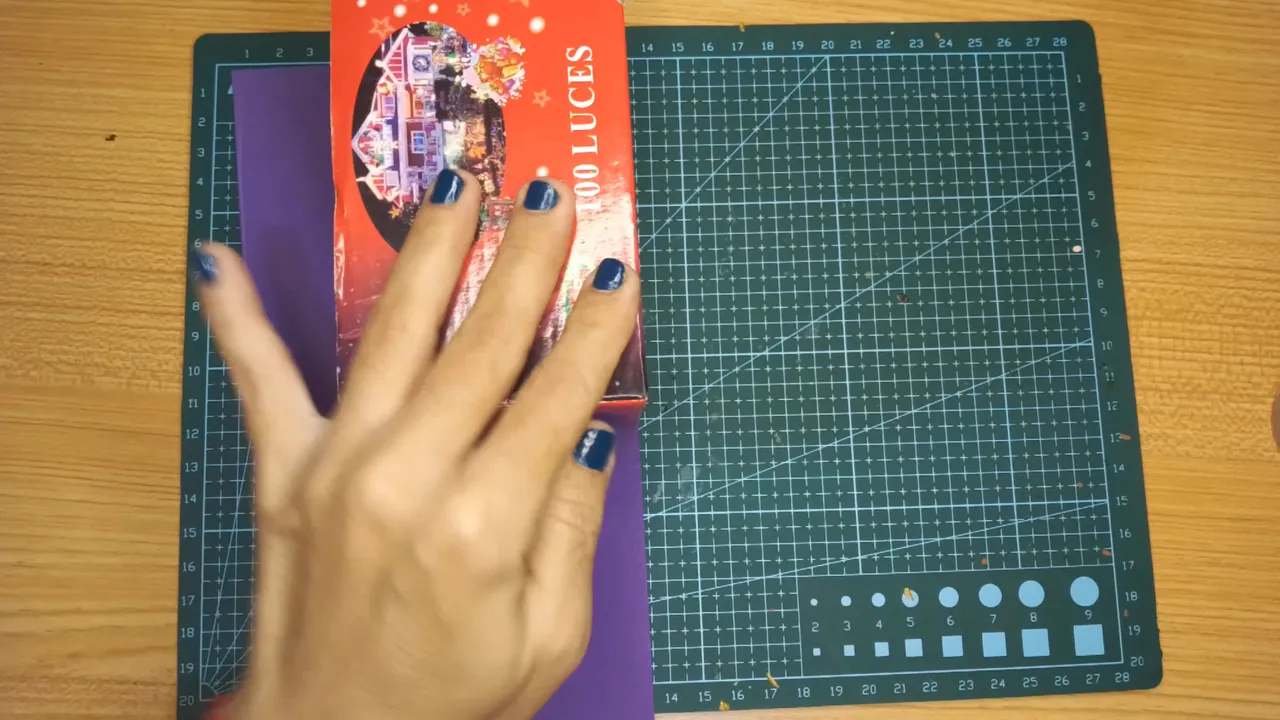
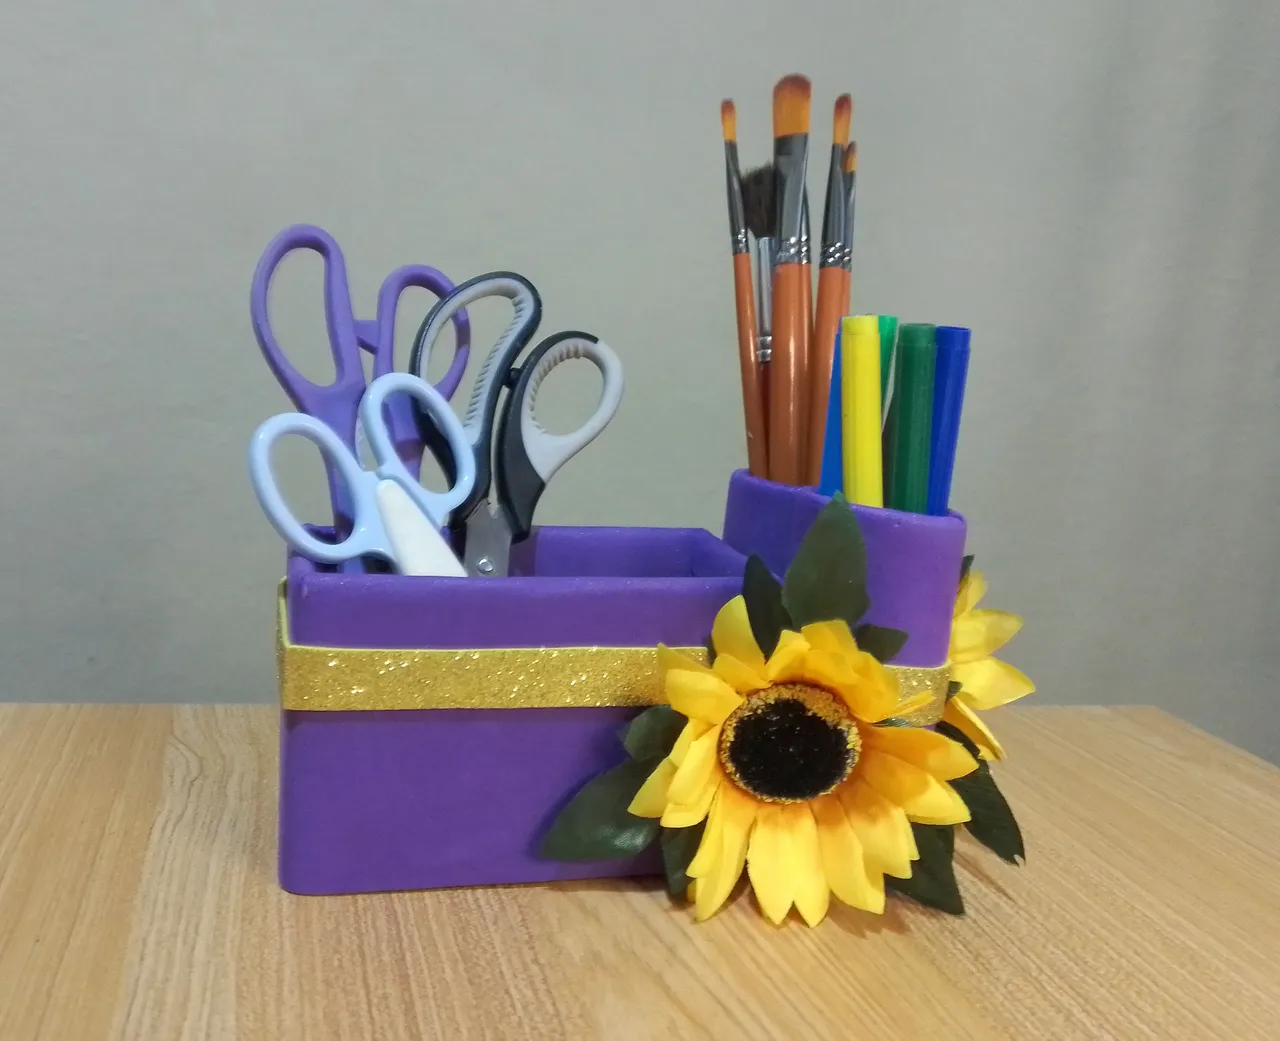
Cuando hago una manualidad atiendo una necesidad, necesitaba un organizador para mis pinceles nuevos, mis tijeras nuevas y mis marcadores nuevos, aunque compré una caja grande donde guardo todo, generalmente no los tengo a mano y como es algo que siempre estoy usando, prefiero estén cerca de mí, sobre mi escritorio.
Con una linda temática para que sirva de decoración, usando uno de mis colores favoritos, y otro de contraste y combinación, pensaba hacer hojas y flores con foami de colores pero, al ver los girasoles que compré y lucían hermosos ellos solos, dejé que se llevaran todo el protagonismo.
Amo las flores amarillas especialmente los girasoles por su simbología y la afinidad con mi signo zodiacal, así que pues continúo en armonía, con el color morado o púrpura transmutando energías negativas, mas el amarillo que representa el sol, la luz, la felicidad y los girasoles que son para iniciar ciclos, atraer alegrías, abundancia, concretar proyectos y éxitos, sin duda, ver el organizador sobre mi escritorio, me recordará el compromiso conmigo misma de mantener un buen ritmo y continuar el camino a la sanación física y emocional.
Espero les guste, los dejo con mi paso a paso.
! [English version]
[Eng]
Greetings artisan, welcome to be visitors!
Today begins a new stage in crafts, there are many things we can do, I had many projects with December theme that I wanted to do and present, at least I know that for this year, I must start in early November if I want everything to be more decorated and beautiful or just be an inspiration for others.
When I make a craft I have a need, I needed an organizer for my new brushes, my new scissors and my new markers, although I bought a big box where I keep everything, I usually don't have them handy and as it is something I am always using, I prefer to keep them close to me, on my desk.
With a nice theme to serve as decoration, using one of my favorite colors, and another one for contrast and combination, I was thinking of making leaves and flowers with colored foami but, seeing the sunflowers I bought and they looked beautiful on their own, I let them take all the limelight.
I love yellow flowers especially sunflowers for their symbolism and affinity with my zodiac sign, so I continue in harmony, with the purple color transmuting negative energies, plus the yellow that represents the sun, light, happiness and sunflowers that are to start cycles, attract joy, abundance, realize projects and success, no doubt, see the organizer on my desk, will remind me the commitment to myself to keep a good pace and continue the path to physical and emotional healing.
I hope you like it, I leave you with my step by step.

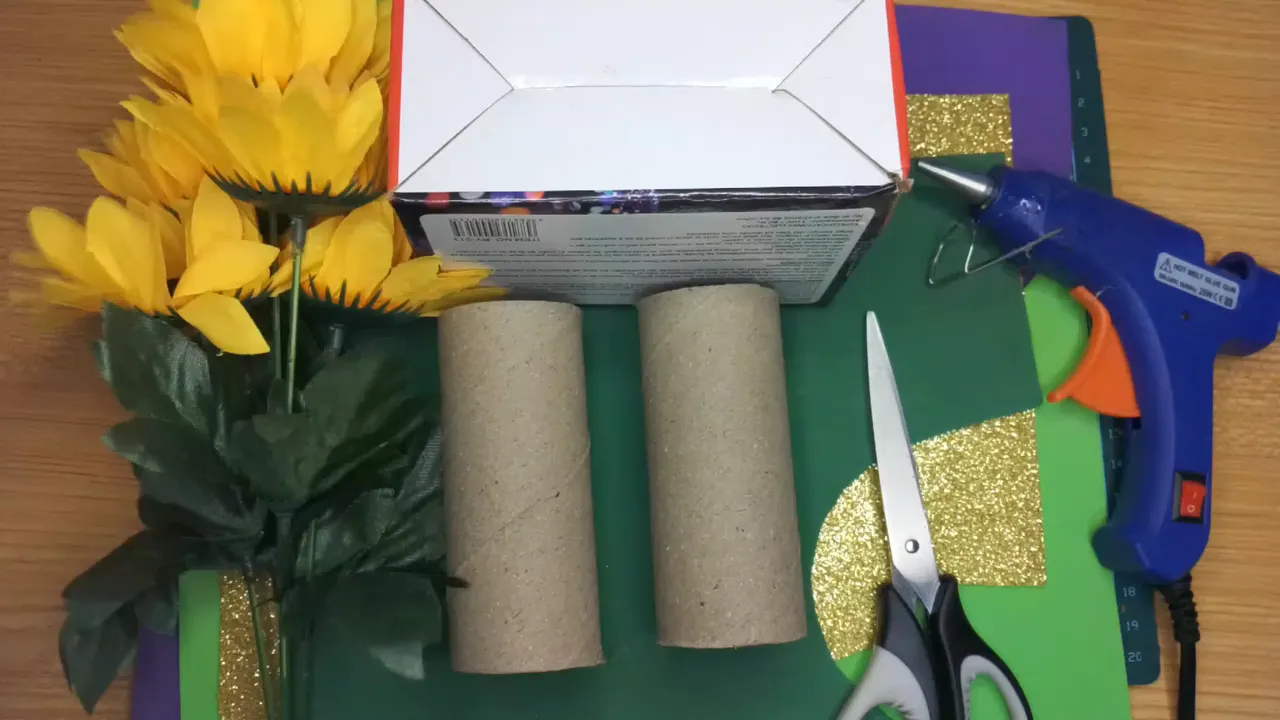
| 💜 1 Caja pequeña de cartón | 💜 1 Small cardboard box | |
| 💜 2 tubos de papel higiénico | 💜 2 tubes of toilet paper | |
| 💜 Flores artificiales | 💜 Artificial flowers | |
| 💜 Foami escarchado amarillo y foami morado | 💜 Yellow frosted foami and purple foami | |
| 💜 Tijera | 💜Scissors | |
| 💜 Silicón caliente | 💜 Hot Silicone |

Step 1️⃣/ Paso 1️⃣
 |  | |
 |  |
[Esp]
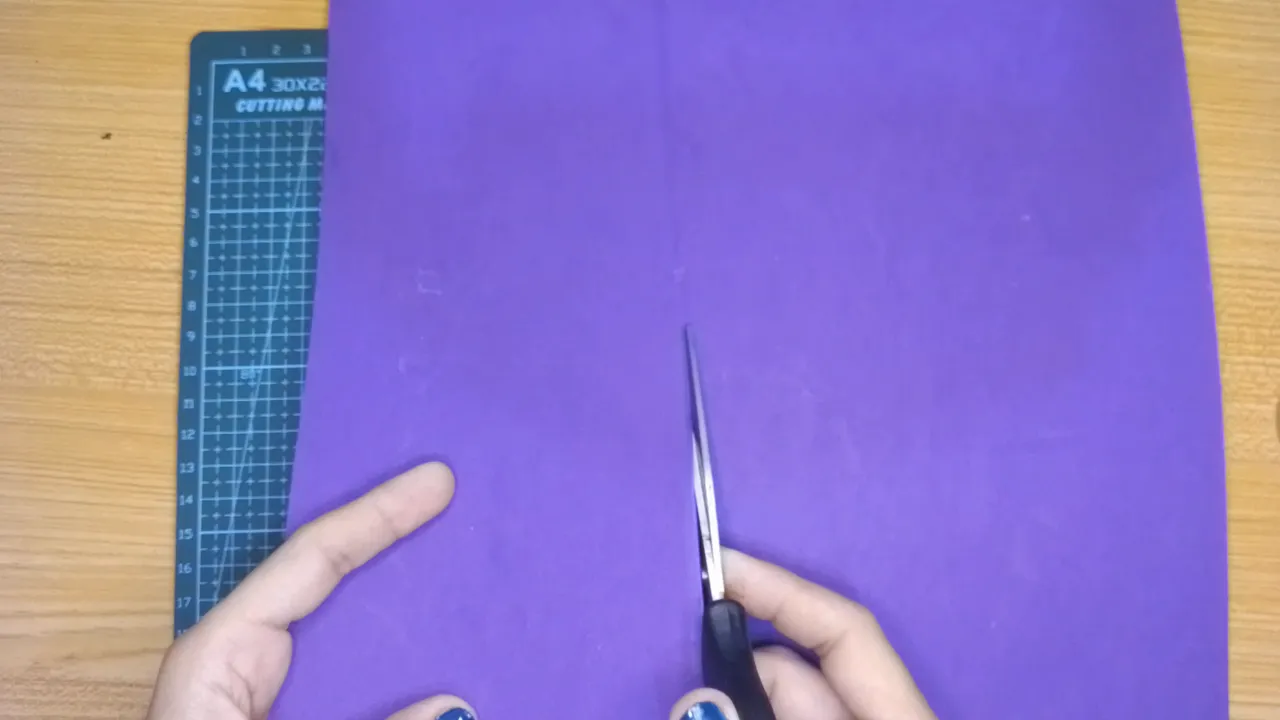
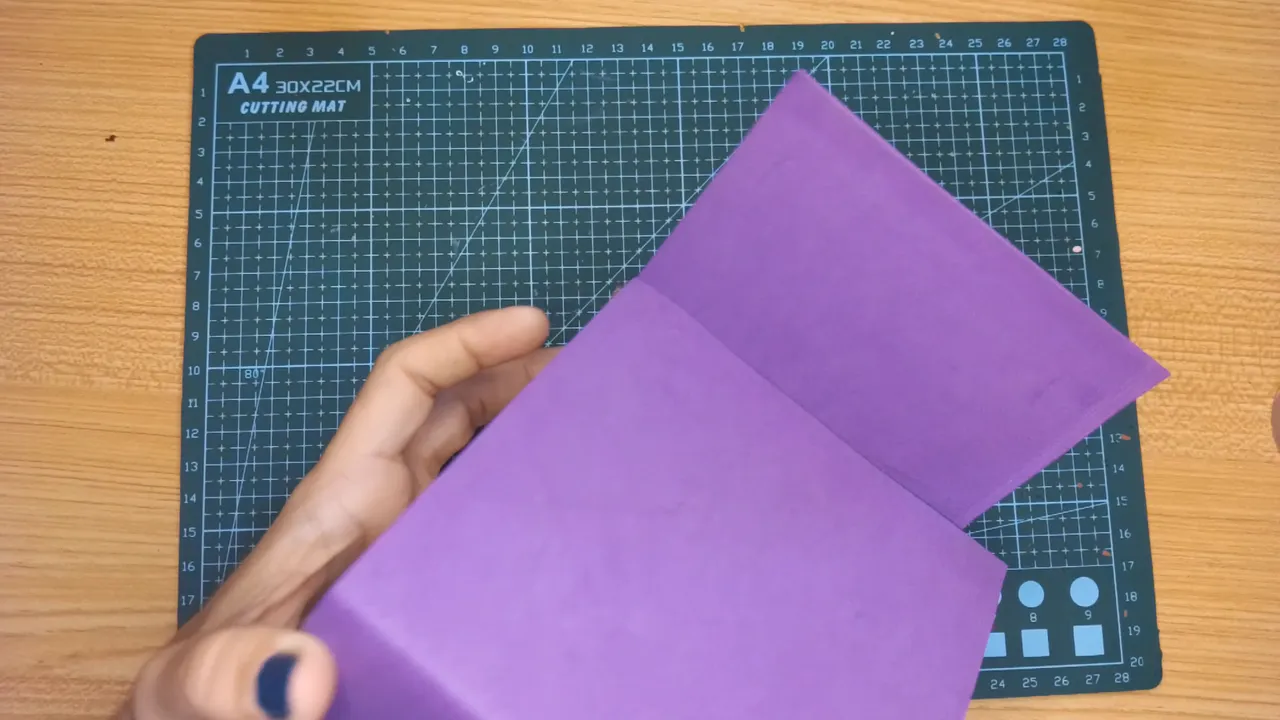
Toma la medida de tu caja y recorta el foami morado para forrar la parte de afuera, deja al menos 1,5 centímetros de sobra para doblar las pestañas hacia adentro, esto le dará un mejor acabado.
Coloca pegamento en cada una de sus caras y ve rodando la caja para que se adhiera el foami, corta el excedente.
Corta las esquinas del foami, coloca pegamento y dobla hacia adentro.
! [English version]
[Eng]
Take the size of your box and cut the purple foami to line the outside, leave at least 1.5 centimeters left over to fold the tabs inwards, this will give a better finish.
Place glue on each of its sides and roll the box to adhere the foami, cut the excess.
Cut the corners of the foami, place glue and fold inwards.
Step 2️⃣/ paso 2️⃣
 |  | |
 |  |
[Esp]
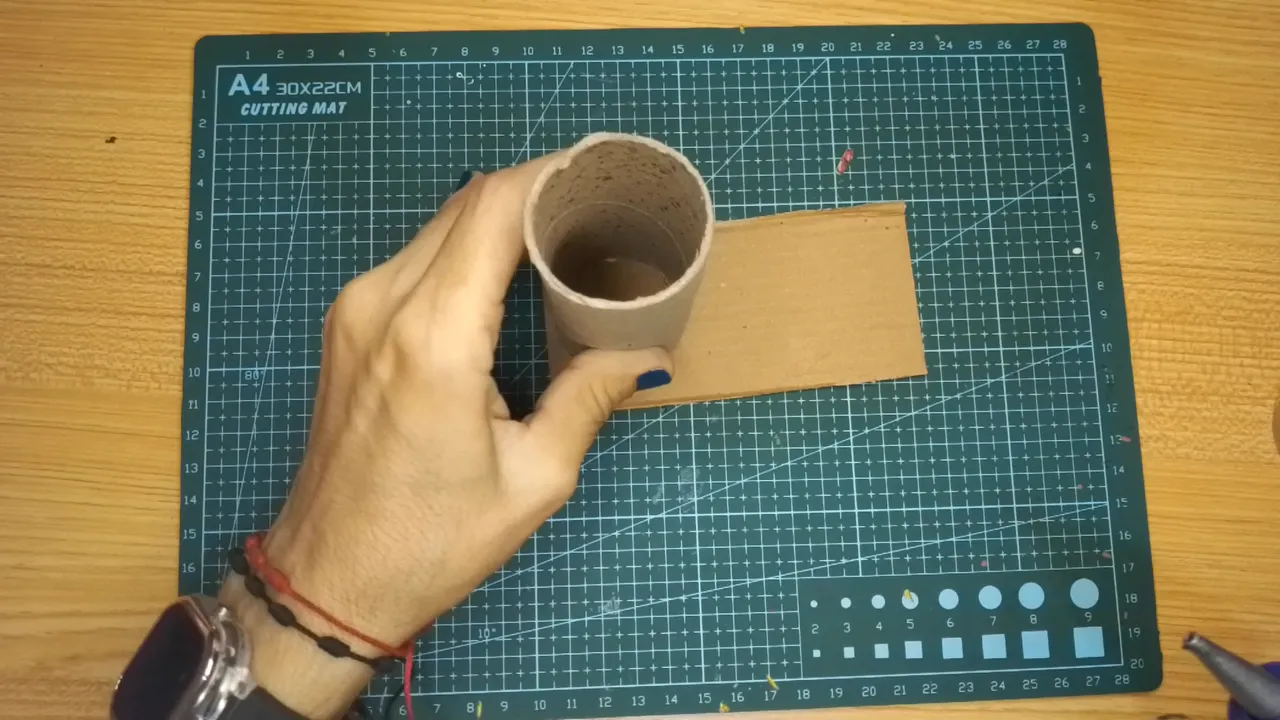
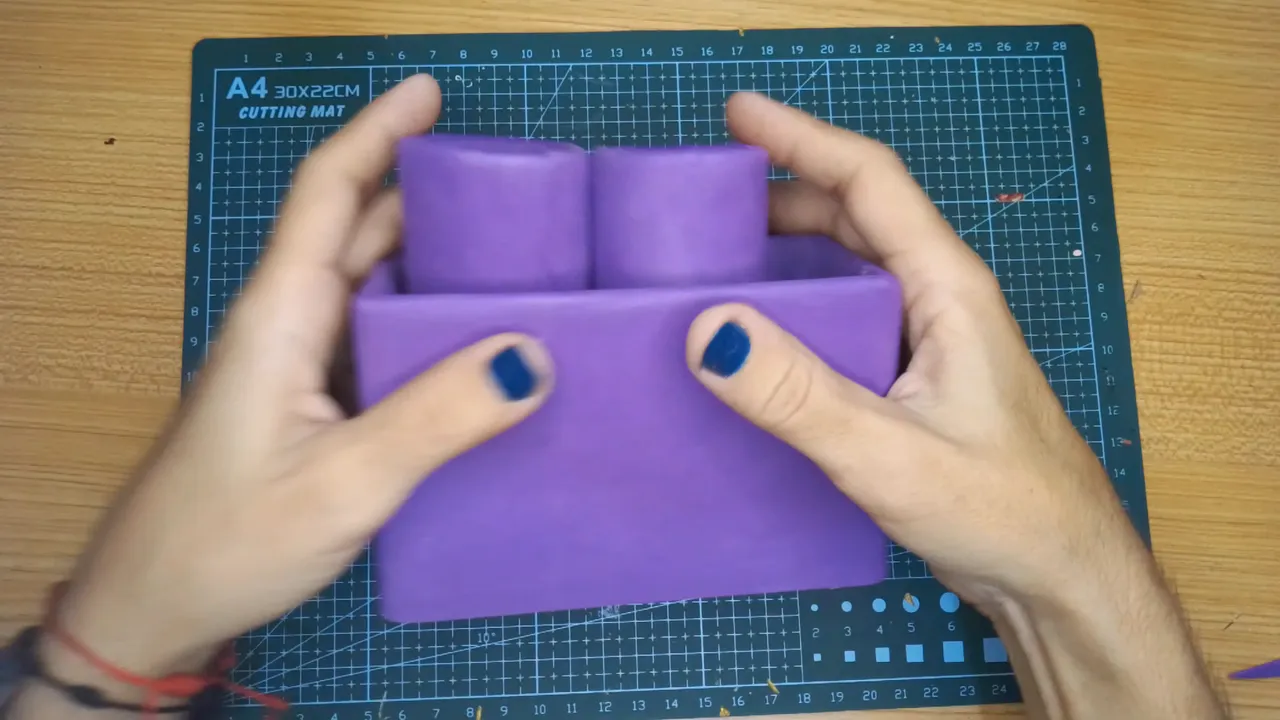
Con un pedazo de cartón, en este caso yo usé el que reciclé de la tapa de la caja, coloca pegamento en la base de un rollo de papel higiénico y pégalo al cartón, repite este procedimiento con el otro rollo.
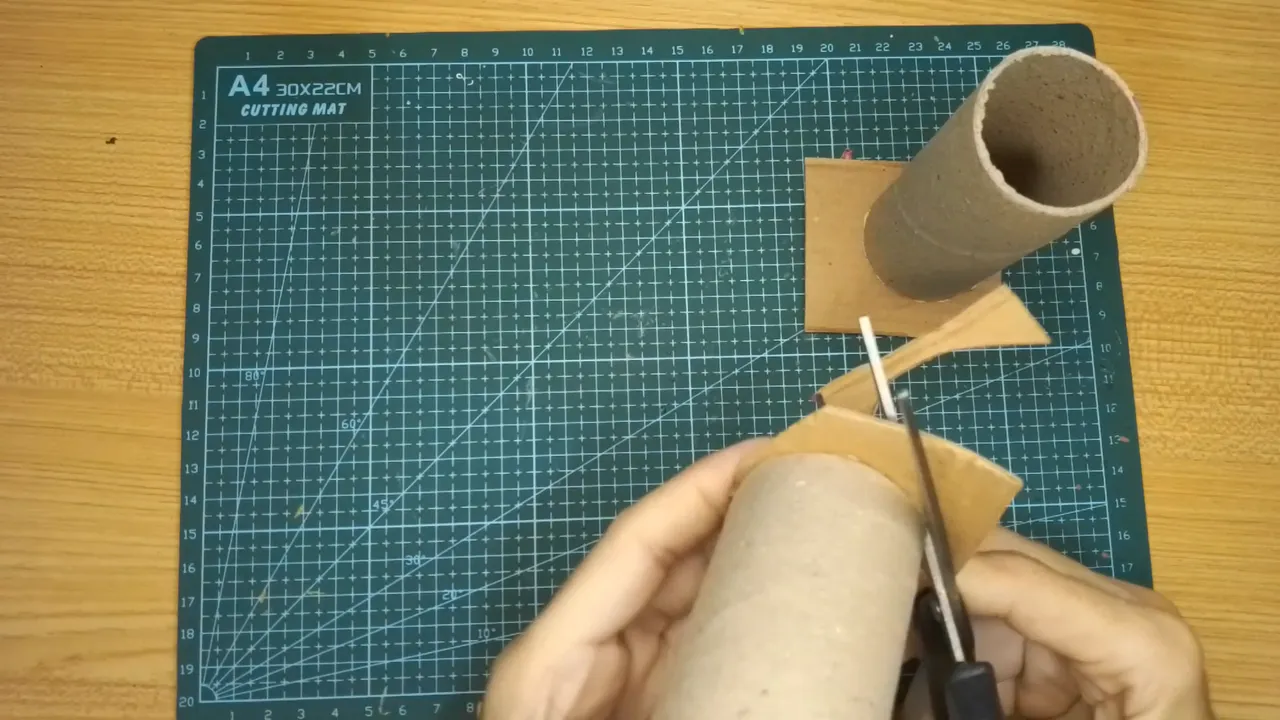
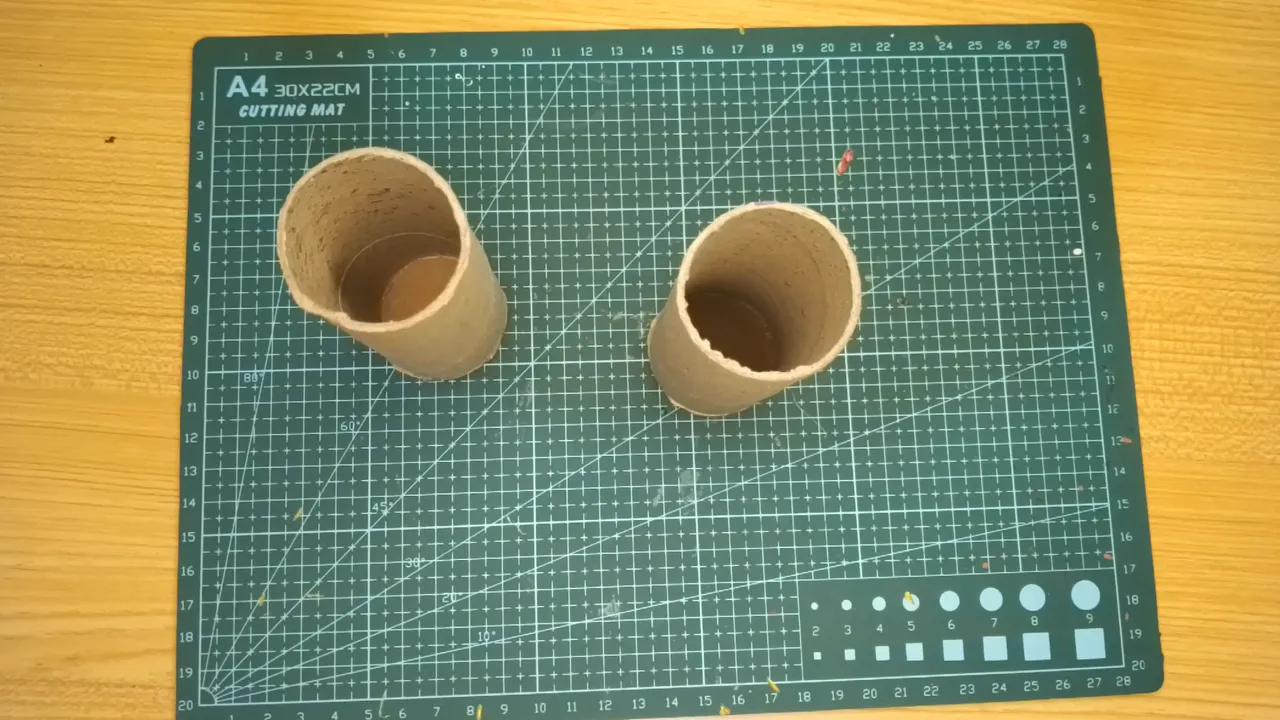
Una vez seco, recorta por el borde de la base.
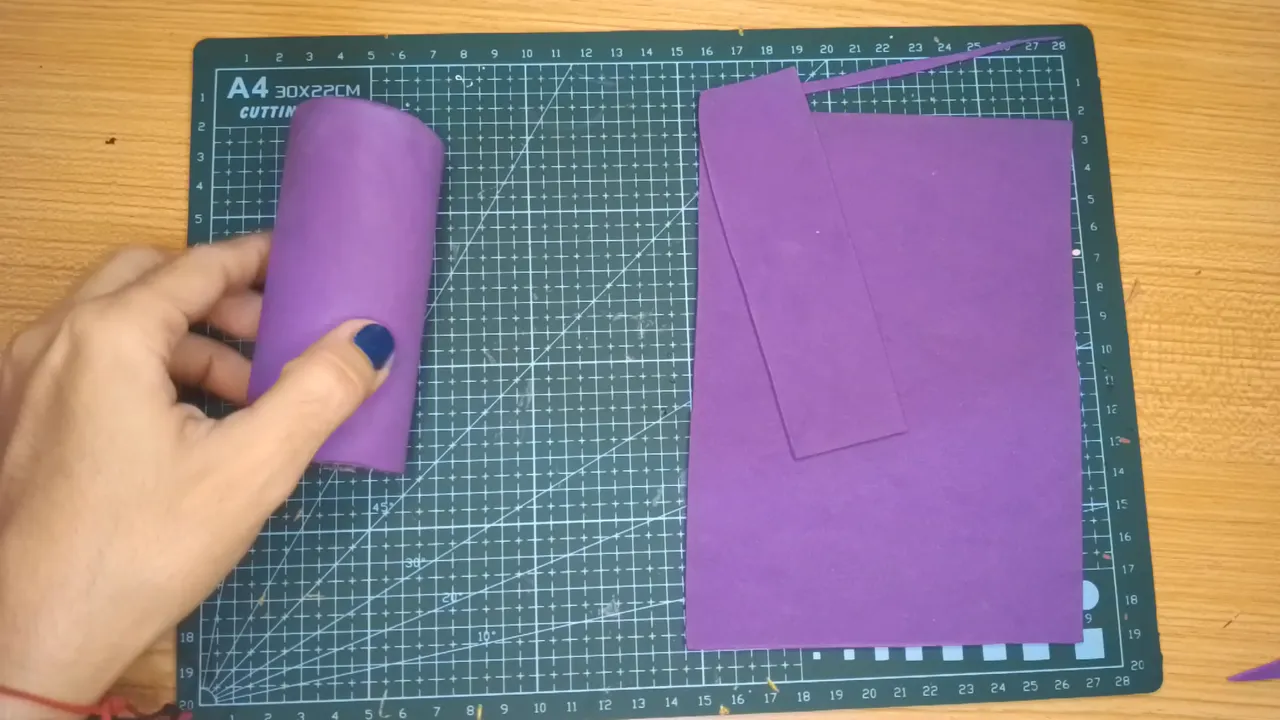
Toma la medida del ancho y largo de los rollos y recorta el foami dejando 1.5 centímetros de sobra para repetir el procedimiento que realizamos al principio en el forrado de la caja.
Pega el foami al rollo, recorta unas cuantas pestañas de las que sobresalen, aplica pegamento y dobla hacia adentro.
! [English version]
[Eng]
With a piece of cardboard, in this case I used the one I recycled from the lid of the box, put glue on the base of a roll of toilet paper and glue it to the cardboard, repeat this procedure with the other roll.
Once dry, cut along the edge of the base.
Measure the width and length of the rolls and cut the foami leaving 1.5 centimeters to repeat the procedure we did at the beginning of the box lining.
Glue the foami to the roll, cut a few tabs from the ones that stick out, apply glue and fold inwards.
Step 3️⃣/ paso 3️⃣
 |  | |
 |  |
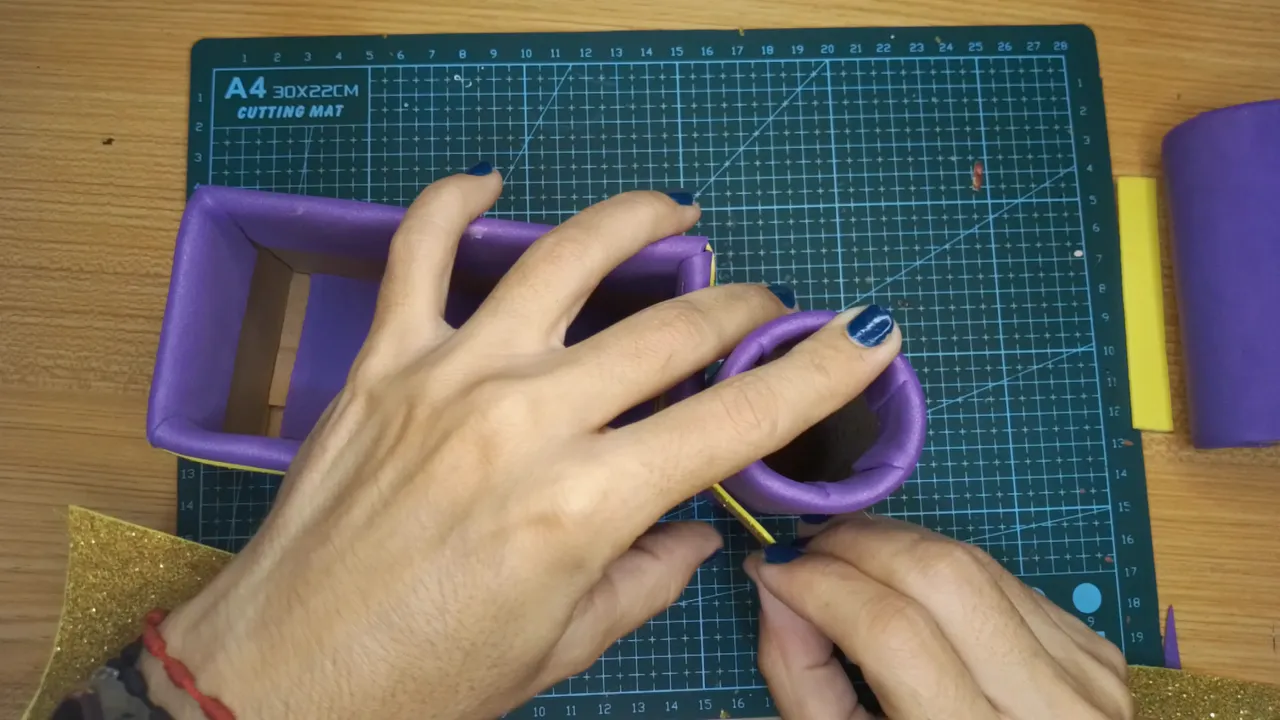
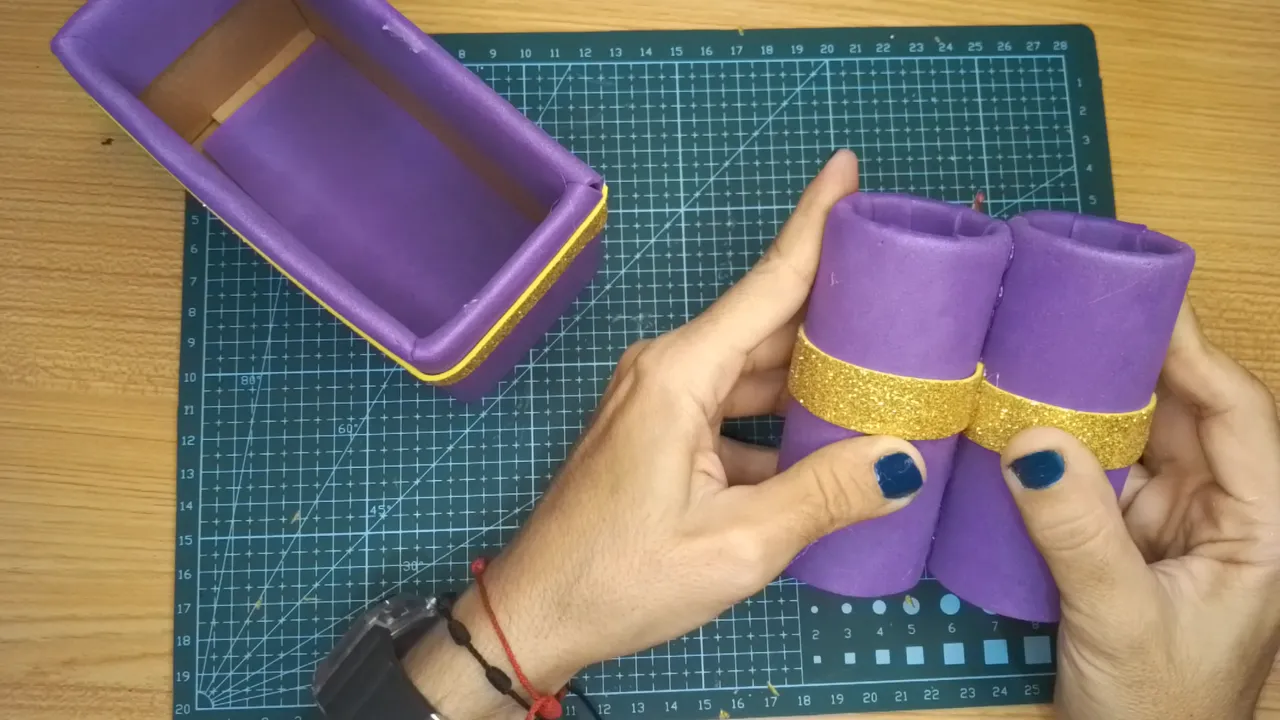
[Esp]
Repite el mismo procedimiento anterior para forrar el otro rollo.
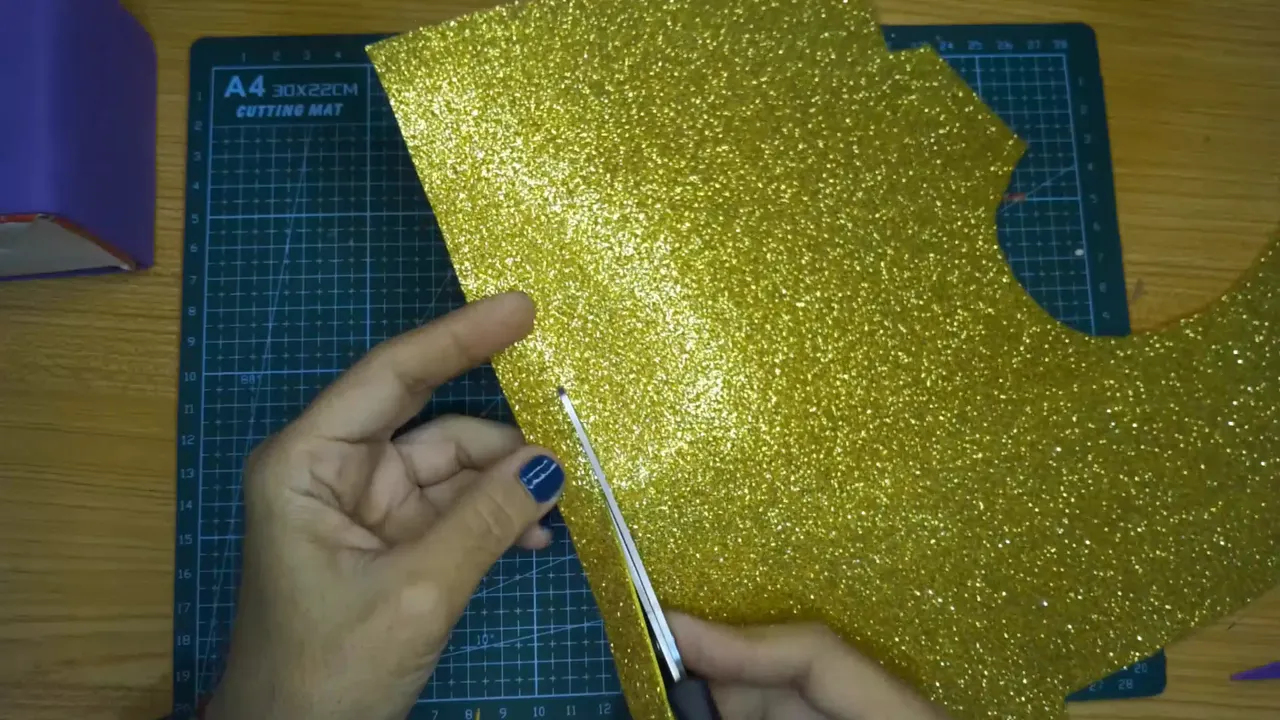
Recorta varias tiras de foami escarchado amarillo de 1.5 centímetros de ancho, por el largo que requieras.
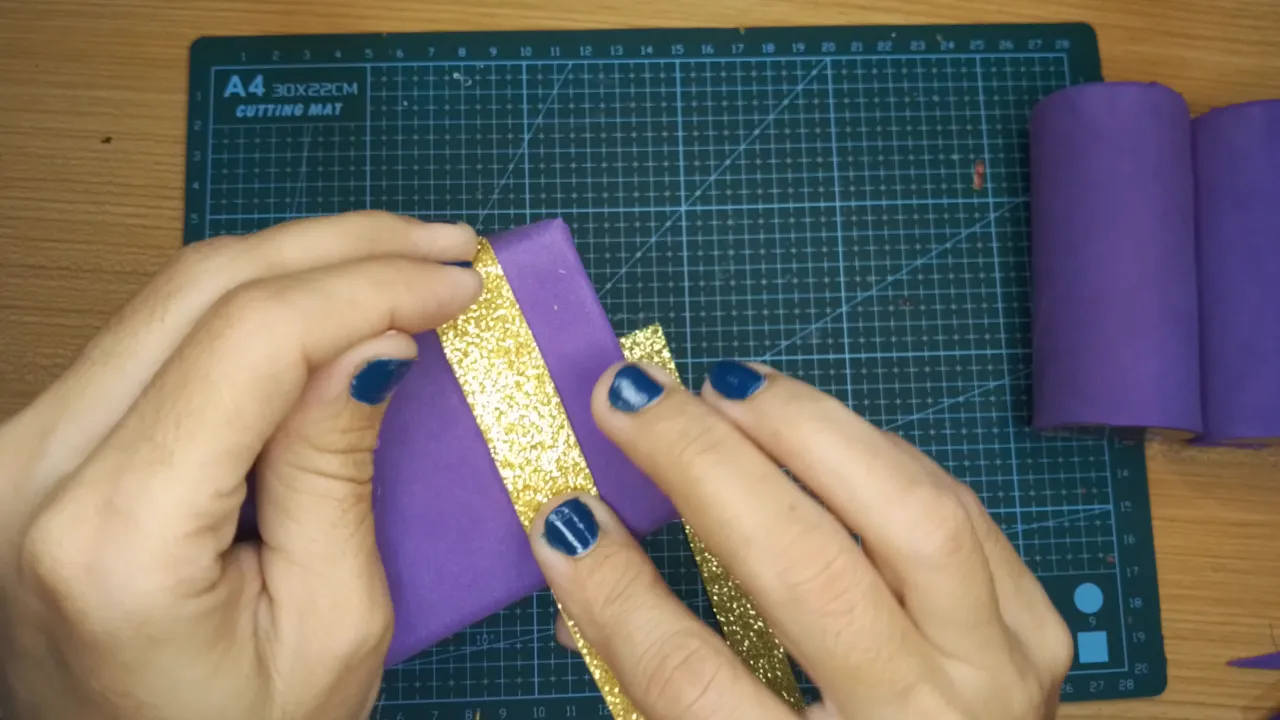
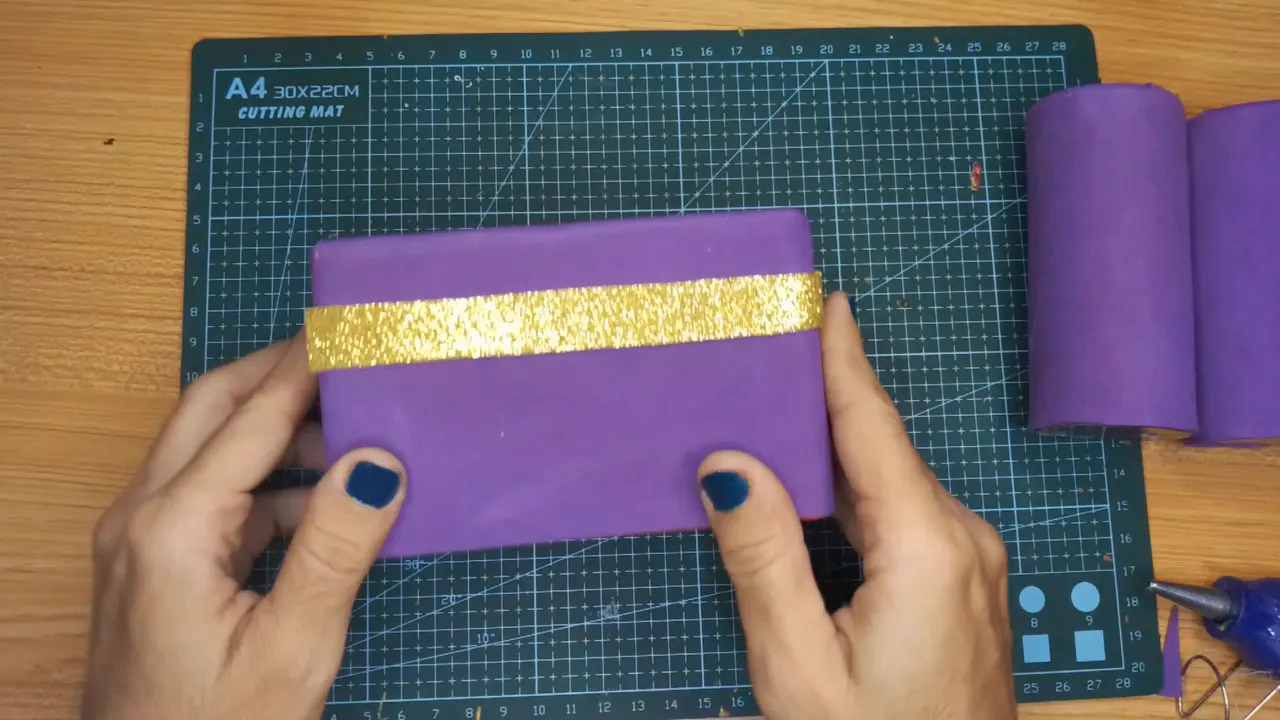
Coloca pegamento sobre la caja y dejando unos centímetros de borde, pega la cinta amarilla.
Repite este procedimiento para cada rollo, cuando vayas a pegarlo, debes procurar que esté en la misma altura que el pegado en la caja.
! [English version]
[Eng]
Repeat the same procedure above to line the other roll.
Cut several strips of yellow frosted foami 1.5 centimeters wide, for the length you need.
Place glue on the box and leaving a few centimeters of border, glue the yellow ribbon.
Repeat this procedure for each roll, when you are going to glue it, make sure it is at the same height as the one glued on the box.
Step 4️⃣/ paso 4️⃣
 |  | |
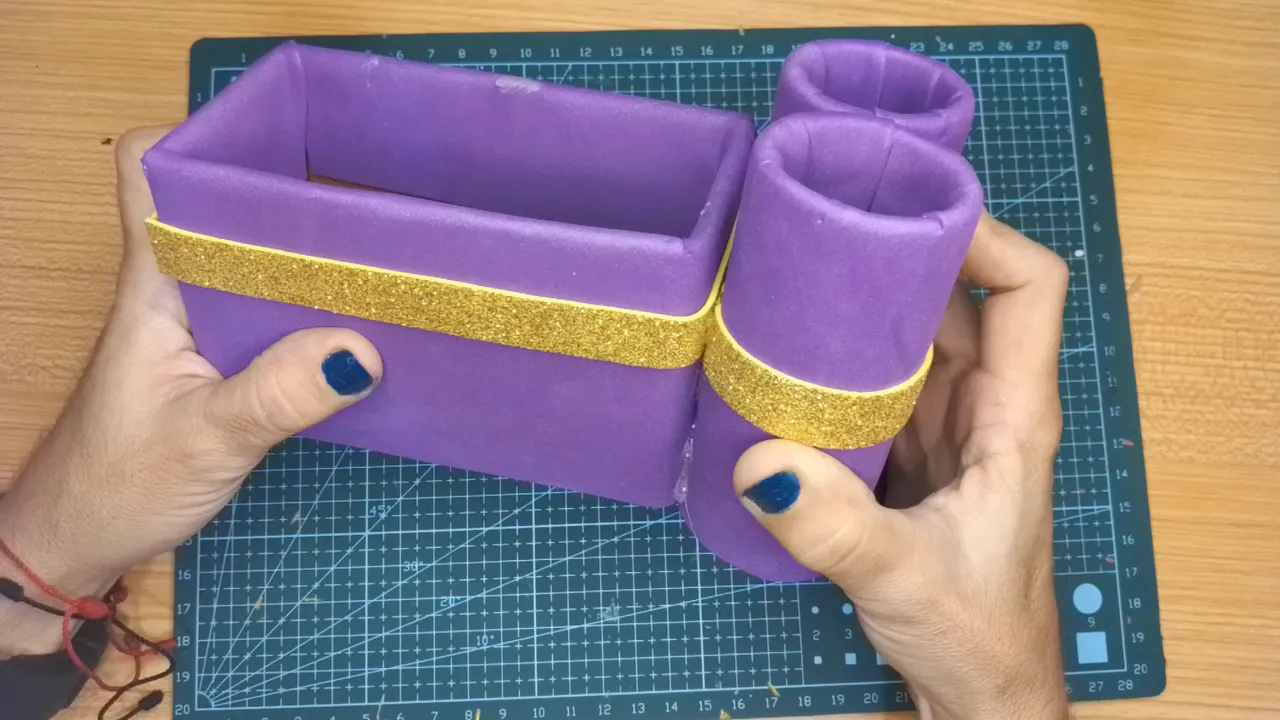 |  |
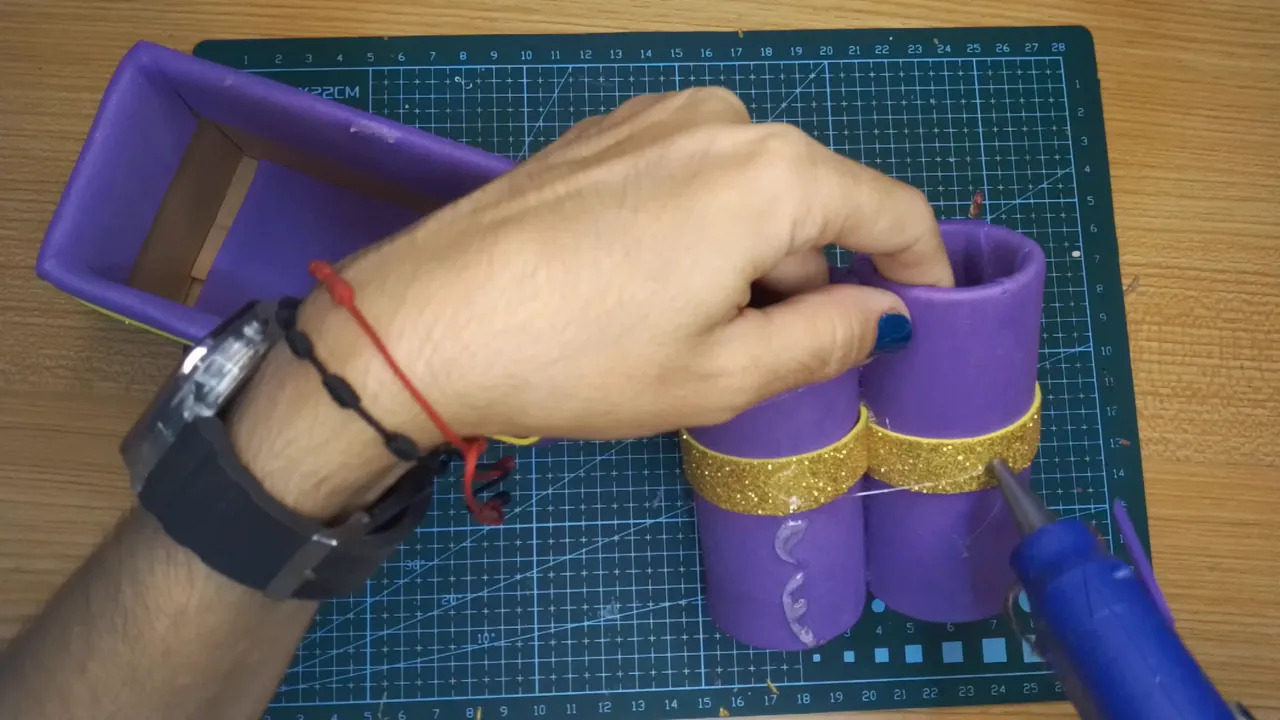
[Esp]
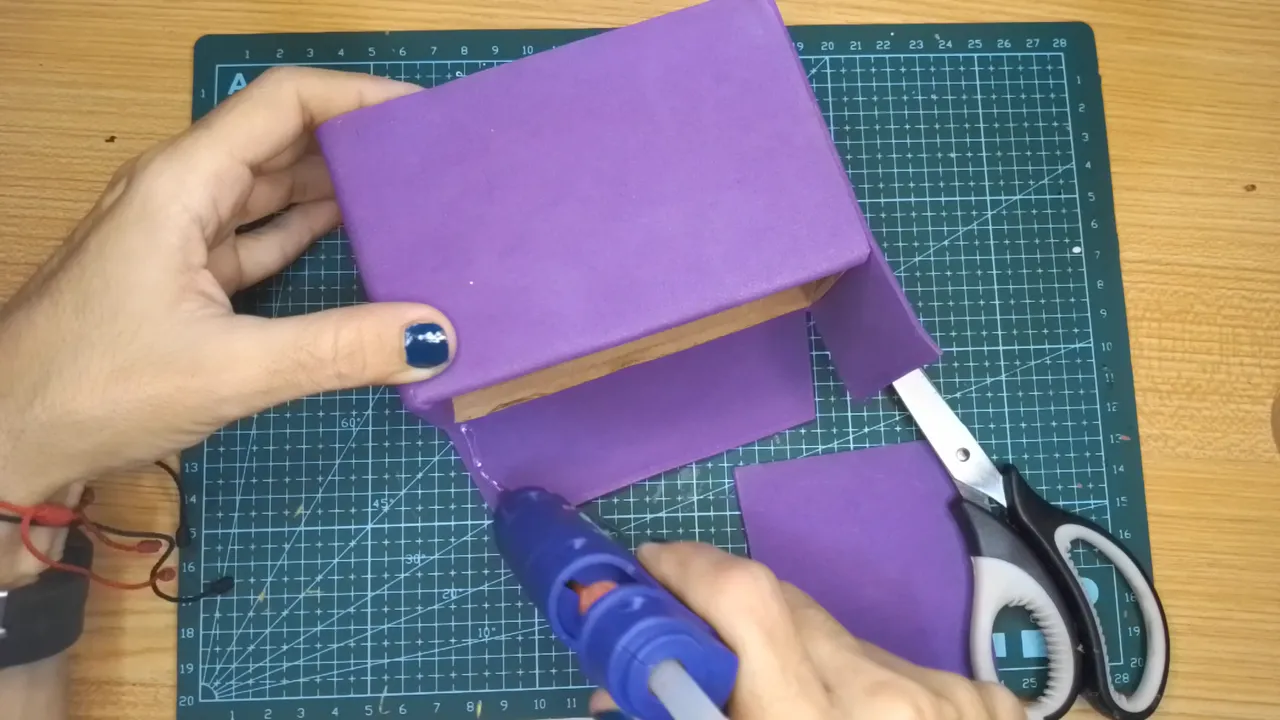
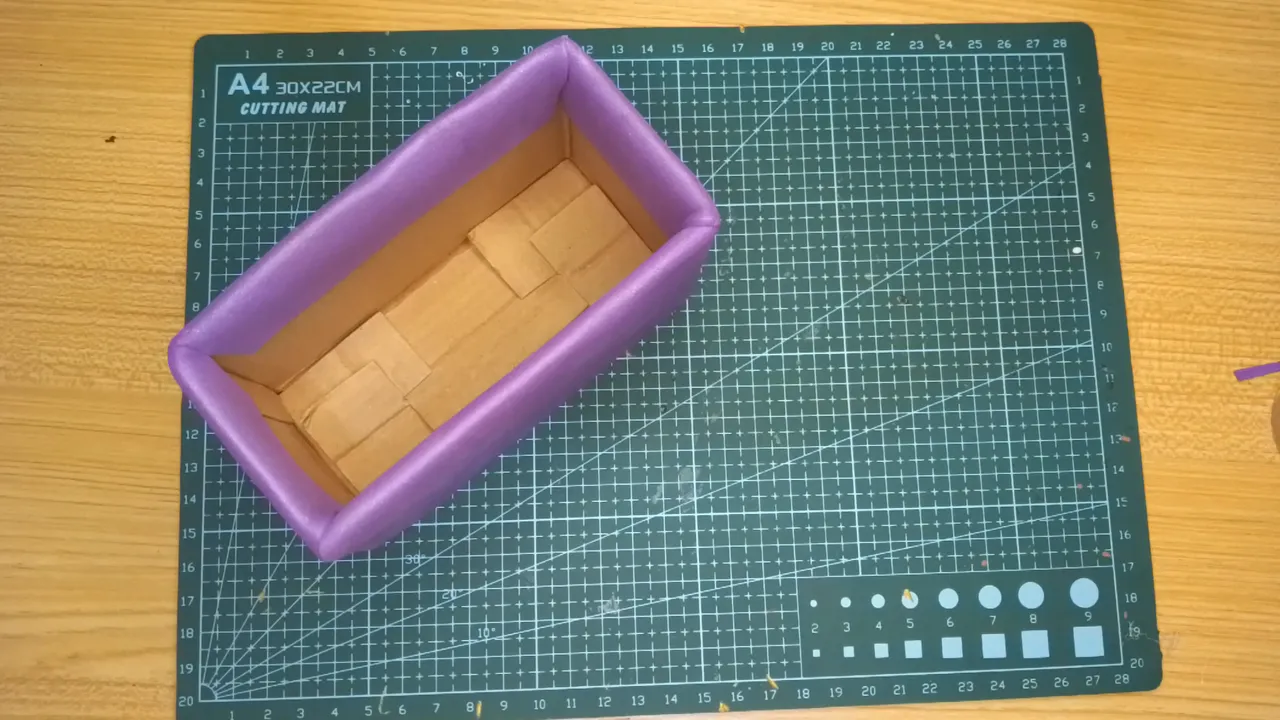
Toma ambos rollos, aplica pegamento y une.
Luego de secar, coloca un poco de pegamento en ellos nuevamente y ahora pégalos a la caja, mantén unos minutos presionando para que peguen bien.
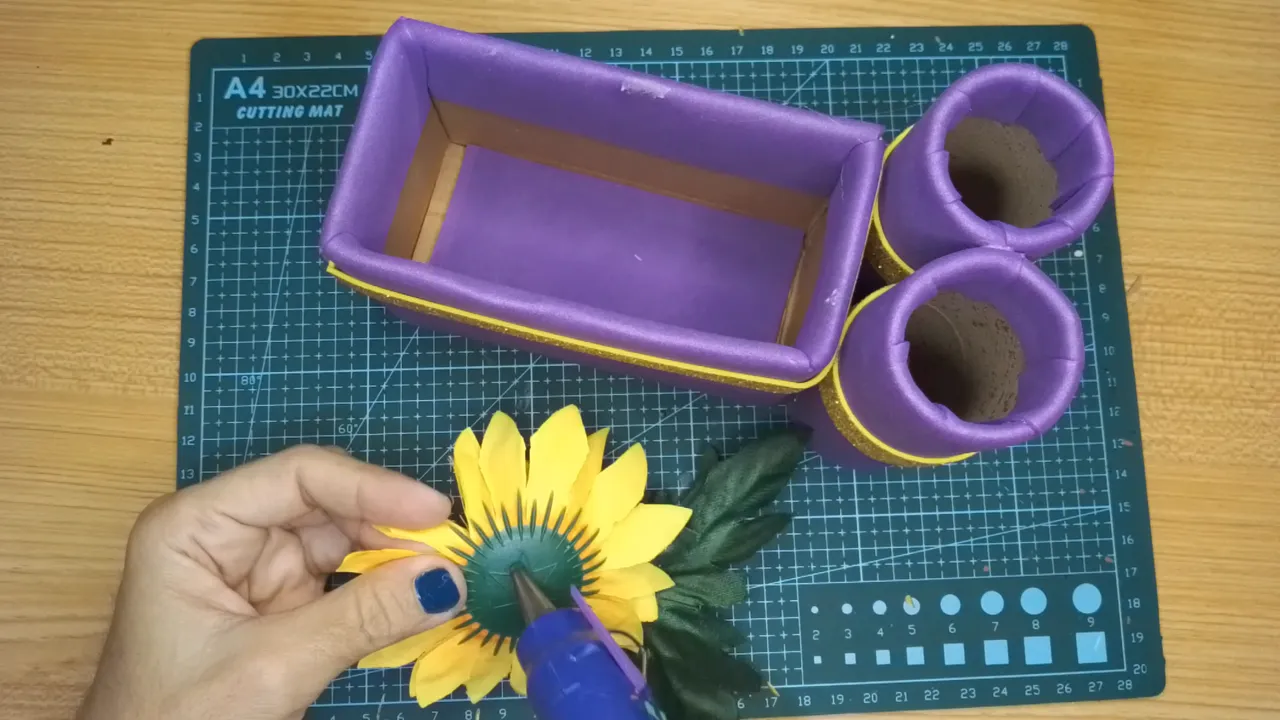
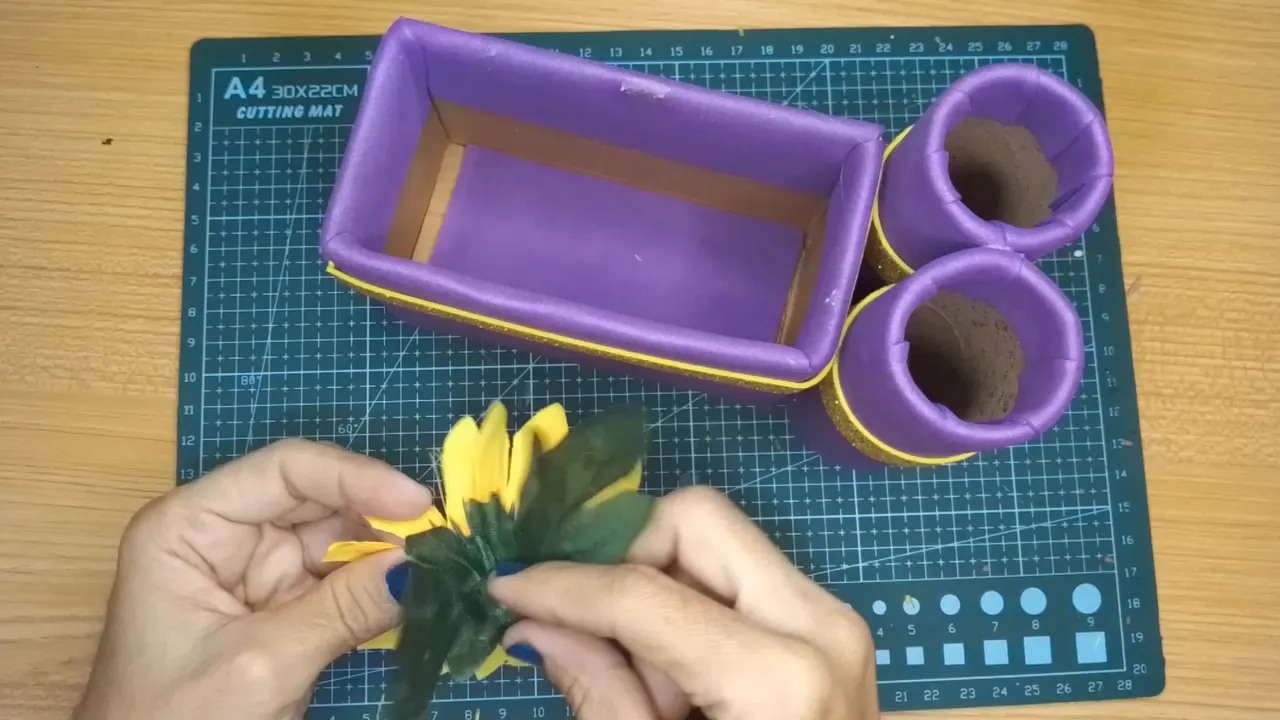
Toma la flor, retira el alambre, si tiene hojas aprovecha reciclando, pégalas a la base de la flor.
! [English version]
[Eng]
Take both rolls, apply glue and join them together.
After drying, put some glue on them again and now glue them to the box, keep pressing for a few minutes so that they stick well.
Take the flower, remove the wire, if it has leaves take advantage of recycling, glue them to the base of the flower.
Step 5️⃣/ paso 5️⃣
 |  | |
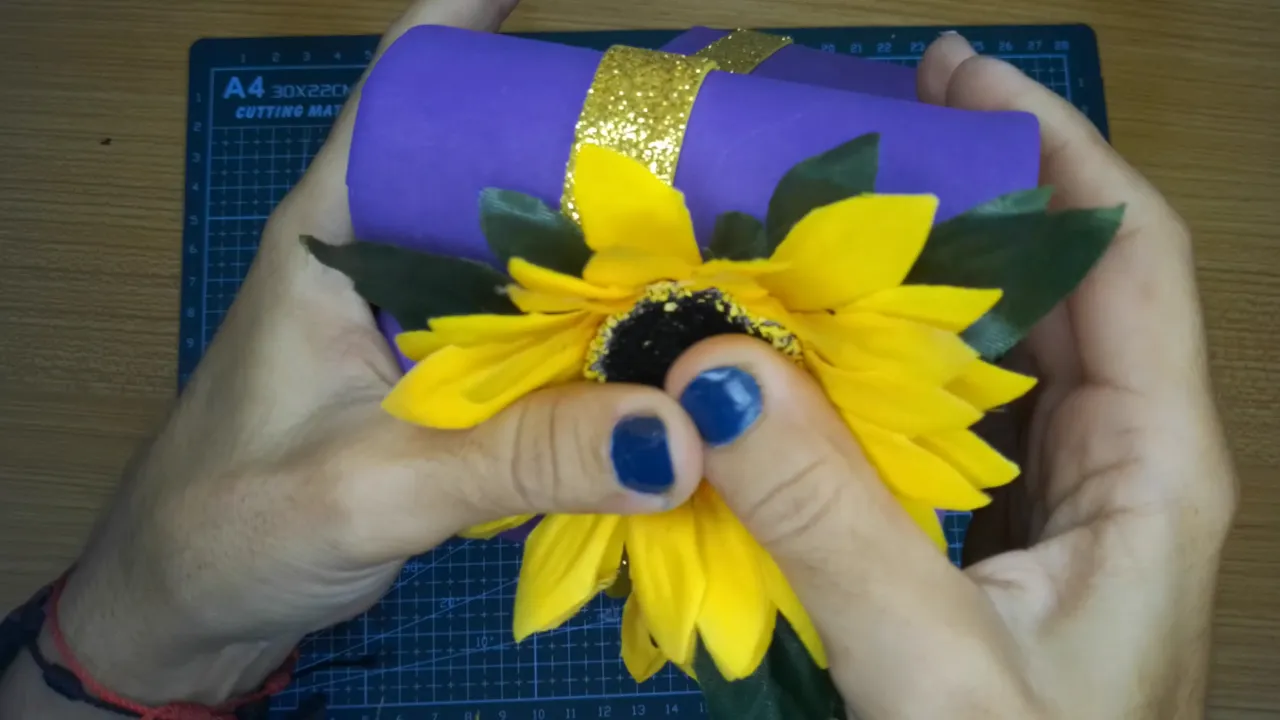 | 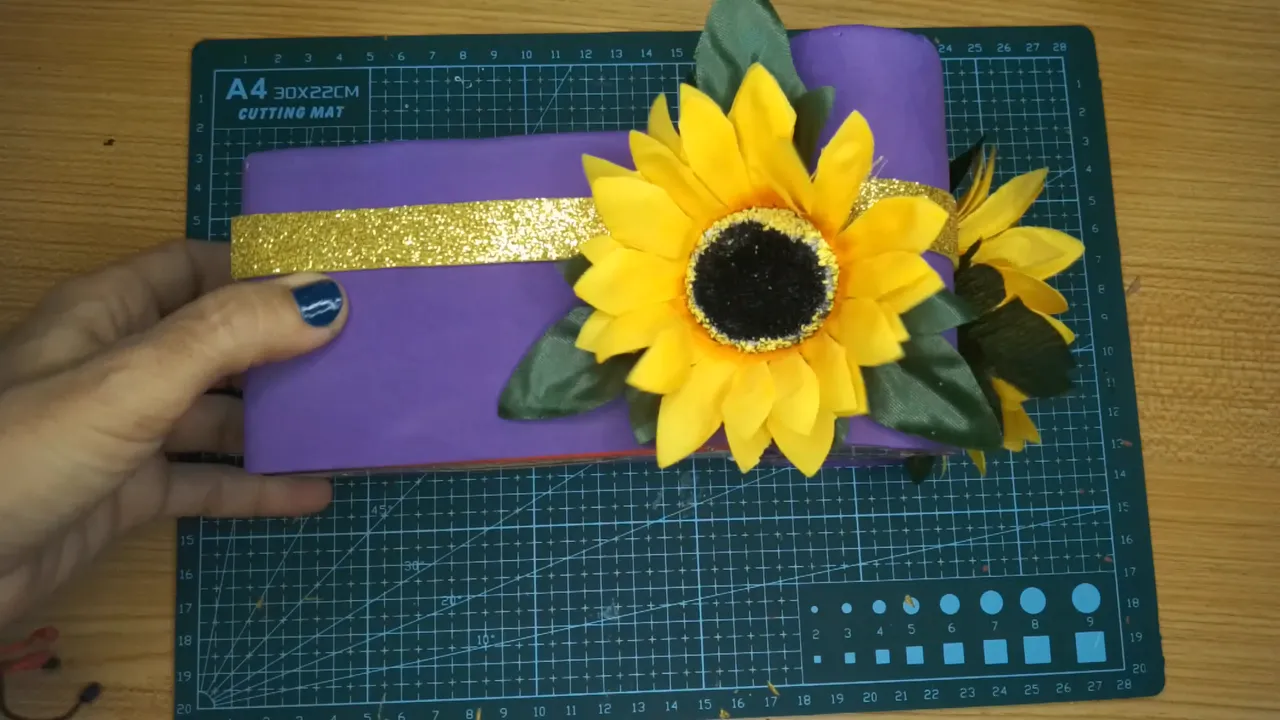 |
[Esp]
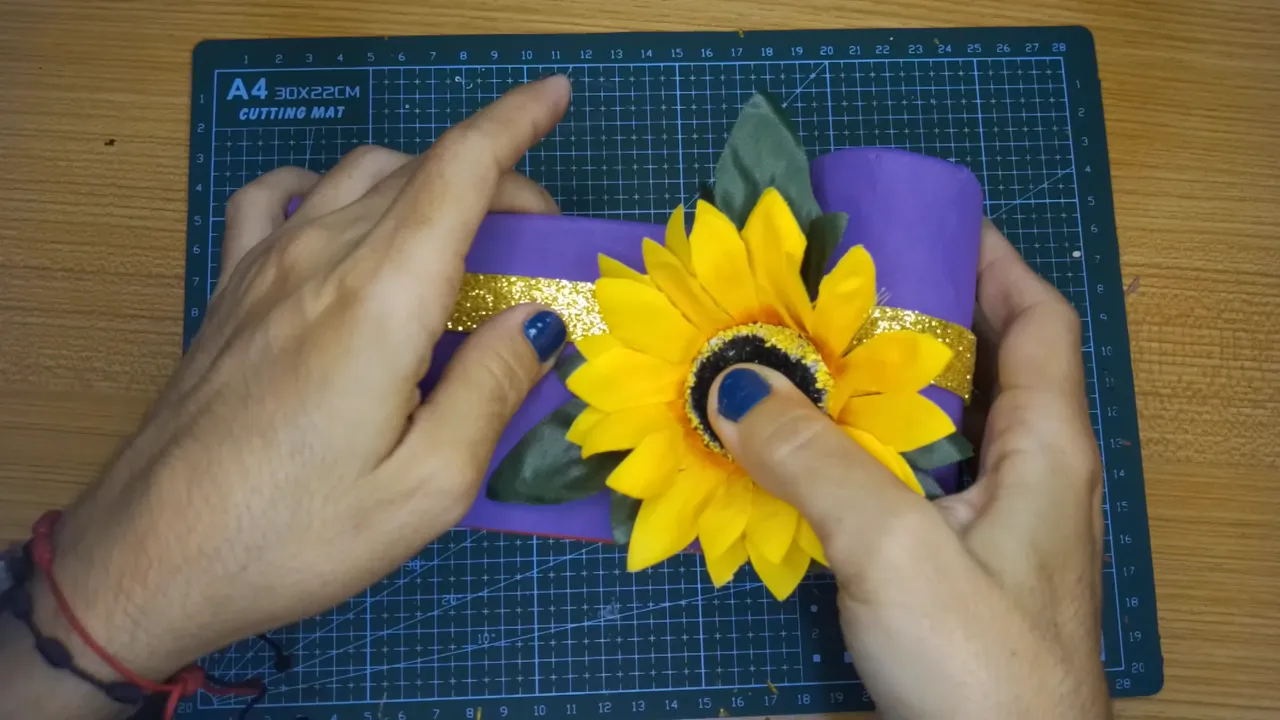
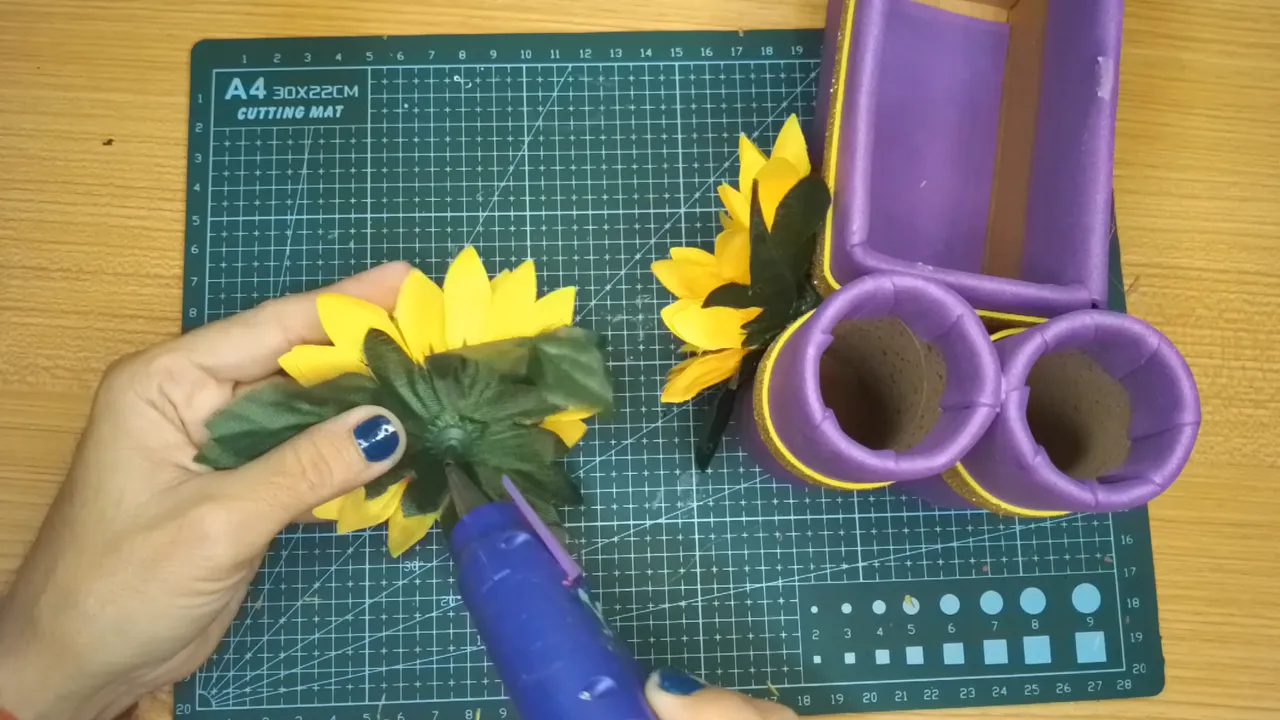
Aplica pegamento en la parte trasera de la flor y pega en la unión de la caja con los rollos de papel higiénico.
Repite el paso anterior con la última flor.
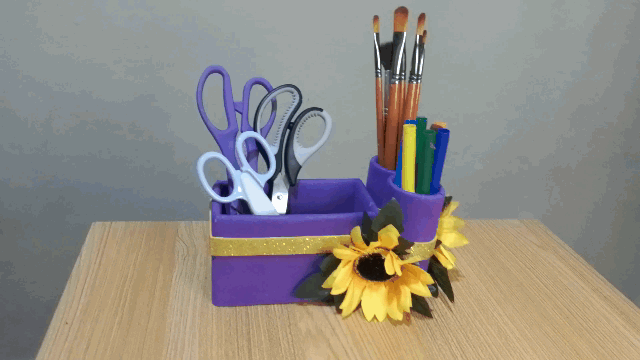
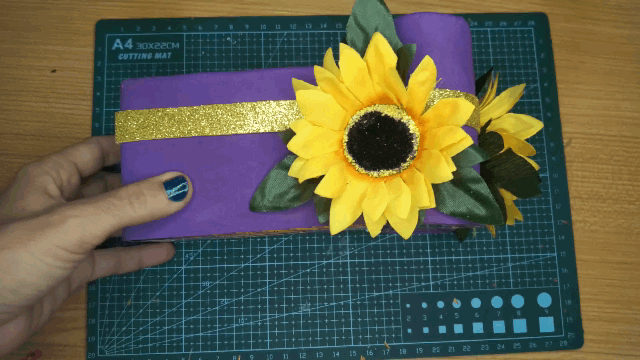
¡Listo! Tenemos un lindo organizador simbólico para decorar nuestro escritorio.
Espero les guste.
! [English version]
[Eng]
Apply glue to the back of the flower and glue at the junction of the box with the toilet paper rolls.
Repeat the previous step with the last flower.
That's it! We have a nice symbolic organizer to decorate our desk.
I hope you like it.


💜💙💜