❤️Hola amigos, feliz martes!❤️
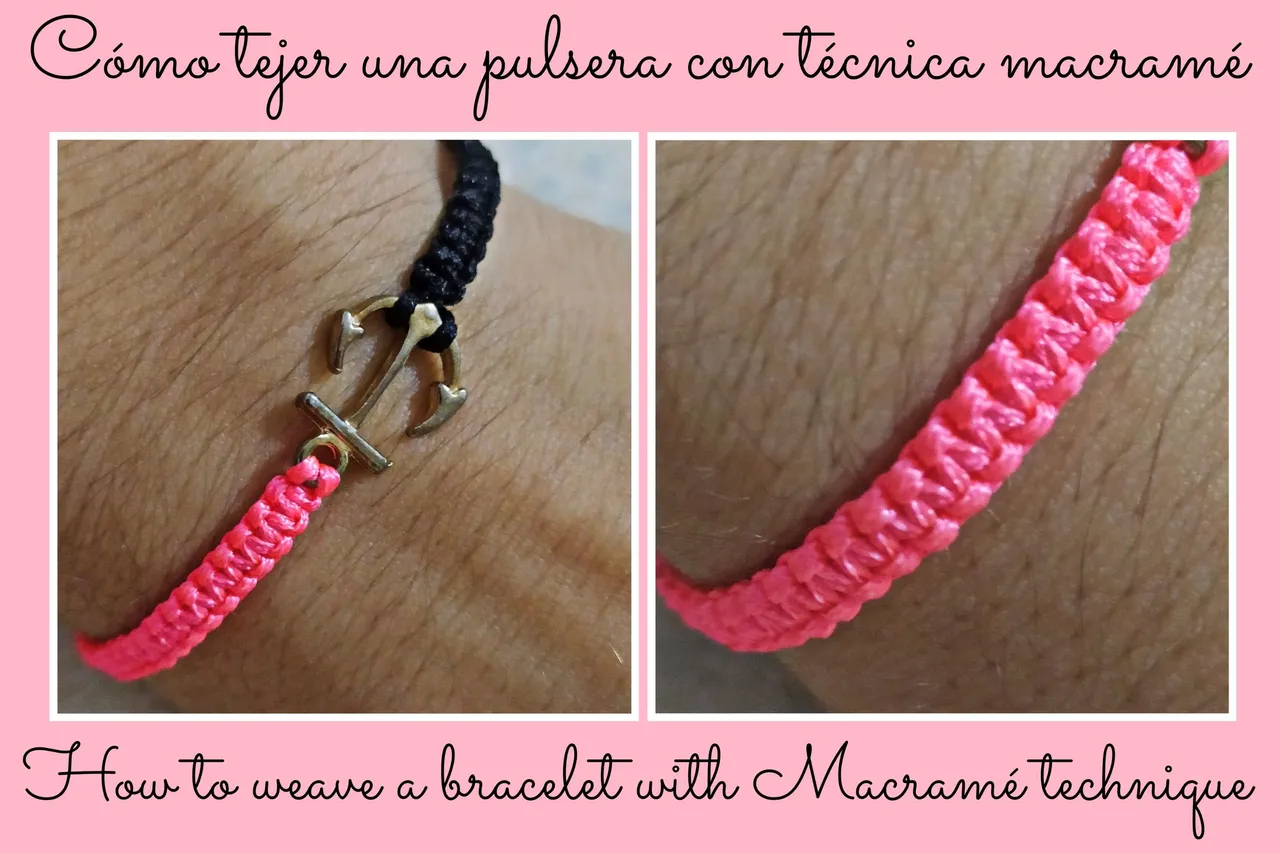
Hoy les traigo un tutorial para aprender a elaborar una linda pulsera tejida con dije.
El macramé es el arte de hacer nudos, yo aprendí muchas de estas técnicas hace un tiempo y quiero compartirles hoy a ustedes este conocimiento.
El nudo que utilicé para elaborar esta pulsera se llama "Nudo plano".
Los materiales que utilicé fueron:
- 2 metros de hilo encerado rosado
- 2 metros de hilo encerado negro
- Encendedor
- Tijeras
- Un dije (Yo utilicé un ancla)
- Cinta métrica
❤️Hello friends, happy Tuesday!❤️
Today I bring you a tutorial to learn how to make a beautiful bracelet woven with a charm.
Macramé is the art of knot tying, I learned many of these techniques some time ago and I want to share this knowledge with you today.
The knot I used to make this bracelet is called "flat knot".
The materials I used were:
- 2 meters of pink waxed thread
- 2 meters of black waxed thread
- Lighter
- Scissors
- A charm (I used an anchor)
- Tape measure
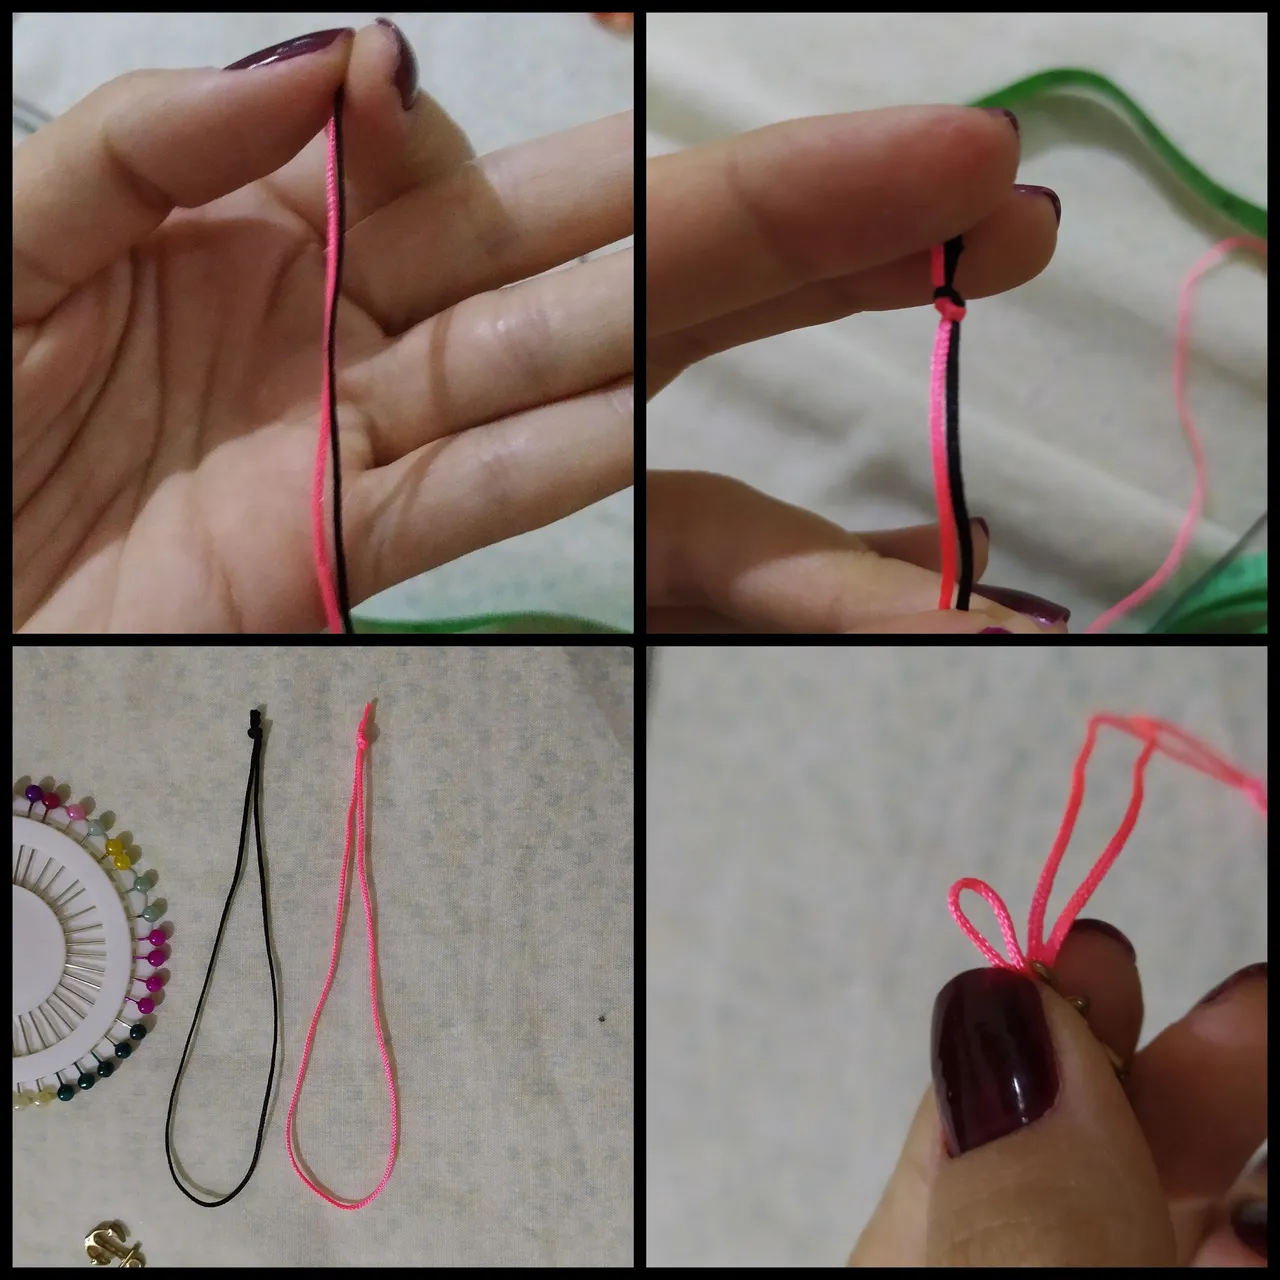
Lo primero que haremos será tomar las puntas de los dos hilos encerados y la cinta métrica, y vamos a medir nuestra muñeca (del brazo) la mía mide 15 cm, entonces, y a esos 15 cm le agrego 10 cm más que serán 5 cm de cada lado extra para cerrar la pulsera.
Recortaremos entonces dos hilos de 25 cm y anudaremos en principio y final.
Yo tengo un cojín donde tejo mis pulseras, porque se me hace más cómodo, ustedes pueden utilizar un telar, una tablilla, etc.
También recortaremos dos hilos de 75 cm, que darán un total de 1.5 m con el cual tejeremos la pulsera.
Vamos a tomar los dos hilos de 25 cm y los vamos a anudar como se muestra en la foto, y pasaremos por los orificios del dije, para así armar la base de la pulsera.
The first thing we will do is to take the ends of the two waxed threads and the tape measure, and we will measure our wrist (of the arm) mine measures 15 cm, then, and to those 15 cm I add 10 cm more that will be 5 cm of each extra side to close the bracelet.
We will then cut two 25 cm threads and knot at the beginning and end.
I have a cushion where I weave my bracelets, because it is more comfortable for me, you can use a loom, a splint, etc.
We will also cut two 75 cm threads, which will give a total of 1.5 m with which we will weave the bracelet.
We are going to take the two 25 cm threads and knot them as shown in the photo, and pass them through the holes of the pendant, in order to assemble the base of the bracelet.
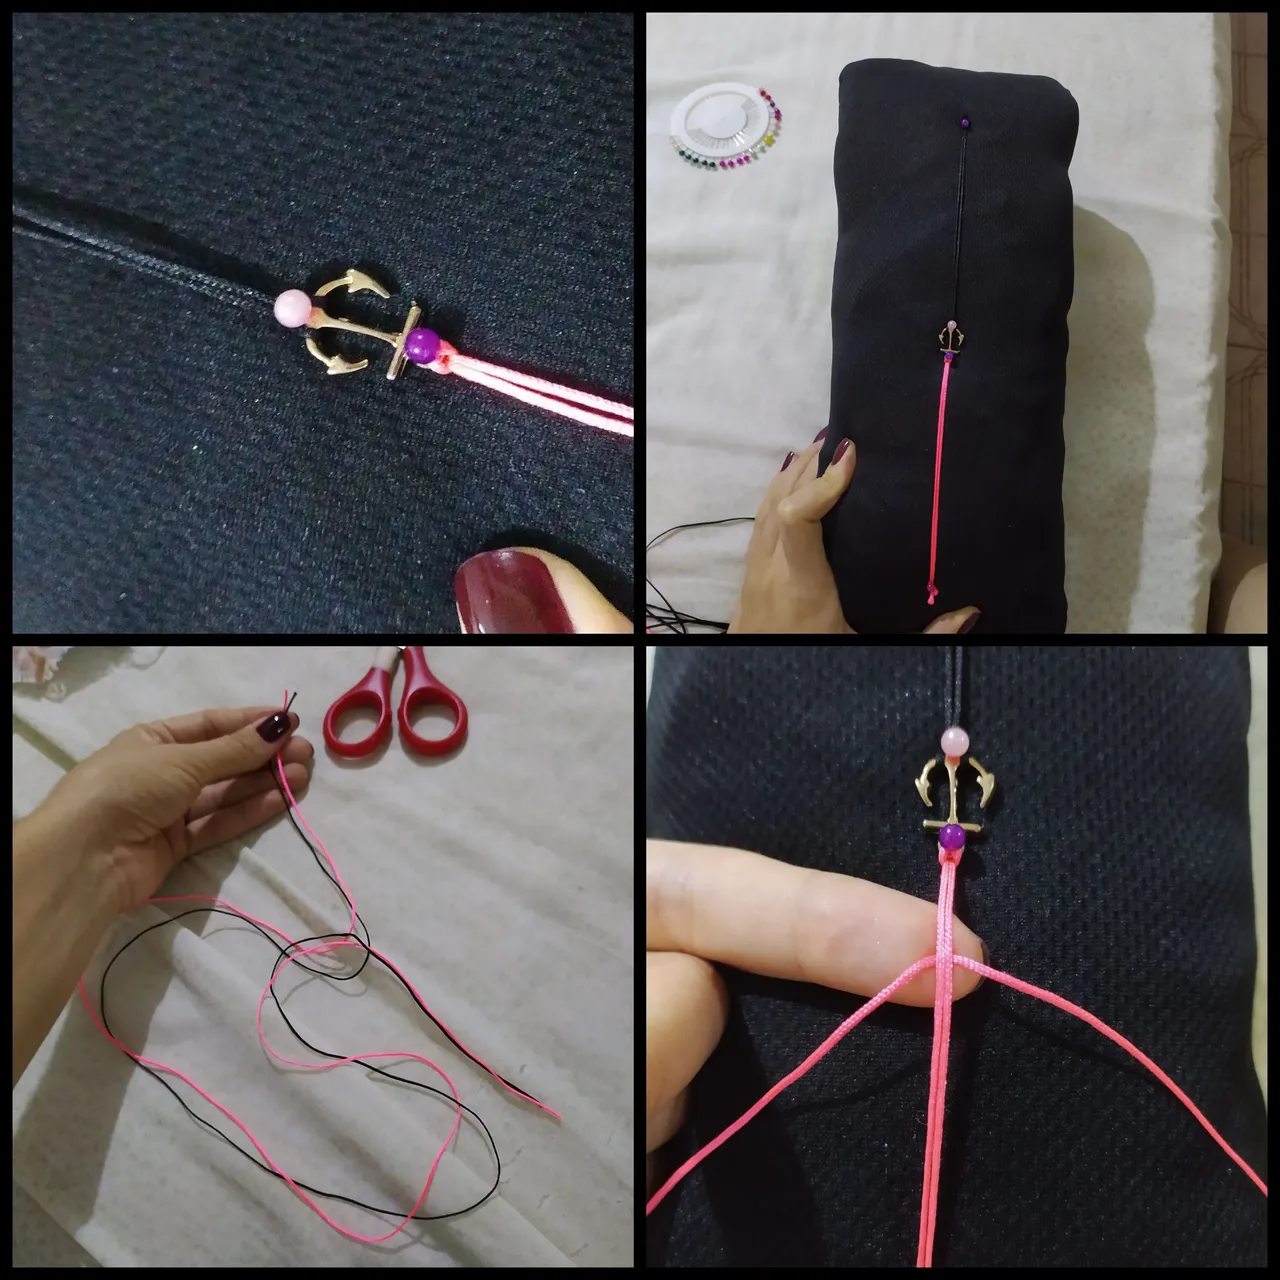
Seguido de esto, ubicamos la base de la pulsera en el cojín para empezar el tejido.
Yo hice un color de cada lado.
Teniendo la base en el cojín, tomamos uno de los hilos de 75 cm ubicamos el punto medio y empezamos el nudo.
Next, we place the base of the bracelet on the cushion to start weaving.
I did one color on each side.
Having the base on the cushion, we take one of the 75 cm threads, place the middle stitch and start the knot.
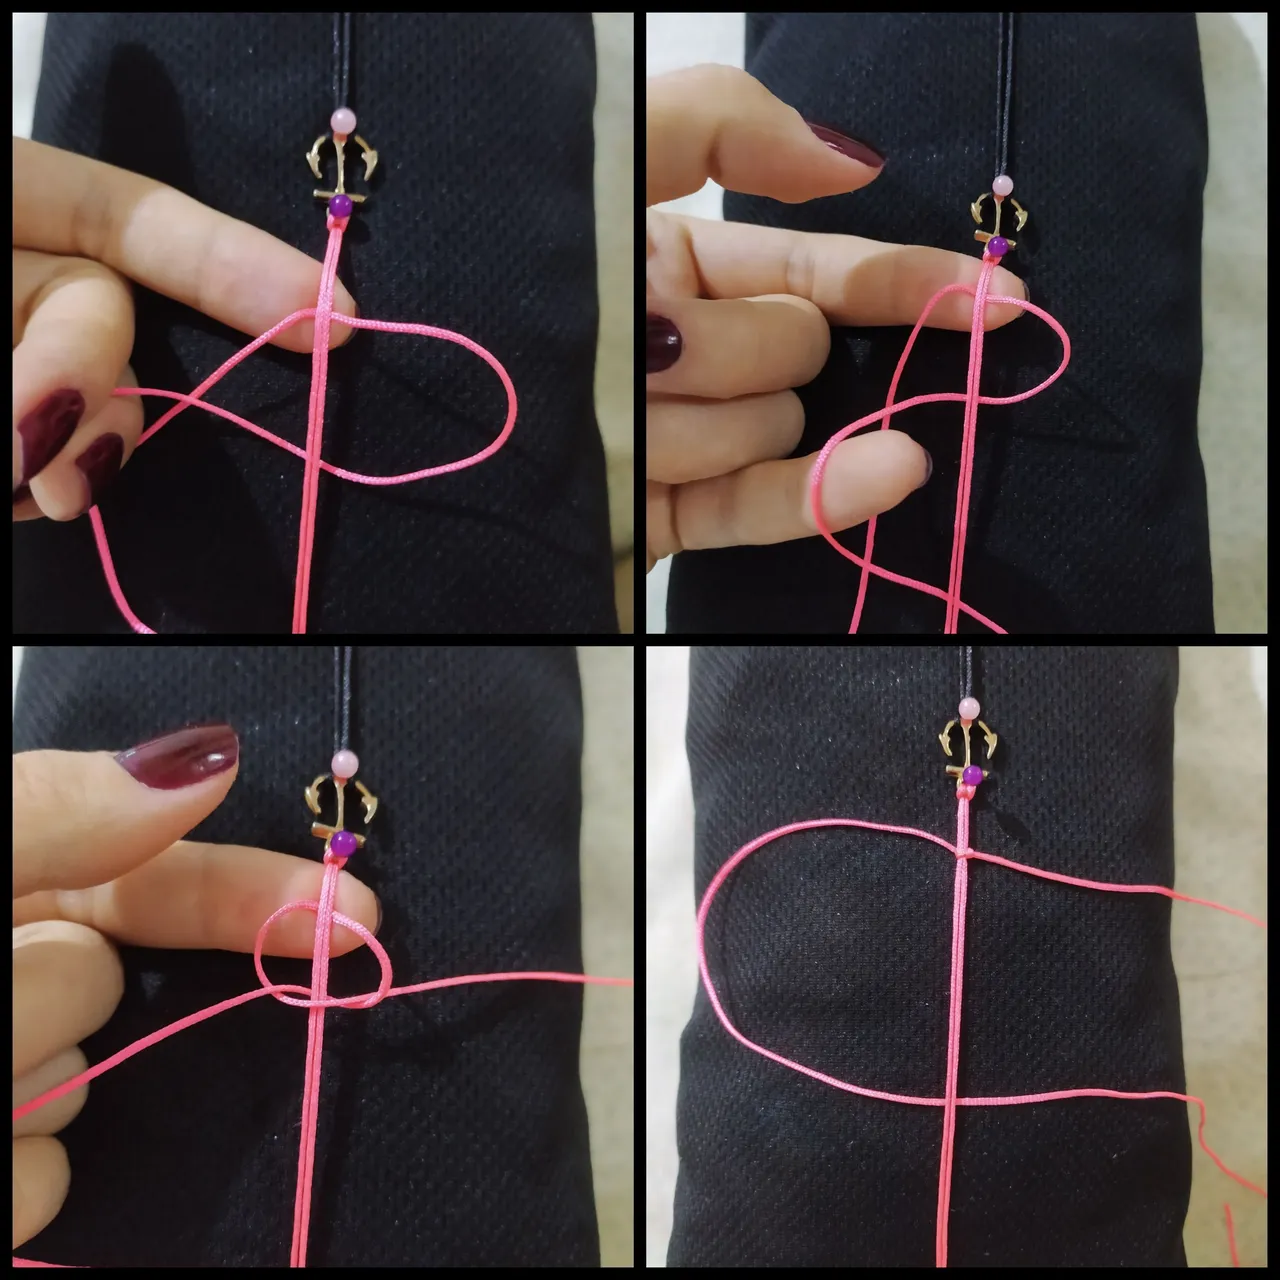
Para hacer el nudo plano, debemos pasar el hilo de la derecha por debajo, y el hilo de la izquierda encima, como se muestra en la foto. Al cerrar el nudo debemos seguir sujetando el punto medio con el dedo.
To make the flat knot, we must pass the right-hand thread underneath, and the left-hand thread on top, as shown in the photo. When closing the knot we must continue holding the middle point with our finger.
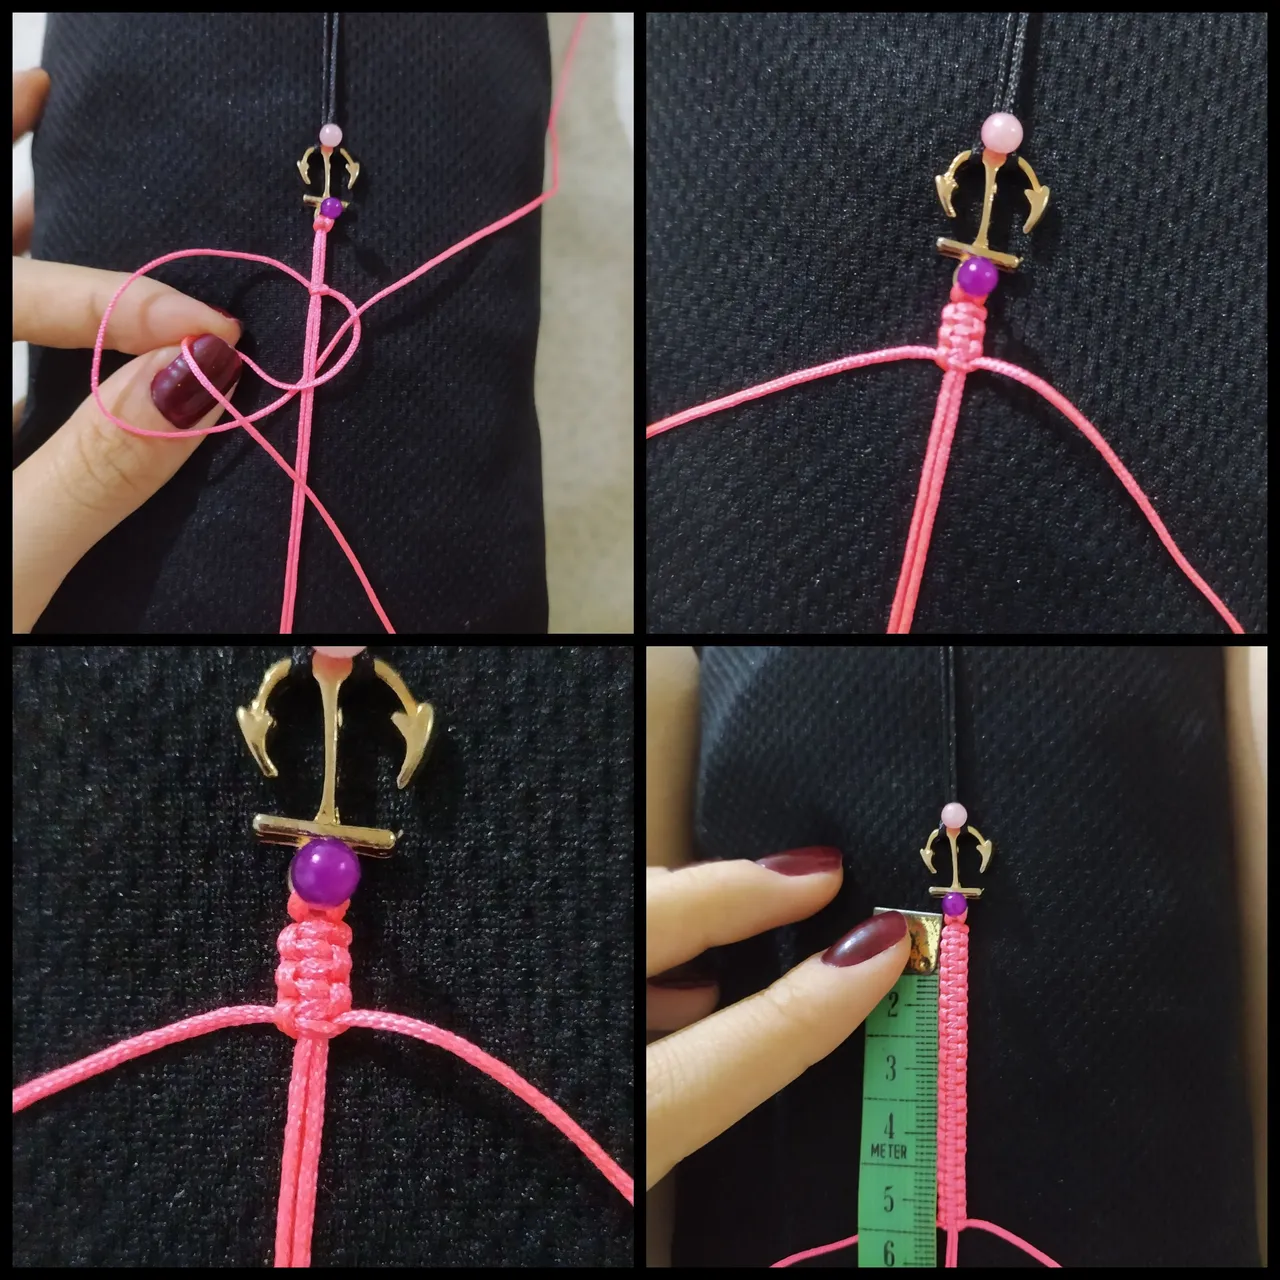
Luego, se intercambian los roles, el hilo que queda por encima pasa por debajo, y el que queda por debajo se cruza por encima.
Los primeros nudos son complicados cuando uno es nuevo, pero con la practica se les hará más fácil.
Then, the roles are exchanged, the thread that is above passes underneath, and the thread that is below crosses over.
The first knots are complicated when one is new, but with practice they will become easier.
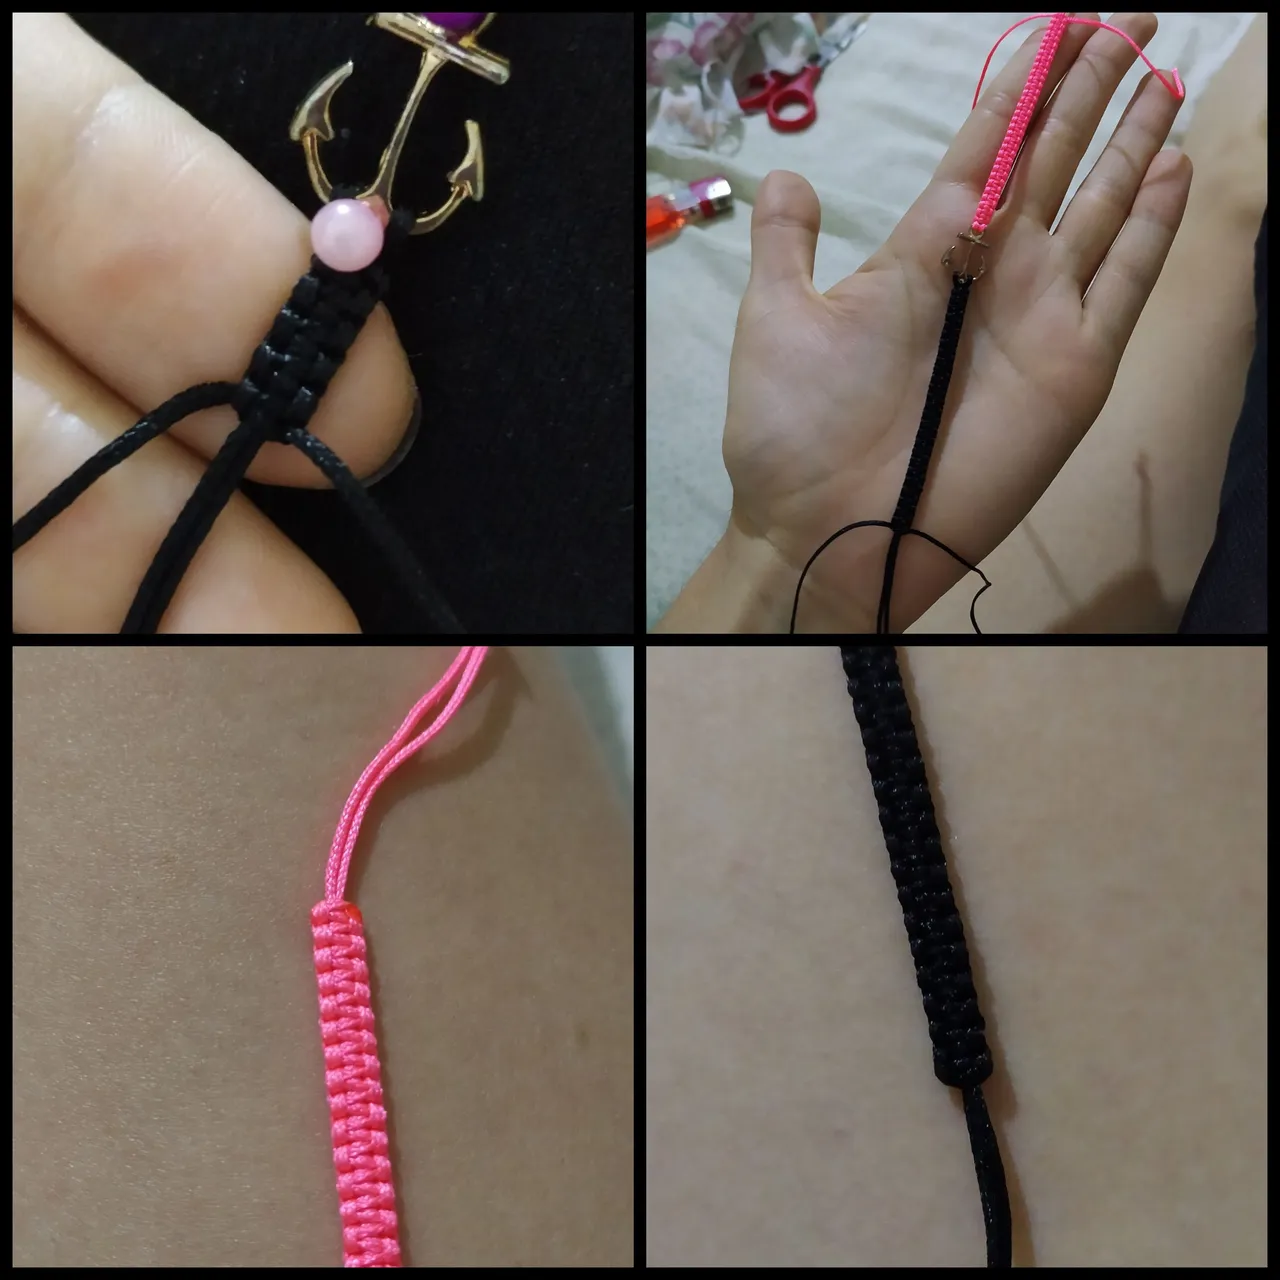
Repetimos lo mismo con ambos hilos, y sellamos el final con el encendedor.
Repeat the same with both threads, and seal the end with the lighter.
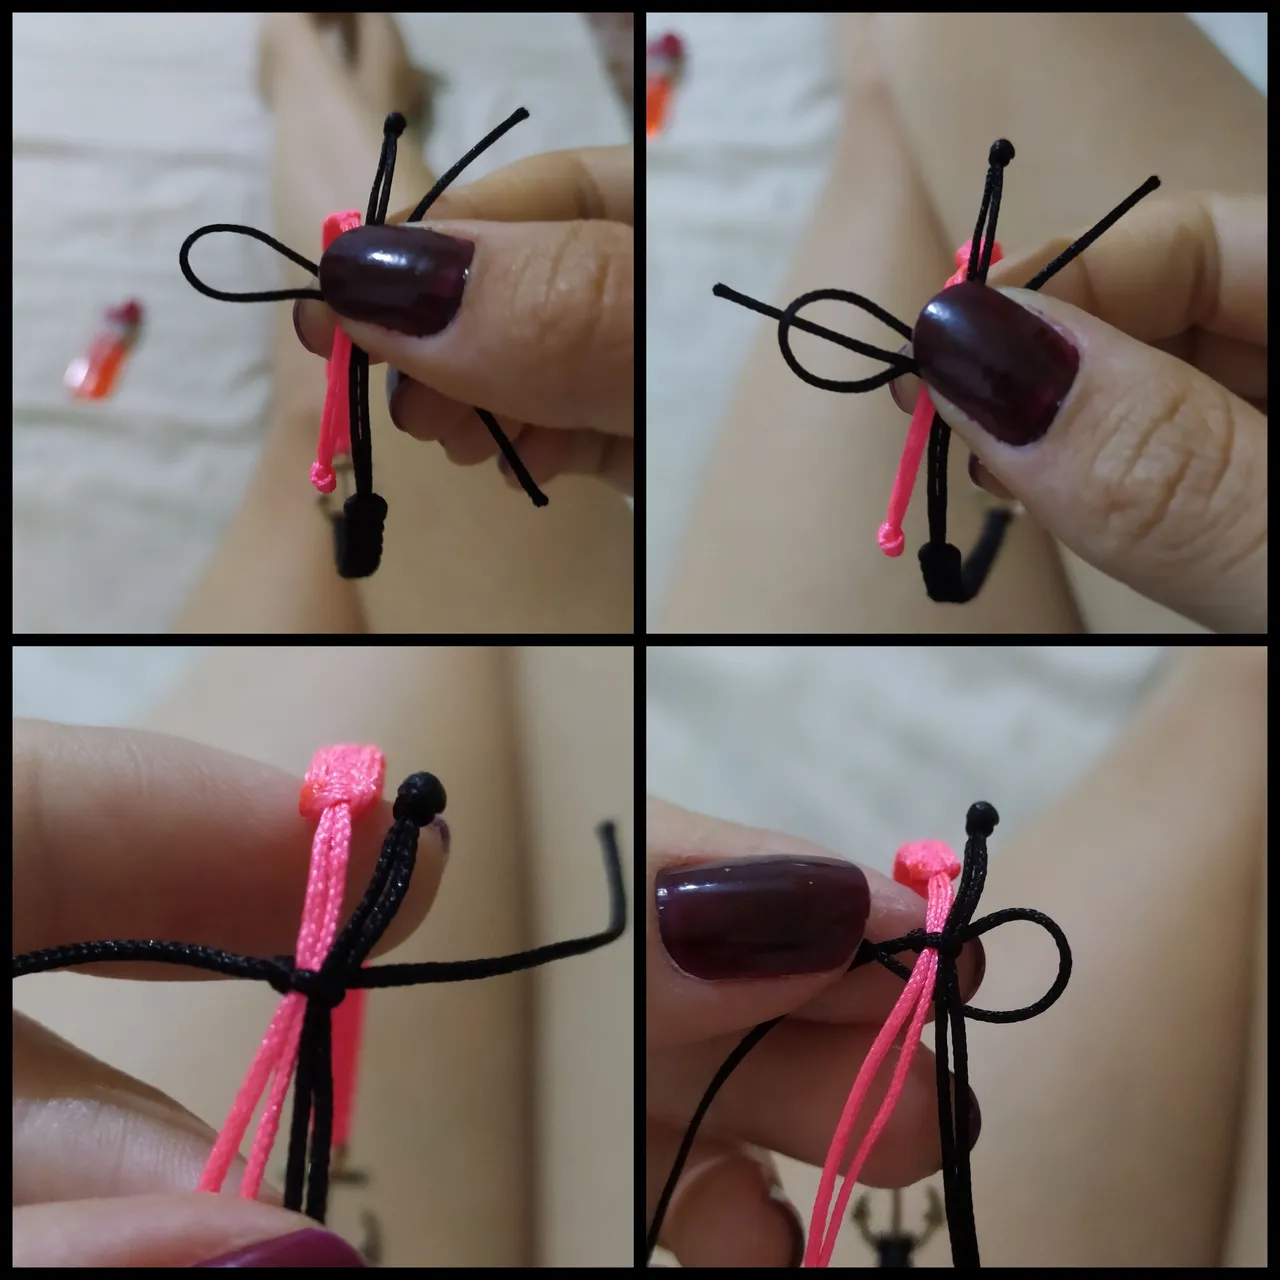
Luego, con un retazo de hilo, vamos a hacer el nudo para cerrar la pulsera, haciendo el mismo nudo plano entre los dos pedazos de base que hablamos al principio, los 5 cm de cada lado que dejaríamos.
Then, with a piece of thread, we are going to make the knot to close the bracelet, making the same flat knot between the two pieces of base that we talked about at the beginning, the 5 cm on each side that we would leave.
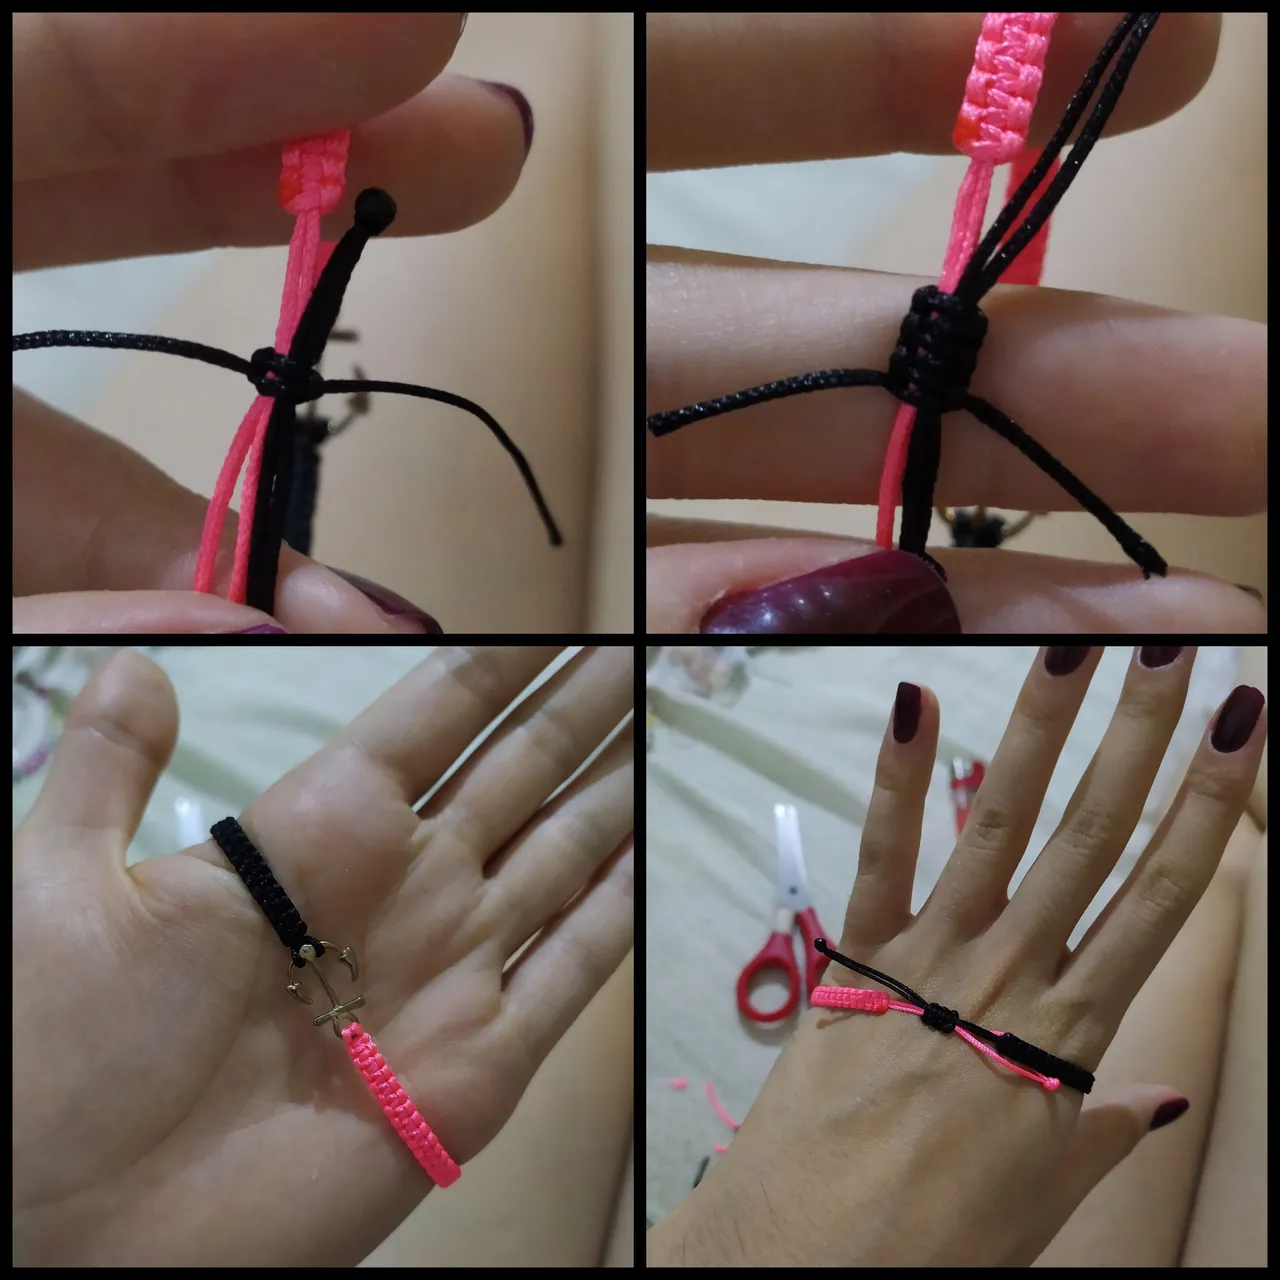
Le damos un grosor acorde a nuestro gusto, y listo!
Este fue mi pequeño tutorial, espero que hayan entendido, y lo más importante que les haya gustado.
We give it a thickness according to our taste, and that's it!
This was my little tutorial, I hope you understood, and most importantly that you liked it.
❤️❤️❤️❤️❤️❤️❤️❤️❤️❤️❤️❤️❤️❤️
Traducido con DeepL
Banner y ediciones con PicsArt y Cymera
Las fotos son de mi autoría
Translated with DeepL
Banner and editions with PicsArt y Cymera
The photos are of my authorship