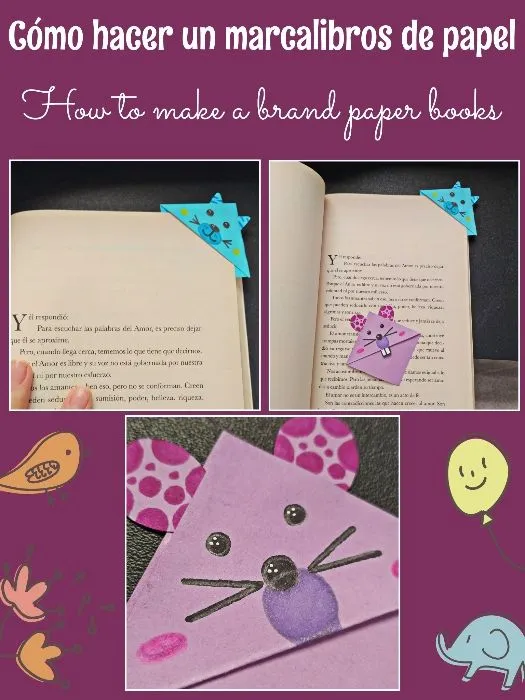

💖📖Hola amigos, feliz jueves💖📖
Hoy les traigo un tutorial súper fácil y creativo para aprender a elaborar estos lindos marcalibros de papel.
Los materiales que utilicé fueron:
- Cartulina de color
- Marcadores
- Pega escolar
- Tijera
- Lápiz
- Pintura blanca
- Un alfiler
💖📖Hello friends, happy Thursday💖📖
Today I bring you a super easy and creative tutorial to learn how to make these cute paper bookmarks.
The materials I used were:
- Colored cardboard
- markers
- School glue
- Scissors
- Pencil
- White paint
- A pin
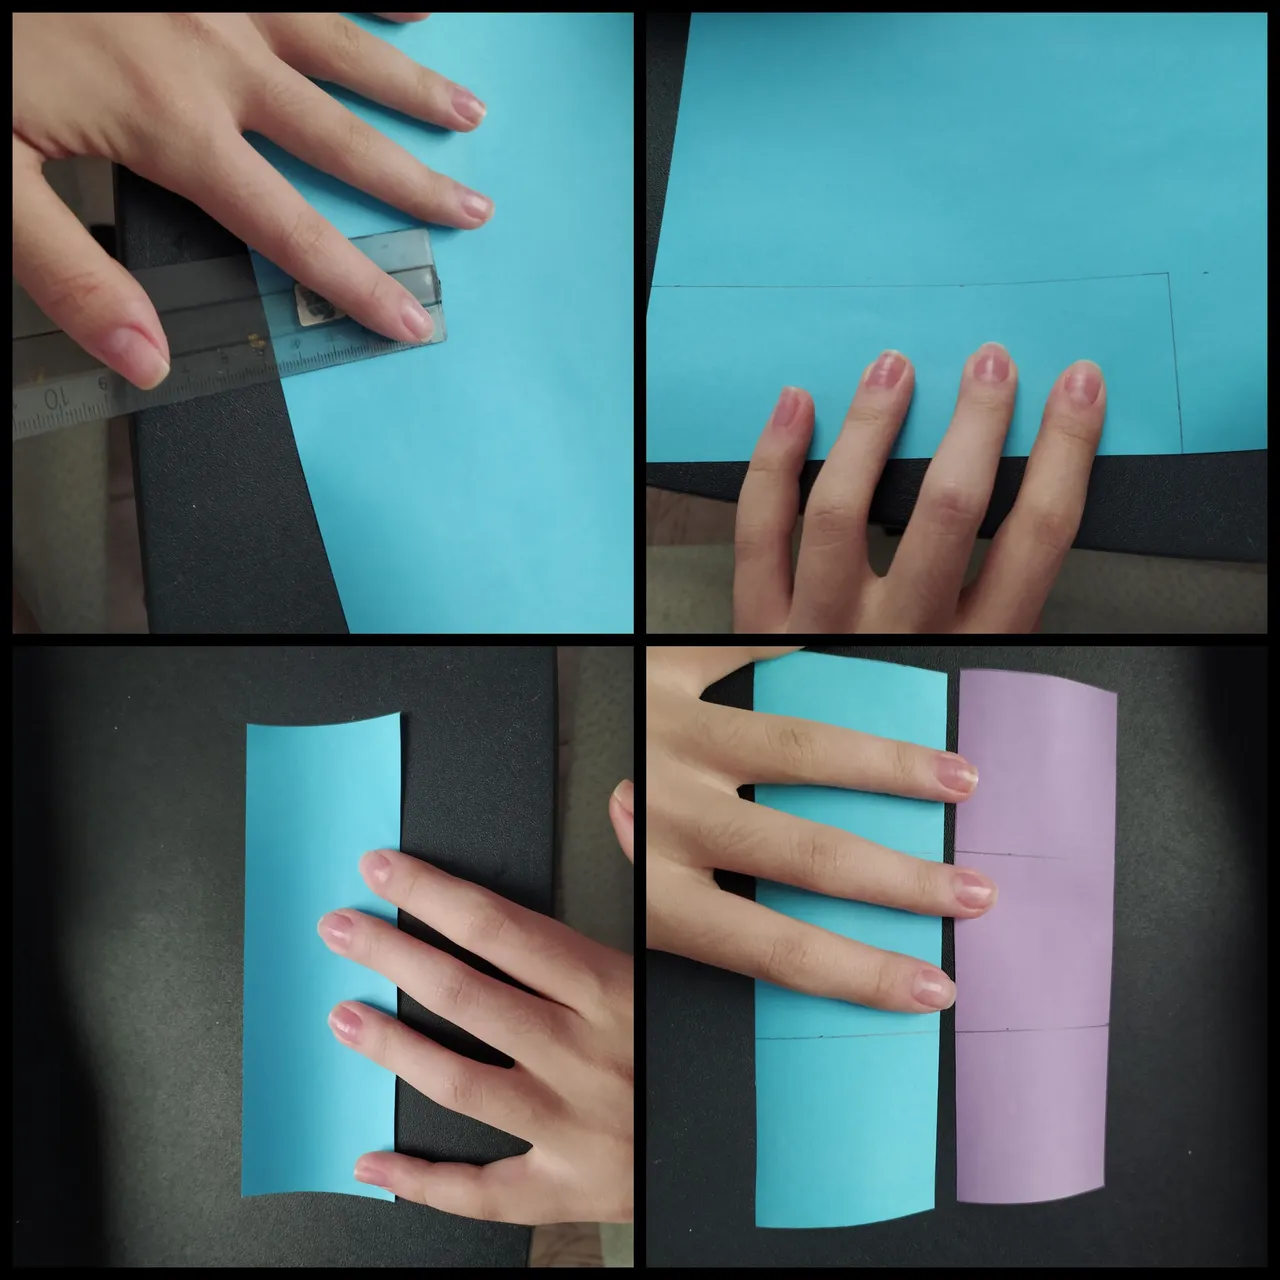
Lo primero que haremos será recortar un rectángulo de 15 cm de largo por 5 cm de alto. El cual dividiremos en 3 partes de 5 cm
The first thing we will do is cut out a rectangle 15 cm long by 5 cm high. We will divide it in 3 parts of 5 cm.
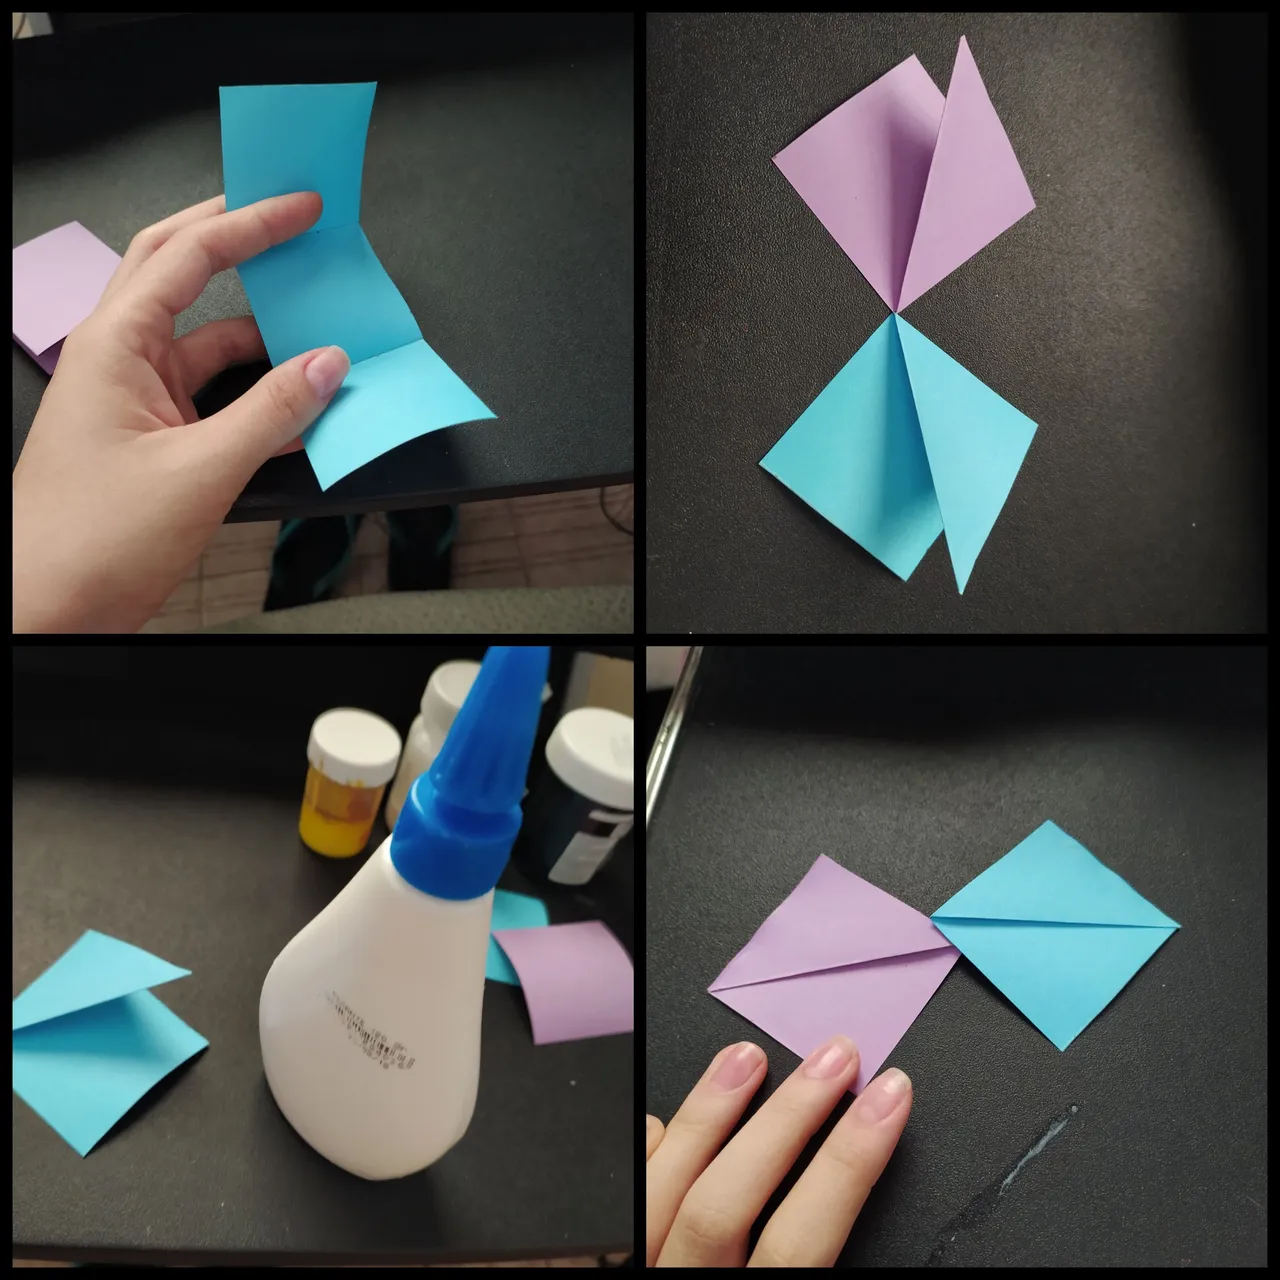
Vamos a recortar una de esas partes de 5 cm y la reservaremos, y las dos partes restantes, le doblaremos una punta como se ve en la foto, y pegaremos.
We will cut out one of these 5 cm parts and keep it, and the two remaining parts, we will fold one end as shown in the picture, and glue.
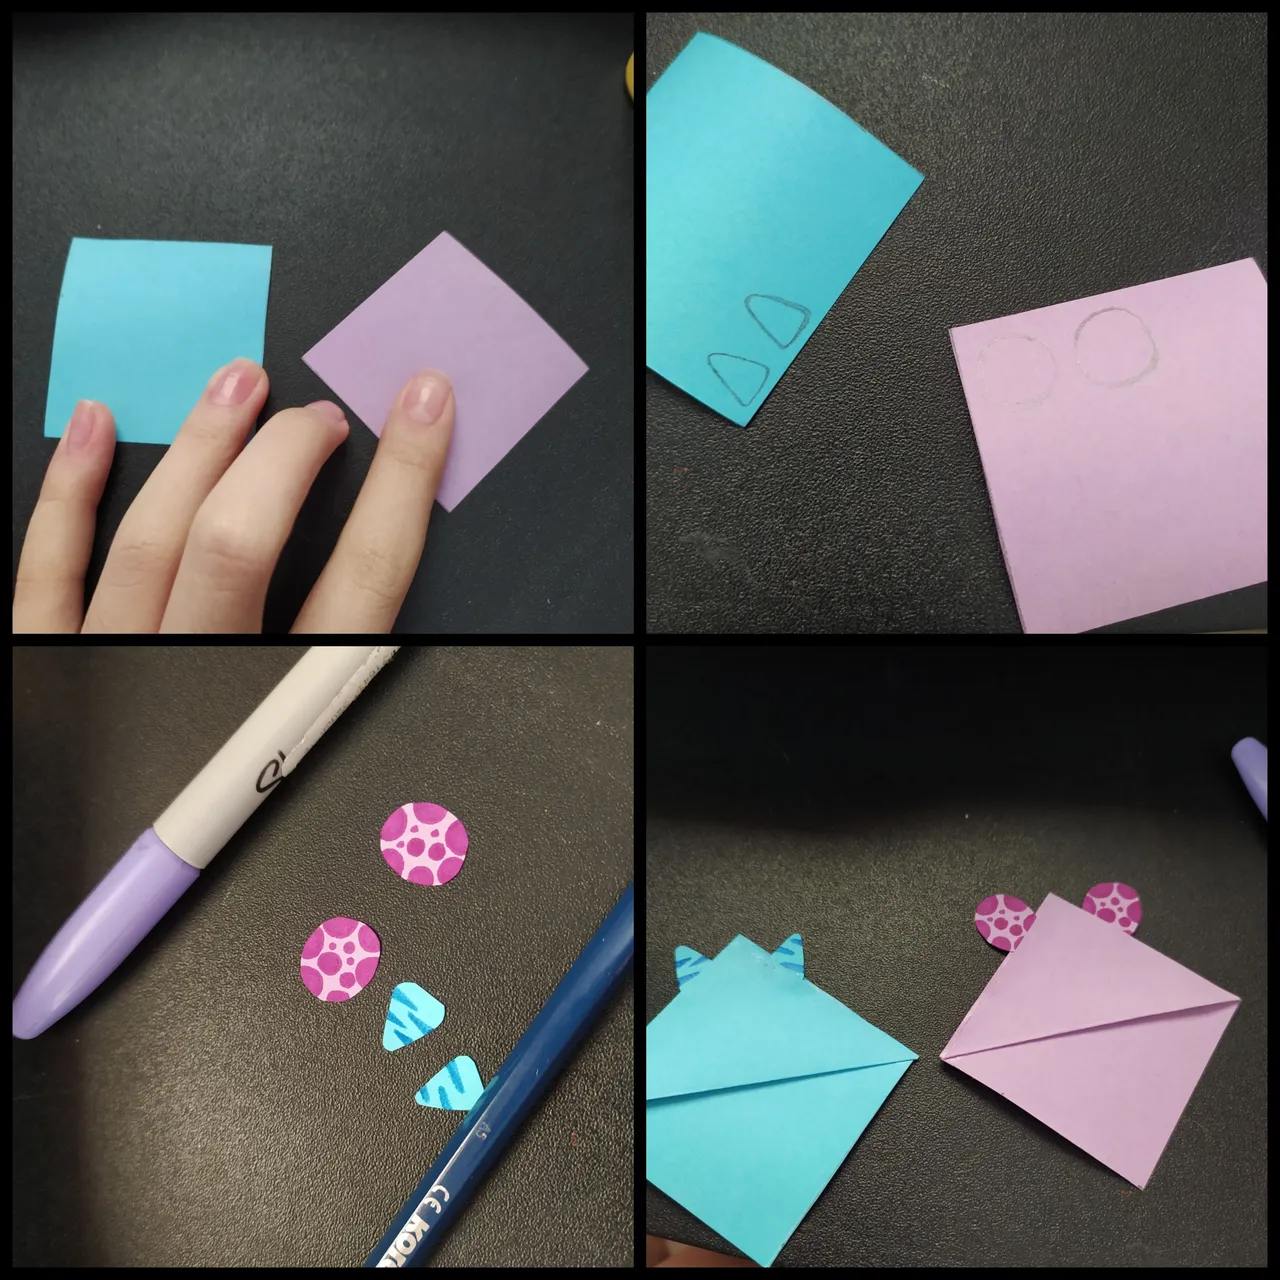
Con las partes que recortamos anteriormente vamos a hacer las orejas de nuestros animalitos, y les daremos detalles con los marcadores.
With the parts we cut out previously we will make the ears of our little animals, and we will give them details with the markers.
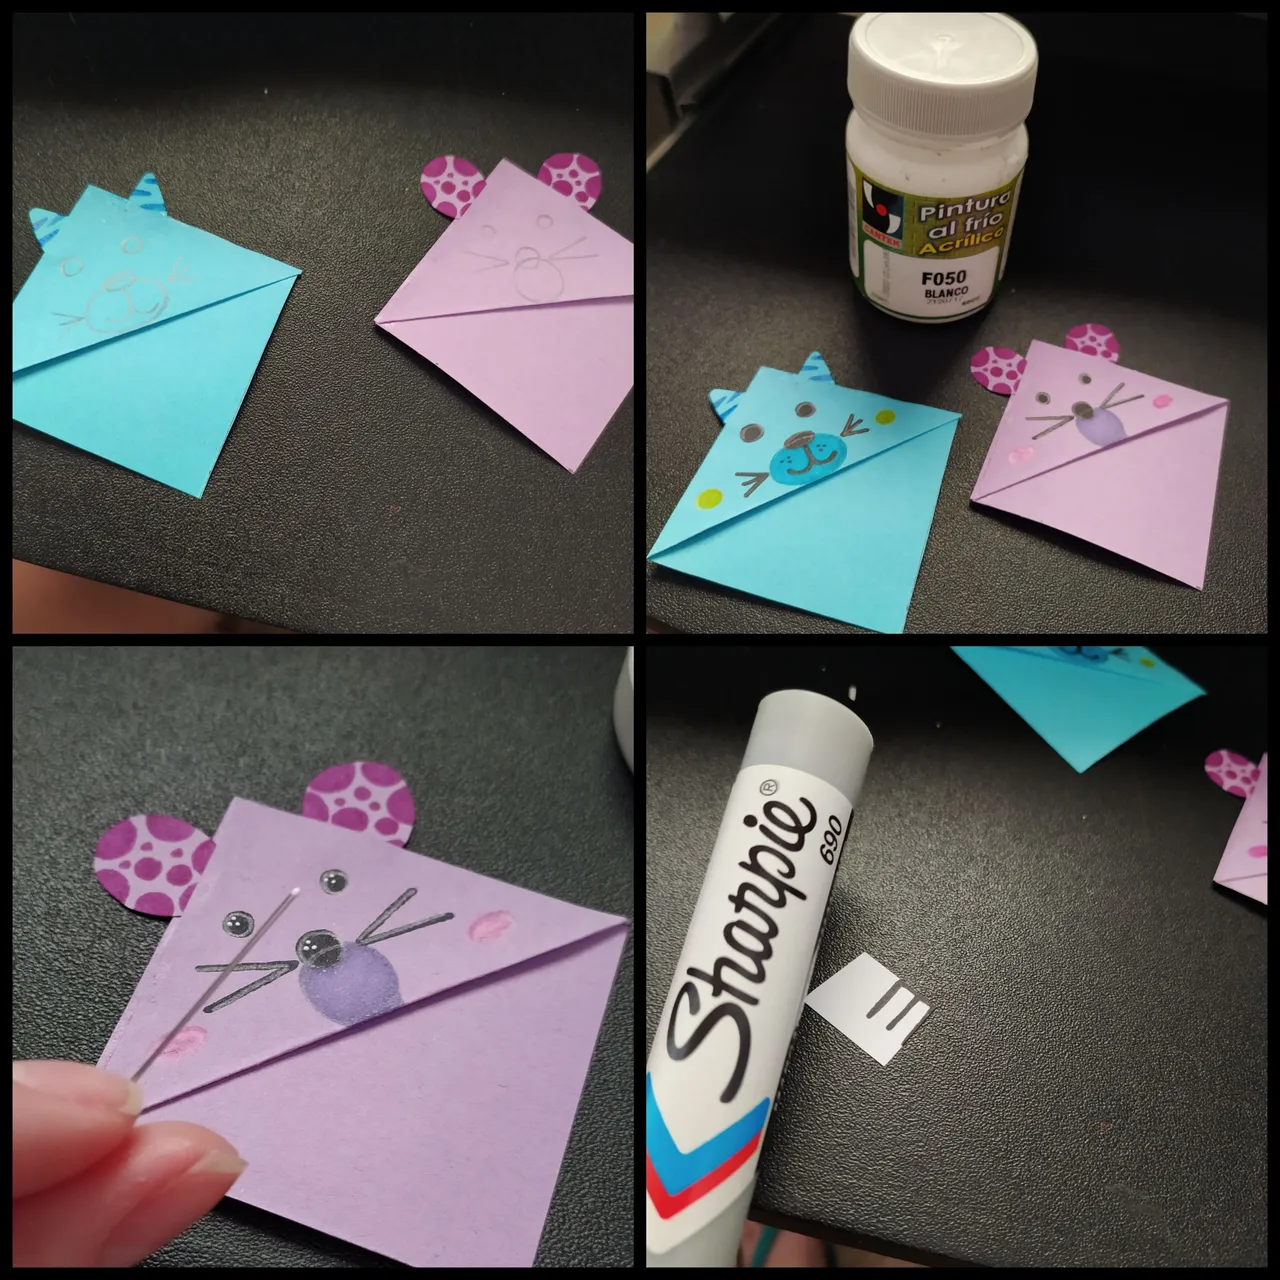
Finalmente, ubicamos todo en su lugar y con el alfiler y la pintura blanca, daremos iluminación en ojos y nariz. Y listo!
De esta manera elaboramos lindos marcalibros con pocos materiales!
Finally, we place everything in its place and with the pin and the white paint, we will give illumination to the eyes and nose. And that's it!
In this way we can make cute bookmarks with few materials!
💖📖💖📖💖📖💖📖💖📖💖📖💖📖
Traducido con DeepL
Banner y ediciones con PicsArt y Cymera
Las fotos son de mi autoría
Translated with DeepL
Banner and editions with PicsArt y Cymera
The photos are of my authorship