
Hola y bienvenidos queridos amigos a este mi lugar preferido!
Así que es hora de empezar este fácil tutorial.
Materiales a usar:
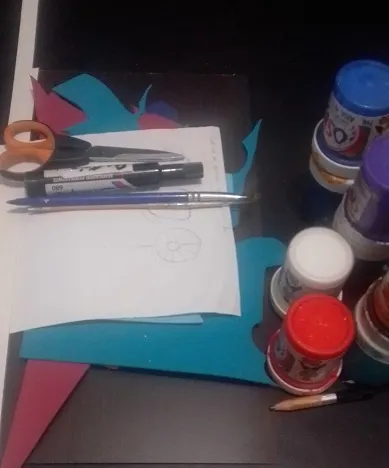
| Fórmica (Sobrante) | Cartulina |
|---|---|
| Foami (Recortes) | Pinturas |
| Pinceles | Silicón líquido |
| Tijera | Lápiz |
| Marcador |
Empecemos con el procedimiento:

- Marcar y recortar 3 figuras en foami, con la forma y color que prefieras, o con las formas que yo hice.
- Luego mojar el pincel en agua, secar, dejando húmedo y mojar la punta en pintura, para comenzar a delinear o sombrear las figuras y rellenar a tu gusto, es cuestión de dejar que tu mente cree o diseñe lo que tu prefieras usando pinturas y marcadores.

- Seguir decorando las flores con puntos de colores, líneas, en fín como quieras decorar, recuerda que son flores abstractas.
- Cuando estén secas todas las piezas, colocar sobre el pedazo de fórmica y con un pincel liner empiezas a pintar lo que serán los tallos con pintura blanca, también decorar con puntos blancos, esto hará crear luz en tu cuadro.
- Luego recortar 4 tiras de cartulina de 3cms de ancho por el largo que prefieras y pegas en todo el borde, creando así los marcos.

- Ahora toca pegar las flores y lo harás colocando un cuadrito de foami en el centro (Ver foto) y pegar a uno de los tallos pintados.
- Así harás con todas las piezas (Flores), esto le dará un poco de relieve al cuadro.

- Puedes decorar con puntos o lunares alrededor de las flores.
- Aplica silicón en el extremo inferior de las hojas y pega haciendo presión en la orilla para que queden levantadas.(ver foto).
Y por último recortar una cintica y hacer una u y pegar a un pedacito de cartulina. dejar secar bien y por último, colocar nuevamente silicón y pegar el borde superior de la parte posterior de la fórmica.
Y así queda listo este bonito cuadro con flores no comunes, creadas muy distintas a la realidad, pero que se ven muy hermosas y llaman la atención por su forma.

Mi publicación esta editada con etiquetas HTML, traducida por DeepL y las fotos editadas con pic collage y tomadas por mi Blu G5.
Ahora me despido esperando sea de su agrado este lindo cuadro hecho con mucho cariño para ustedes.
Gracias por visitarme y por su apoyo.
Hello and welcome dear friends to this my favorite place!
So it's time to get started on this easy tutorial.
Materials to use:
| Formica (Leftover) | Cardboard |
|---|---|
| Foami (cut-outs) | Paints |
| Brushes | Liquid silicone |
| Scissors | Pencil |
| Marker |
Let's start with the procedure:
- Mark and cut out 3 figures in foami, with the shape and color you prefer, or with the shapes I made.
- Then dip the brush in water, dry, leaving it wet and dip the tip in paint, to begin to outline or shade the figures and fill in as you like, it's a matter of letting your mind create or design what you prefer using paints and markers.
- Continue decorating the flowers with colored dots, lines, whatever you want to decorate, remember that these are abstract flowers.
- When all the pieces are dry, place on the piece of formica and with a liner brush start painting what will be the stems with white paint, also decorate with white dots, this will create light in your painting.
- Then cut 4 strips of cardboard 3cms wide by the length you prefer and glue all around the edge, thus creating the frames.
- Now it's time to glue the flowers and you will do it by placing a small square of foami in the center (see photo) and glue it to one of the painted stems.
- This is how you will do it with all the pieces (flowers), this will give a little relief to the picture.
- You can decorate with dots or polka dots around the flowers.
- Apply silicone on the lower end of the leaves and glue by pressing on the edge so that they are raised (see photo).
And finally cut out a knot and make a u and glue it to a piece of cardboard. let it dry well and finally, apply silicone again and glue the top edge of the back of the formica.
And so is ready this beautiful picture with unusual flowers, created very different from reality, but they look very beautiful and attract attention for its shape.
My publication is edited with HTML tags, translated by DeepL and the photos edited with pic collage and taken by my Blu G5.
Now I say goodbye hoping you like this nice picture made with love for you.
Thank you for visiting me and for your support.