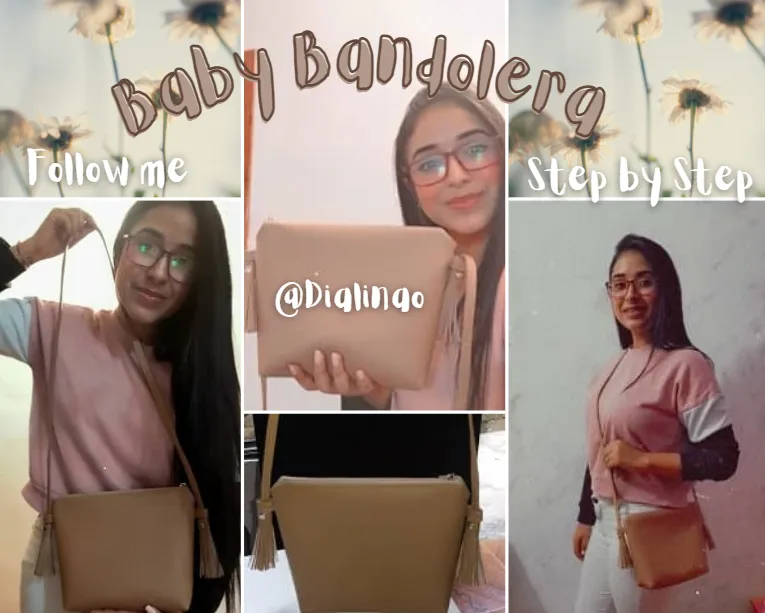
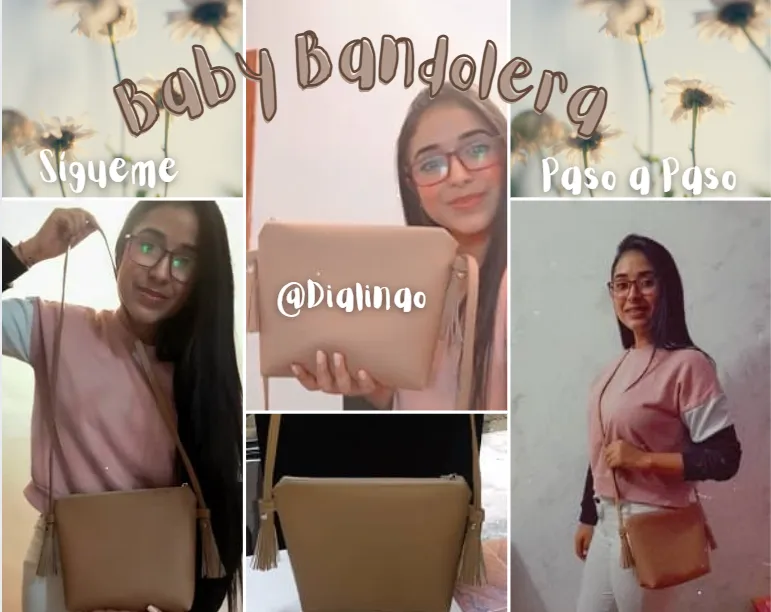
Hello dear Hive community, I hope you are very well, for me it is a pleasure to greet you and to be able to share a little with you. Among the things that I like and enjoy doing are crafts, some time ago I learned to make bags, purses, backpacks and I would love to teach you too, it is the first time that I document the process of making a craft and the I really liked it a lot. I hope you can follow the step by step and if you have any questions, do not hesitate to write it in the comments.

🌼 40cm to 50cm of Semi Leather.
🌼40cm of some fabric for the lining (it can be POP, Taffeta or whatever you like, I use taffeta)
🌼 29 cm of closure and 1 Slaider (you can use an already assembled closure,
in the same way I will show you how you can assemble one)
🌼 Rivets
🌼 Thread in combination with the fabric
🌼 Scissor
🌼 Measuring tape
🌼 Pins
🌼 Sewing machine.
🌼 Hammer

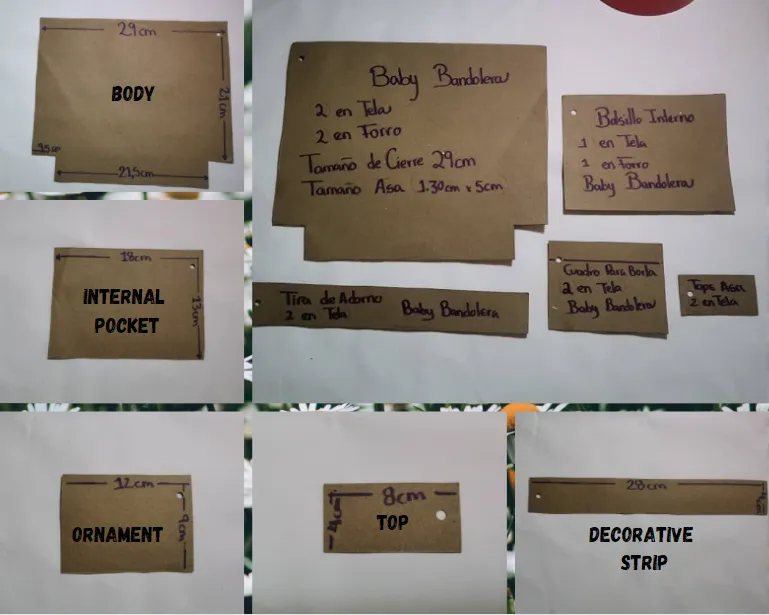
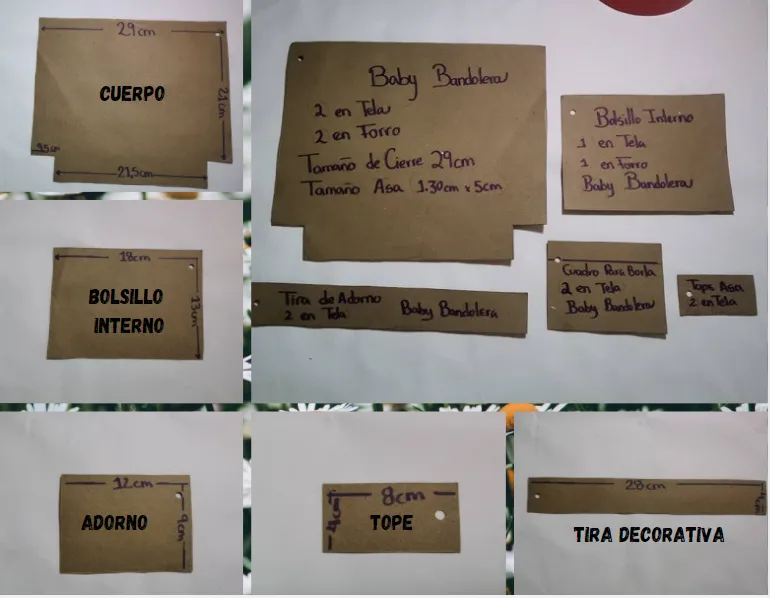
Our Baby Shoulder Bag is comprised of approximately 6 patterns.
- Body of the Baby Shoulder Bag. We will need 2 pieces in fabric and 2 pieces in lining. The closure measures 29cm.
- Internal pocket, we will need 1 piece in fabric and 1 in lining.
- 1 or 2 squares for tassels, in this case I used 2 pieces.
- 2 stops for the handle strip.
- 1 or 2 trim strips is optional.
- Our Main Handle is 1 meter 30cm in size by 5cm wide.
They will look like the following.
created in canva

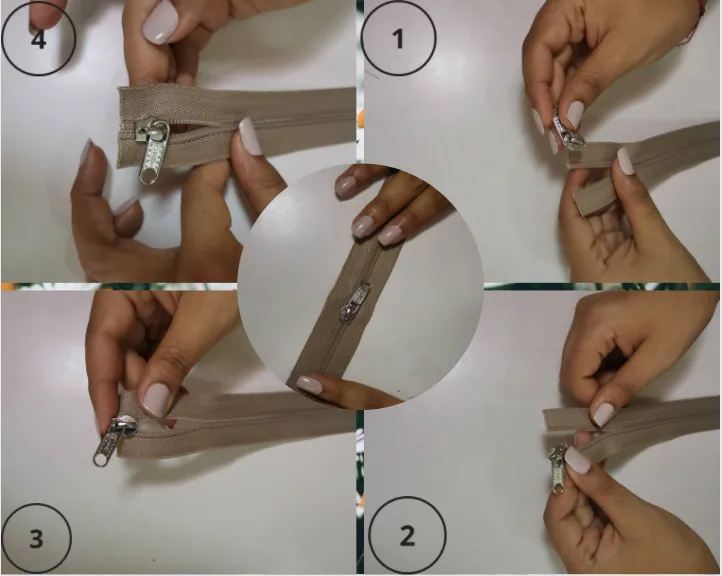
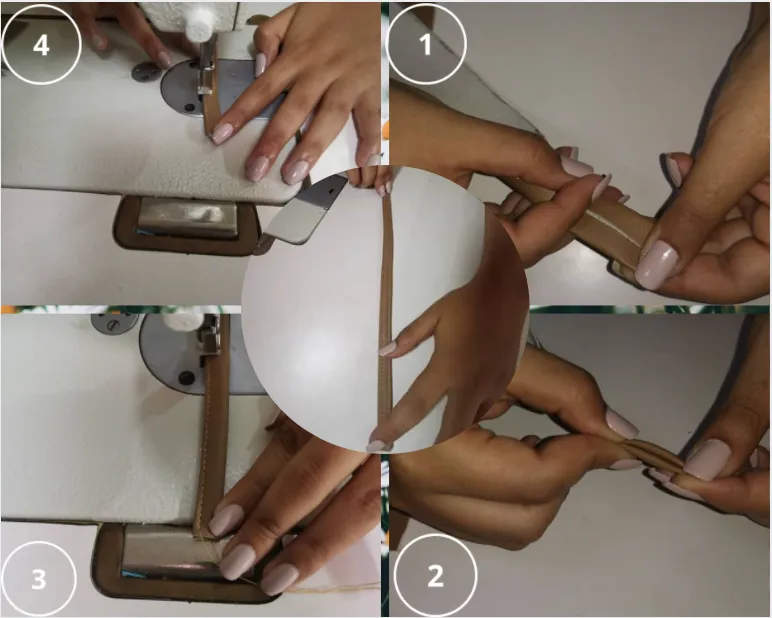
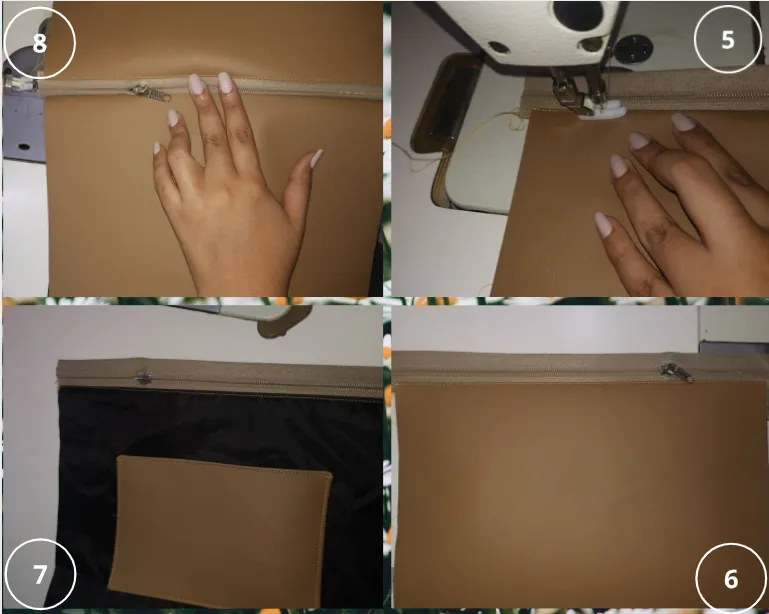
🌼1. We will start by assembling our closure in case we buy it by the meter, for this we will need 1 Slider, we will separate both sides of the closure, first introducing one of the sides in the slider, without completely introducing it, only presenting it, then we present the other side, when Let's have the two presented inside the slider, we simultaneously introduce the two sides inside the slider, it may cost a bit at first, but little by little you will get the hang of it. Or we can buy an already assembled closure, it is an option.
created in canva
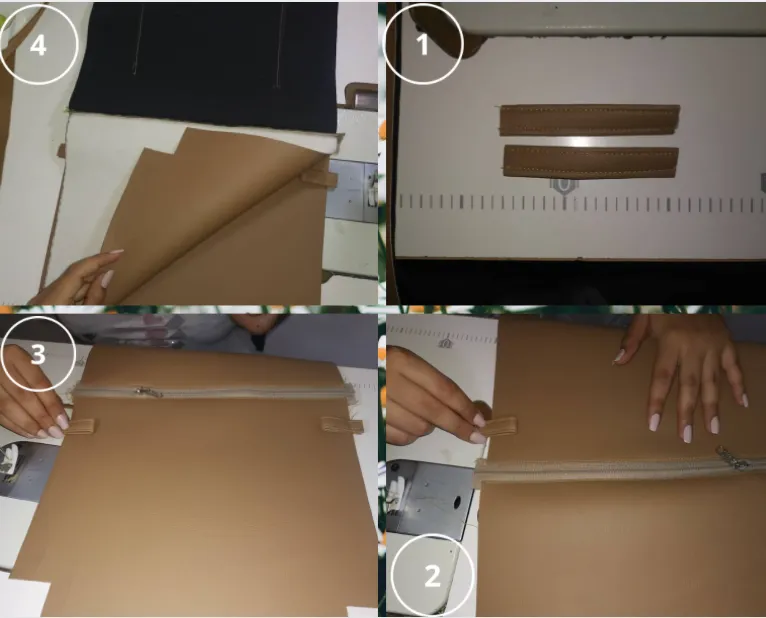
🌼Then we continue with the decorative strips. Joining the two ends in the middle as seen in the image, facing again. Sewing first to join the sides to the edge of the selvage. Then repeating on the opposite side. Then we go with the main handle, we repeat the operation as with the decorative strips.
created in canva
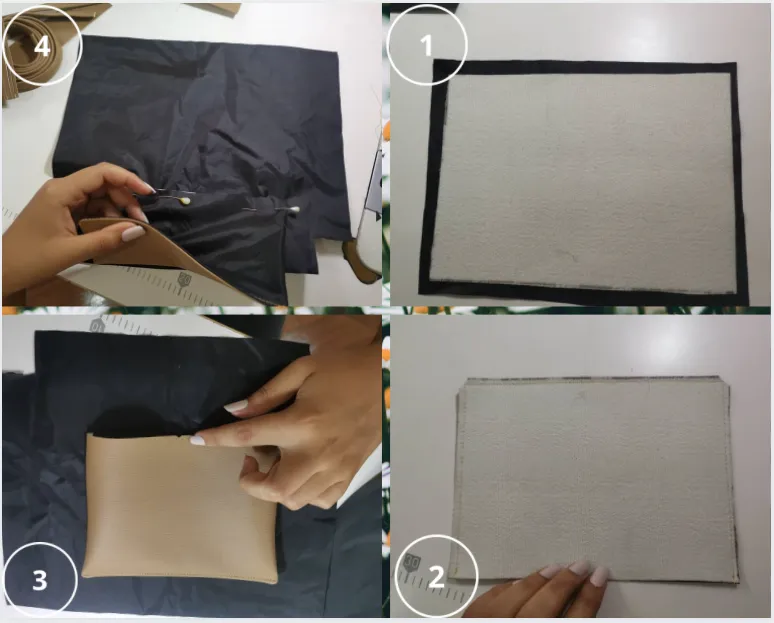
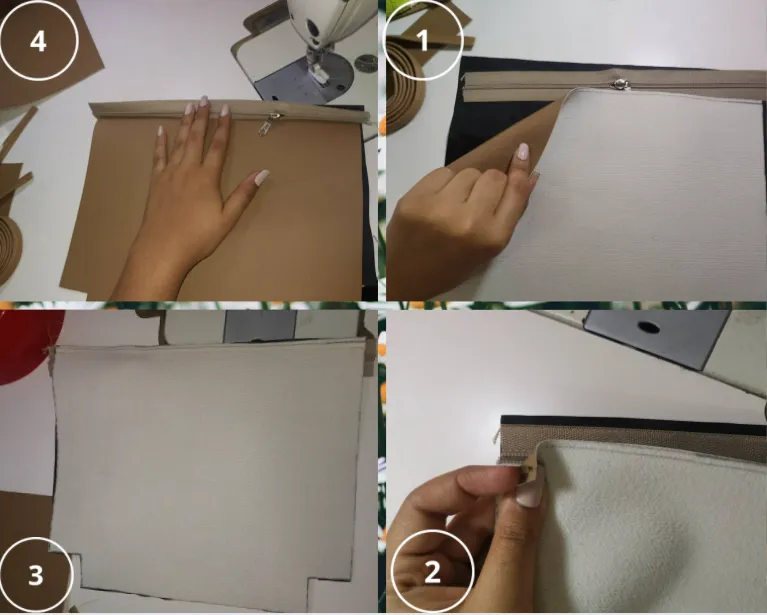
🌼 We continue with the internal pocket, we face the front of the fabric with the front of the lining. We sew on 3 sides of the rectangle, at the machine foot. We trim the excess of the lining, and trim the upper ends. We turn over the Pocket and make a shelf seam on the top edge. The internal pocket must be presented to one of the lining pieces of the body, centering and pinning as follows. We passed a seam at the foot of the machine. We flip our pocket in the following way, to join by ledging the other 3 ends of the pocket rectangle.
created in canva
created in canva
created in canva
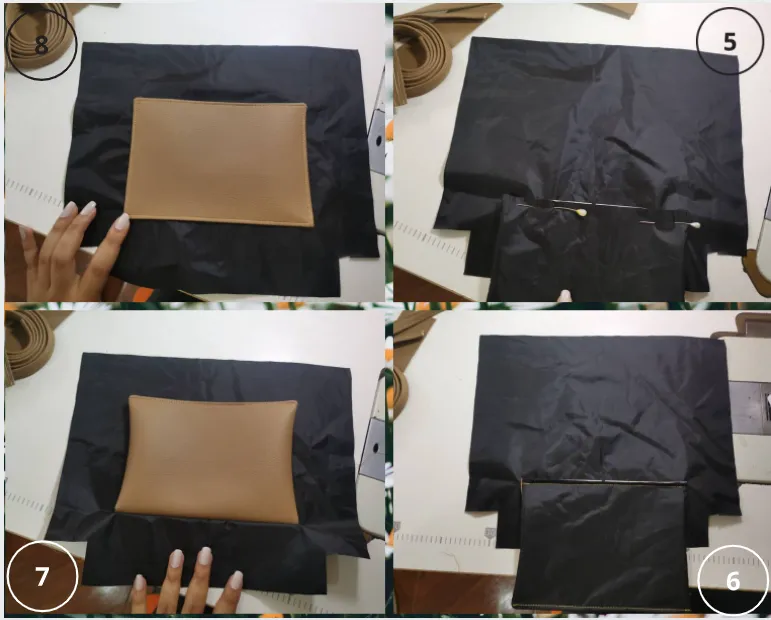
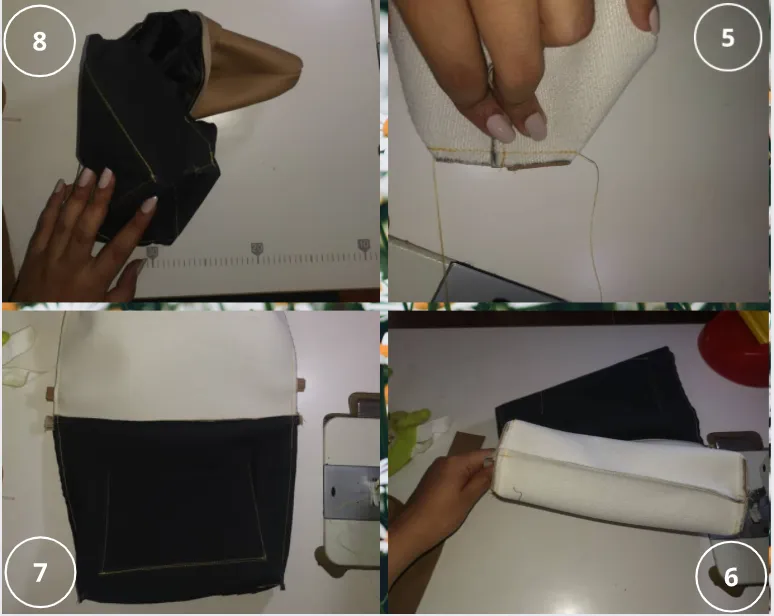
🌼To make the body of our bag, we face the right of the fabric, with the right of the closure and the right of the lining. We go through a seam making sure we have grabbed the two layers of fabric and zip. We repeat on the right side, just to the edge of the fabric. We repeat the operation on the opposite side.
created in canva
created in canva
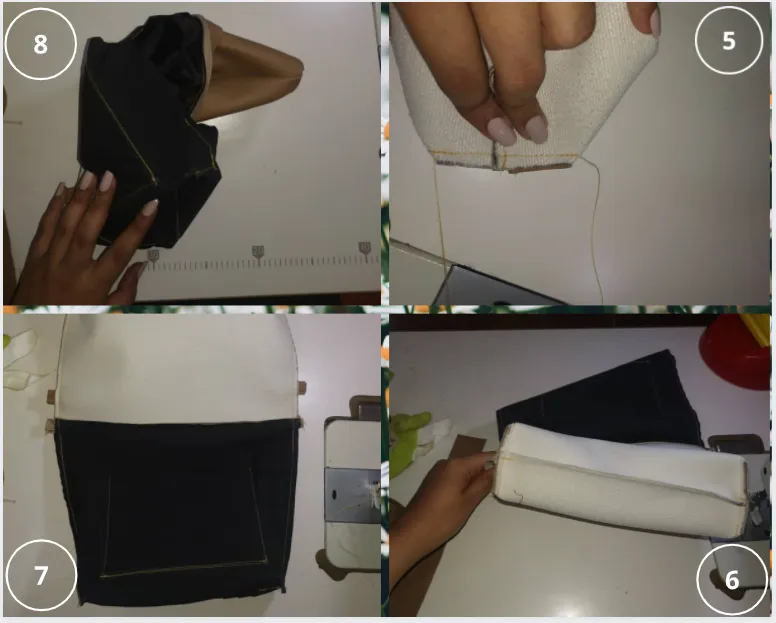
🌼Let's go with the stoppers on the handle. Bringing one of the sides to the middle and overlapping the other. We sew the edges (we repeat the operation of the decorative strips and main handle) We present the stops about 4cm approx. from the zipper edge to each side as follows.
created in canva
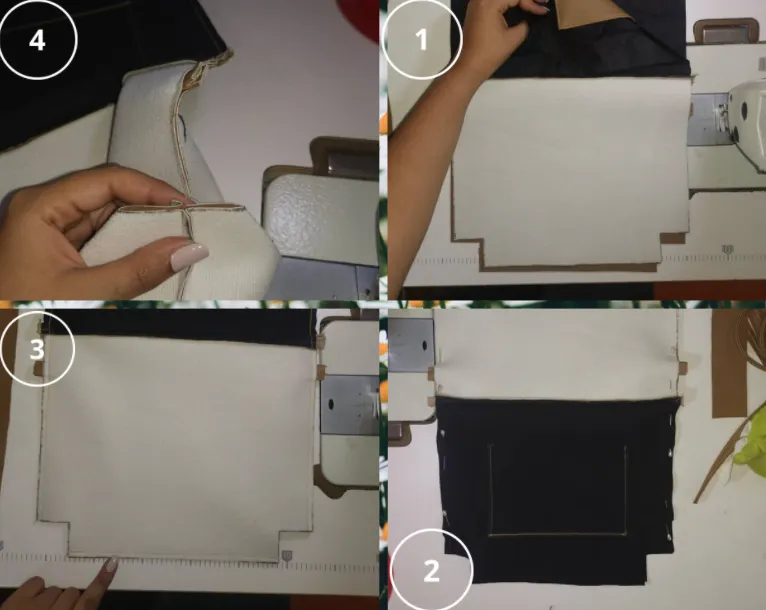
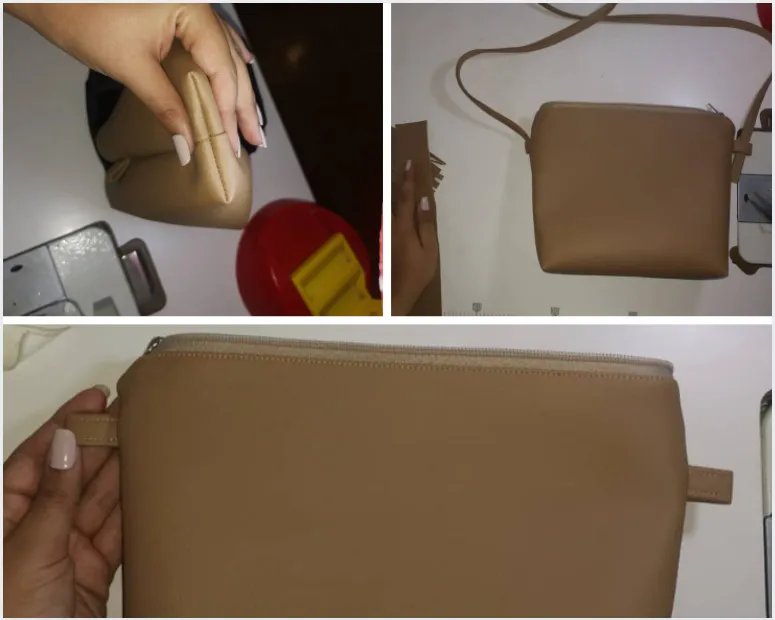
🌼We present the fabric fronts and lining fronts as follows. We sew through the pinned areas. It should be as follows. Facing the edges of the tips we pass machine stitching as follows. We do the same on the side of the base of the lining. The only difference is that, on this side, we will not close completely, but we will leave a hole to be able to turn our shoulder bag. We turn taking the corners very well. Our flipped shoulder bag should be this way. We introduce the handle through the handle stops. Rolling each of the tassel squares to the ends of the handle.
created in canva
Creado en canva
Creado en canva
🌼 We make some holes, it can be with a scissors or awl to insert the rivet. We lay the flat end and hammer to secure. Finally, we close the hole that we had left in the lining to turn with a machine seam. And our shoulder bag is ready.

Created in canva
Creado en canva
Hola querida comunidad de Hive, espero se encuentren muy bien, para mí es un gusto saludarles y poder compartir un poco con ustedes. Dentro de las cosas que me gustan y disfruto hacer están las manualidades, hace algún tiempo aprendí a hacer bolsos, carteras, morrales y me encantaría enseñarles a ustedes también, es la primera vez que documento el proceso que se lleva el hacer una manualidad y la verdad me gustó mucho. Espero pueda seguir el paso a paso y si surge alguna duda, no duden escribirlo en los comentarios.

🌼De 40cm a 50cm de Semi cuero.
🌼40cm de alguna tela para el forro (puede ser POP, Tafeta o cualquiera de su agrado, yo utilice tafeta)
🌼29 cm de cierre y 1 Slaider (pueden usar un cierre ya armado, de igual forma les enseñare como pueden armar uno)
🌼Remaches
🌼Hilo en combinación con la tela
🌼Tijera
🌼Cinta métrica
🌼Alfileres
🌼Máquina de coser.
🌼Martillo

Nuestra Baby Bandolera está comprendida por aproximadamente 6 patrones.
- Cuerpo de la Baby Bandolera. Necesitaremos 2 piezas en tela y 2 piezas en forro. El cierre una medida de 29cm.
- Bolsillo interno, necesitaremos 1 pieza en tela y 1 en forro.
- 1 o 2 cuadros para borlas, en este caso yo use 2 piezas.
- 2 topes para la tira de asa.
- 1 o 2 tiras para adornos, es opcional.
- Nuestra Asa principal tiene un tamaño de 1 metro 30cm por 5cm de ancho.
Se verán de la siguiente manera.
Creado en canva

🌼Comenzaremos por armar nuestro cierre en caso de que lo compremos por metro, para esto necesitaremos 1 Slider, separaremos ambos lados del cierre, introduciendo primero uno de los lados en la slider, sin introducirlo completamente, solo presentarlo, luego presentamos el otro lado, cuando tengamos los dos presentados dentro del slider, introducimos simultáneamente los dos lados dentro del slider, puede que cueste un poco al principio, pero poco a poco iras agarrando el truco. O podemos comprar un cierre ya armado, es una opción.
Creado en canva
🌼Luego seguimos por las tiras decorativas. Juntando los dos extremos al medio como se observa en la imagen, volviendo a enfrentar. Haciendo una costura primero para unir los lados al borde del orillo. Luego repitiendo en el lado contrario. Luego vamos con el asa principal, repetimos la operación como el de las tiras decorativas.
Creado en canva
🌼 Continuamos con el bolsillo interno, enfrentamos el frente de la tela con el frente del forro. Pasamos costura por 3 lados del rectángulo, a pie de máquina. Recortamos el excedente del forro, y recortamos las puntas superiores. Volteamos el Bolsillo y hacemos una costura de repise en el borde superior. El bolsillo interno debemos presentarlo a una de las piezas de forro del cuerpo, centrando y alfilereando de la siguiente manera. Pasamos una costura a pie de máquina. Volteamos nuestro bolsillo de la siguiente manera, para unir repisando los otros 3 extremos del rectángulo del bolsillo.
Creado en canva
Creado en canva
🌼Para realizar el cuerpo de nuestro bolso, enfrentamos el derecho de la tela, con el derecho del cierre y el derecho del forro. Pasamos una costura asegurándonos haber agarrado las dos capas de tela y cierre. Repisamos por el lado del derecho, justo al borde de la tela. Repetimos la operación al lado contrario.
Creado en canva
Creado en canva
🌼Vamos con los topes del asa. Llevando al medio al medio uno de los lados y sobreponiendo el otro. Pasamos costuras a los bordes (repetimos la operación de las tiras decorativas y asa principal) Presentamos los topes a unos 4cm aprox. del borde del cierre a cada lado de la siguiente manera.
Creado en canva
🌼Presentamos los frentes de tela y frentes de forro de la siguiente manera. Cosemos por las áreas alfilereadas. Debe quedar de la siguiente manera. Enfrentando los bordes de las puntas pasamos costura a pie de máquina de la siguiente manera. Lo mismo hacemos del lado de la base del forro. La única diferencia es que, de este lado, no cerraremos completo, sino que dejaremos un orificio para poder voltear nuestra bandolera. Volteamos sacando muy bien las esquinas. Nuestra bandolera volteada debe quedar de esta manera. Introducimos el asa por los topes de asa. Enrollando cada uno de los cuadros de borlas a los extremos del asa.
Creado en canva
Creado en canva
Creado en canva
Creado en canva
🌼Realizamos unos orificios puede ser con una tijera o punzón pata introducir el remache. Colocamos el extremo plano y martillamos para asegurar. Por ultimo cerramos con una costura a pie de maquina el orificio que habíamos dejado en el forro para voltear. Y nuestra bandolera ha quedado lista.
Creado en canva
Este fue el procedimiento completo para la realizar de esta linda cartera, si te gusto este trabajo te invito a seguirme para que puedas ver los próximos proyectos. votando me motivas a seguir subiendo este tipo de contenido. leo tus dudas en los comentarios y nos vemos en una próxima publicación.