Feliz tarde amigos. Hoy quiero compartir con ustedes está manualidad que hice. De un vaso viejo decidí hacer un porta lápices. Es genial cuando comienzas a hacer algo y te gusta. Espero poco a poco ir mejorando en las manualidades.
Happy afternoon friends. Today I want to share with you this craft that I made. From an old glass I decided to make a pencil holder. It's great when you start doing something and you like it. I hope little by little to improve in the crafts.
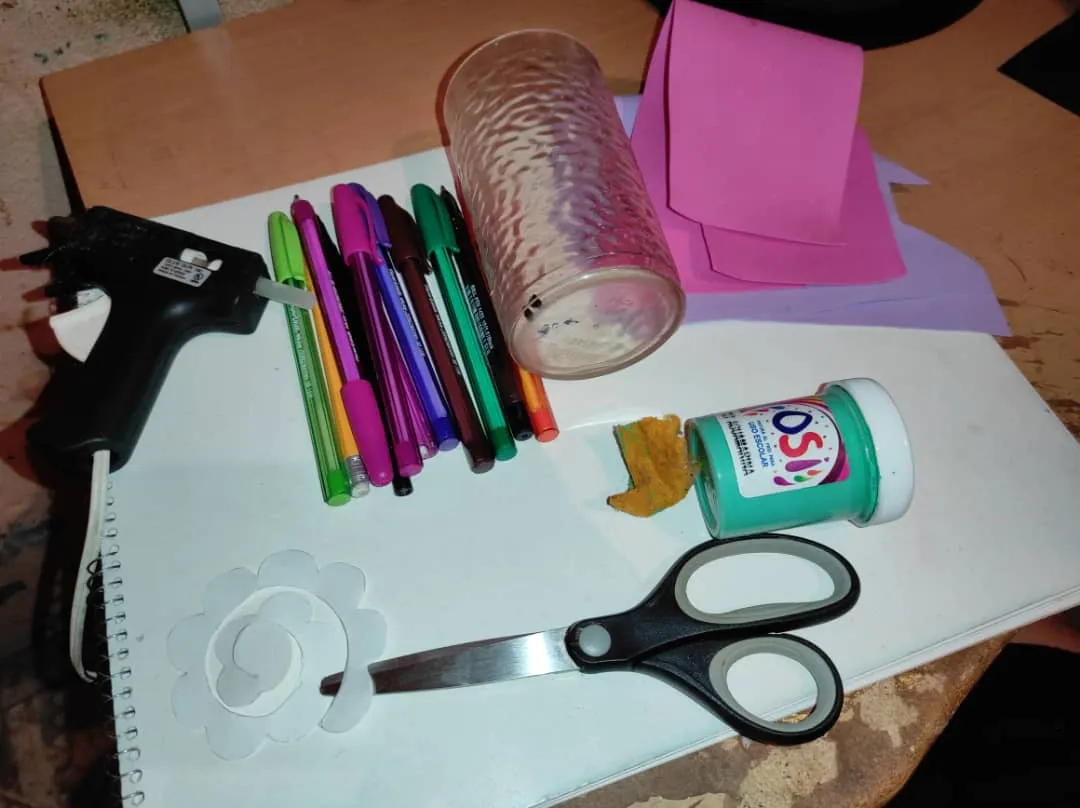
Para hacer este porta lápices necesitamos:
- 1 vaso viejo.
- pistola de silicón.
- pintura.
- foami delgado.
- tijera.
- molde de flores.
- pincel o algo que te ayude a pintar el vaso.
To make this pencil holder we need:
- 1 old glass.
- silicone gun.
- painting.
- thin foami.
- scissor.
- flower mold.
- brush or something to help you paint the glass.

Vamos a comenzar pintando el vaso. Le vamos a dar una primera capa de pintura.
Let's start by painting the glass. We are going to give it a first coat of paint.

Así se ve el vaso cuando le damos una primera capa de pintura, vamos a esperar que está primera capa se seque bien.
This is how the glass looks when we give it a first coat of paint, we will wait for the first coat to dry well.
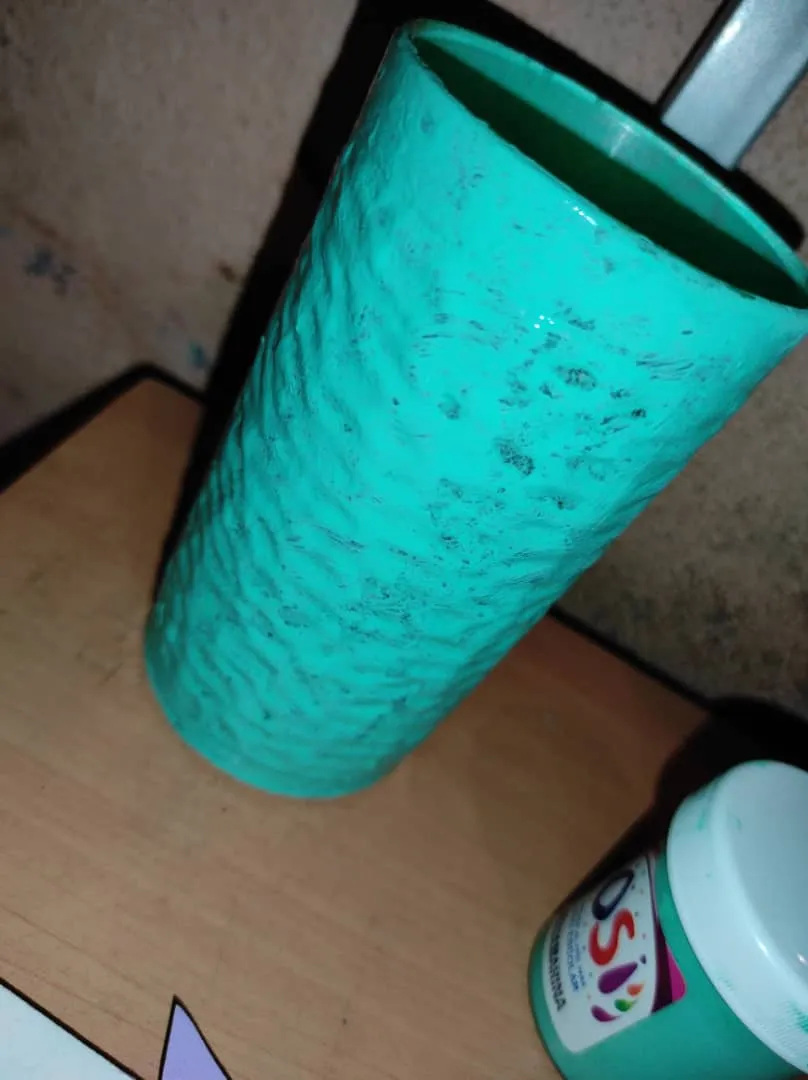
Y luego de que se seco la primera capa vamos a dar una segunda capa de pintura para que el color sea un poco más oscuro.
And after the first coat is dry we are going to give a second coat of paint so that the color is a little darker.
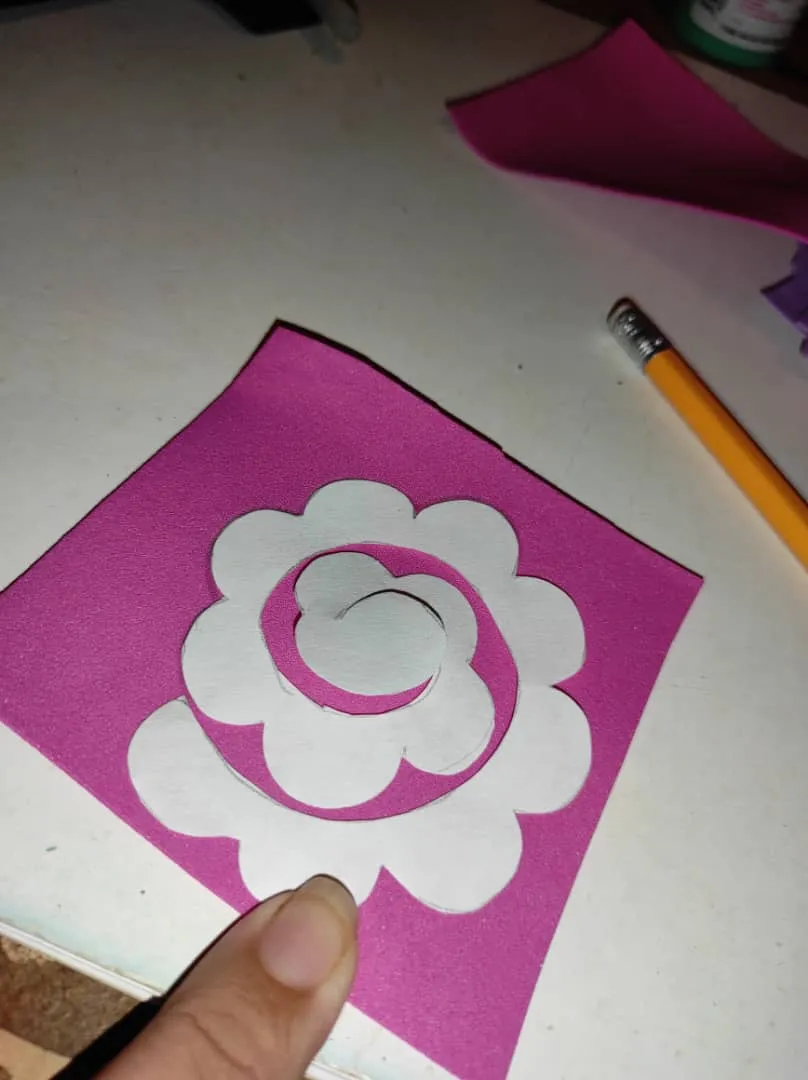
El molde de flores que use es uno que solo debemos enrollar y nos sale la flor. La verdad bastante fácil de hacer.
The flower mold that I use is one that we just have to roll up and the flower comes out. The truth is quite easy to do.
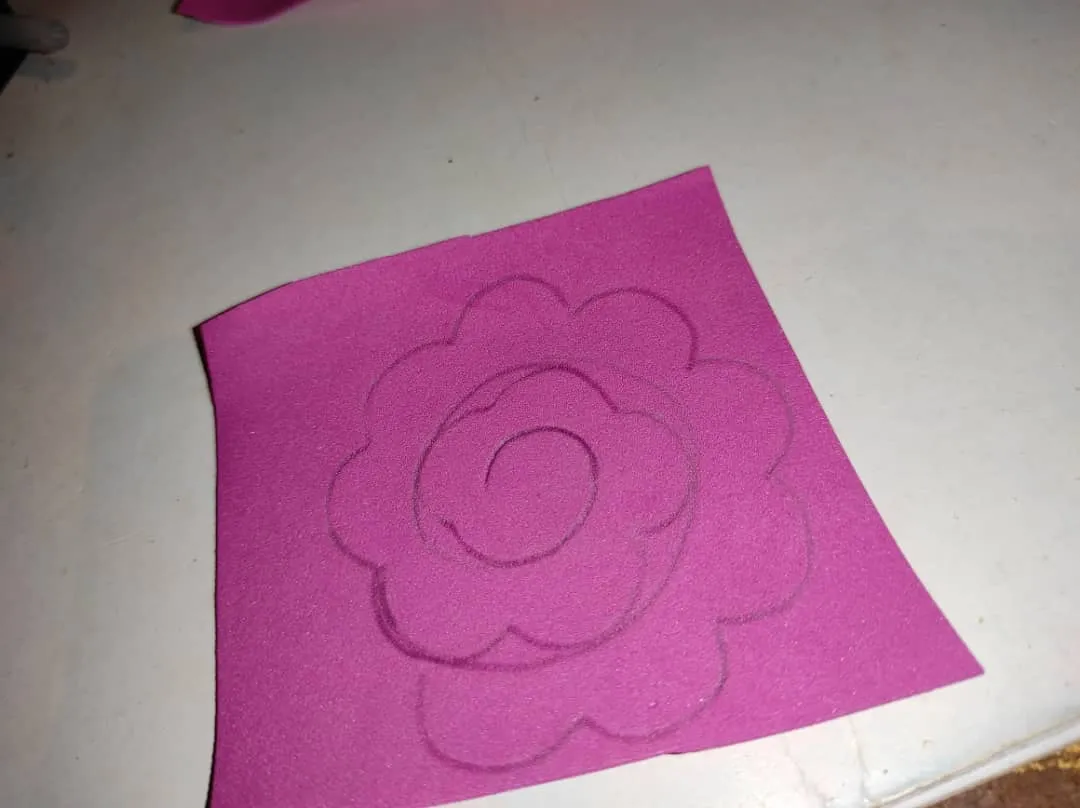
El moldeo vamos a copiarlo en el foami y sacar varias flores.
We are going to copy the molding on the foam and take out several flowers.
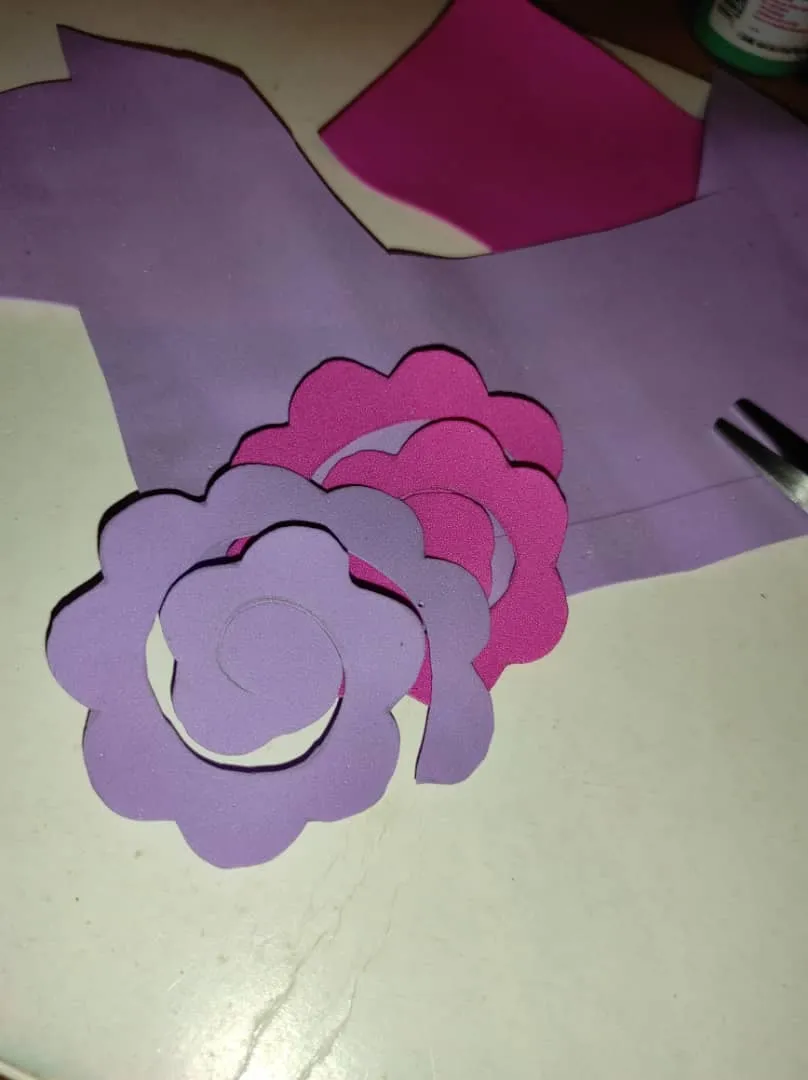
Sacamos flores rosadas y lilas. Combinan muy bien con el color que pusimos de base en el portalápices.
We take out pink and lilac flowers. They combine very well with the color that we put as a base in the pencil holder.
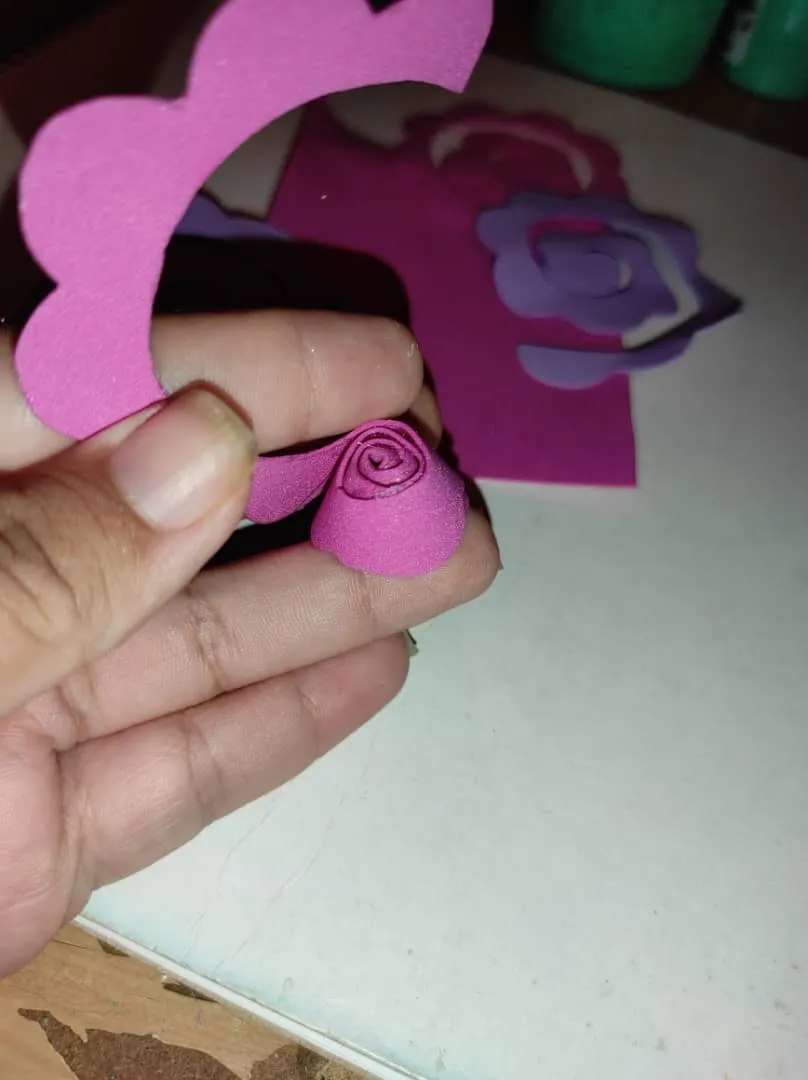
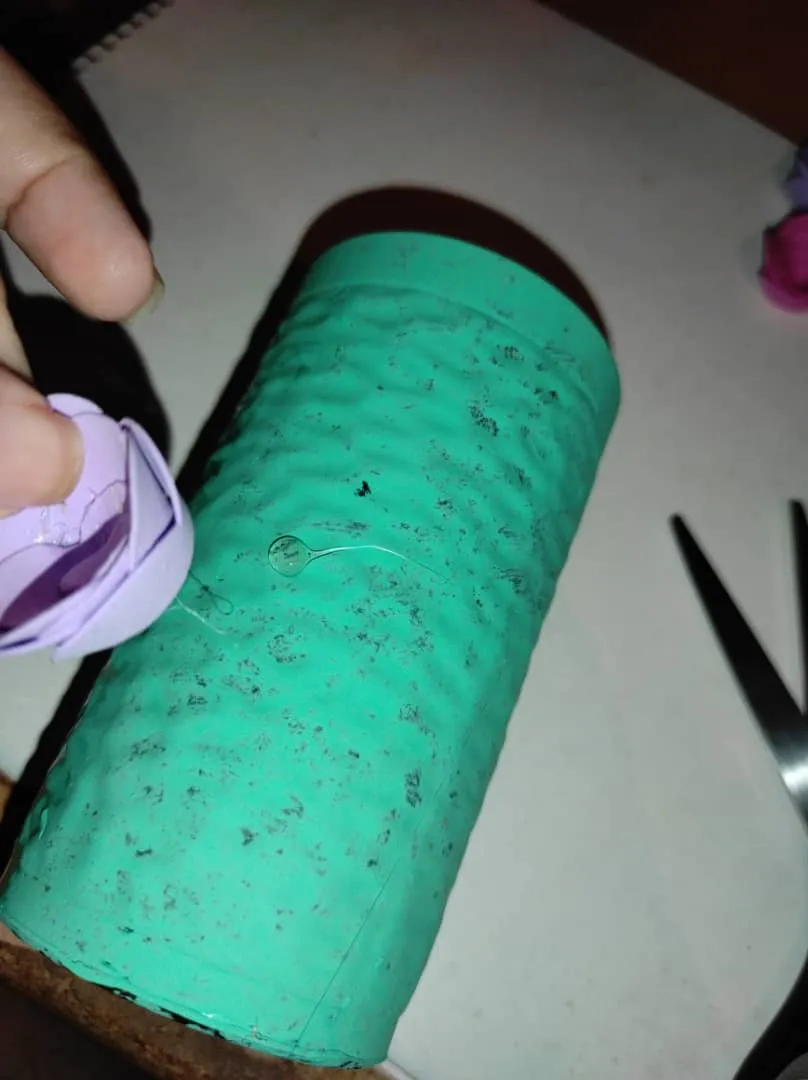
Y aquí pueden ver qué vamos enrollando y pegando con silicón caliente la flor.
And here you can see what we are rolling and gluing the flower with hot silicone.
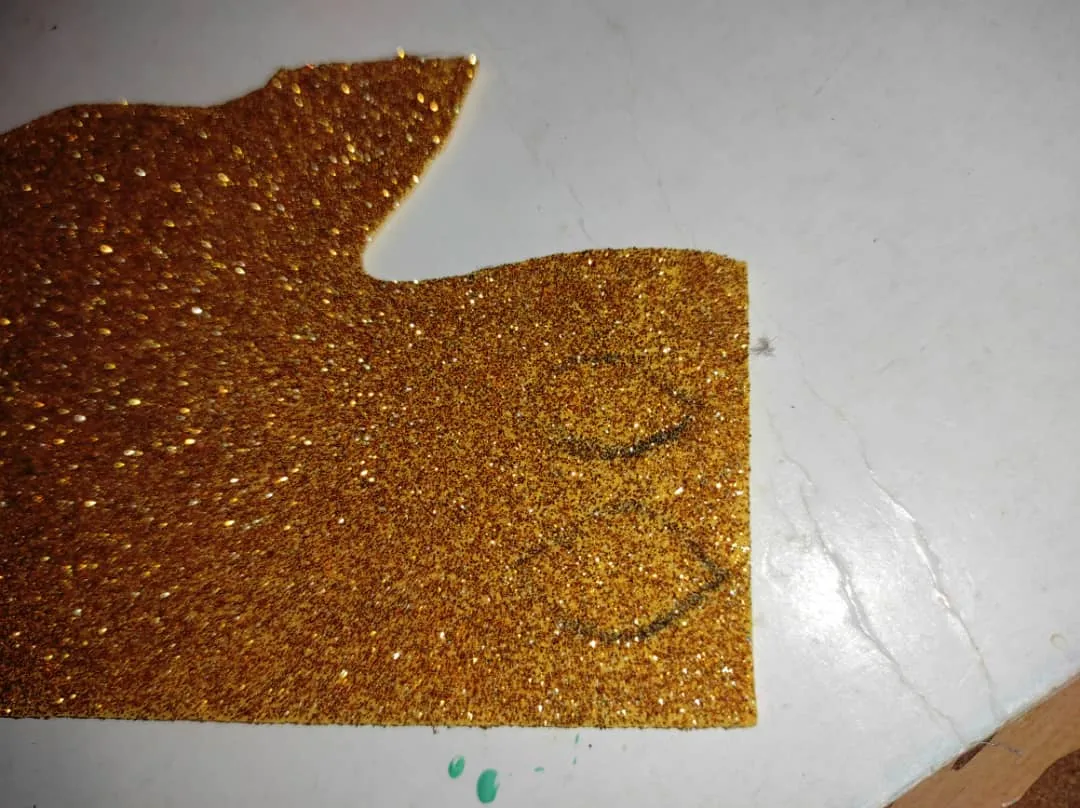
En este foami dorado vamos a dibujar dos hojas.
In this golden foami we are going to draw two leaves.
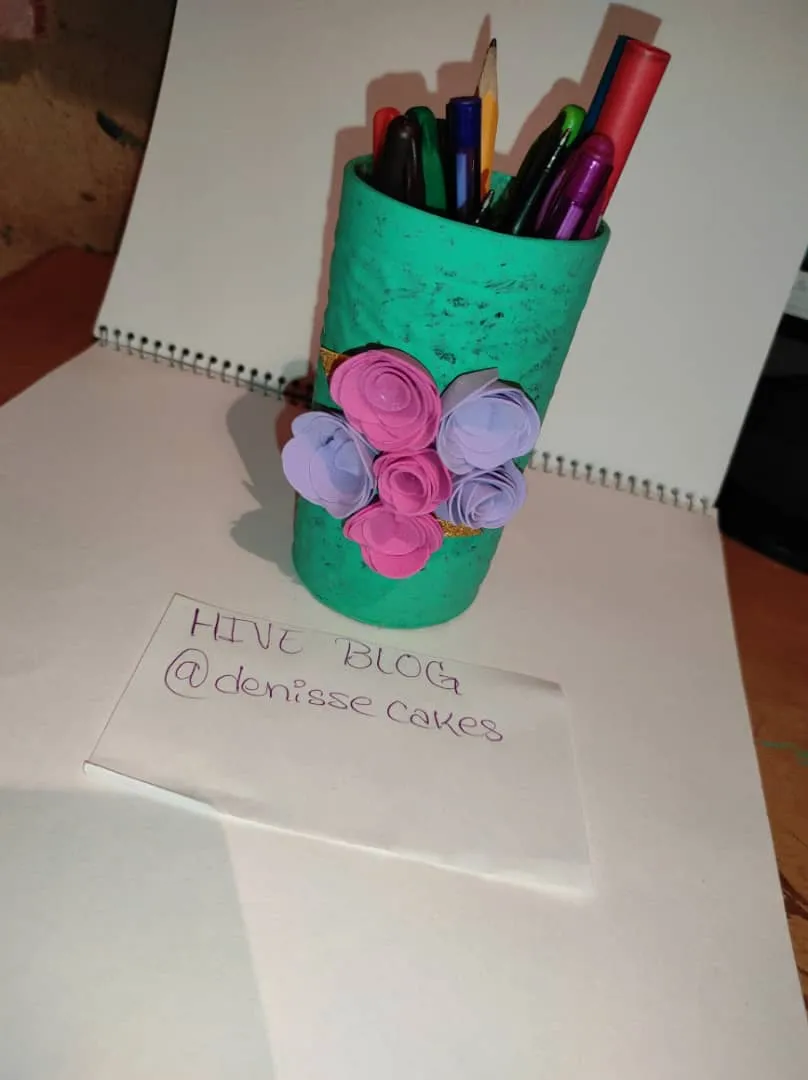
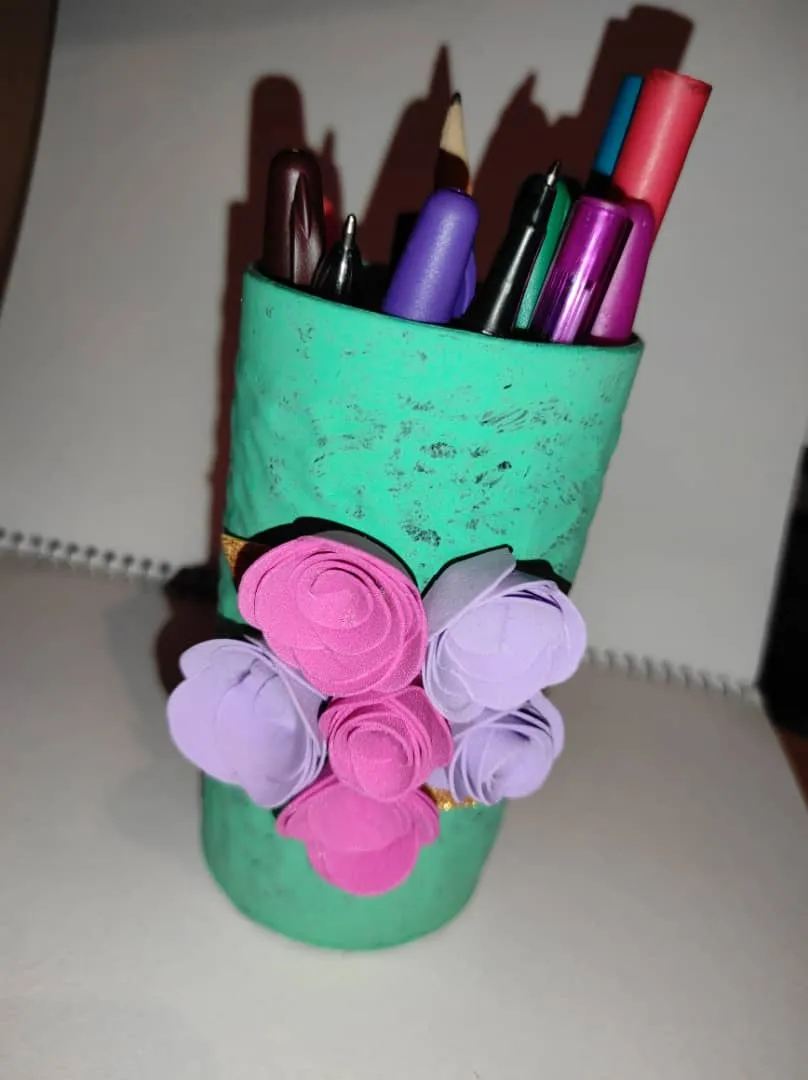
Ahora vamos a pegar la flores en el porta lápices. Yo coloque 6 flores. Usted puede colocar cuántas usted guste.
Now we are going to stick the flowers in the pencil holder. I put 6 flowers. You can place how many you like.
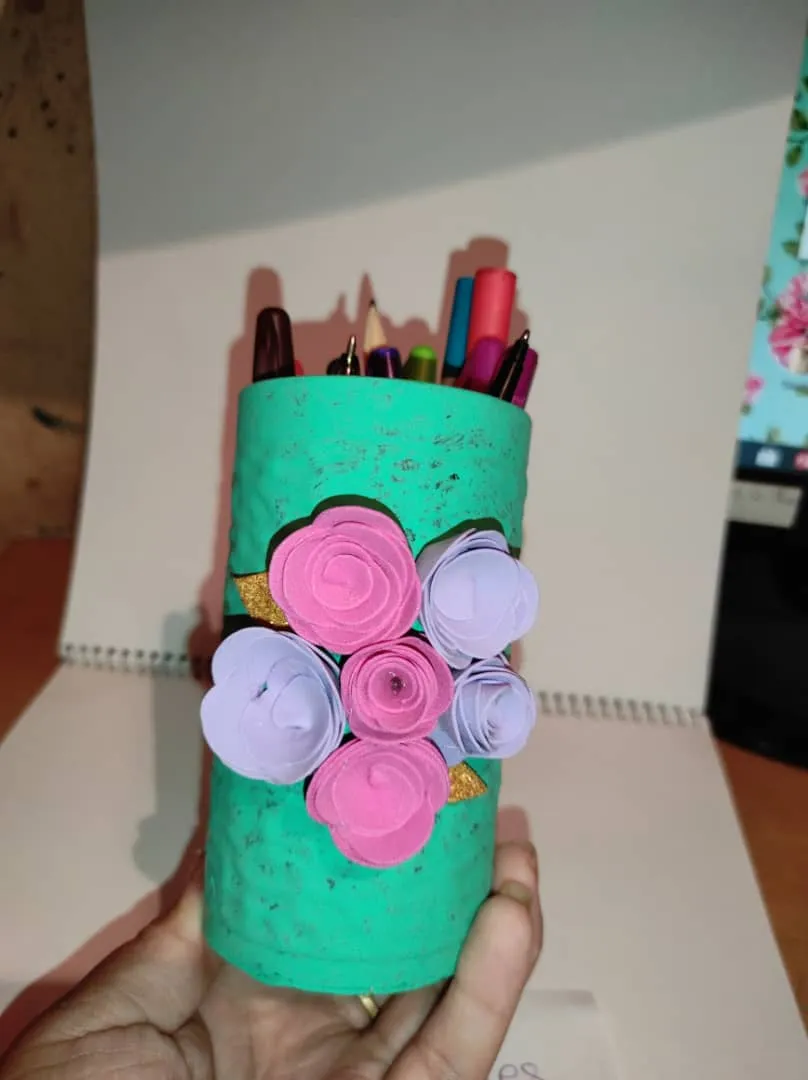
Así luce nuestro porta lápices ya listo. Es increíble las cosas tan bellas que podemos hacer reutilizando cosas que ya no usamos en casa.
This is what our ready-made pencil holder looks like. It's amazing how beautiful things we can do by reusing things that we no longer use at home.