Welcome to my Blog.
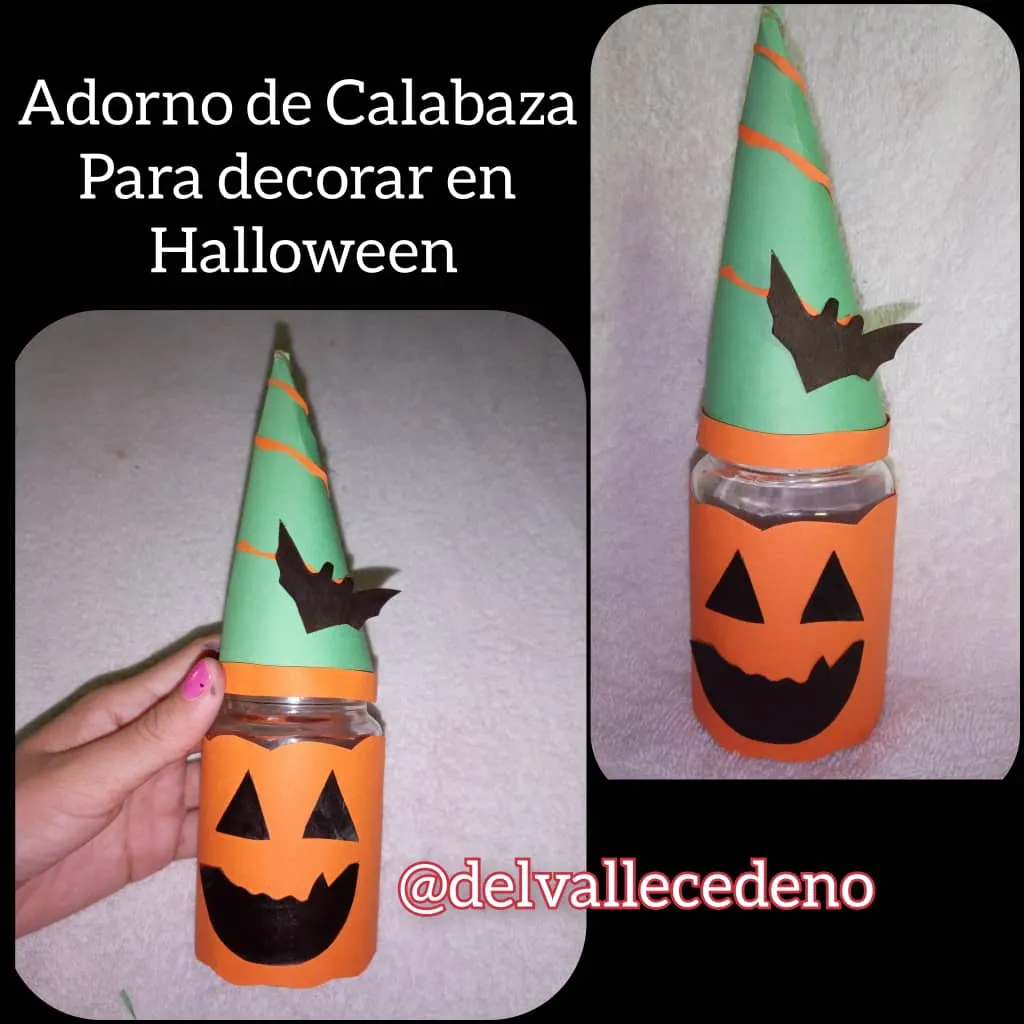
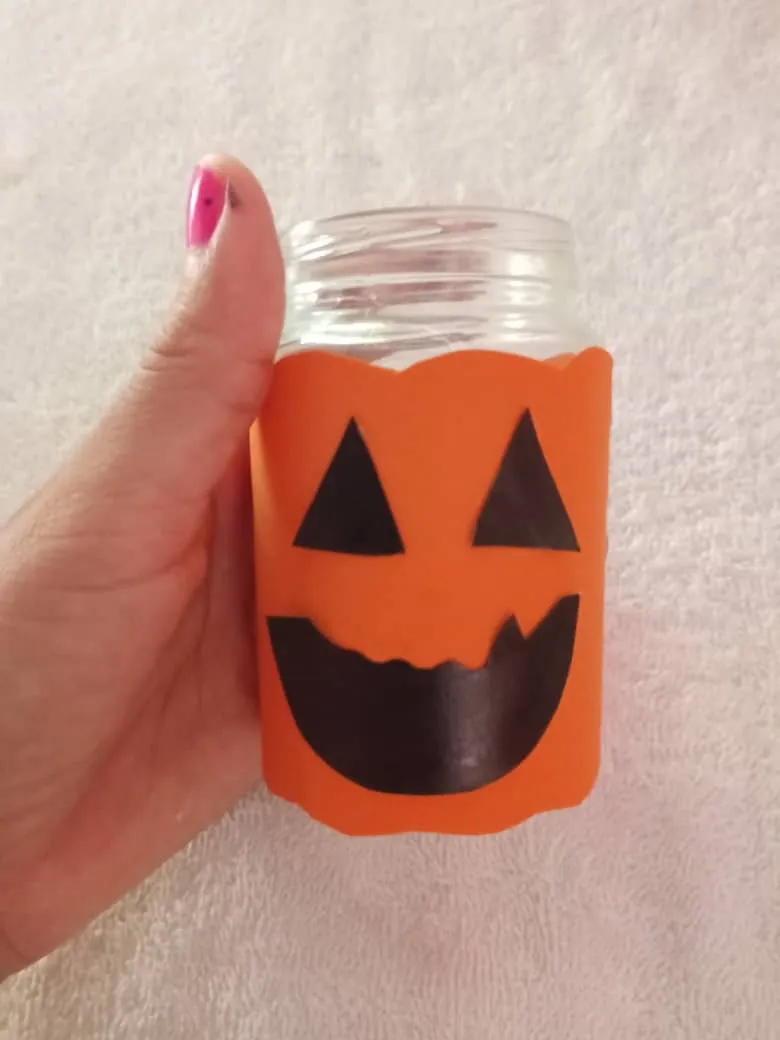
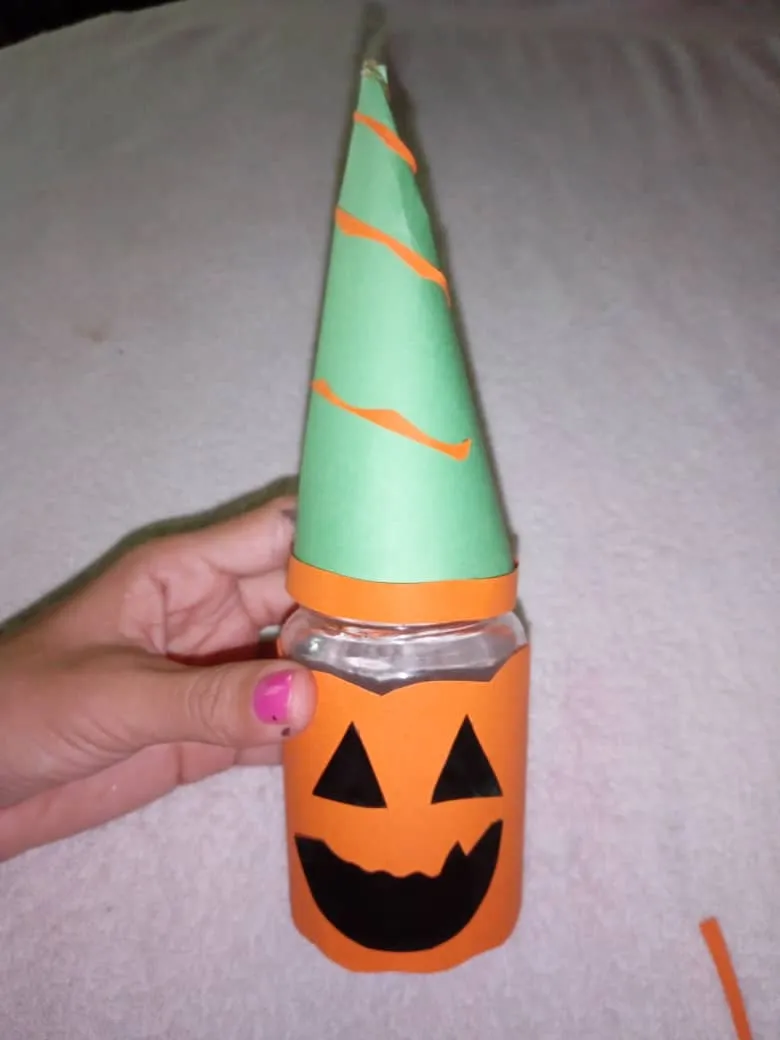
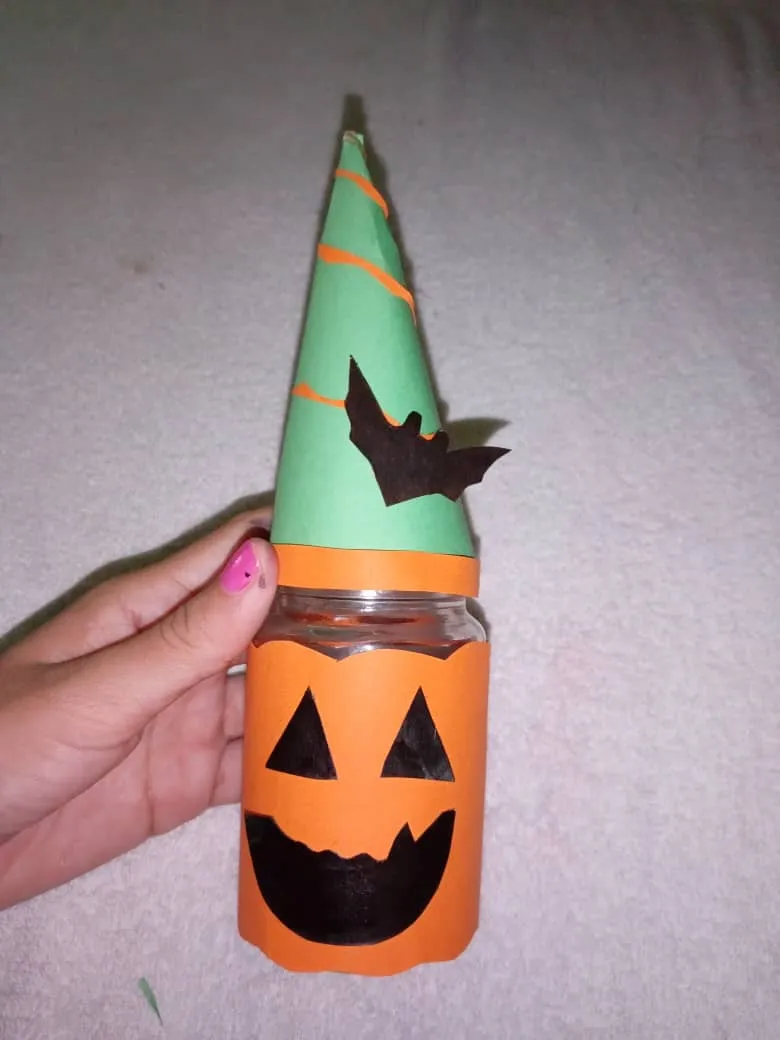
Buenas noche amigos Hivers espero estén muy bien lleno de mucha Salud y Paz en sus hogares, reciban un fuerte abrazo a todos los que hacen vida en esta maravillosa comunidad de @Hivediy, Una vez más quiero compartir con ustedes mis trabajos en esta oportunidad les traigo como elaborar un Sencillo Adorno de Calabaza usando envase de reciclaje ideal para decorar en Halloween. Espero les guste y se animen en casa a realizarlo. A continuación pasos a seguir:
Good night friends Hivers, I hope you are very well filled with a lot of Health and Peace in your homes, receive a big hug from all those who make life in this wonderful community of @Hivediy, Once again I want to share with you my work, this time I bring you How to make a Simple Pumpkin Ornament using recycling container ideal for decorating on Halloween. I hope you like it and are encouraged to do it at home. Here are the steps to follow:

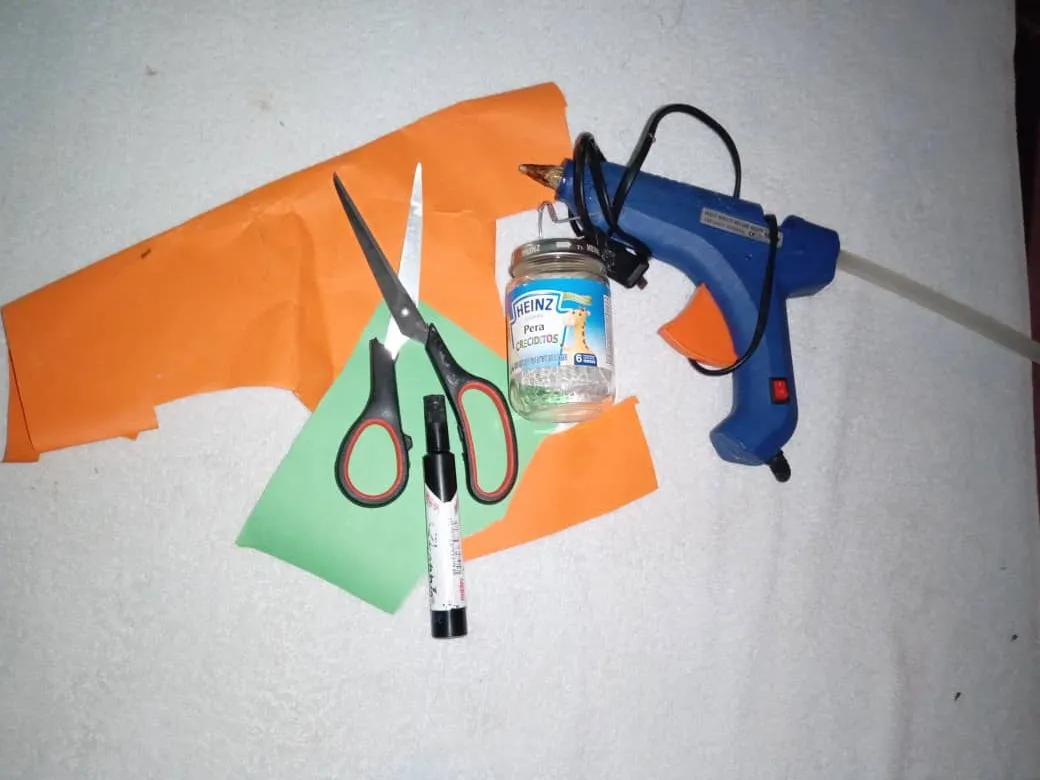
Materiales:
- Cartulina verde y naranja.
- Tijera.
- Envase reciclado.
- Tijera.
- Silicón caliente.
- Marcador negro.
Materials:
- Green and orange card stock.
- Scissor.
- Recycled packaging.
- Scissor.
- Hot silicone.
- Black marker.
Step by Step || Pasó a paso:
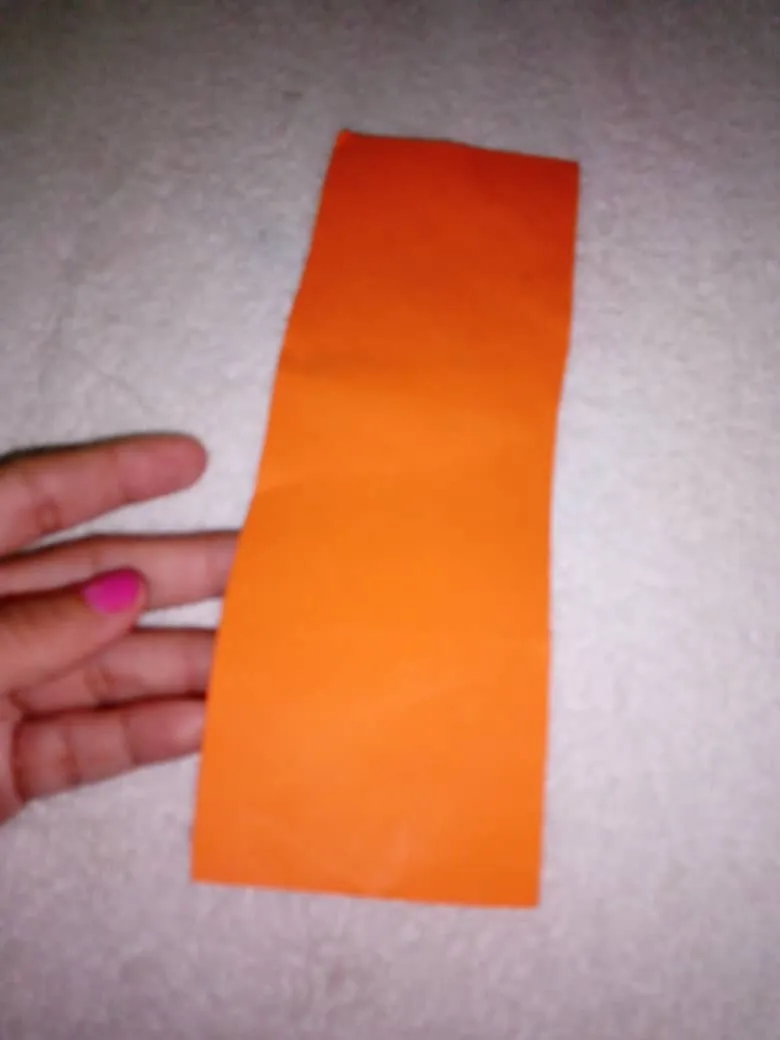
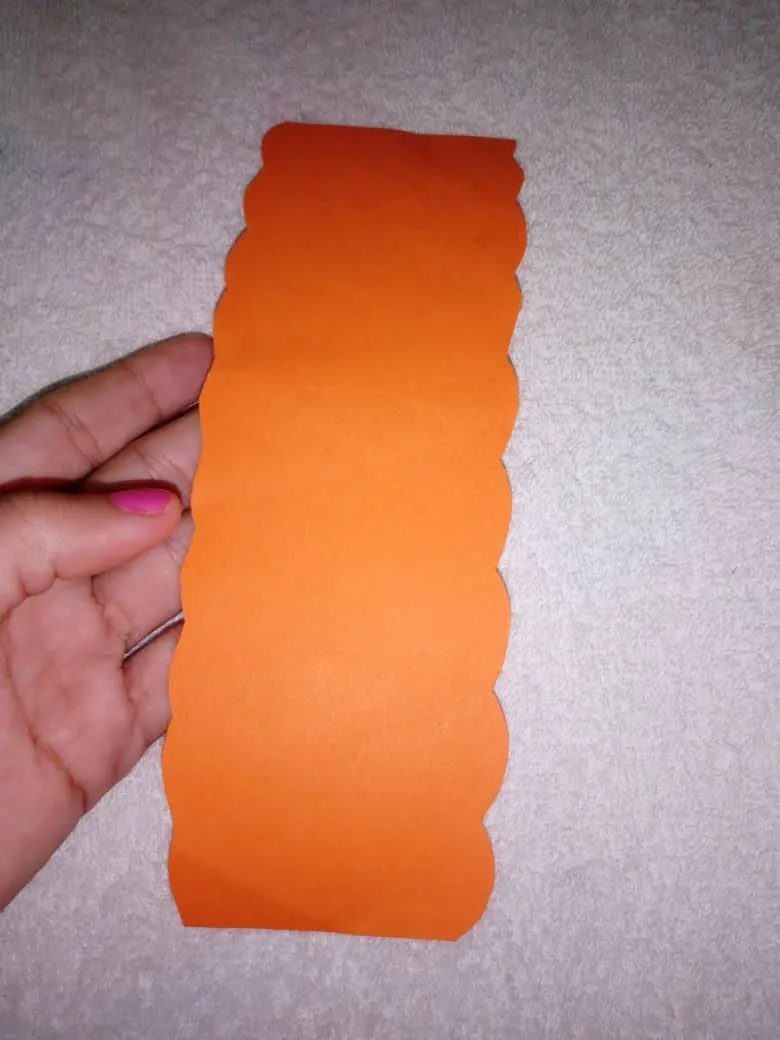
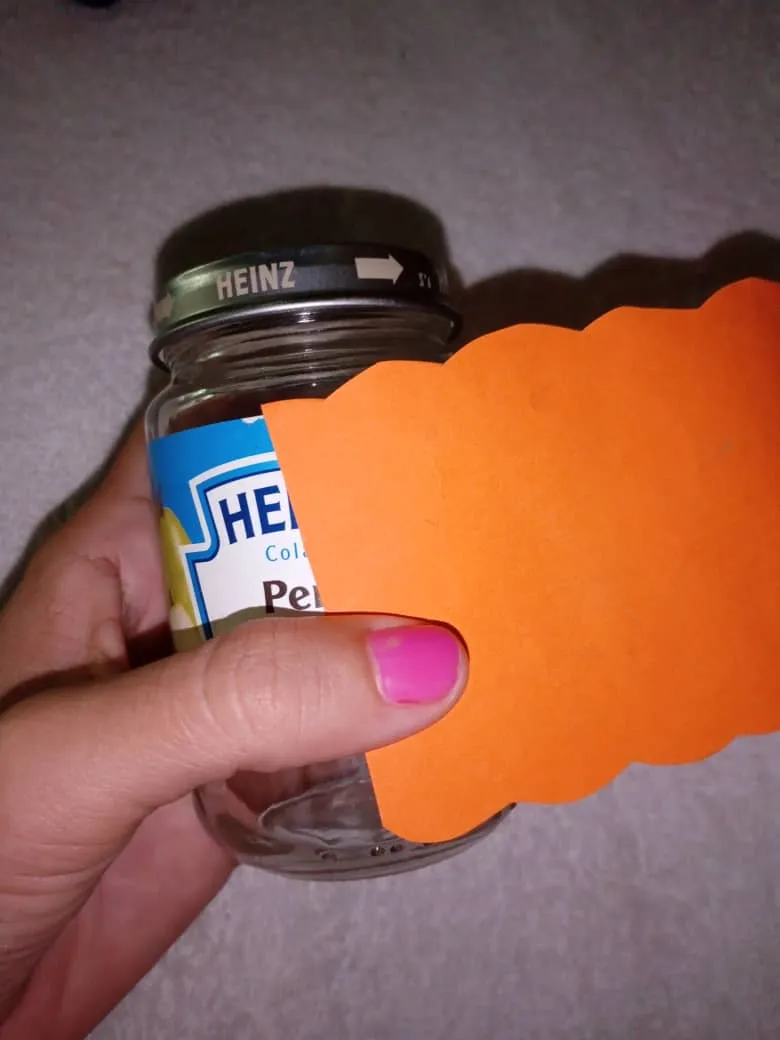
1er paso: Lo primero que haremos cortar un pequeño cuadro con la cartulina naranja y darle forma con las tijeras por los bordes.
1st step: The first thing we will do is cut a small square with the orange cardboard and shape it with the scissors around the edges.
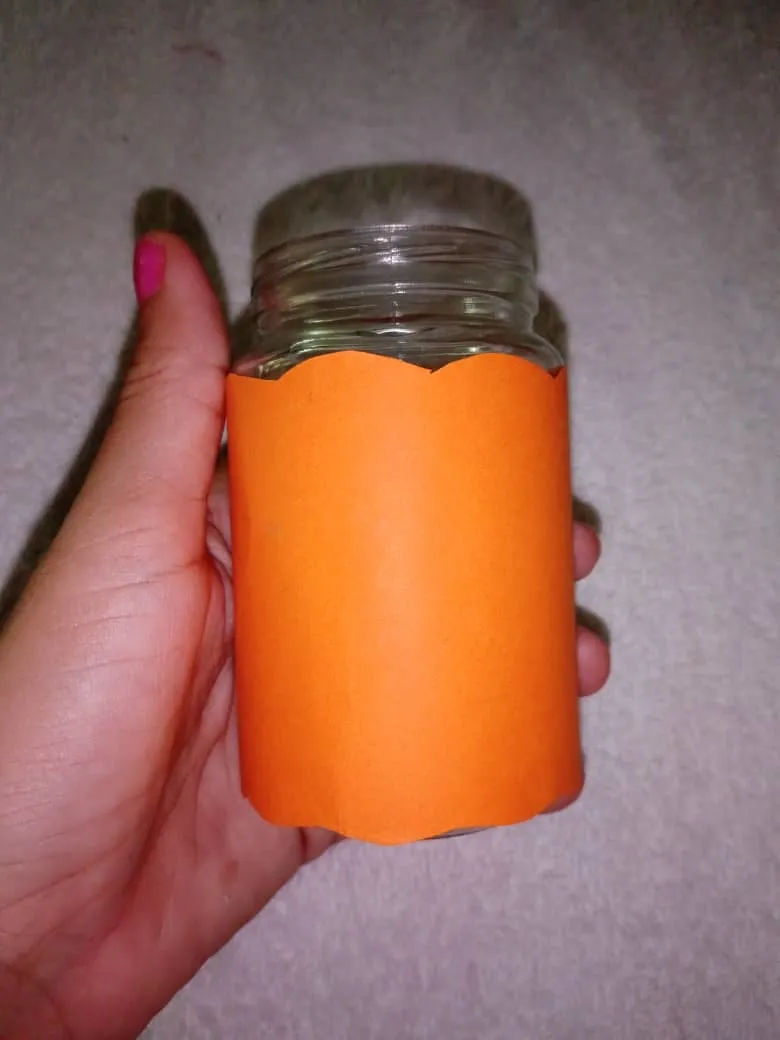
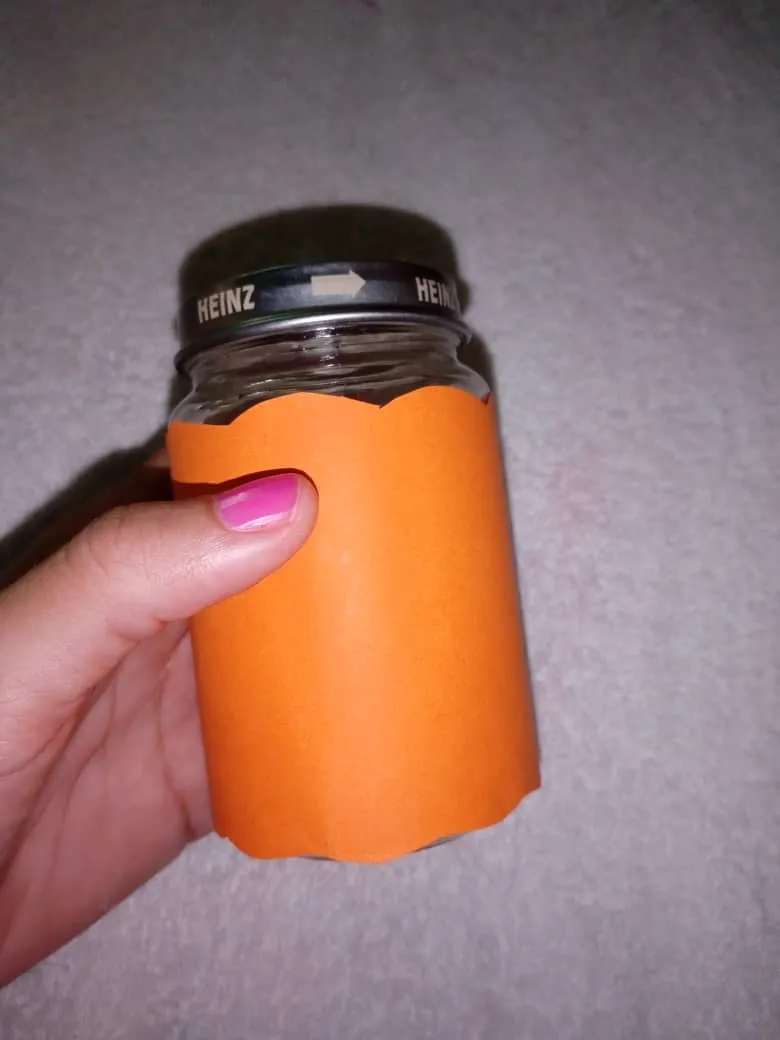
2do paso: Seguidamente procedemos a forrar el envase.
2nd step: Then we proceed to line the container.
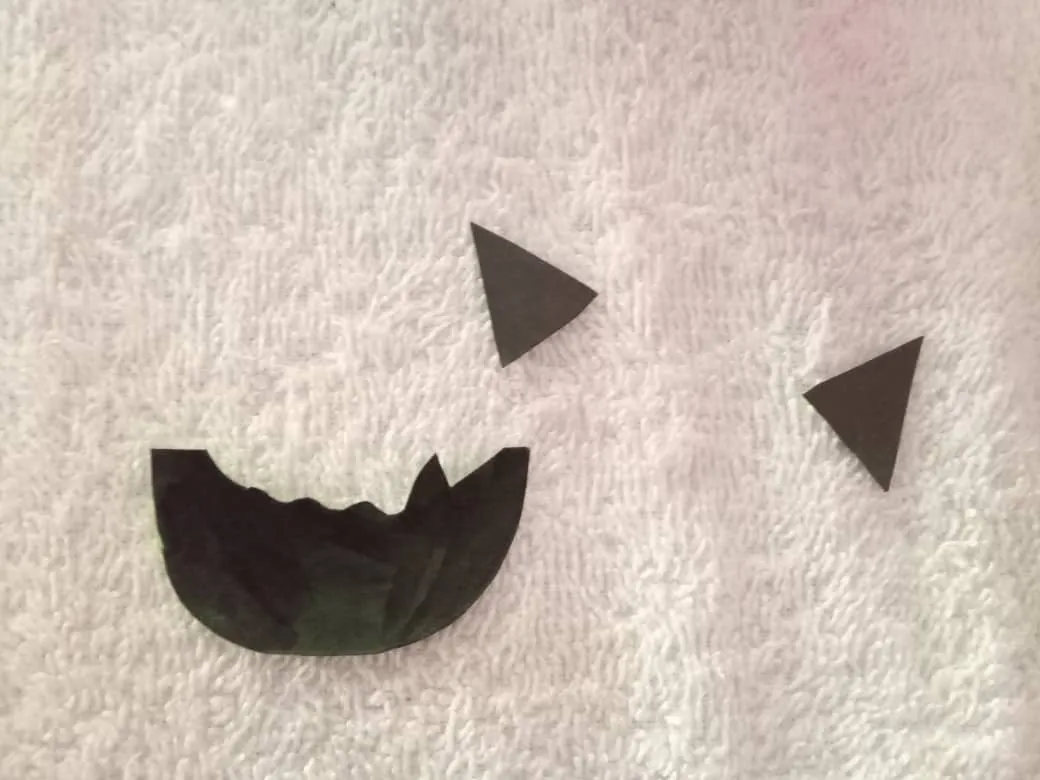
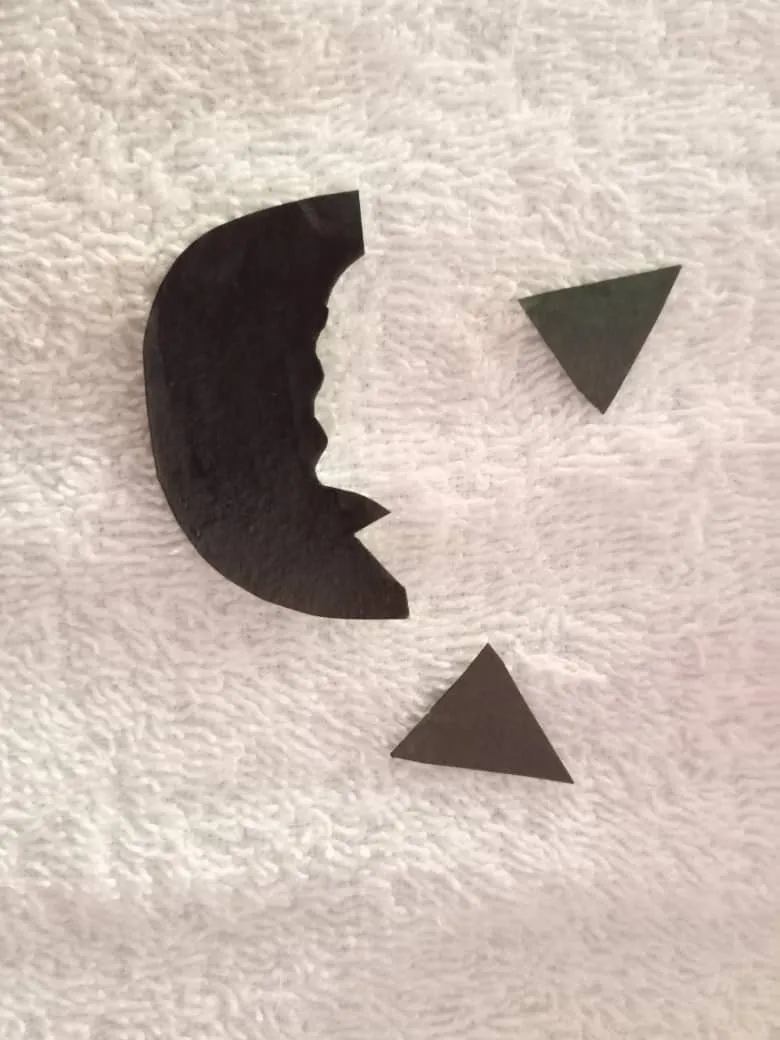
3er paso: Luego recortamos ojos y nariz pintamos con el marcador de color negro y pegamos.
3rd step: Then we cut out eyes and nose, paint with the black marker and glue.
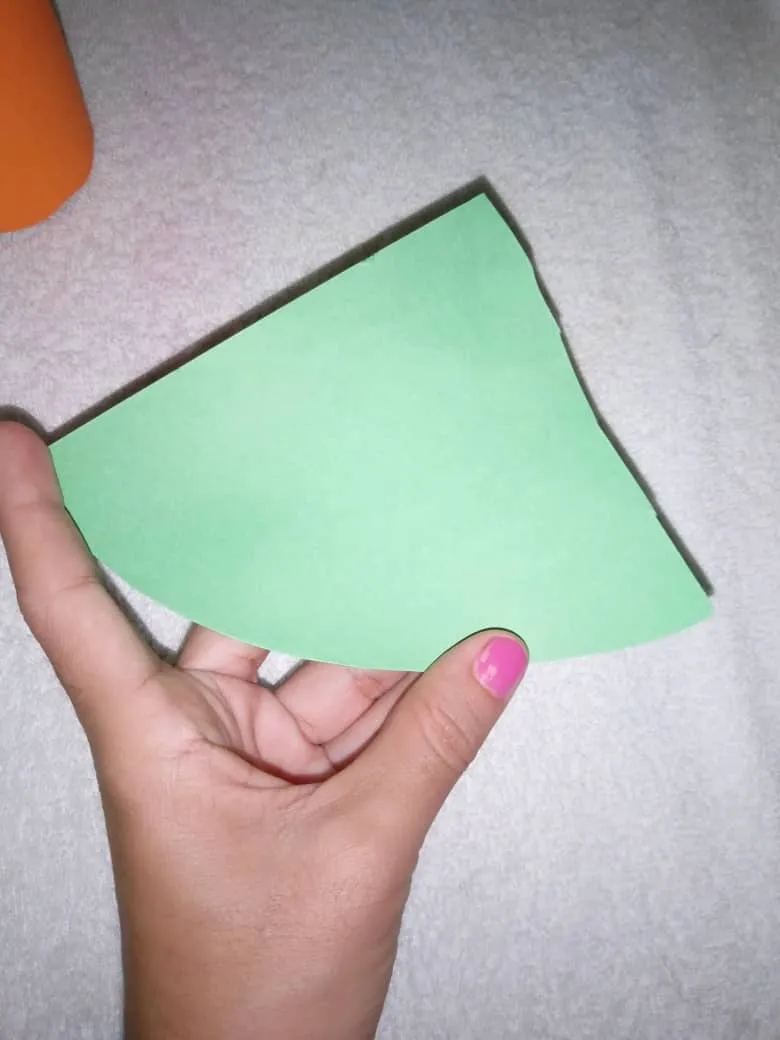
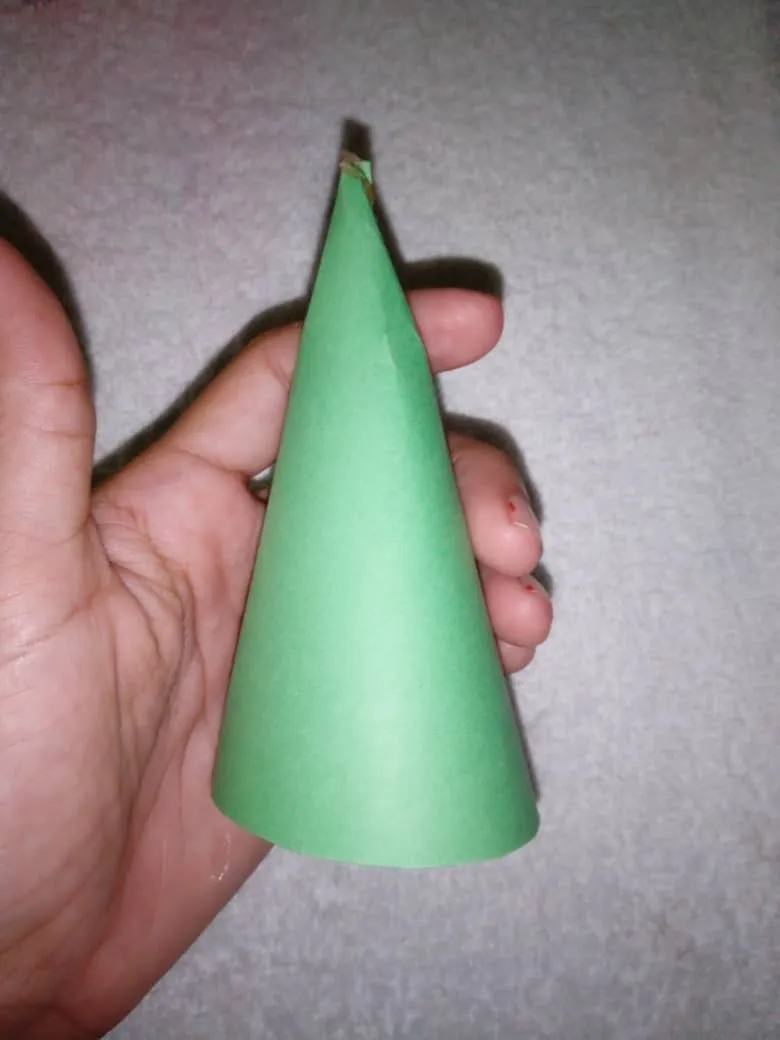
4to paso: Para finalizar cortamos un rectángulo con la cartulina verde para armar la parte superior de nuestro gorro y listo mis amigos.
4th step: To finish we cut a rectangle with the green cardboard to assemble the upper part of our hat and that's it my friends.
Muchas gracias por visitar mi Blog
Thank you very much for visiting my Blog.