Welcome to my Blog.
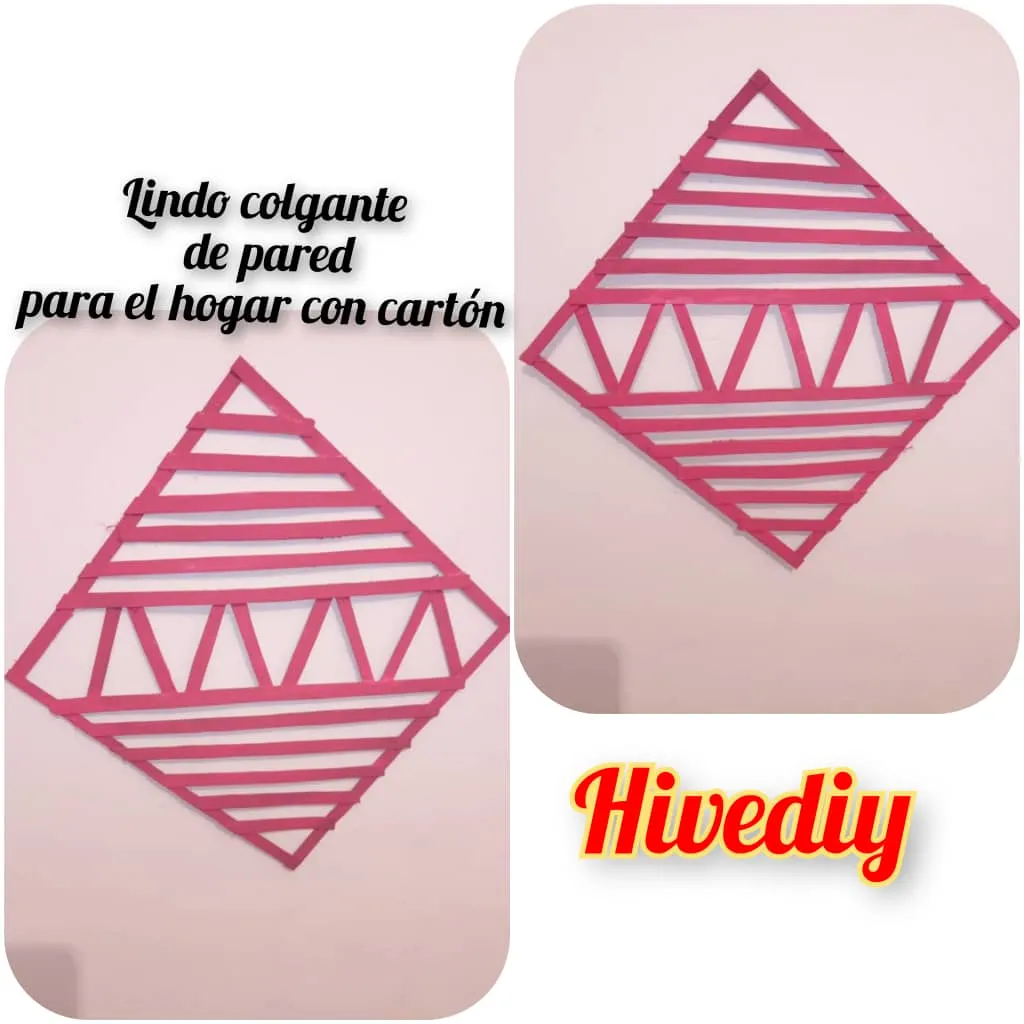
Hola colmena de Hivers, Feliz noche para todos un fuerte abrazo virtual para todos mis amigos, muy en especial a los que dia a dia hacen vida en está hermosa comunidad de @Hivediy, Hoy quiero compartir con ustedes como elaboré un Lindo Colgante de pared hecho de cartón para embellecer el hogar. A continuación pasos a seguir:
Hello Hivers hive, Happy night to everyone, a big virtual hug for all my friends, especially those who make life every day in this beautiful community of @Hivediy, Today I want to share with you how I made a Cute Wall Hanging made cardboard to beautify the home. Here are the steps to follow:

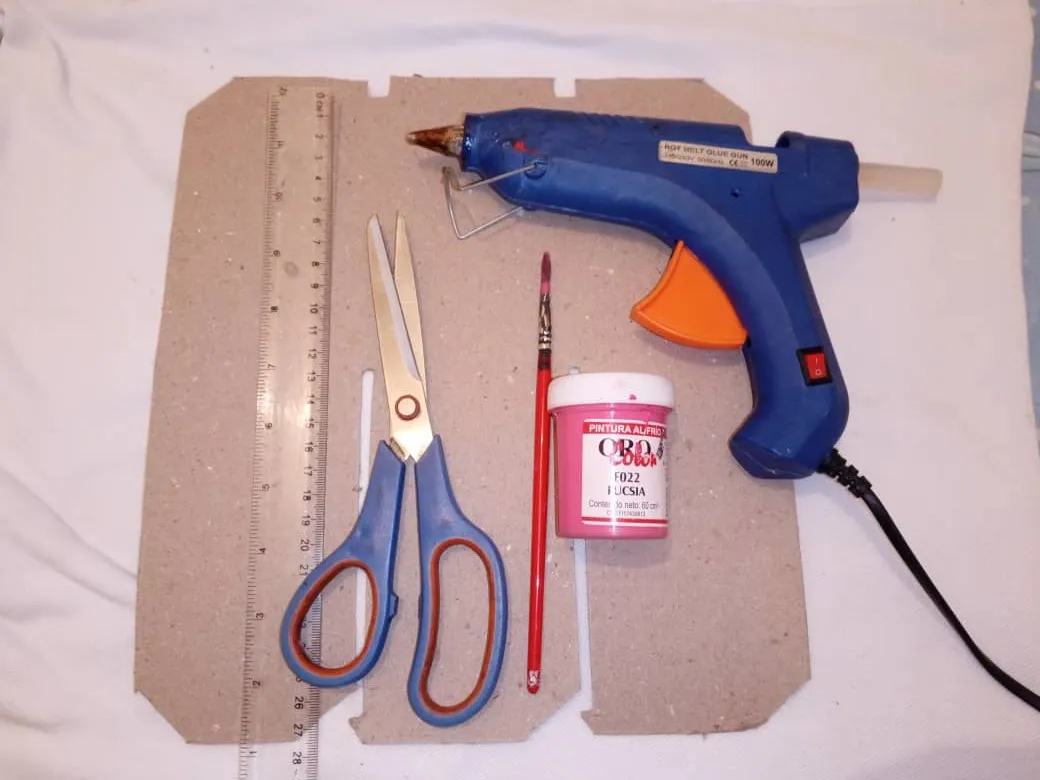
Materiales:
- Cartón reciclado.
- Tijera.
- Pincel.
- Regla.
- Silicón caliente.
- Pintura fucsia.
Materials:
- Recycled carton.
- Scissor.
- Brush.
- Rule.
- Hot silicone.
- Fuchsia paint.
Step by Step || Pasó a paso:
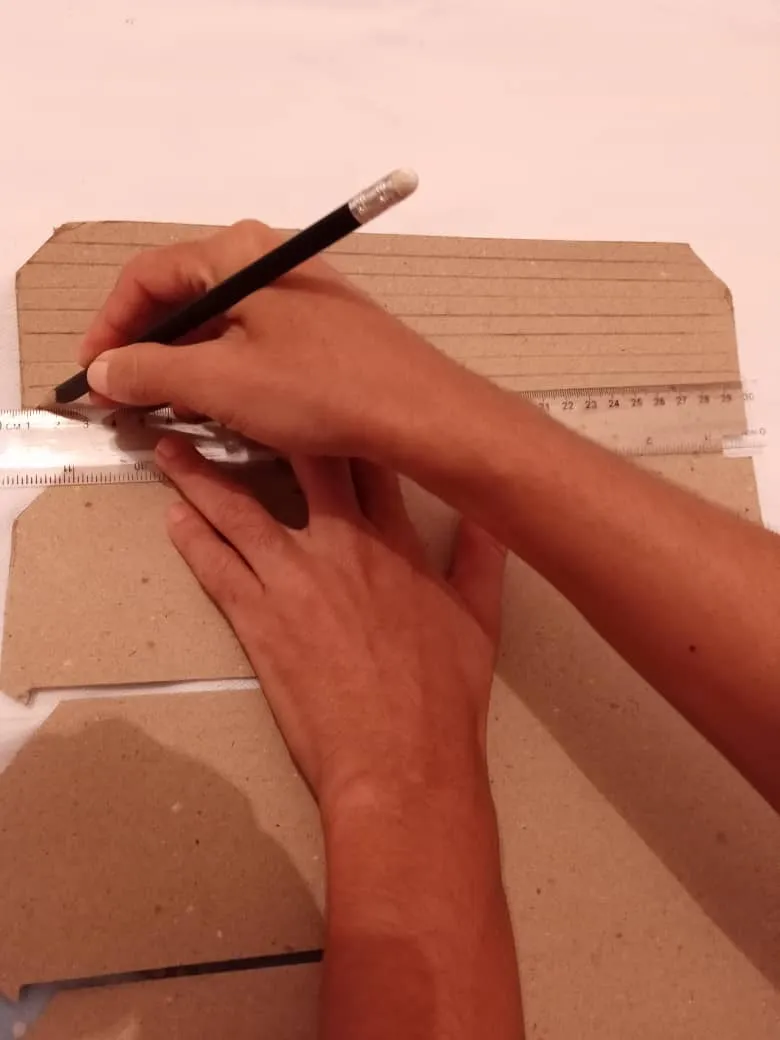
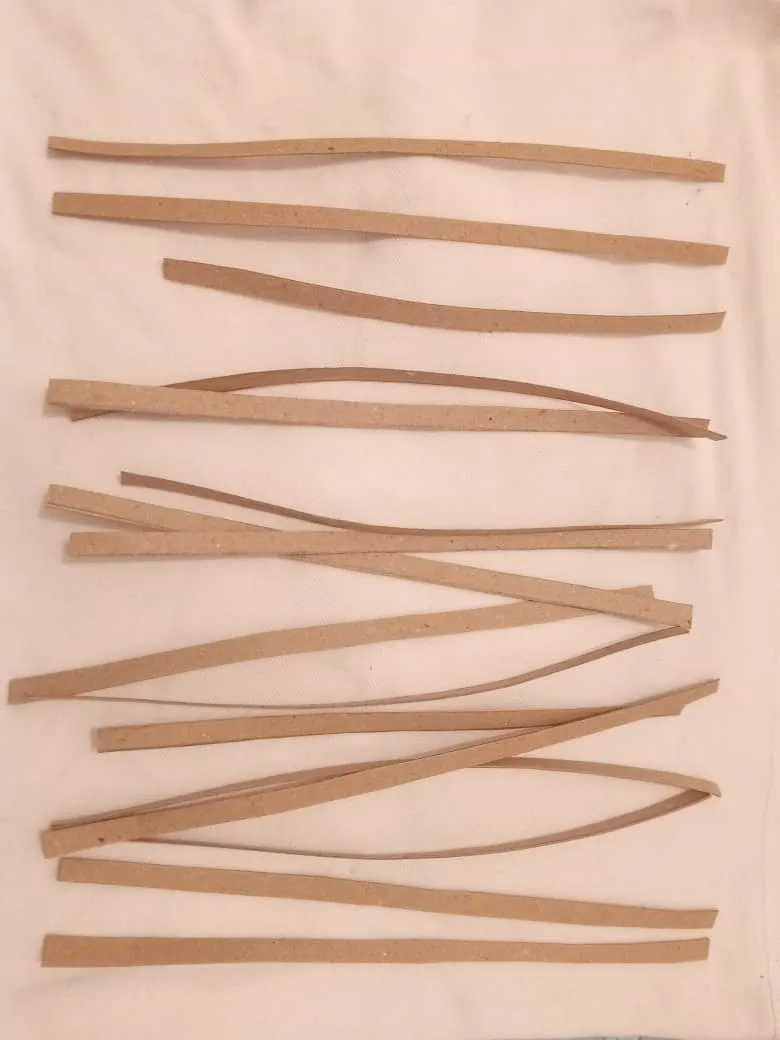
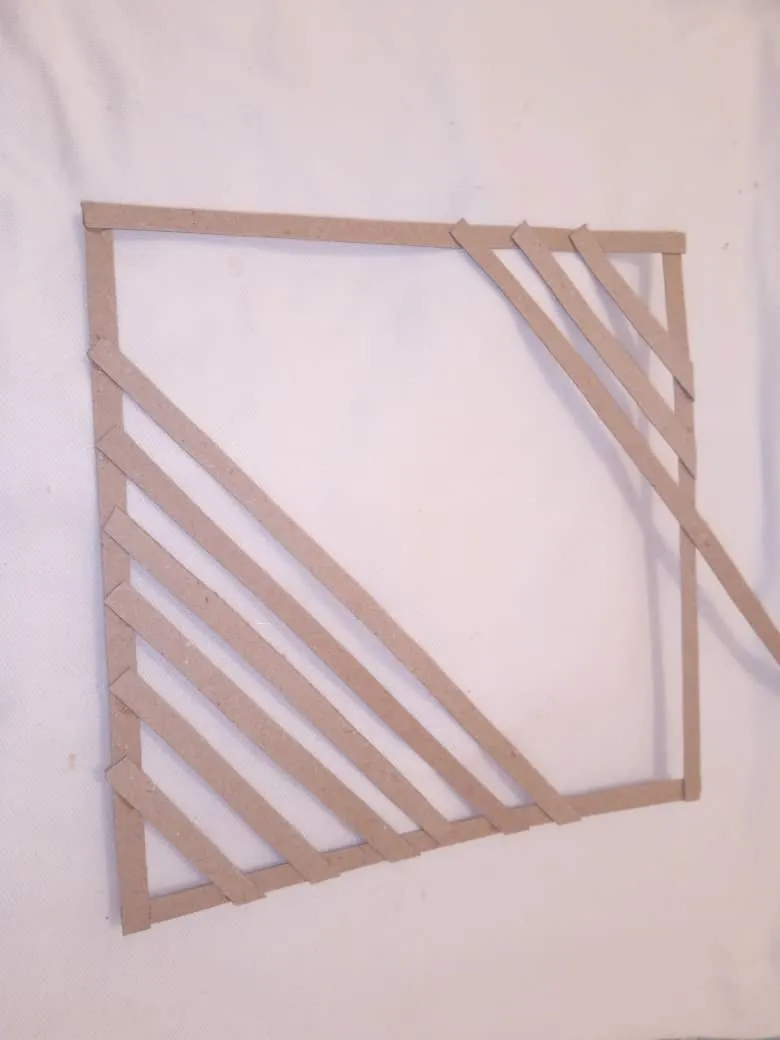
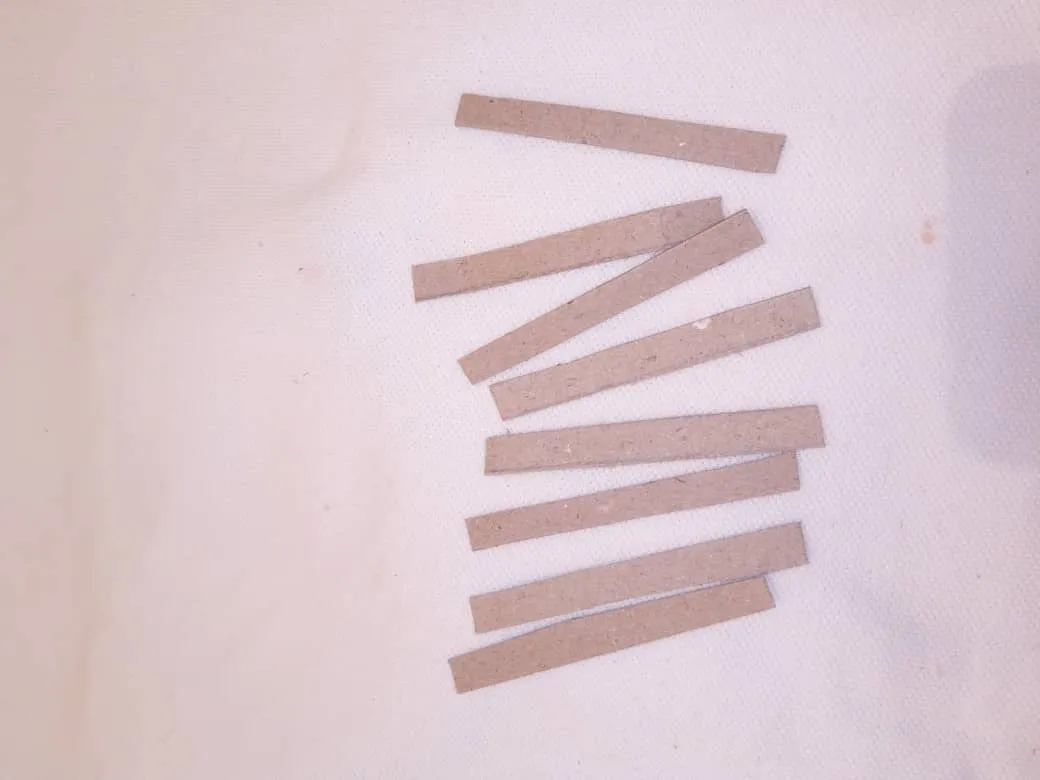
1er paso: Lo primero que haremos es con ayuda de la regla vamos a ir marcando varias lineas y recortamos tiras delgadas.
1st step: The first thing we will do is with the help of the ruler, we will mark several lines and cut thin strips.
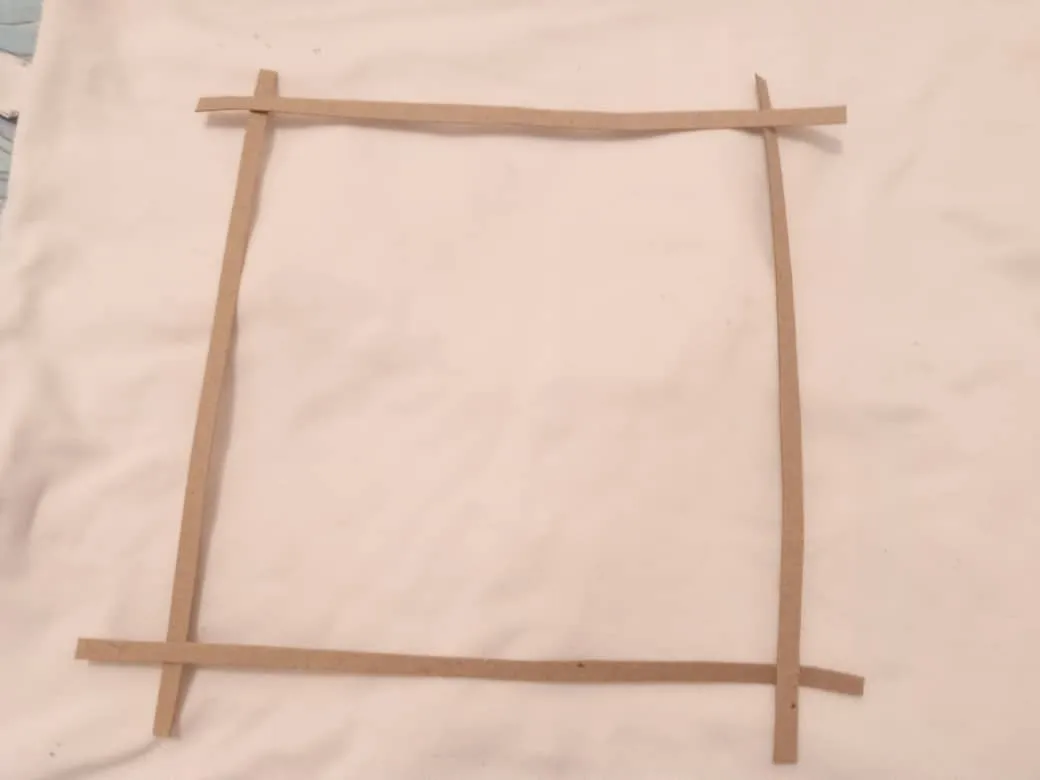
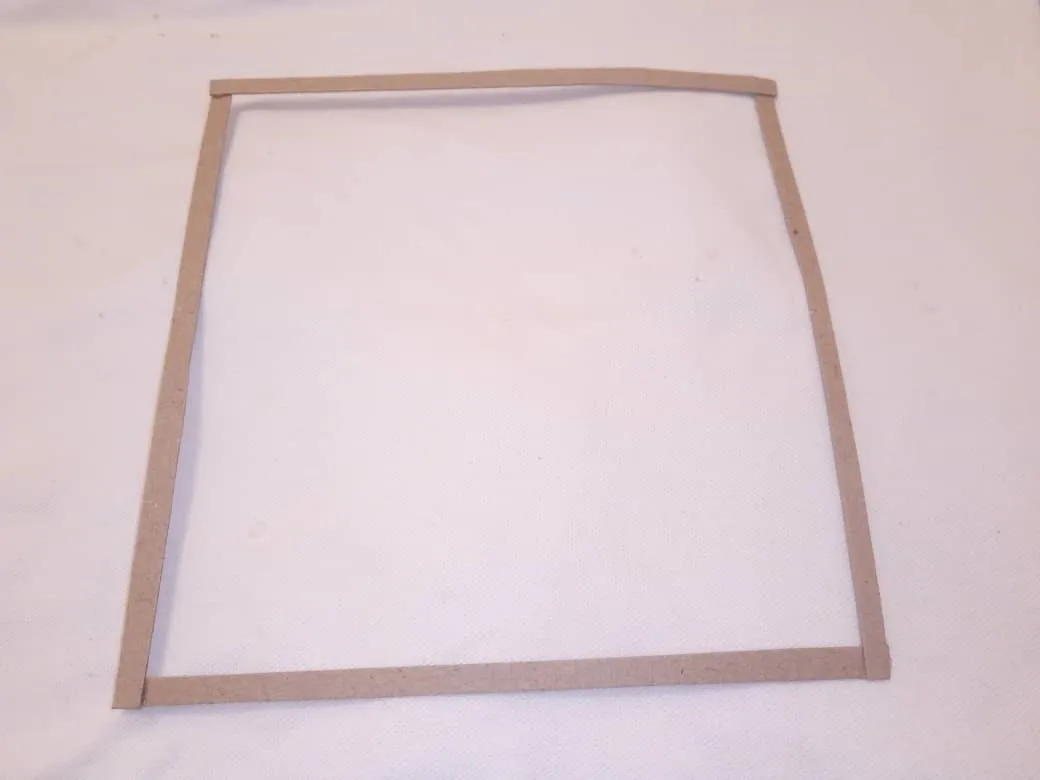
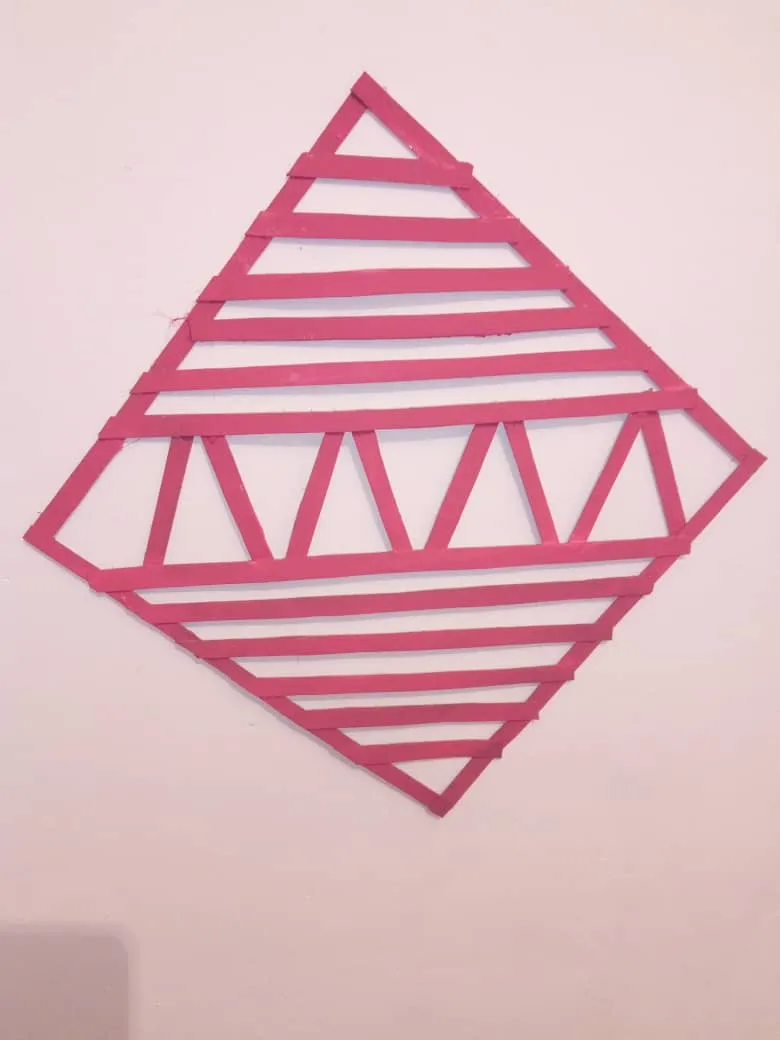
2nd step: Next we are going to put together a painting depending on the size you want, it has measures of 23cm x 23cm.
2do paso: Seguidamente vamos a armar un cuadro dependiendo el tamaño que desee, este tiene medidas de 23cm x 23cm.
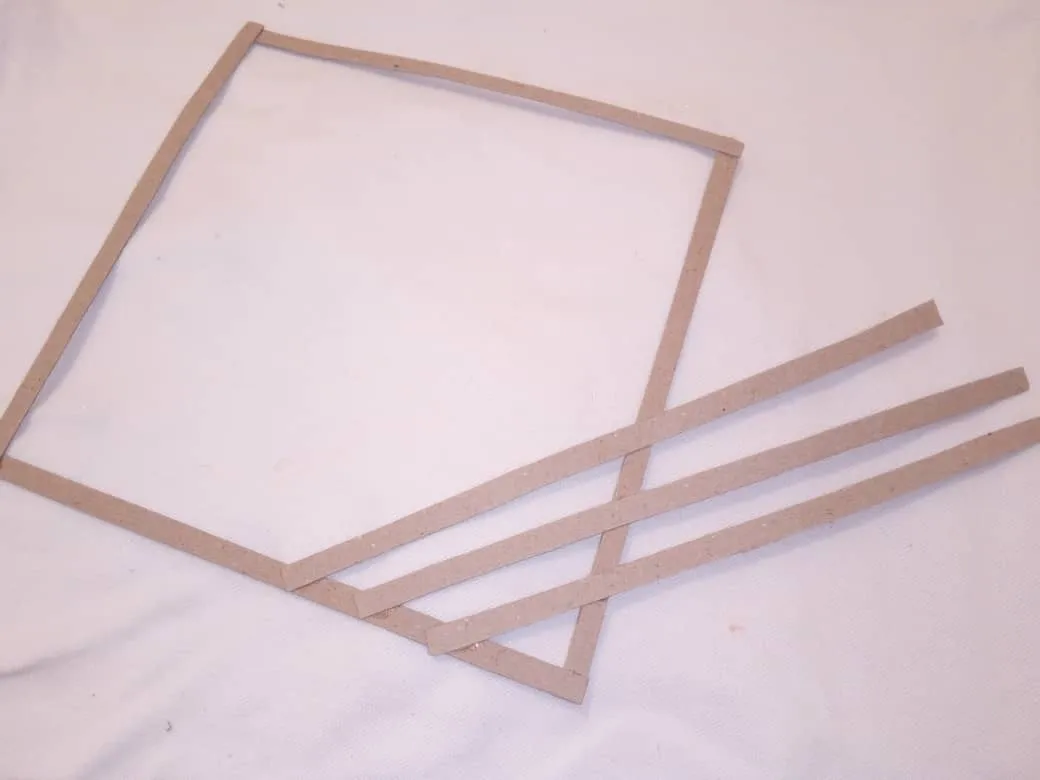
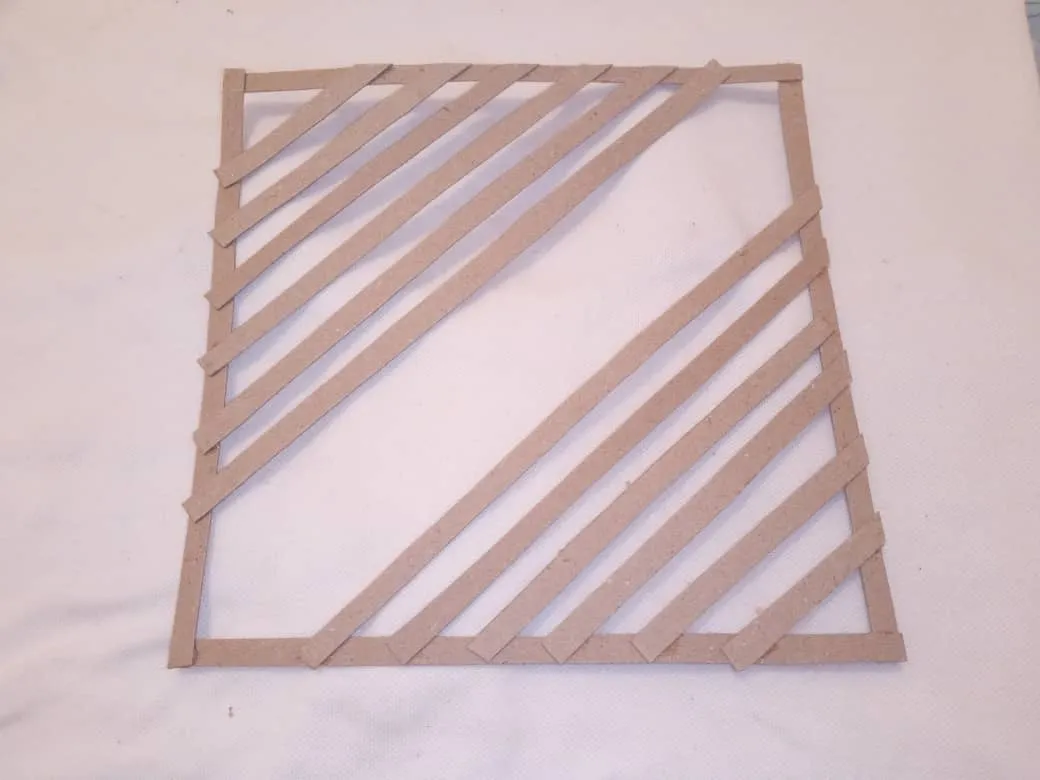
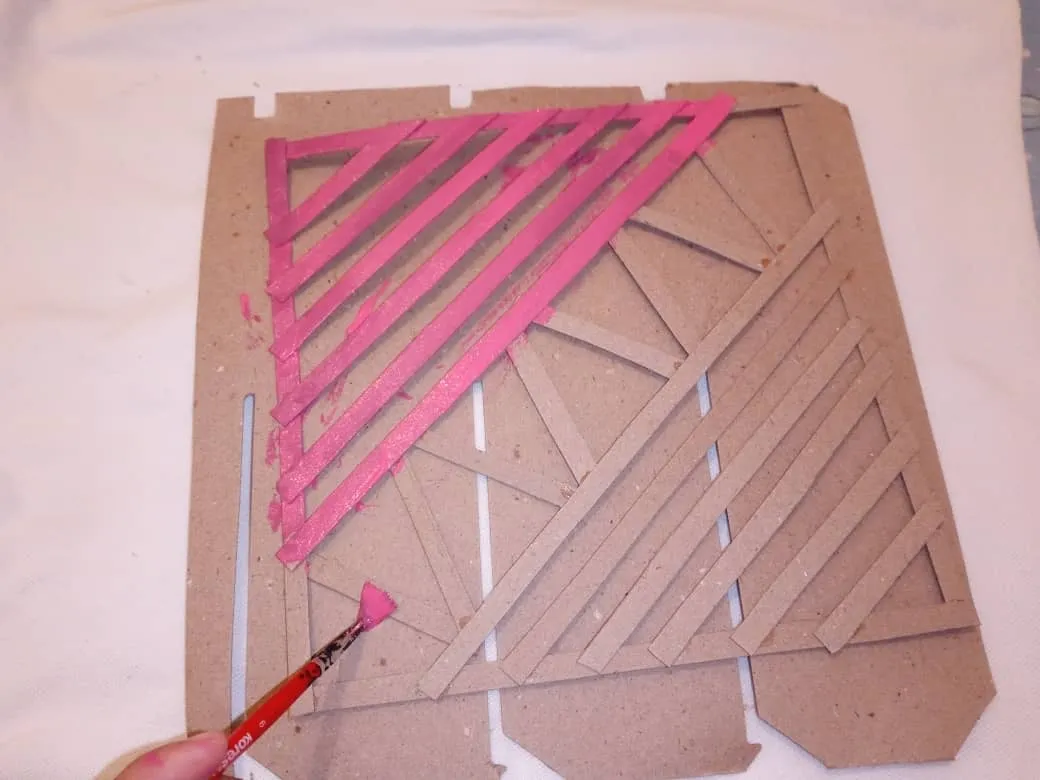
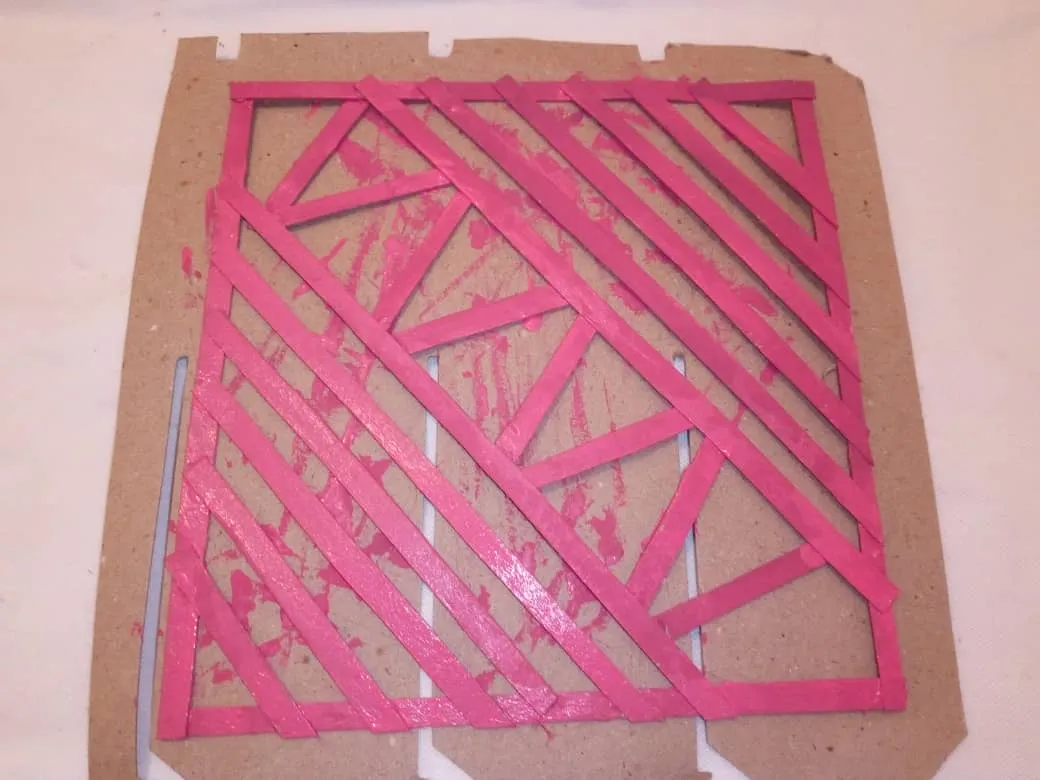
3er Paso: Luego procedemos a anexar las tiras de cartón antes cortadas desde la parte inferior a la superior como se muestra en la imagen.
3rd Step: Then we proceed to attach the cardboard strips previously cut from the bottom to the top as shown in the image.
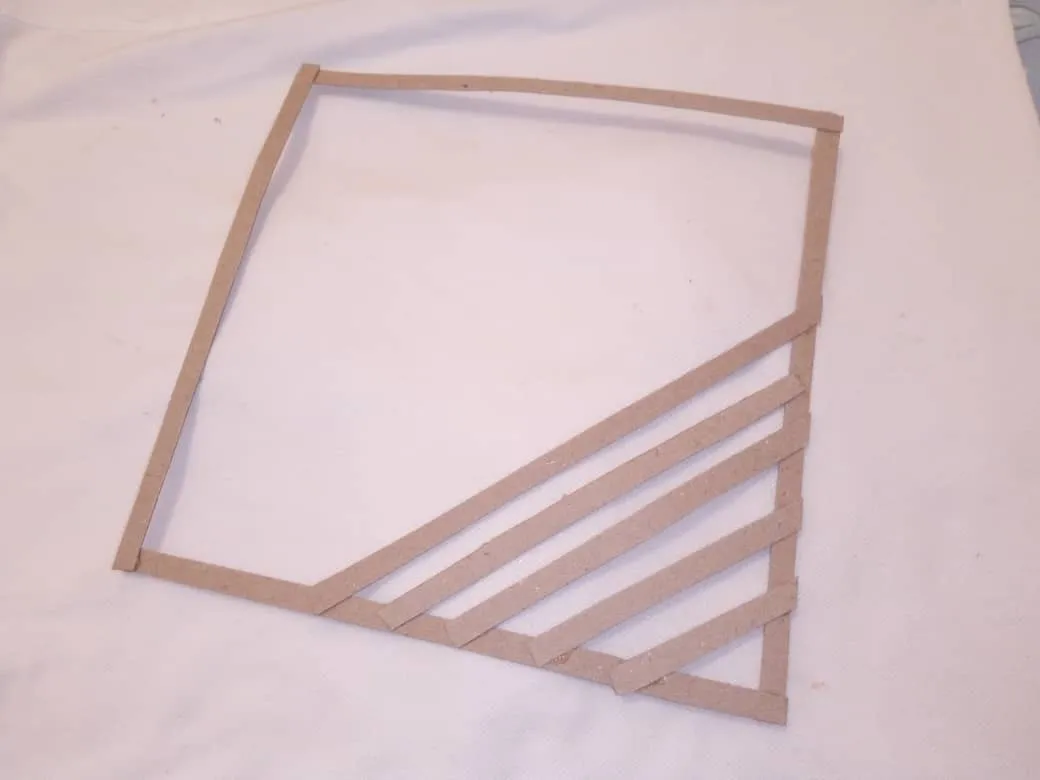
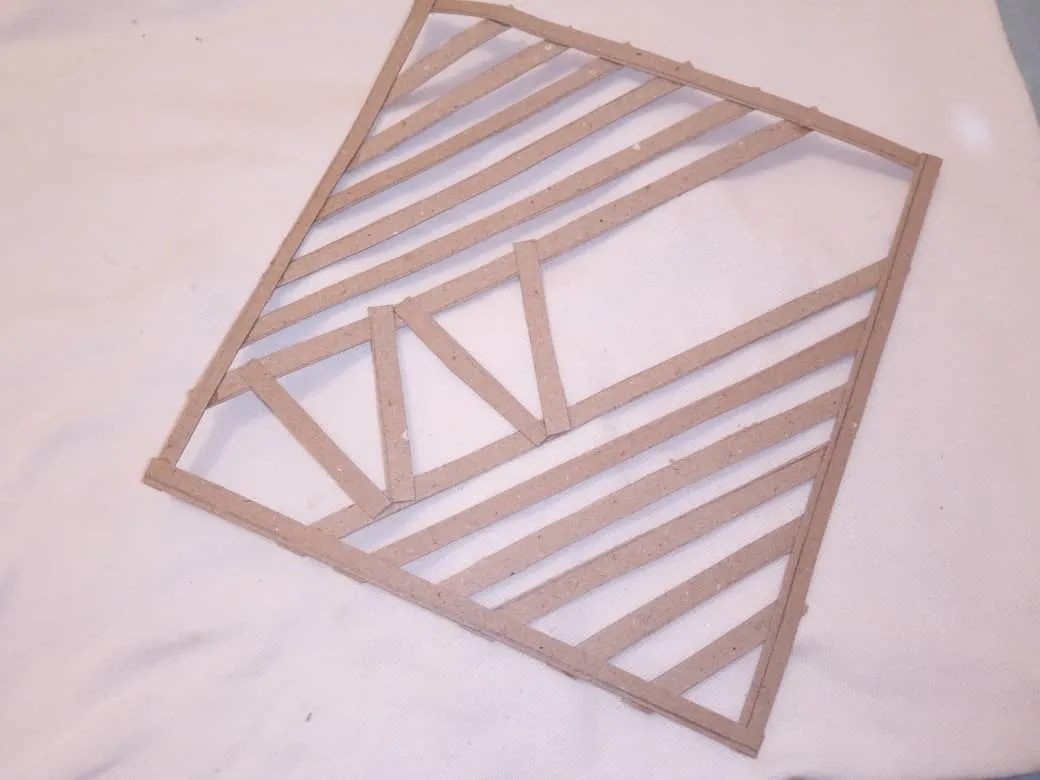
4to paso: Después en la parte del centro incorporamos unas tiras mas pequeñas.
4th step: Then in the center part we add some smaller strips.
5to paso: Para finalizar procedemos a pintar todo y listo mis amigos asi de lindo quedo!
5th step: To finish we proceed to paint everything and that's it my friends that's how cute I look
Muchas gracias por visitar mi Blog
Thank you very much for visiting my Blog.