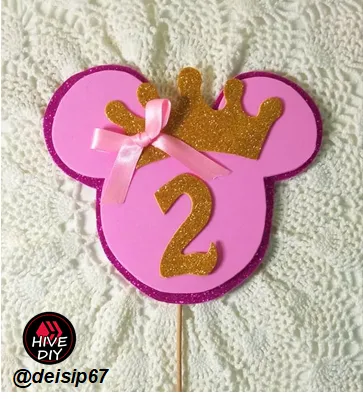
Hello friends of the Hive Diy community, I am pleased to share with you the step by step of a Caketopper or Topper for cakes, taking advantage of the fact that the number two birthday of a princess of the house is approaching, I want to give you this cute topper for your cake .
A Cake-topper, is an ornament to place on cakes, they have been known for a long time with the simple name of cake decoration, which by this date have been very varied and personalized for each event.
Hola amigos de la Comunidad de Hive Diy, me es grato compartir con ustedes el paso a paso de un Caketopper o Topper para tortas, aprovechando que se acerca el cumpleaños número dos de una princesa de la casa, quiero obsequiarle este lindo topper para su torta.
Un Cake-topper, es un adorno para colocar en tortas, se les conoce desde hace mucho tiempo con el simple nombre de decoración de tortas, que para esta fecha han sido muy variados y personalizados para cada evento.
Learn to make a Cake-topper step by step. // Aprende hacer un Cake-topper paso a paso.🎂
Step by Step // Paso a paso:
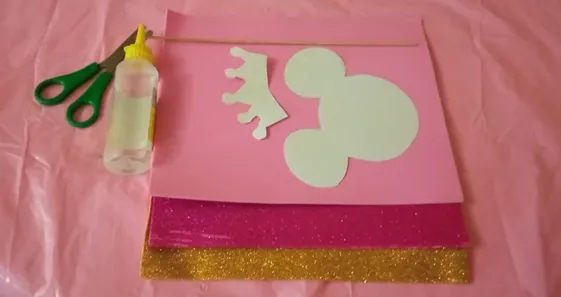
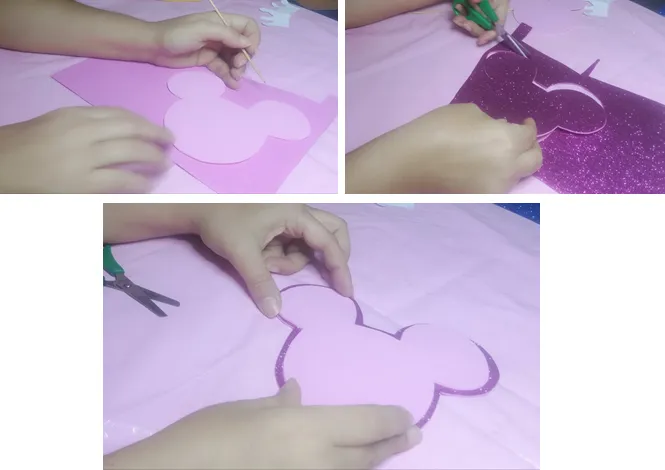
Step 1 // Paso 1
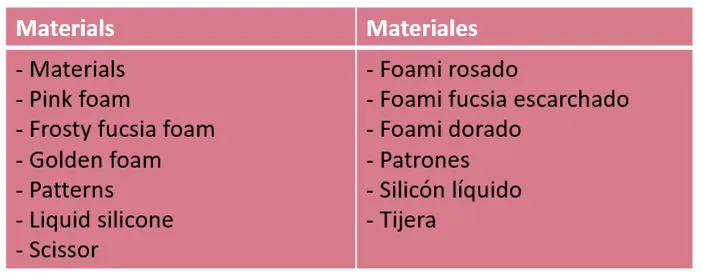
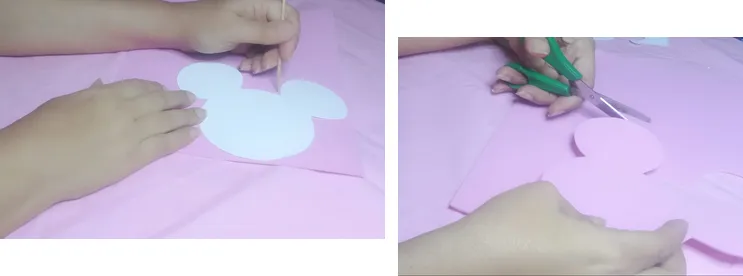
First, in the pink foami we mark the pattern of Minnie's face with the help of a tall toothpick and cut it very carefully, respecting the measurements.
Primero, en el foami rosa marcamos el patrón de la cara de Minnie con la ayuda de un palillo alto y lo cortamos con mucho cuidado, respetando las medidas.
Step 2 // Paso 2
Next, we place on the fuscia foami, the piece of Minnie that is already ready, which is not so close to the edges and with the help of the height toothpick we mark leaving a space of 1/2 cmt., And then we cut, starting of this when placing one piece on top of the other, the one below will be larger.
A continuación, colocamos sobre la foami fuscia, la pieza de Minnie que ya está lista, que no está tan cerca de los bordes y con ayuda del palillo de altura marcamos dejando un espacio de 1/2 cmt., luego cortamos, así al colocar una pieza encima de la otra, la de abajo será más grande.
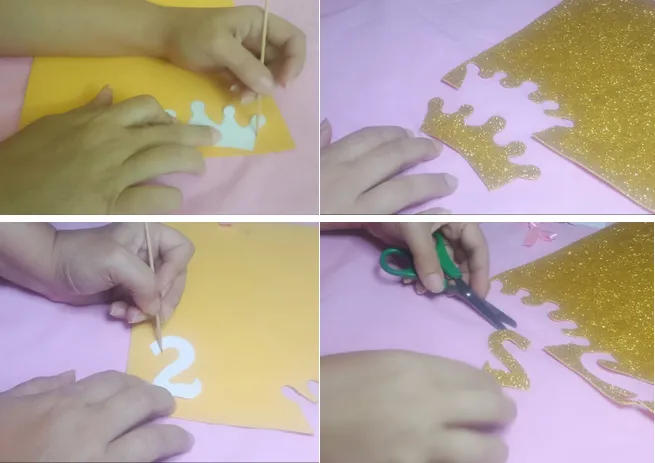
Step 3 // Paso 3
Now, we mark and cut the number 2 and the crown in the golden foami, always taking care of the measurements so that the pieces are perfect.
Ahora, marcamos y cortamos el número 2 y la corona en el foami dorado, siempre cuidando las medidas para que las piezas queden perfectas.
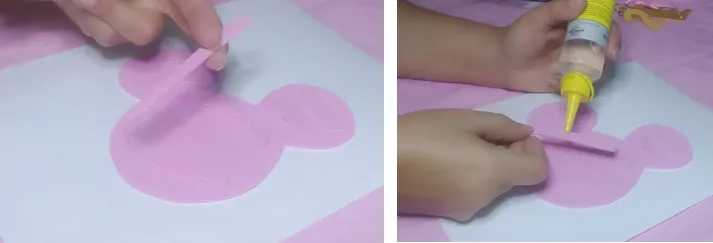
Paso 4
Here we must cut out some pieces of foam and glue them to the back of the pink piece, this is to give it height and separation between one piece and another.
Aquí debemos recortar unas piezas de foami y pegarlas en la parte trasera de la pieza rosada, esto es para darle altura y separación entre una pieza y otra.
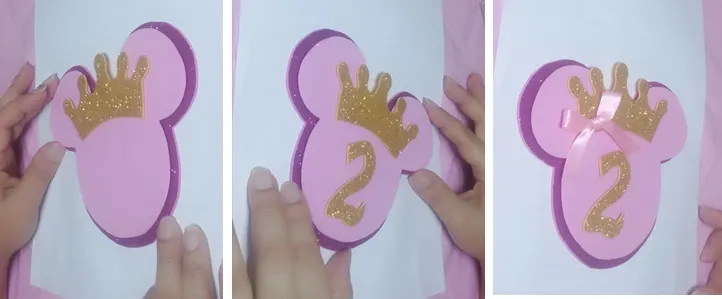
Paso 5
In this step, we place glue on the pieces that we glued in the first piece, we superimpose it on the second piece, taking care of the space around the edges.
En este paso, colocamos pega en los trozos que pegamos en la primera pieza la sobreponemos sobre la segunda pieza, cuidando el espacio de los bordes.

Paso 6
Then we have to place the crown and the number; And as a complement, put a ribbon bow.
Luego nos queda colocar la corona y el número; y de complemento le coloque un lazo de cinta.
I hope you liked it, it is the first Topper I made, I accept a suggestion, in order to improve.
Espero les haya gustado, es el primer Topper que hago, acepto una sugerencia, para poder mejorar.

Join the Hive Diy community and create quality content.