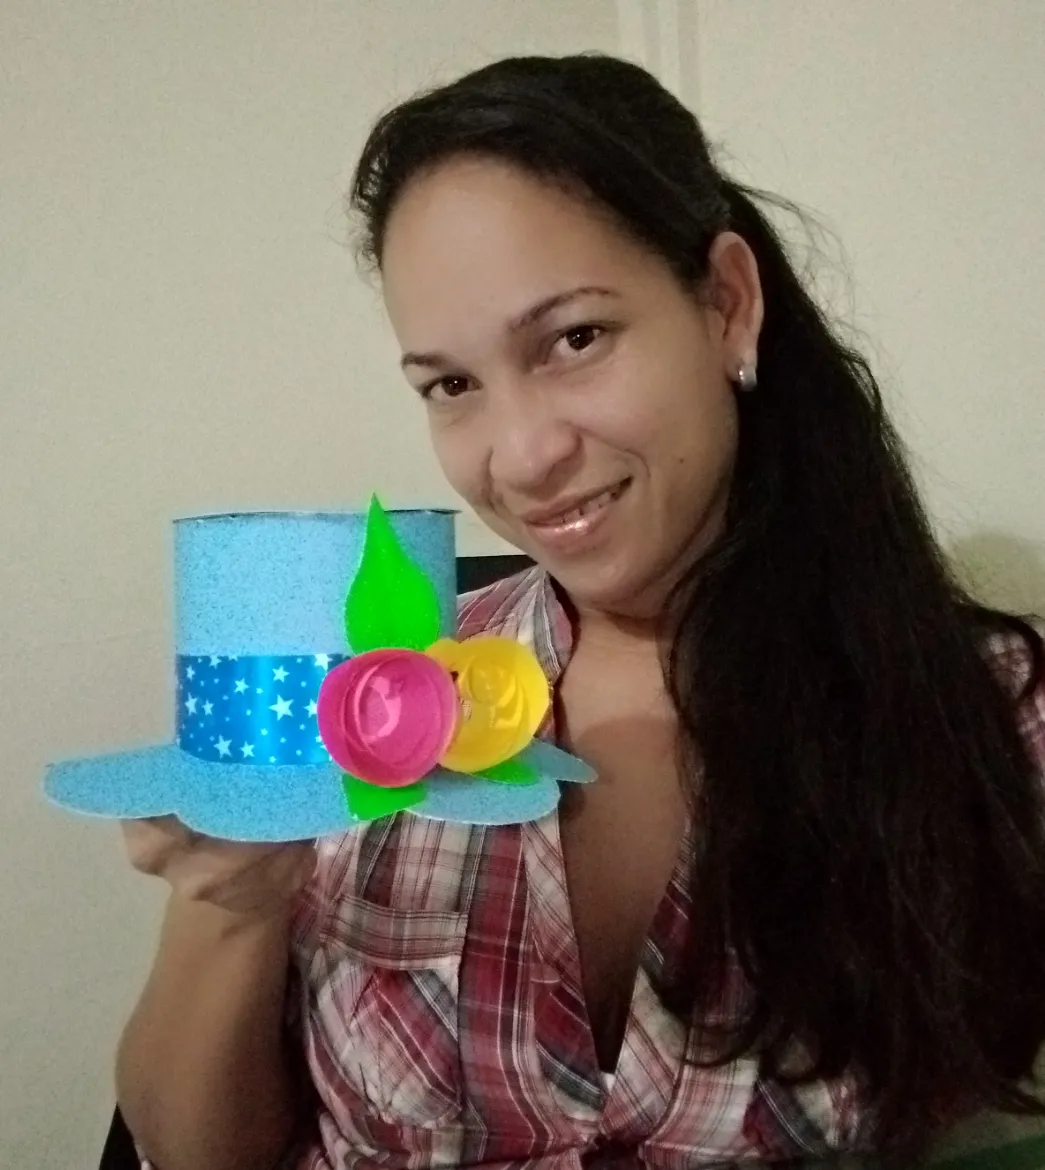
Greetings dear friends of hive, excellent day for everyone, today I want to share with you how to make a super easy hat with cardboard.
Saludos apreciados amigos de hive, excelente día para todos, hoy quiero compartirles como hacer un sombrero con cartulina súper fácil .
**Materials""
• Light blue card
• Decorative tape
• Glue
• Scissor
• Rule
• Sheets of paper, various colors
Materiales
• Cartulina celeste
• Cinta decorativa
• Pegamento
• Tijera
• Regla
• Hojas de papel, colores varios

Process
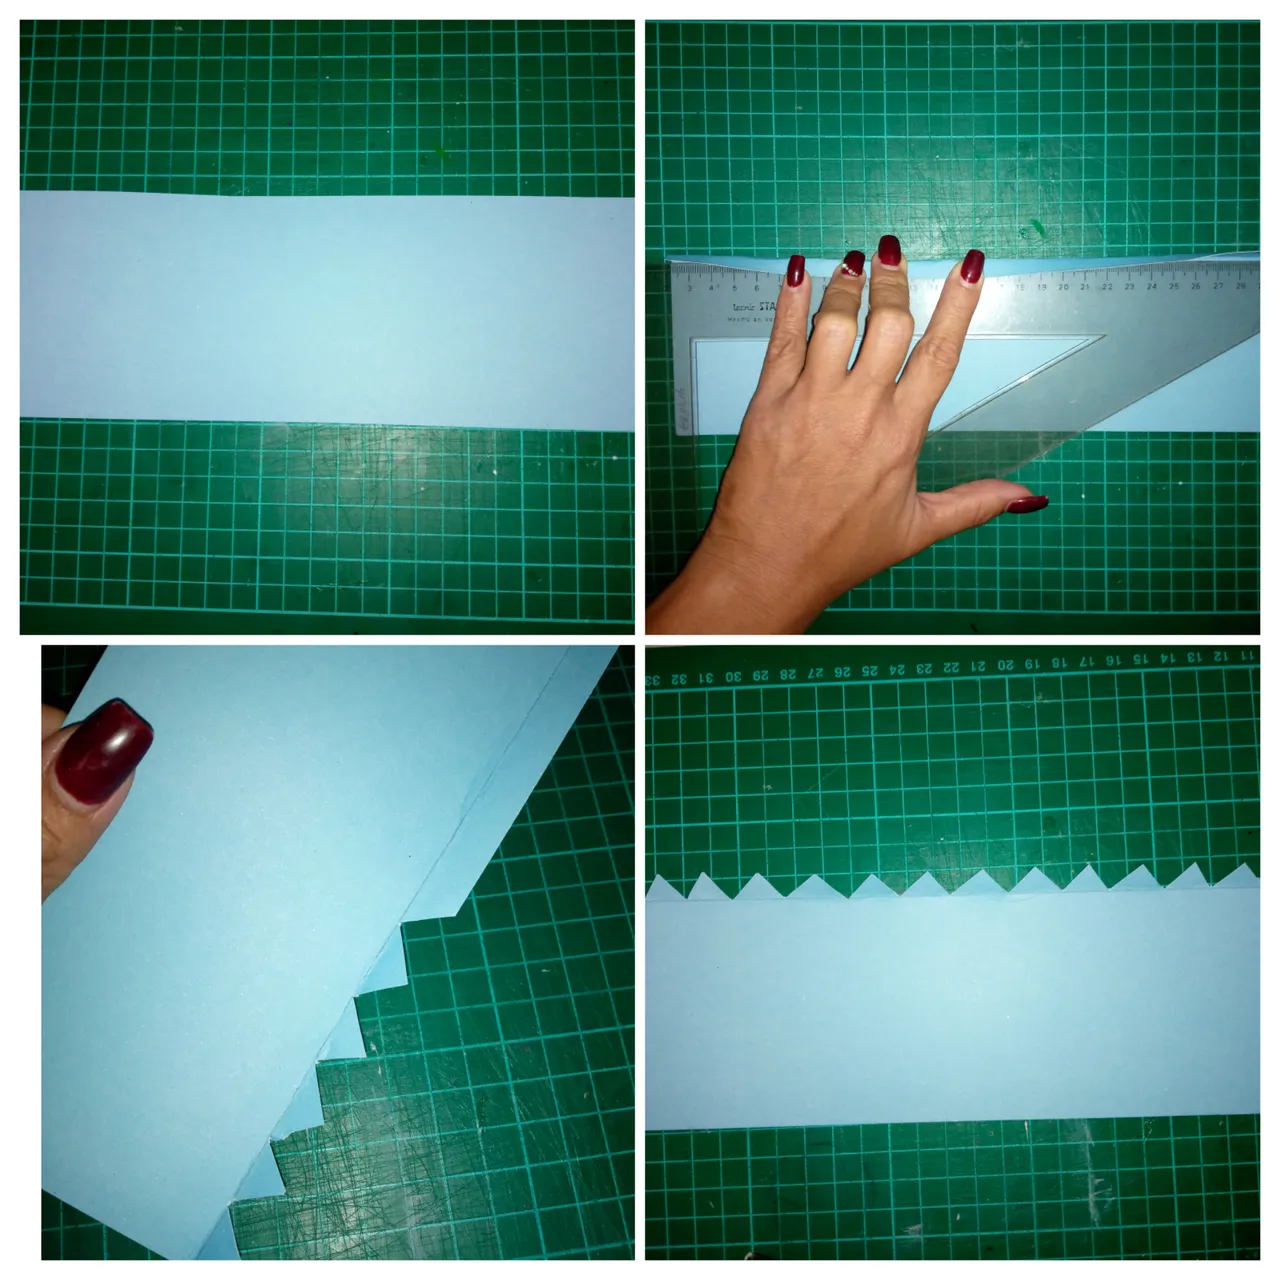
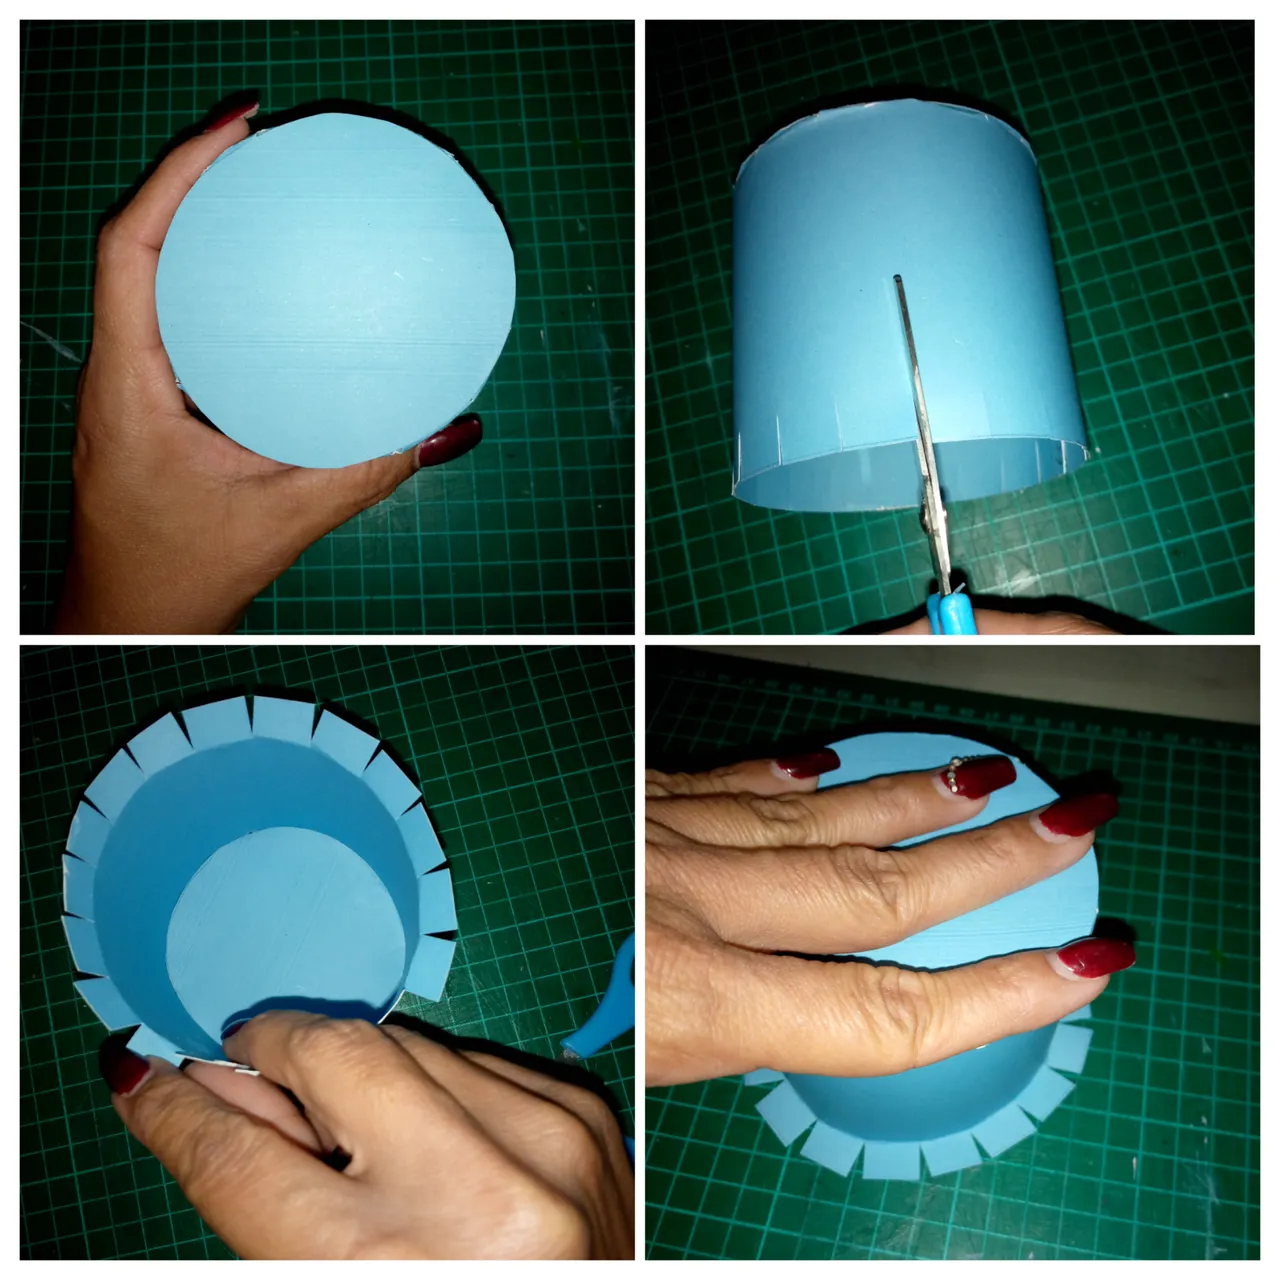
We cut a 9cmx28cm strip, mark 1 cm, fold and cut small triangles tabs.
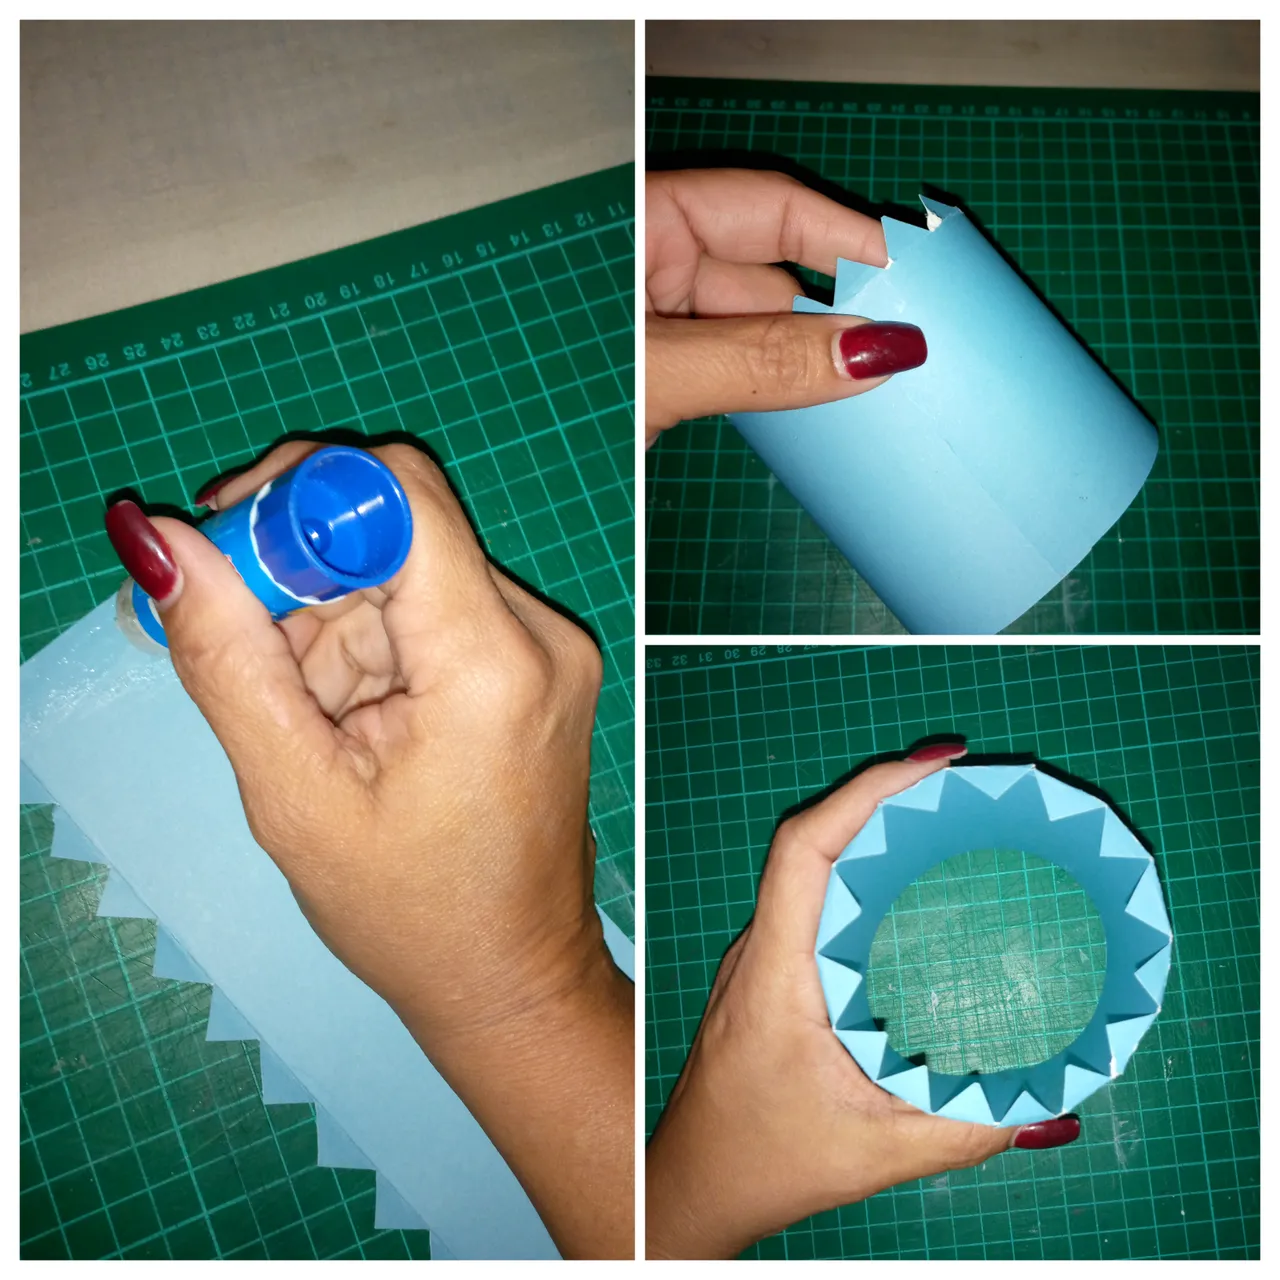
We put glue on one of the ends and glue towards the other, forming a small cylinder, we fold the tabs inwards.
Proceso
- Recortamos una tira de 9cmx28cm, marcamos 1 cm doblamos y cortamos pequeñas pestañas de triángulos.
- Colocamos pegamento en uno de los extremos y pegamos hacia el otro, formando 1 pequeño cilindro, doblamos las pestañas hacia dentro.
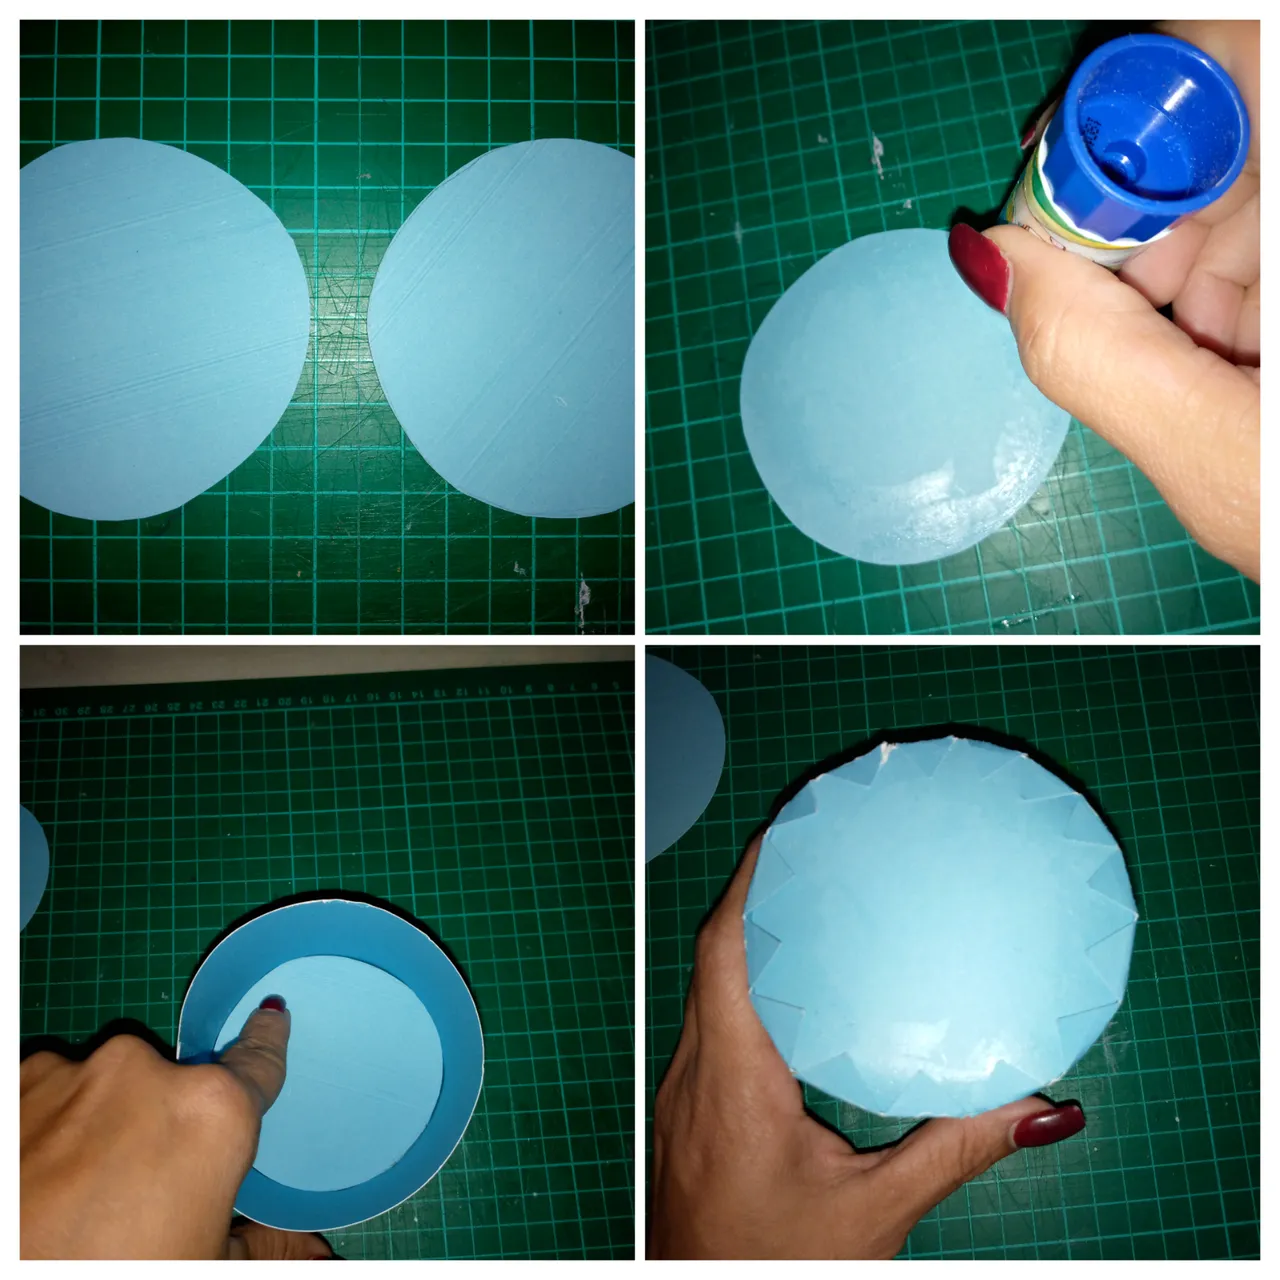
We cut out 2 circles and glue, one inside the cylinder and the other outside the upper part then we cut small square tabs and fold outwards.
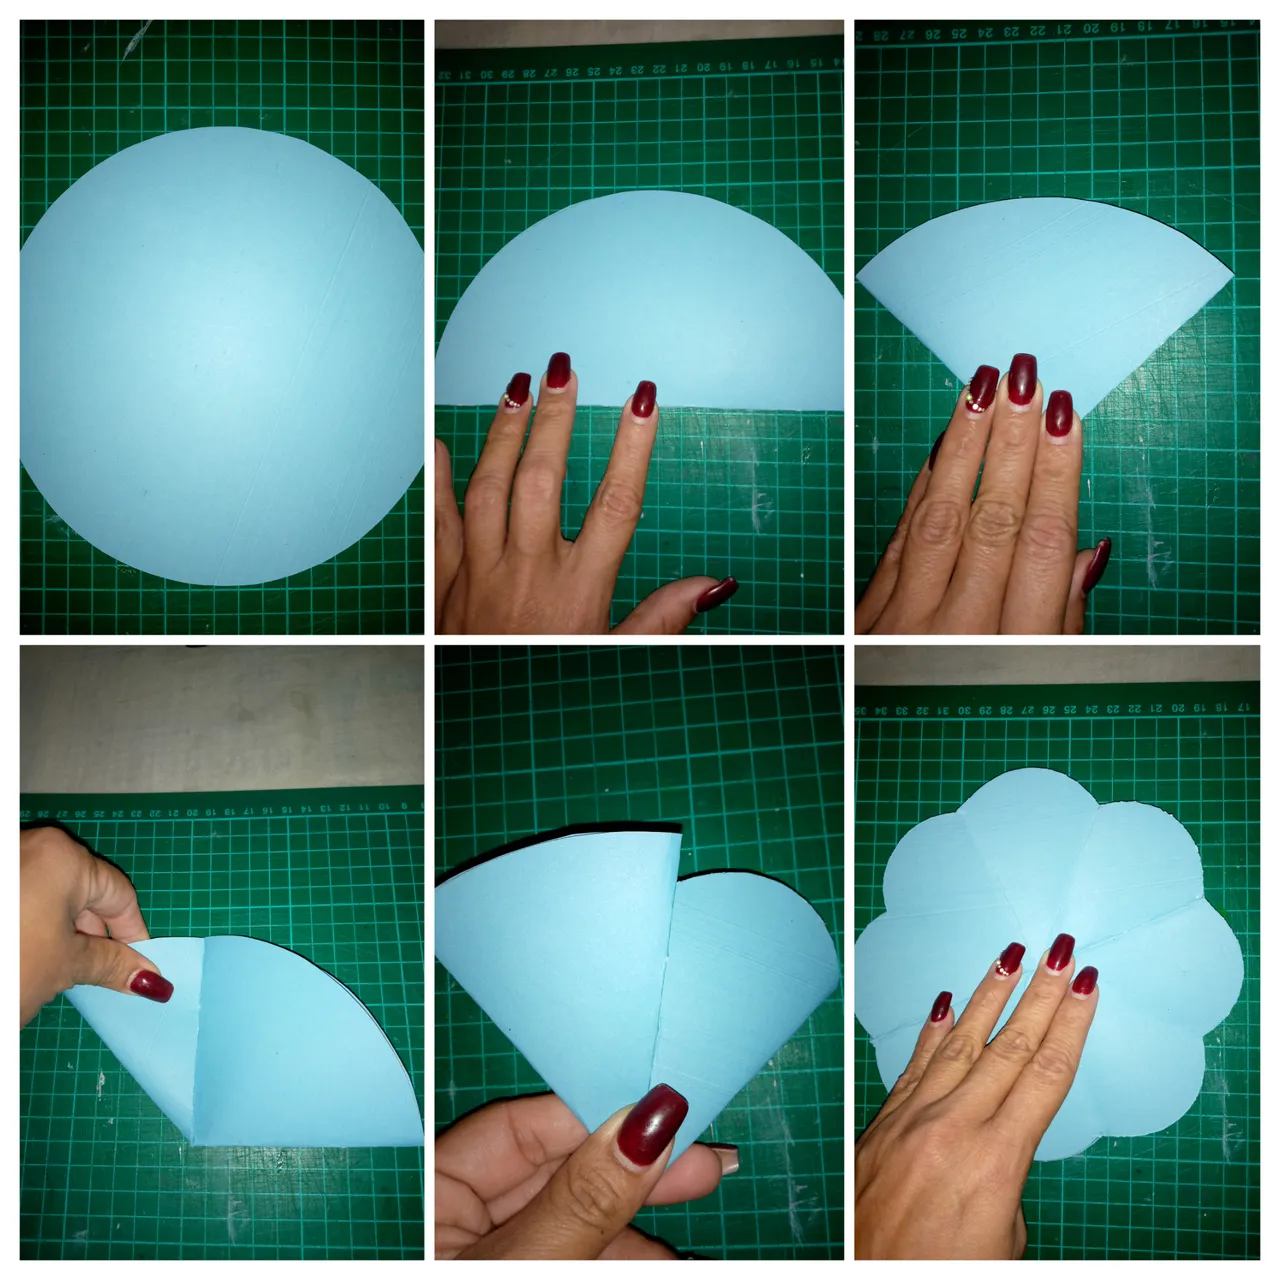
We make a large circle, fold twice, then unfold, fold again halfway, cut a semicircle at the top, do the same with the other side and open.
- Recortamos 2 círculos y pegamos, uno por dentro del cilindro y el otro por fuera de la parte superior luego cortamos pequeñas pestañas cuadradas y doblamos hacia afuera.
- Hacemos un círculo grande, doblamos dos veces, luego desdoblamos, volvemos a doblar hasta la mitad, recortamos un semicírculo en la parte superior, hacemos lo mismo con el otro lado y abrimos.
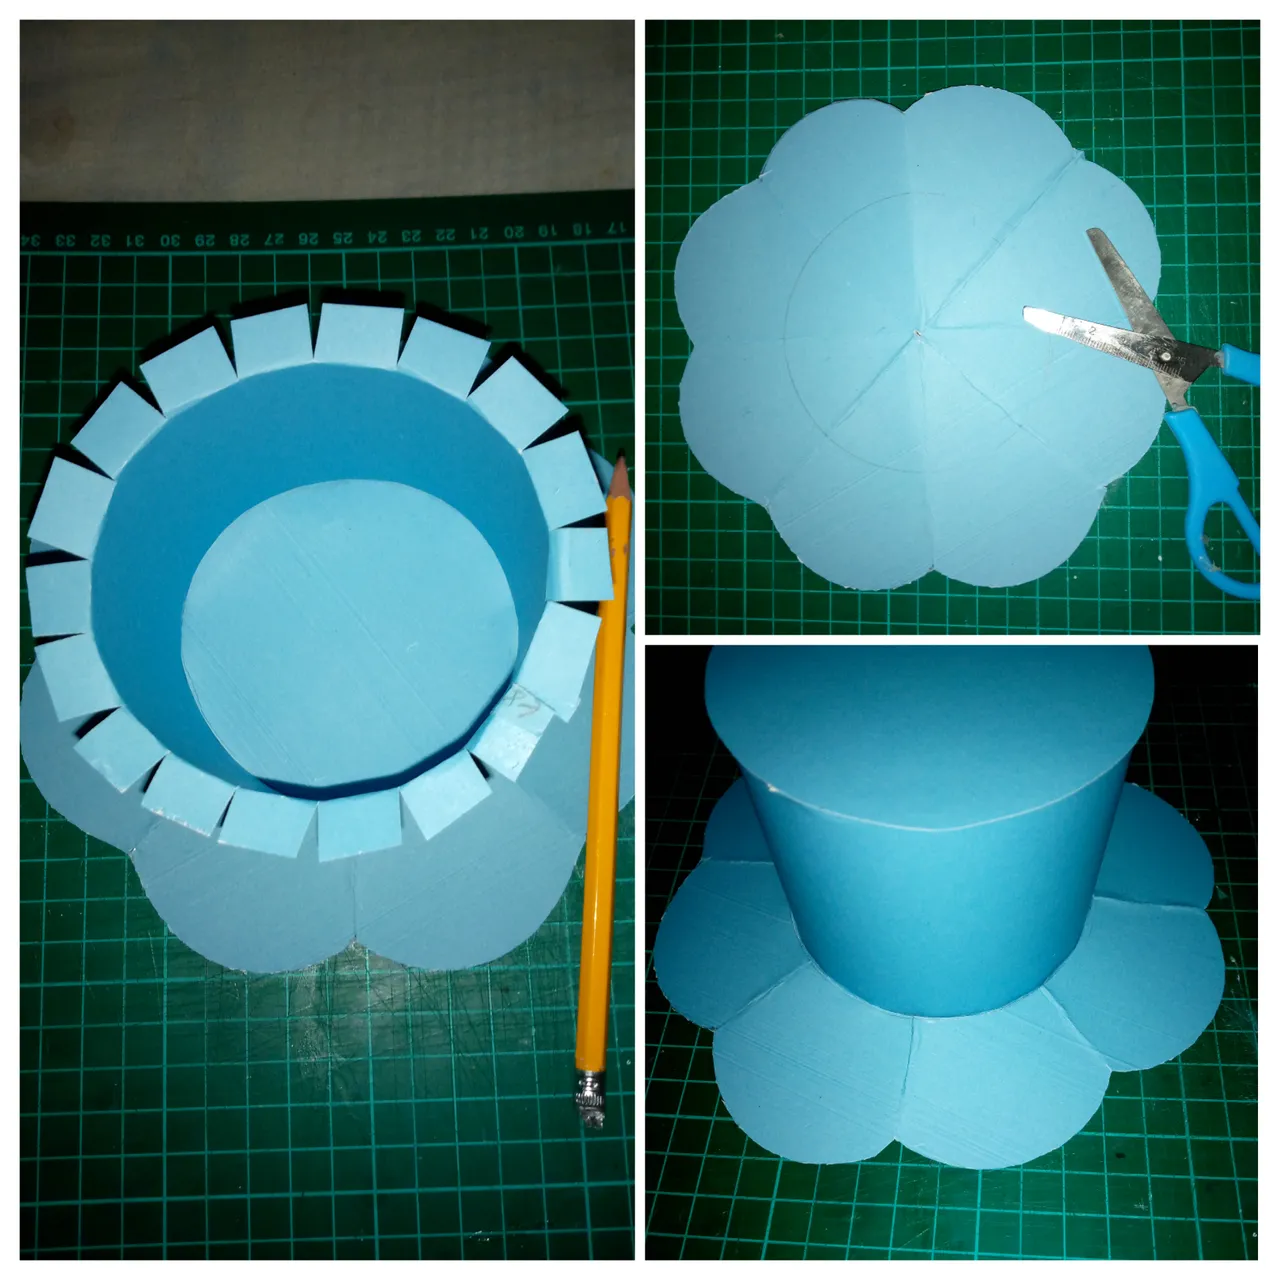
Then we place the cylinder in the center of the piece before made, we mark, cut and introduce it on it, gluing it with the square tabs.
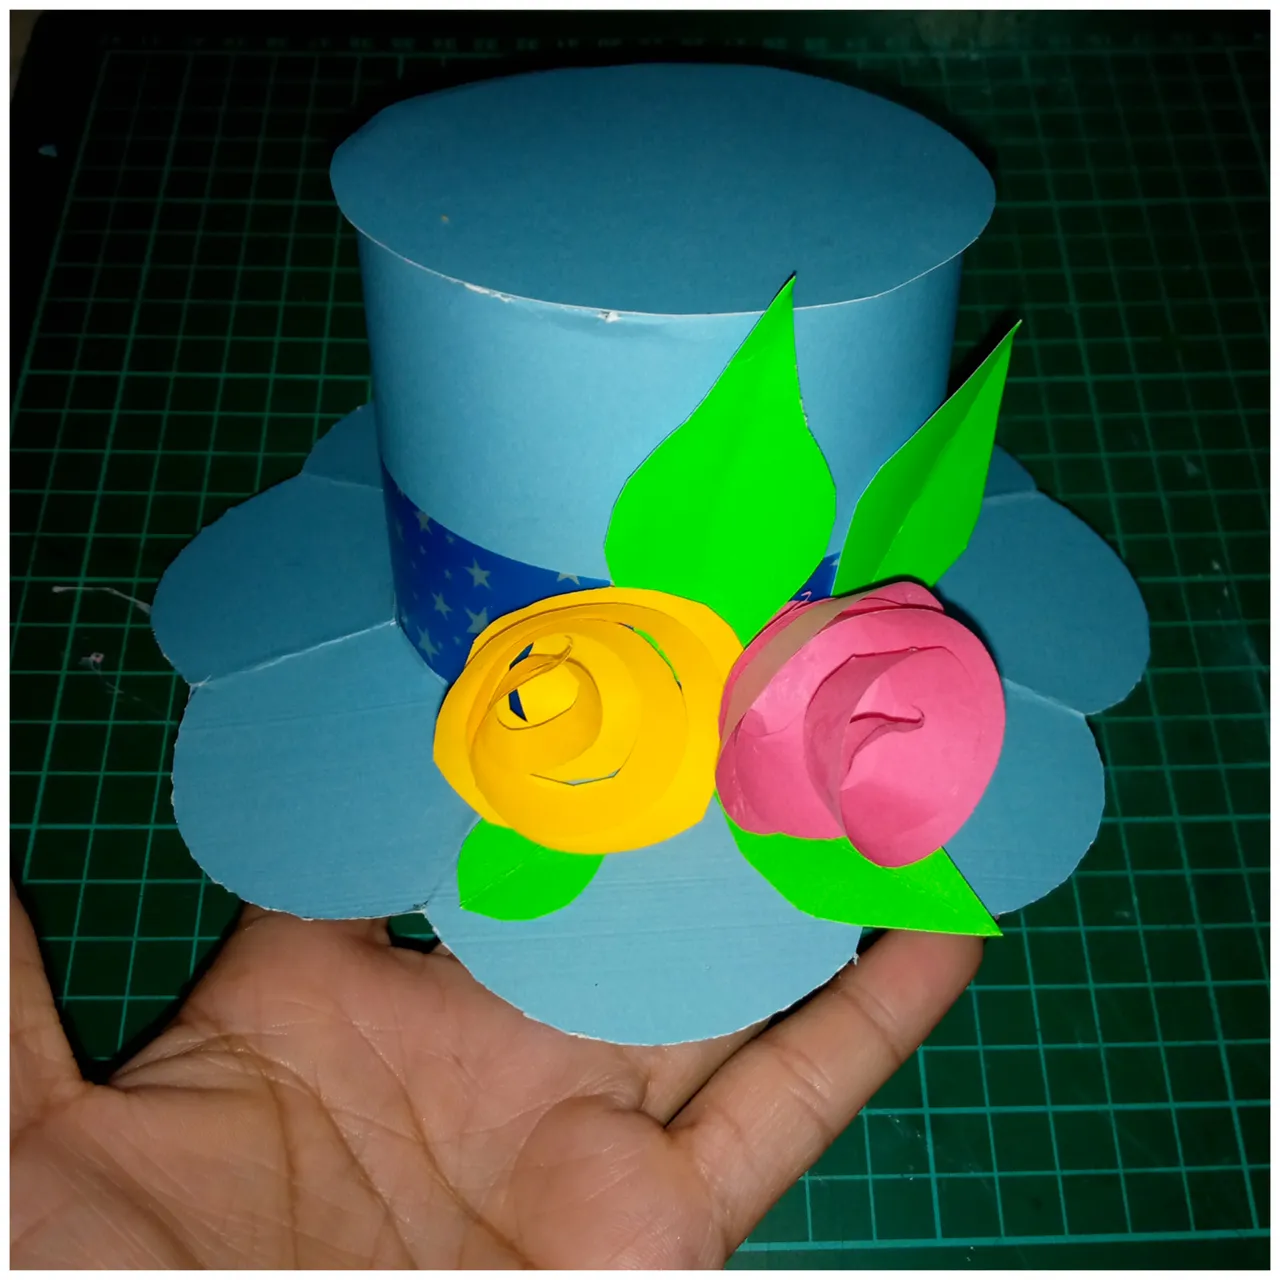
- Finally we decorate with the decorative ribbon and some flowers.
- Luego colocamos el cilindro en el centro de la pieza antes hecha, marcamos, recortamos y la introducimos sobre él pegandola con las pestañas cuadradas.
- Finalmente adornamos con la cinta decorativa y unas flores.
I hope you liked it, see you another time!
@dayanaromer
Espero les haya gustado, nos vemos en otra oportunidad!
@dayanaromer