Hello everyone... 🐔
Hello to my dear Hivers and the dear community of artists #HiveDIY, as always very pleased and excited to be here again, showing you my work made with love and especially for you.
Greetings to the Splinterland community, and everyone who lives there, I am pleased to be here to participate in the Splinterlands Art Contest Week 275.
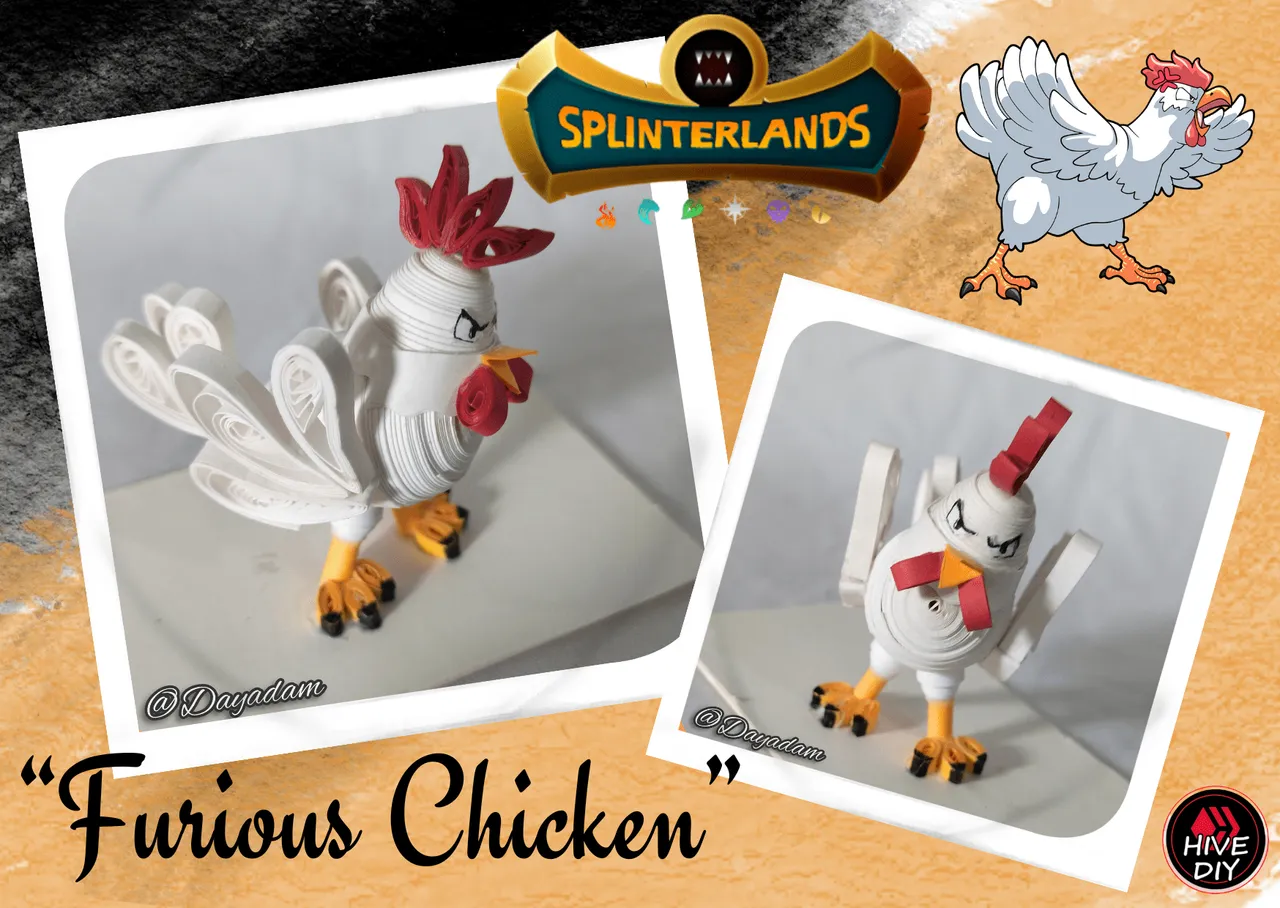
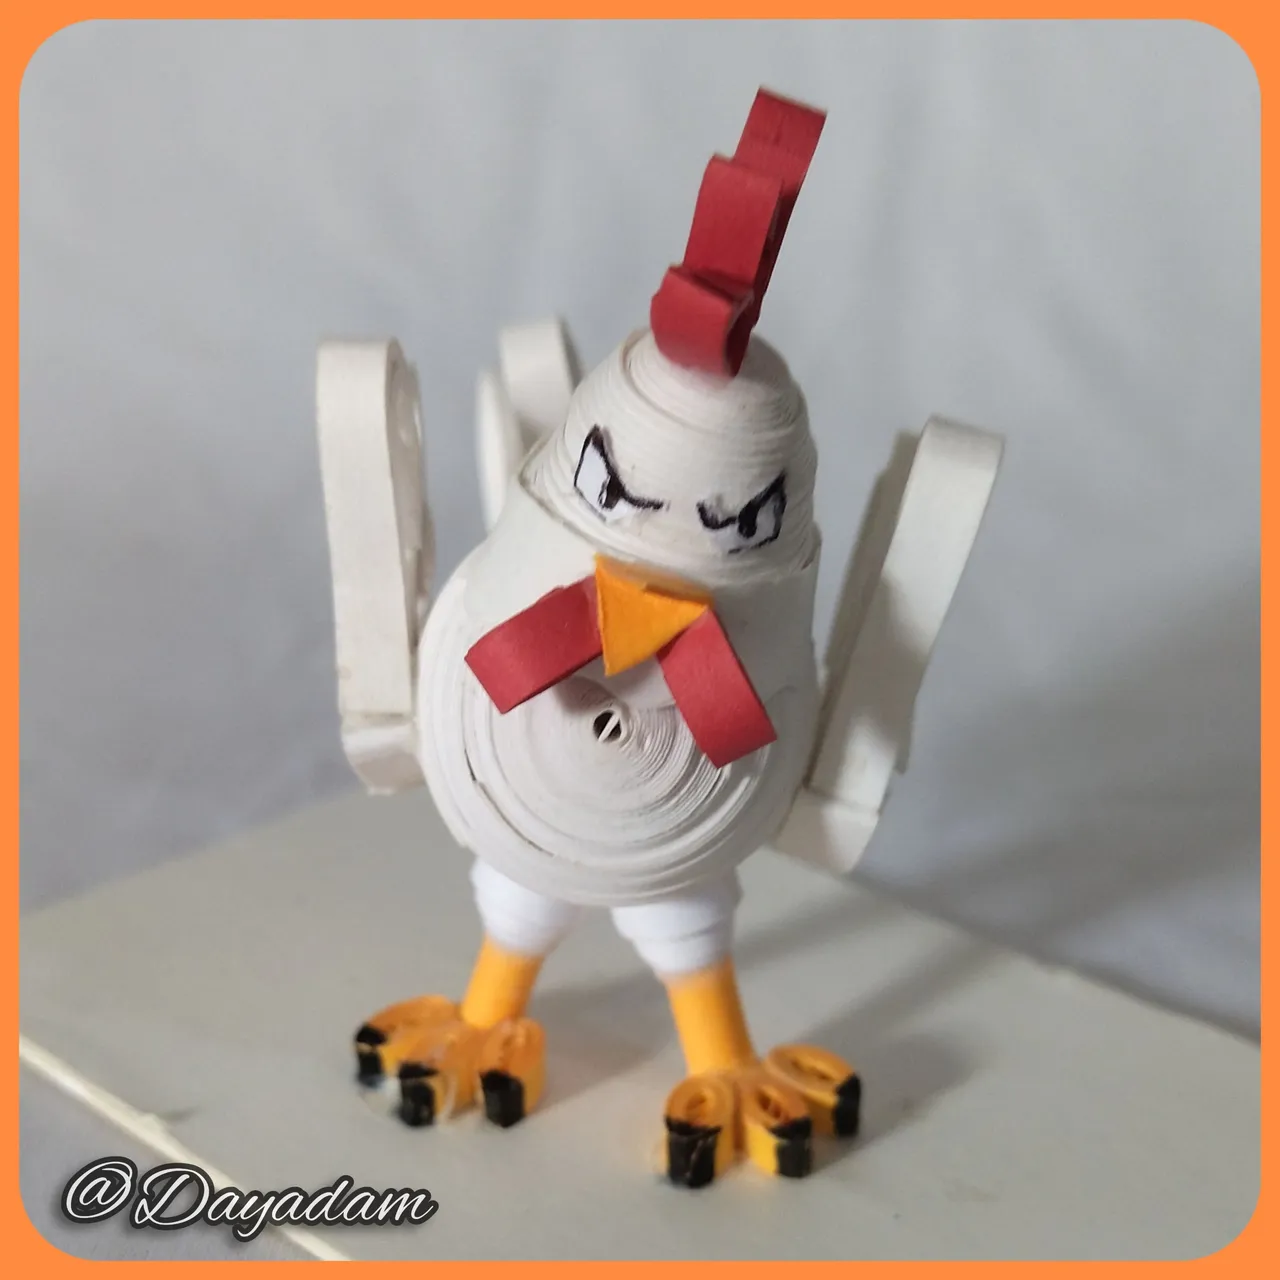
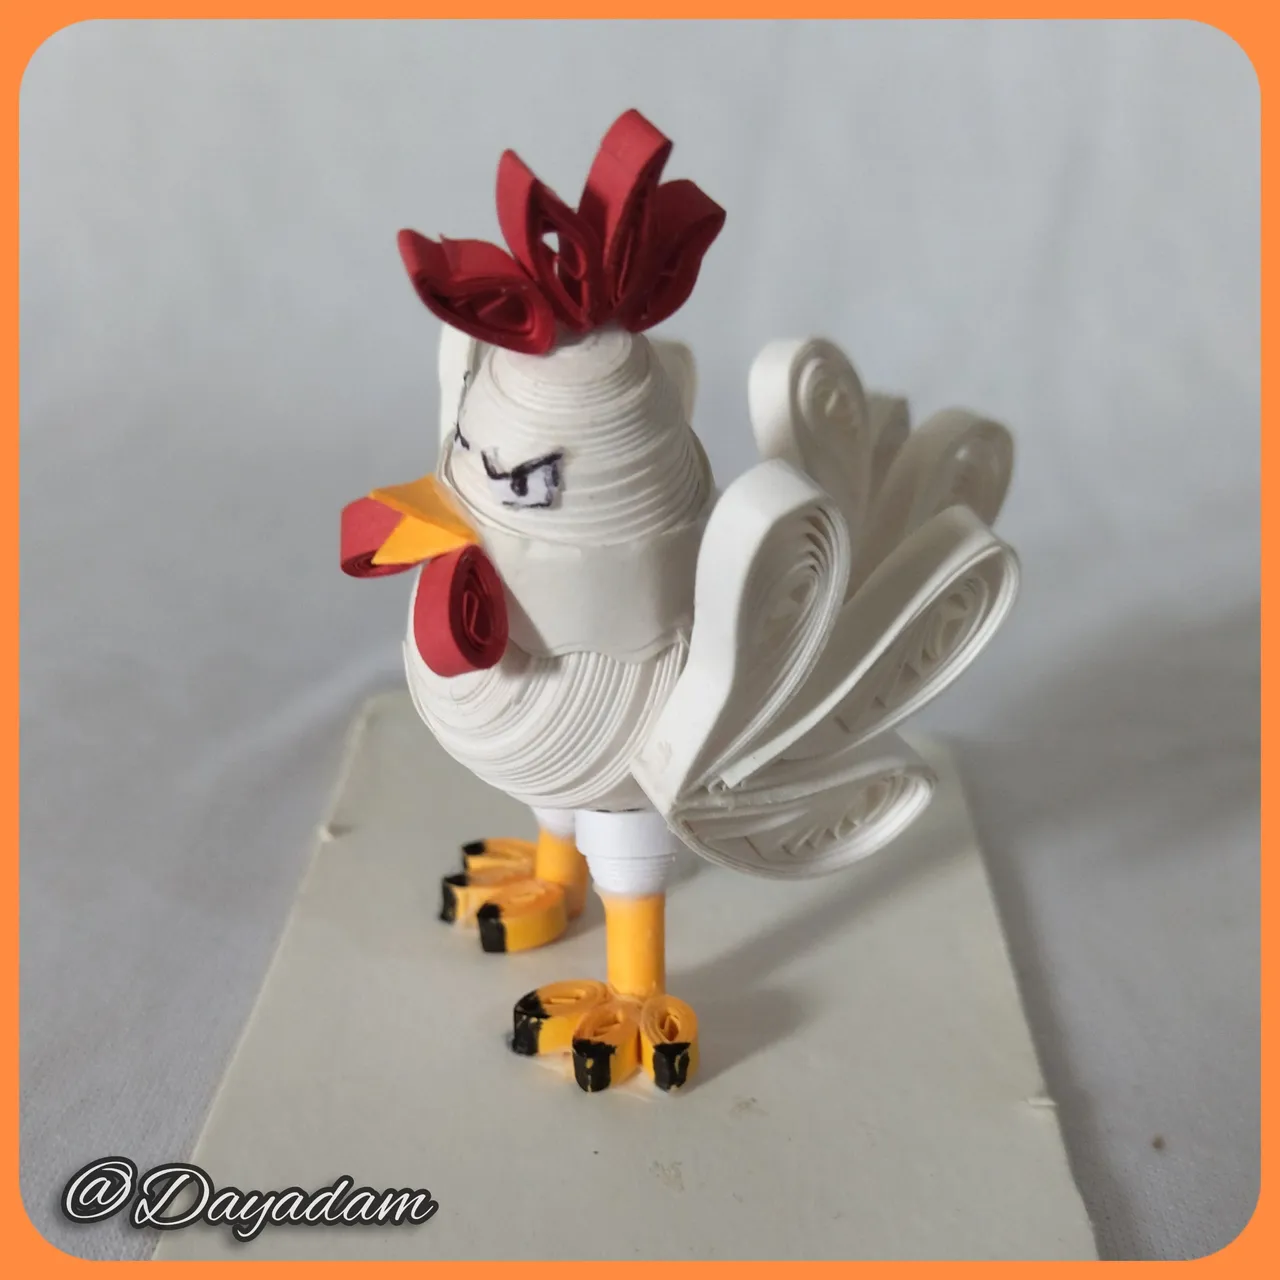
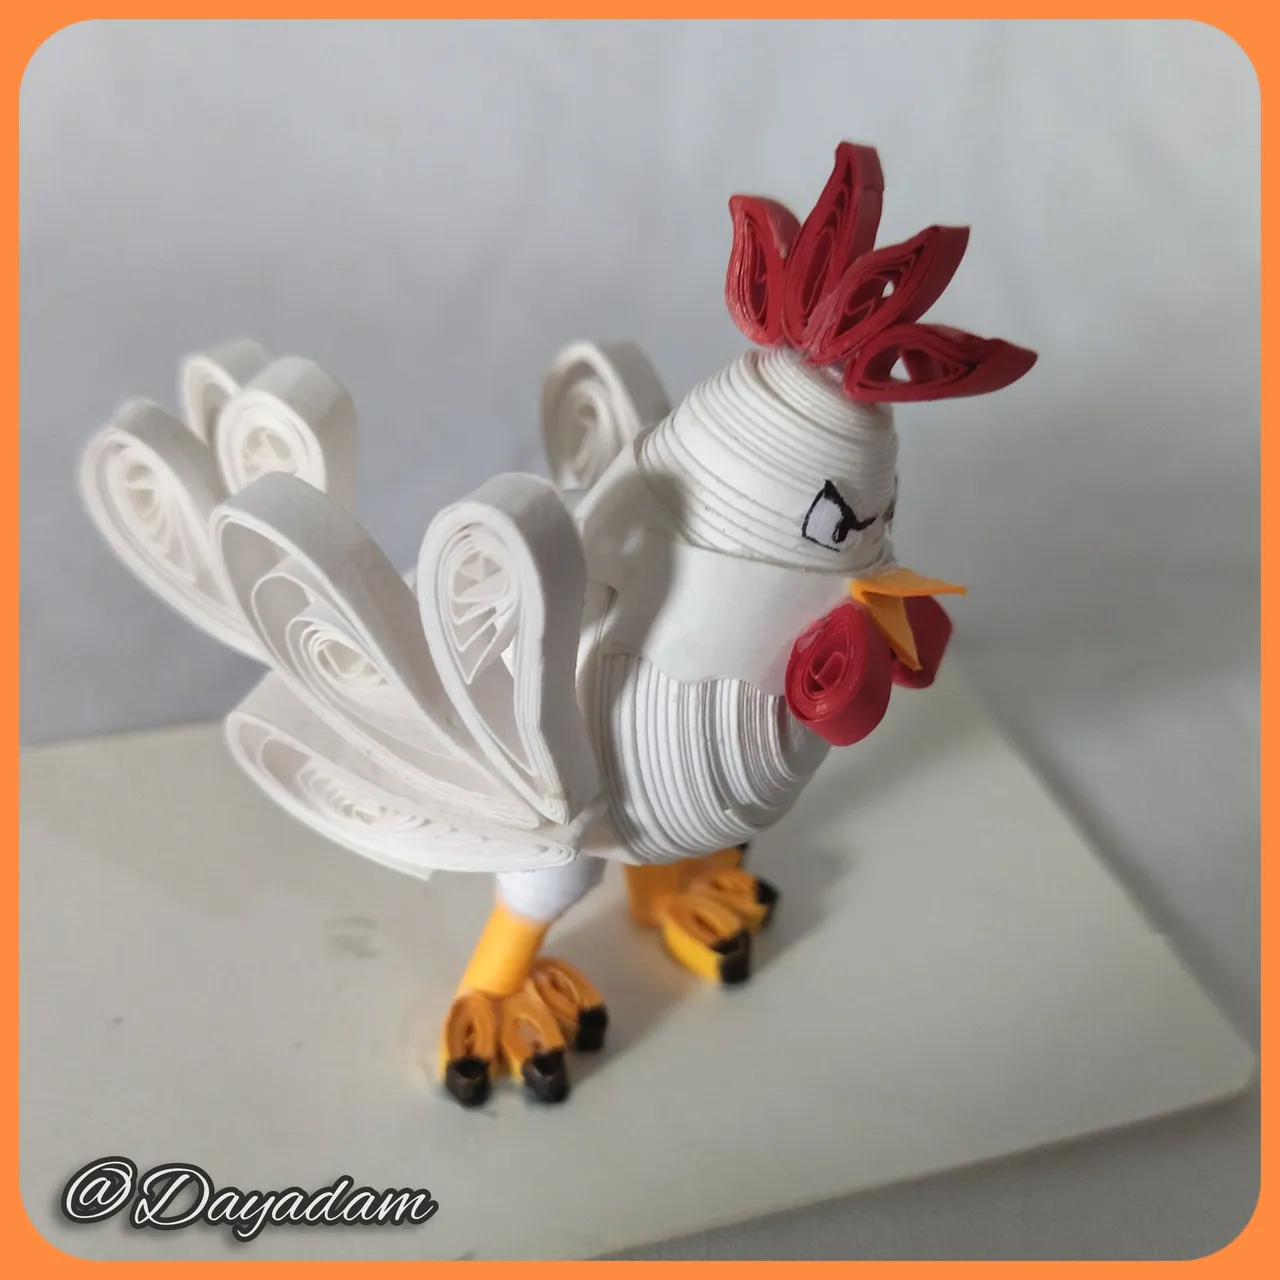
Today I bring you a fan-art of a card called Furious Chicken I found it very interesting for its imposing appearance, so I wanted to materialize it in 3D in the quilling technique for all of you.
If you want to know more about the game, I leave you my reference link to enter it and navigate through this wonderful world: https://splinterlands.com?ref=dayadam
Hoping you like my work, without further ado, I leave you with my creative process.
Let's start:😃

Hola a Todos...🐔
Hola a mis queridos Hivers y a la querida comunidad de artistas #HiveDIY, como siempre muy complacida y emocionada de encontrarme por acá nuevamente, mostrándole mi trabajo hecho con mucho amor y especialmente para ustedes.
Un saludo para la comunidad de Splinterland, y todos los que hacen vida por allí, me gratifica estar por acá para participar en el Splinterlands Art Contest Week 275.
Hoy les traigo un fan-art, de una carta llamada Furious Chicken me pareció muy interesante por su apariencia imponente, por ello quise materializarla en 3D en la técnica de quilling para todos ustedes.
Si quieren saber más con respecto al juego les dejo mi enlace de referencia para que ingresen en él, y naveguen por este maravilloso mundo: https://splinterlands.com?ref=dayadam
Esperando les guste mi trabajo, sin más preámbulos, les dejo mi proceso creativo.
Comencemos:😃

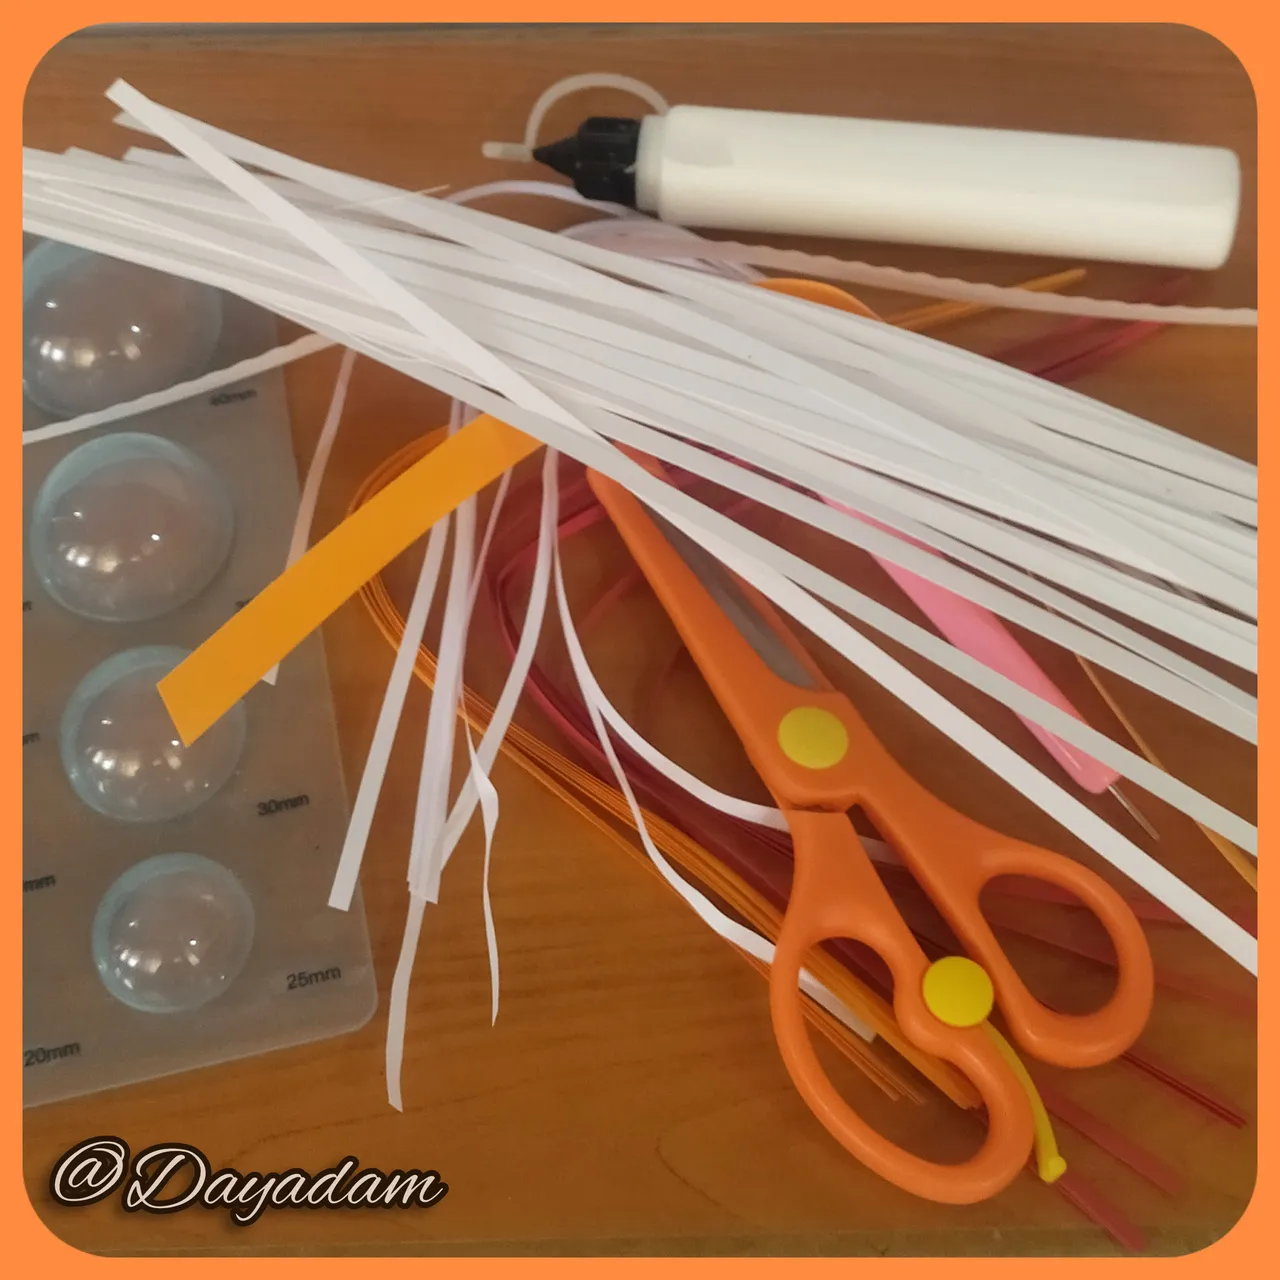
• Cintas de quilling de variados colores.
• Aguja para quilling.
• Molde para círculos.
• Marcador negro.
• Pega blanca extra fuerte (de carpintería).
• Tijera.
• Pincel.
- Quilling ribbons of various colors.
- Quilling needle.
- Mold for circles.
- Black marker
- Extra strong white glue (carpentry glue).
- Scissors.
- Brush.

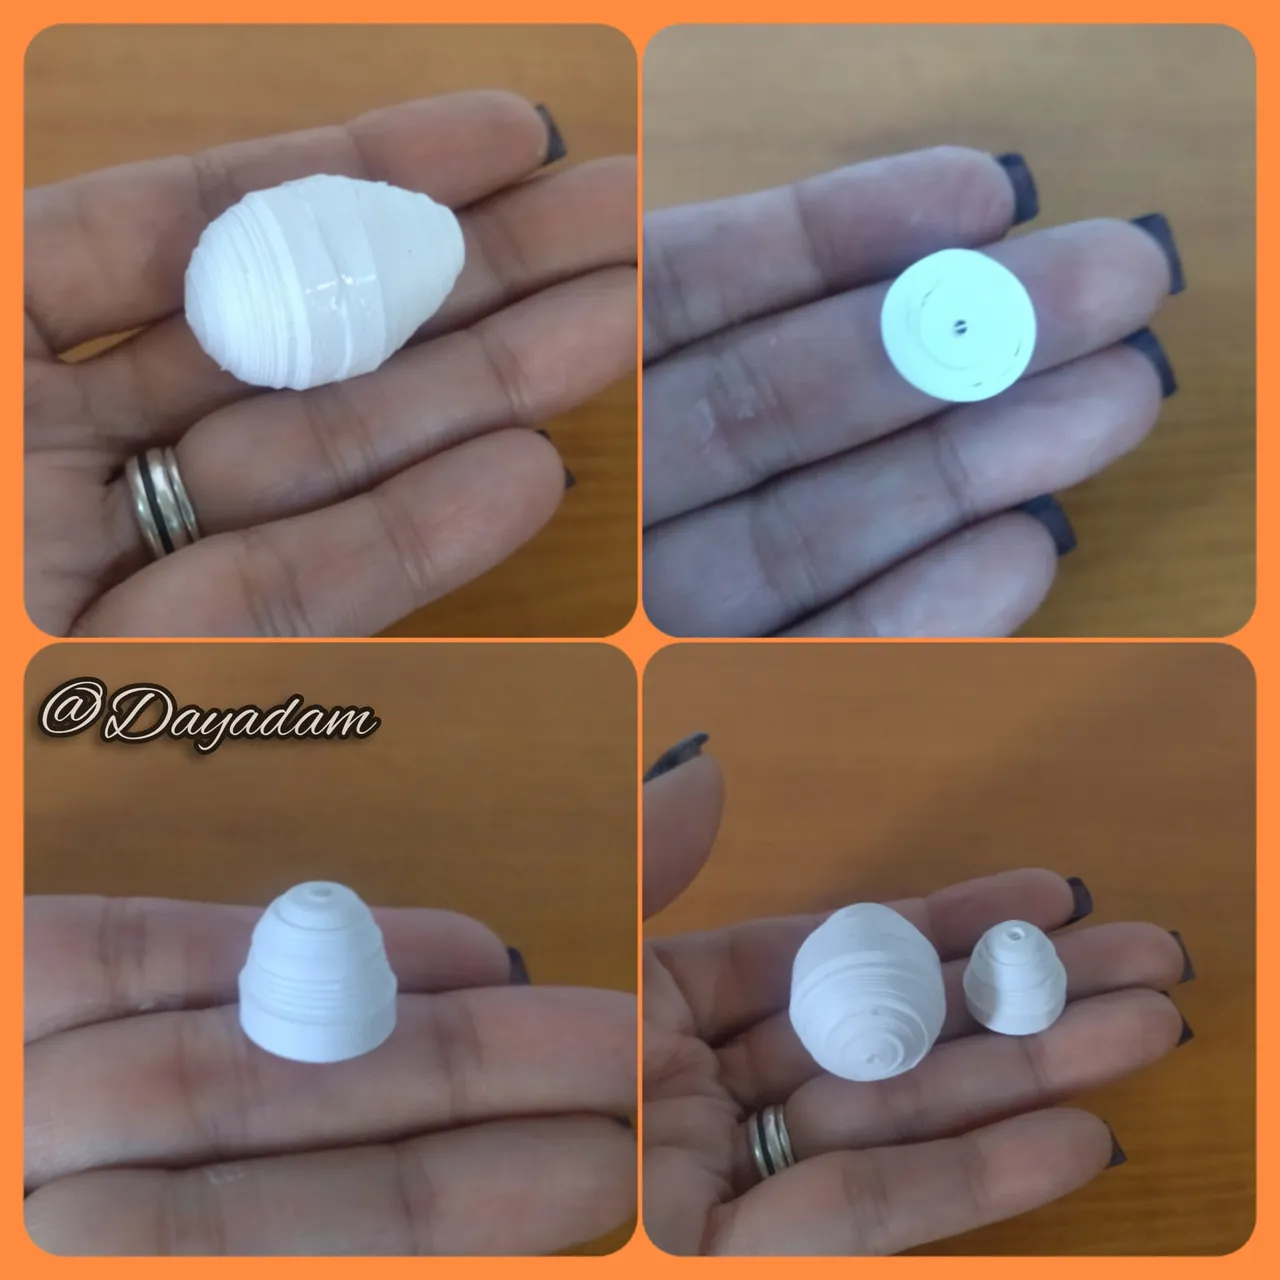
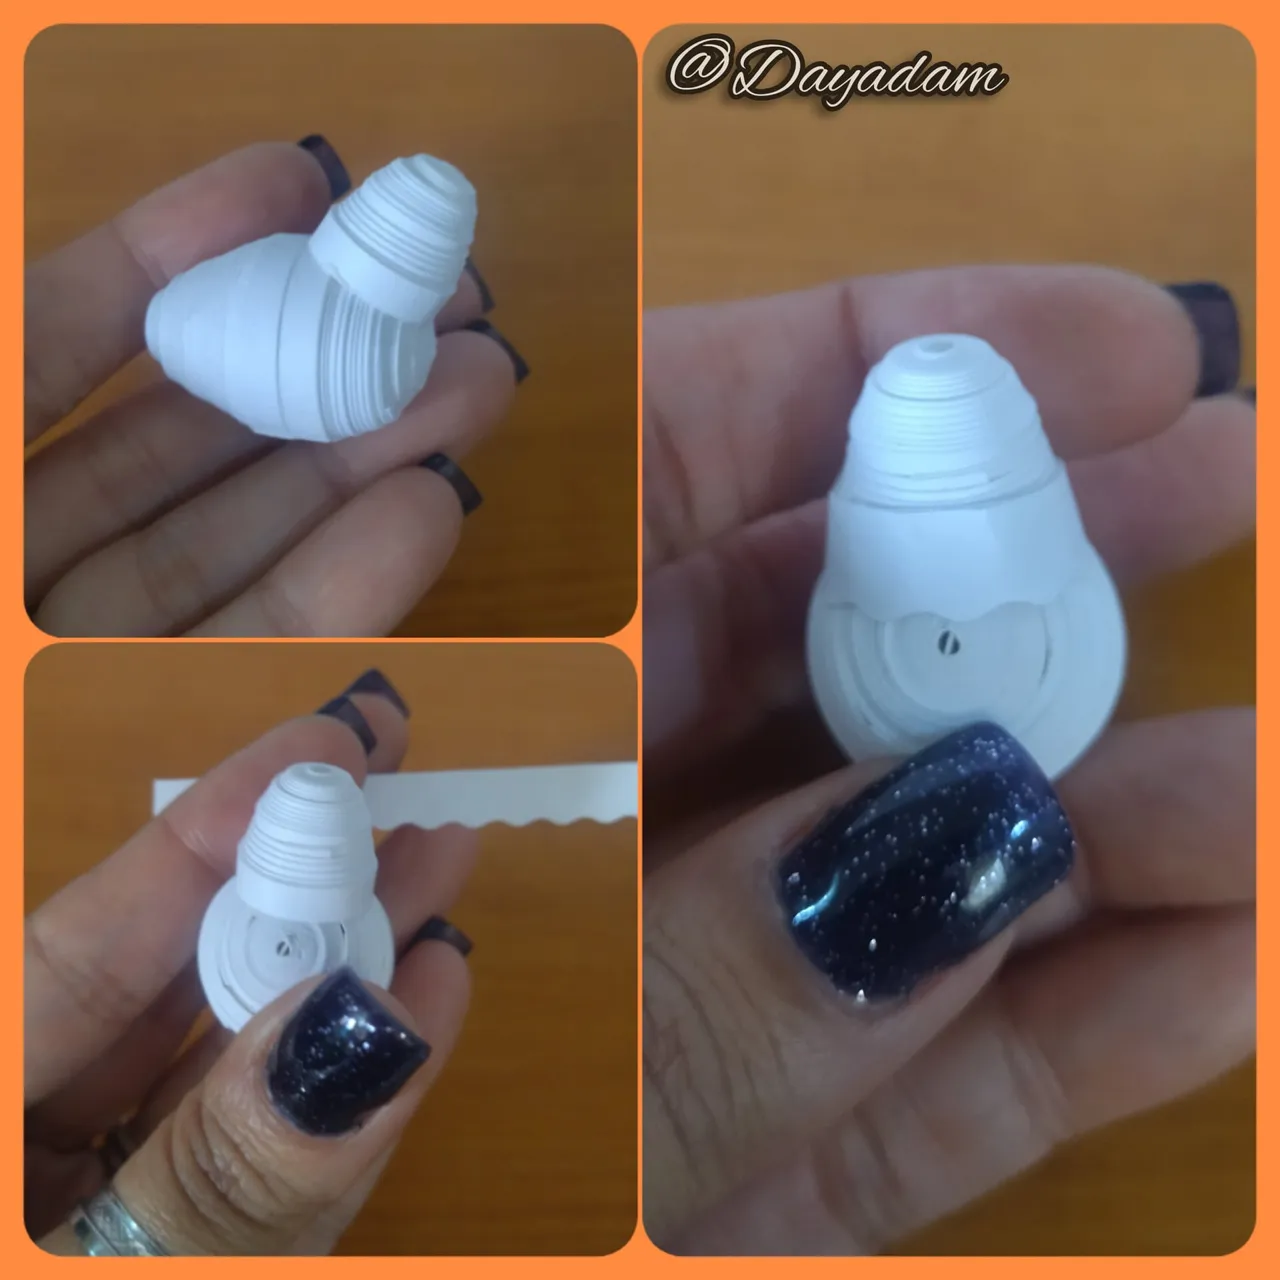
Body:
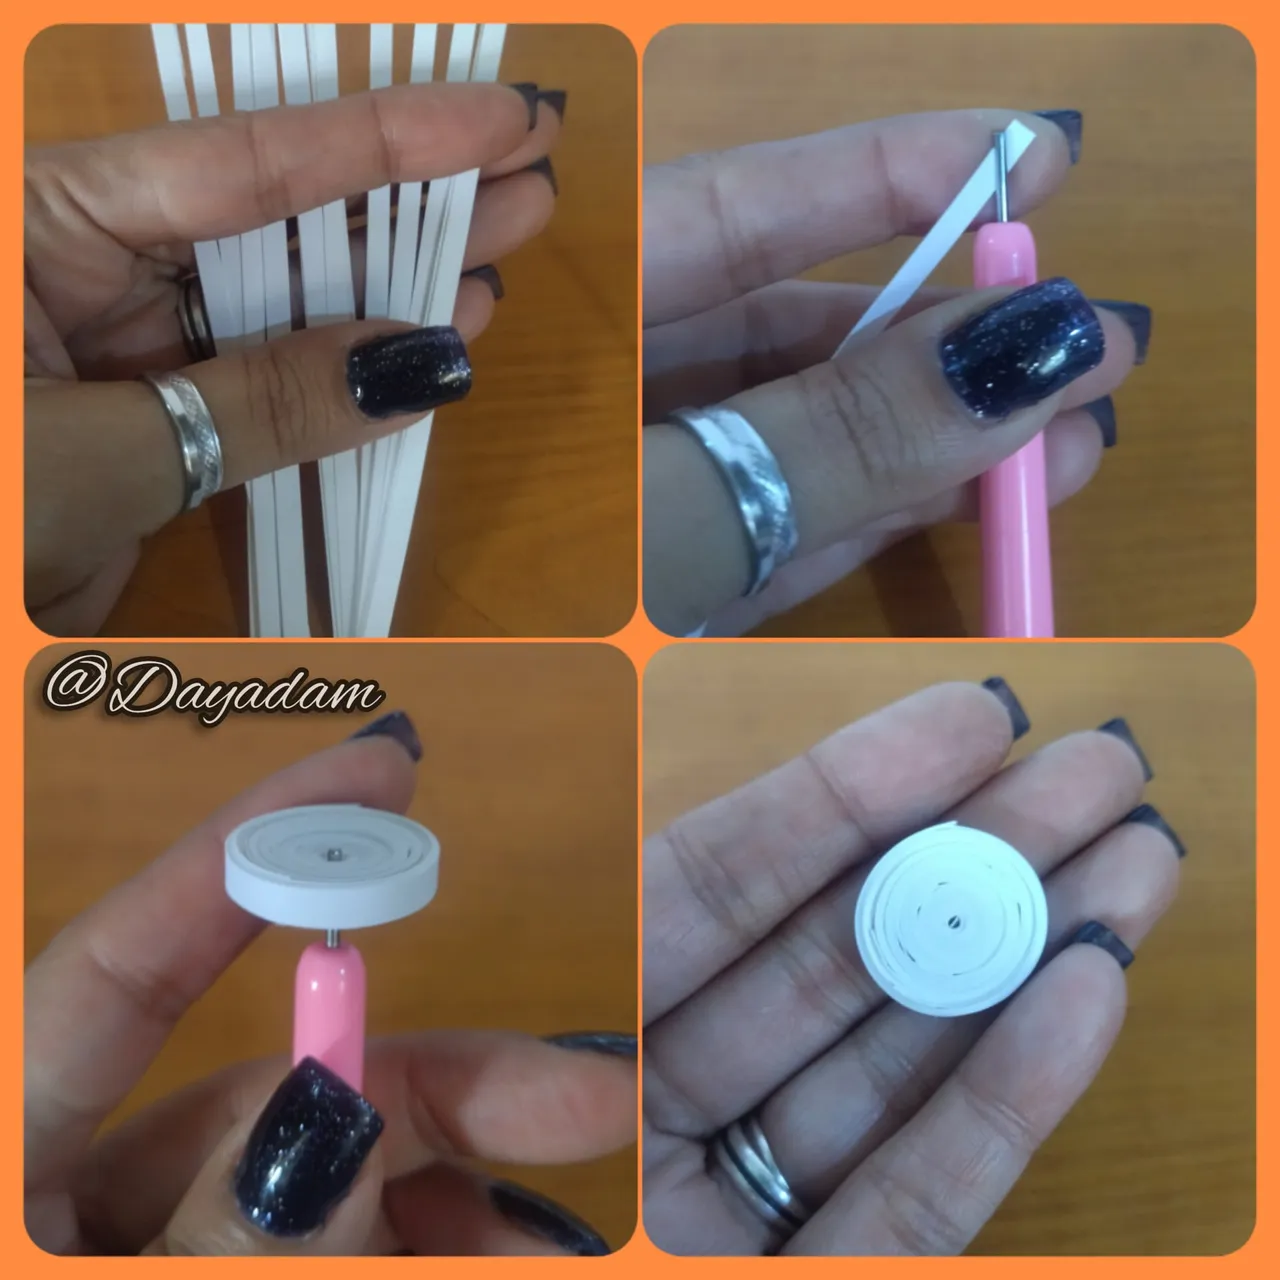
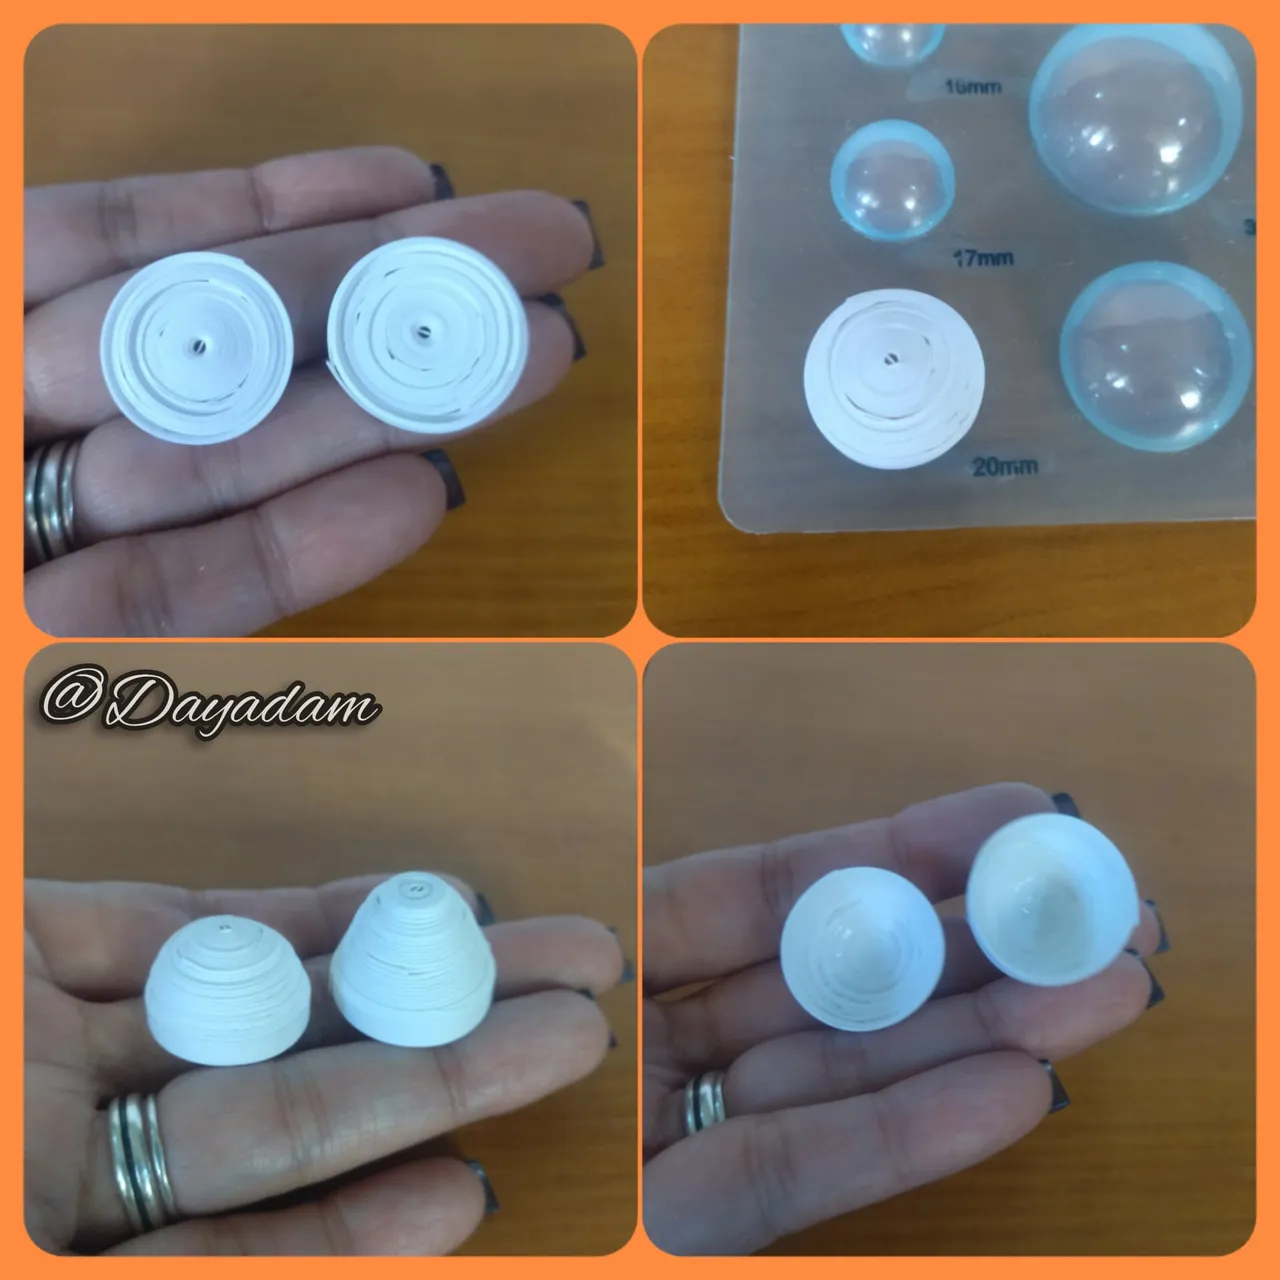
- We are going to take 1 4mm wide white ribbon 180cms long, with the quilling needle we are going to make 2 closed circle, then we will mold both circles according to how we want the body of the chicken to look like, help me shape it with a mold for circles, once ready we apply white glue on the inside of each piece, so that the pieces are not deformed and we will join both with extra strong glue.
Head:
- We will take 1 4mm wide white ribbon 90cms long, with the quilling needle we will make 1 closed circle, then we will mold it in the shape of a kind of cone, apply white glue on the inside and let it dry.
- Ready both pieces, we will glue the head of the body, in the head place a piece of ribbon that we previously cut in the form of waves.

Cuerpo:
• Vamos a tomar 1 cinta de 4mm de ancho blanca de 180cms de largo, con la aguja para quilling vamos a realizar 2 círculo cerrados, luego moldearemos ambos círculos según como queramos que quede el cuerpo del pollo, me ayude a darle forma con un molde para círculos, una vez listos aplicamos pega blanca en la parte interna de cada pieza, para que no se deformen las piezas y uniremos ambas con pega extra fuerte.
Cabeza:
• Tomaremos 1 cinta de 4mm de ancho blanca de 90cms de largo, con la aguja para quilling vamos a realizar 1 círculo cerrado, luego moldearemos en forma de una especie de cono, aplicamos pega blanca en la parte interna dejamos secar.
• Listas ambas piezas, pegaremos la cabeza del cuerpo, en la cabeza coloque un trozo de cinta que pique previamente en forma de ondas.
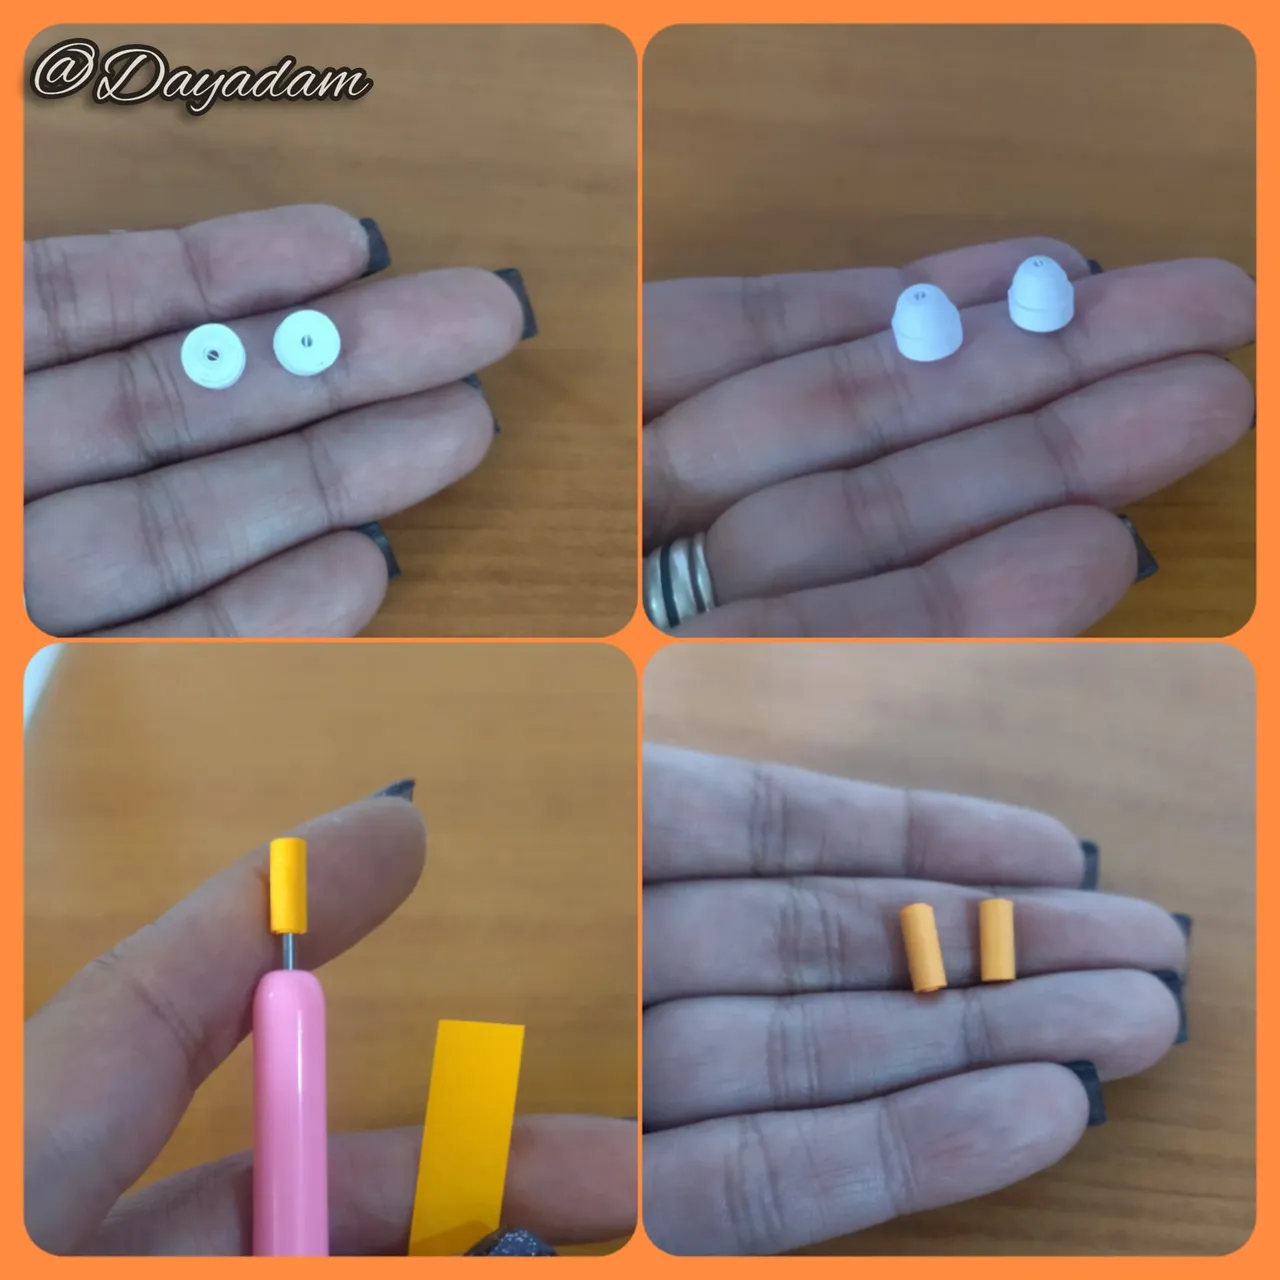
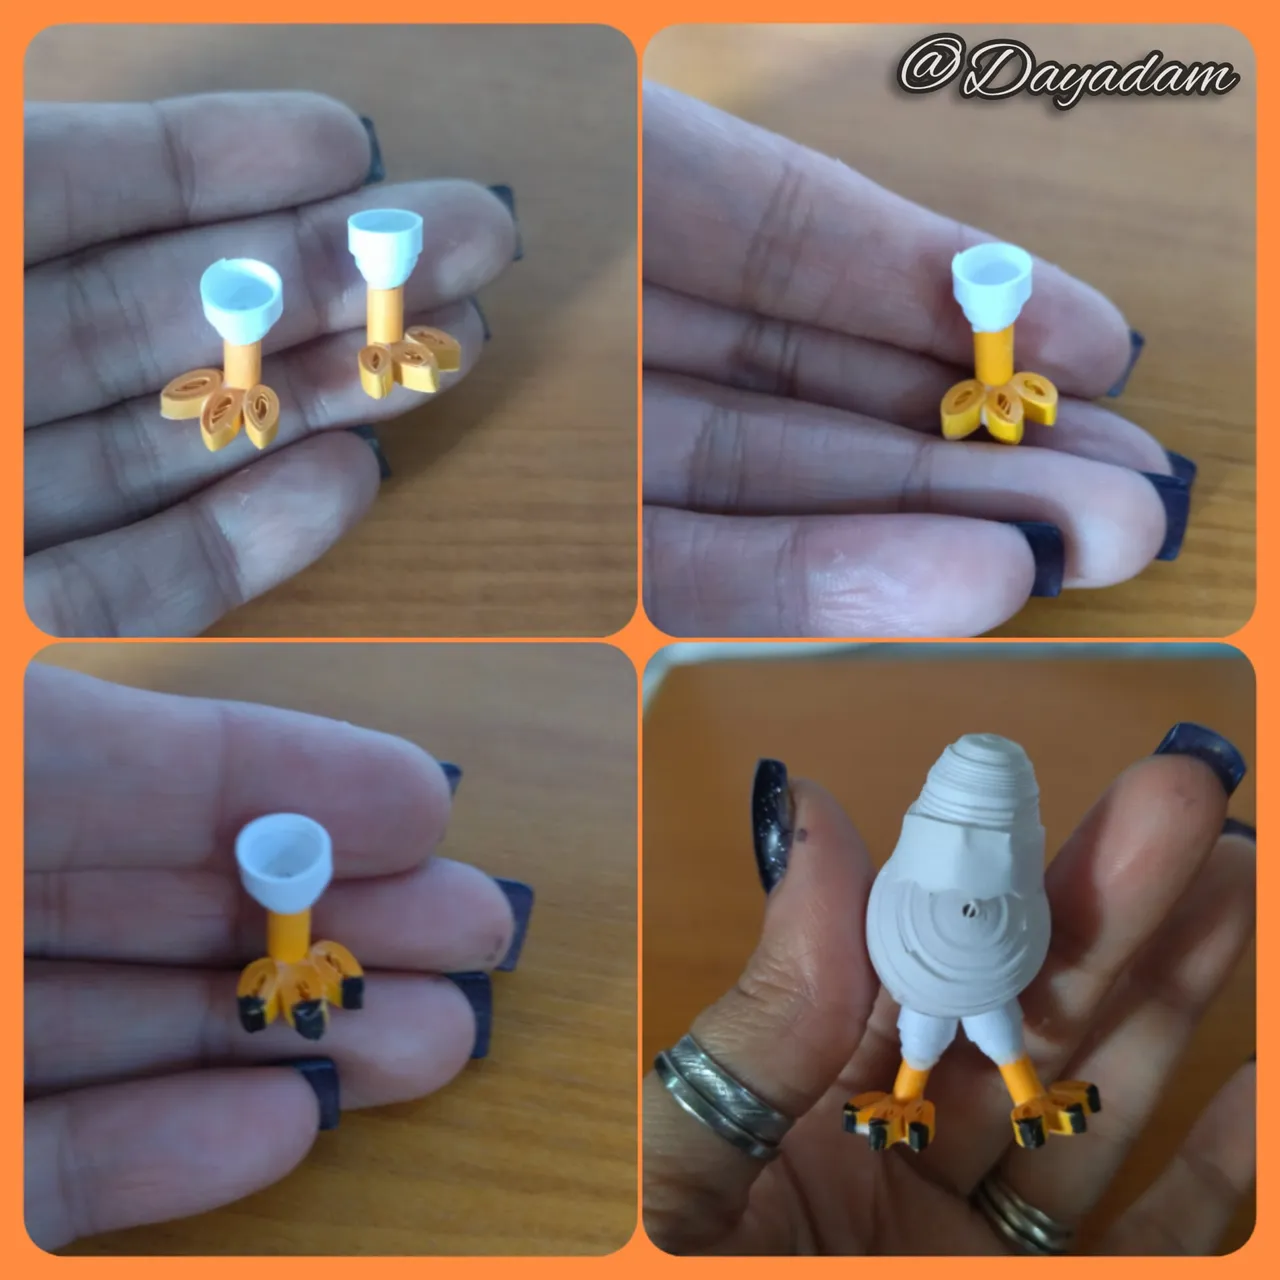
Legs:
- With 3mm wide white quilling tape, we will make 2 closed circles which we will mold a little bit in a circular way.
- Then with orange quilling tape of 9mm wide we will make a thin closed circle as a kind of cylinder.
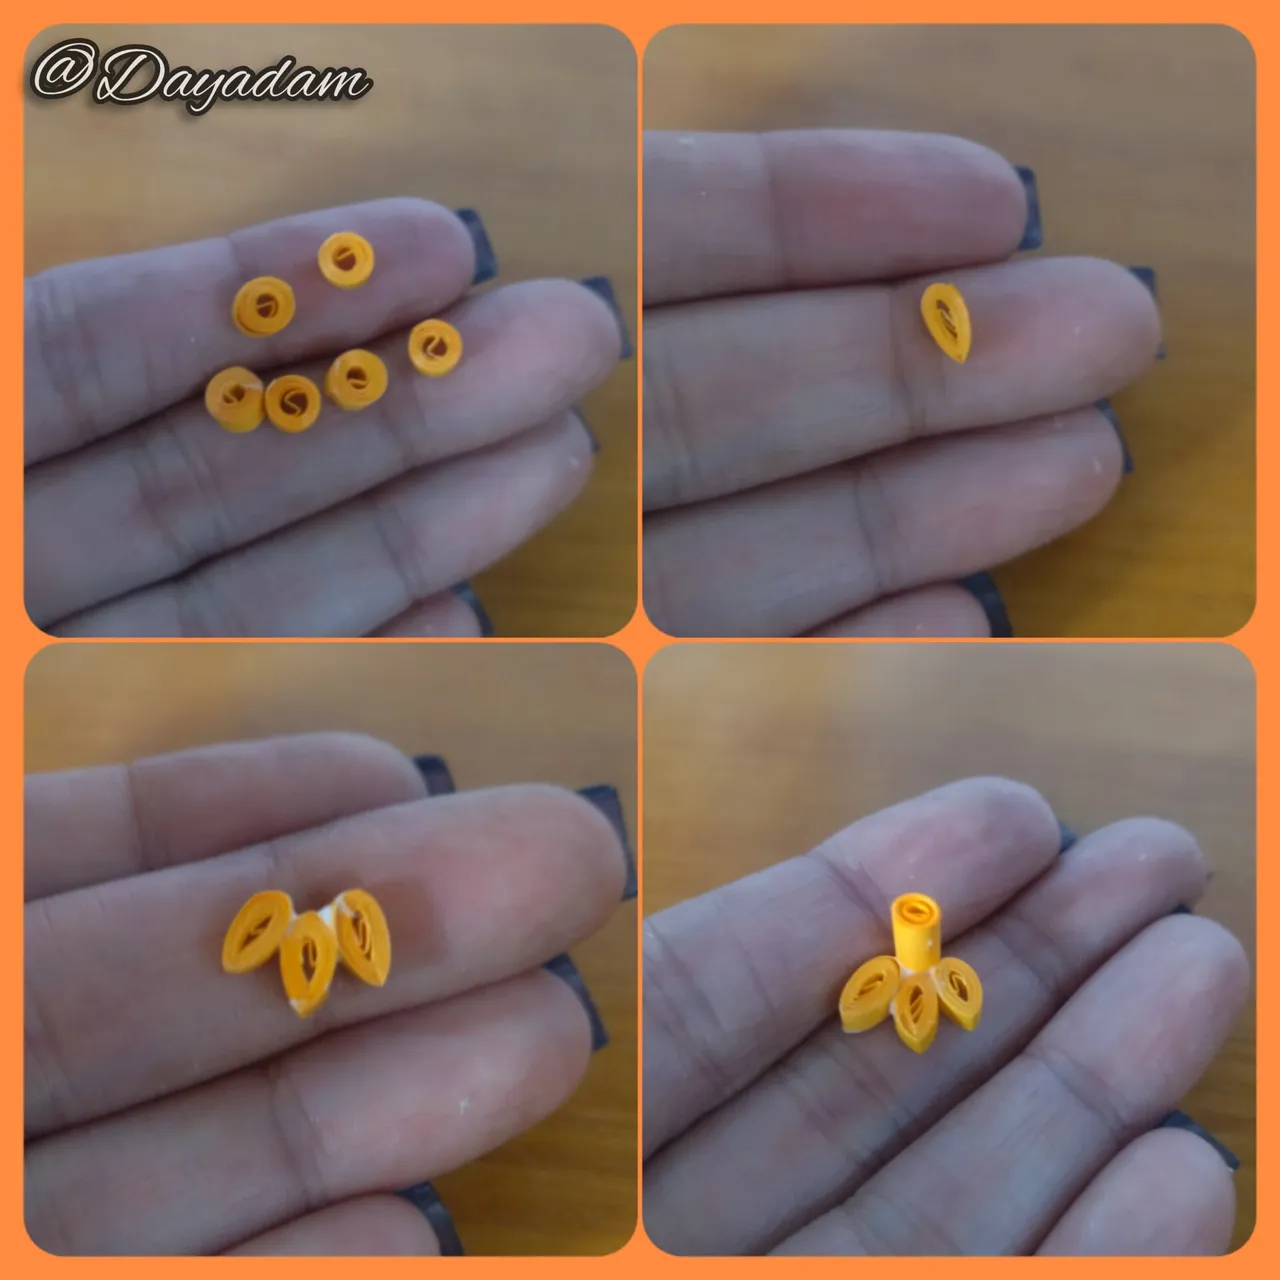
-For the claws we will make 6 small open circles with orange colored tape of 3mm wide, which we will mold flattening it, then we will glue 3 by 3.
- Once ready we will glue the thigh, the paw and the claws, to the claws with a black marker we will color the tips. Glue the legs to the body.
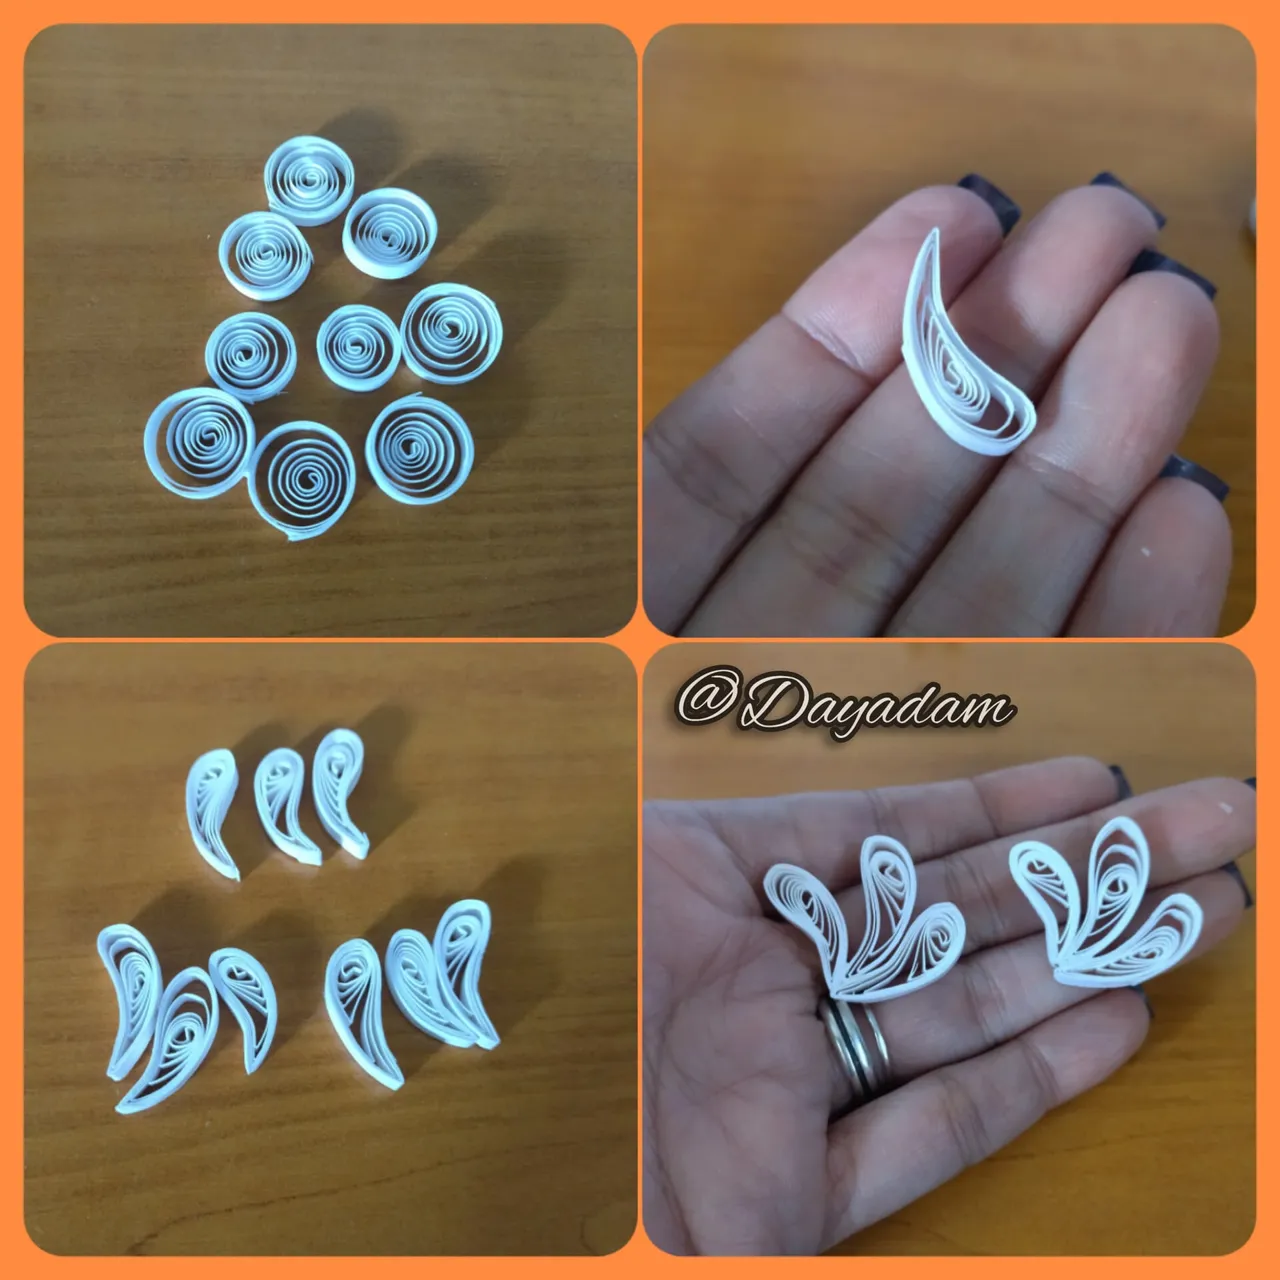
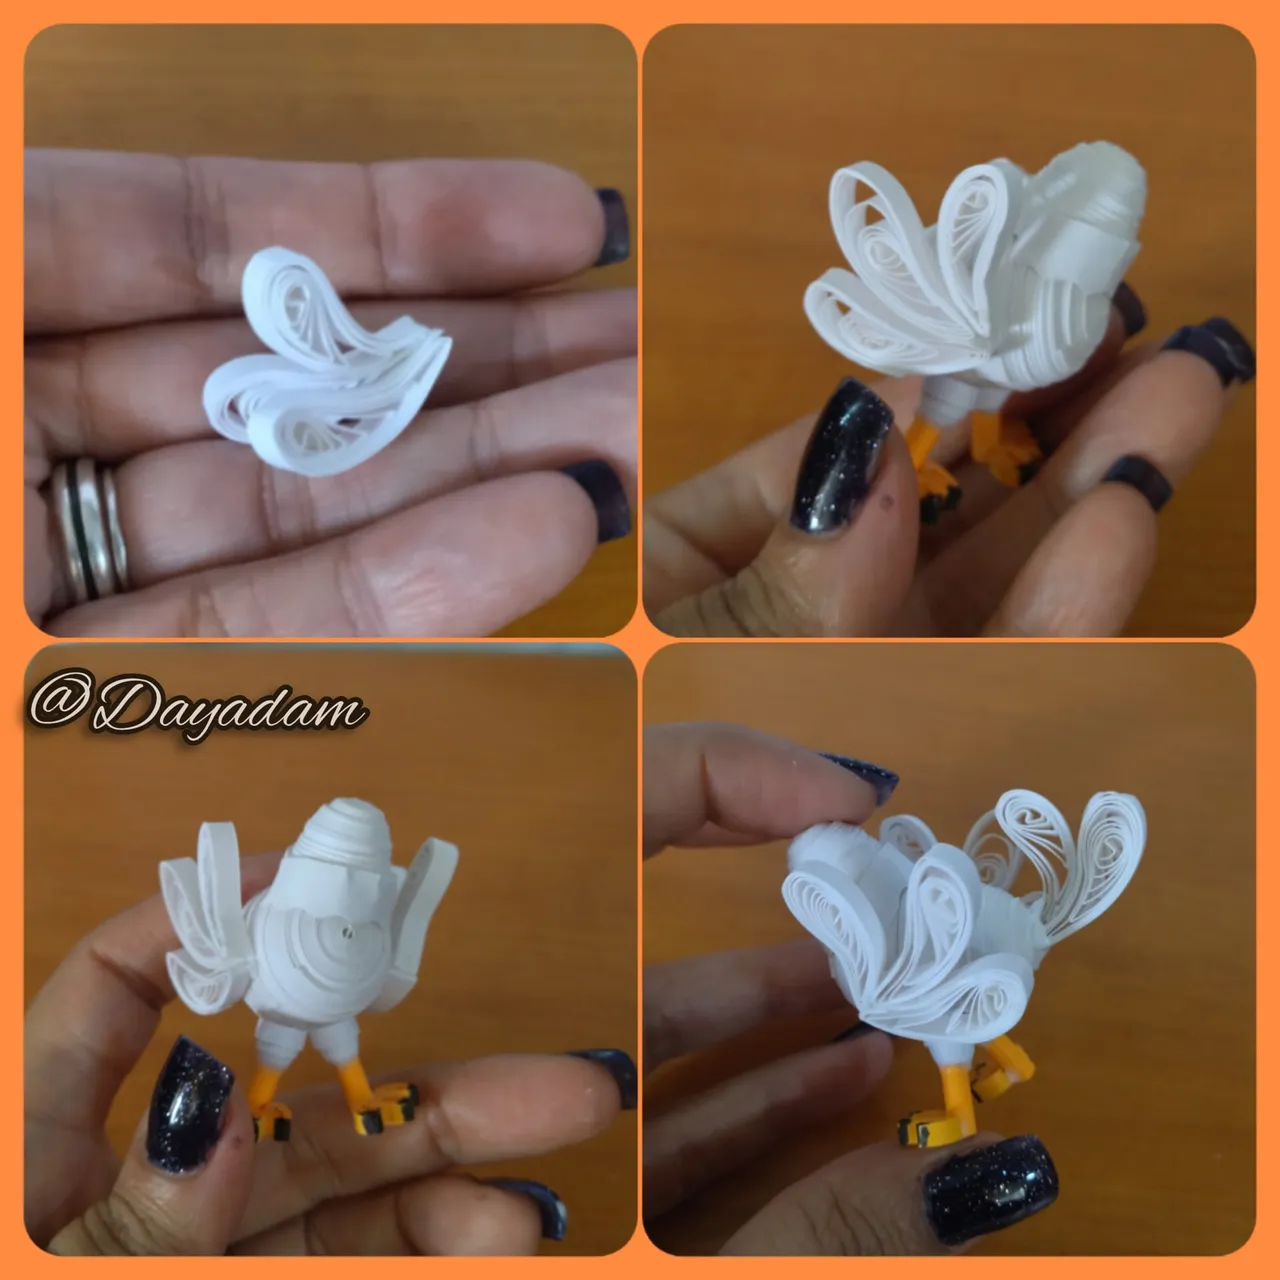
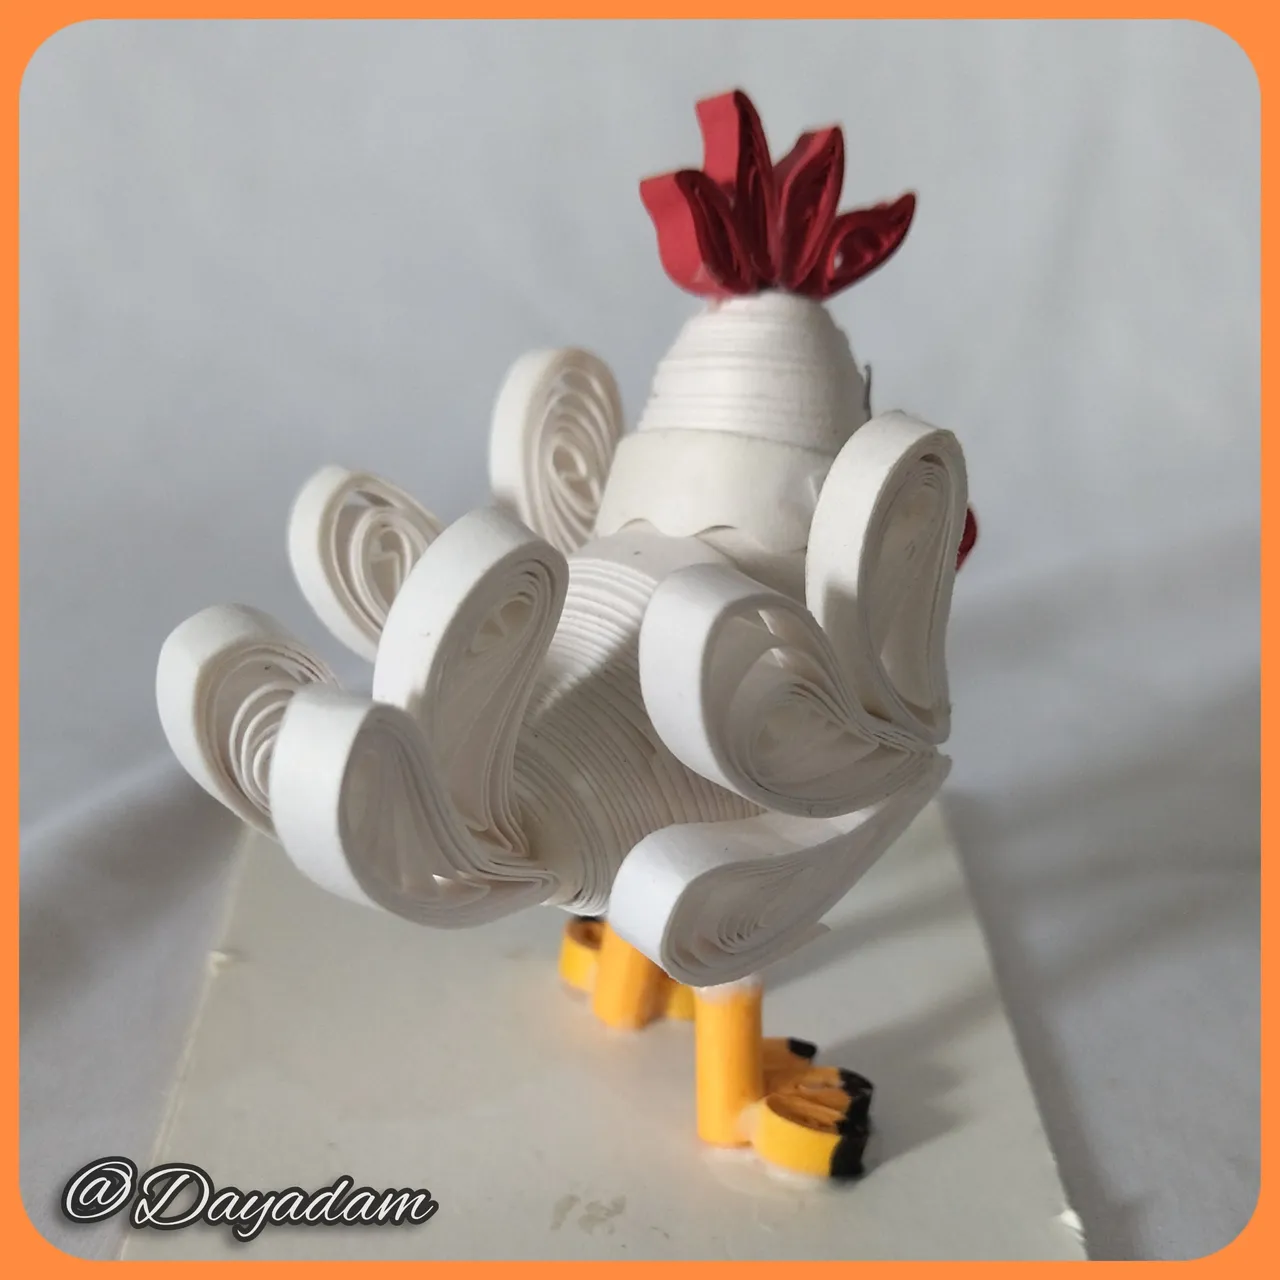
Tail and Wings:
- For these we will make with white tape 4mm wide 9 open circles, these we will mold them in the shape of an inclined drop, we will glue in groups of 3, the 3 of the wings we will glue one on top of the other, and we will repeat with another 3, and the 3 of the tail we will glue them vertically. Glue the wings and the tail to the body of the chicken.
Patas:
• Con cinta para quilling de 3mm de ancho color blanco, realizaremos 2 círculos cerrados los cuales moldearemos un poco de manera circular.
• Luego con cinta para quilling color naranja de 9mm de ancho realizaremos un circulo cerrado delgado como una especie de cilindro.
•Para las garras realizaremos 6 pequeños círculos abiertos con cinta color naranja de 3mm de ancho, los cuales moldearemos aplanando el mismo, luego pegaremos de 3 en 3.
• Una vez listas pegaremos el muslo, la pata y las garras, a las garras con un marcador negro le coloree las puntas. Pegaremos las patas al cuerpo.
Cola y Alas:
• Para estas realizaremos con cinta color blanco de 4mm de ancho 9 círculos abiertos, estos los moldearemos en forma de gota inclinada, pegaremos en grupos de 3, los 3 de las alas los pegaremos uno encima del otro, y repetiremos con otros 3, y los 3 de la cola los pegaremos en vertical. Pegamos las alas, y la cola al cuerpo del pollo.
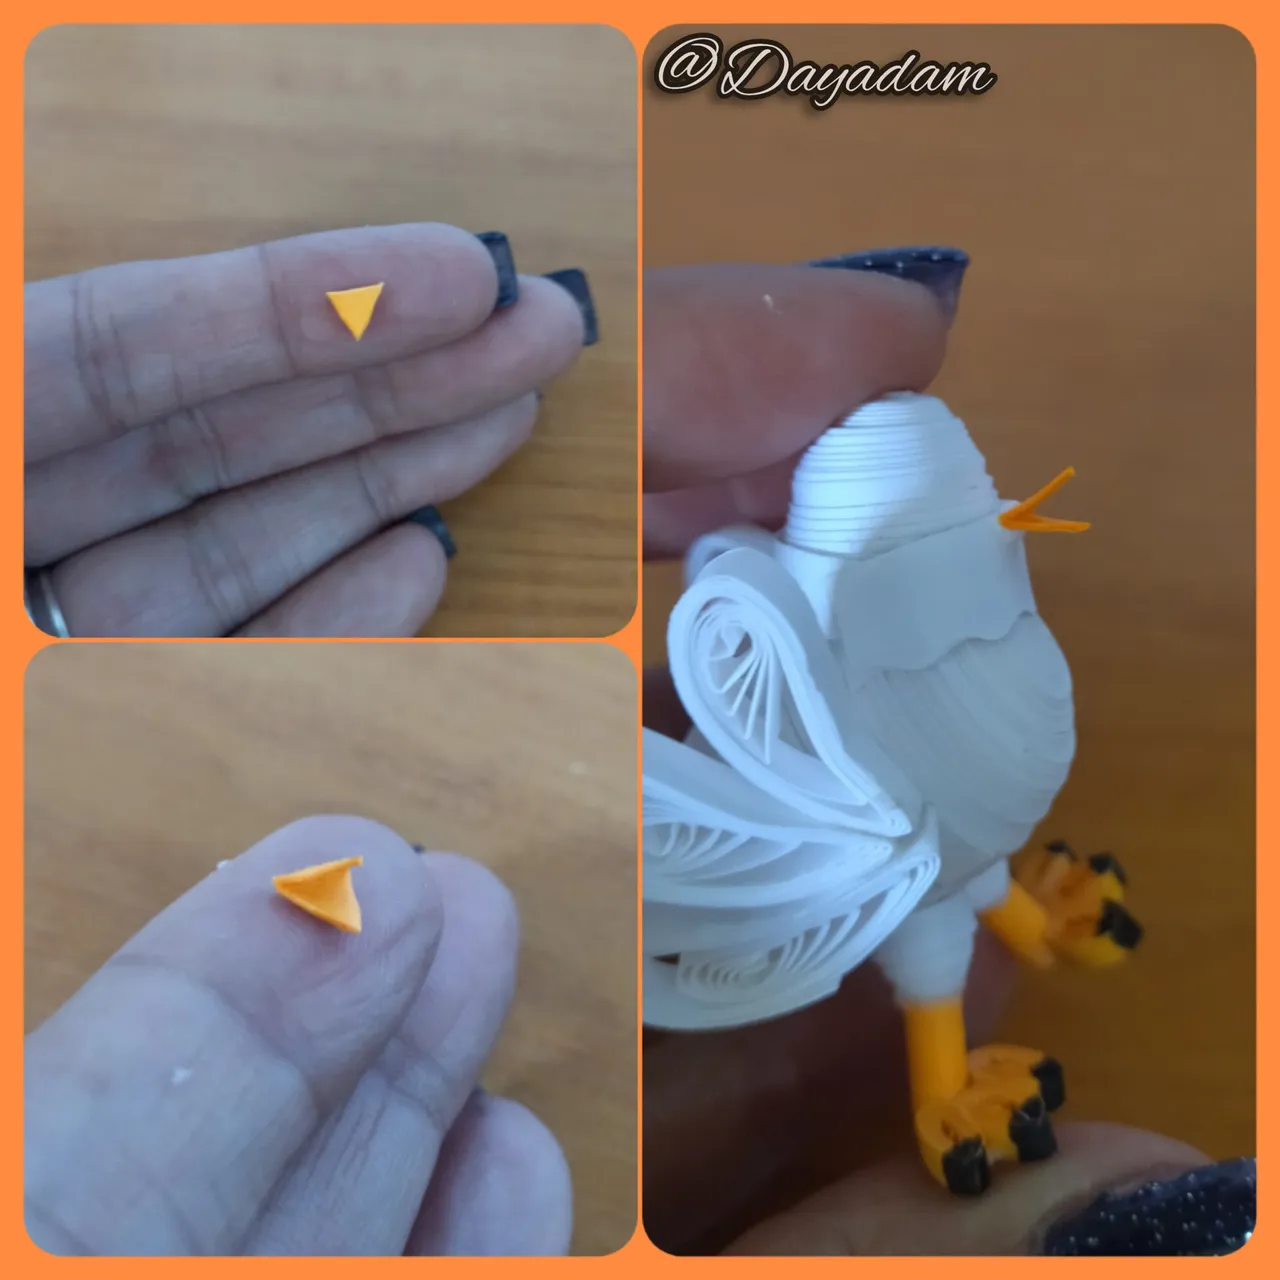
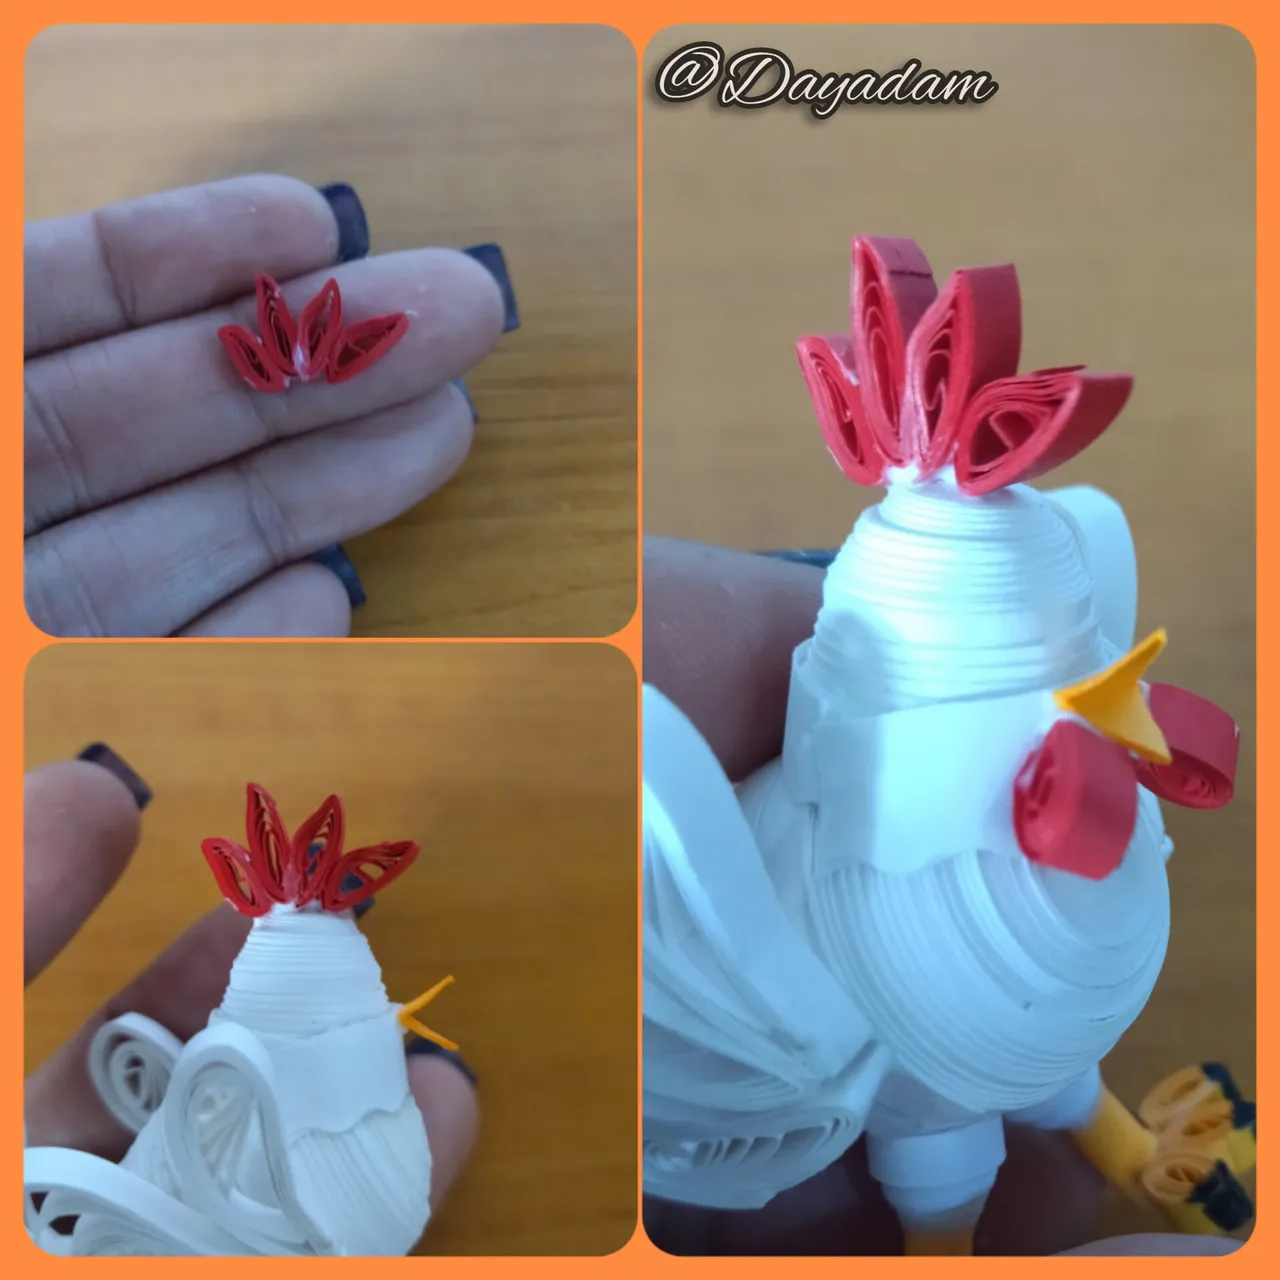
Peak:
- I made this with a piece of orange tape which I folded and cut in the shape of a triangle.
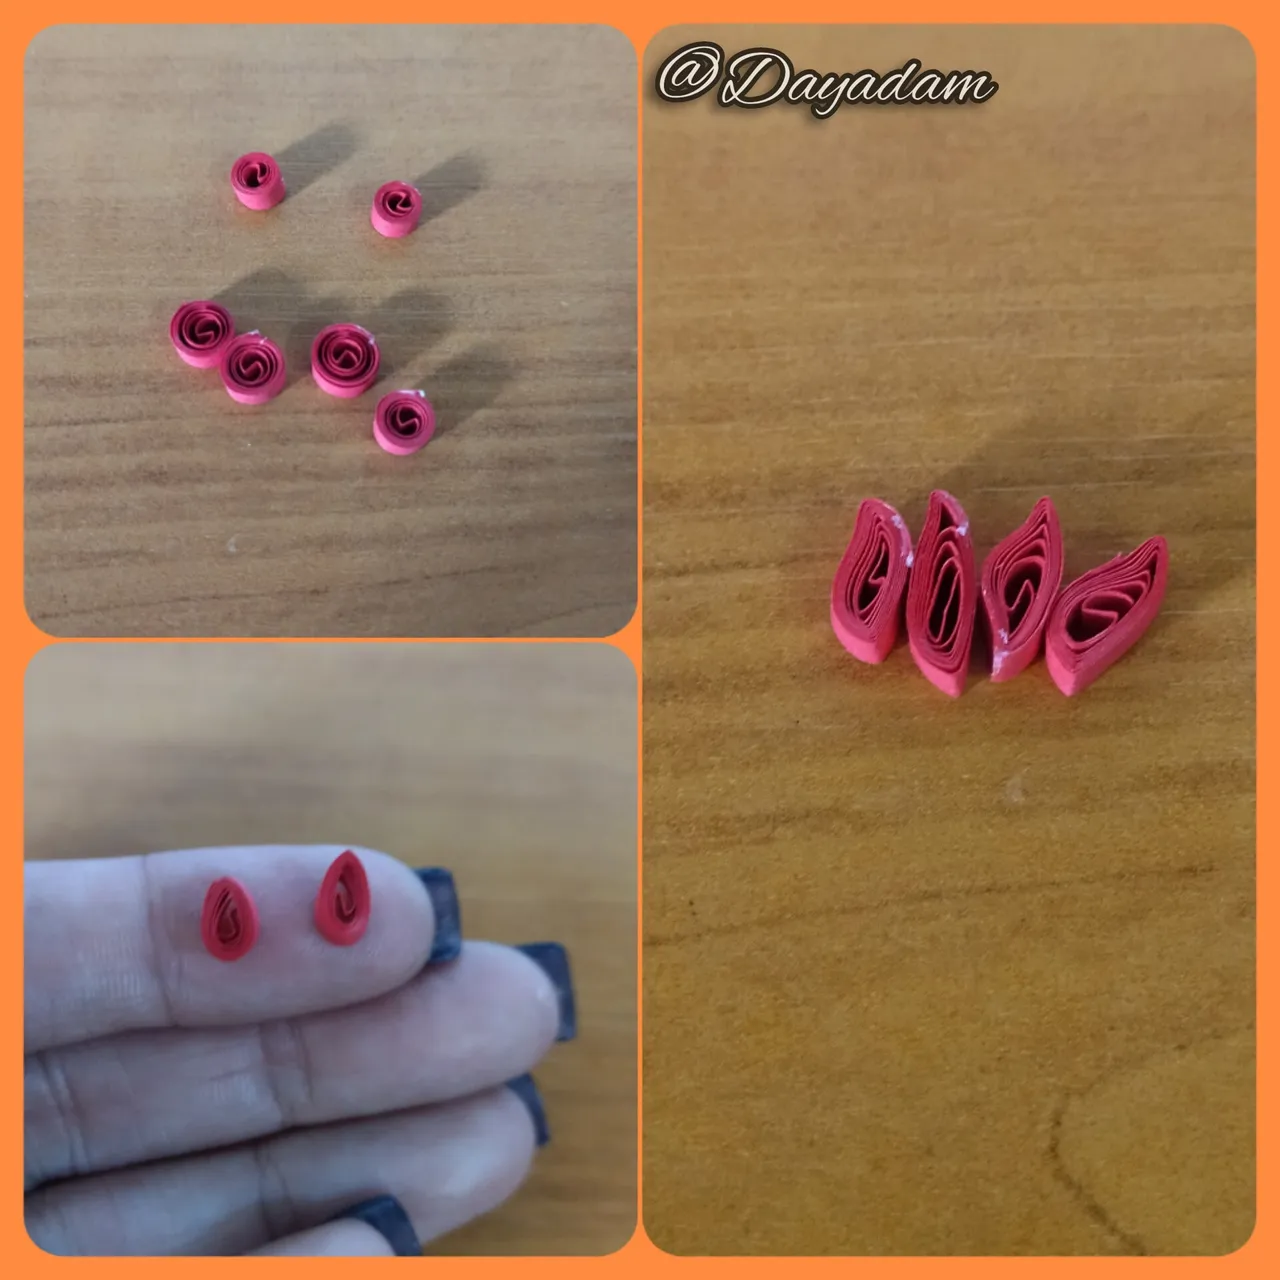
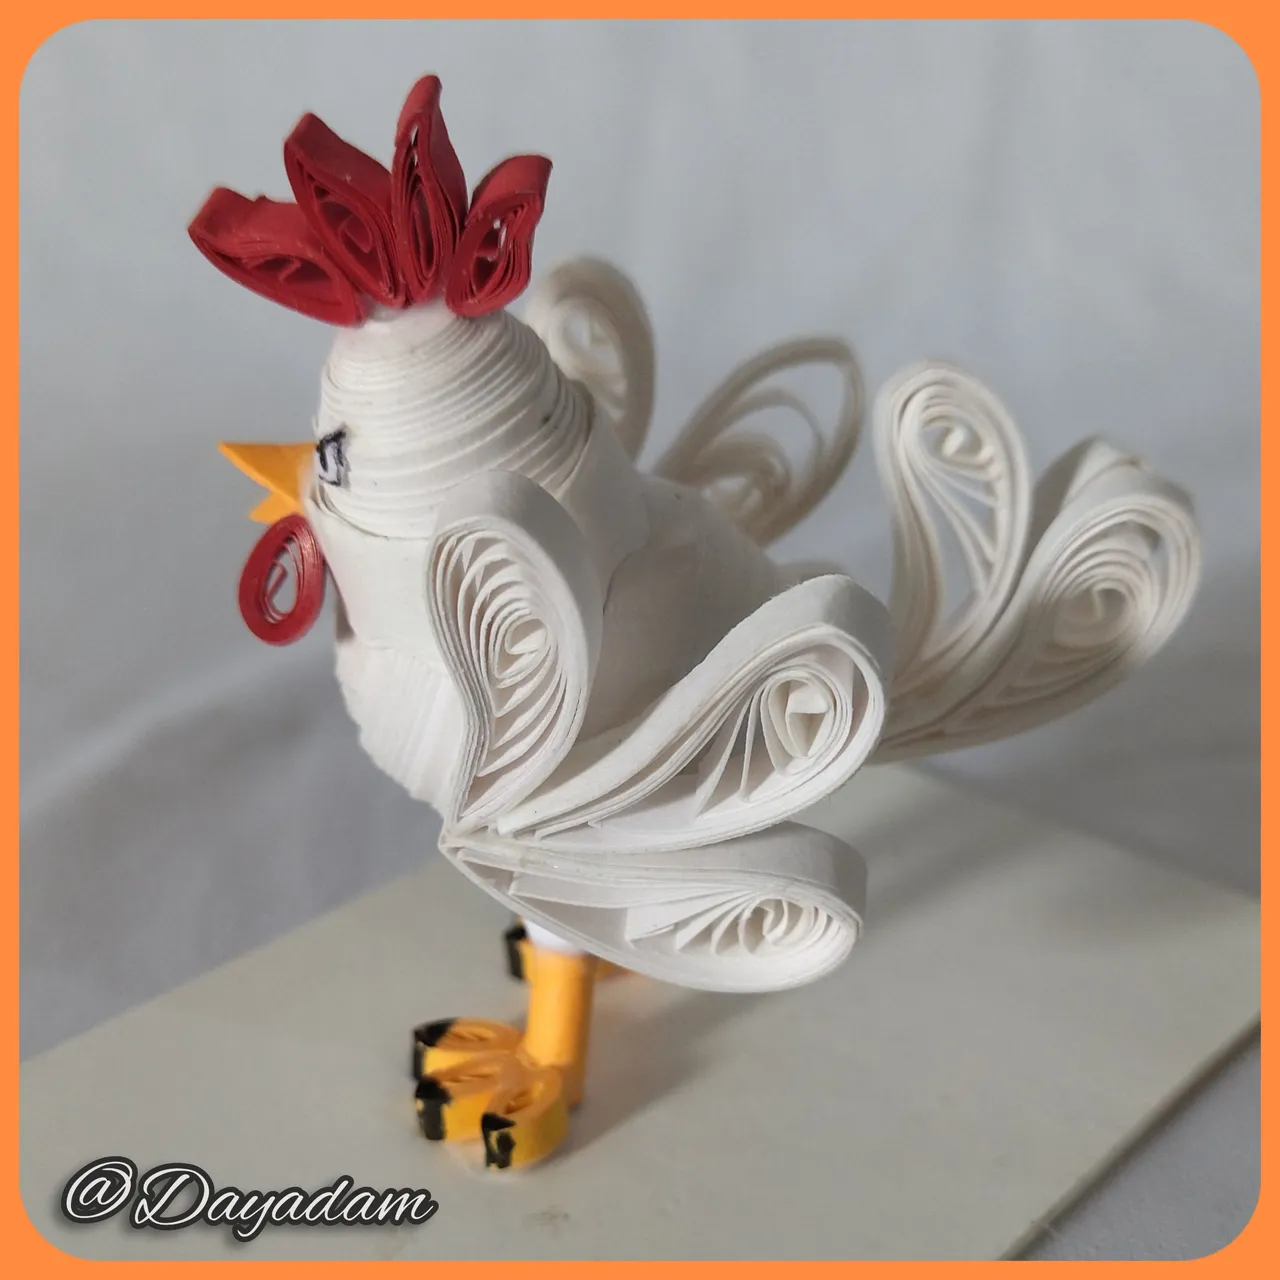
Crest and chin:
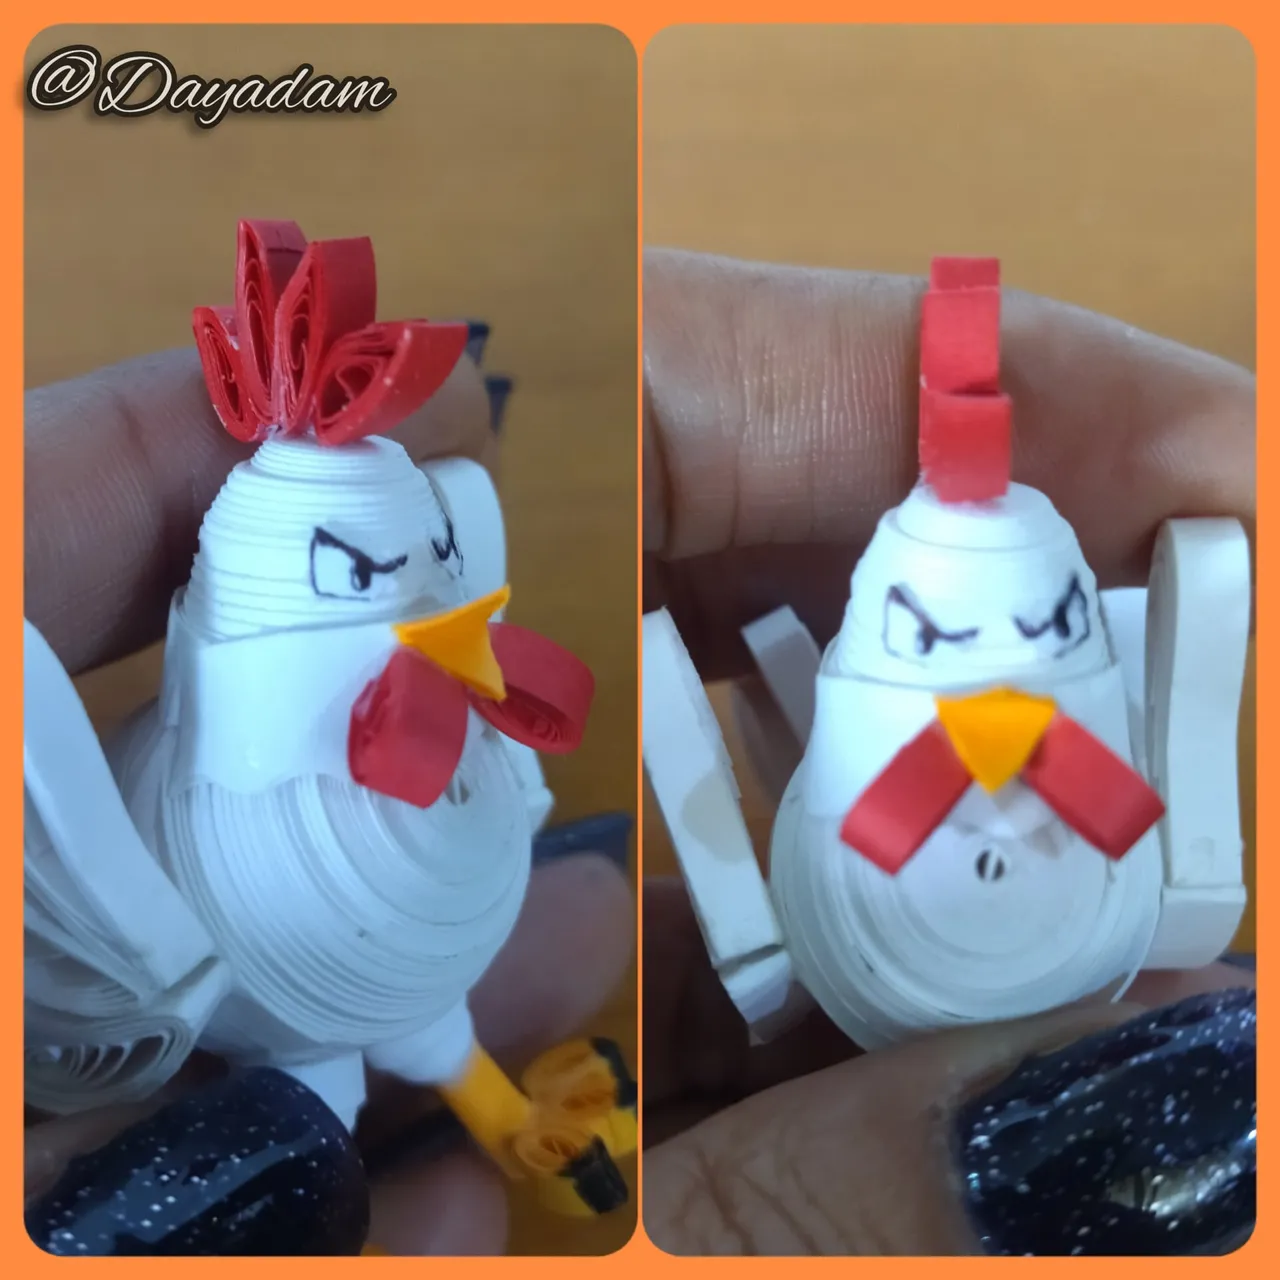
- For these we will make 6 small open circles with 3mm wide quilling tape, 2 will be molded in the shape of a drop, and the other 4 in a flattened shape, these 4 we will join with glue and place them on the top of the head, the other two on the sides of the beak.
-Finally we will paint the eyes, and glue them to the face of the chicken.
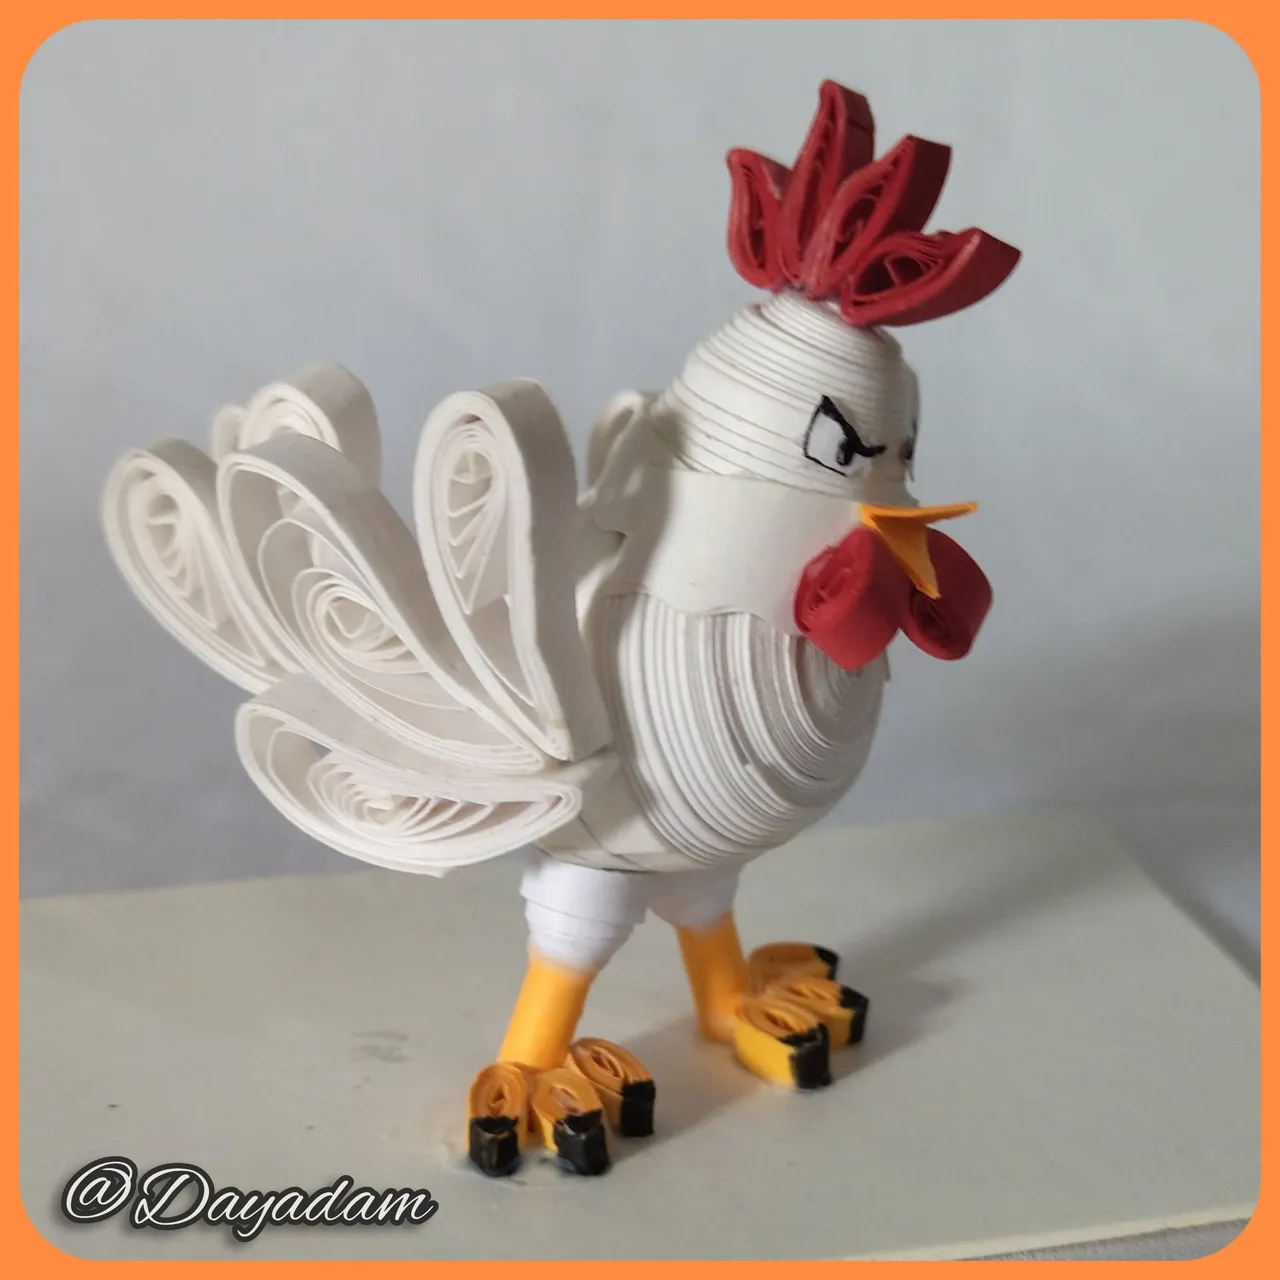
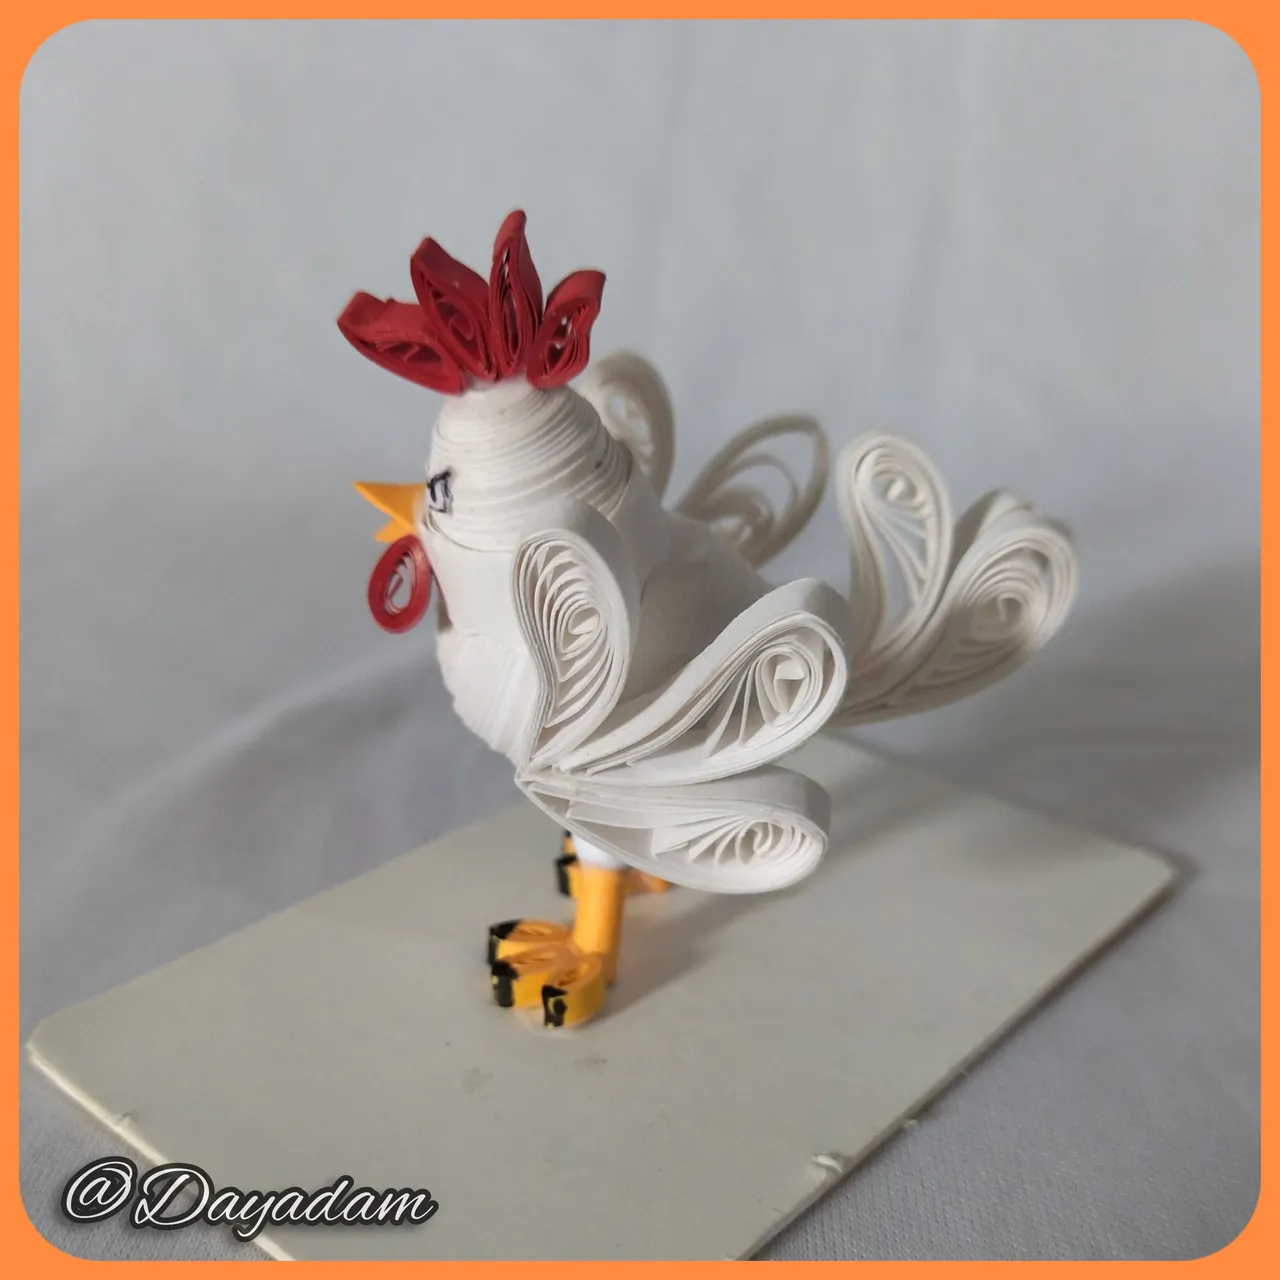
This way this figure in 3D Furious Chicken.
Pico:
• Este lo realice con un trozo de cinta naranja el cual doble y corte en forma de triangulo.
Cresta y barbilla:
• Para estas realizaremos 6 pequeños círculos abiertos con cinta para quilling de 3mm de ancho, 2 los moldearemos en forma de gota, y los otros 4 en forma un poco aplanada, estos 4 los uniremos con pega y los colocaremos en la parte de arriba de la cabeza, los otros dos a los lados del pico.
•Por ultimo pintaremos los ojos, y los pegaremos de la cara del pollo.
De esta manera esta figura en 3D Furious Chicken.


What did you think, did you like it?
I hope you did, I hope you liked my explanation, procedure and photos, I made them with love for you.
"Let out that muse that inspires you, and let your imagination fly".
Thank you all, see you next time.
¿Que les pareció, les gustó?
Espero que sí, que les haya gustado mi explicación, procedimiento y fotos, los hice con mucho cariño por y para ustedes.
"Deja salir esa musa que te inspira, y deja volar tu imaginación".
Gracias a todos, nos vemos en la próxima.
Todas las fotos usadas en este post son de mi autoría y han sido sacadas en mi celular personal un Redmi 9T y editadas en Canva y en Inshot Sourse/ Fuente Banner y separador hecho por mí en Canva Traducido con la ayuda de DeepL
