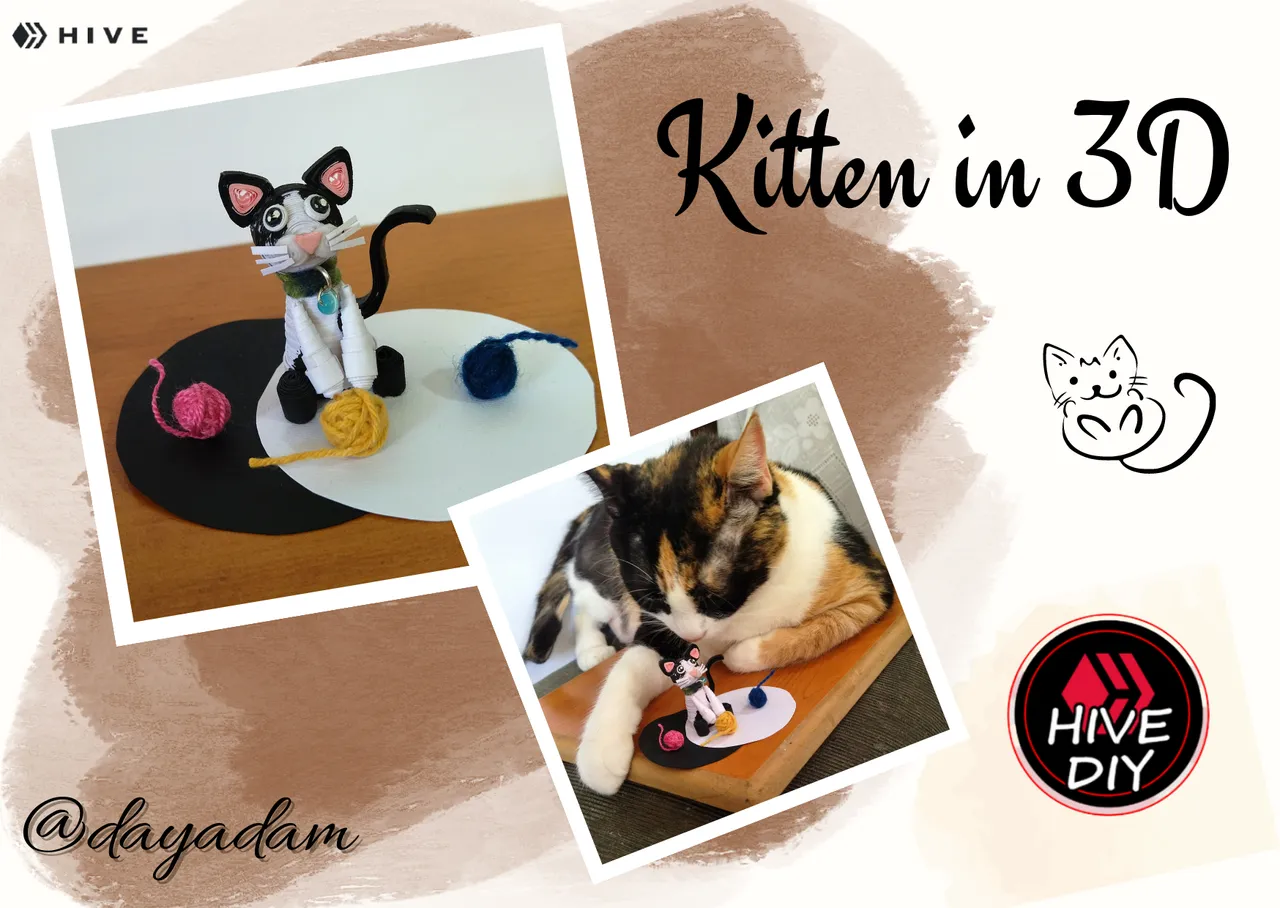
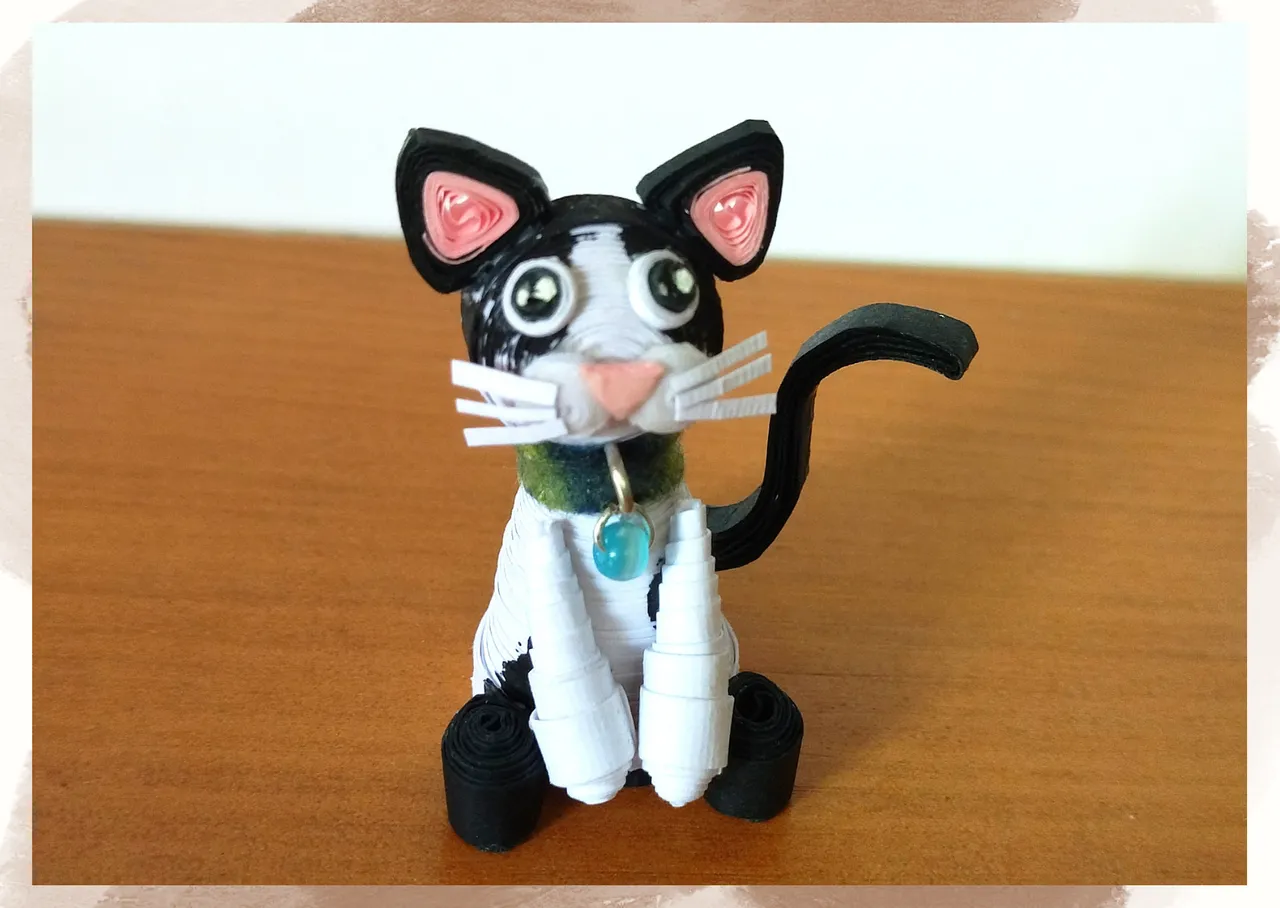
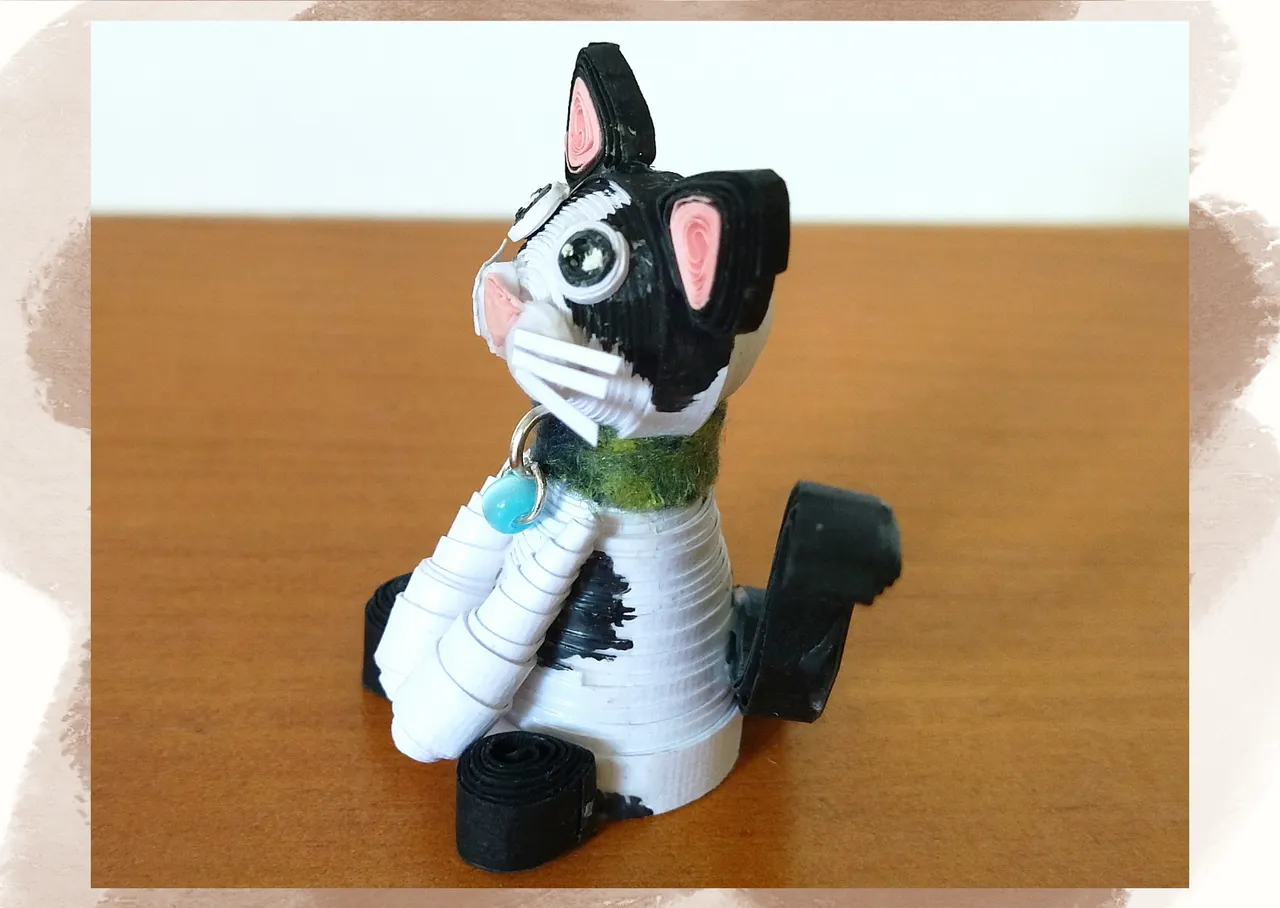
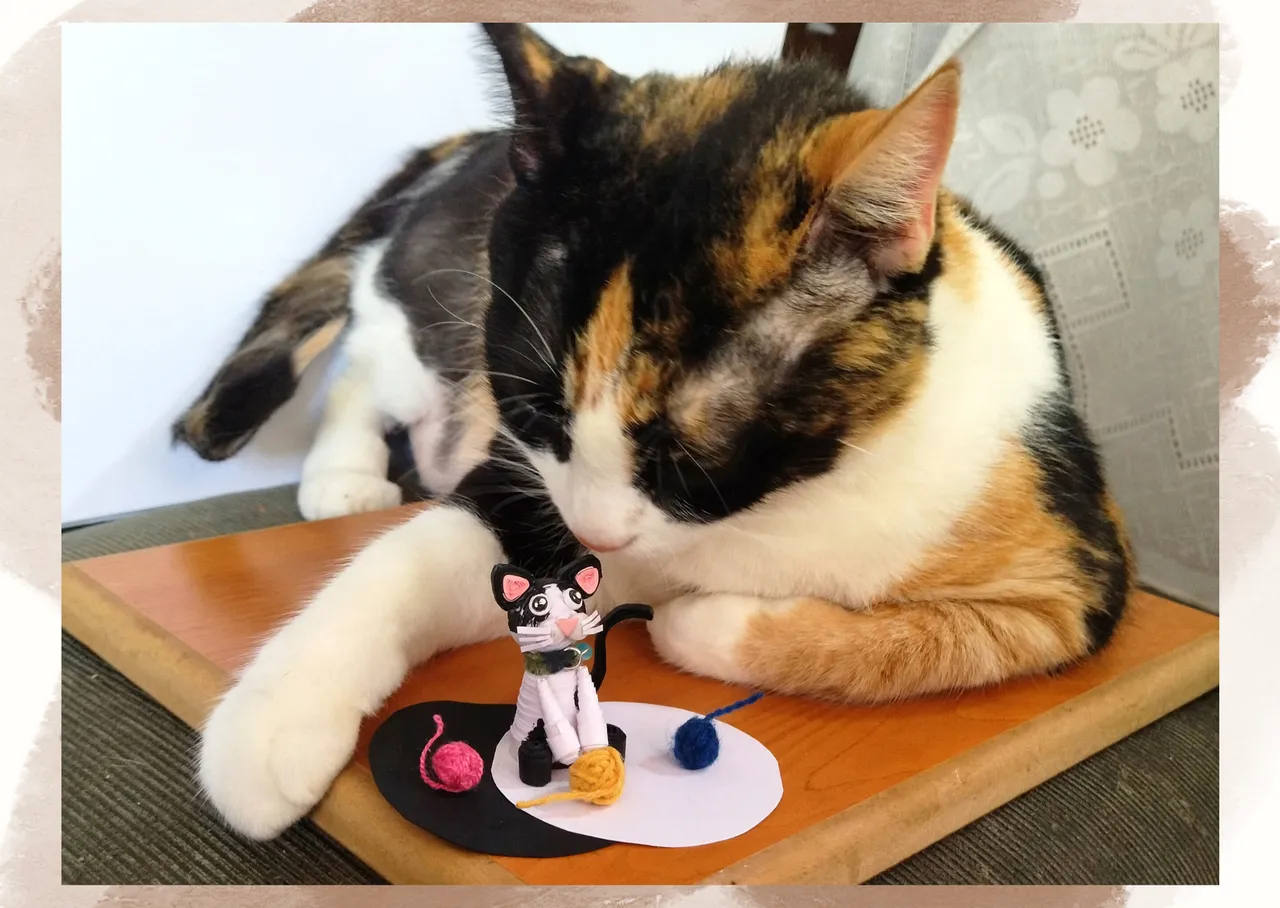
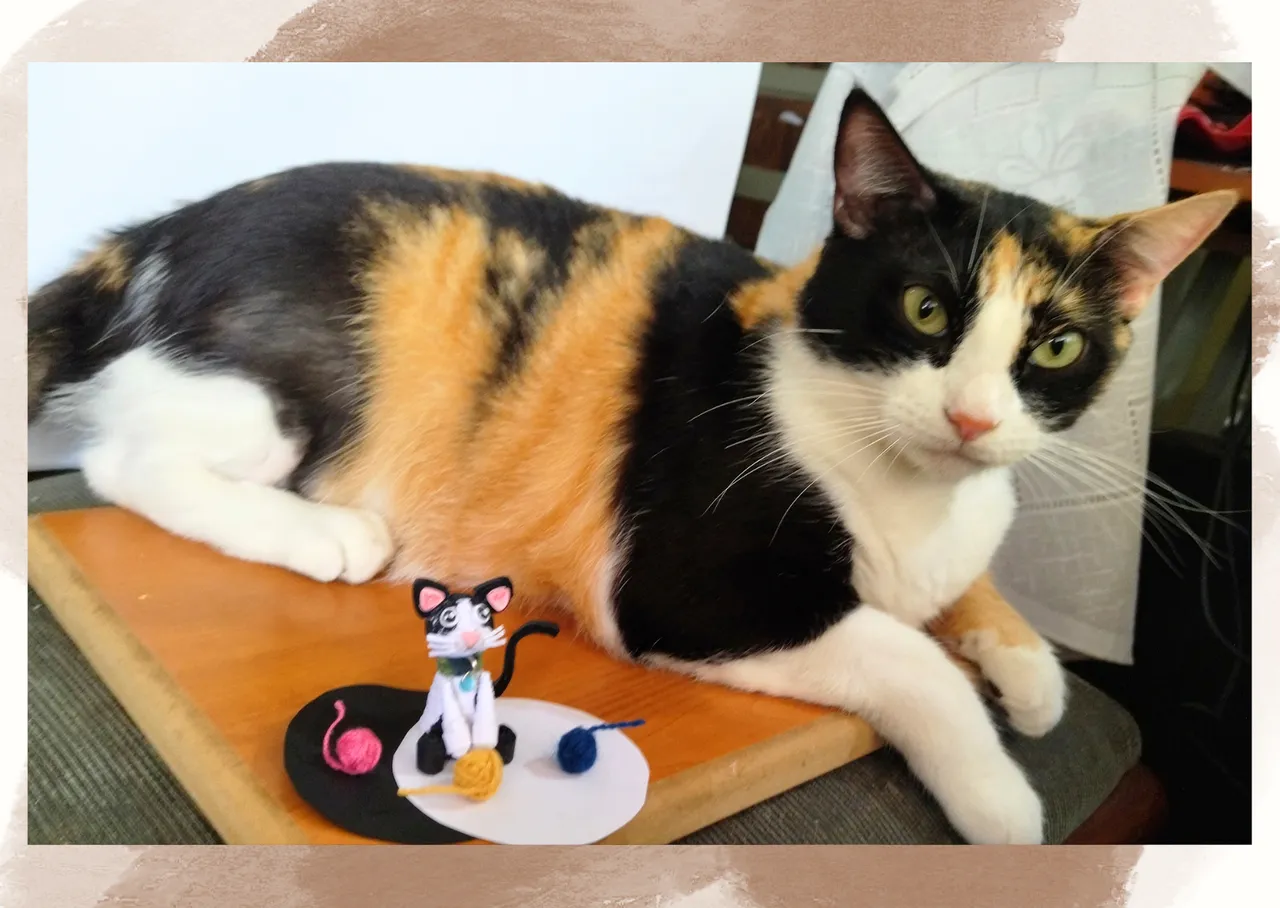
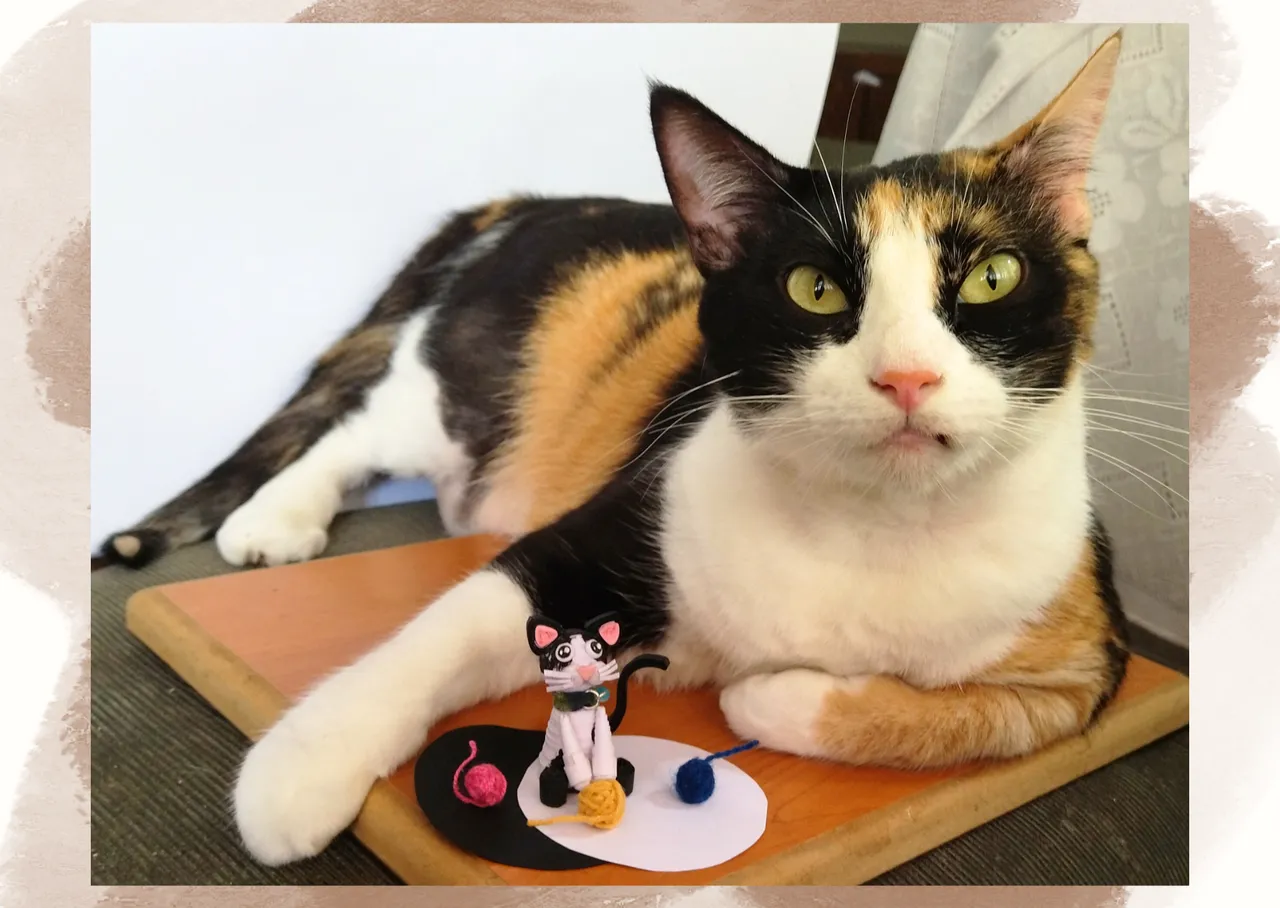
For this opportunity, as a faithful lover of kittens being the human mommy of a beautiful furry that fills my life and my day to day of love, company and happiness. I bring you a 3D decorative kitten, which I made for me in the quilling technique, although my plans were to keep it to place it as an ornament on my desk, I will have to carry out another one since my daughter saw it and told me mom, that kitten is mine and she even named it hahahaha. My cat girl and assistant Michi also served me as a model in the pictures posing with this new friend.
I have rarely done this kind of 3D sculpture type of work, seeing that it looks very good I will surely soon be encouraged to make other figures in this style.
I hope you like the work, join me in this creative process.

Hola a todos... 🐱🐾💕
Hola a mis queridos Hivers y a la querida comunidad de artistas #HiveDiy, como siempre muy complacida y emocionada de encontrarme por acá nuevamente, mostrándole mi trabajo hecho con mucho amor y especialmente para ustedes.
Para esta oportunidad, como fiel amante de los gatitos siendo la mami humana de una hermosa peludita que llena mi vida y mi día a día de amor, compañía y felicidad. Les traigo un gatito decorativo en 3D, que elabore para mí en la técnica de quilling, aunque mis planes era conservarlo para colocarlo de adorno en mi mesa de trabajo, me va a tocar llevar a cabo otro ya que mi hija lo vio y me dijo mama, ese gatito es mío y le puso hasta nombre jajajaja. Mi niña gatuna y asistente michi también me sirvió de modelo en las fotografías posando con este nuevo amiguito.
Pocas veces he realizado este tipo de trabajo tipo escultura en 3D, al ver que luce muy bien seguramente próximamente me anime a realizar otras figuras de este estilo.
Espero sea de su agrado el trabajo, acompáñenme en este proceso creativo.
Comencemos:😃

• Cartulina blanca y negra.
• Cintas de quilling de diversos mm de ancho blancas, negras.
• Aguja para quilling.
• Pega blanca extra fuerte (de carpintería).
• Pintura al agua blanca y negra.
• 2 argollas pequeña de bisutería.
• 1 Perla del color de tu preferencia.
• Trozo de tela del color de tu preferencia.
• Tijera.
• Aguja de coser o alfiler.
• Palito de altura.
• Pincel.
• Alicate punta fina.
• Perla mediana.
• Trozos de hilos de colores varios.


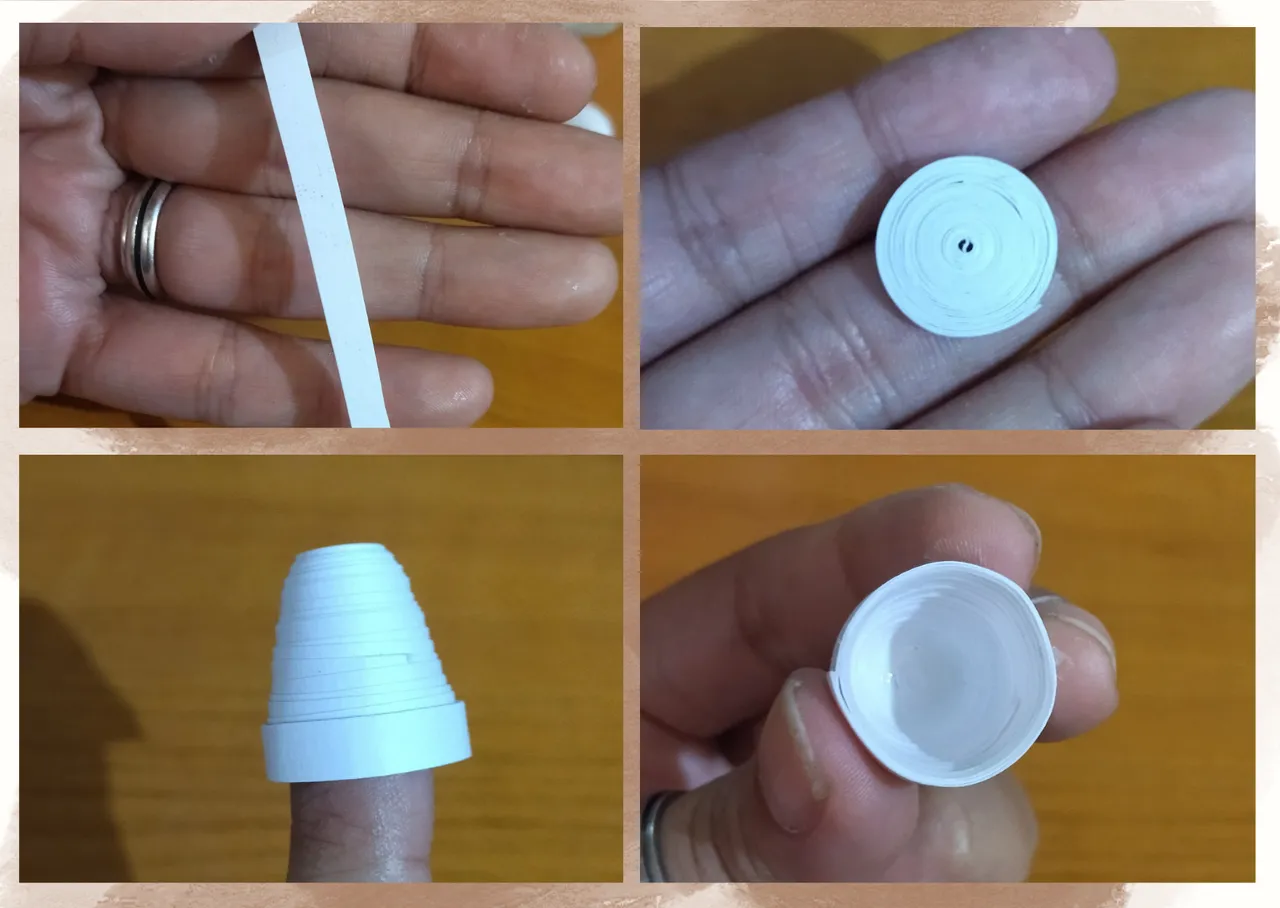
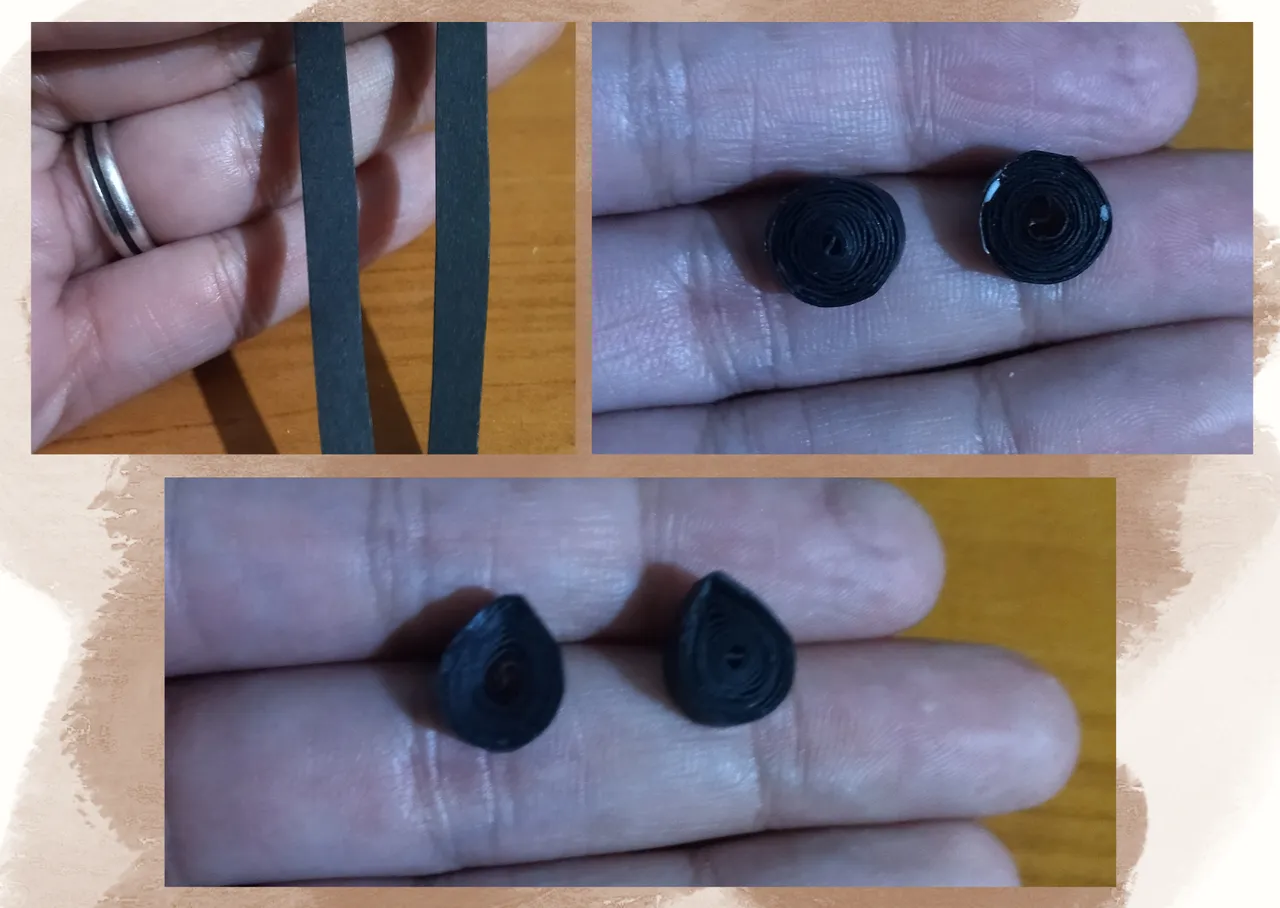
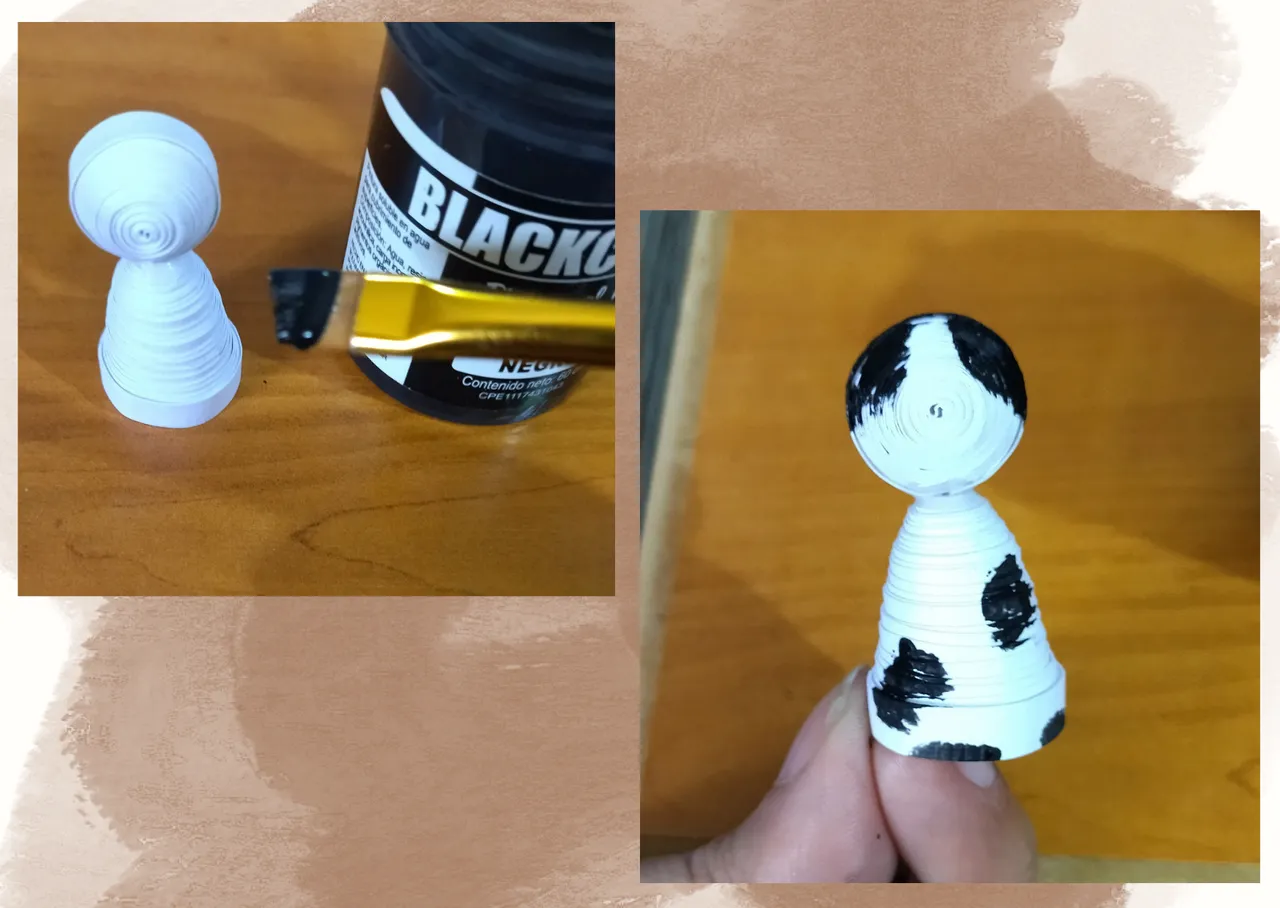
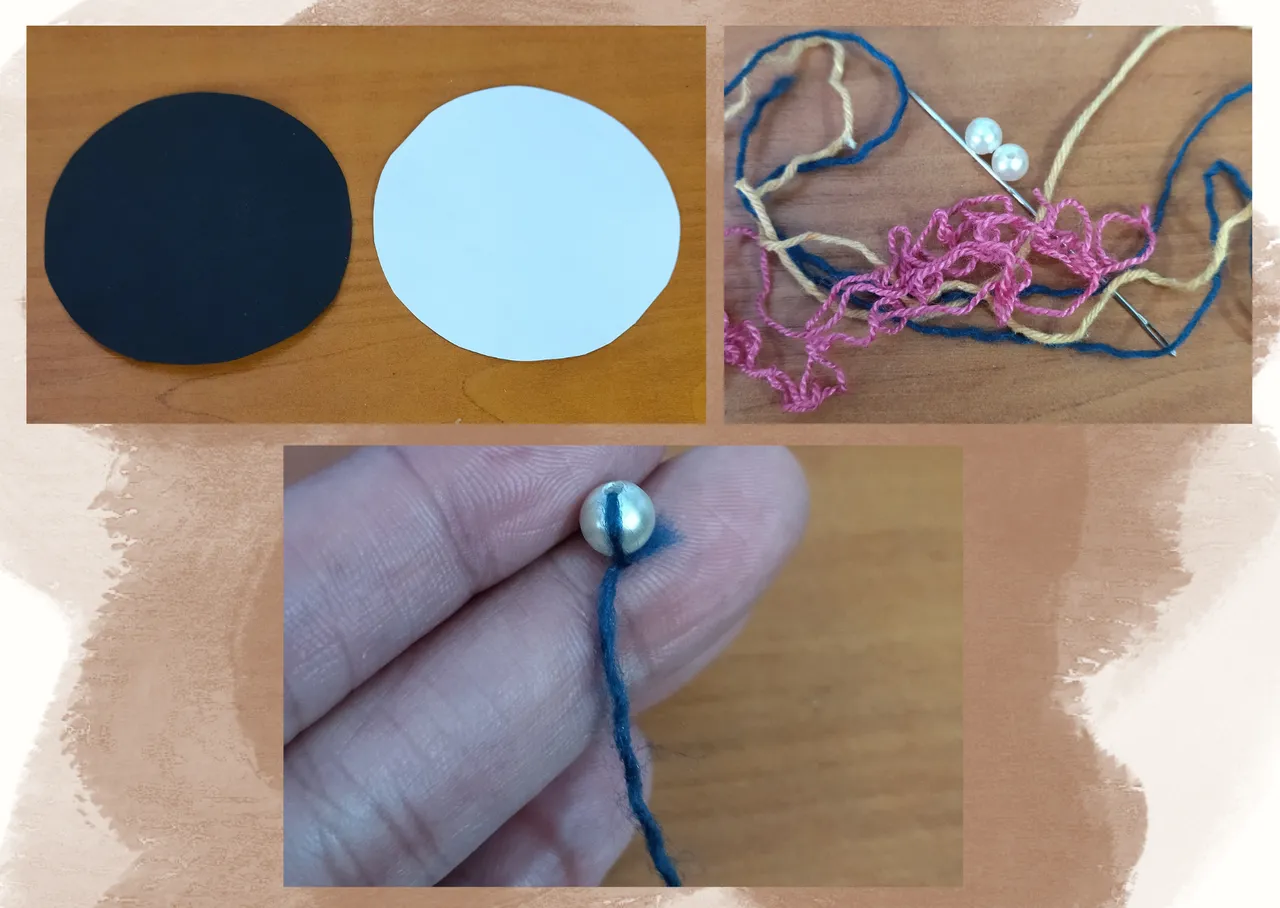
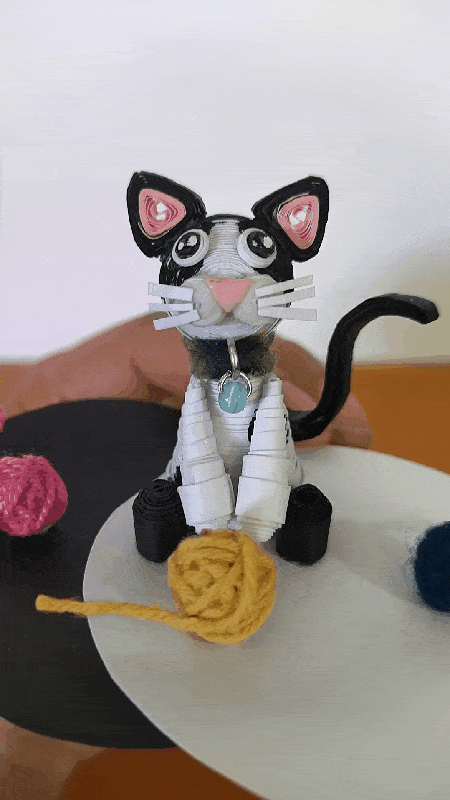
• Comenzamos tomando cartulina blanca (reciclable) y vamos a picar una tira de 3mm de ancho x 100cms de largo, enrollamos con la aguja para quilling hasta llegar al final de la cinta, sellamos con pega blanca extra fuerte, sacamos de la aguja, obtendremos un círculo cerrado, vamos a necesitar otro igual. Por cada dije que queramos hacer vamos a repetir el mismo proceso.
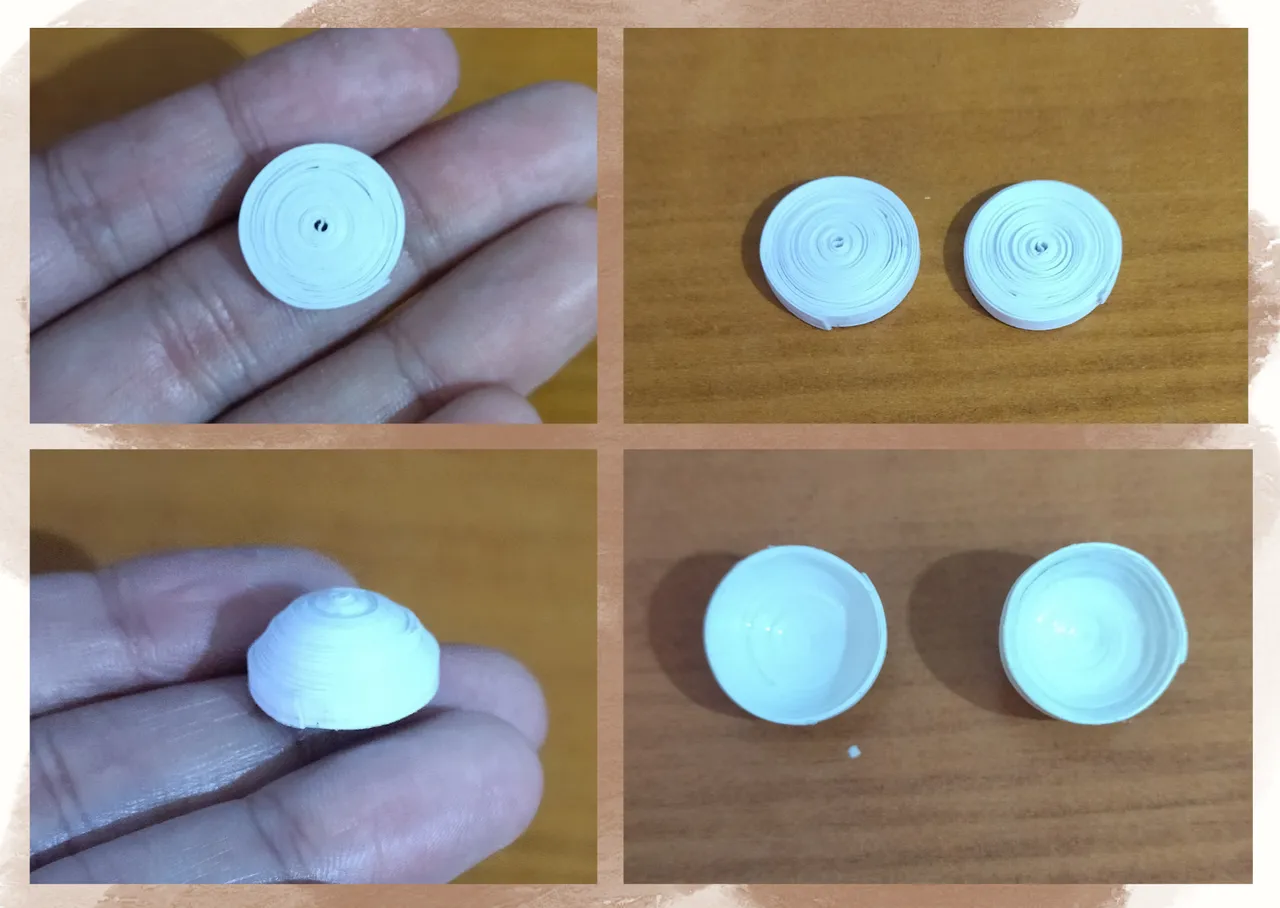
• Vamos a moldear los círculos, con la ayuda de los dedos vamos a empujar hacia afuera hasta conseguir la forma necesaria para la cabeza del gatito, en la parte de adentro agregamos un poco de pega y dejamos secar para evitar que se muevan las piezas.
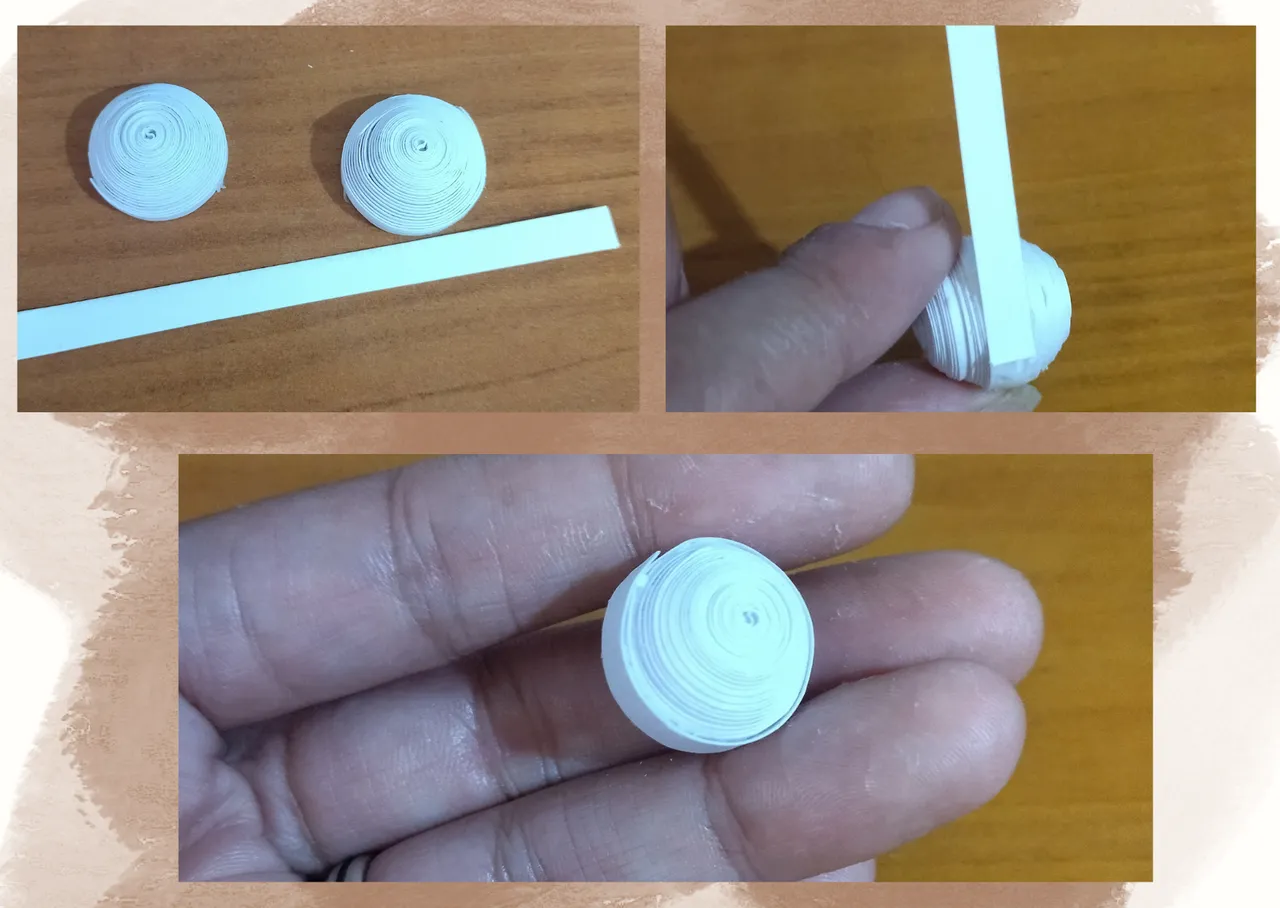
• Vamos a tomar un pequeño trozo de cinta de quilling blanca, (también lo realice cortando una cartulina), de aproximadamente 5mm de ancho para unir las piezas que elaboramos, acoplamos ambas pasando la cinta por el medio con pega blanca extra fuerte (reservamos).
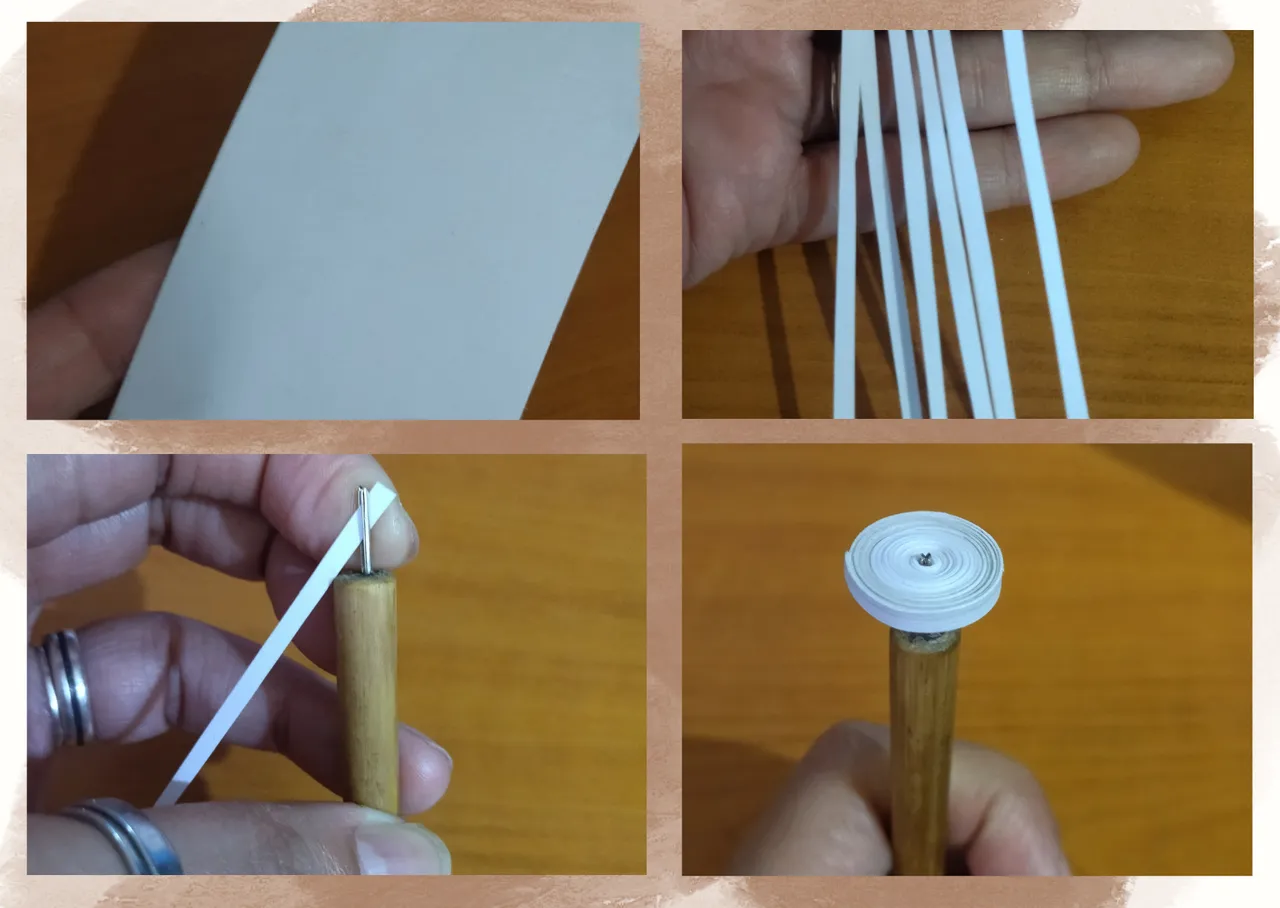
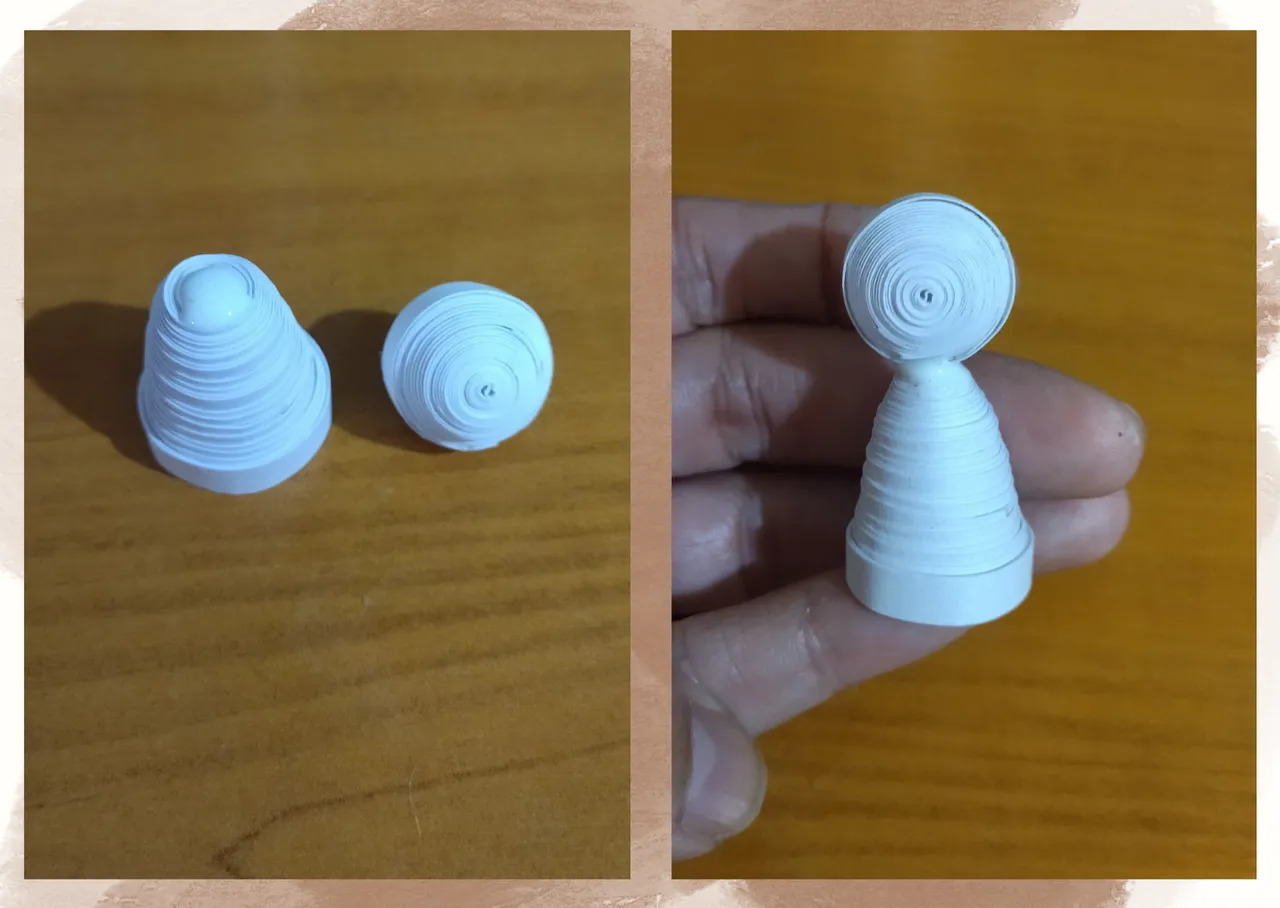
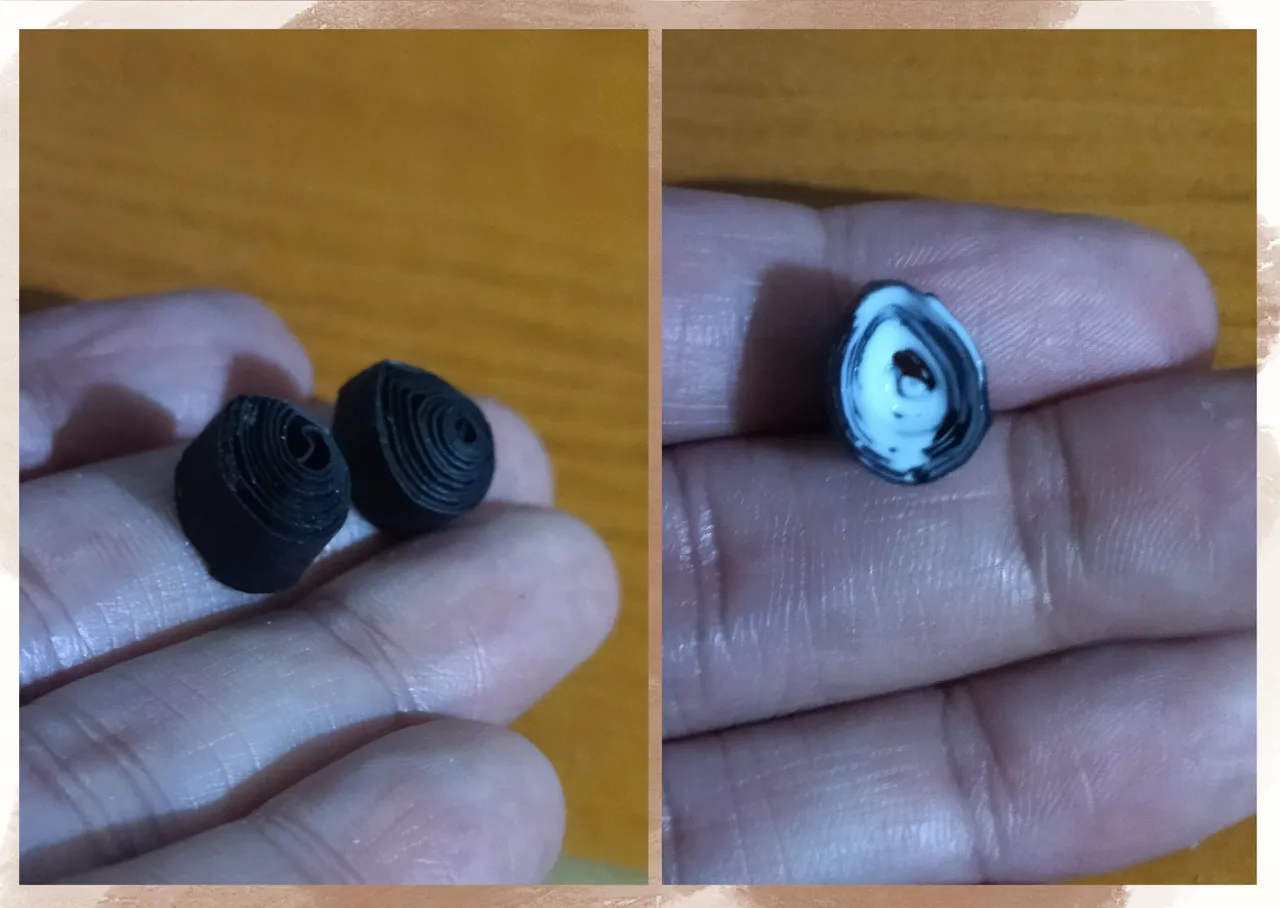
• Ahora vamos a proceder a picar una tira de 5mm de ancho x 150cms de largo color blanca, enrollamos con la aguja para quilling hasta llegar al final de la cinta, sellamos con pega blanca extra fuerte, sacamos de la aguja, obtendremos un círculo cerrado.
• Este círculo cerrado también lo moldearemos, sacando hacia afuera para formar el cuerpo del gatito, tal como hicimos con la pieza anterior le colocaremos pega en la parte hueca para evitar que la misma se mueva o deforme. Luego pegaremos la cabeza a la misma.
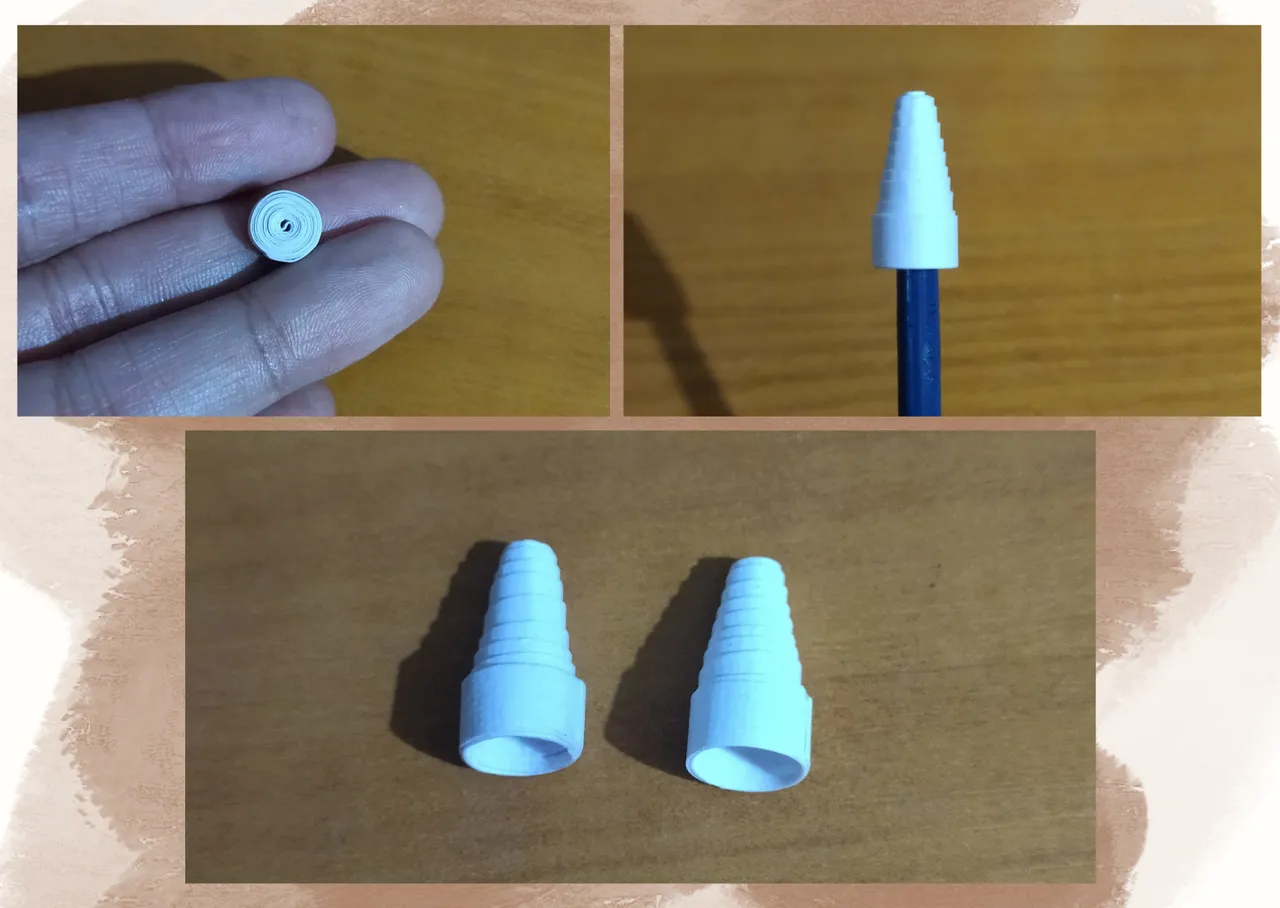
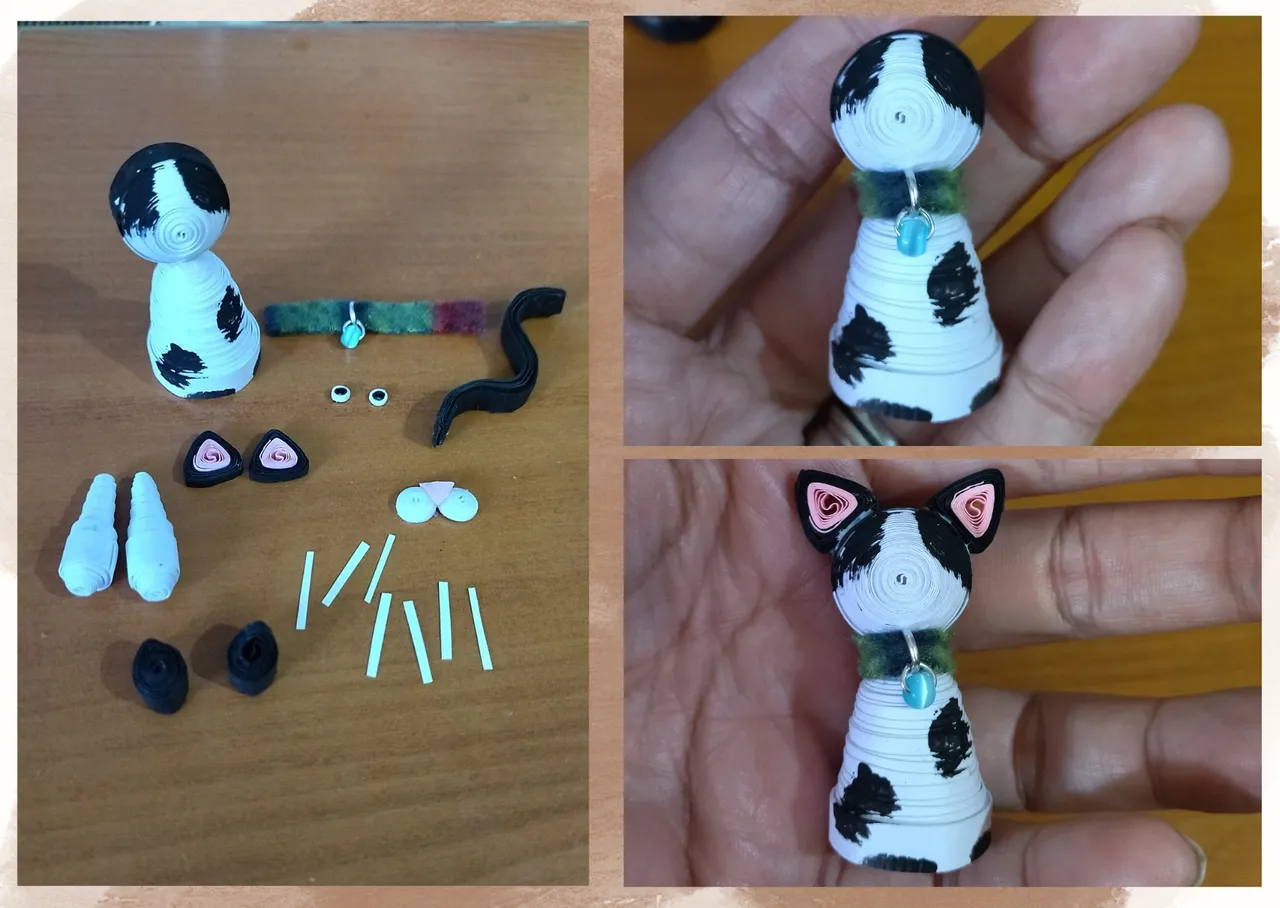
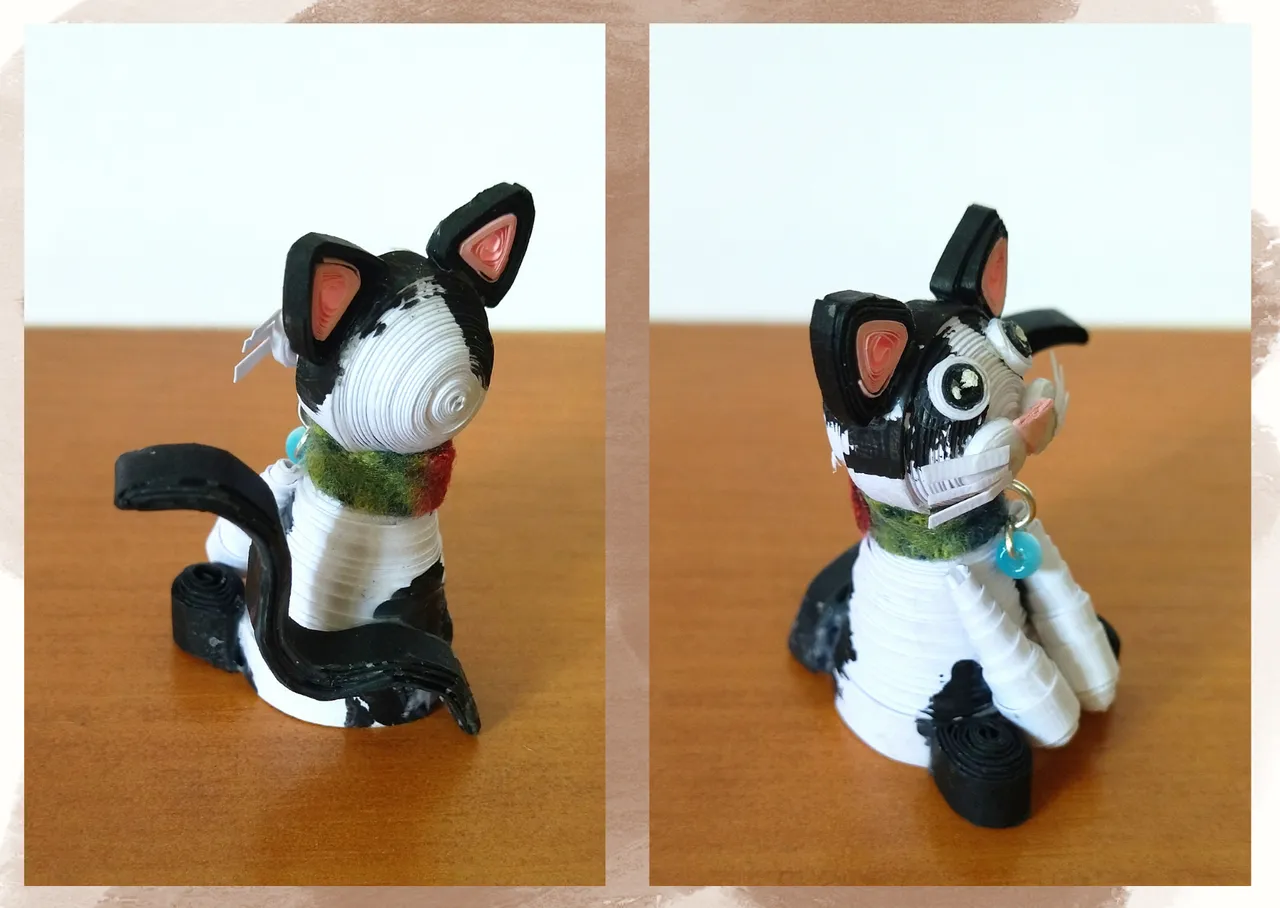
• Ahora vamos con las patas delanteras, para eso necesitaremos cortar una tira de quilling de 5mm de ancho x 15cms de largo enrollaremos con la aguja para quilling para formar un círculo cerrado, sellamos al finalizar con pega, moldearemos en forma de cono sacando hacia afuera con un pincel o palito de altura, en la parte de adentro también colocaremos pega para que la pieza no se deforme. Necesitaremos 2 piezas como esta.
• Para la otra parte de las patas delanteras, cortaremos una tira para quilling de 3mm de ancho x 15cms de largo, enrollamos con la aguja para formar un pequeño círculo cerrado, sellamos con pega, solo empujaremos un poco hacia afuera para moldearlo y darle una forma algo redondeada, añadimos pega para que no se deforme. Uniremos a la otra pieza en forma de cono pegando alrededor un trozo de cartulina más o menos de 4mm de ancho.
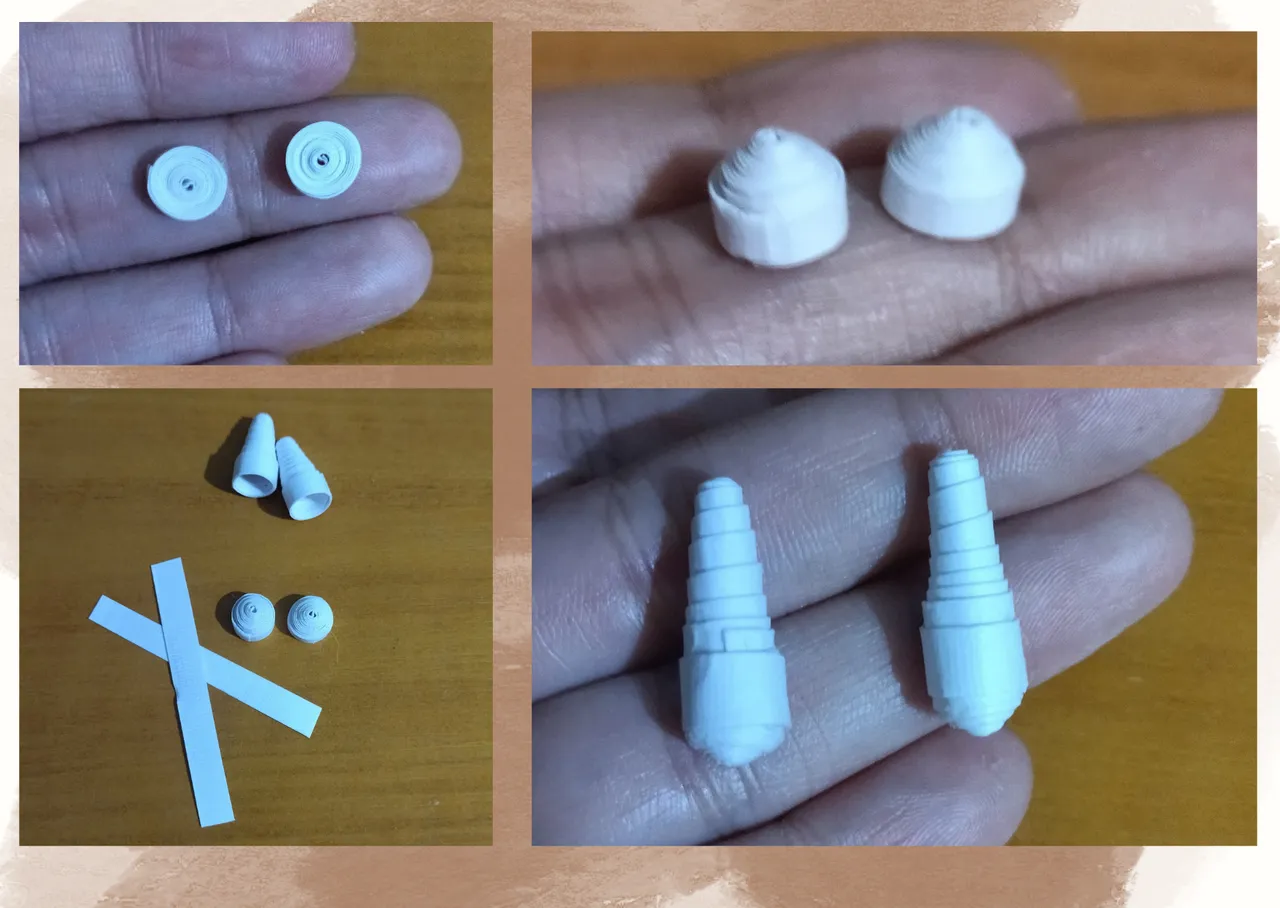
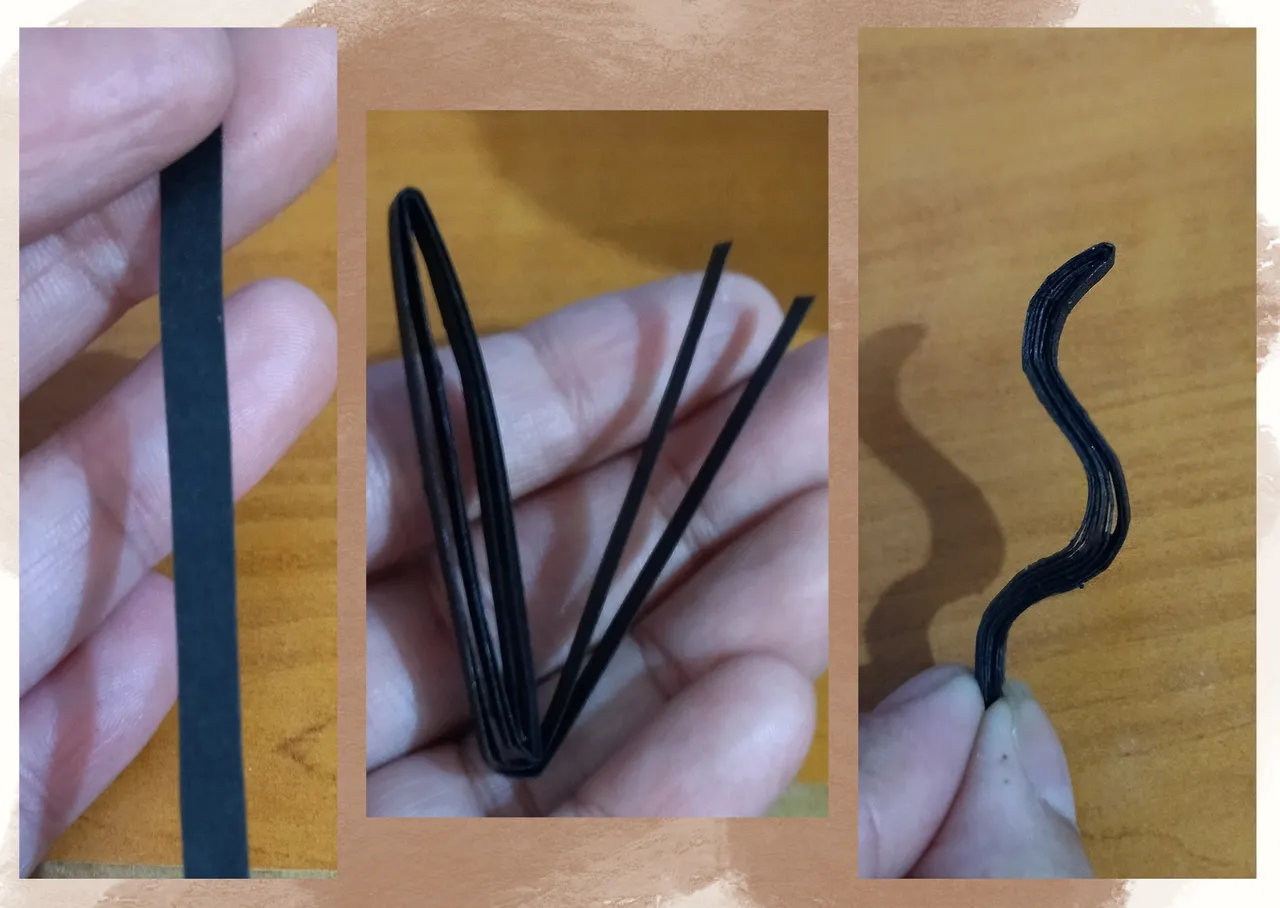
• Vamos con las patas traseras del gatito, estas decidí hacerlas de color negro, cortaremos 2 tiras de cartulina negra de 5mm de ancho x 20cms de largo, enrollamos con la aguja, pero tratamos de no apretar en exceso, al culminar sellamos con pega, sacamos de la aguja y pellizcaremos la punta para darle forma de gota, luego con la ayuda de los dedos moldearemos sacando un poco hacia afuera, agregamos un poco de pega a la parte hueca para que no se deforme.
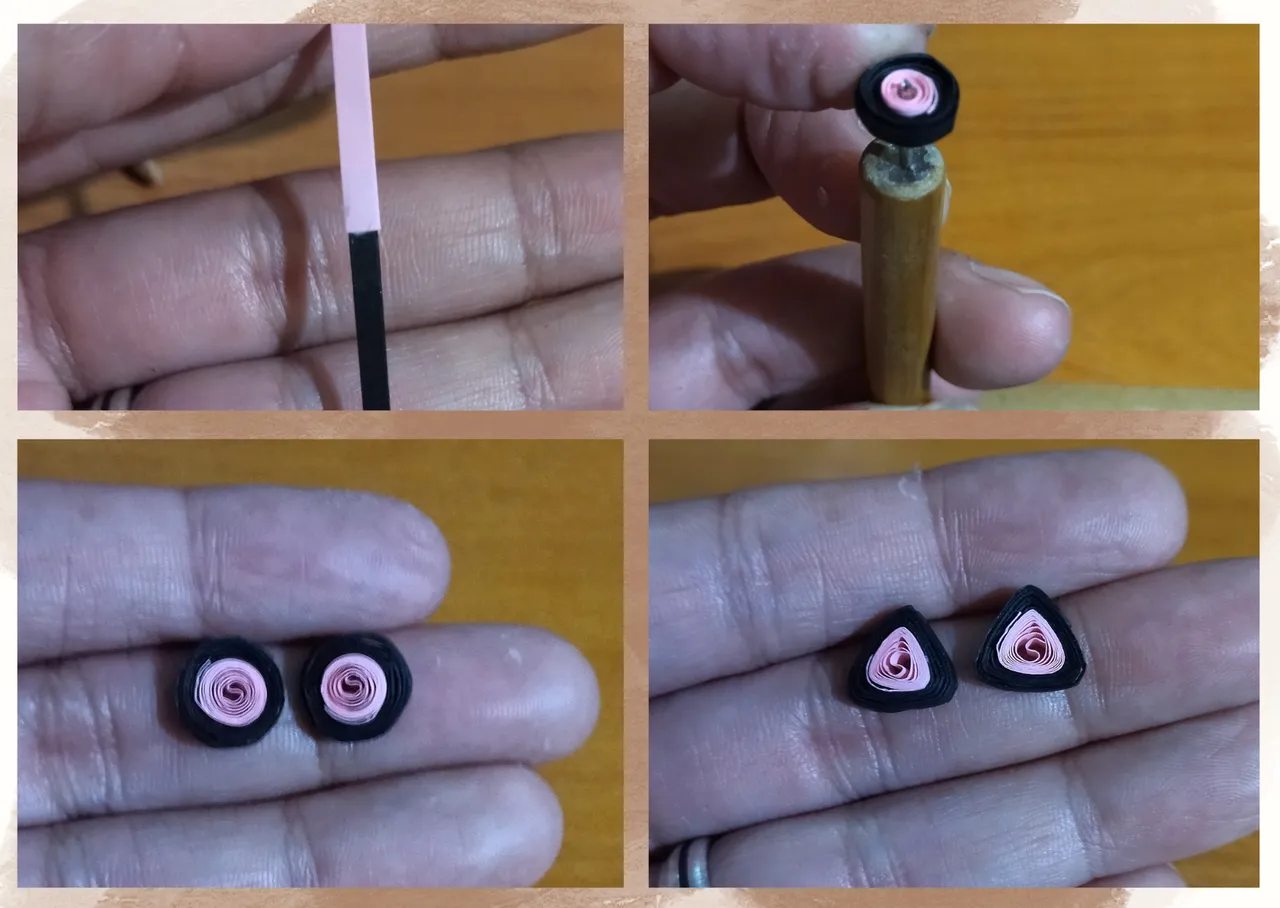
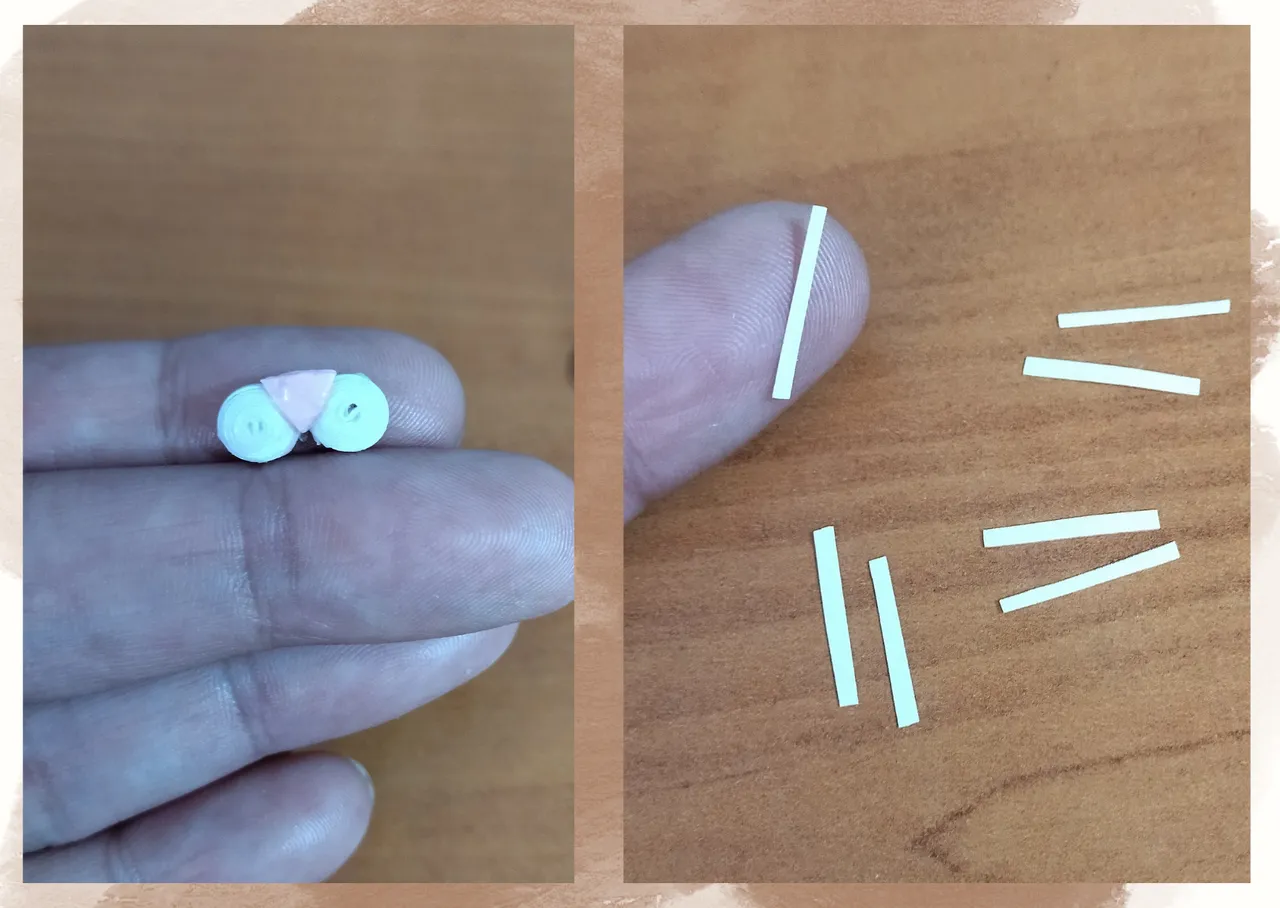
• Para hacer las orejitas pique dos trocitos de cartulina de 3mm de ancho x 10cms de largo y la uní con una cinta rosada de 3mm de ancho x 10cms de largo, enrolle con la aguja e hice un circulo no muy apretado, luego moldee en forma de triángulo.
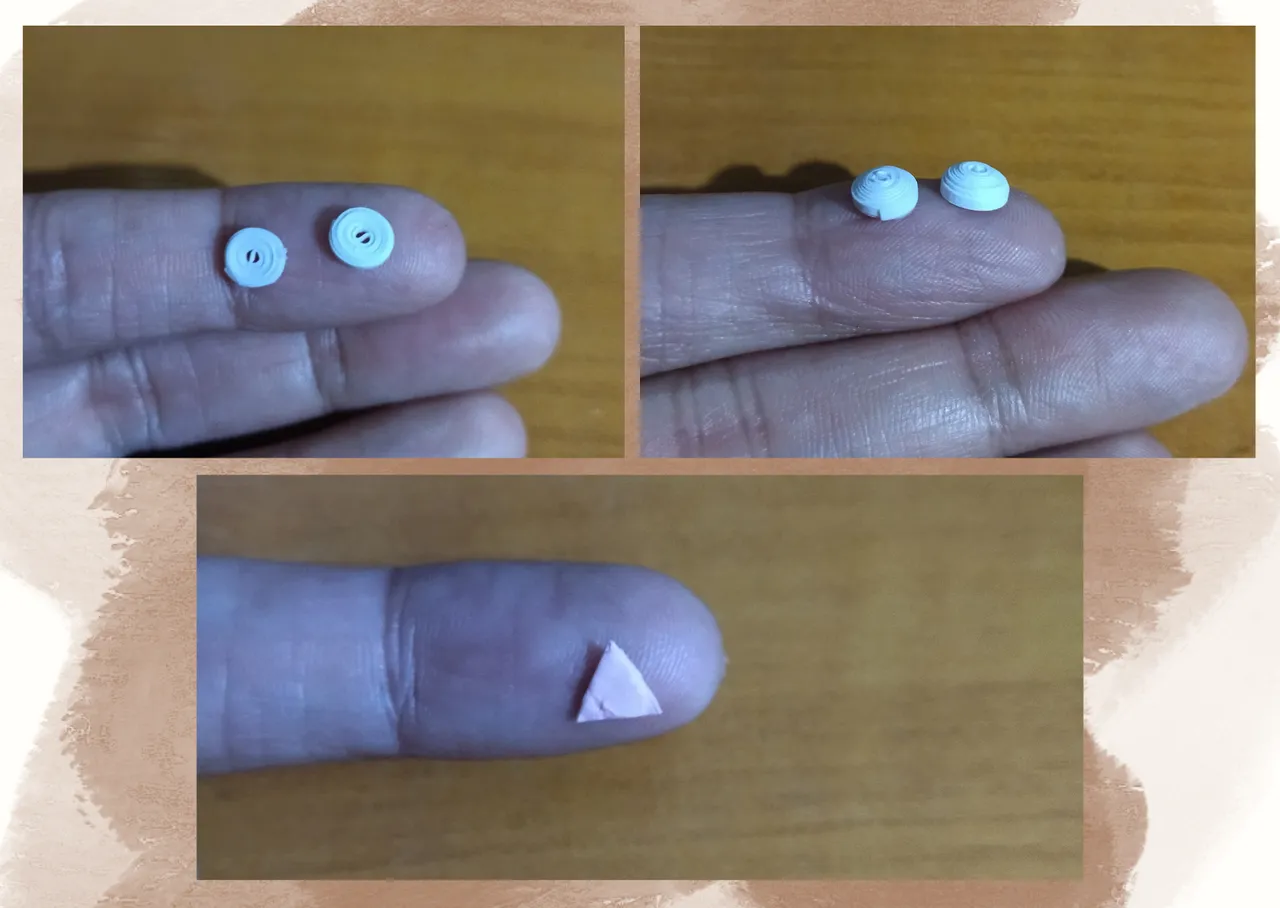
• Vamos con los cachetitos y nariz del gatito. Cortamos dos trocitos de cartulina de 1mm de ancho x 5cms de largo, enrollamos con la aguja, sellamos con pega, sacamos un poquito hacia afuera para darle un pequeño efecto en 3D, colocamos un poquito de pega para que no se mueve la pieza dejamos secar. Necesitaremos dos pizas iguales.
• Para la nariz pique un trocito de cartulina rosada en forma de triángulo, si no tienen disponible solo pinten una blanca. Tomamos los dos círculos de la nariz los unimos y en la parte de arriba le pegamos el pequeño triangulo rosado.
• Hagamos los bigotes cortando 6 pequeñas tiras de cartulina blanca de 1mm de ancho.
• Para la cola vamos a cortar una tira larga de cartulina negra de 4mm de ancho, la doblaremos y moldearemos de la forma que deseamos quede la colita del gato, puede ser recta, en forma de S, trabajemos a nuestro gusto.
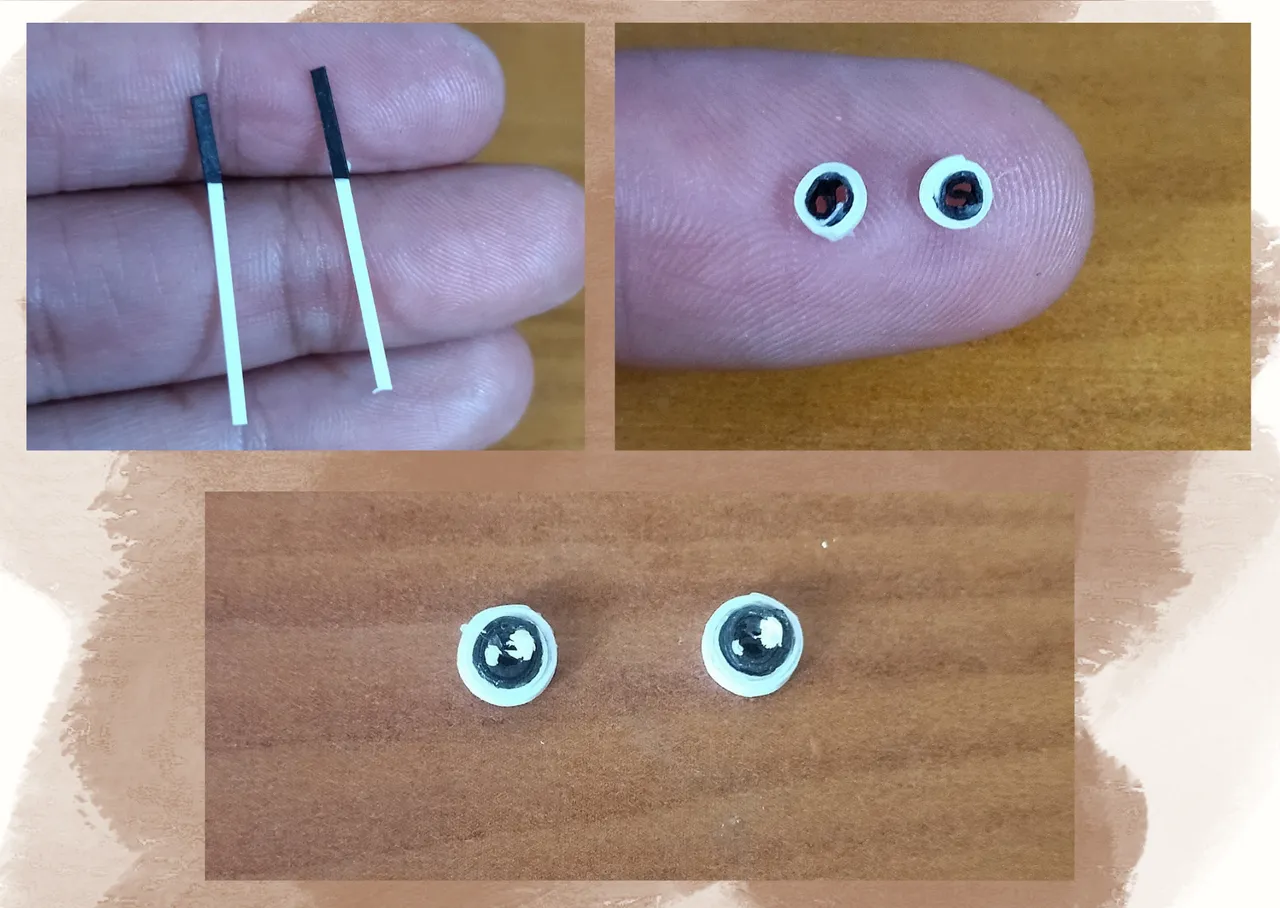
• Hagamos los ojos tomando dos pequeños trozos de cinta blanca y negra, de 1mm de ancho lo enrollamos con la aguja y de esta manera obtendremos un circulo apretado para este fin, con pintura blanca al agua les pinte dos brillitos a los ojitos.
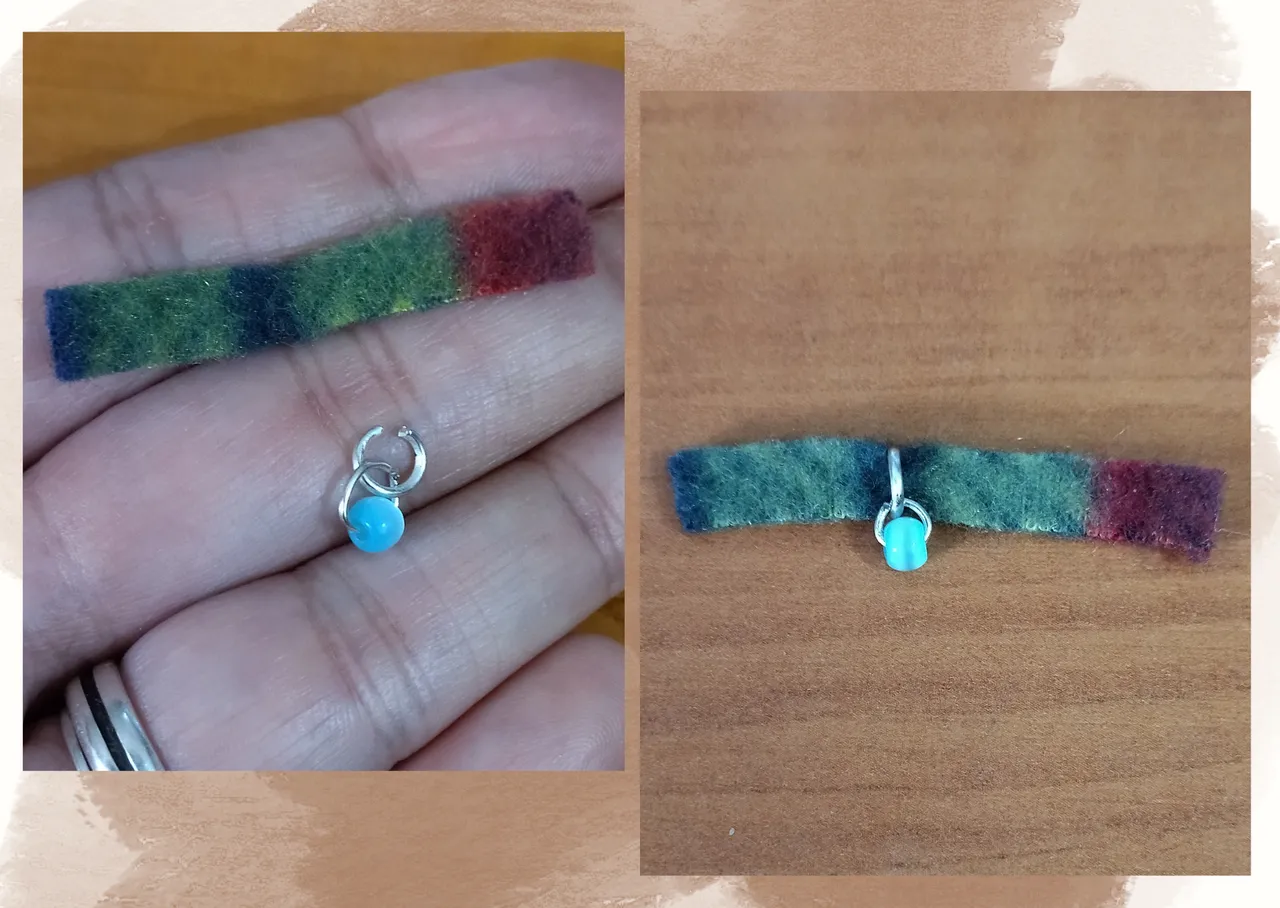
• Para el collar tome un trozo de tela de 4mm de ancho, y le coloque 2 argollas con una pequeña perla para decorar. Esto también lo puedes hacer con quilling enrollando alrededor del cuello un pedazo del color que desees.
• Antes de unir las piezas tome el cuerpo del gato y con pintura al agua negra y un pincel realice algunas manchas, deje secar muy bien la pintura.
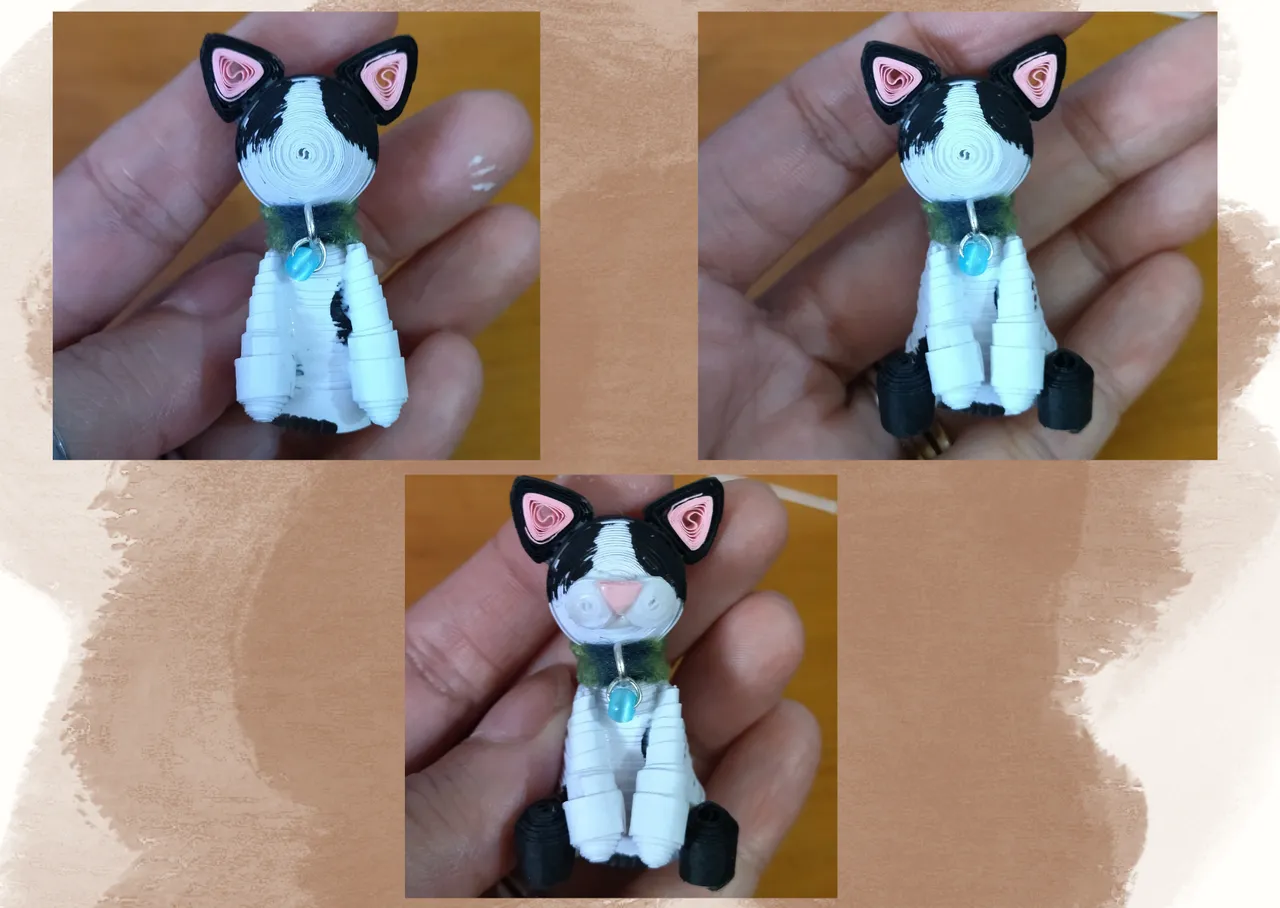
• Vamos a armar nuestro gatito, comenzaremos colocando el collar alrededor del cuello sellamos con pega.
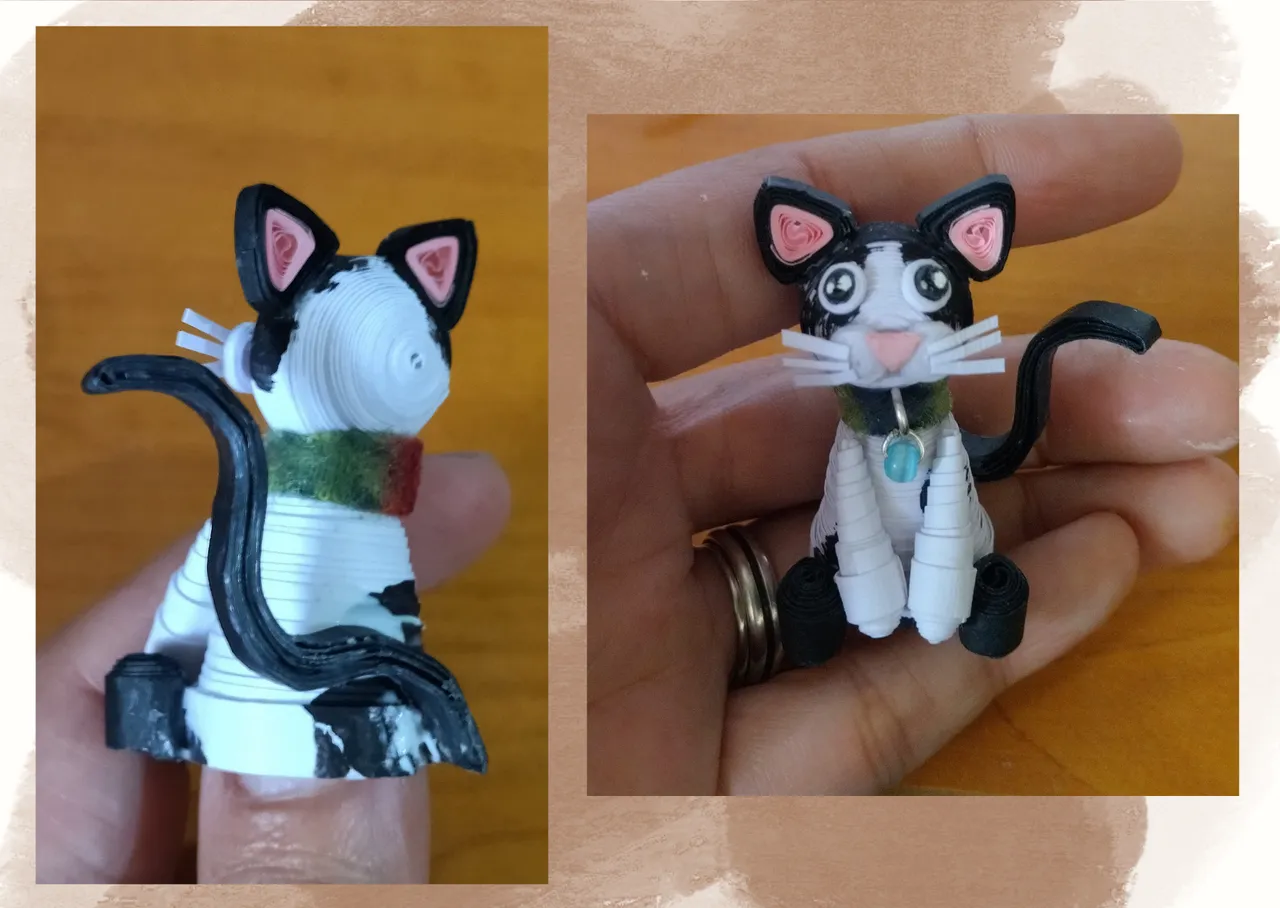
• Seguimos con las orejas, luego con las patitas delanteras y traseras, luego la nariz que esta previamente unida a los cachetitos, seguido de los ojos, bigotes, y por ultimo pegamos la colita.
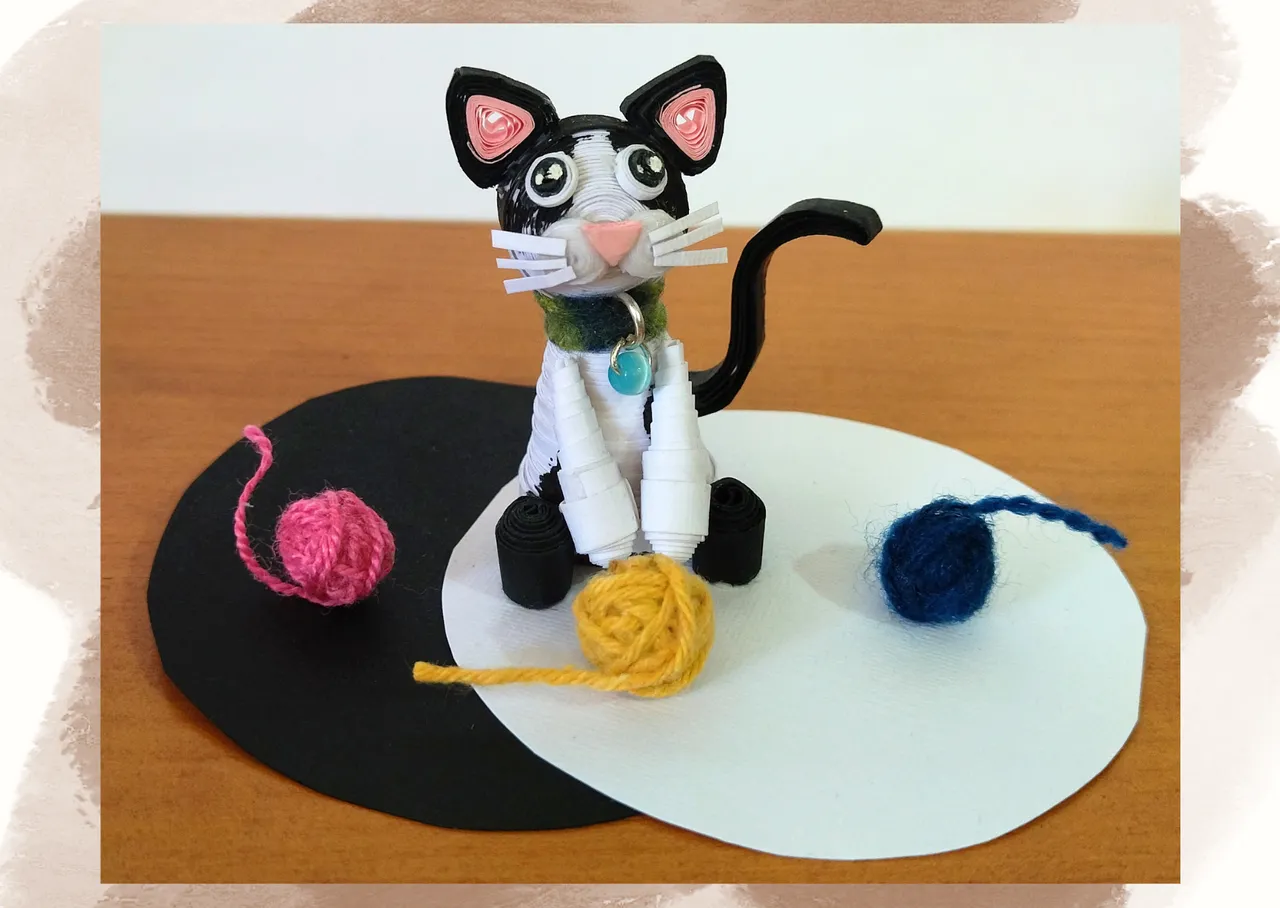
• De manera opcional corte un trozo de cartulina blanca y otro negro los uní, eso para hacer una base para colocar al gatito. Lo puedes hacer como desees.
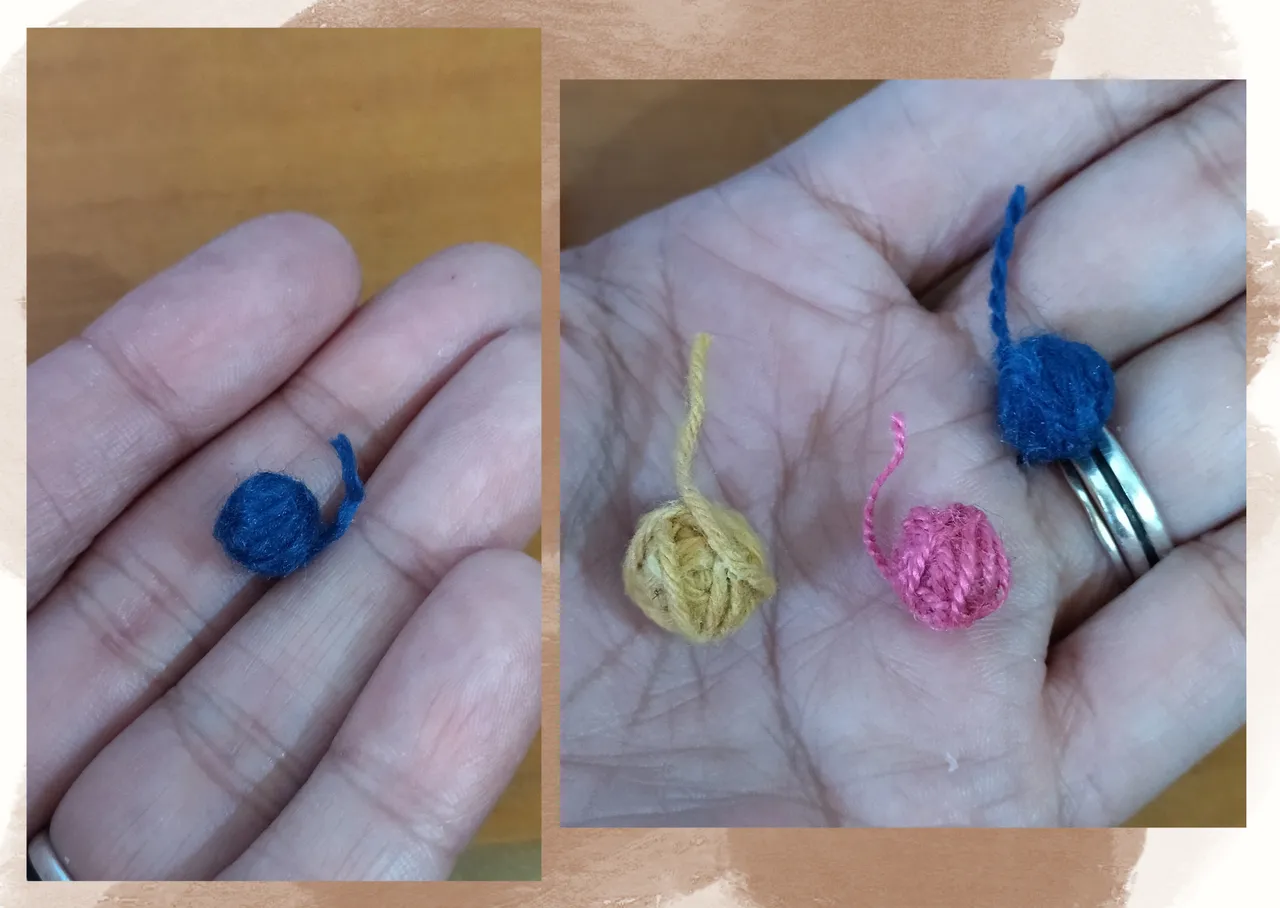
• Tome una perla mediana y un trozo de hilo, el cual enrolle alrededor de la perla para hacer las veces de un rollito de estambre para colocarlo junto al gatito, repetí el proceso con otras perlas y trozos de hilos de otros colores.
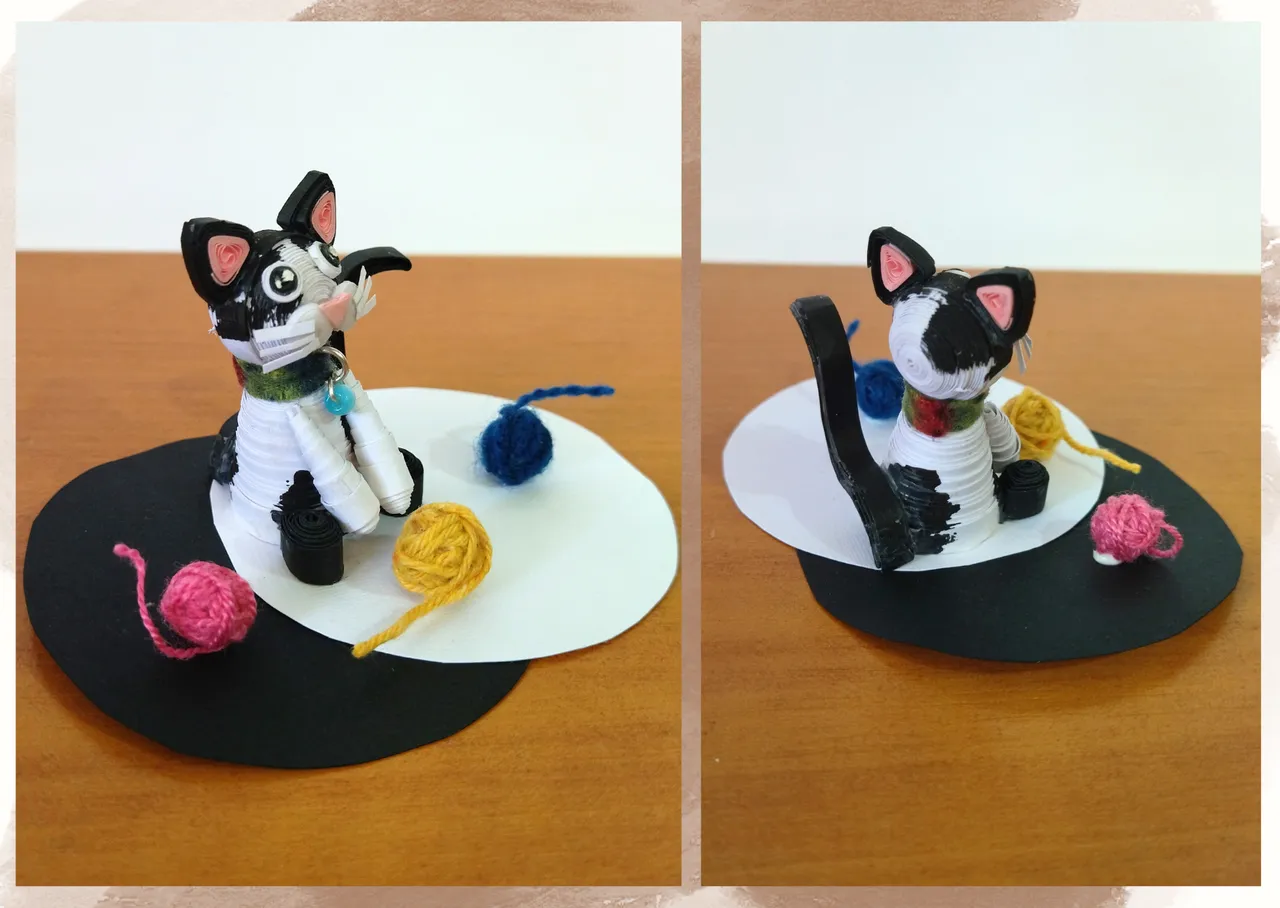
• Coloque las cartulinas para formar un piso o plataforma y poner a mi gatito, decore con los rollitos de estambre alrededor del mismo, y de esta manera tuve listo mi gatito decorativo en 3D.

I hope you did, I hope you liked my explanation, procedure and photos, I made them with love for you.
¿Que les pareció, les gustó?
Espero que sí, que les haya gustado mi explicación, procedimiento y fotos, los hice con mucho cariño por y para ustedes.
"Deja salir esa musa que te inspira, y deja volar tu imaginación".
Gracias a todos, nos vemos en la próxima.✨
Todas las fotos usadas en este post son de mi autoría y han sido sacadas en mi celular personal un Redmi 9T y editadas Canva Banner y separador hecho por mí en Canva Traducido con la ayuda de DeepL
