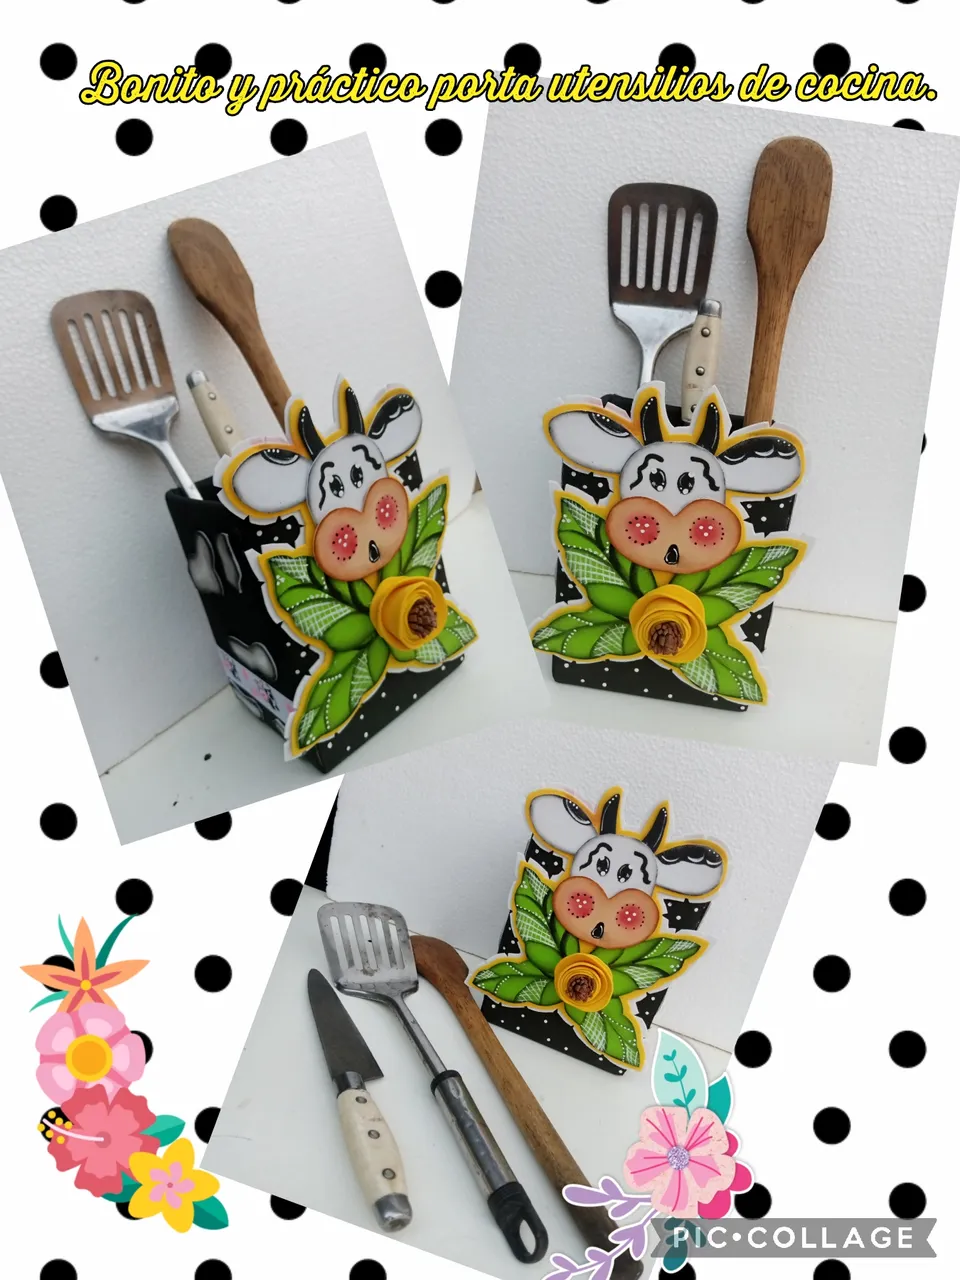
Hola muy buenos días, amigos creativos de esta hermosa comunidad Hivediy, ante de todos quiero agradecerle a Dios, por un nuevo día y también por permitirme cumplir otro año más de vida, les envió a todos ustedes un saludo virtual, espero que se encuentren muy bien y que pasen un feliz día, con muchas bendiciones. Hoy les traigo un nuevo tutorial, se trata de como elaborar un porta utensilios para la cocina, con la temática de una vaca, este porta utensilios está elaborado con materiales de uso reciclables y también con otros materiales que son económicos y muy fáciles de conseguir. Ahora, sin más nada que decir, vamos a comenzar con este divertido paso a paso. Seguro te va a gustar.
Hello good morning creative friends of this beautiful Hivediy community, first of all I want to thank God for a new day and also for allowing me to celebrate another year of life, I sent you all a virtual greeting, I hope you are very well and that have a happy day, with many blessings. Today I bring you a new tutorial, it's about how to make a kitchen utensil holder, with the theme of a cow, this utensil holder is made with recyclable materials and also with other materials that are cheap and very easy to get. Now, without further ado, let's get started with this fun step-by-step. I'm sure you will like it.
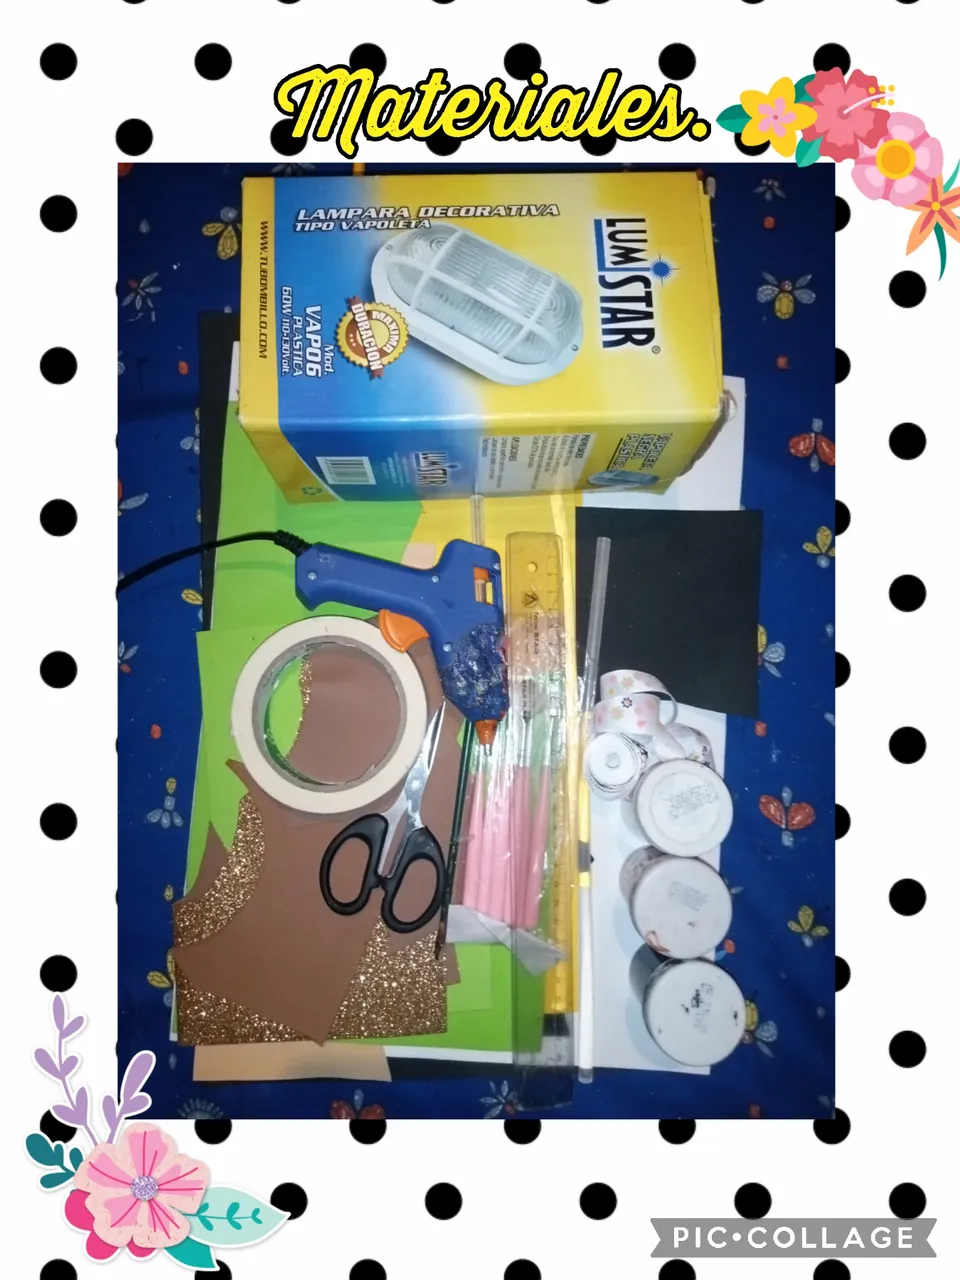
Para elaborar este bonito y practico porta utensilios, con la temática de una vaca, vamos a necesitar los siguientes materiales y herramientas.
*Materiales:
*1 caja de cartón, de utilización reciclable.
*Foami de varios colores.
*Pinturas al frío.
*Barra de silicona.
*Cinta de embalaje,
*Cinta de tela estampada.
*Herramientas:
*1 tijera.
*Pinceles para pintar variados.
*1 lápiz.
*Pistola de silicona.
To make this beautiful and practical utensil holder, with the theme of a cow, we are going to need the following materials and tools.
*Materials:
*1 cardboard box, for recyclable use.
*Foam in various colors.
*Cold paints.
*Silicone bar.
*Packing tape,
*Printed fabric ribbon.
*Tools:
*1 scissors.
*Assorted paint brushes.
*1 pencil.
*Glue gun.
We begin with the step by step, to make this beautiful and practical utensil holder, with the theme of a cow.
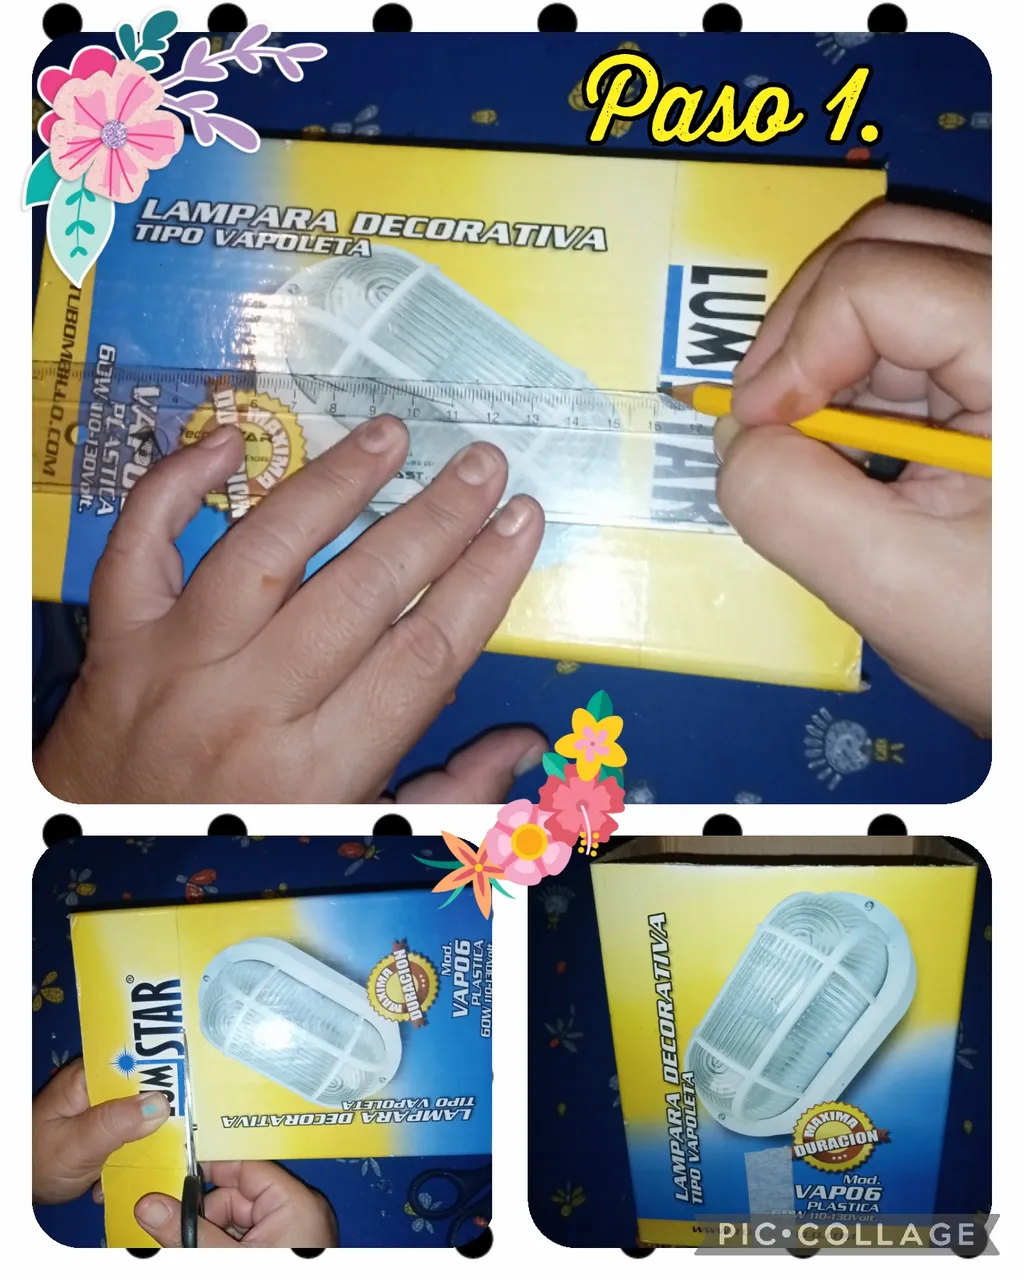
Step 1. To start making this beautiful and practical cow-themed kitchen utensil holder, the first thing we're going to do is take the recyclable box, and mark off the measurements we're going to use to make this holder. utensils, then with the help of scissors we cut out the already marked parts, see the images.
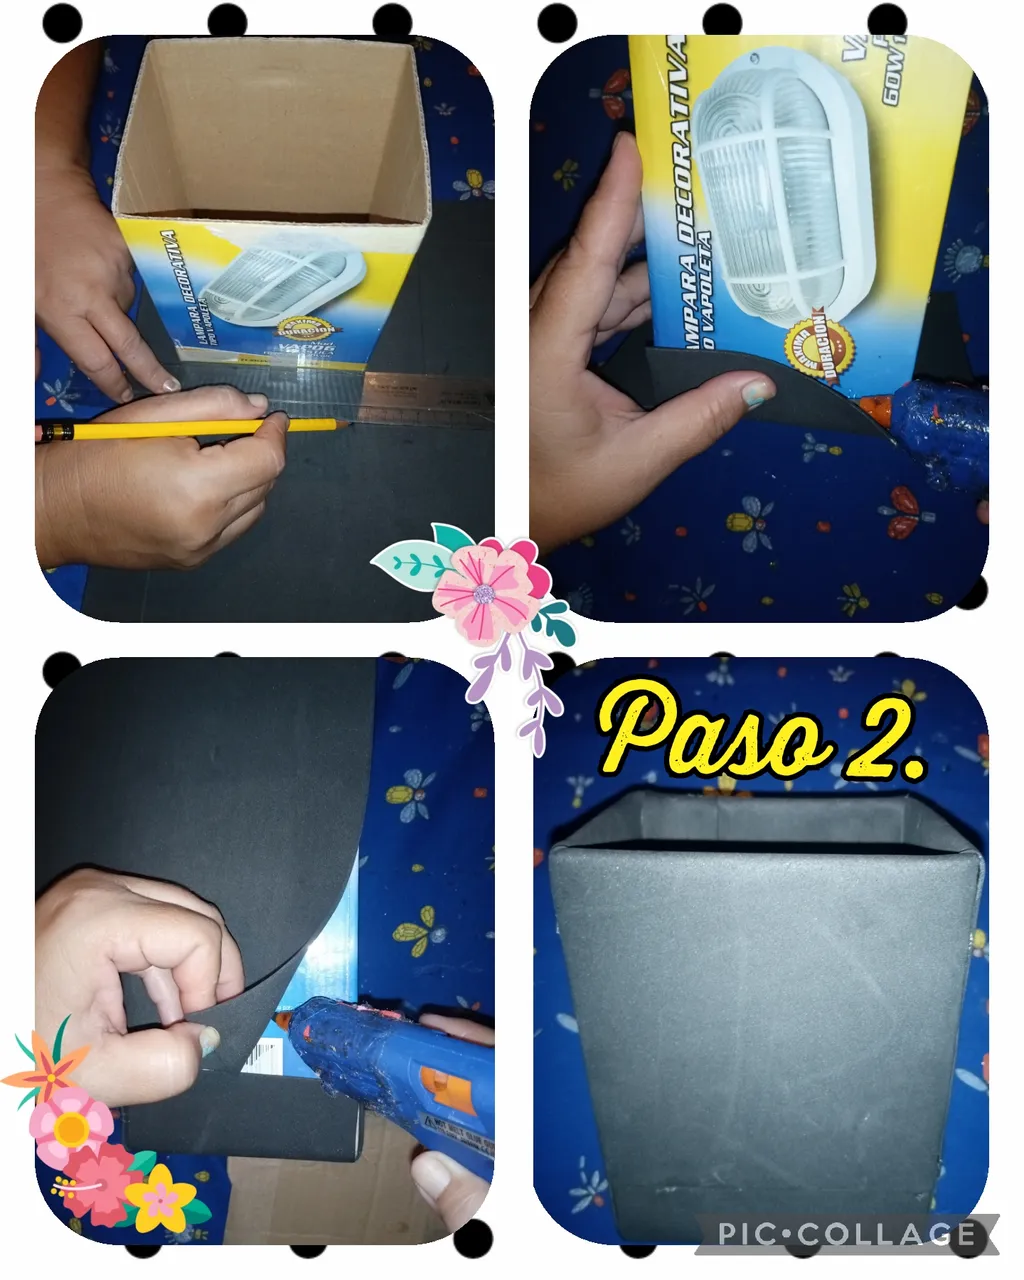
Step 2. In this step we are going to take black foam with a soft texture, and mark the measurements to be able to cover the cardboard box, then with hot silicone, we begin to cover the box, see the images.
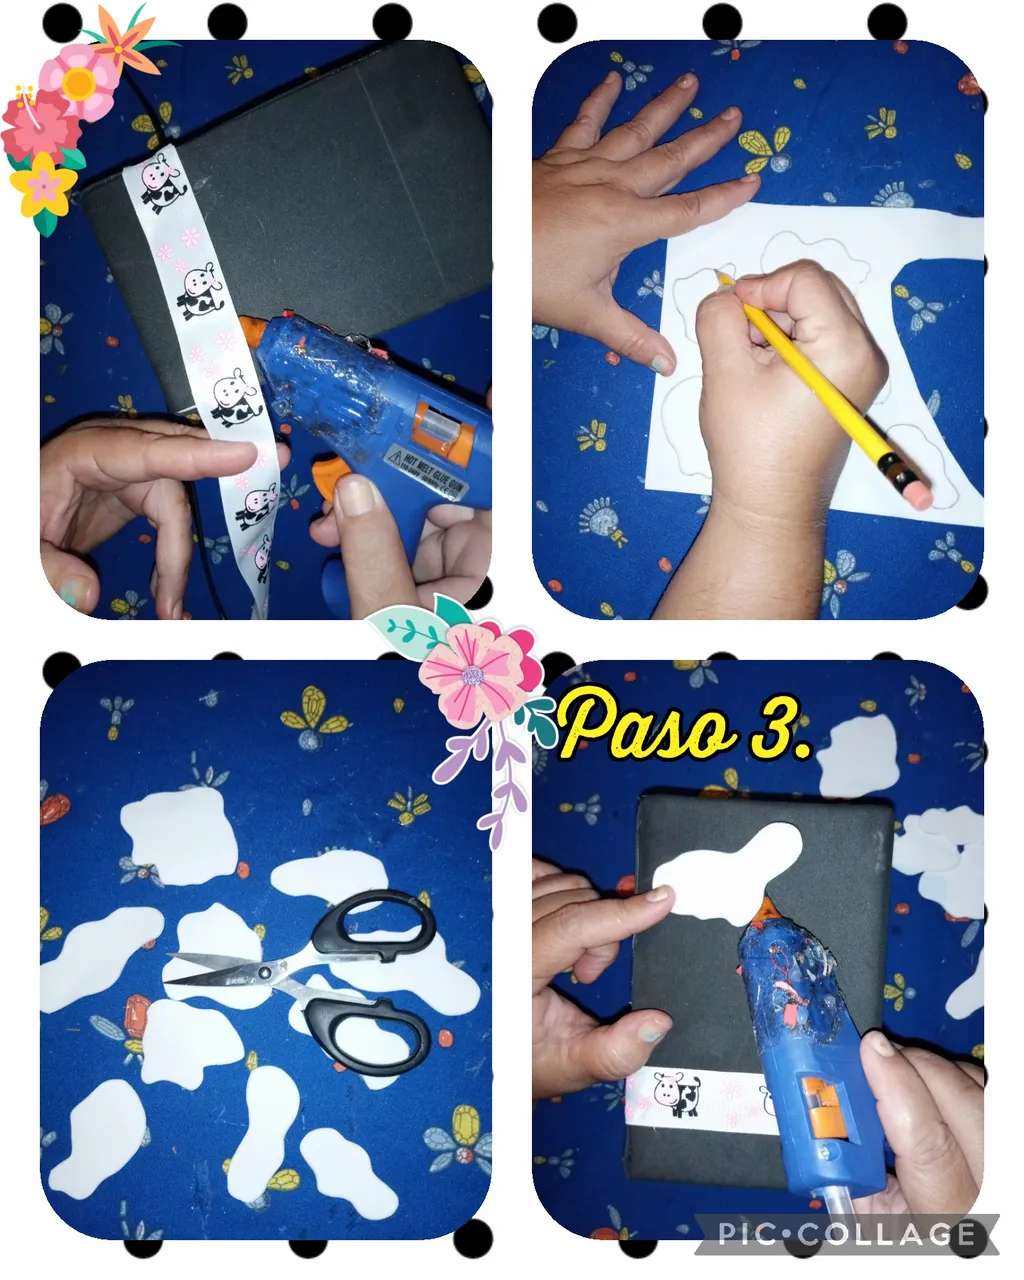
Step 3. Next, in this step we are going to decorate the box already covered with foami and we are going to paste it with hot silicone, the patterned fabric tape, then on a white foami with a soft texture, we mark enough stains, to simulate the spots on a cow, in this case the cow would be black with white spots, then with the help of scissors we cut out all the spots and end up gluing them to the box with hot silicone, see the images.
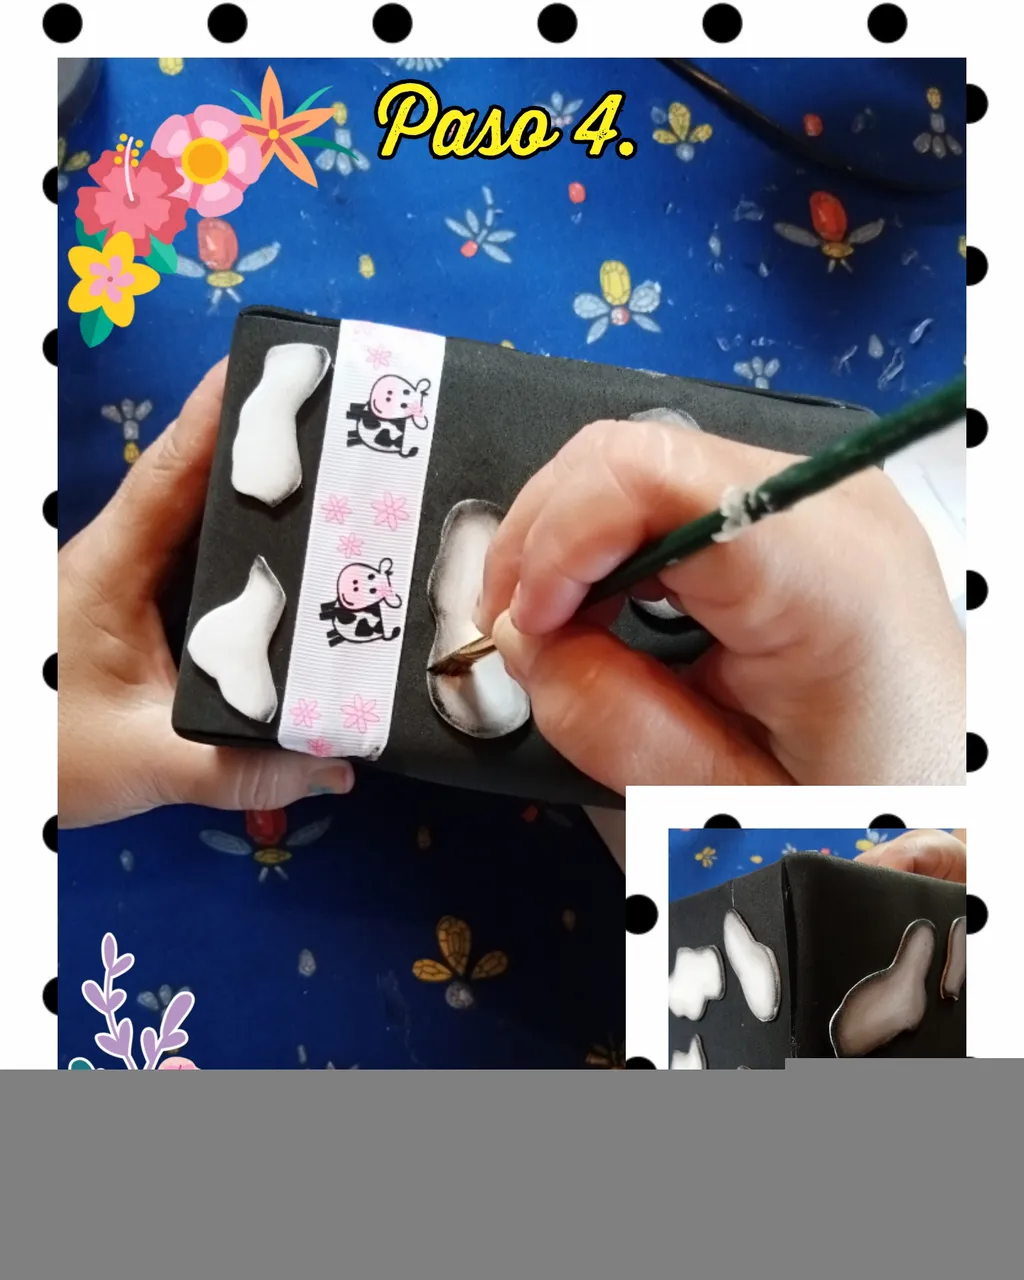
Step 4. In this step we are going to blur the stains that we glued on the box, which we are using to continue making the utensil holder and we are going to do it in the following way, we are going to use cold black paint, a brush angular and a little water, first we dip the brush in a little water, we unload it on a cloth, then we dip it in the paint again and finally we pass it through the edges of each stain, leaving a good shading, see the images .
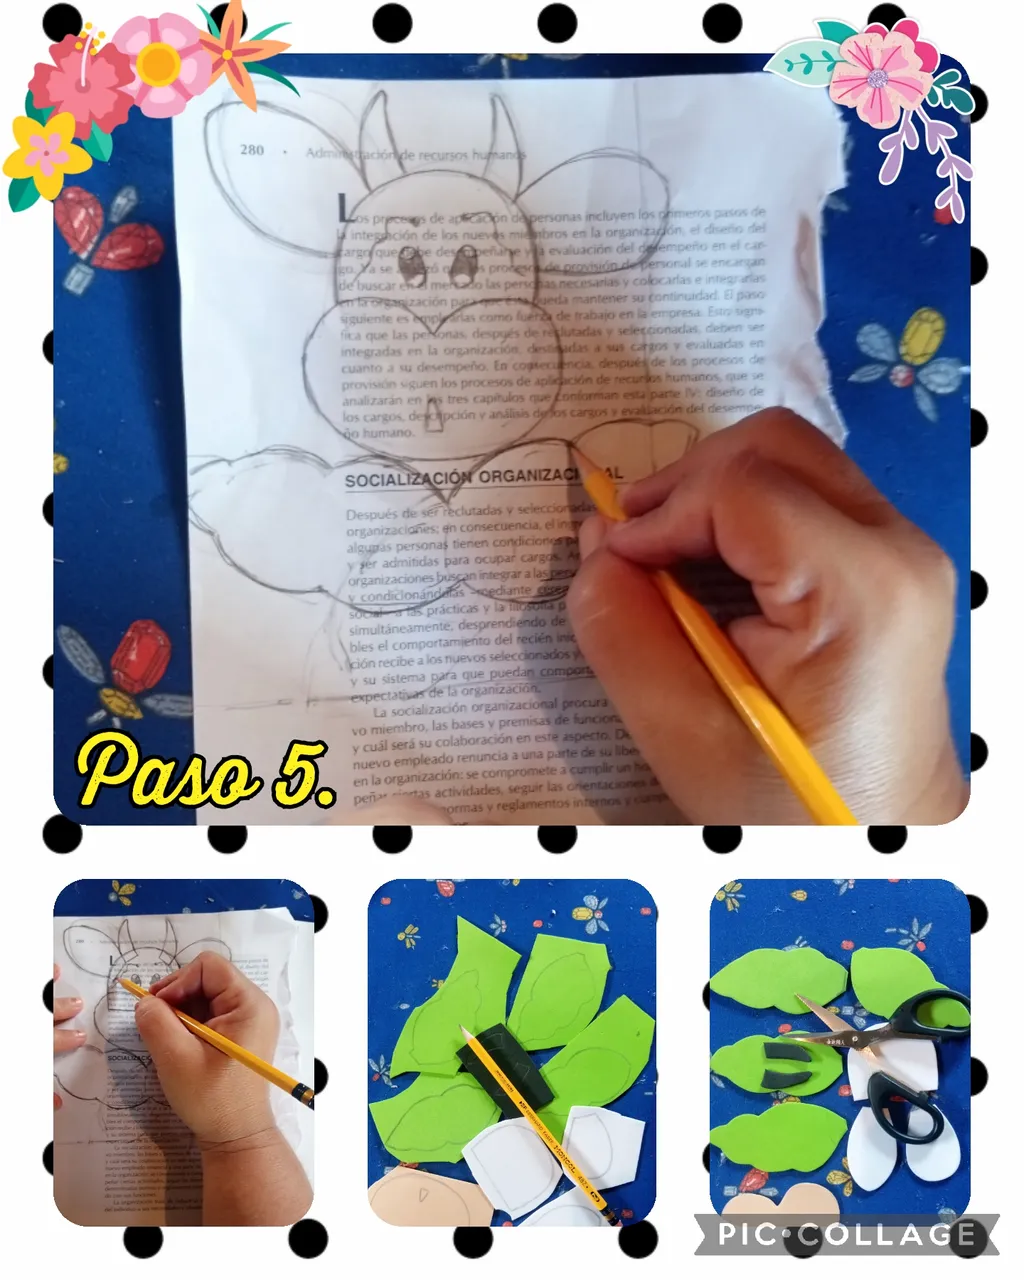
Step 5. In this step we are going to take a sheet of recyclable paper and we are going to draw the figure of a cow, then with foamis of various colors, we are going to mark all the pieces in their respective colors and with the help of the we are going to cut it with scissors, look at the images.
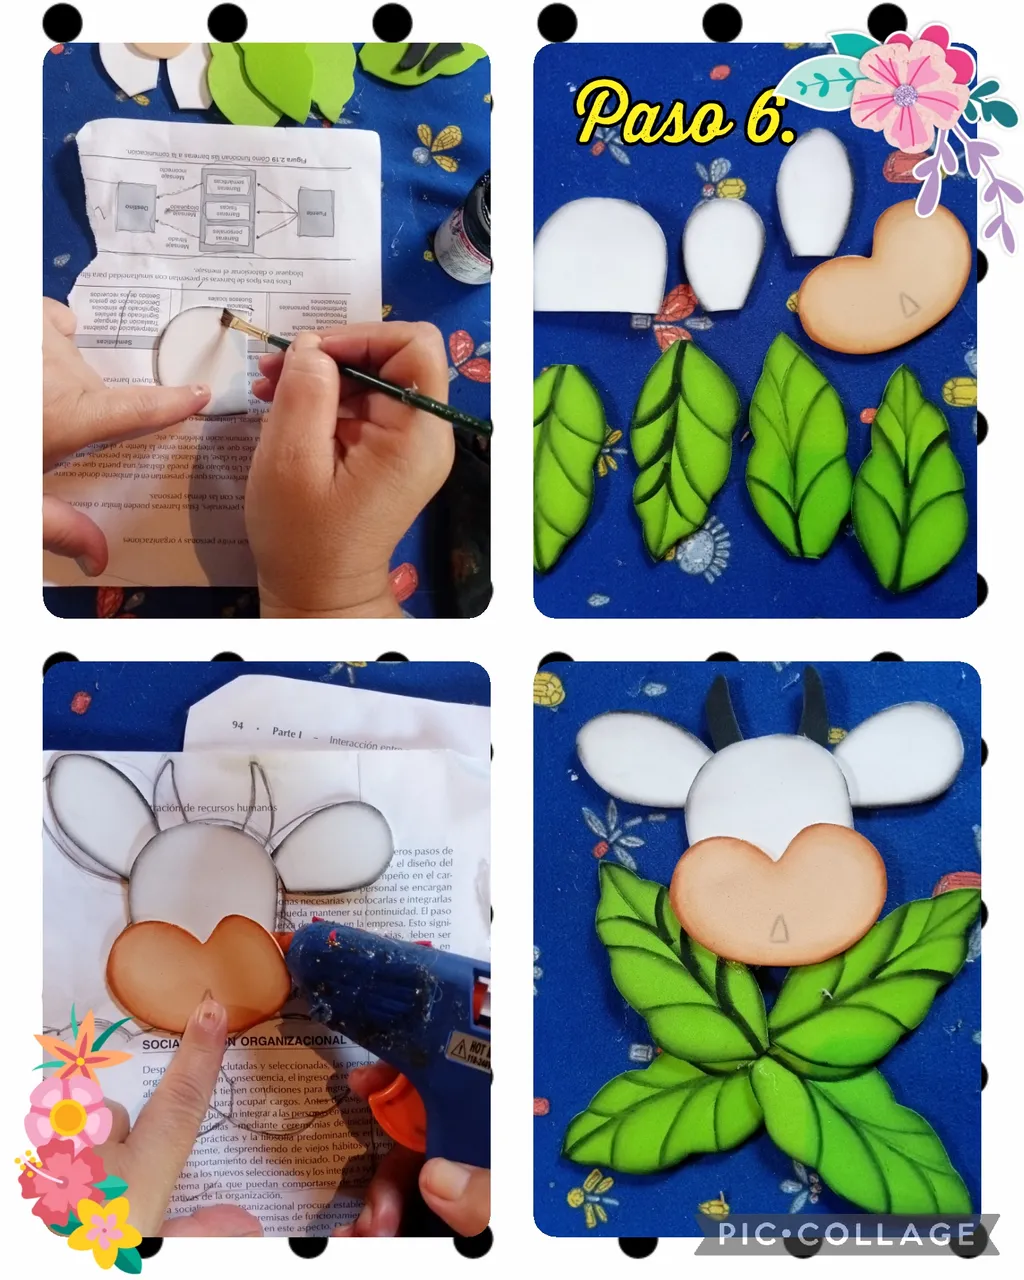
Step 6. Now in this step we are going to blur all the pieces of foami, with which we are going to form the figure of a cow, and we are going to do it, with the same procedure of step 4, then with hot silicone we start to join all the pieces, until finally forming the figure of a cow.
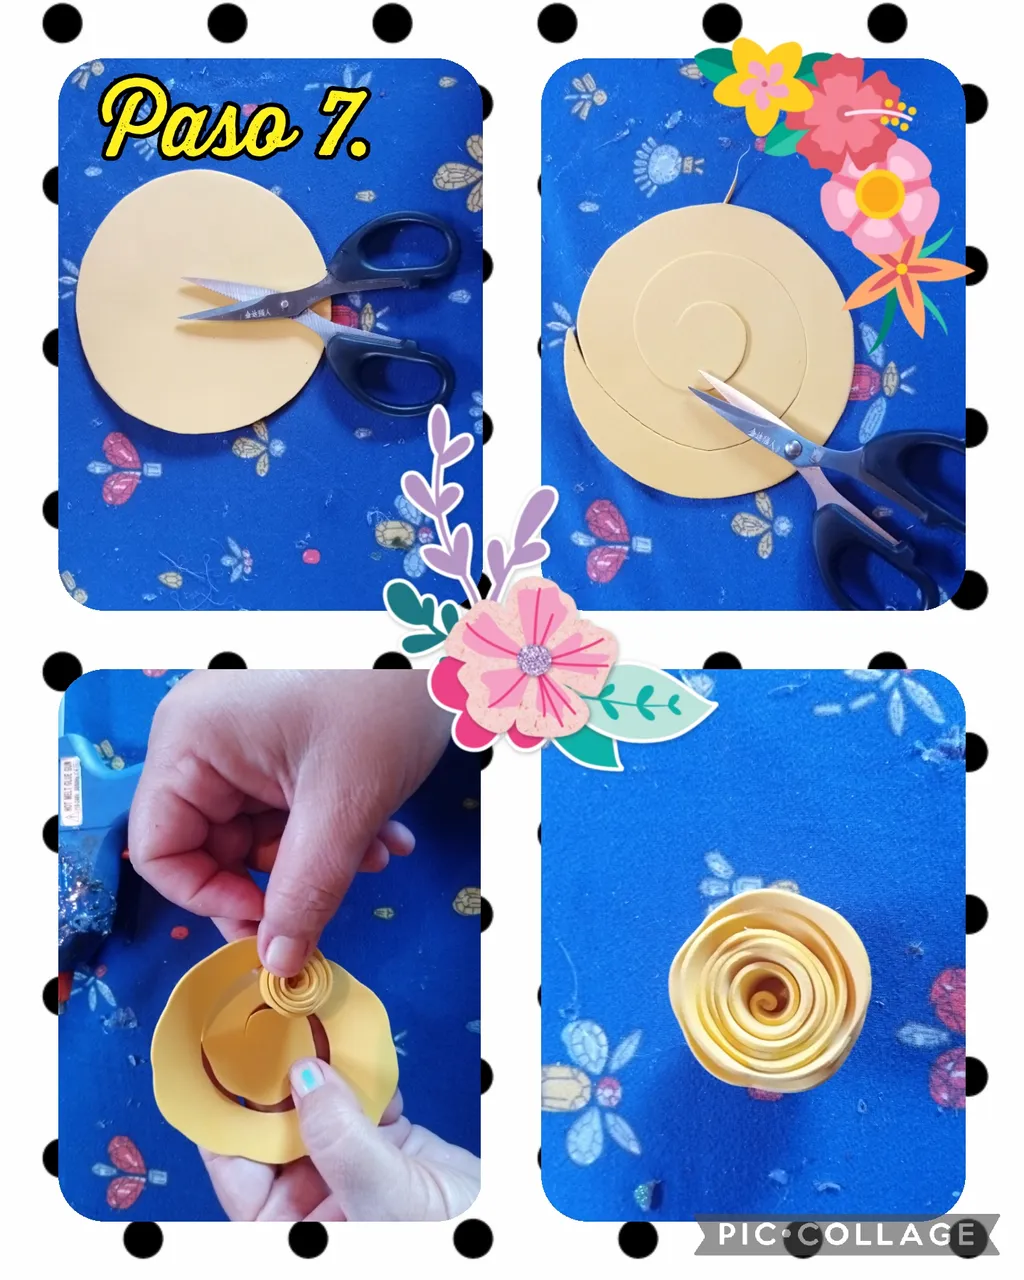
Step 7. In this step we are going to make a rose, and we are going to do it in the following way, we mark and cut out a circle, then we are going to cut the same circle in the central part, in a spiral shape, we put a little hot silicone on the tip and we begin to roll it from the outside to the center, I show you the images.
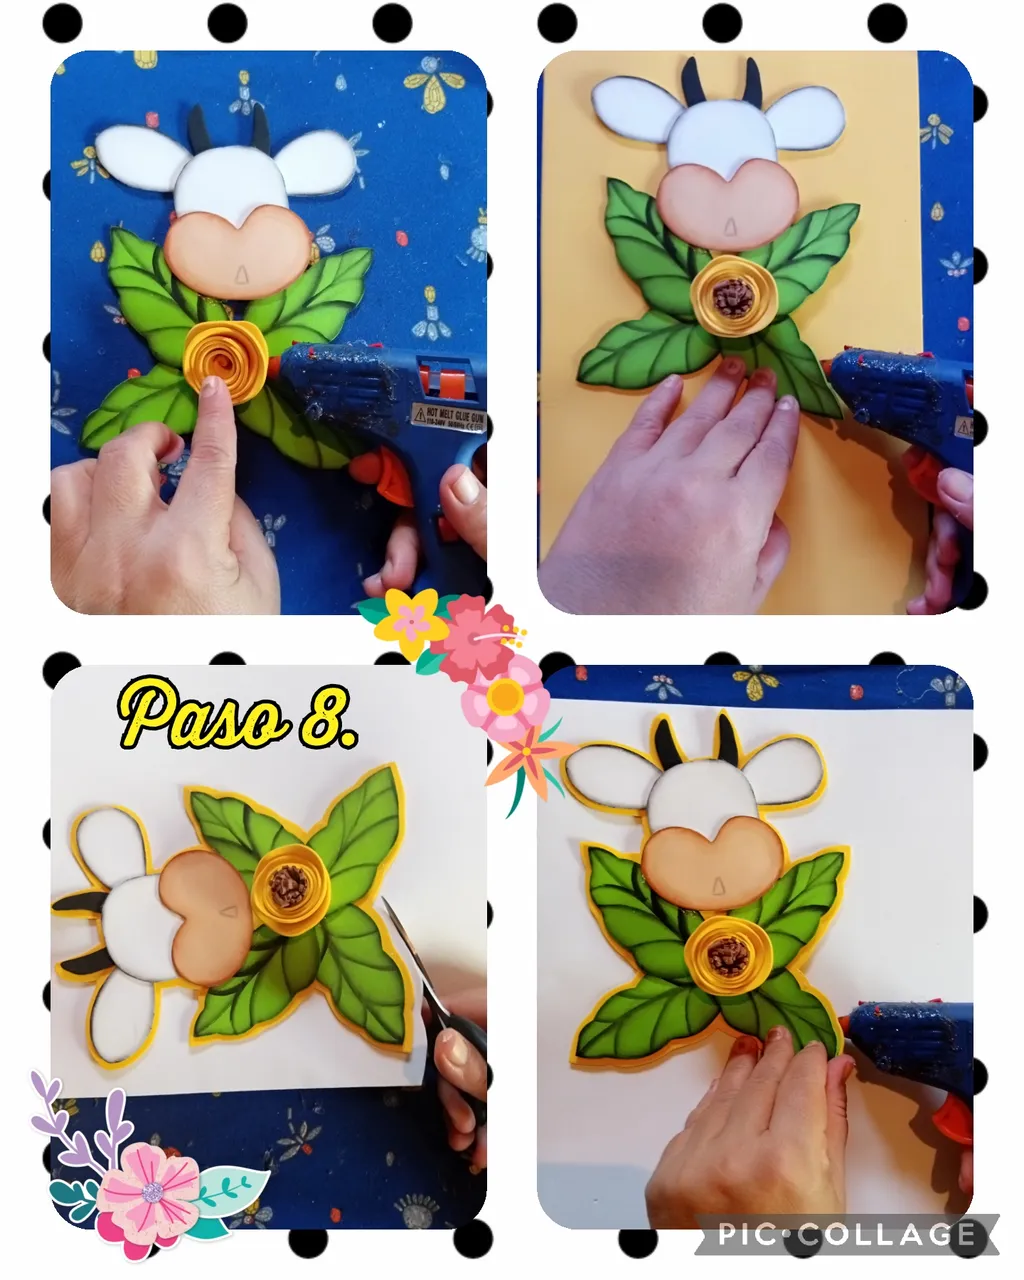
Step 8. Once the cow is formed, we glue the rose with hot silicone, in the center part, then we take a yellow foami with a smooth texture, and we are going to paste the figure of a cow, with the help of scissors we cut out leaving, more or less like half a centimeter of distance, so that it remains as relief, we still took another white foami with a smooth texture and we glued it again with hot silicone and also cut it, leaving half a centimeter of distance as relief, see the images.

Step 9. Almost to finish this project, with cold paint of the colors that we are going to use and brushes, we are going to paint the eyes and other details to the figure of the cow and we finish by gluing it to the box already listed above with hot silicone , see the images.
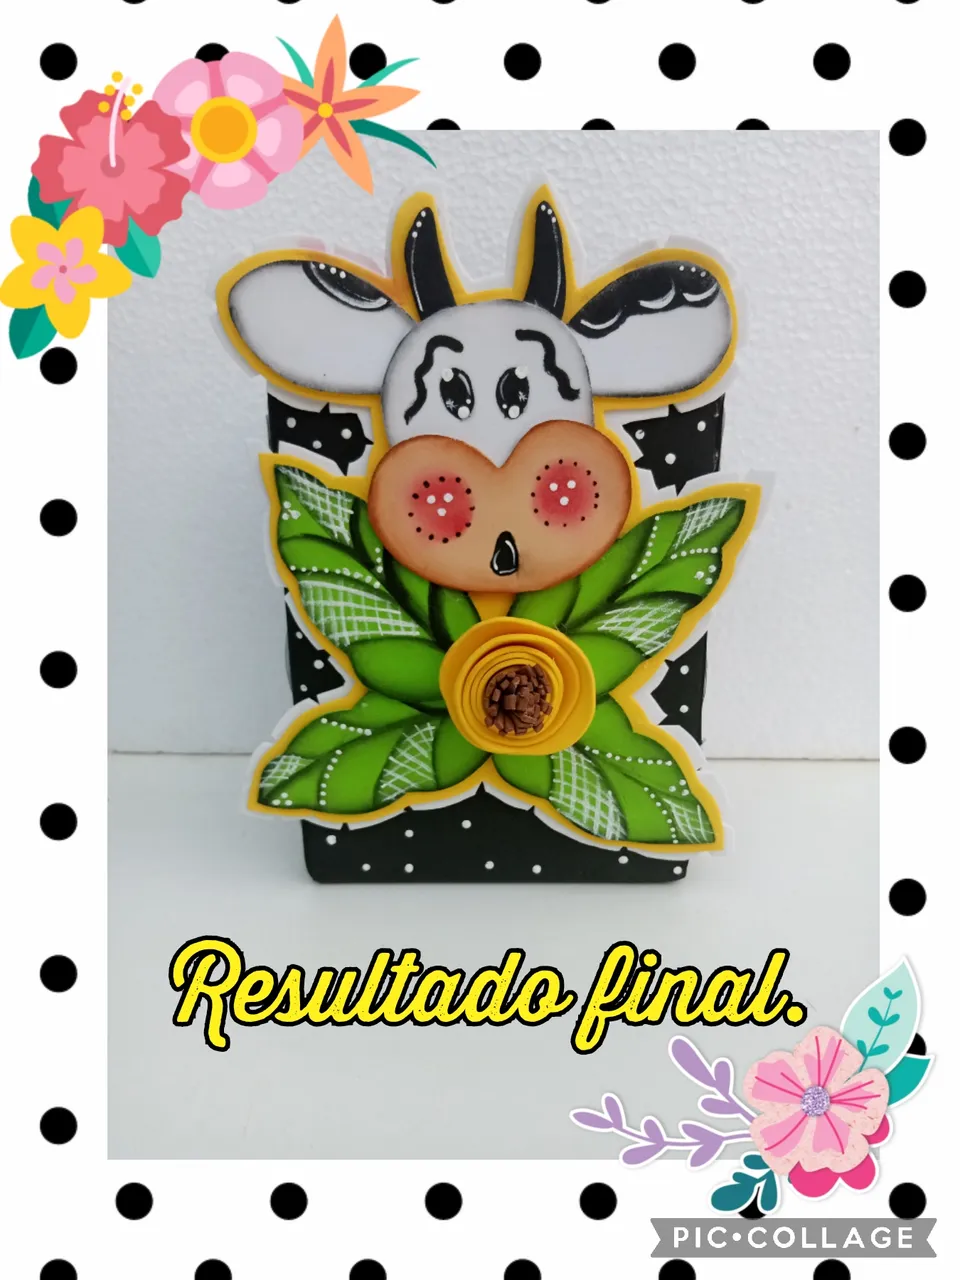
We have already finished all the steps, this is the final result, a beautiful and practical kitchen utensil holder, ideal to protect your utensils in your kitchen, it is also very decorative, thanks for visiting my blog, see you very soon with another creative project, have a nice day and God bless you all.
Las fotos fueron tomadas con mi telefono androide TECNO SPARK 6GO y editadas con la aplicacion PIC-COLLAGE y el texto fue traducido de español a ingles por el traductor de Google.
The photos were taken with my TECNO SPARK 6GO android phone and edited with the PIC-COLLAGE application and the text was translated from Spanish to English by Google translate.