Dear friends Hivers greetings and many blessings to all, today I am pleased to share with you a simple but very nice table runner, it is easy to make, besides that it helps us to decorate a space in our kitchen; in particular in my apartment I have no dining table, I have is a breakfast table, but it serves us for both, I did it for my breakfast table and I love it I hope you do too. Let's start.
Español:
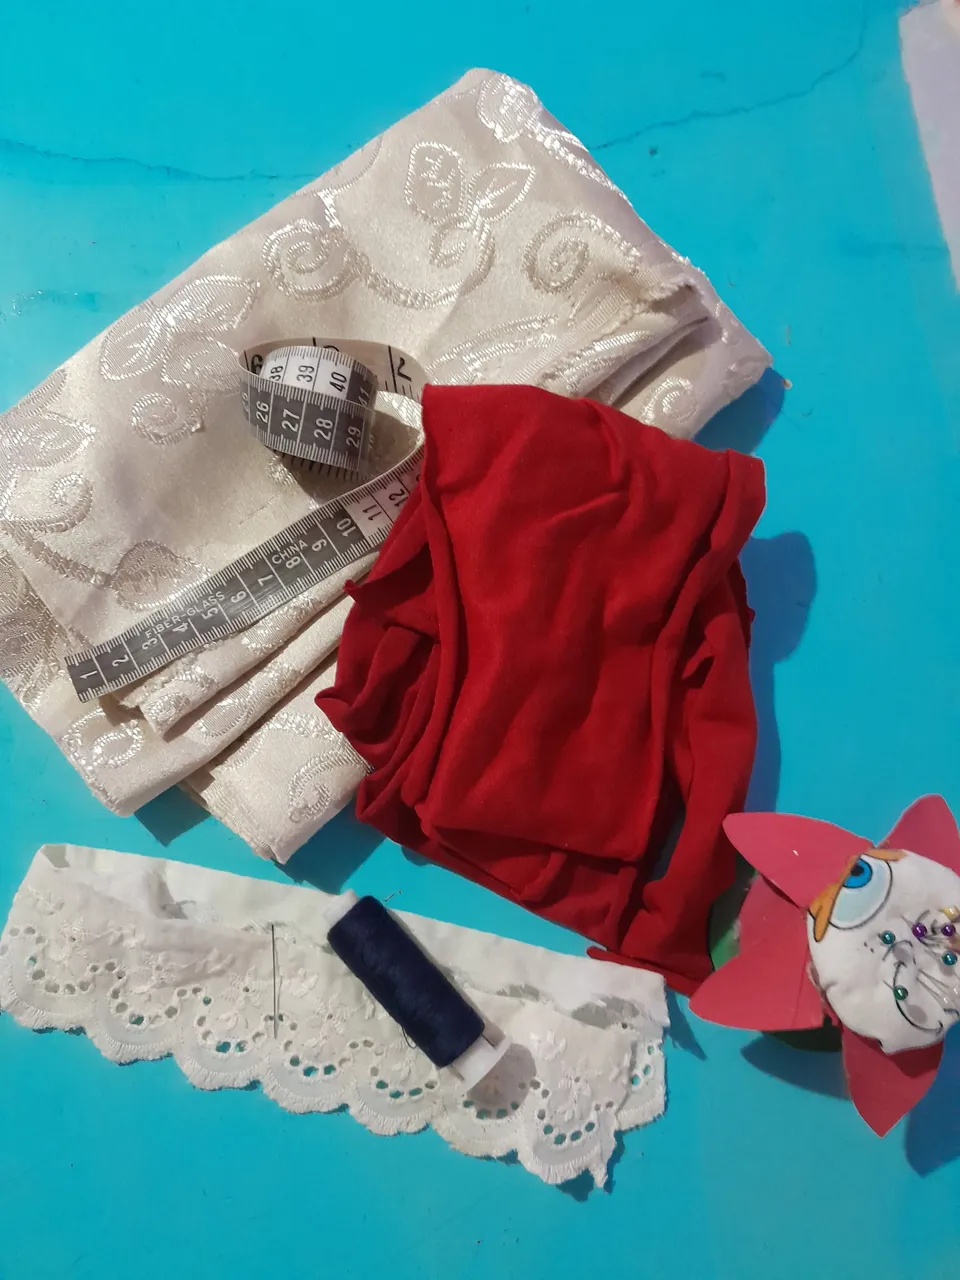
Materiales:
- Tela de su preferencia. ( yo utilice un retazo de tela color crema que me sobro de una tela que compre para hacer una cortina); y una de color rojo.
- Cinta métrica.
- Encaje.
- Alfiler de cabeza.
- Tijera.
- Aguja.
- Hilo.
English:
Materials:
- Fabric of your choice (I used a piece of cream colored fabric left over from a fabric I bought to make a curtain); and a red one.
- Tape measure.
- Lace.
- Head pin.
- Scissors.
- Needle.
- Thread.


Español:
Paso 1:
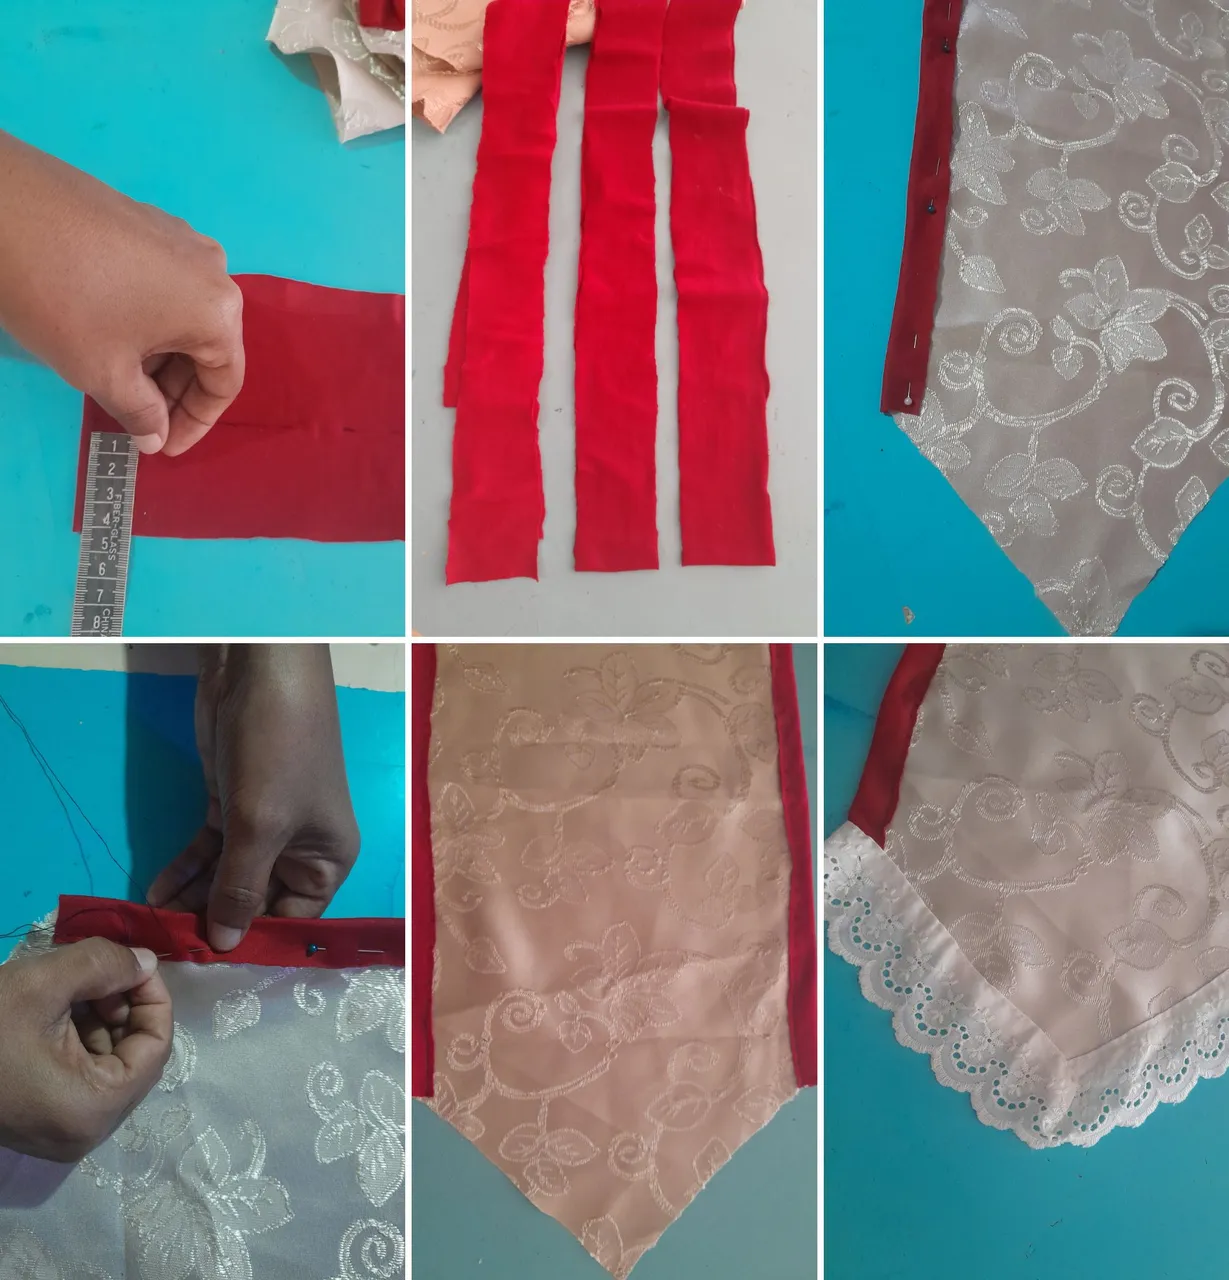
- Con la ayuda de la cinta métrica medimos y luego recortamos la tela color crema en forma rectangular, la medida depende del tamaño de su mesa, luego en uno de los extremos de la tela doblamos la 2 puntas hacia arriba quedando las 2 a la mitad, aguantamos con 2 alfileres y así cortamos con la tijera con mas facilidad ambas puntas quedando en forma de "V".
English:
Step 1:
- With the help of the tape measure we measure and then cut the cream colored fabric in a rectangular shape, the size depends on the size of your table, then at one end of the fabric we fold the 2 ends upwards leaving the 2 in half, we hold with 2 pins and then we cut with the scissors more easily both ends remaining in the form of "V".
Español:
Paso 2:
- Ahora recortamos tiras largas de 4 cm de ancho de la tela roja, luego la colocamos por ambos lados de la otra tela aguantándola con los alfileres, para así comenzar a coser muy bien la tela, después cosido ambos lados procedo a coser el encaje en la punta tipo "V".
English:
Step 2:
- Now we cut long strips of 4 cm wide of the red fabric, then we place it on both sides of the other fabric holding it with the pins, in order to begin to sew the fabric very well, after sewing both sides I proceed to sew the lace in the tip type "V".

Español:
Paso 3:
- Para terminar nuestro camino de mesa, cortamos 2 tiras rojas una pequeña de 14 por 4 cm y el otro de 34 por 2 cm para hacer un lazo. Aquí tomamos la tira pequeña, le doblamos hacia el centro las 2 puntas, le aguantamos con los dedos realizando un dobles haciendo la forma del lazo, después con la otra tira mas larga la doblamos en 2 quedando a 1 cm de ancho y procedemos a coser en la parte de atrás del lazo, para luego volver a coser colocandola en la punta de la tela junto con el encaje.
English:
Step 3:
- To finish our table runner, we cut 2 red strips, a small one of 14 by 4 cm and the other of 34 by 2 cm to make a bow. Here we take the small strip, we fold towards the center the 2 ends, we hold it with our fingers making a double fold making the shape of the bow, then with the other longer strip we fold it in 2 remaining 1 cm wide and we proceed to sew in the back of the bow, and then sew it again placing it at the end of the fabric together with the lace.
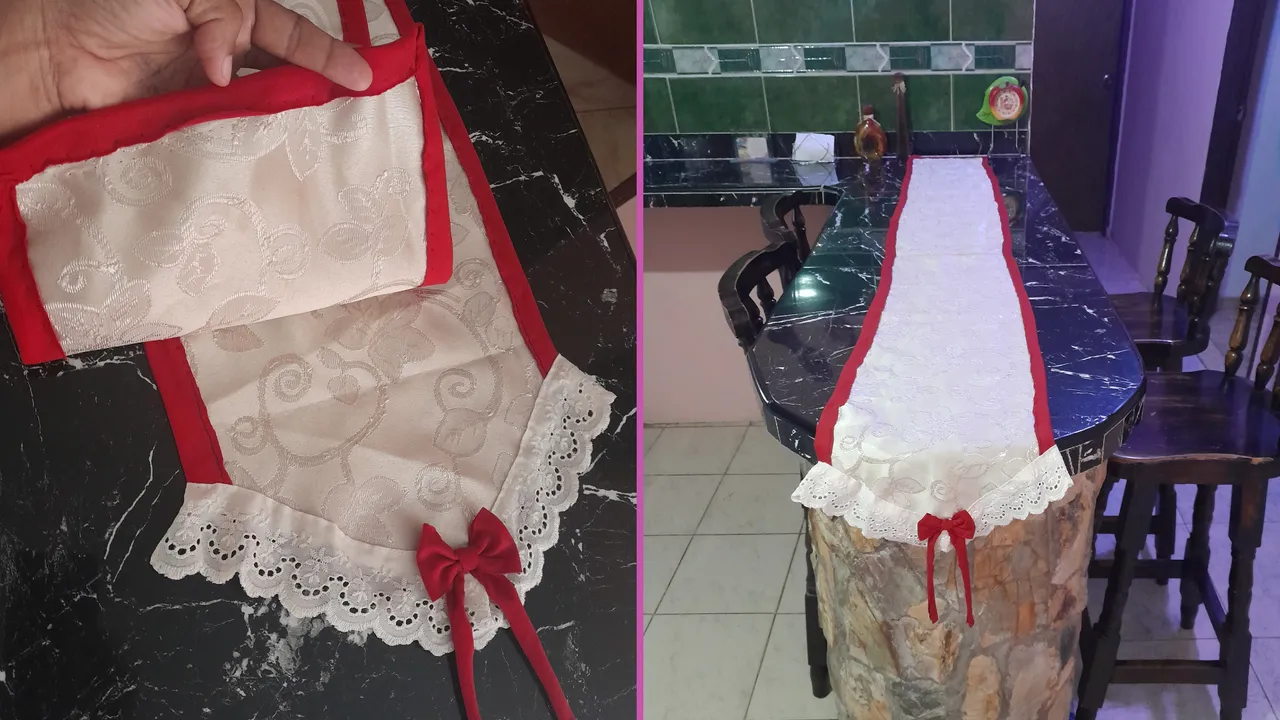
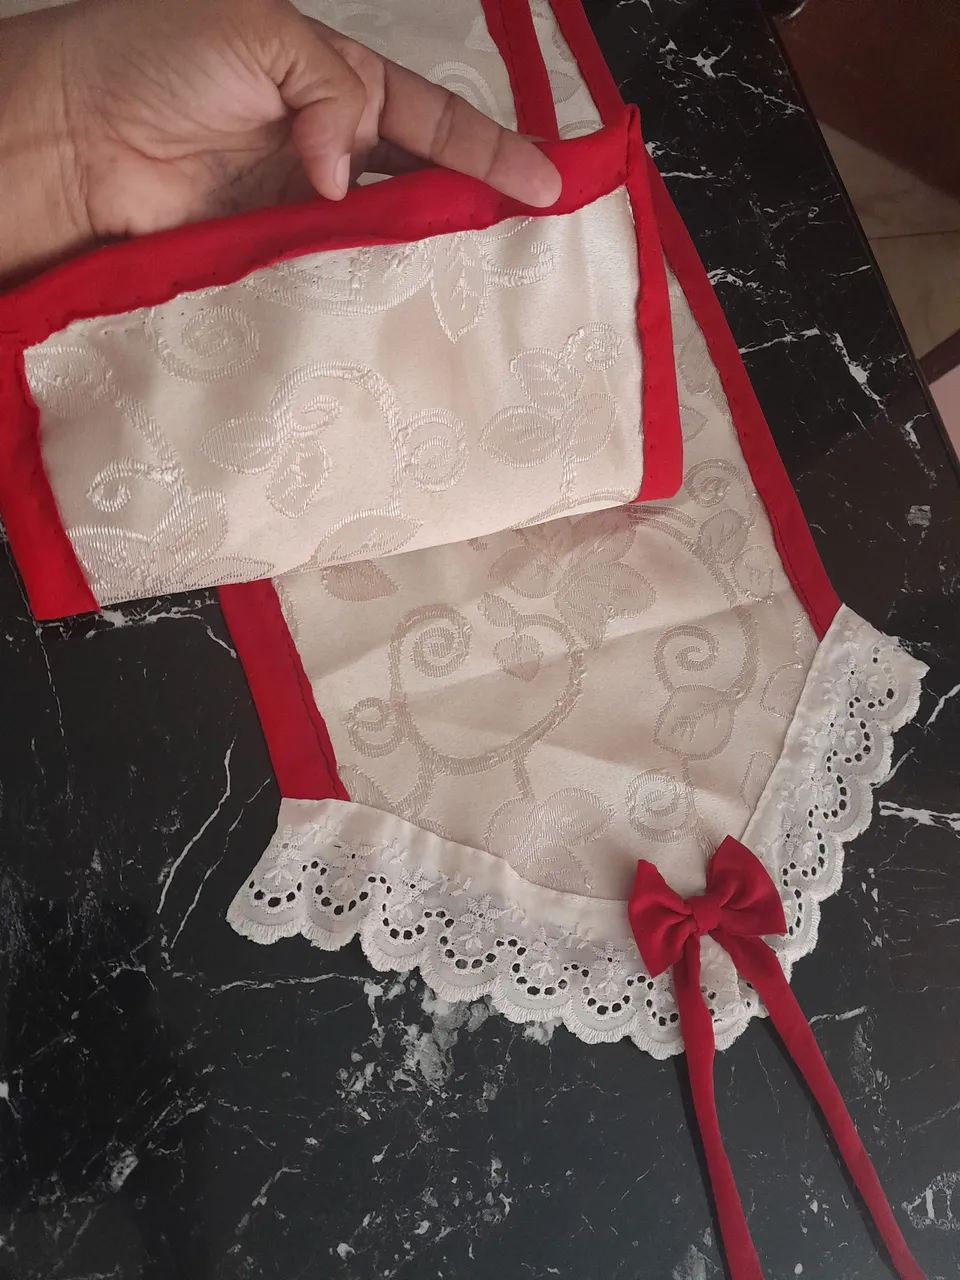
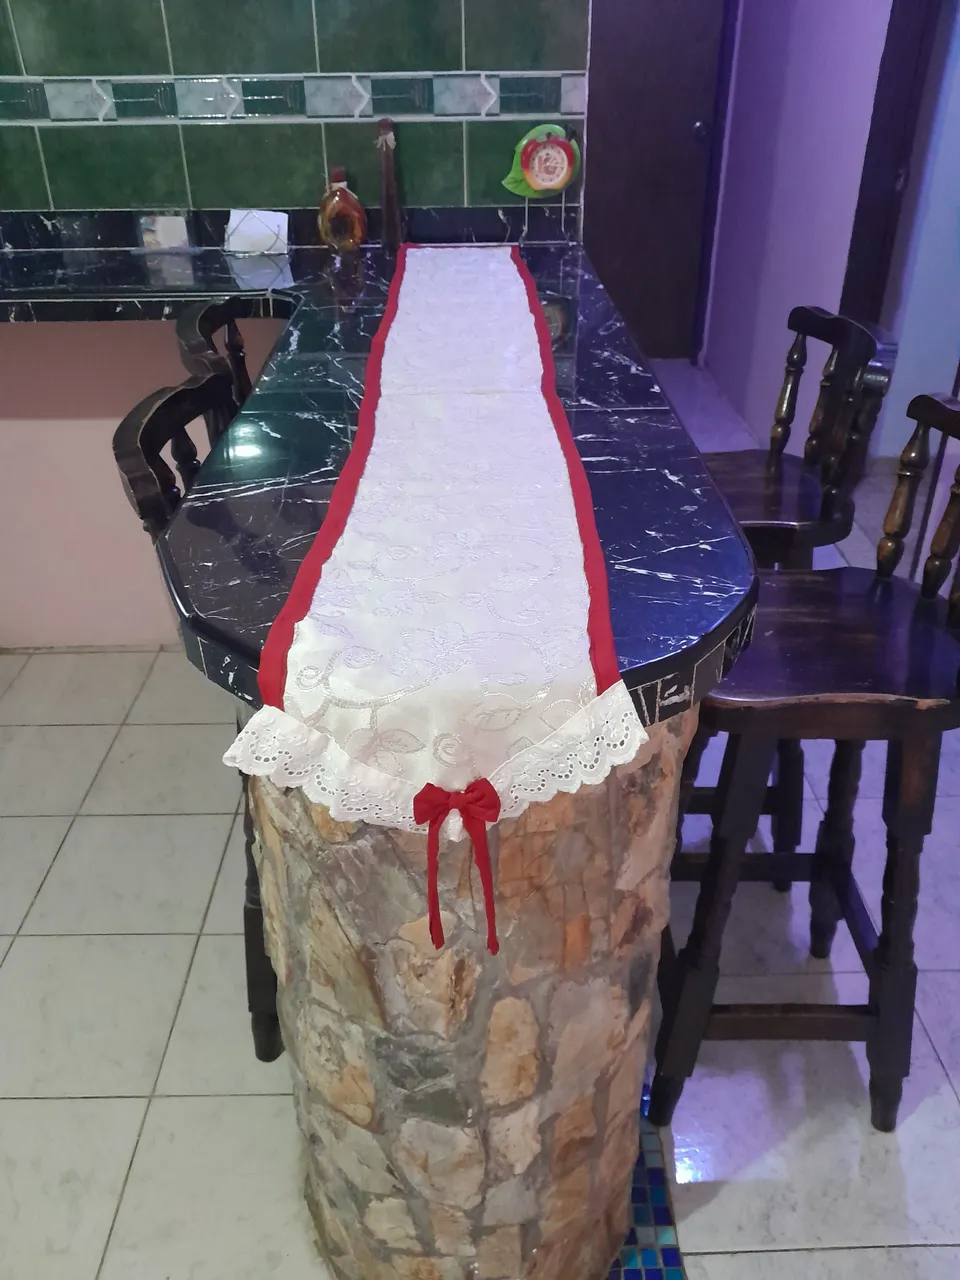
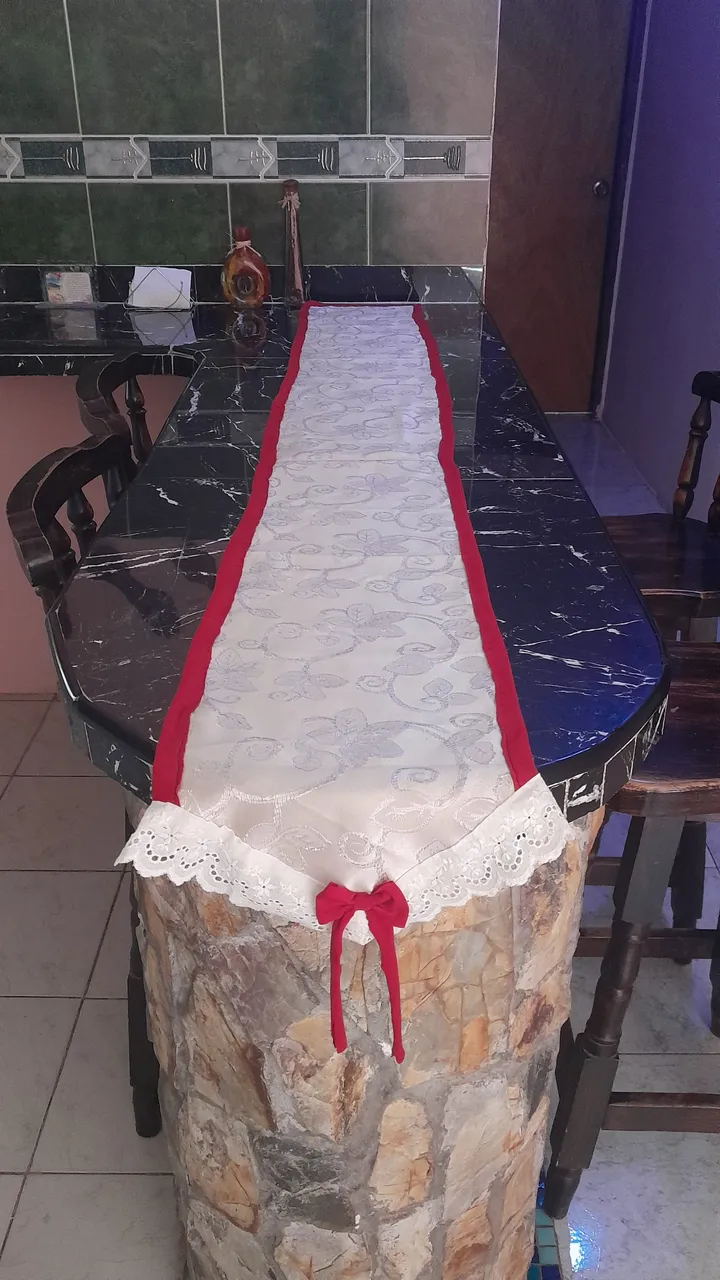
Resultado final, espero les haya gustado, saludos nos vemos en el próximo post.
Final result, I hope you liked it, greetings see you in the next post.
Todas las fotos son de mi autoría y editadas con Canva.
All the photos were taken by me and edited with Canva.