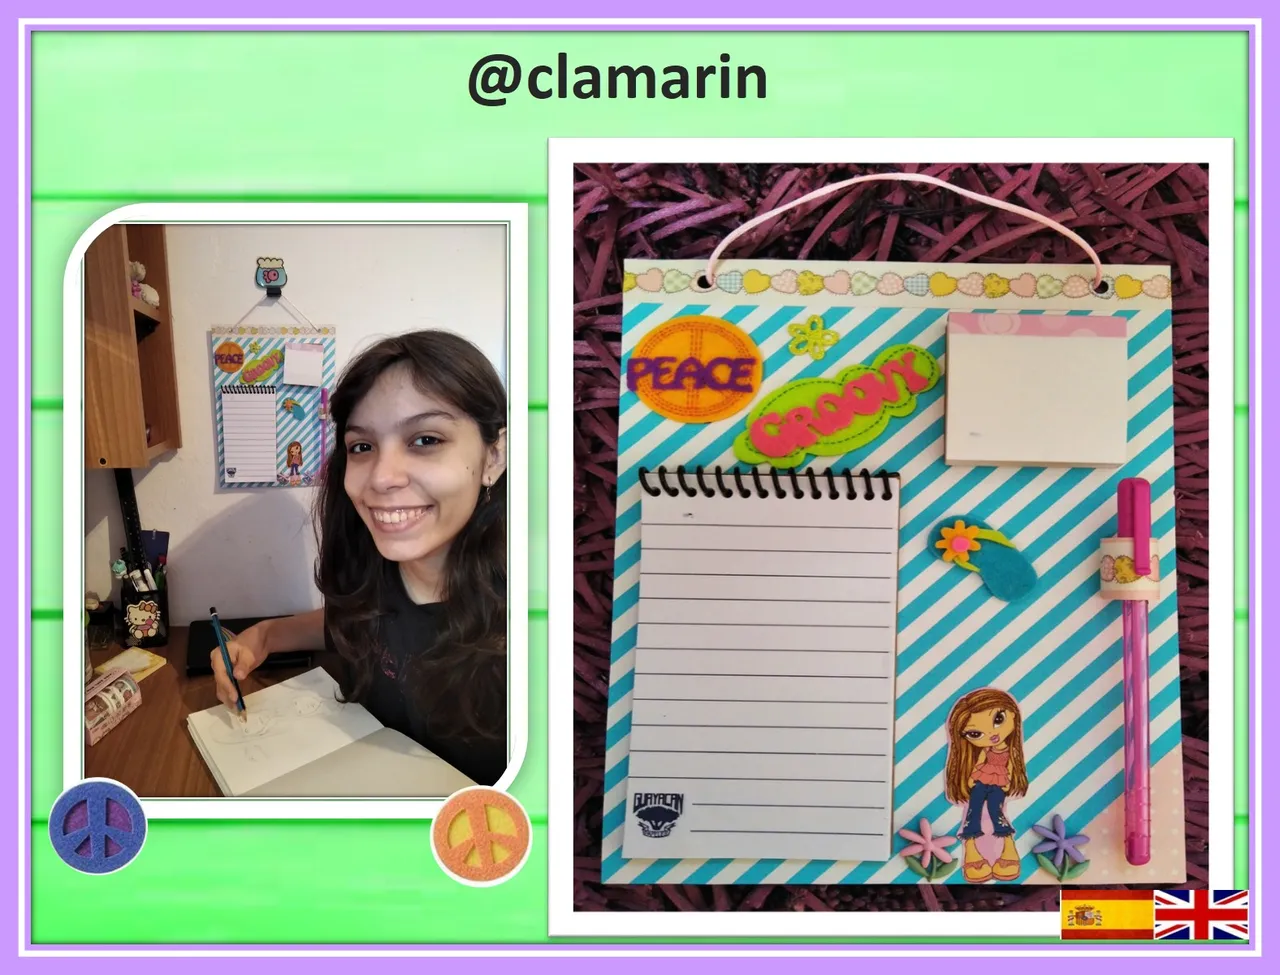
¡Hola queridos amigos de Hive! El día de hoy, les quiero mostrar una idea útil y funcional: un portanotas de pared, hecho a mano para la habitación de mi hija Lucía. Los portanotas son perfectos para recordar las cosas que tenemos que hacer, ya que a veces con el poco tiempo y el estrés diario que vivimos, no tenemos buena memoria para tantos asuntos. A continuación, les voy a mostrar un paso a paso de cómo realizar un portanotas hermoso y práctico. ¡Comencemos!
Hello dear Hive friends! Today, I want to show you a useful and functional idea: a wall note holder, handmade for my daughter Lucía's room. Notes holder are perfect to remember the things we have to do, since sometimes with the little time and daily stress that we live, we do not have a good memory for so many matters. Next, I am going to show you a step by step on how to make a beautiful and practical note holder. Let's get started!
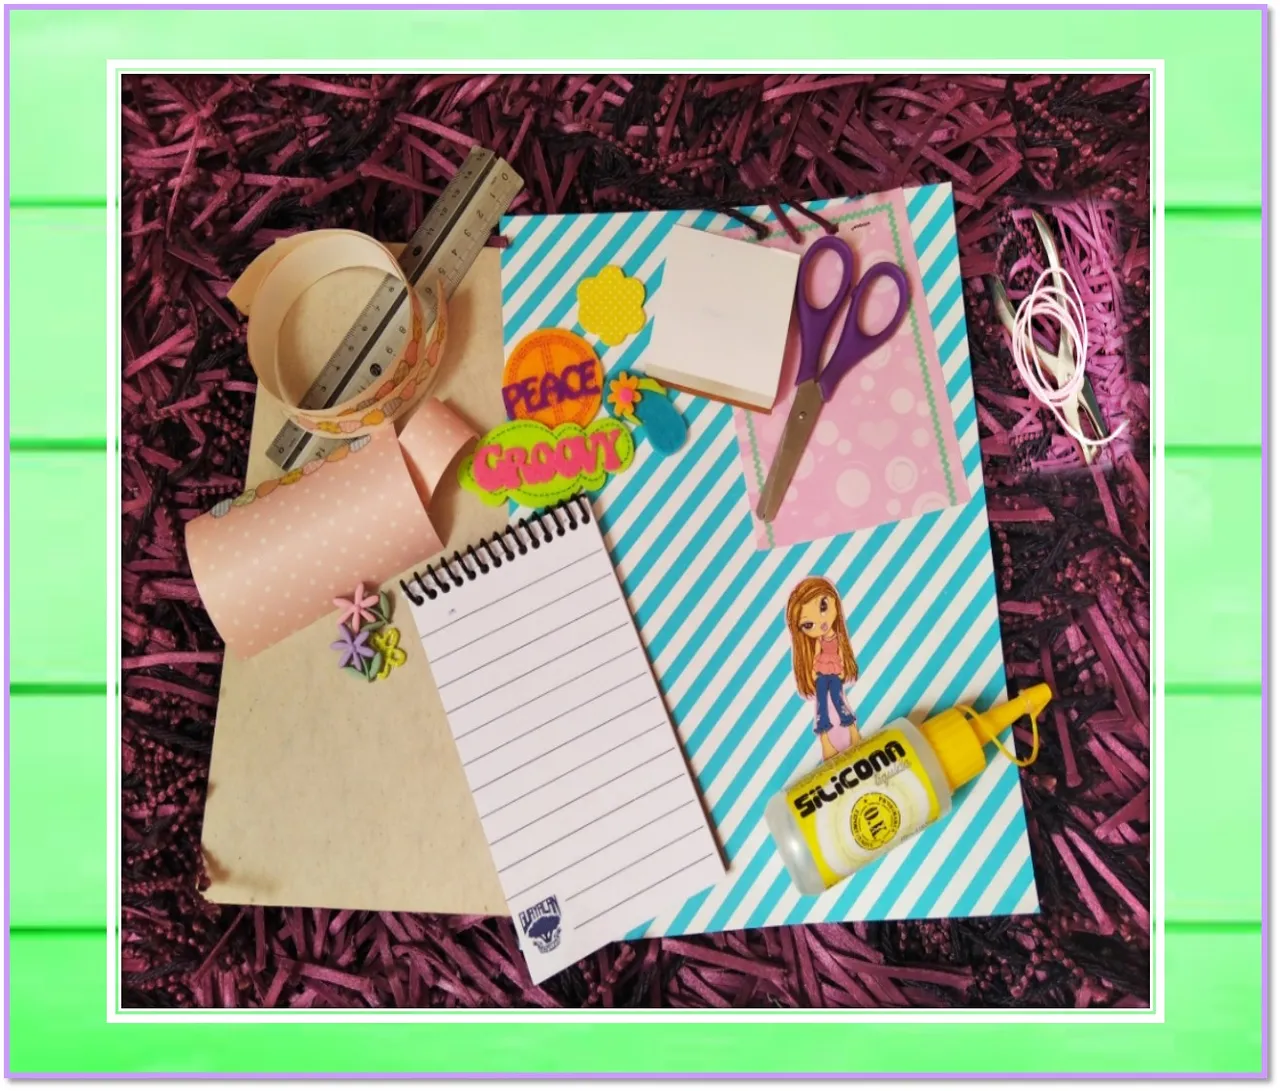
Materiales a utilizar:
• Etiquetas variadas
• Cartulina de colores
• Cartón (19 cm x 25,5 cm)
• Cinta decorativa de papel
• Tijera
• Silicon frío
• Libreta (8,5 cm x 14 cm)
• Taco de notas (6cm x 6cm)
• Lápiz
• Regla
• Cordón
• Perforadora
Materials to use:
• Stickers
• Colors cardboard
• Cardboard (19 cm x 25.5 cm)
• Decorative paper tape
• Scissor
• Cold sylicon
• Note pad (8.5 cm x 14 cm)
• Sticky Note Pad (6cm x 6cm)
• Pencil
• Rule
• Ribbon cord
• Hole punch
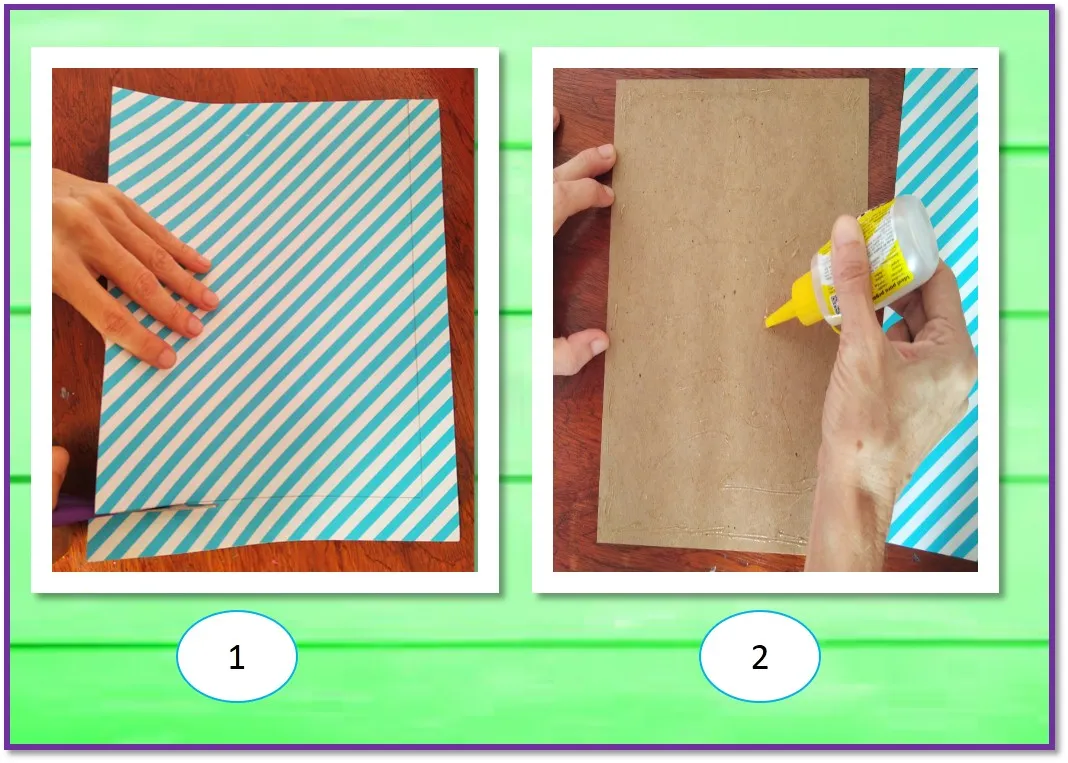
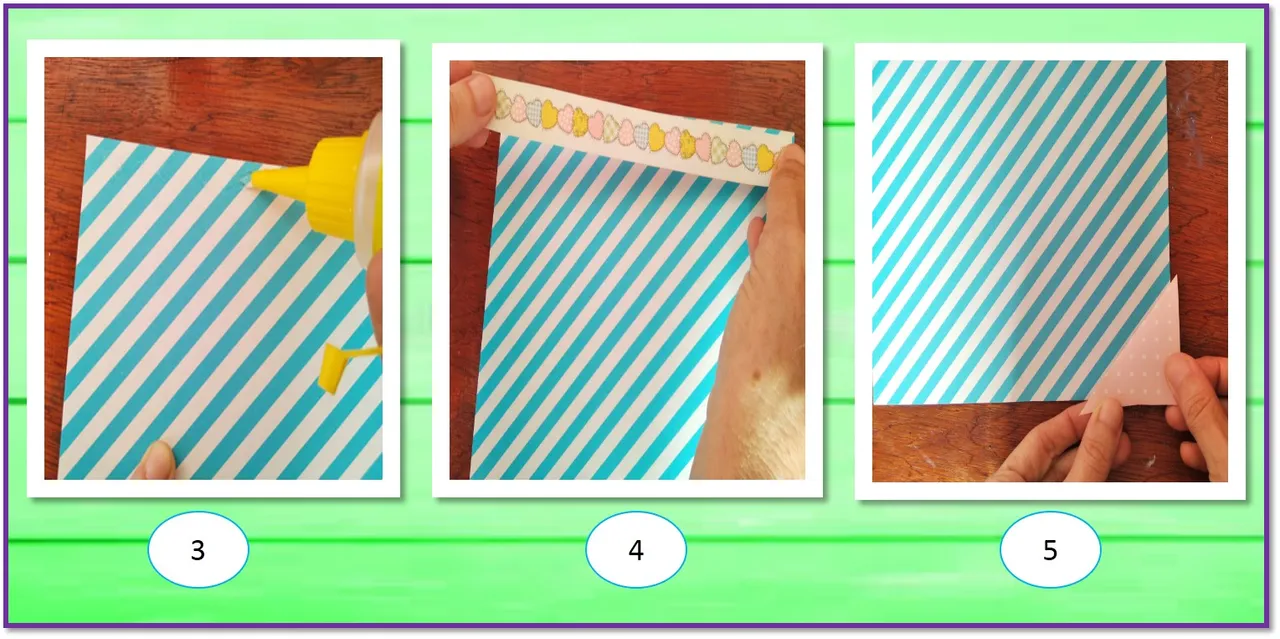
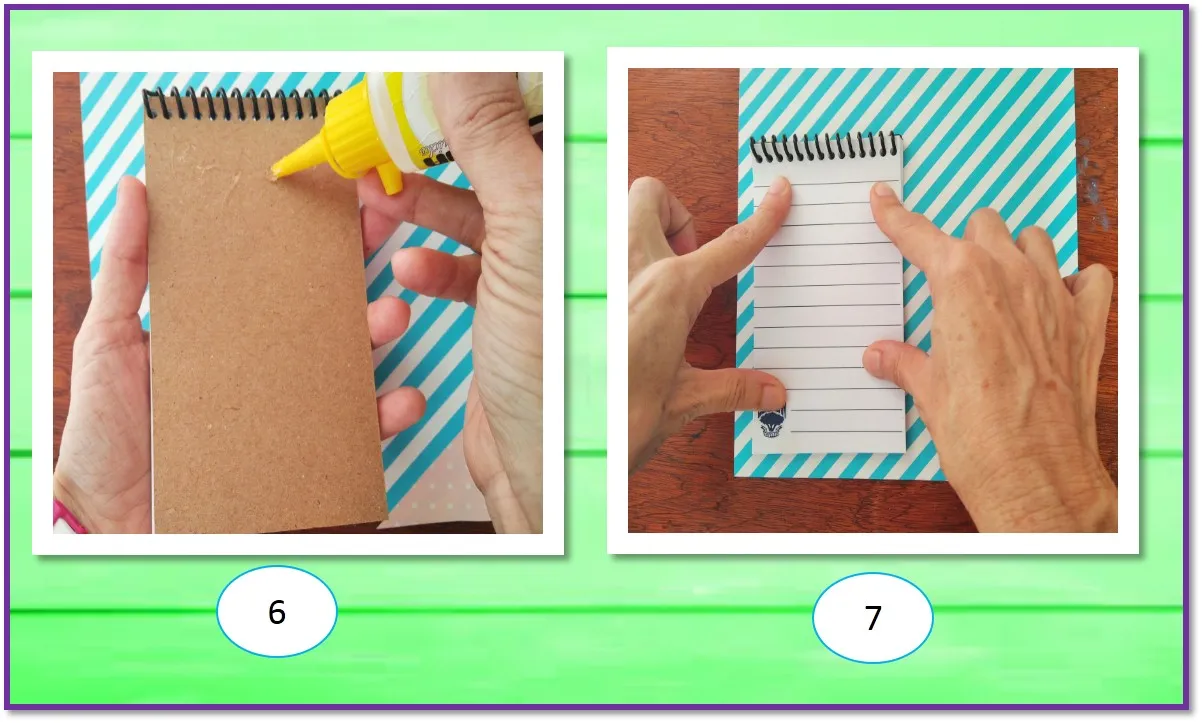
Paso 1:
Cortamos la cartulina del tamaño del cartón, y pegamos. Luego colocamos con silicon, en la parte superior la cinta decorativa de papel, y en la esquina inferior derecha.
Step 1
We cut the color cardboard to the size of the cardboard, and glue. Then we place with cold silicone, in the upper part the decorative paper tape, and in the lower right corner.
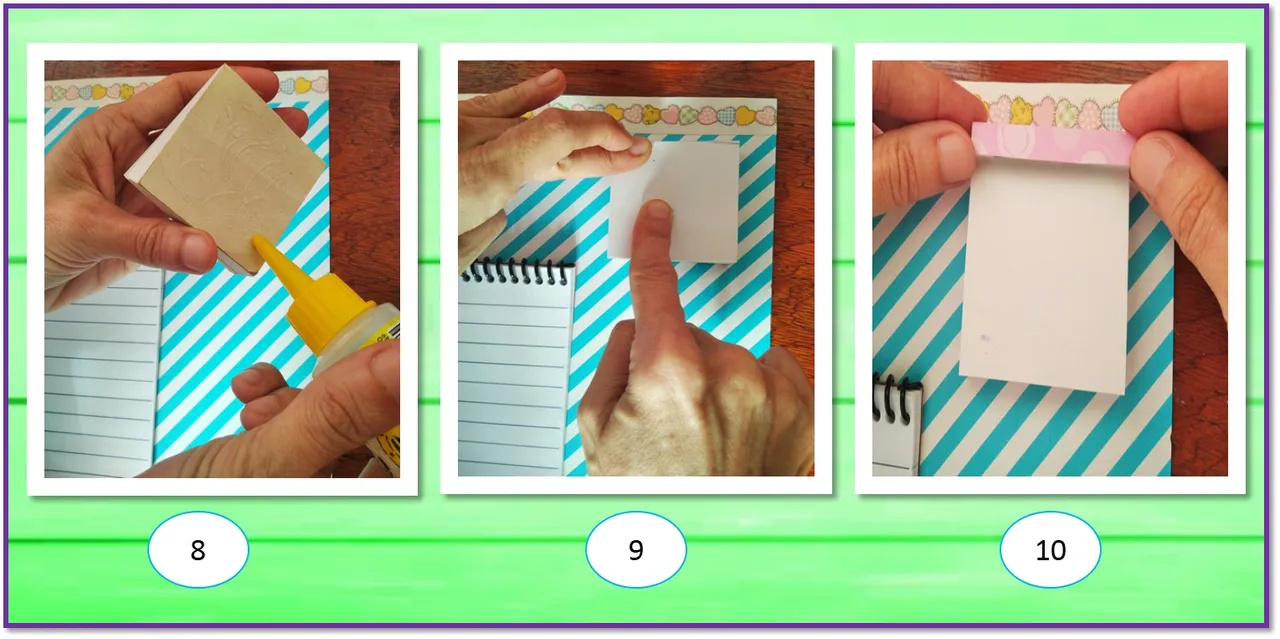
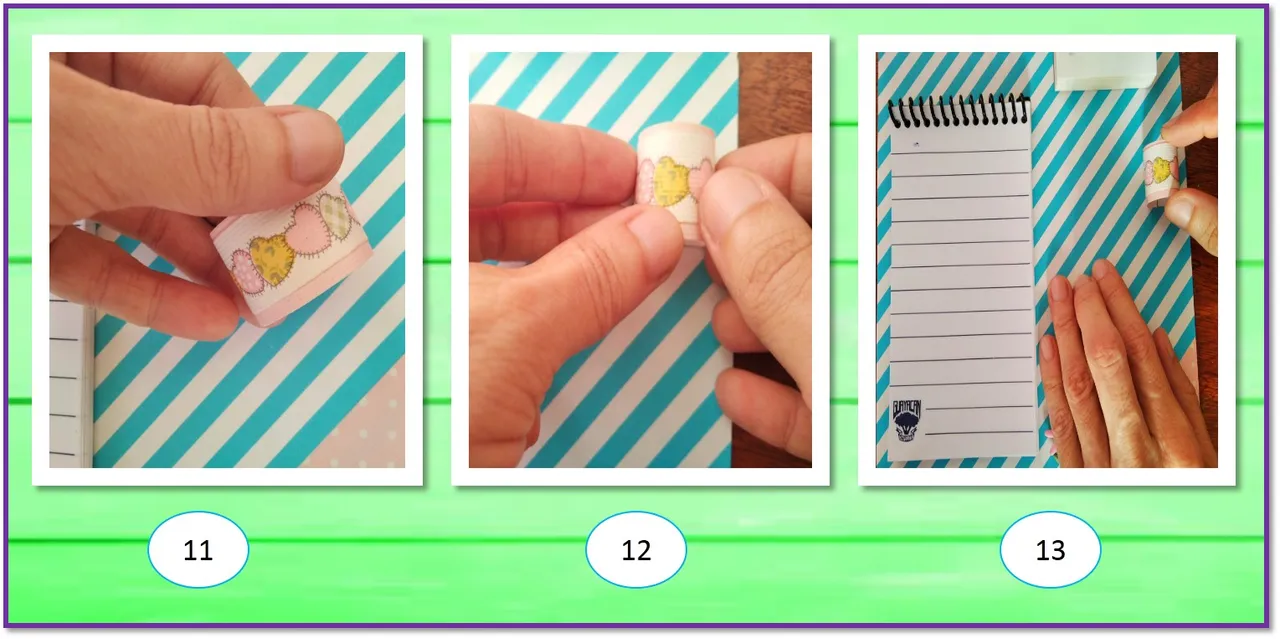
Paso 2:
Pegamos la libreta y el taco de notas. Cortamos una tira de cartulina decorativa (2,5 cm x 6cm) y pegamos en la parte superior del taco de notas.
Step 2:
We glue the note pad and the sticky note pad. Cut a strip of decorative cardboard (2.5cm x 6cm) and glue on top of the sticky note pad.
Paso 3:
Para colocar el lapicero cortamos una tira de cinta decorativa de papel (6 cm x 2,5 cm). Hacemos especie de un tubito y pegamos.
Step 3:
To place the pencil we cut a strip of decorative paper tape (6 cm x 2.5 cm). We make a kind of a tube and glue.
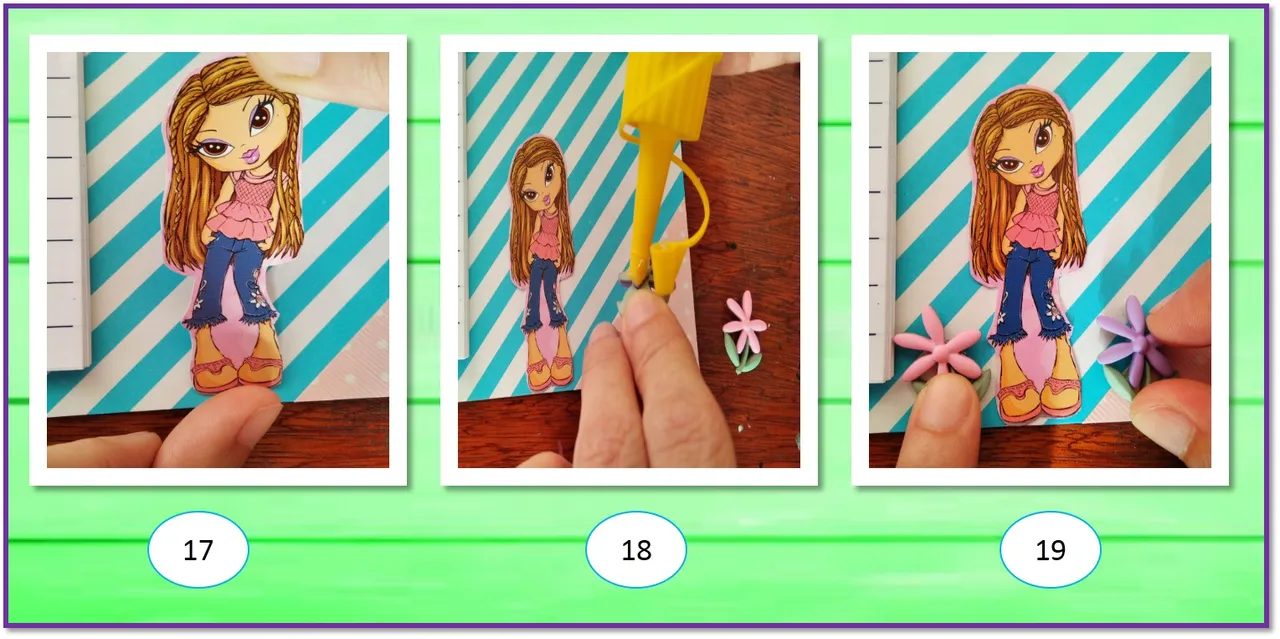
Paso 4:
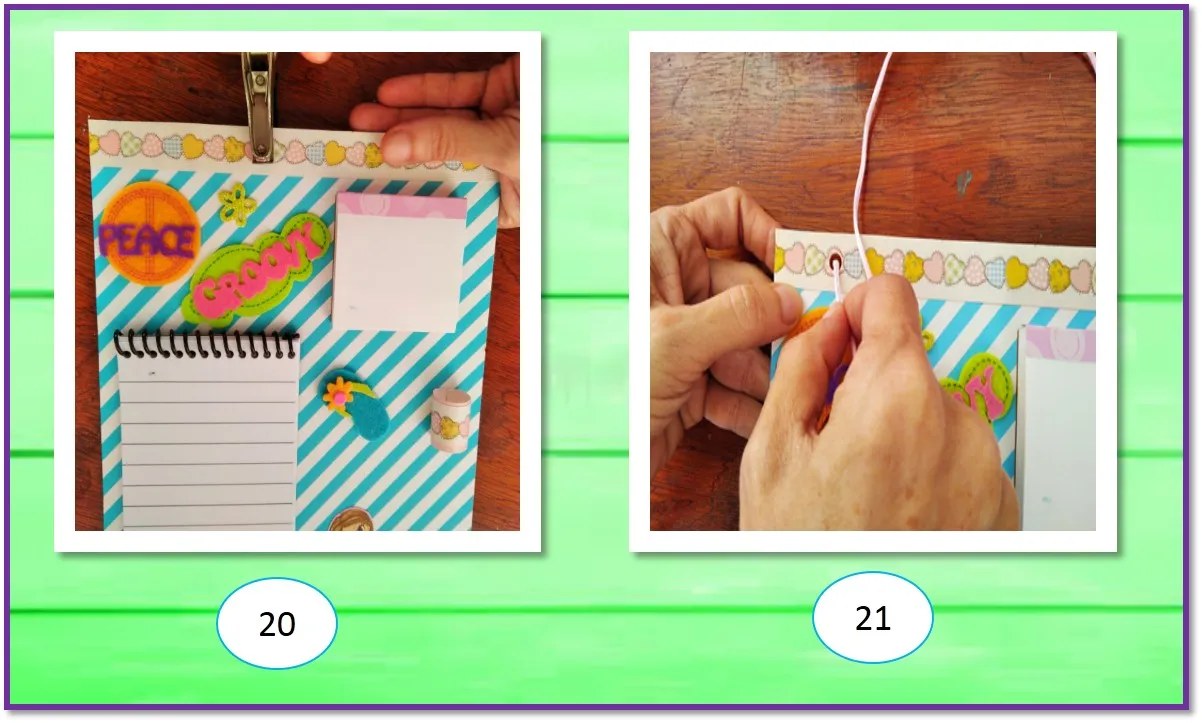
Decoramos con stickers.
Step 4:
We decorate with stickers.

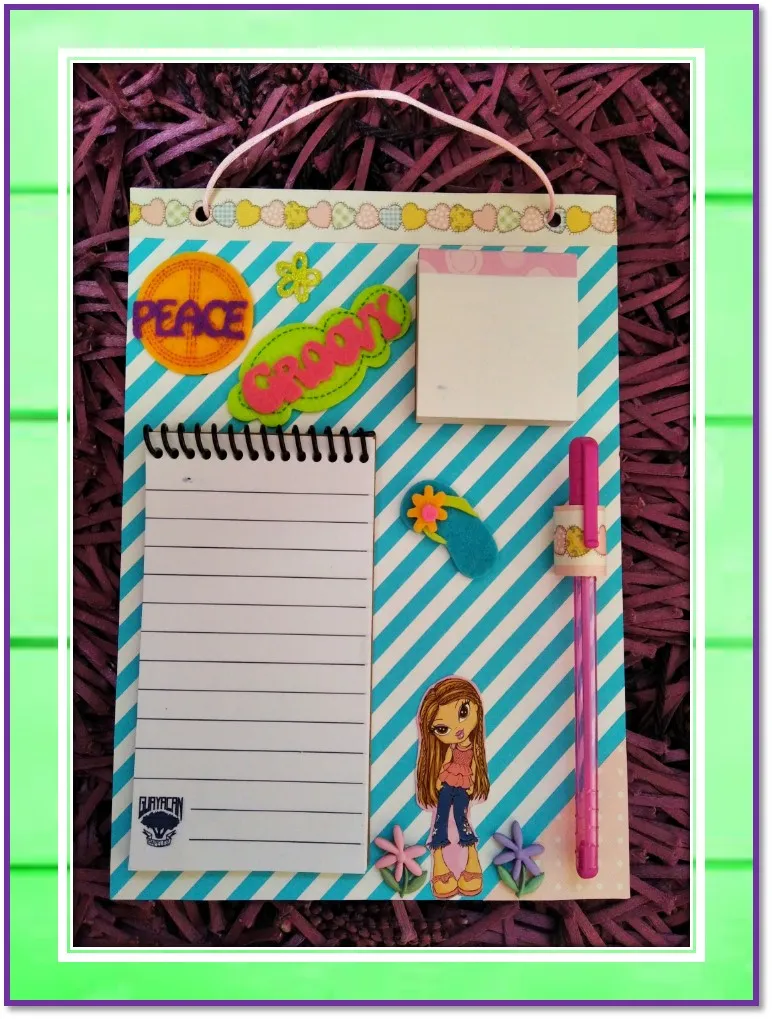
Paso 5:
Abrimos, en la parte superior 2 orificios y colocamos el cordón que, permitirá colocarla en la pared.
Step 5:
We open 2 holes in the upper part and place the cord that will allow it to be placed on the wall.
¡Espero les guste! Como ven, fue muy fácil de hacer y se ve muy bien en la habitación de mi hija. ¡Hasta otra oportunidad!
Hope you like! As you can see, it was very easy to do and it looks great in my daughter's room. See you soon!
