Hello, friends of Hive after a year of absence for reasons of the theft in my house and with the support of my son and his wife who supported me with the registration of the photos I will be publishing again my creations in this great platform. I hope you like them and support me with your comments which will help me to improve in this interactive community as Hive.

Hoy, les traigo este pequeño proyecto navideño el cual lo hice con material reutilizable que tenia en casa. Se trata de un Pie de árbol Navideño espero que les guste!.
Sin mas que decir procedo a nombrar los materiales:
Today, I bring you this little Christmas project which I made with reusable material that I had at home. It is a Christmas tree stand, I hope you like it!
Without more to say I proceed to name the materials:
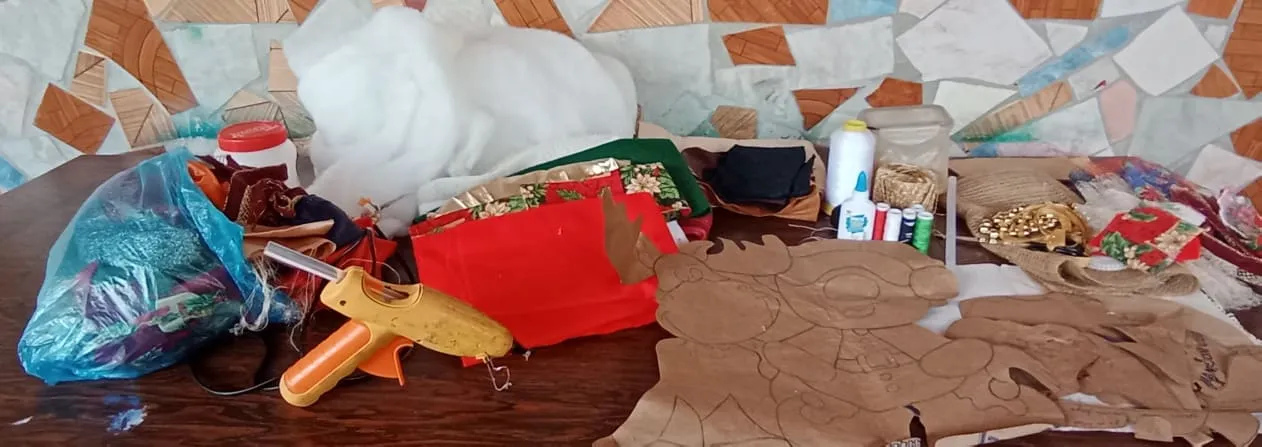
Materiales:
- 2 Metros de tela de saco.
- 1/4 Metros de fieltro rojo,verde, blanco, negro, marrón y beige.
- Retazo de tela de ovejo y de color piel.
- Agujas e hilos para coser.
- Tijeras.
- Barra y pistola de silicón.
- 1/2 Metros de tela estampada navideña .
- 1/4 Metros de lame dorada.
- Escarcha dorada.
- Pega escolar.
- Cartón.
- Cintas.
- Guata para rellenar.
- 1/2 Metro de collar de perlas doradas.
- Retazos de tela navideña.
Todos estos materiales los tenia guardada en casa.
Materials:
- 2 Meters of sackcloth.
- 1/4 Meter of red, green, white, black, brown and beige felt.
- Piece of sheep and skin colored fabric.
- Needles and threads for sewing.
- Scissors.
- Silicone stick and gun.
- 1/2 Meter of Christmas printed fabric.
- 1/4 Meters of golden lame.
- Gold frosting.
- School glue.
- Cardboard.
- Ribbons.
- Wadding for stuffing.
- 1/2 meter of golden pearl necklace.
- Christmas fabric scraps.
All these materials were stored at home.

Paso 1:
Primeramente, recorté la tela de saco de forma rectangular para la base del Pie de árbol. Con la tela estampada navideña corte 4 tiras de aproximadamente 7 centímetros de ancho por 1 metro de largo para tapar los bordes de la tela de saco las cuales despues de cortarlas le planche los bordes para que quedaran como una cinta. El mismo procedimiento lo realice con la tela lame dorado corté 4 tiras de aproximadamente 3 centimetros de ancho por 1 metro de largo y luego las planche para fijar los bordes.
Luego, pegue primeramente las 4 tiras de tela estampada navideña en cada uno de los bordes del rectángulo de la tela de saco con silicon caliente ya que esta es muy engorrosa para coserla a mano en las orillas por que se hislacha . Luego ,fije con silicon caliente las 4 tiras de lame dorado en el borde de la tela estampada y la tela de saco.
Step 1:
First, I cut out the sackcloth in a rectangular shape for the base of the tree stand. With the Christmas printed fabric I cut 4 strips of approximately 7 centimeters wide by 1 meter long to cover the edges of the sackcloth. After cutting them I ironed the edges so that they would look like a ribbon. The same procedure was done with the gold lame fabric, I cut 4 strips of approximately 3 centimeters wide by 1 meter long and then I ironed them to fix the edges.
Then, first glue the 4 strips of Christmas printed fabric on each of the edges of the rectangle of the sackcloth with hot silicone as this is very cumbersome to sew it by hand on the edges because it gets stretched. Then, attach the 4 strips of gold lame to the edge of the printed fabric and the sackcloth with hot glue.
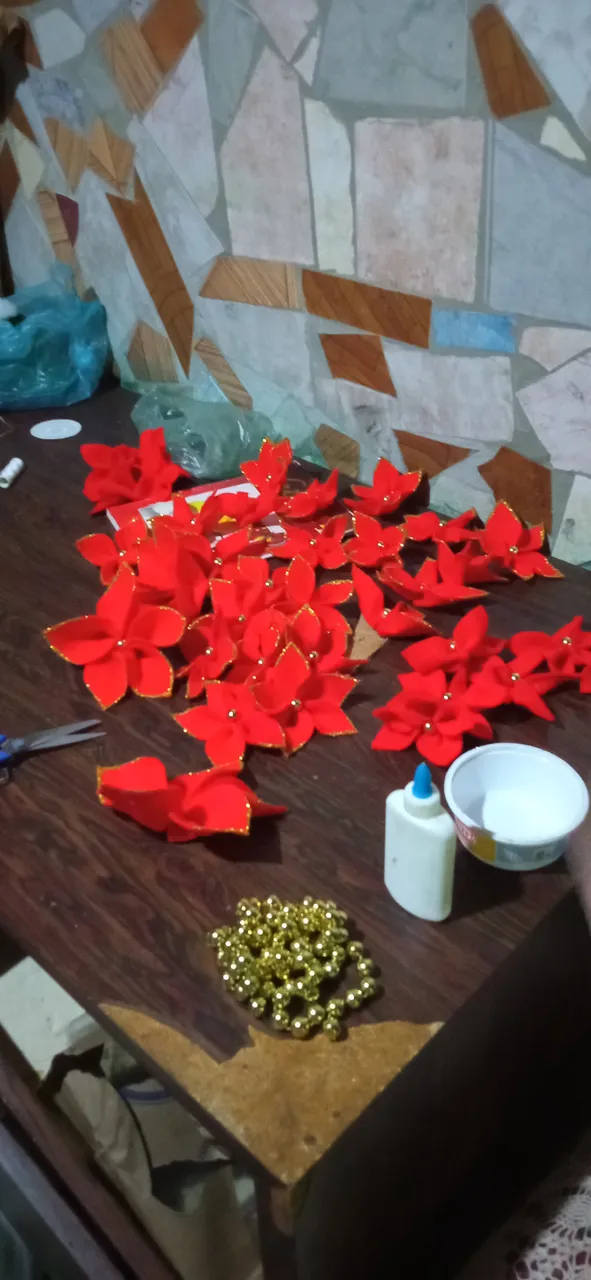
Paso 2:
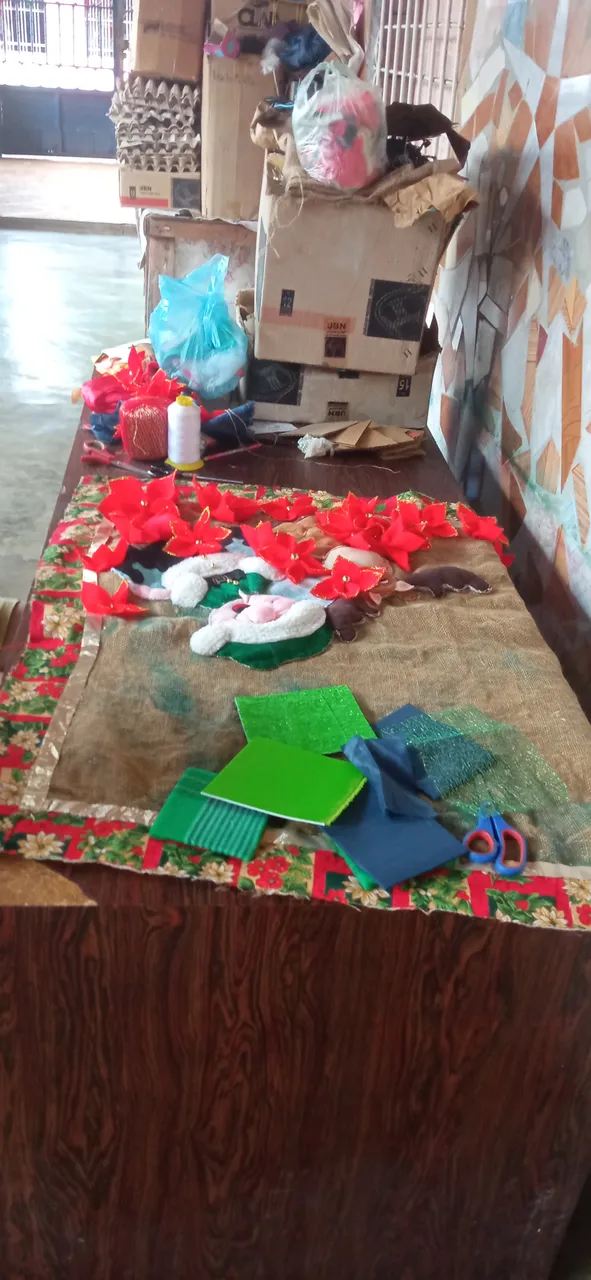
Con el fientro rojo corte 150 pétalos pequeños para realizar 30 flores de navidad pequeñas y cada flor esta compuesta de 5 pétalos y 20 pétalos grandes para 4 flores de navidad grandes las cuales cosí en la parte inferior, las uni y en el centro les coloque una perlita dorada grande.con la ayuda de un pincel en los bordes le coloque pega escolar blanca diluida con un poquito de agua y le eche la escarcha dorada.
Step 2:
With the red liner cut 150 small petals to make 30 small Christmas flowers and each flower is composed of 5 petals and 20 large petals for 4 large Christmas flowers which I sewed at the bottom, I joined them and in the center I put a large golden pearl. With the help of a brush on the edges I put white school glue diluted with a little water and I put the golden frost.
Paso 3:
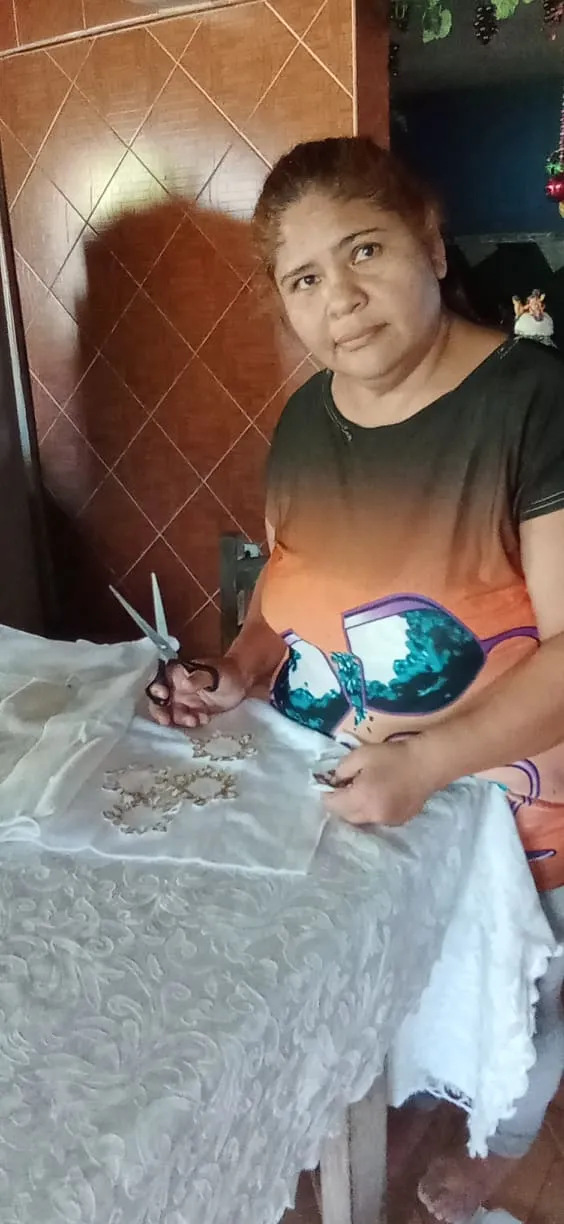
Con el fieltro blanco recorte ayuda de un patrón de copos de nieve recorte 7 copos de nieves pequeños a los cuales les coloque escarcha dorada en los bordes para darle un punto de luz al proyecto y los fije con pequeños puntos de costura.
Step 3:
With the white felt cut out with the help of a snowflake pattern cut out 7 small snowflakes to which I put gold frosting on the edges to give a point of light to the project and attach them with small stitches.
Paso 4:
Desglose el patrón del Reno y el Duendecito en partes las cuales recorte con las telas en sus colores correspondientes y cosi a mano rellenandolos con guata cada parte para darle volumen y realce al proyecto.
Step 4:
Break down the pattern of the Reindeer and the Elf into parts which I cut out with the fabrics in their corresponding colors and sew by hand filling each part with wadding to give volume and enhancement to the project.
<center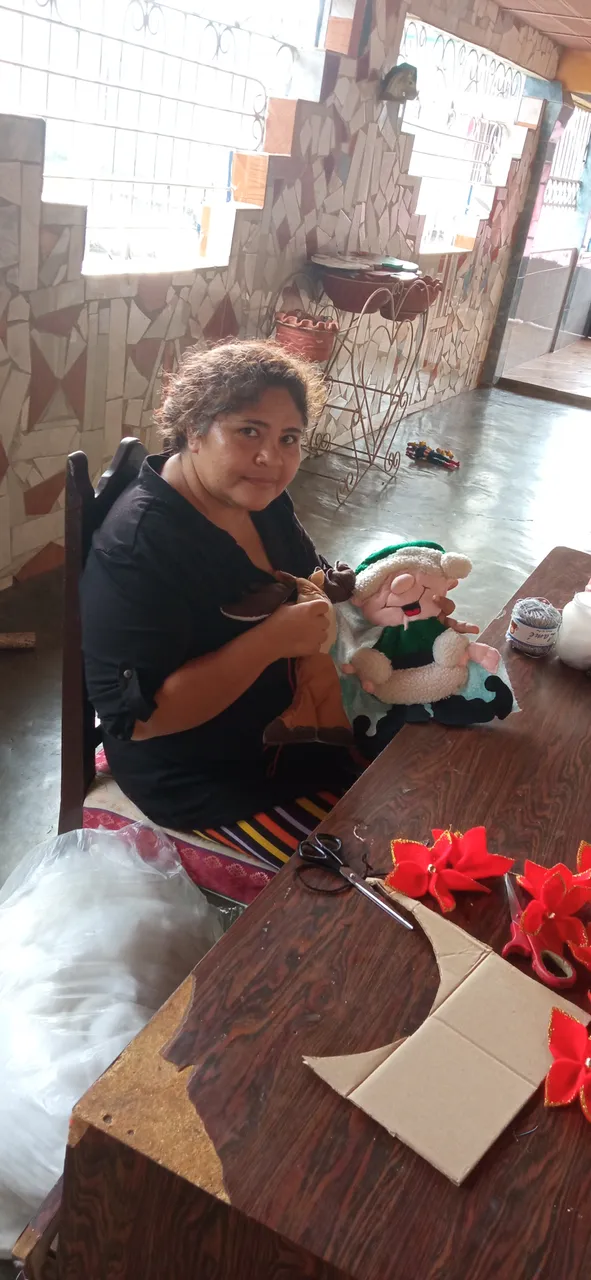
Paso 5:
Una vez, listo el reno y el duende procedi a bordarle los ojos, las cejas y las bocas con hilos de coser negro, rojo, marrón y blanco y les ruborice el rostro con mi rublor personal para darle un toque tierno y los cosi directamente a la tela de saco.
Step 5:
Once the reindeer and the elf were ready, I proceeded to embroider the eyes, eyebrows and mouths with black, red, brown and white sewing threads and I blushed their faces with my personal blush to give them a tender touch and sewed them directly to the sackcloth.
Paso 6:
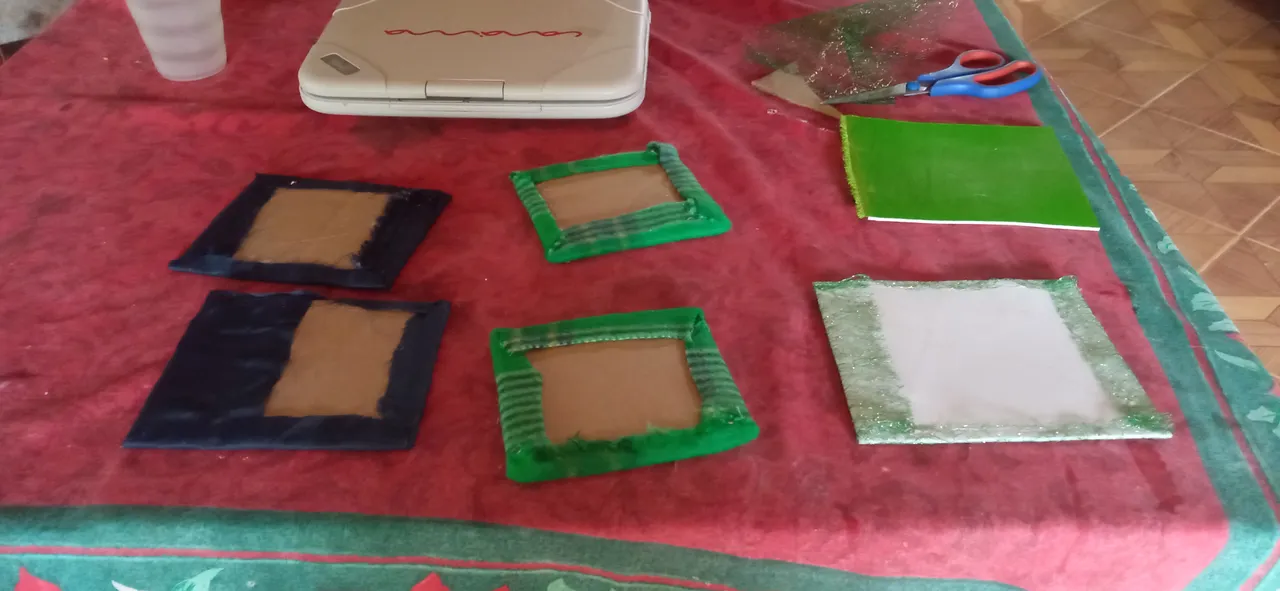
Los regalos los realice con seis (6) rectángulos de cartón los cuales forre con tela estampada navideña, los pegue con silicon caliente y los decore con retazos de cintas.
Step 6:
I made the gifts with six (6) cardboard rectangles which I lined with Christmas printed fabric, glued them with hot glue and decorated them with scraps of ribbons.
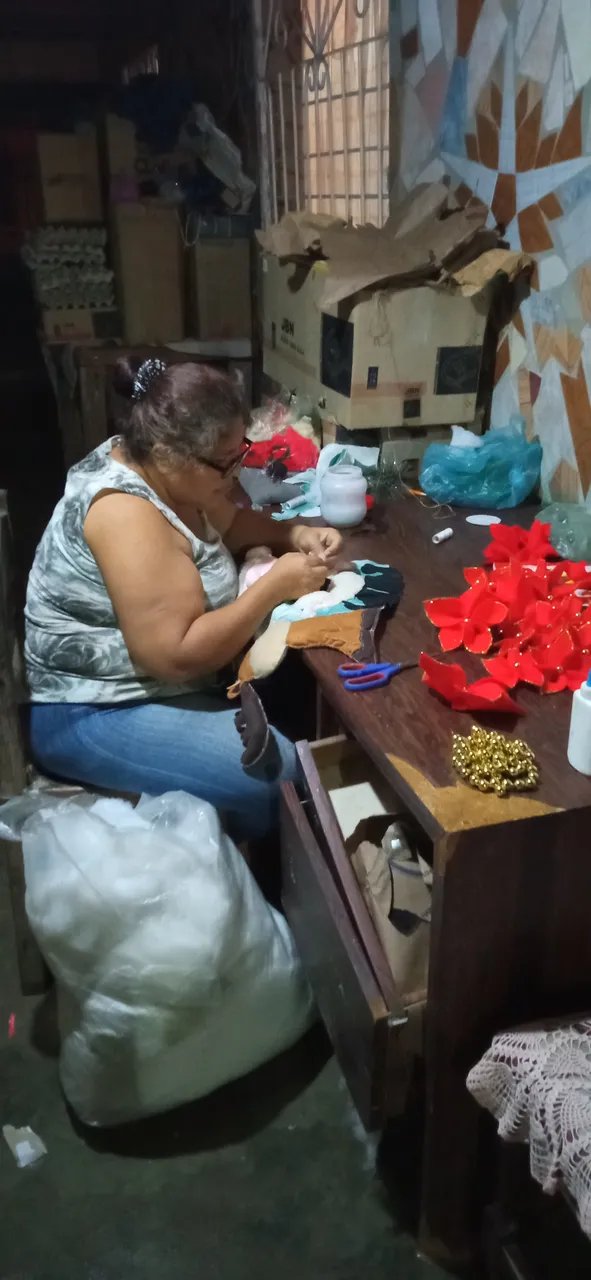
Paso 7:
Teniendo todas las piezas listas que adornan este proyecto, procedi a fijarlos en la tela de saco. Las flores, los copos, el reno y el duende los cosi para fijarlos. Así se me hace mas fácil para lavarlos. En cambio, los regalos los fije con pequeños puntos de silicon caliente.
Este proyecto me llevo 3 dias realizarlo, espero que les haya encantado como a mí la verdad me diverti en hacerlo ya que me quedo un ojito del reno un poco mas grande que el otro pero no se nota mucho, Espero sus comentarios y Dios los bendiga !!!.
Step 7:
Having all the pieces ready that adorn this project, I proceeded to attach them to the sackcloth. The flowers, the flakes, the reindeer and the elf I sewed to attach them. This makes it easier for me to wash them. The gifts, on the other hand, I attached them with small hot glue stitches.
This project took me 3 days to make, I hope you enjoyed it as much as I did, I really had fun making it because one of the reindeer's eyes was a little bigger than the other but it is not very noticeable, I hope your comments and God bless you !!!!.