Feliz sábado mis corazones lindos de Hive estoy feliz porque es mi primera participación en esta respetada comunidad en la cual vengo a formar parte de este concurso "el mundo de madera" obviamente donde la principal protagonista es la madera en sus diferentes estilos y aquí les presento una actividad muy creativa cómo es la creación de una bella cama de juguete, en la cual me permite desarrollar habilidades demostrando una vez más mis labores manuales que han sido muy significativos y me han generado buenos ingresos durante este tiempo en la página.
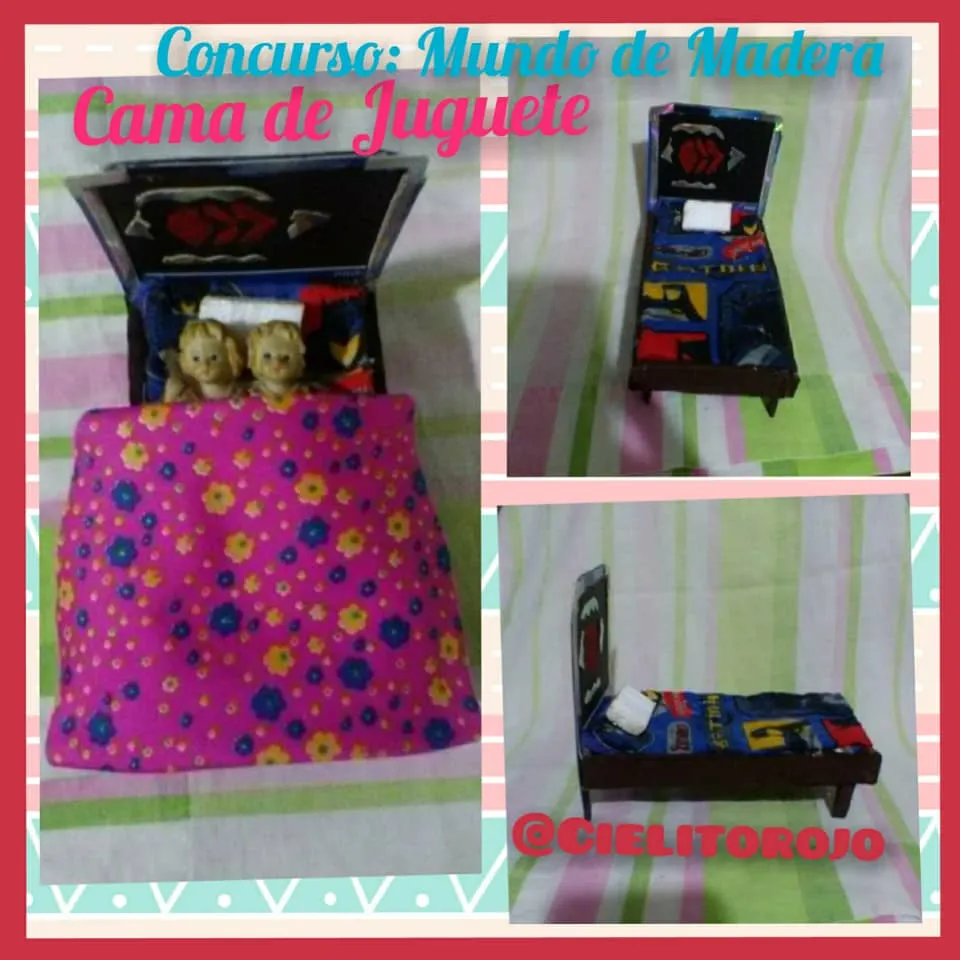
Happy Saturday my cute hearts of Hive I am happy because it is my first participation in this respected community in which I come to be part of this contest "the wooden world" obviously where the main protagonist is the wood in its different styles and here I present a very creative activity how is the creation of a beautiful toy bed, which allows me to develop skills once again demonstrating my manual labor that have been very significant and have generated me good income during this time on the page.

Materiales:
2 Láminas de mdf de 16 2 cms
2 Láminas de mdf de 10 2 cms
Gancho de ropa de madera
Hojilla de segueta
Lija
Silicón
Estuche de CD
Tela acolchada
Rejilla de plástico
Pincel
Pintura marrón.
Materials:
2 sheets of mdf of 16 *2 cms.
2 sheets of mdf of 10 * 2 cms.
Wooden clothes hanger
Saw blade
Sandpaper
Silicone
CD case
Padded cloth
Plastic grid
Brush
Brown paint.
Elaboración:
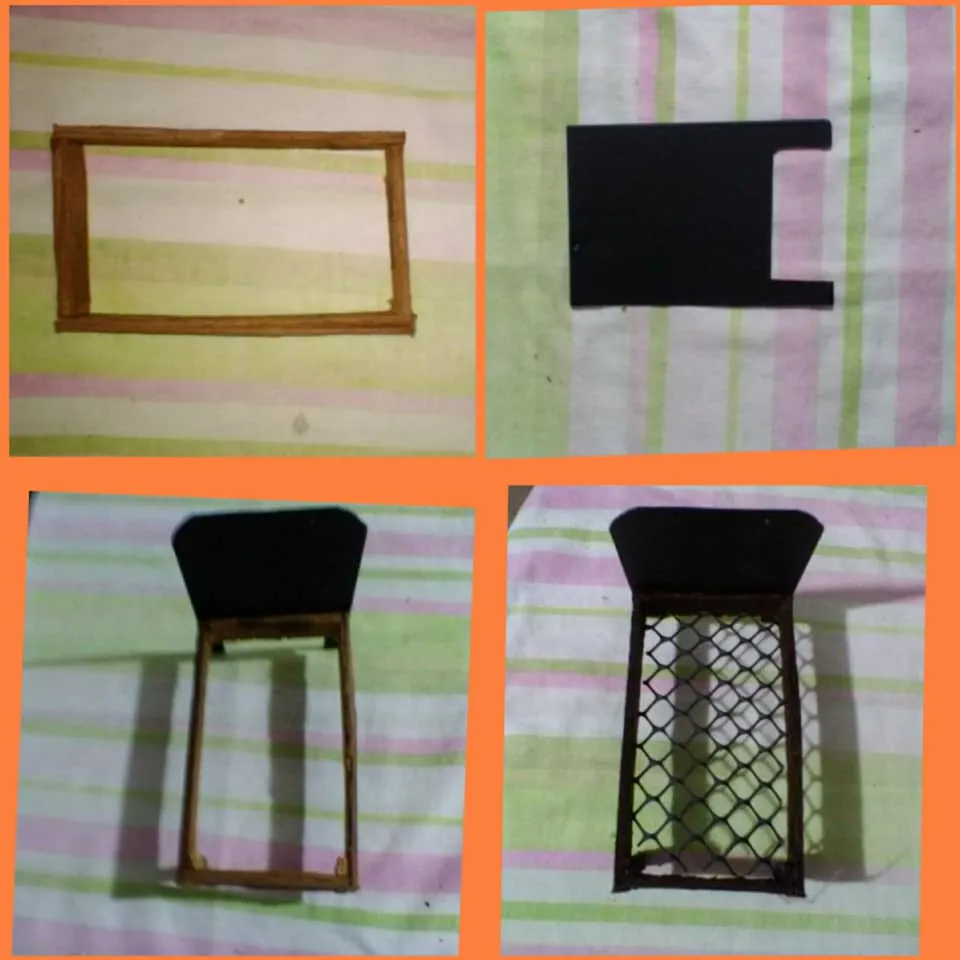
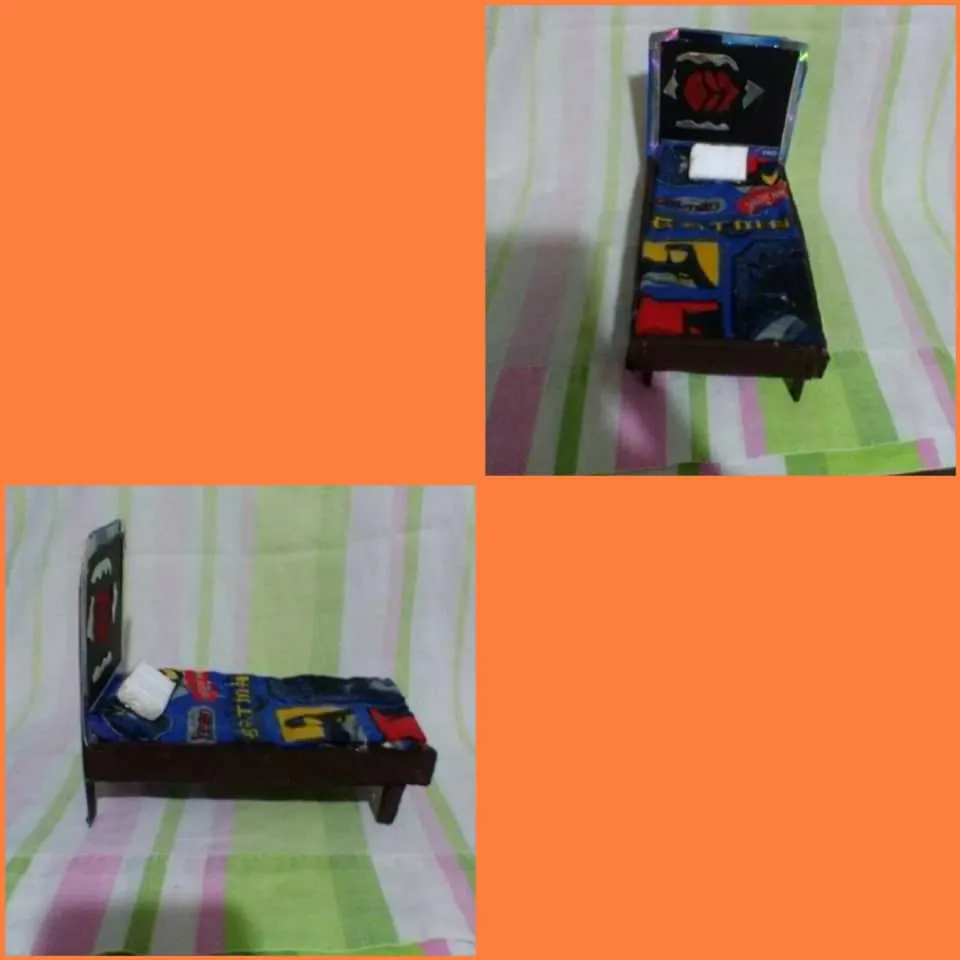
Primeramente marcamos los listones de diferentes tamaños, 2 de 16 x 2 cms y 2 de 10 x 2 cms en la madera luego picamos con la segueta después procedemos a lijar y retirarle todos los residuos de polvo continuamos pegando los cuatro listones para crear un rectángulo que serán pintado de color marrón también picamos un gancho de madera en dos y lo pegamos en los cuatro extremos para que sean las patas de la cama igual manera el estuche de CD marcamos, recortamos el espaldar de la misma con las medidas 11 x 9 cm continuamos pegando este rectángulo a la base de madera para irle dando forma a la cama igualmente la rejilla de plástico la vamos a recortar de las medidas 16 x 10 cm que lo vamos a colocar en la base de la cama y se va a simular el jergón qué sirve de soporte para el colchón y para lograr una mejor apariencia se le va a forrar con tela acolchada y el espaldar se va decorada con unas láminas plateada y también se le va a pintar el logo de hive, que ando así como muestran las imágenes.
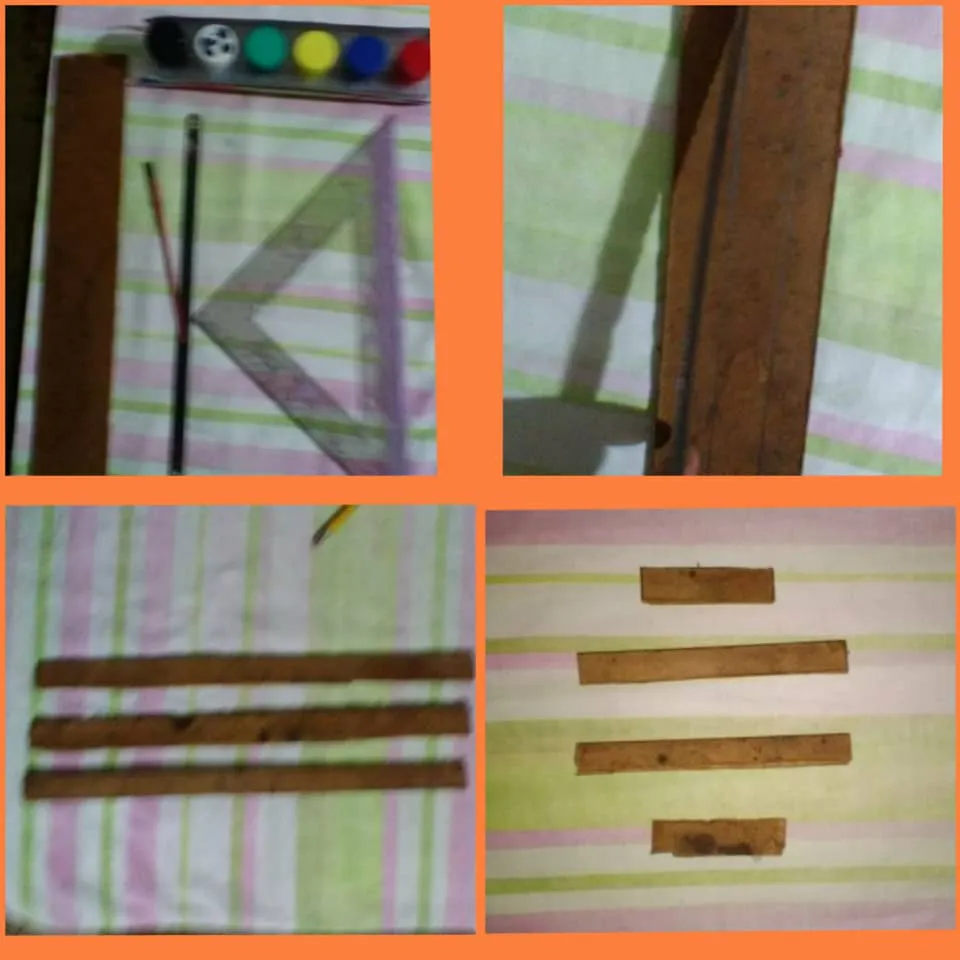
Elaboration:
First we mark the strips of different sizes, 2 of 16 * 2 cm and 2 of 10 * 2 cm in the wood then we chop with the saw then proceed to sand and remove all dust residues continue gluing the four strips to create a rectangle that will be painted brown also chop a wooden hook in two and glued at the four ends to be the legs of the bed in the same way the CD case we mark, we cut the back of the same with the measures 11*9 cm we continue gluing this rectangle to the wooden base to give shape to the bed also the plastic grid we are going to cut it with the measures 16 x 10 cm that we are going to place it in the base of the bed and we are going to place it in the base of the bed and we are going to glue it to the base of the bed. The plastic grid is going to be cut to the size of 16 x 10 cm and we are going to place it on the base of the bed to simulate the mattress support and to get a better appearance we are going to cover it with quilted fabric and the backrest is going to be decorated with silver sheets and we are also going to paint the hive logo on it, I'm going to paint the hive logo as shown in the pictures.
Espero que le haya gustado mi participación y antes de retirarme quiero invitar a la amiga @mariser y @elgatoshawua y que nos muestren sus sorprendentes creaciones.
I hope you liked my participation and before I leave I want to invite my friends @mariser and @elgatoshawua to show us their amazing creations.
I hope you liked it, I'll see you another time.
Espero que les haya gustado, será hasta otra oportunidad.
The photos are my authorship @cielitorojo
Thank you for reading and supporting me.
Las fotos son de mis autoria @cielitorojo
Gracias por leerme y su apoyo.
Utilizado traductor DeepL.