Hola, que tal saludos amigos de Hive y de esta comunida. Esta es mi primera publicación que comparto con ustedes, siempre me ha llamado la atención crear e inventar diseños desde casa ya que realmente quedan muy bonitos.
Como ya se acerca la navidad he tenido la oportunidad de ver muchos diseños y adornos de navidad que muchas personas realizan con sus propias manos para decorar sus casas y colocar sus arbolitos de navidad. No tenemos excusas, ya que existen muchos maneras de cómo ser creativos y adornar nuestras casas.
Hace unos días me animé y quería comprar el material pero la verdad es que cuando buscaba para elegir cuál hacer, mi mente quedaba en el aire porque no sabía cuál escoger, todos me encantaban. Hasta que por fin me topé con este árbol de navidad hecho con materiales sencillos, así que le comenté a mi hija y ella estuvo de acuerdo conmigo y las dos nos pusimos de acuerdo para realizar nuestro árbol de papel.
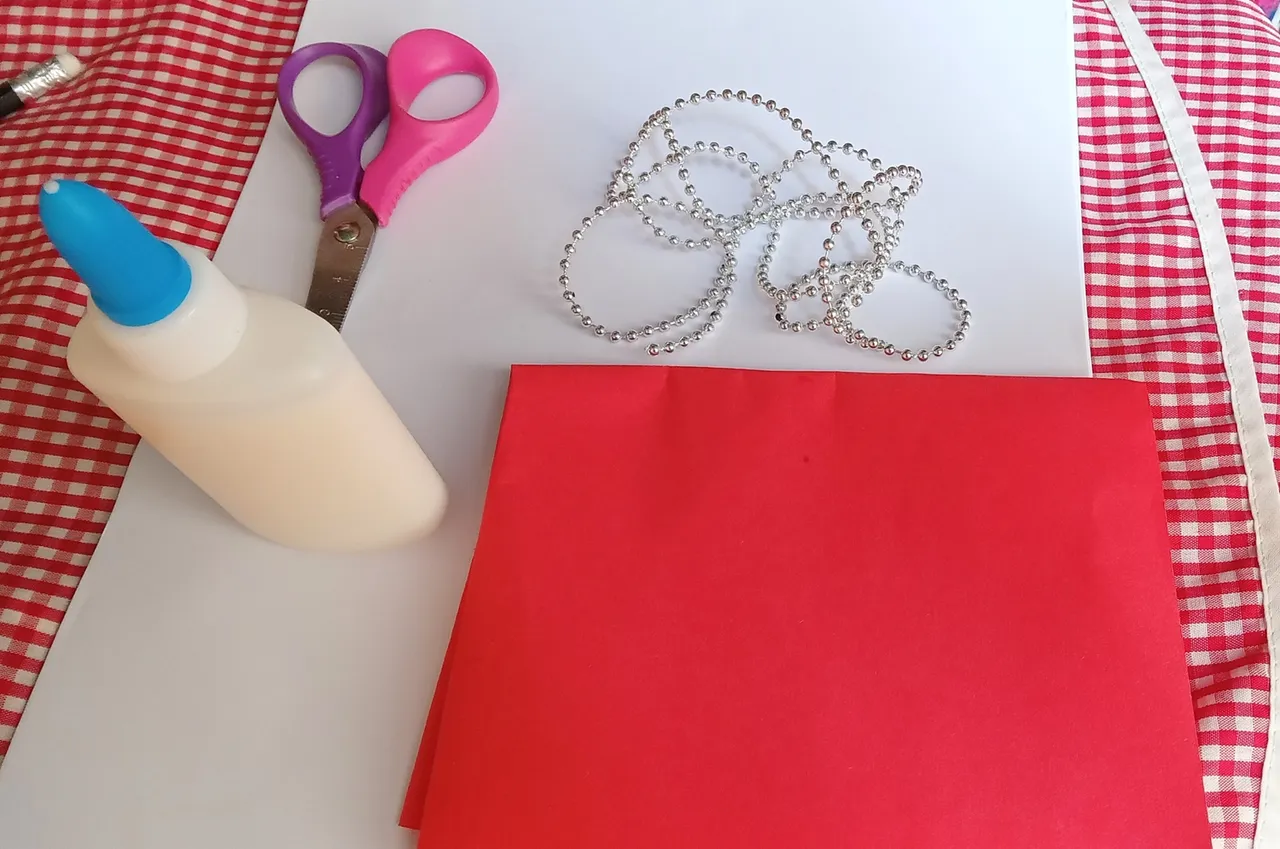
Hoy en la mañana salí a comprar los materiales porque no los tenía en casa. Compré diez hojas blancas, pega blanca y una hoja de color rojo. Cuando llegué a casa me puse manos a la obra.
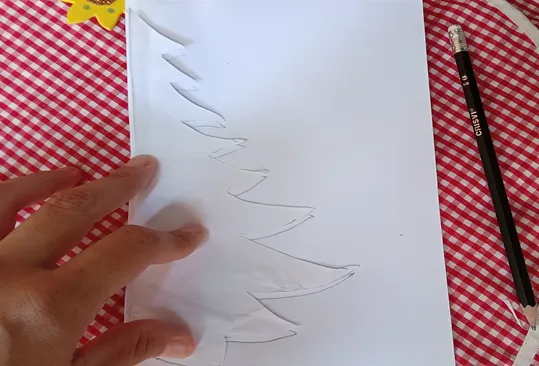
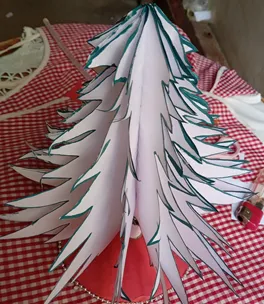
Lo primer que realicé fue un árbol en una hoja para así poder sacar los otros árboles y que fueran del mismo tamaño, ya que esa es la idea que nuestro árbol quede muy bonito.
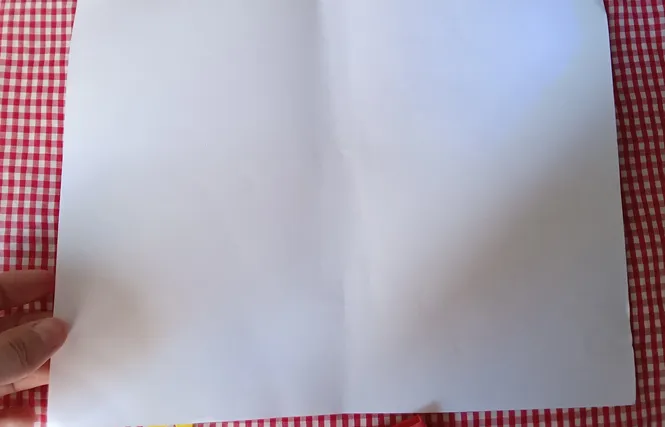
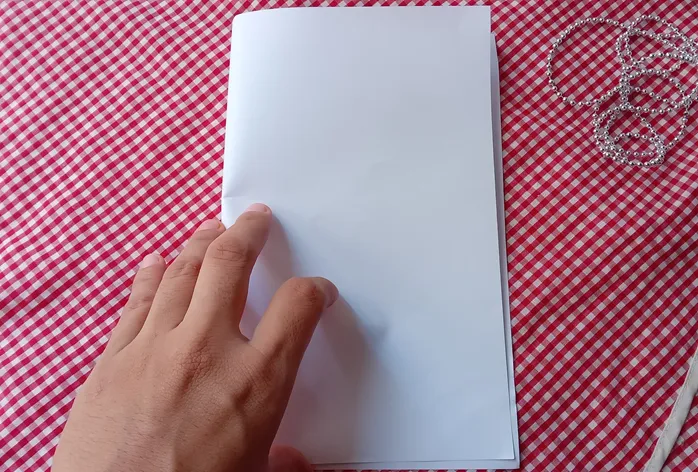
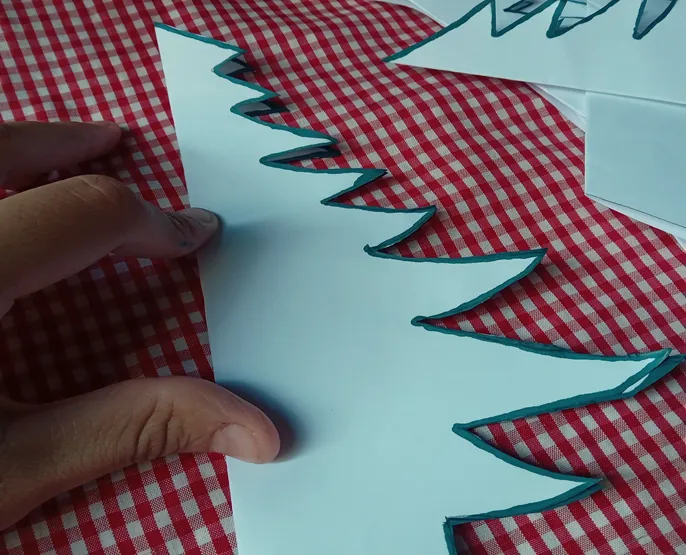
Una vez teniendo la medida del árbol, tomé las hojas blancas y las fui doblando por la mitad así hice con todas. Ya listas me puse a remarcar el árbol en cada hoja hasta terminar la última.
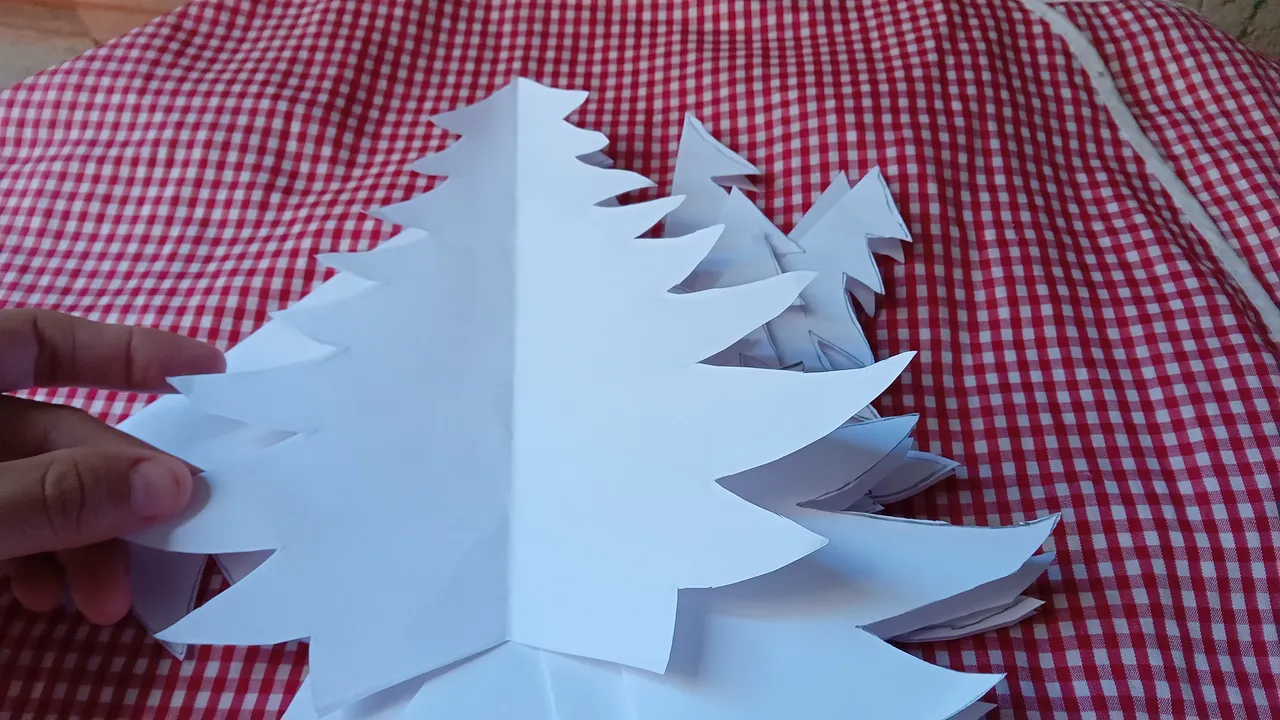
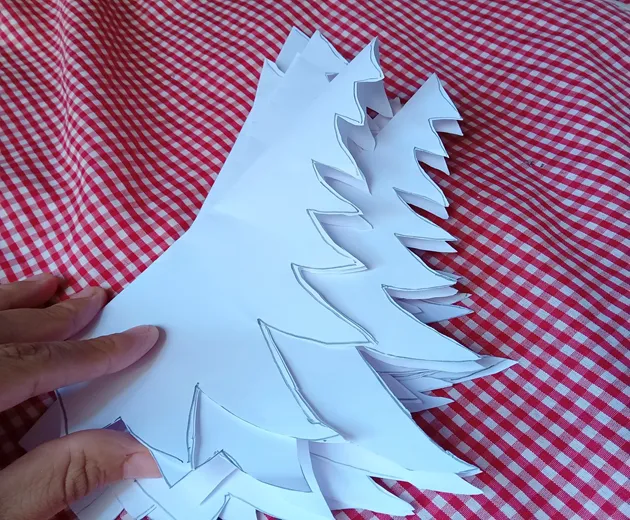
Habiendo terminado mi primera parte, pasé al segundo paso que era cortar y sacar el árbol.
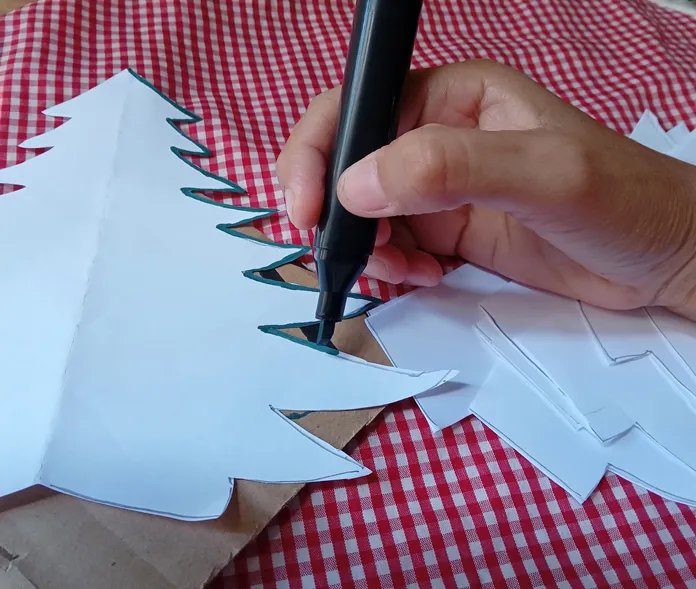
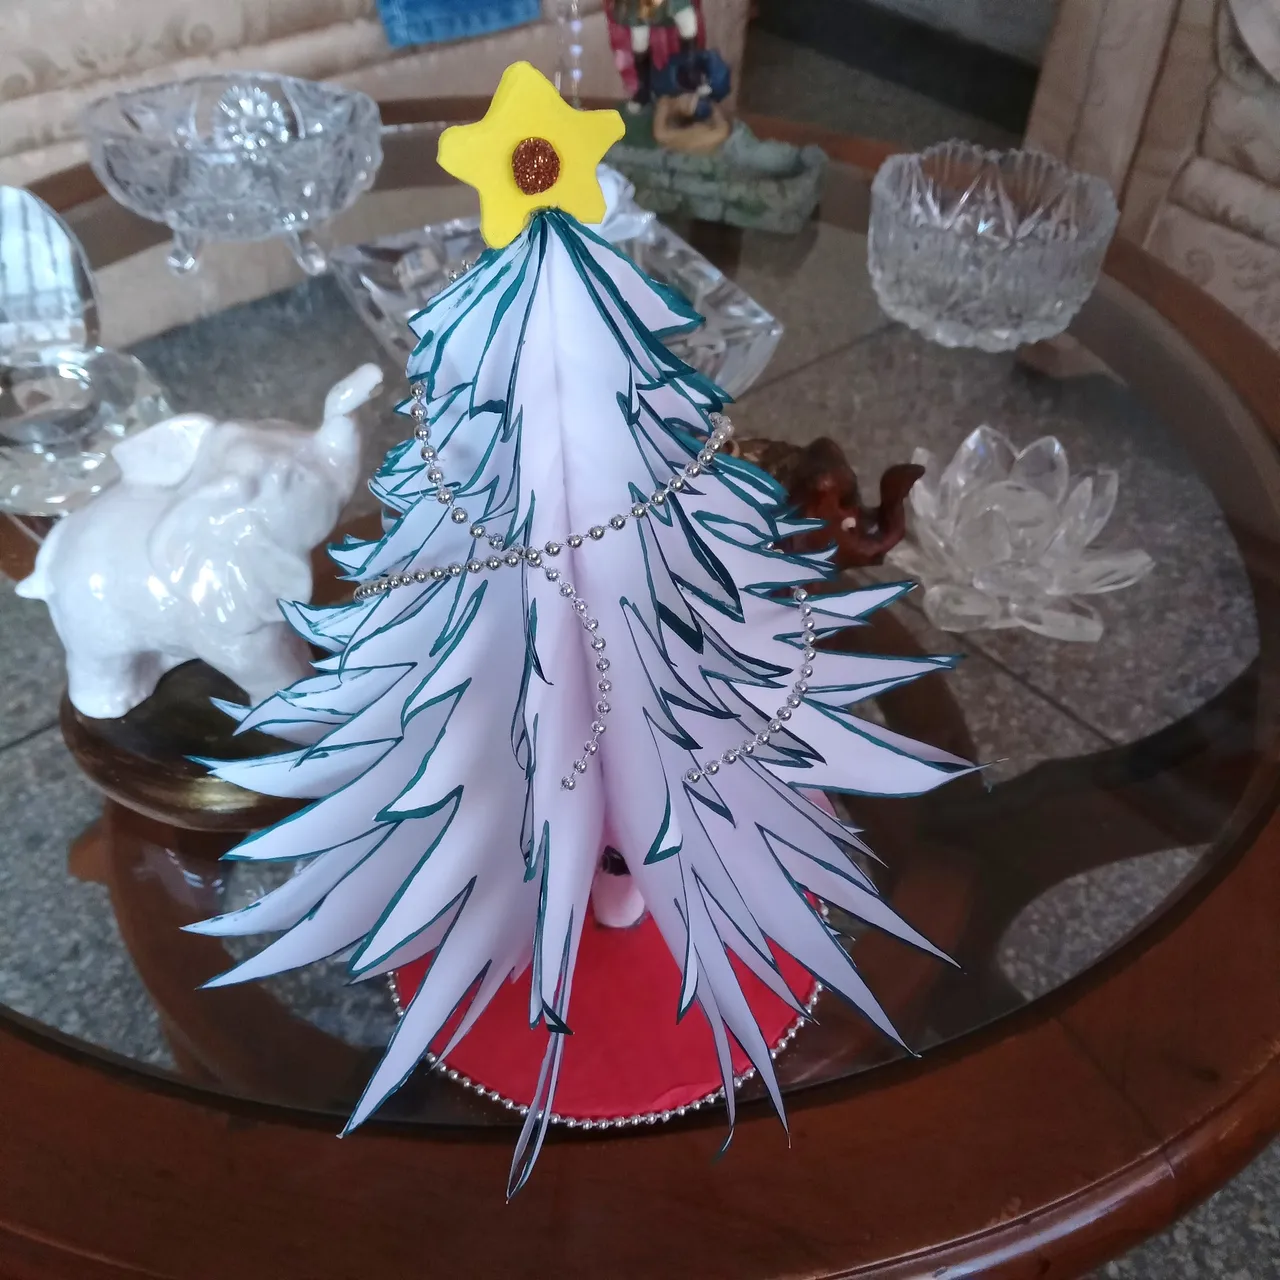
Habiendo terminado todo, con un marcador de color verde empecé a remarcar solo las orillas del árbol y así hice con todos hasta terminar.
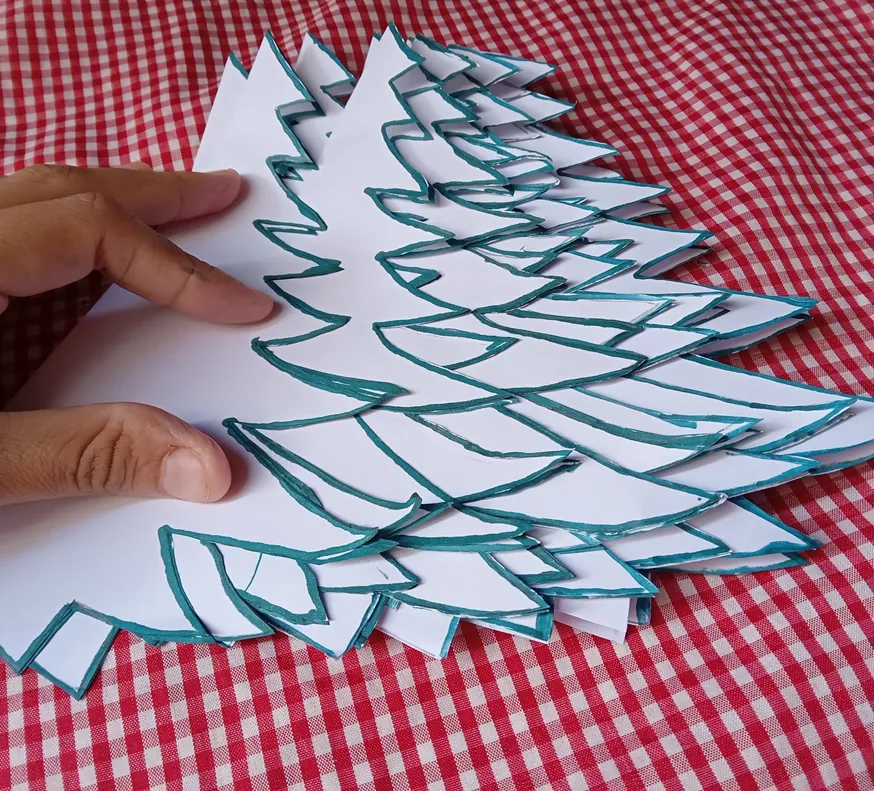
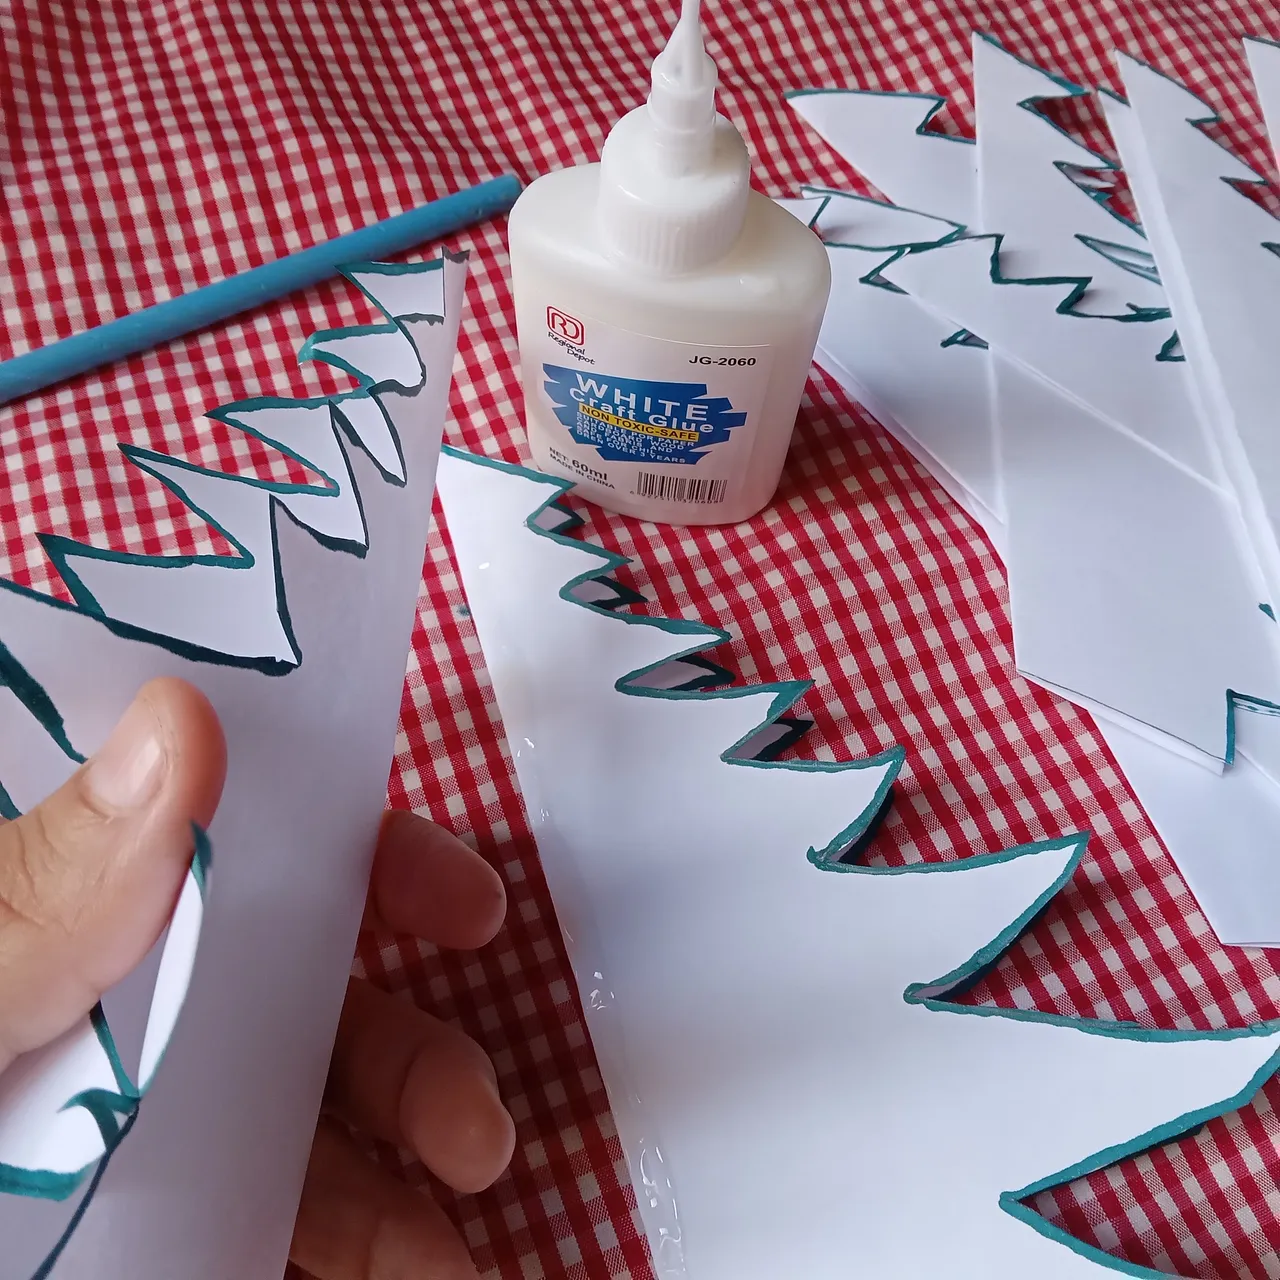
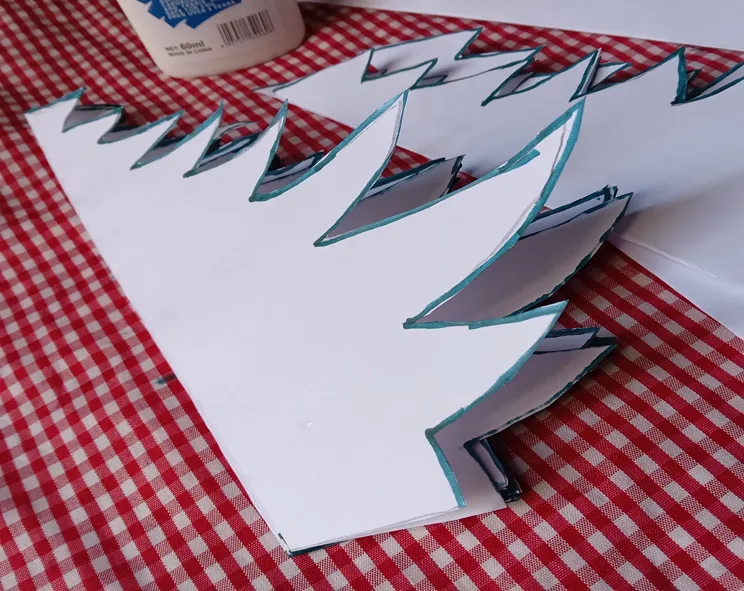
Seguidamente comencé a unir con la pega blanca uno encima del otro y así sucesivamente.
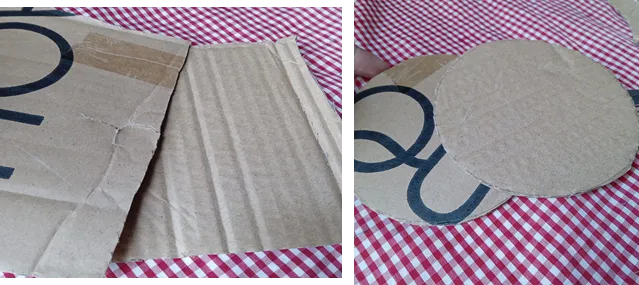
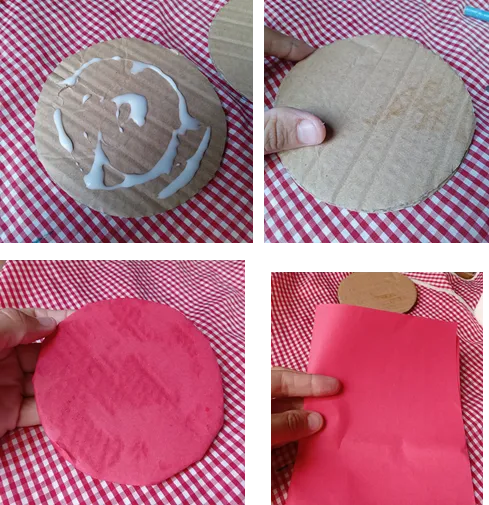
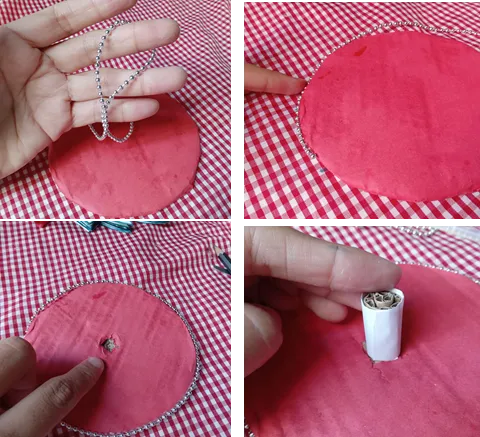
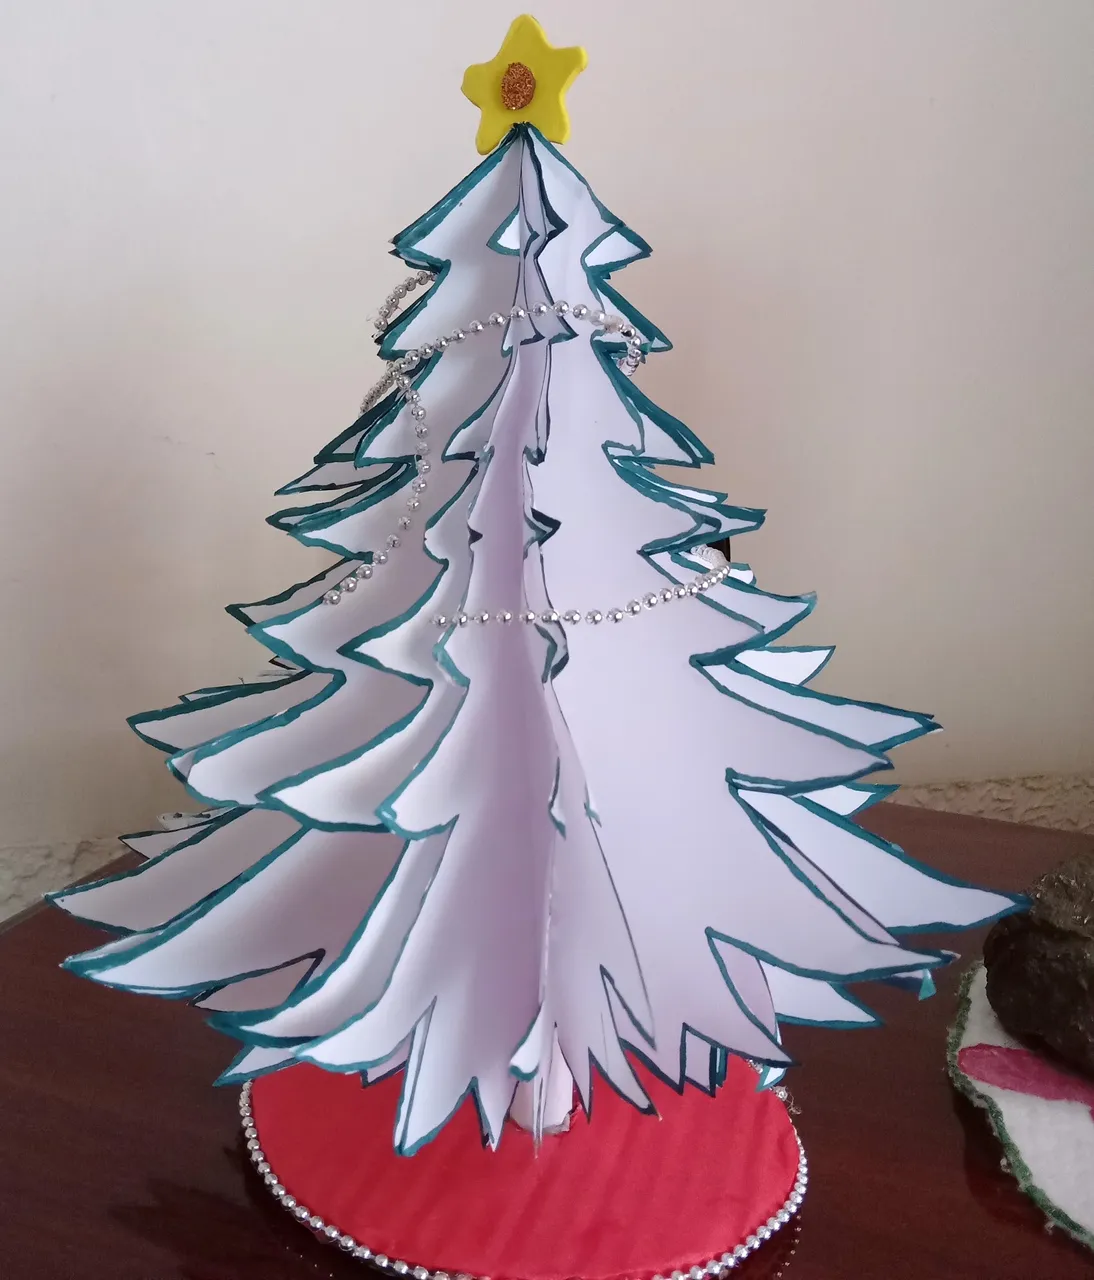
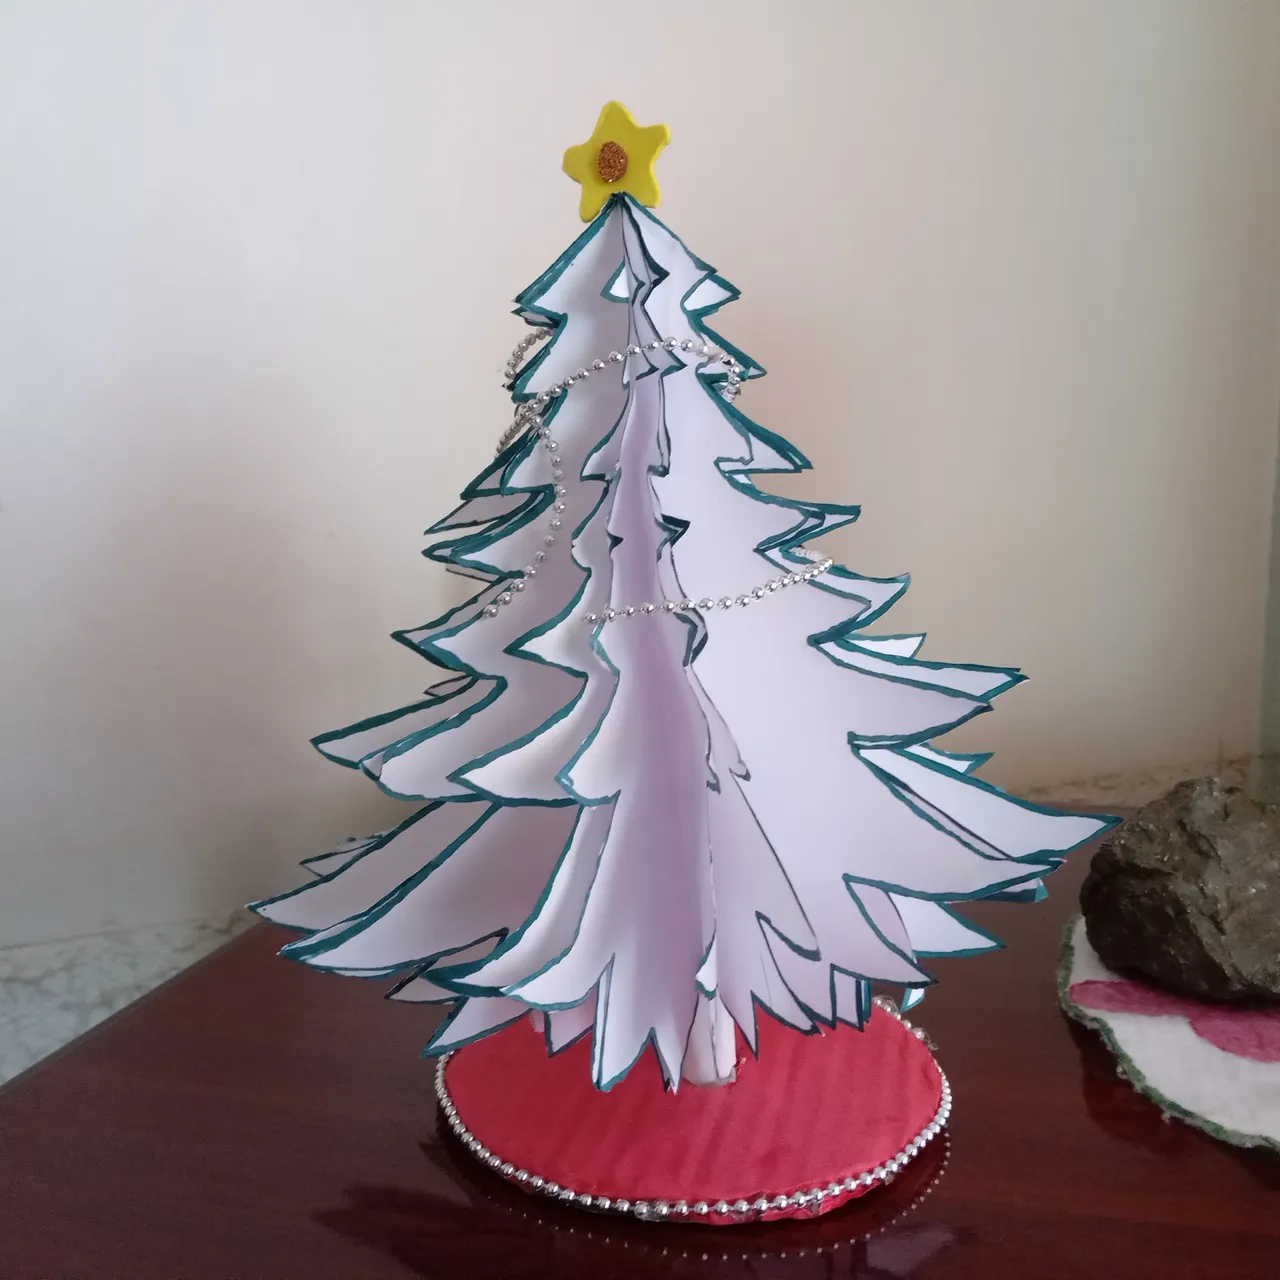
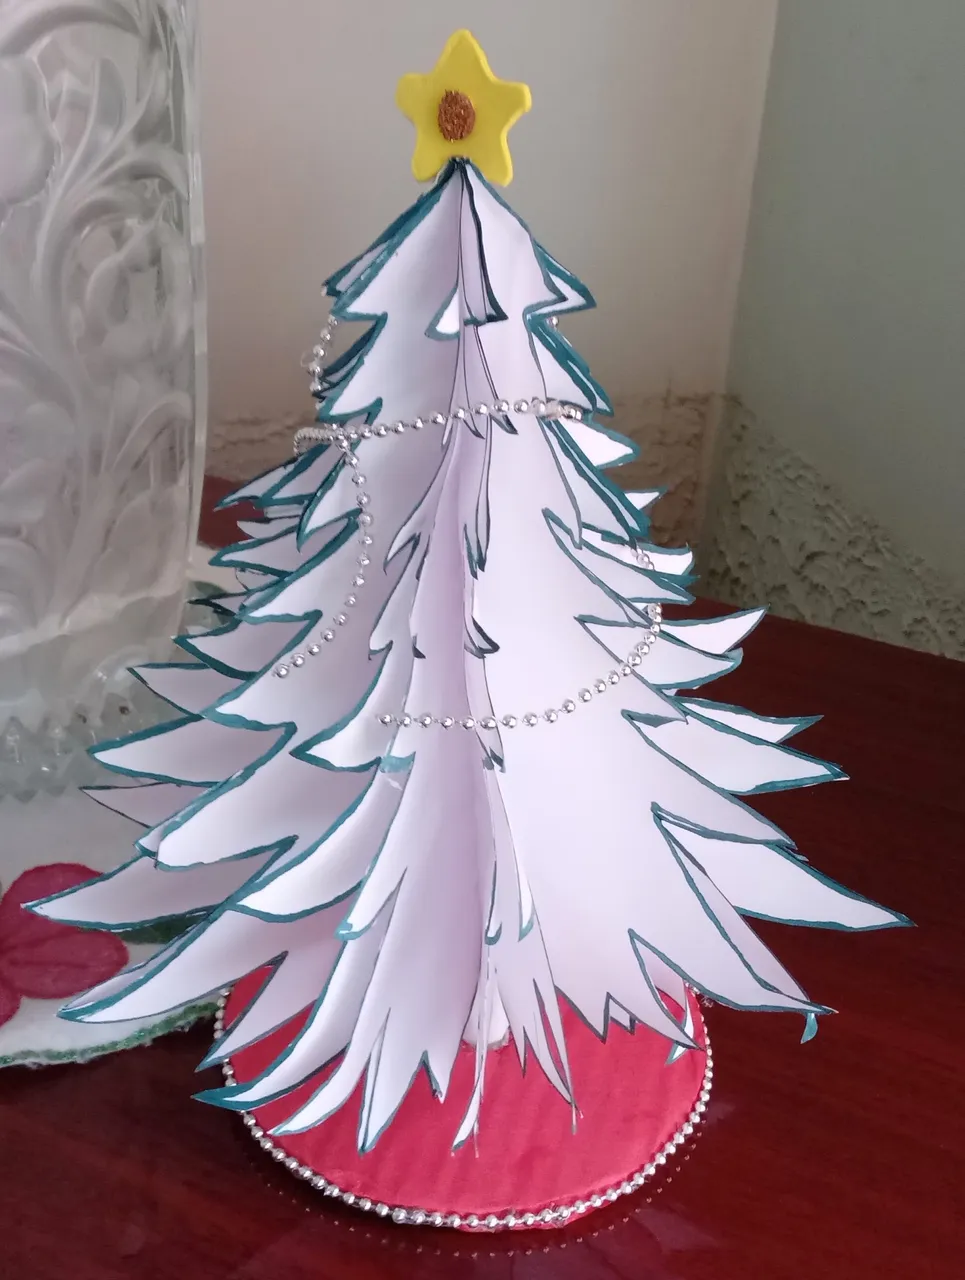
Luego tomé dos pedazos de cartón y los corté en forma redonda y pegue uno encima del otro y lo cubrí todo con la hoja de color rojo. En el centro hice un hueco pequeño para colocar el árbol también le hice un pequeño tronco con cartón y lo envolví de esta manera y lo pegué al árbol por los bordes le coloqué un adorno muy lindo.
Ya para finalizar pegué mi árbol. Me costó un poquito hacerlo pero lo hice, terminé de hacer unos últimos arreglos y ya casi estaba listo. Quería colocarle en el centro una estrella pero tenia que hacerla y yo soy malísima haciendo estrellas. Mi hijo me ayudó porque yo no pude hacerla 🫣. Aún así me quedó muy bonito mi árbol de navidad, ideal para decorar. Me encanto tanto que lo tengo en mi escritorio mientras decoro mi hogar.
¿Que tal les pareció el árbol? Es fácil de hacer y muy bonito. Ojalá te animes a realizarlo.
Gracias por visitar mi blog esto ha sido todo. Saludos y un abrazo. Nos vemos en un próximo post.
ENGLISH
Hello, greetings friends of Hive and this community. This is my first publication that I share with you, it has always called my attention to create and invent designs from home because they are really beautiful.
As Christmas is approaching I have had the opportunity to see many designs and Christmas decorations that many people make with their own hands to decorate their homes and place their Christmas trees. We have no excuses, since there are many ways to be creative and decorate our homes.
A few days ago I was encouraged and wanted to buy the material but the truth is that when I was looking to choose which one to make, my mind was in the air because I did not know which one to choose, I loved them all. Until I finally came across this Christmas tree made with simple materials, so I told my daughter and she agreed with me and we both agreed to make our paper tree.
Today in the morning I went out to buy the materials because I didn't have them at home. I bought ten white sheets, white glue and a red sheet. When I got home I got down to work.
The first thing I did was to make a tree on a leaf so that I could take out the other trees and make them the same size, since that is the idea that our tree will be very nice.
Once I had the measurement of the tree, I took the white leaves and folded them in half and did the same with all of them. Once they were ready, I started to mark the tree on each leaf until I finished the last one.
Having finished my first part, I moved on to the second step which was to cut and remove the tree.
Having finished everything, with a green colored marker I started to highlight only the edges of the tree and so I did with all of them until I was done.
Next I started to join with the white glue one on top of the other and so on.
Then I took two pieces of cardboard and cut them into round shapes and glued one on top of the other and covered the whole thing with the red colored sheet. In the center I made a small hole to put the tree in and also made a small trunk with cardboard and wrapped it this way and glued it to the tree around the edges and put a very nice ornament on it.
Finally, I glued my tree. It took me a little while to do it but I did it, I finished making some last arrangements and it was almost ready. I wanted to put a star in the center but I had to make it and I suck at making stars. My son helped me because I couldn't do it 🫣. I still got a very nice Christmas tree, ideal for decorating. I loved it so much that I have it on my desk while I decorate my home.
How did you like the tree? It is easy to make and very pretty. I hope you are encouraged to make it.
Thanks for visiting my blog this has been all. Greetings and a hug. See you in a next post.