Happy day friends HIVE, I hope you have a good day!
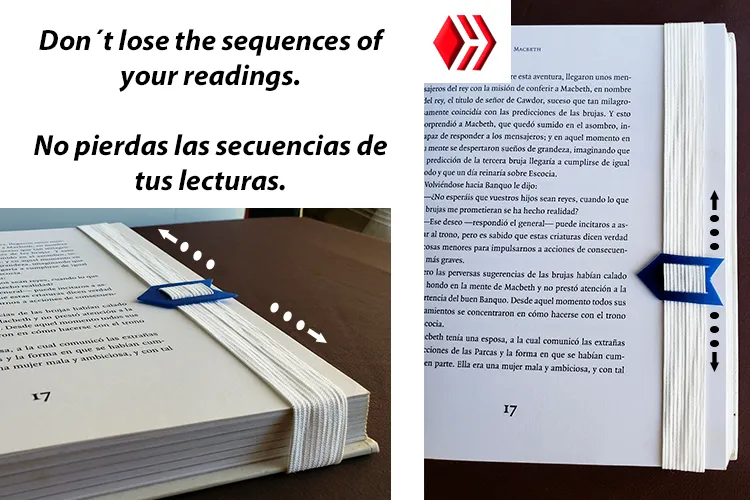
For today I will share with you how to make a practical, but useful bookmark, so as not to lose the sequence of our readings.
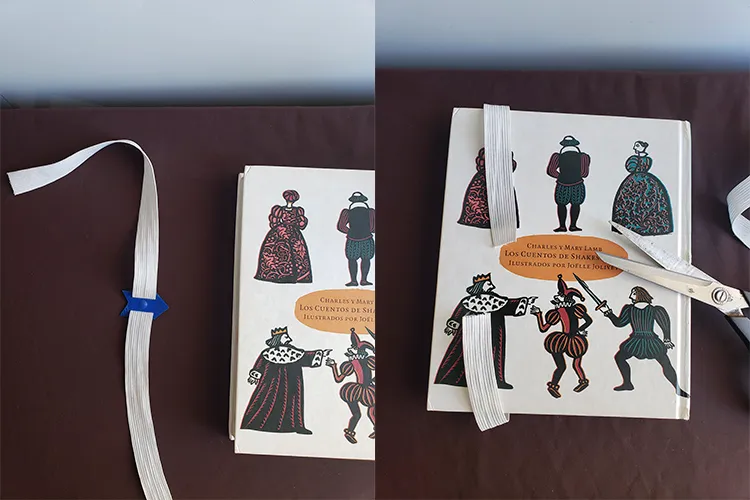
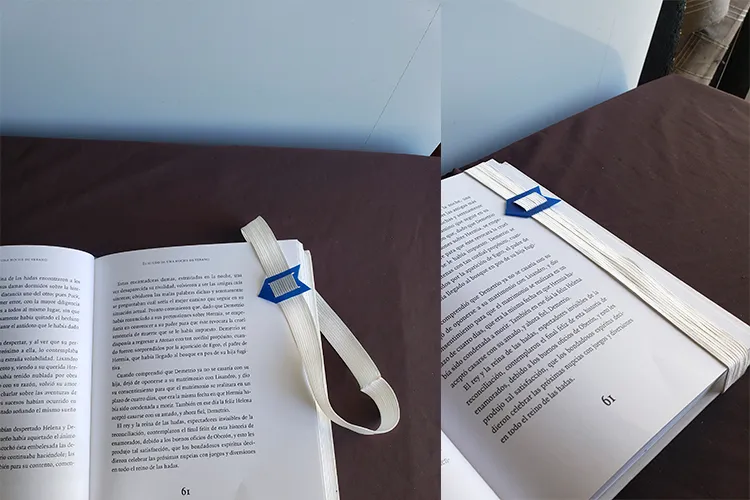
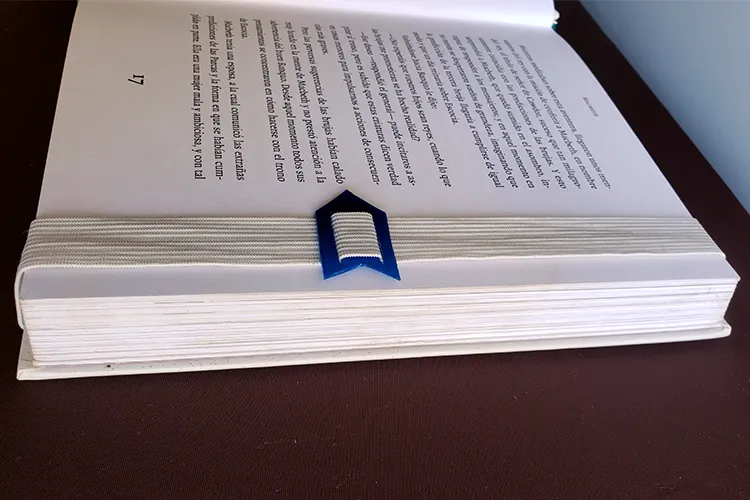
In addition to marking the sheet, it points out the line where you left the last time, it is very practical and with very simple materials that we could have at home.
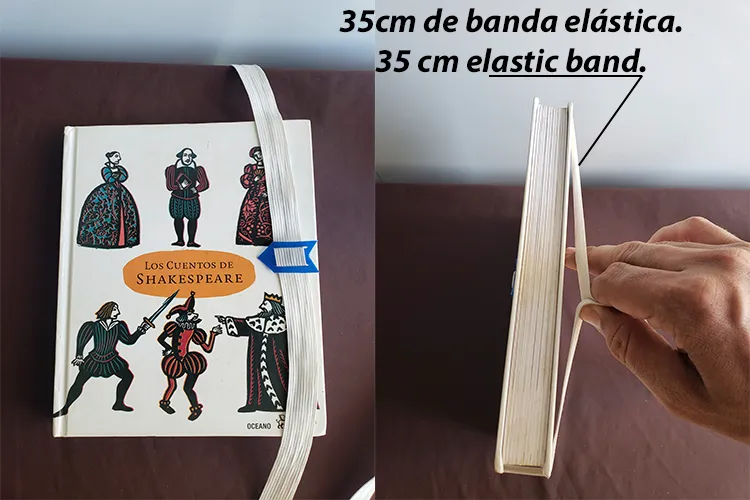
This bookmark is very versatile for any book we are reading since it adapts to any size because it is an elastic band.
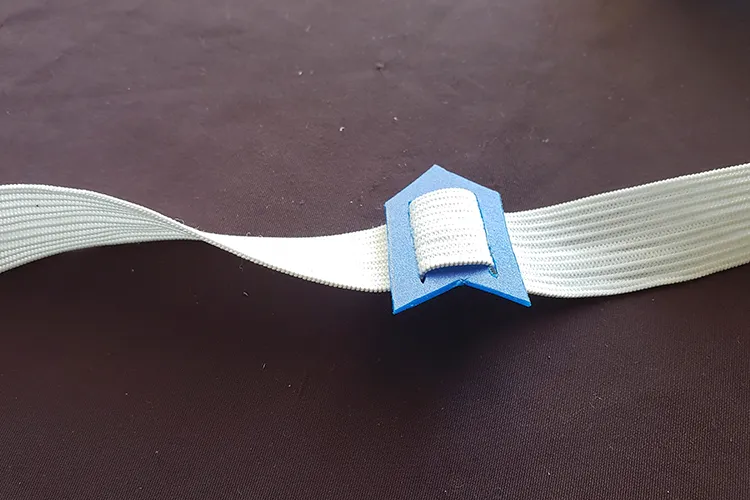
The arrow was made with a 5-liter plastic bottle cap and the tools used were a scissors, razor, needle and thread the color of the elastic band.
I am pleased to show you the step by step of this great accessory for our readings we begin.
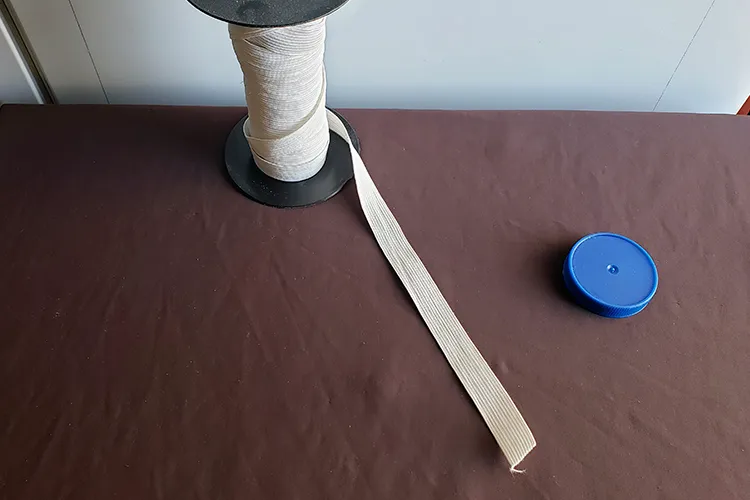
Materials:
• 35cm of elastic band.
• 1 plastic bottle cap of 5 liters.
Tools:
• Pencil, eraser and square.
• Scissor.
• Needle and thread.
¡Feliz día amigos HIVE, espero tengan un buen día!
Para el día de hoy les compartiré como hacer un práctico, pero útil marcador de libros, para no perder la secuencia de nuestras lecturas.
Además de marcar la hoja, te señala la línea donde quedaste por última vez, es muy práctico y con materiales muy simples que podríamos tener en casa.
Este marcador de página resulta muy versátil para cualquier libro que estemos leyendo ya que se adapta a cualquier tamaño por ser una banda elástica.
La flecha la elabore con una tapa de botellón plástico de 5 litros y las herramientas utilizadas fueron una tijera, navaja, aguja e hilo del color de la banda elástica.
me complace mostrarles el paso a paso de este genial accesorio para nuestras lecturas, ¡empezamos!
Materiales:
• 35cm de banda elástica.
• 1 tapa de botella plástica de 5litros.
Herramientas:
• Lápiz, borrador y escuadra.
• Tijera.
• Aguja e hilo.

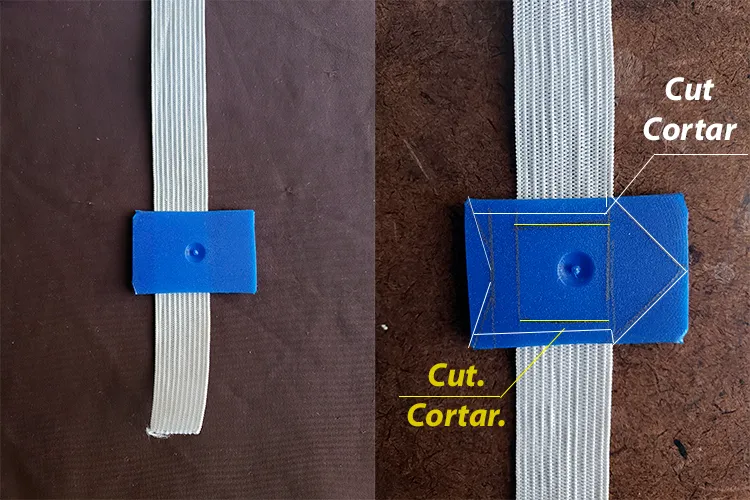
Step 1
• We collect our materials, these markers can be made with clothing elastic, or any other elastic tape you have available, the arrow-shaped plastic we can use any available that is easy to cut with scissors.
Paso 1
• Recolectamos nuestros materiales, estos marcadores pueden hacerse con elástica de ropa, o cualquier otra cinta elástica que tenga disponible, el plástico en forma de flecha podemos usar cualquiera disponible que sea fácil cortar con tijera.
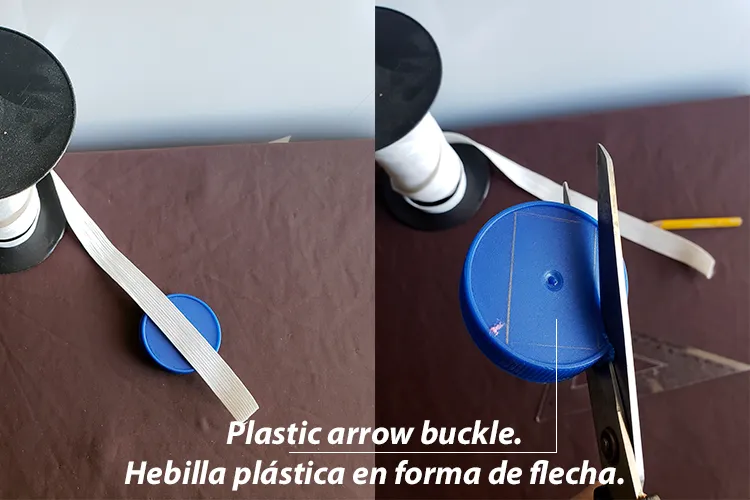
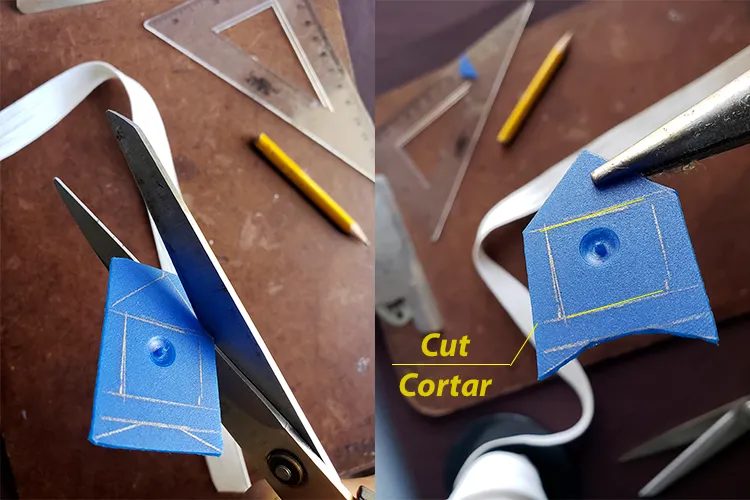
Step 2
• We draw the figure we want to cut on the plastic, in my case draw an arrow.
• We cut with the help of a scissors and a razor.
Paso 2
• Dibujamos la figura que deseamos cortar en el plástico, en mi caso dibuje una flecha.
• Cortamos con la ayuda de una tijera y una navaja.
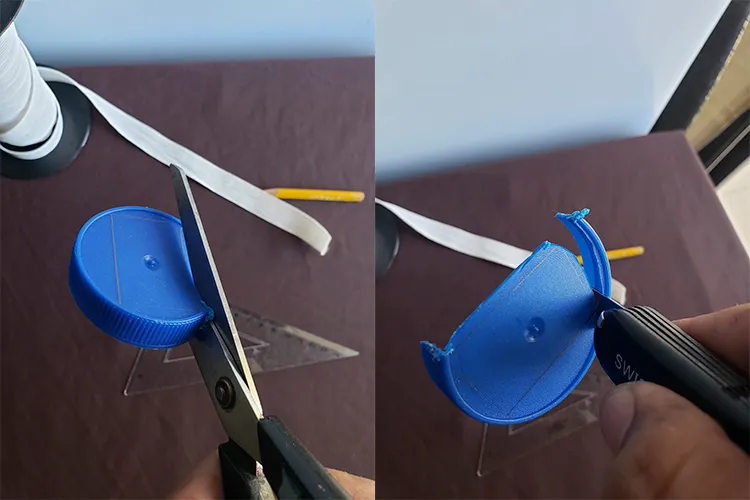

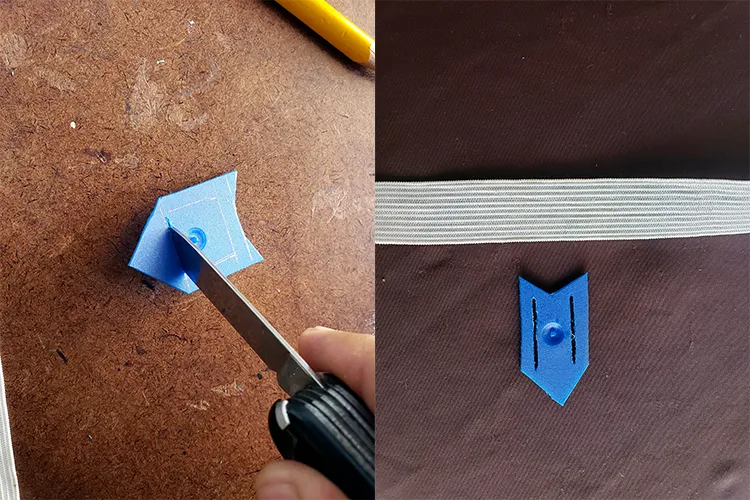
Step 3
• We open where the elastic band will pass
Paso 3
• Abrimos por donde pasara la banda elástica.
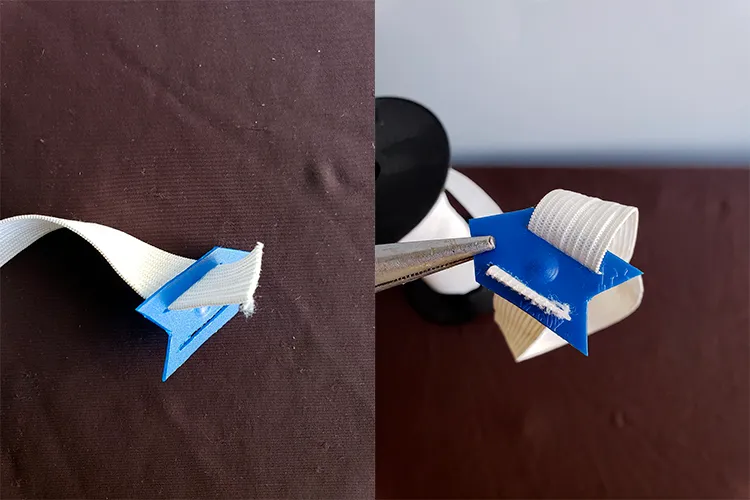
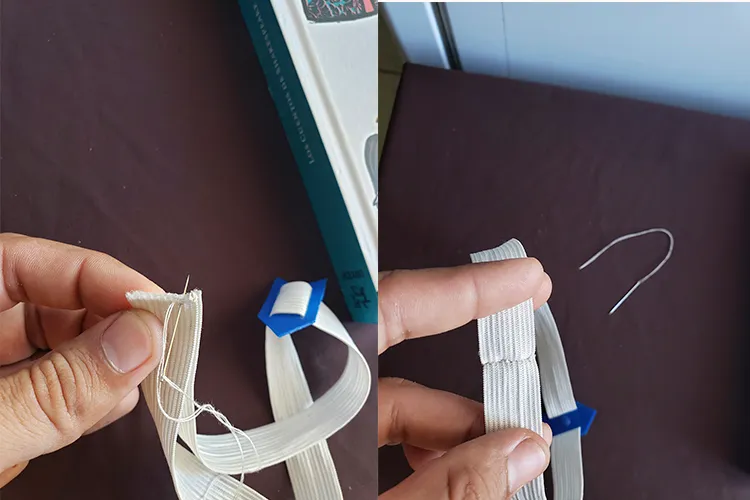
Step 4
• Use 35 cm of elastic band.
• And he sewed its ends with a needle and white thread.
Paso 4
• Utilice 35 cm de banda elástica.
• Y coci sus extremos con aguja e hilo blanco.


Thankful to the entire HIVE community for their support, I hope you liked the idea, see you in my next post and greetings to all
Agradecido con toda la comunidad de HIVE por su apoyo, espero les haya gustado la idea, nos vemos en mi siguiente post y ¡saludos a todos!
Resource // Recursos
Teléfono Samsung A10
Edition // Edición
Photoshop S6
Translator // Traductor;
https://translate.google.com/?hl=es&sl=auto&tl=en&op=translate