Hello friends!!
Hola Amigos!!
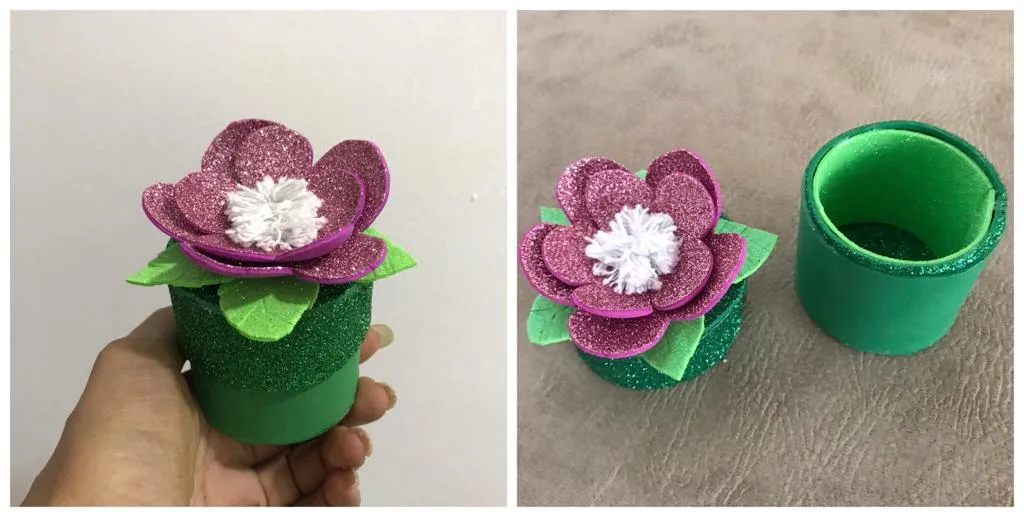
Have a wonderful day everyone!! Developing our creativity every day has great value. That is why it is great when through crafts we can share, make useful ideas and that when giving a gift it will be liked by whoever receives it. Today I am going to show you how, following this tutorial step by step, you will be able to make this cute little box with a beautiful bright flower using a small roll of cardboard. You will love the original result.
Maravilloso día tengan todos!!, desarrollar cada día nuestra creatividad tiene gran valor. Por ello es genial cuando a través de las manualidades podamos compartir, realizar ideas útiles y que al obsequiar será del agrado de quien lo reciba. El día de hoy les voy a mostrar como siguiendo paso a paso este tutorial podrán elaborar esta coqueta cajita con linda flor brillante empleando un pequeño rollo de cartón. Les encantará el original resultado.
The following materials will be needed to make this beautiful design:
Se necesitarán para elaborar este hermoso diseño los siguientes materiales:
•Cardboard roll.
• Bright fuchsia and bright light green, dark and bright green foam.
• White wick thread.
•Scissors.
•Ruler.
•Pencil.
•Iron.
•Rollo de cartón.
•Foami fucsia brillante y verde claro brillante ,verde oscuro y brillante.
•Hilo pabilo blanco.
•Tijera.
•Regla.
•Lápiz.
•Plancha.
He began the craft by marking the cardboard roll of the desired height; and then cut out, I continue lining the contour of the cardboard roll with the green foami and marking its base with the pencil on the bright green foami, cut out and pasted. To later cut a rectangle of the same height in the shiny light green foam, but its width must fit inside the roll.
Inició la manualidad marcando el rollo del cartón del alto deseado; y luego recortó, sigo forrando con el foami verde su contorno del rollo de cartón y marcando con el lápiz en el foami verde brillante su base, recortó y pegó. Para posteriormente cortar en el foami verde claro brillante un rectángulo del mismo alto pero su ancho debe calzar en el interior del rollo.
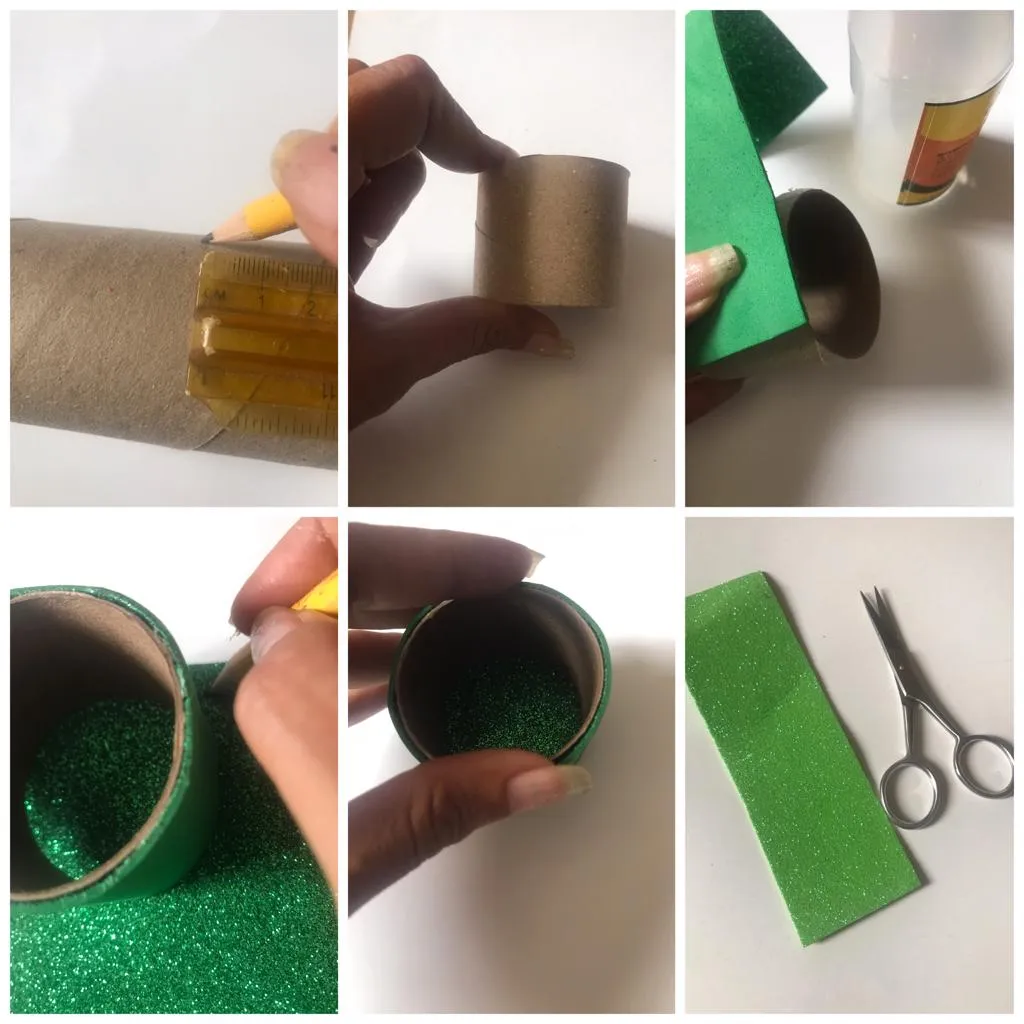
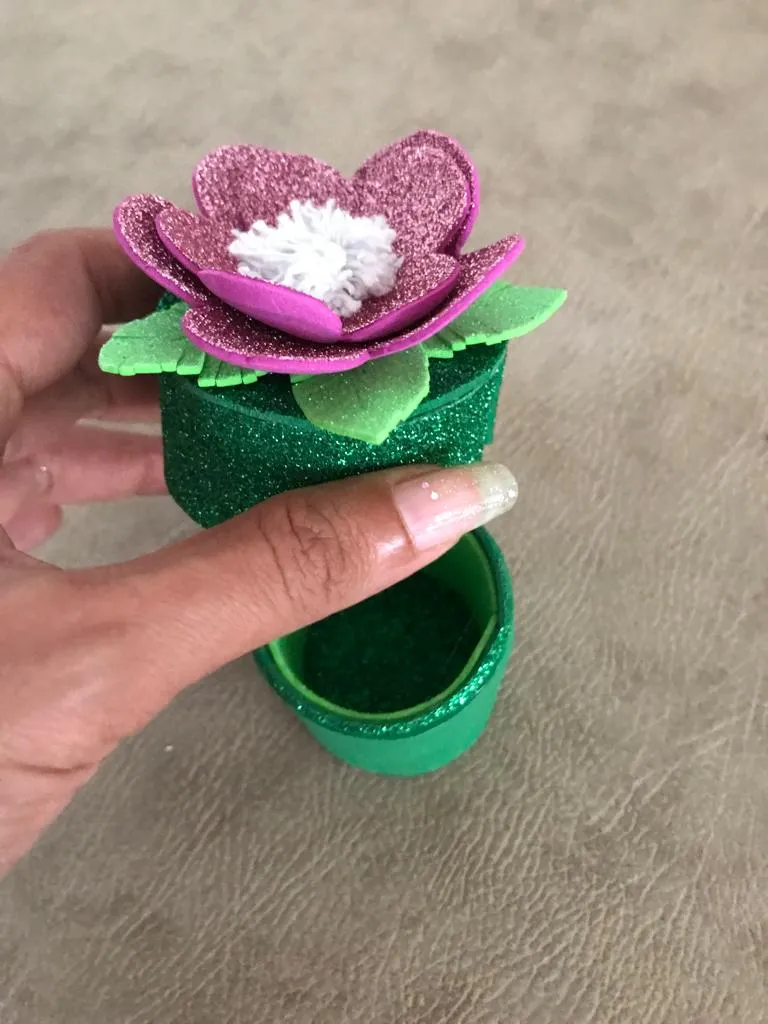
I fix the foami rectangle inside the base that will shape the beautiful box (as seen in the figure). I continue by cutting a thin strip of bright green foam and attaching it to the top edge of the box. In addition, he cut a strip 3.5 centimeters high and 1 centimeter wide more than the outline of the box.
Fijo el rectángulo de foami en el interior de la base que dará forma a la hermosa cajita (tal como se observa en la figura). Sigo cortando un delgada tira de foami verde brillante y la fijo al borde superior de la cajita. A demás cortó una tira de 3,5 centímetros de alto y el ancho 1 centímetro más que el contorno de la cajita.
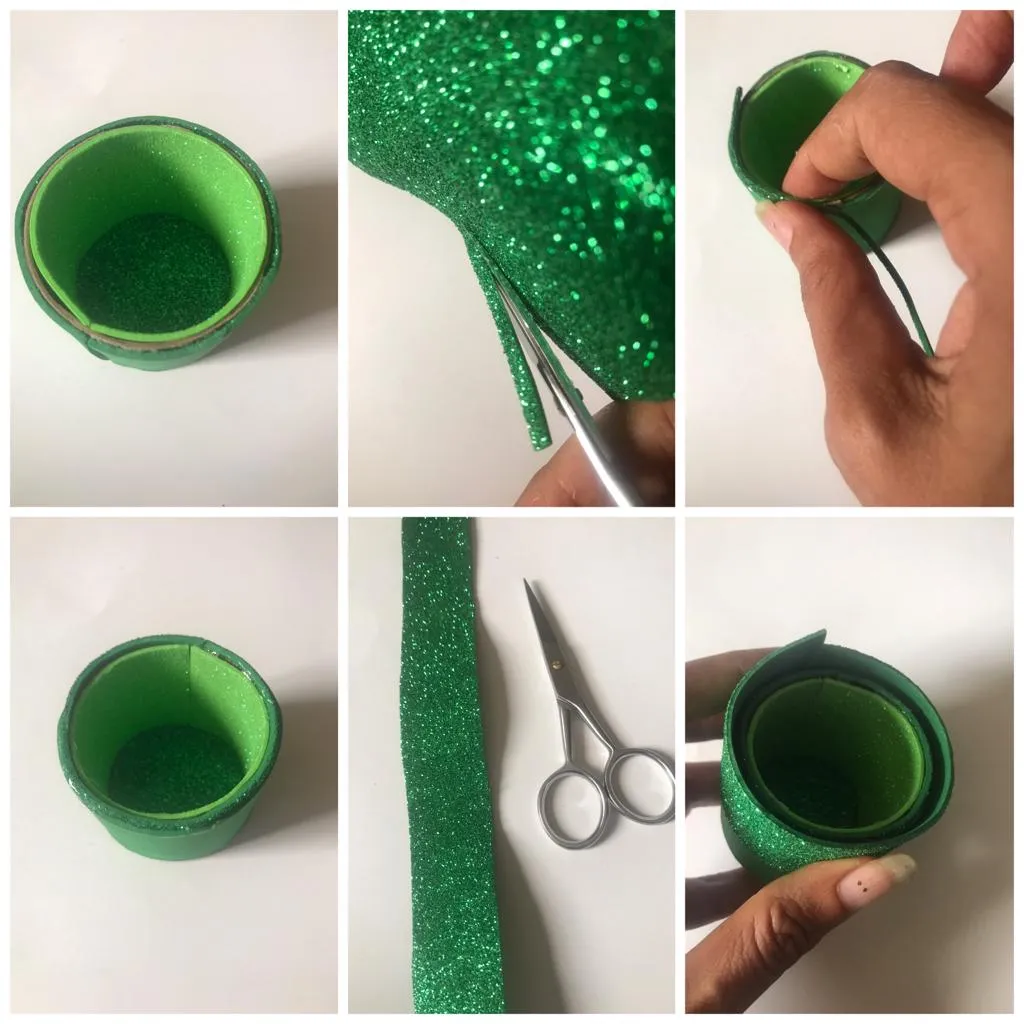
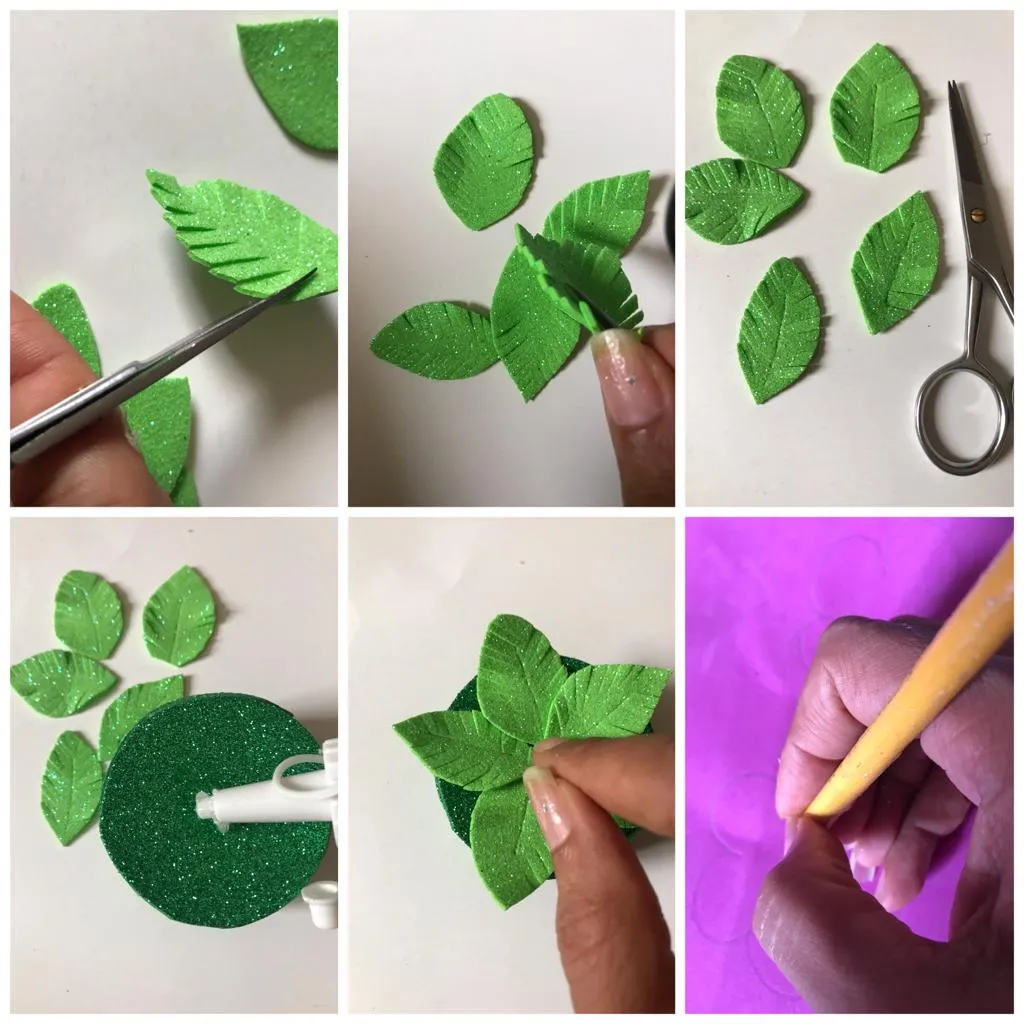
I fix the ends of the strip to form a ring (that slides through the bottom edge of the box with ease). Continue marking on the back of the bright green foam the outline of the foam ring; cut and pasted, giving shape to the lid of the box. On the back of the light green foam, he marked and cut out 5 leaf-shaped figures.
Fijo los extremos de la tira formando un aro (que se desplace a través del extremo inferior de la cajita con facilidad). Continuó marcando en la parte posterior del foami verde brillante el contorno del aro de foami; recortó y pegó dando forma así a la tapa de la caja. En la parte posterior del foami verde claro marcó y recortó 5 figuras en forma de hojas.
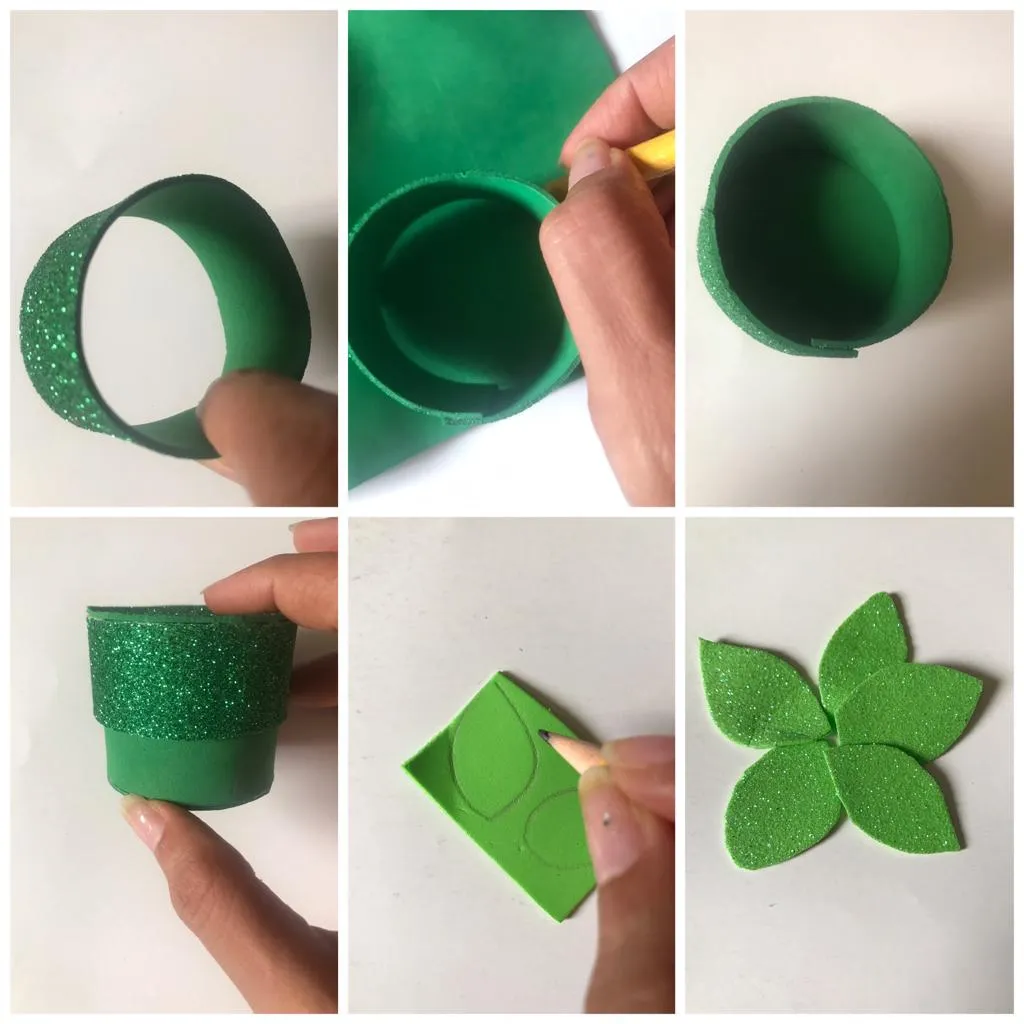
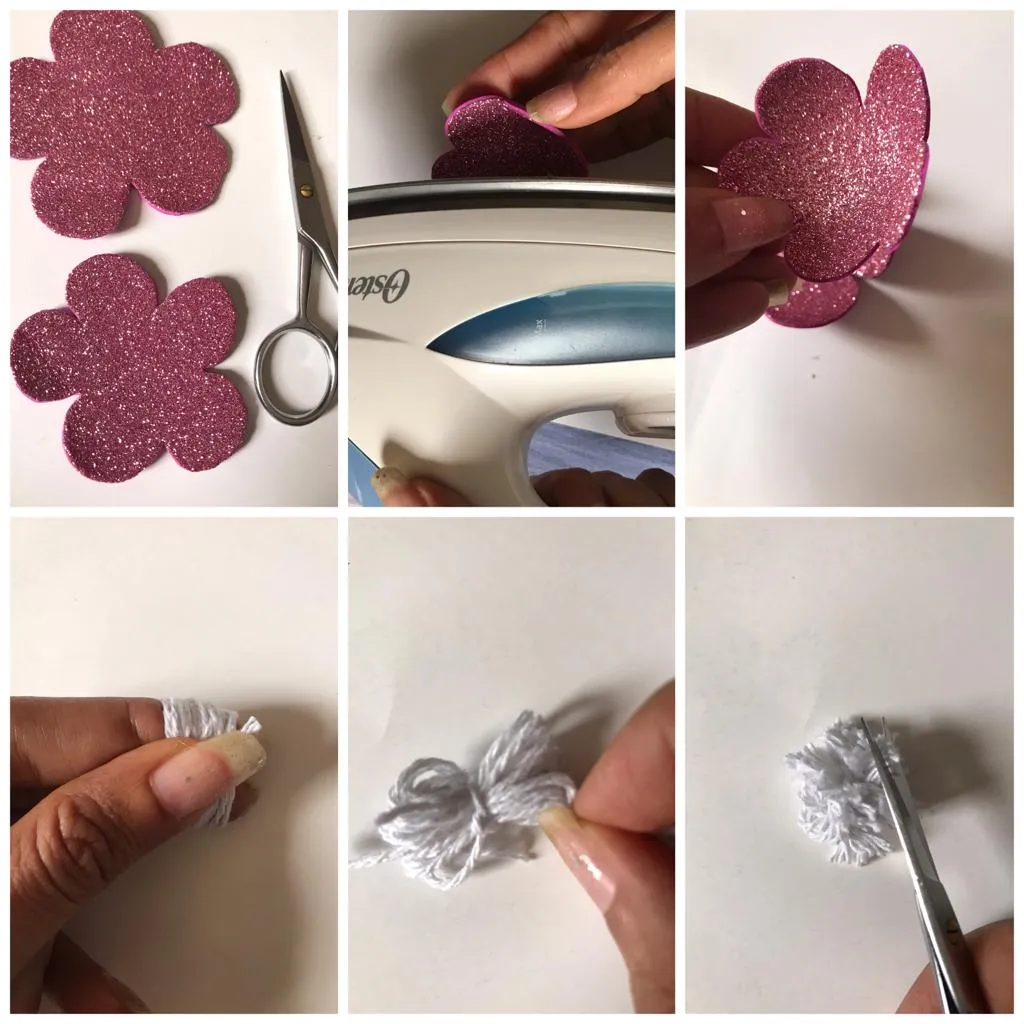
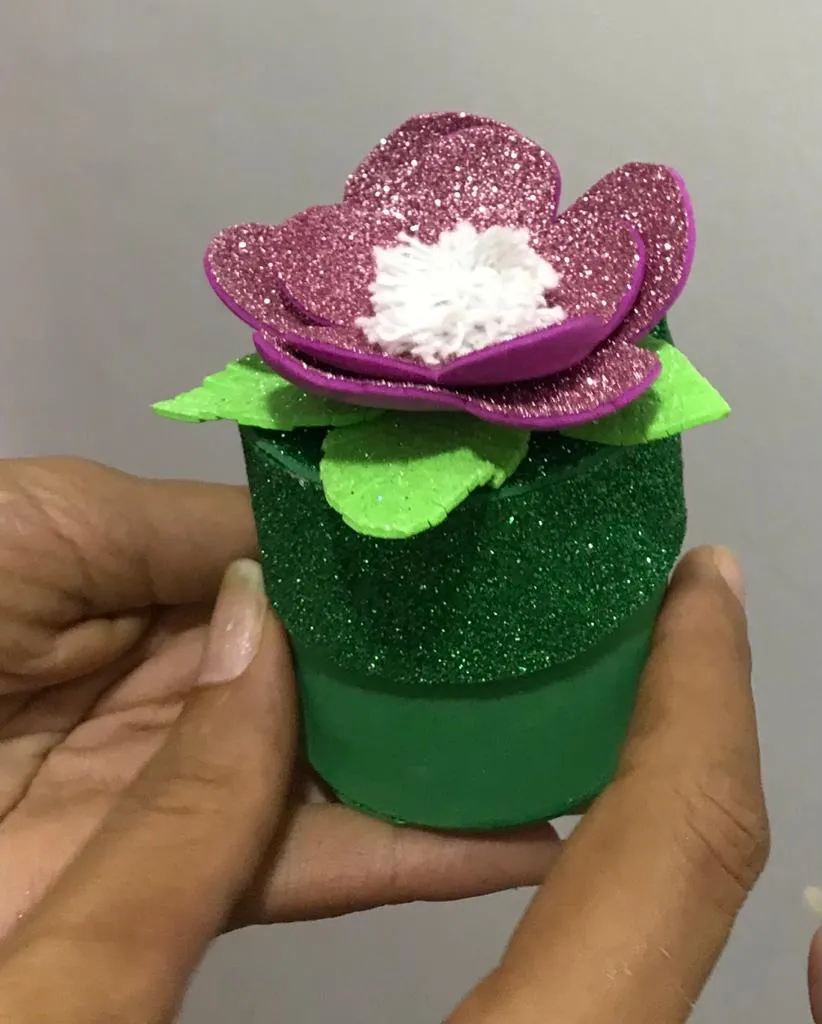
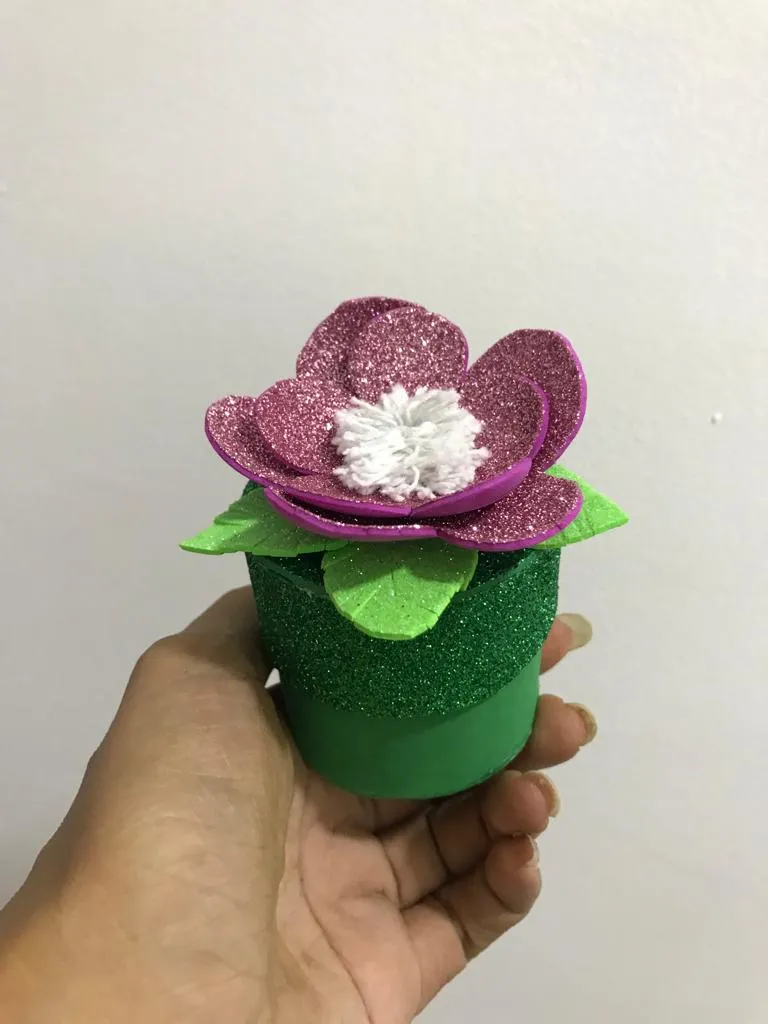
I continue making small cuts on each side (prevent the cut from passing through the center of the sheet) when I have the 5 sheets ready I proceed to mark the center of the sheet with the tip of the scissors (as seen in the figure) I shape ; I applied glue to the center of the lid and attached the leaves. On the back of the bright fuchsia foami drew the outline of 2 flowers with 5 petals; one bigger than the other.
Sigo realizando pequeños cortes a cada lado( evitar que el corte pase del centro de la hoja) al tener lista las 5 hojas procedo a marcar con la punta de la tijera el centro de la hoja ( tal como se observa en la figura) doy forma; aplicó pegamento al centro de la tapa y fijo las hojas. A la parte posterior del foami fucsia brillante dibujó el contorno de 2 flores de 5 pétalos; una más grande que la otra.
He cut out the figures and with the help of the iron I am giving heat (carefully) to the foami, which will allow me to mold and shape each flower. With the wick thread, make a small roll, knot it in the center, cut both sides and even out the ends (as seen in the figure).
Recortó las figuras y con ayuda de la plancha voy dando calor (con cuidado) al foami lo que me permitirá moldear y dar forma a cada flor. Con el hilo pabilo realizar un pequeño rollo lo anudó en el centro cortó ambos lados y emparejó las puntas ( tal como se observa en la figura).
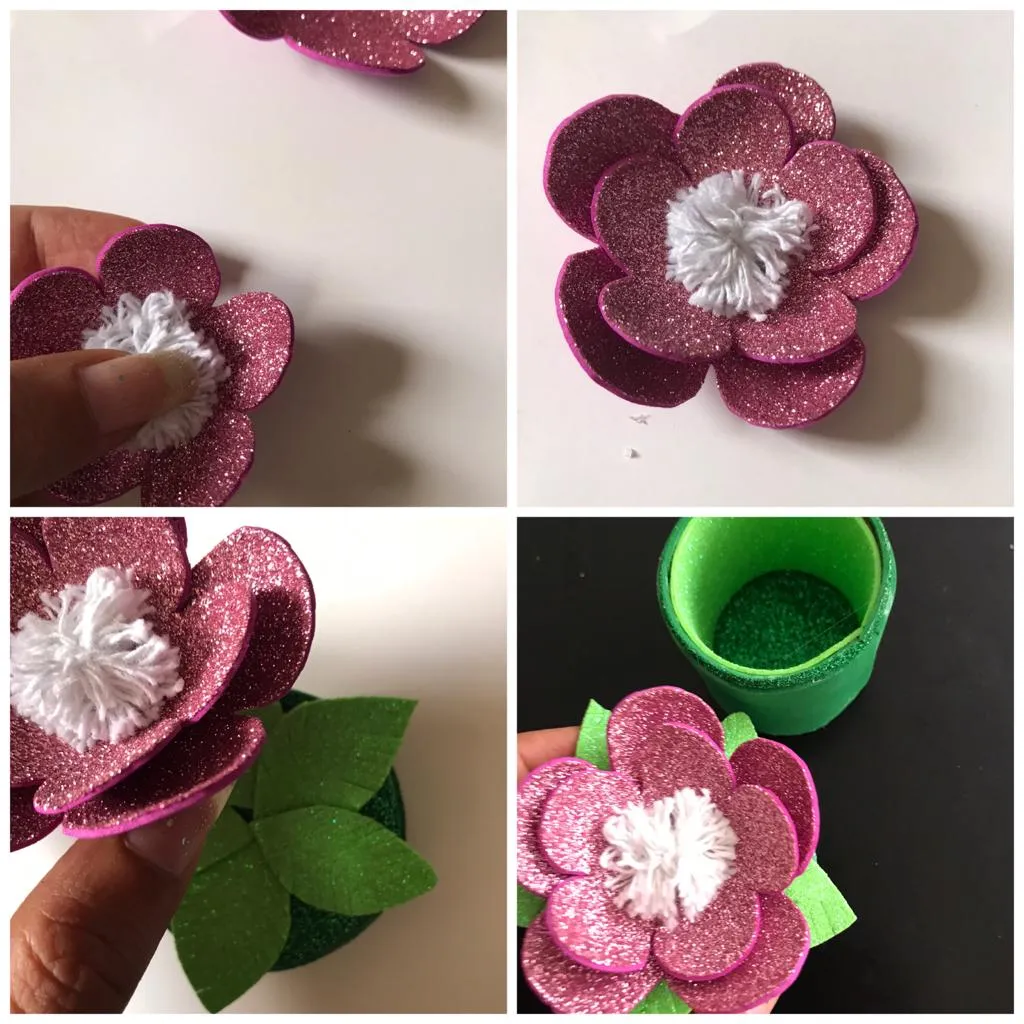
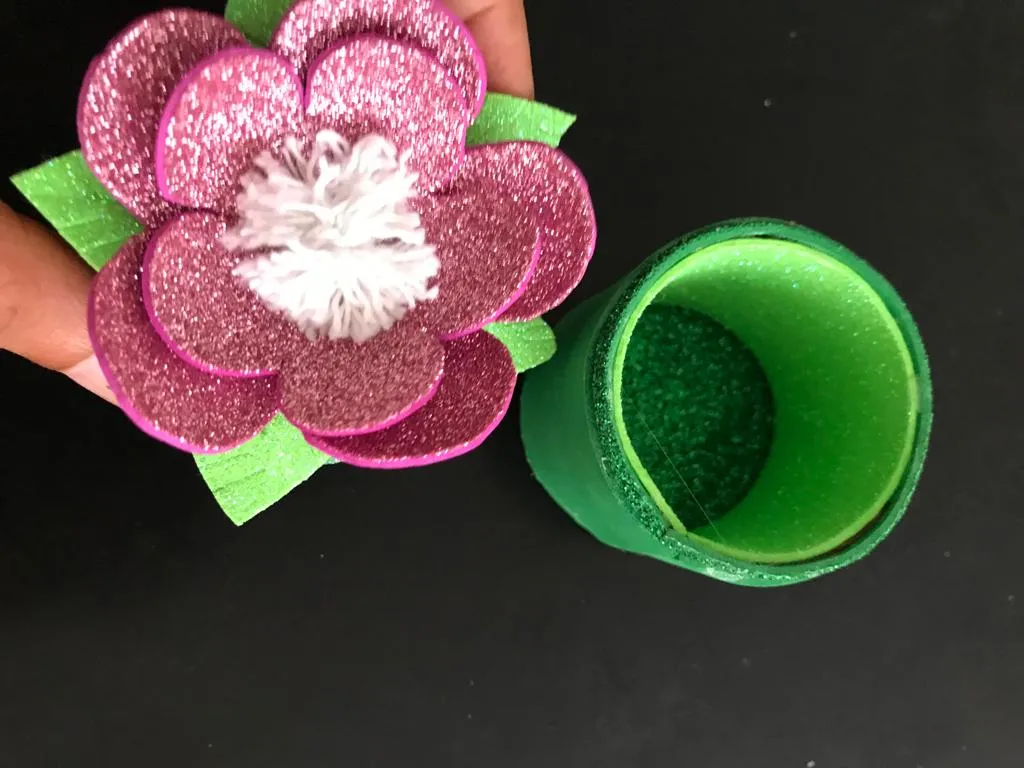
Finished by fixing the small thread pompom to the center of the small flower and is fixed on the other flower. To glue the beautiful shiny flower to the lid of the box.
Culminó fijando el pequeño pompón de hilo al centro de la flor pequeña y está la fijo sobre la otra flor. Para pegar la hermosa flor brillante a la tapa de la cajita.
This cute little box with a beautiful bright flower using small cardboard rolls; It is a sample of the beautiful crafts that you can create at home by drawing the desired flower shapes, the colors of your choice and use as a special detail when making a gift or as a souvenir.
Esta coqueta cajita con linda flor brillante empleando pequeños rollo de cartón; es una muestra de las hermosas manualidades que usted mismas podrán crear en casa dibujando las forma de flores deseadas ,los colores de su elección y usar como detalle especial al realizar un obsequio o como souvenir.
Until a next opportunity.
Hasta una próxima oportunidad.
The photographs in this article are my own and the grids were made using the incollage application. The translation was done using Google translate.
Las fotografías de este artículo son de mi autoría y las cuadrículas fueron realizadas utilizando la aplicación incollage. La traducción se realizó usando el traductor de Google.