Hello friends!!
Hola Amigos!!
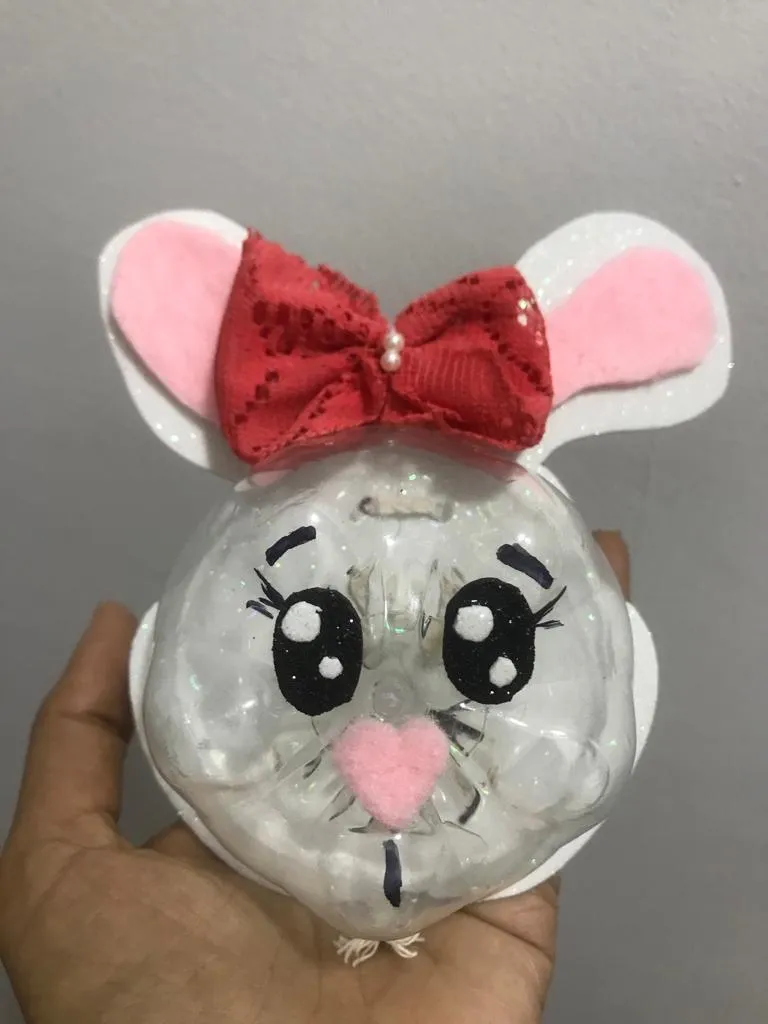
Happy day to everyone!! Today I want to share with you a beautiful and fun idea that you can use to give gifts to your guests at celebrations and parties. Using recycled materials and following a simple tutorial. Everyone will love this cute bunny party favor box made from recycled plastic bottles.
Feliz día a todos!! Hoy quiero compartir con ustedes una hermosa y divertida idea que podrán usar para obsequiar a sus invitados en celebraciones y fiestas. Empleando materiales de reciclaje y siguiendo un sencillo tutorial. A todos les encantará esta linda cajita para cotillón de conejita realizada con botella plástica reciclada.
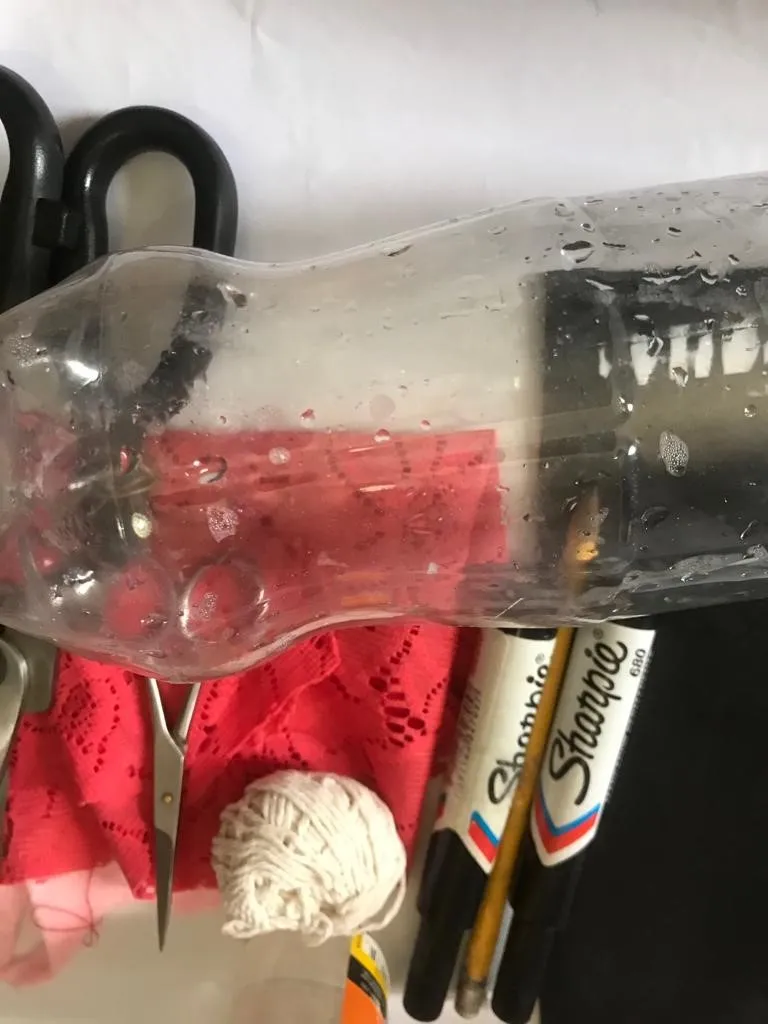
You will need the following materials to make it:
Necesitarán para su elaboración los siguientes materiales:
•Recycled plastic bottle.
•White glossy foamy.
• Black foamy patch.
•Pink felt scraps.
•Orange cloth.
•2 small white jewelry beads.
•Pencil.
•Needle and thread.
•White cotton thread.
•Large and small scissors.
•Ruler.
•Glue.
•Black marker.
•Botella plástica reciclada.
•Foamy brillante blanco.
•Retazo de foamy negro.
•Retazos de fieltro rosado.
•Tela naranja.
•2 cuentas blancas pequeñas de bisutería.
•Lápiz.
•Aguja e hilo.
•Hilo blanco de algodón.
•Tijeras grande y pequeña.
•Regla.
•Pegamento.
•Marcador negro.
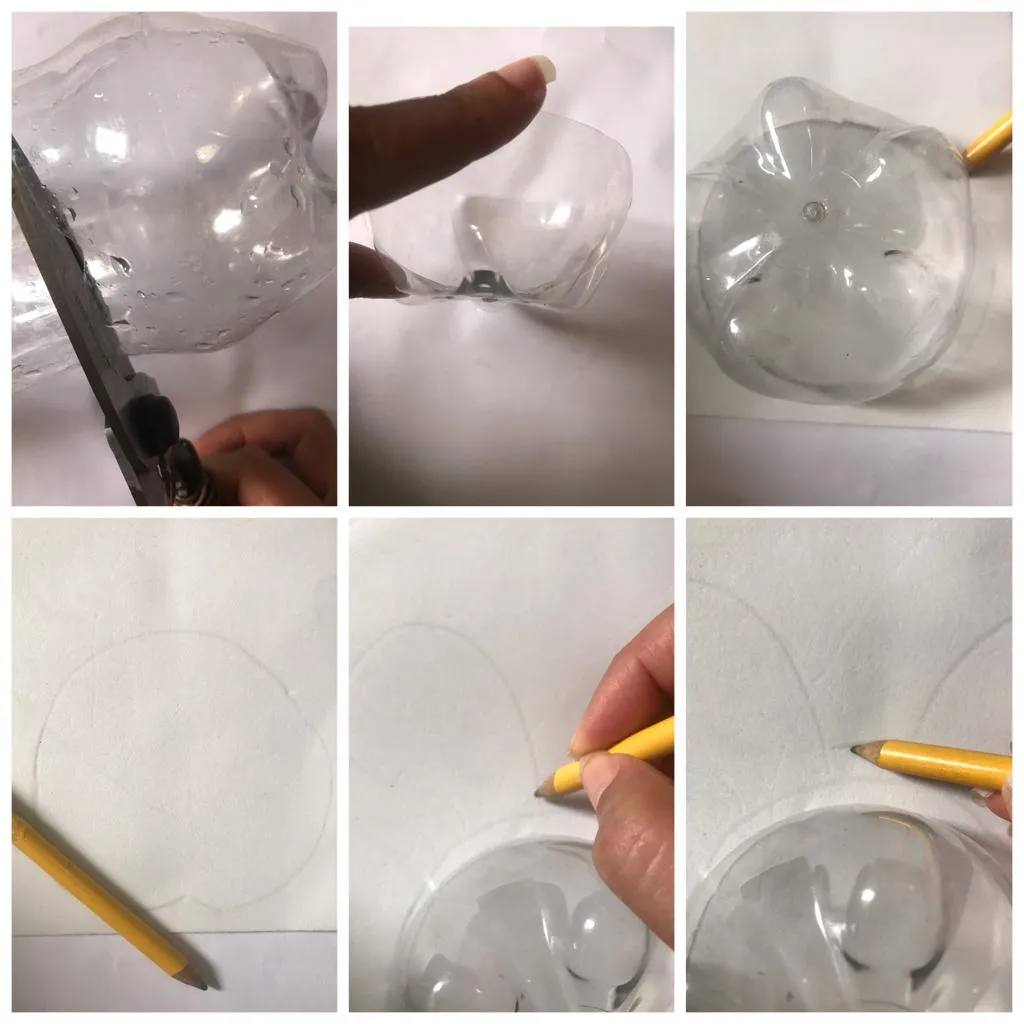
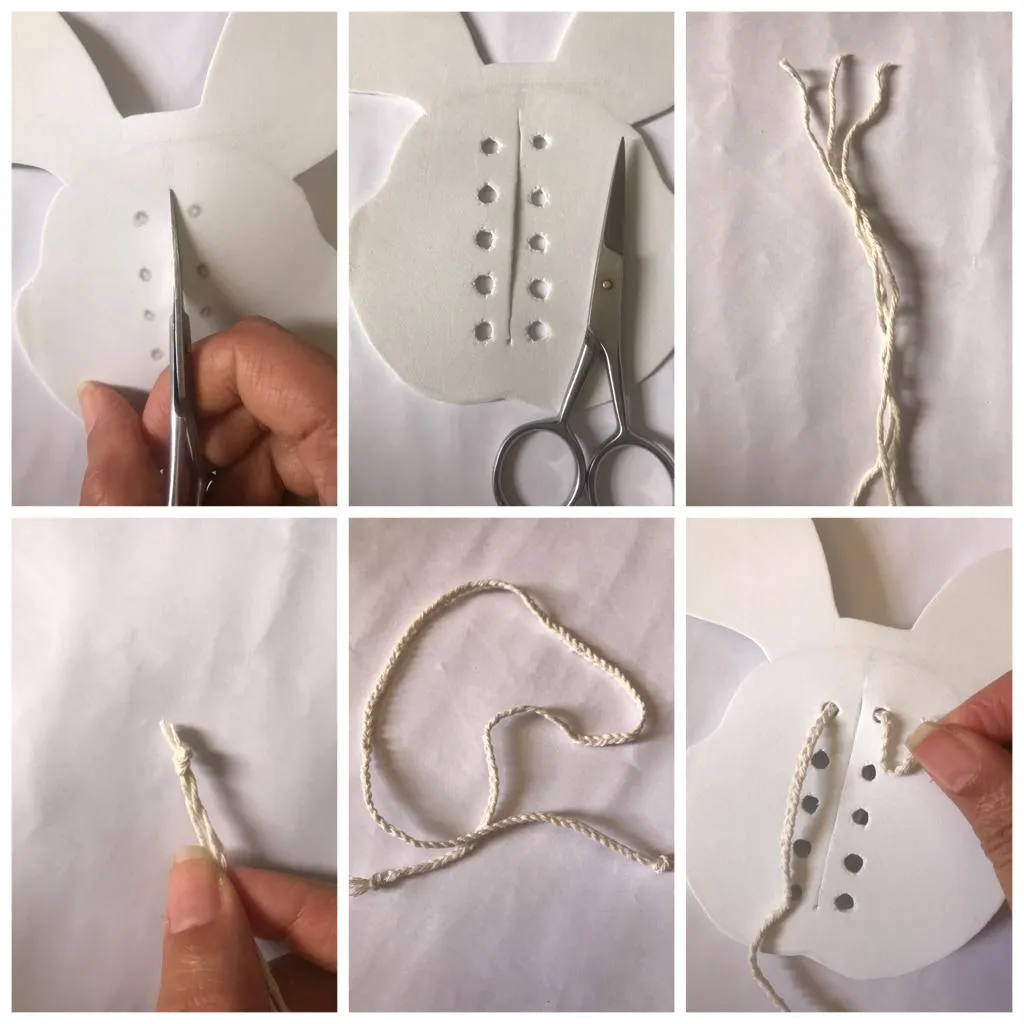
He began by cutting the plastic bottle at its lower end; leaving a few centimeters from the base upwards (as seen in the figure). Then he used the cut out figure and marked its outline on the back of the glossy white foamy (leaving an extra edge of a few millimeters) at the top he drew a pair of little ears and drew a small horizontal line between them.
Inició cortando la botella plástica en su extremo inferior; dejando unos centímetros de la base hacia arriba ( tal como se observa en la figura). Luego utilizó la figura recortada y marcó su contorno en la parte posterior del foamy blanco brillante ( dejando un borde adicional de algunos milímetros) en el extremo superior dibujó un par de orejitas y trazo una pequeña línea horizontal entre ellas.
By having the face of the bunny cut out. With the help of the ruler, I draw a vertical line on the back of the face and I continue to mark small points on each side of this (as shown in the figure).
Al tener la carita de la conejita recortó. Con ayuda de la regla trazo una línea vertical en la parte posterior de la carita y sigo marcando a cada lado de esta pequeños puntos (tal como se observa en la figura).
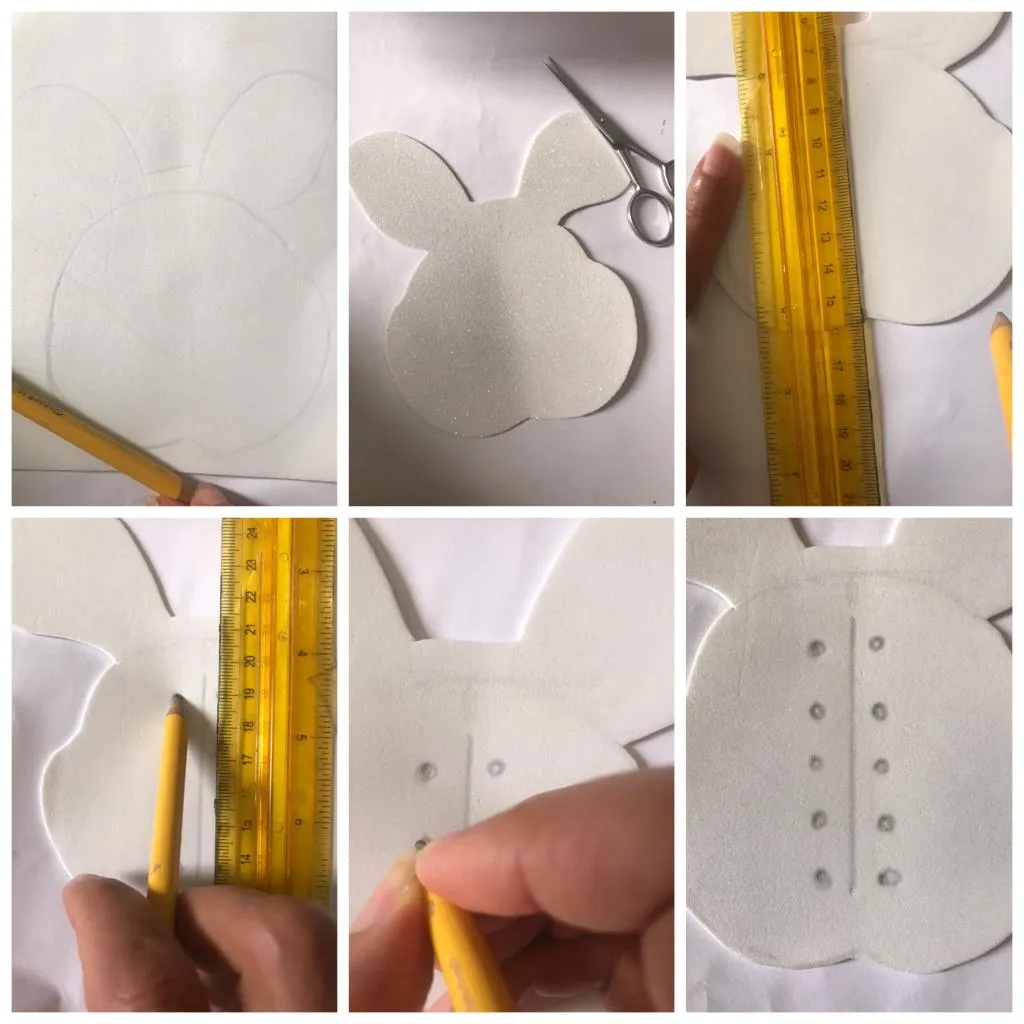
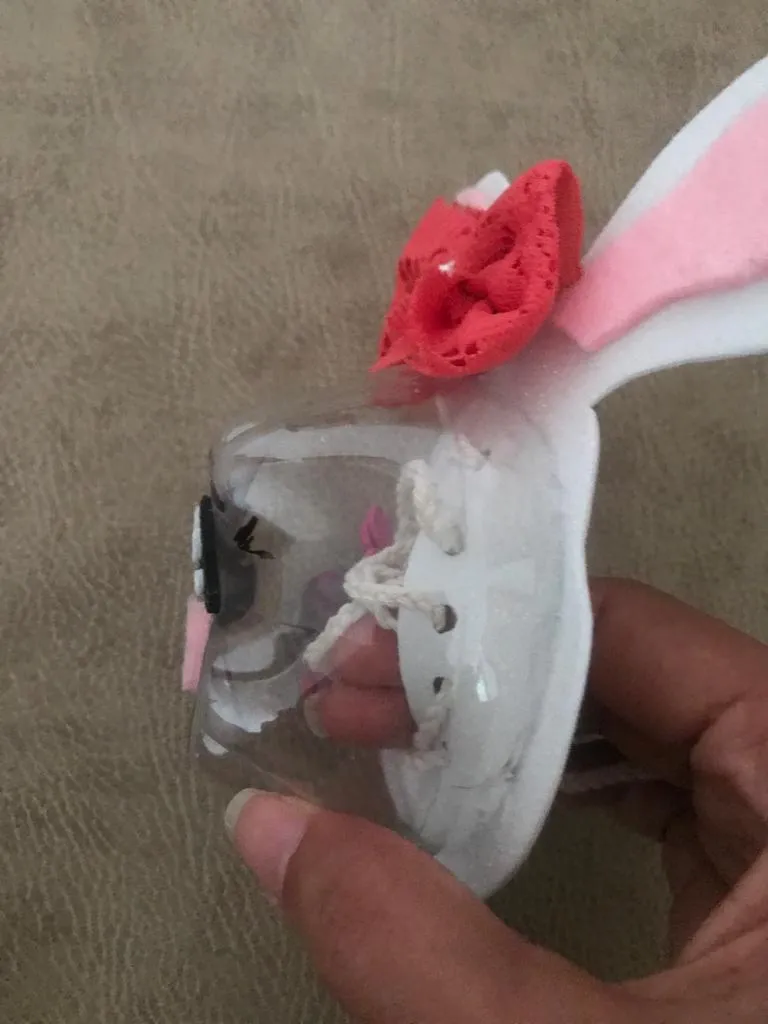
Then I cut the line and cut out the holes that I previously marked. To proceed to cut 3 strips of cotton thread (25 centimeters), he tied a knot and weaved a braid to tie at the end. I pass the braid through the first holes in the upper end.
Luego corto la línea y recortó los orificios que previamente marqué. Para proceder a cortar 3 tiras de hilo (25 centímetros) de algodón realizó un nudo y tejo una trenza anudar al culminar. Paso la trenza por los primeros orificios del extremo superior.
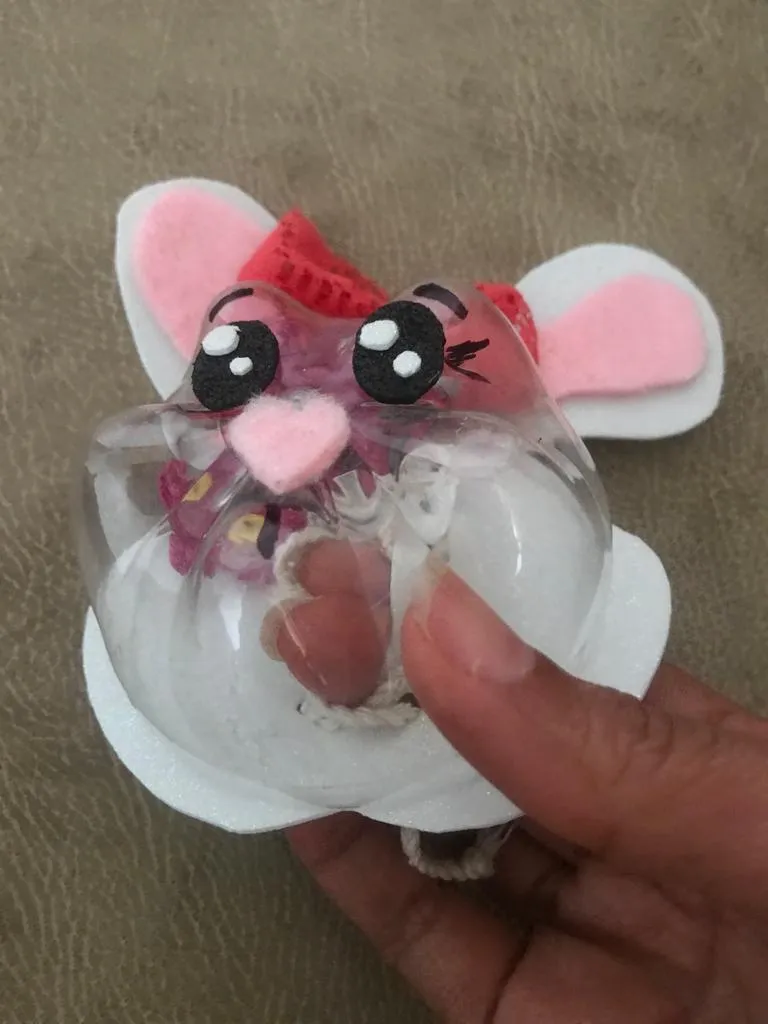
She stretched the braid and brought both ends together; passed the braid from the top end of the hole on the left side to the next hole on the right side (forming a small x ). So on until you reach the bottom end where you made a small loop. He continued by applying glue to the edge of the figure on the plastic base.
Estiró la trenza y junto ambas puntas; pasó la trenza del extremo superior del orificio del lado izquierdo al orificio siguiente del lado derecho (formando una pequeña x ). Así sucesivamente hasta llegar hasta abajo al extremo inferior donde realizó un pequeño lazo. Continuó aplicando pegamento al borde de la figura de la base plástica.
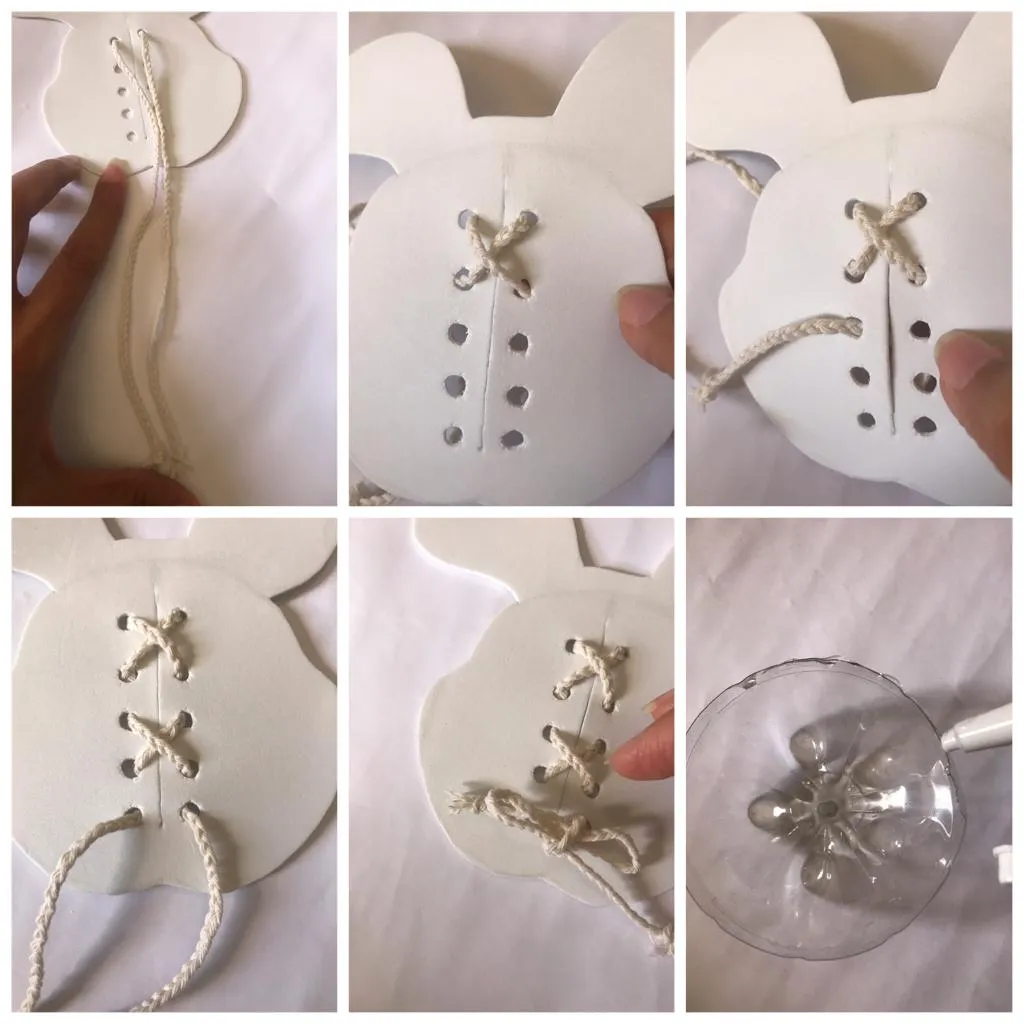
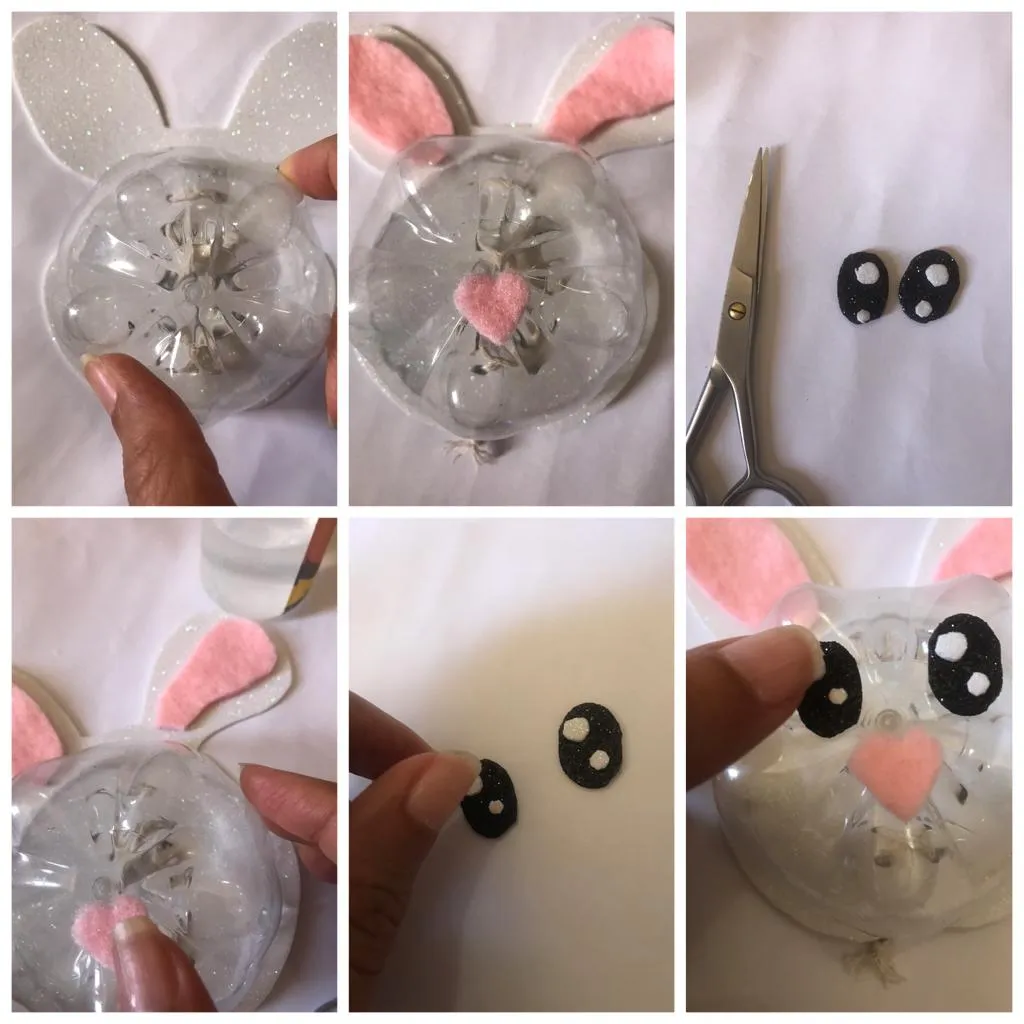
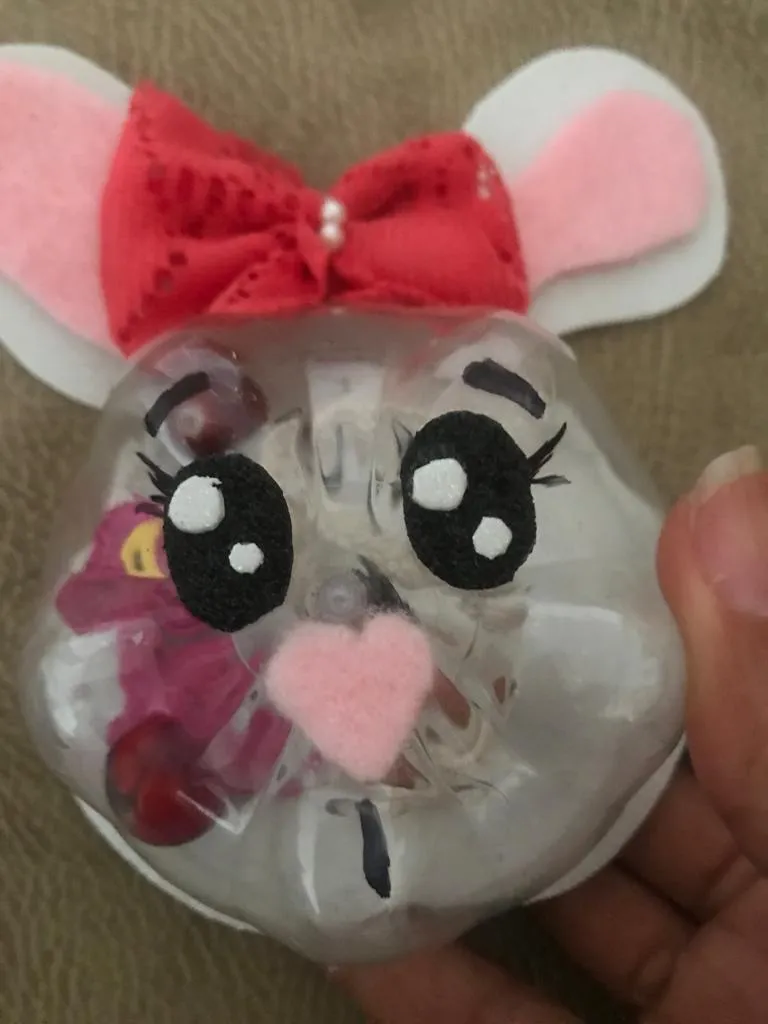
I fix the plastic base on the shiny part of the face of the foamy bunny. Then I cut in the felt the inside part of the ears and a small nose giving this heart shape. He also cut out the eyes in the black and white foamy. I continue to glue the felt figures to the ears and nose on the plastic base. As well as the small details of the eyes to proceed to stick these on the nose; to shape the bunny's face (as shown in the figure).
Fijo la base plástica sobre la parte brillante de la cara de la conejita de foamy. Luego corto en el fieltro la parte interior de las orejas y una pequeña nariz dando a esta forma de corazón. Además cortó en el foamy negro y blanco los ojos. Sigo pegando las figuras de fieltro a las orejas y la nariz sobre la base plástica . Así como los pequeños detalles de los ojos para proceder a pegar estos sobre la nariz ; para dar forma a la carita de la conejita (tal como se observa en la figura).
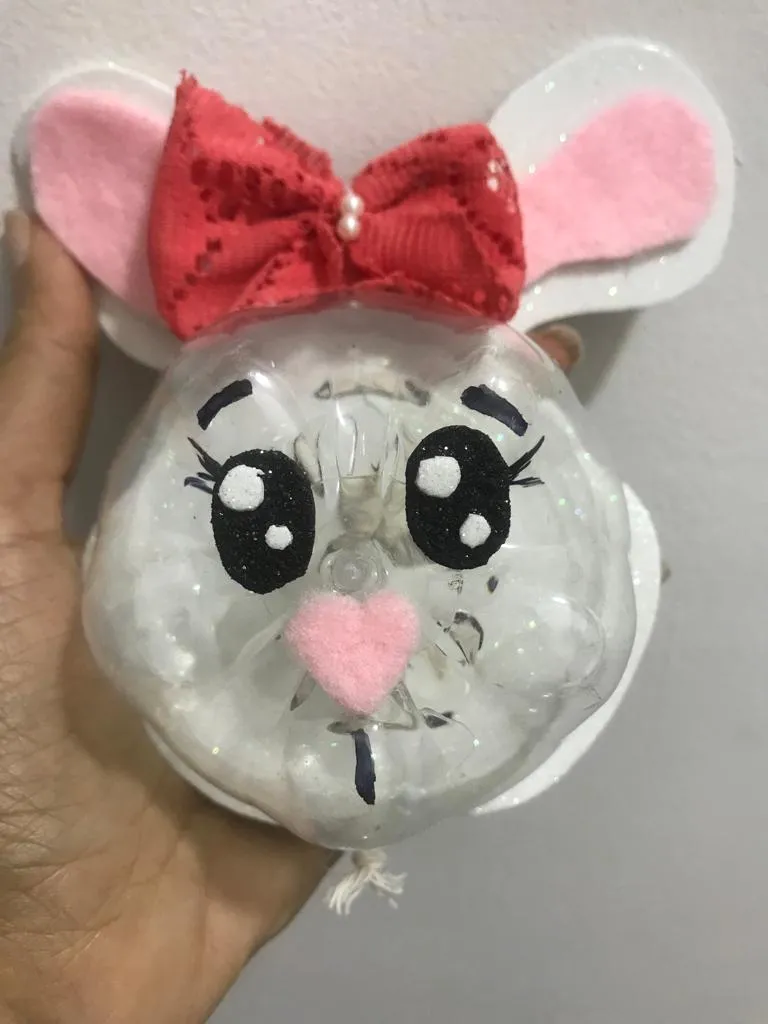
To finish with the black marker, he drew the small details on the bunny's face (eyebrows, eyelashes and a vertical line at the base of the nose). I cut a piece of fabric to shape a bow with stitches and in the center I fix the small white beads. When ready, he hit the upper end of the figure between the ears.
Para culminar con el marcador negro dibujó los pequeños detalles a la cara de la conejita (cejas, pestañas y línea vertical en la base de la nariz). Corto un trozo de tela para dar forma a un lazo con puntadas y en el centro fijo las pequeñas cuentas blancas. Al estar listo pegó entre las orejas al extremo superior de la figura.
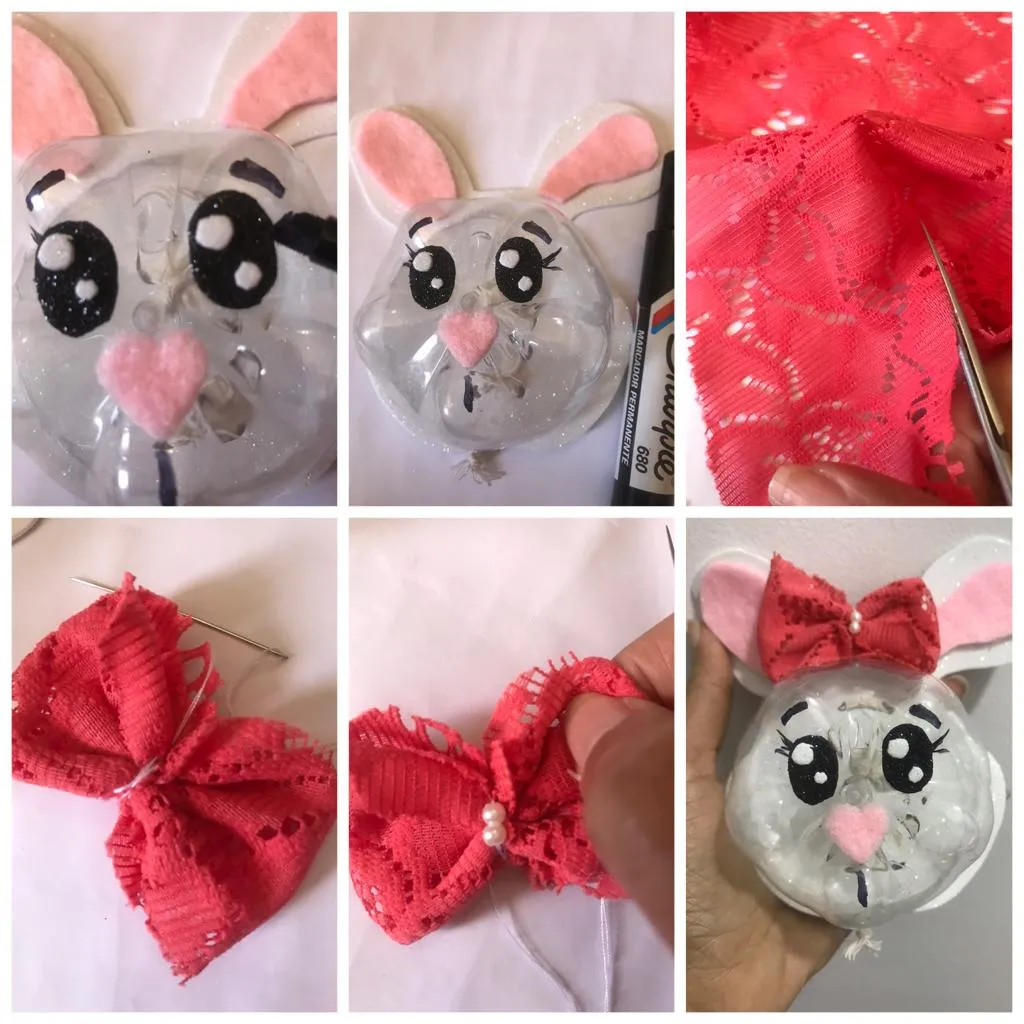
This little box for bunny party favors made with recycled plastic bottle. It is one of the easy, cheap and fun ideas that we can do at home with simple and colorful materials. As I always tell you, give your imagination free reign and create beautiful crafts at home. Today's is great in it they can store sweets, cookies and give away on a special day. Everyone will love her.
Esta cajita para cotillón de conejita realizada con botella plástica reciclada. Es una de las ideas fáciles, económicas y divertidas que podemos hacer en casa con sencillos y coloridos materiales. Como siempre les digo denle riendas a su imaginación y creen bellas manualidades en casa. La de hoy es genial en ella podrán guardar golosinas, galletas y regalar en un día especial. Todos la amarán.
Until a next opportunity.
Hasta una próxima oportunidad.
The photographs in this article are my own and the grids were made using the incollage application; translation using google translate.
Las fotografías de este artículo son de mi autoría y las cuadrículas fueron realizadas utilizando la aplicación incollage; la traducción usando el traductor de Google.