El día de ayer fue el inicio del año escolar en todo el país, y con el vienen nuevos retos y manualidades jaja y es que, a petición de mi bebé le realice un organizador o portalapices escolar, a modo que cada vez que esté haciendo sus tareas tenga a la mano sus colores y demás bien ordenados y generandole comodidad
La verdad después de improvisar un poco, y de darle utilidad a un vaso que tenía por allí, me gusto mucho el resultado de esta manualidad y lo mejor, que Lionella estuvo más que contenta, aquí te muestro su realización ✂️✨
Hello Friends! How great to spend once again, as every week by this creative community, I hope you are great and that your day has been very nice.
Yesterday was the start of the school year across the country, and with it comes new challenges and crafts haha and is that, at the request of my baby I made a school organizer or pencil holder, so that every time she is doing her homework she has at hand her colors and other things well ordered and generating comfort for her.The truth is that after improvising a little, and giving utility to a glass that I had around, I really liked the result of this craft and the best thing, Lionella was more than happy, here I show you its realization ✂️✨


Materiales:
- Cartón fino
- 1 vaso de aluminio
- Foami de color (morado, amarillo, negro, azul, piel, rosado, blanco)
- Cartulina color negro
- Silicón
- Tijera
- Marcadores
- Pintura al frío negra y blanca
Materials:
- Thin cardboard
- 1 aluminum cup
- Colored Foami (purple, yellow, black, blue, skin, pink, white)
- Black cardboard
- Silicone
- Scissors
- Marker pens
- Black and white cold paint
Paso a Paso | Step by Step ✨
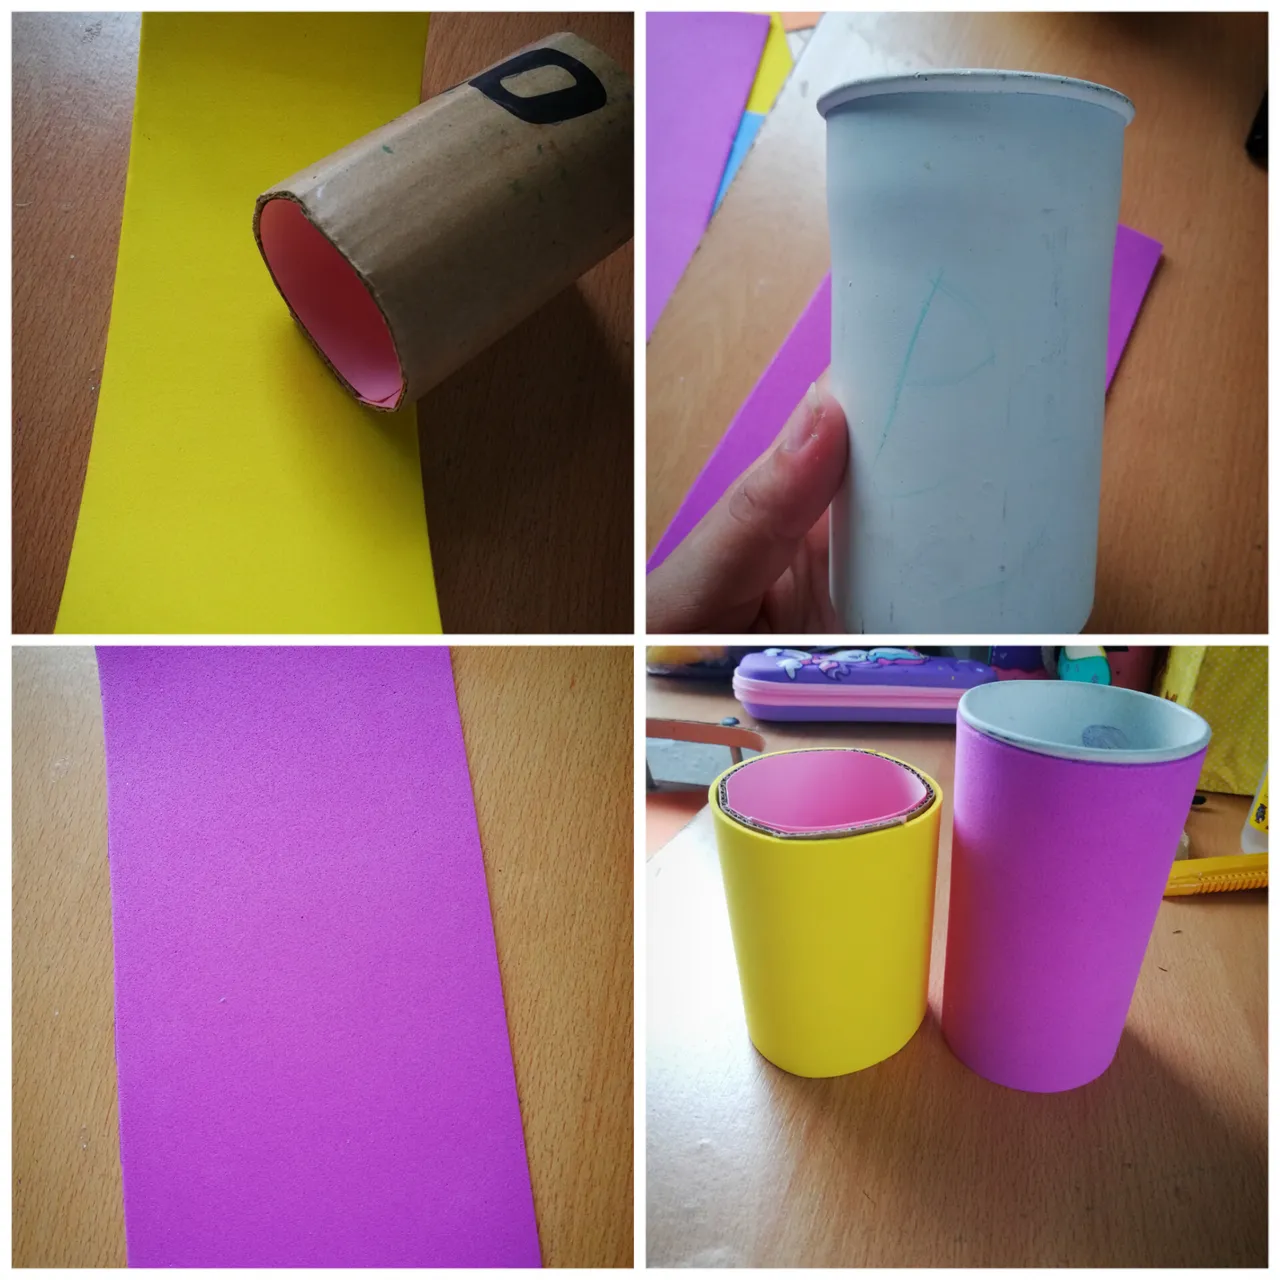
✨ Dispuse de la tapa de una caja de zapatos, y en ella medí un rectángulo de 9,5cm × 22cm. Luego tome las mismas medidas en una hoja de cartulina rosada y pegue sobre el cartón, al cual luego di forma cilíndrica y pegué dejando la parte rosa por dentro.
✨ I took the lid of a shoe box, and measured a rectangle of 9.5cm × 22cm. Then I took the same measurements on a sheet of pink cardboard and glued on the cardboard, which I then shaped into a cylinder and glued leaving the pink part on the inside.

✨ Cómo era para Lionella este organizador, quería hacerlo en tonos vivos, por lo que procedí a cortar un rectángulo en Foami amarillo y utilice para cubrir el cilindro de cartón. También corte en Foami fucsia un rectángulo el cual use para cubrir el vaso.
✨ As it was for Lionella this organizer, I wanted to make it in bright colors, so I proceeded to cut a rectangle in yellow Foami and used it to cover the cardboard cylinder. I also cut in fuchsia Foami a rectangle which I used to cover the glass.
✨ Medí nuevamente un Retazo de cartón de 10,5cm × 15,5cm y cubrí por sus ambos lados con cartulina color negro; con tiras de Foami morado escarchado cubrí la parte superior de ambos cilindros, y luego pegue sobre el cuadro de cartón, uniendo los dos cilindros justo desde la unión que dejaron los foamis (una forma fácil de cubrir estos pequeños detalles)
✨ Al fucsia le pegue pequeños círculos y al amarillo le dibujé pequeñas flores en marcadores.
✨ I measured again a 10,5cm × 15,5cm piece of cardboard and covered both sides with black cardboard; with strips of frosted purple Foami I covered the top of both cylinders, and then glued over the cardboard square, joining the two cylinders just from the joint left by the foamis (an easy way to cover these small details).
✨ On the fuchsia part I glued small circles and on the yellow one I drew small flowers in markers.

✨ Para decorarlo elegí hacer una muñequita, por lo que luego de dibujarla recorté cada pieza en el foami correspondiente a cada color, las cuales difumine con marcadores y comencé a armar para finalmente realizar los ojos con un pincel delineador y pintura al frío color negro, adicional le agregué un poco de luz con pintura blanca.
✨ En foami blanco dibujé y recorte dos flores.
✨ To decorate it I chose to make a little doll, so after drawing it I cut out each piece in the foami corresponding to each color, which I blurred with markers and began to assemble to finally make the eyes with an eyeliner brush and cold black paint, I also added a little light with white paint.
✨ In white foami I drew and cut out two flowers.

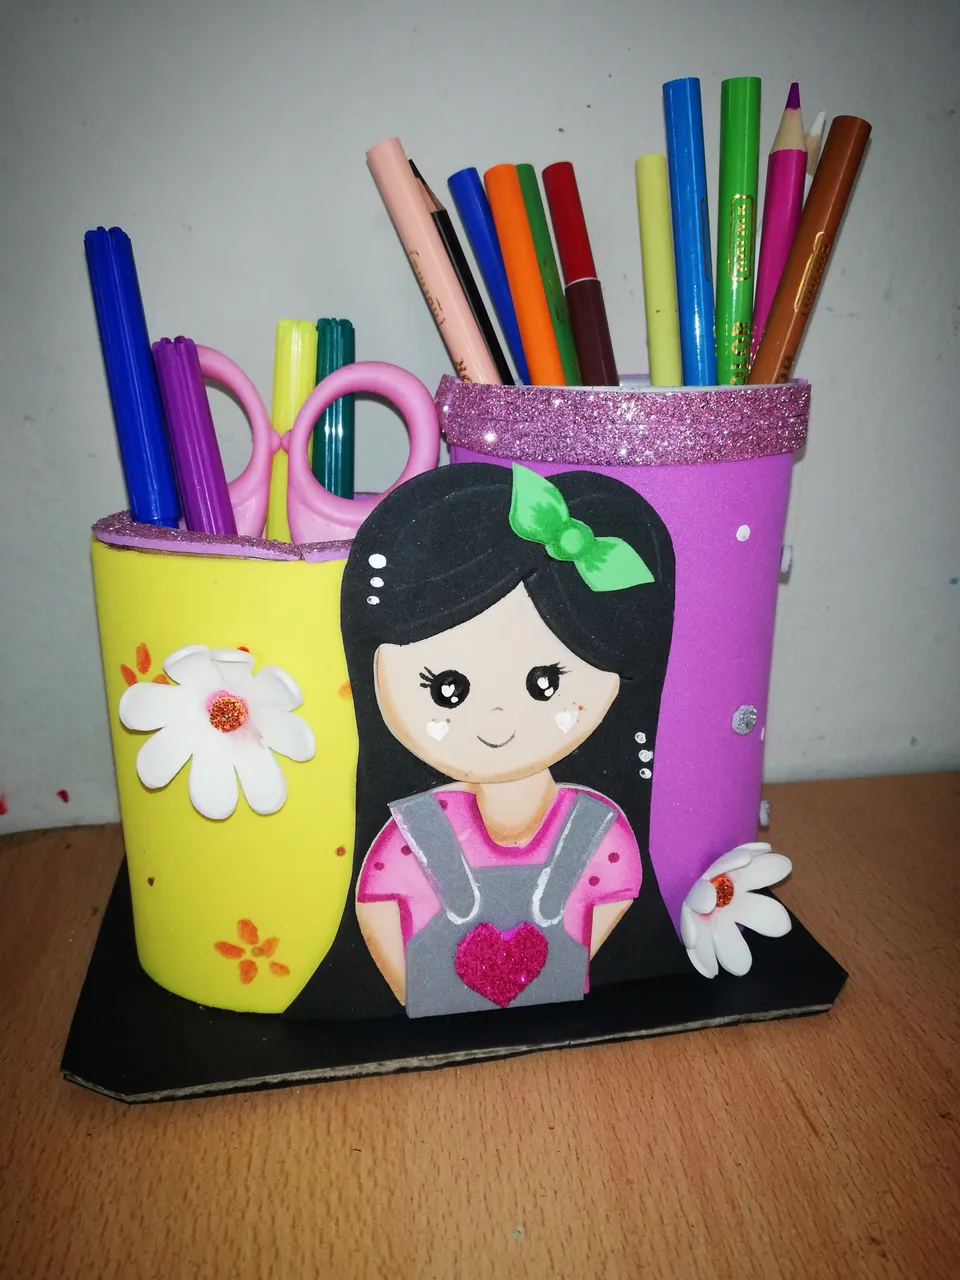
✨ Pegué la muñeca en medio de los dos espacios organizadores. Para darle una vista más bonita a las flores las pase por la plancha a modo que estas se abombaran y en el centro pegue un círculo de Foami escarchado, posterior a ello procedí a pegar una flor a cada lado de la muñeca.. ¡Finalizando así este organizador!..
✨ I glued the doll in the middle of the two organizer spaces. To give a nicer view to the flowers, I put them through the iron so that they bulge and in the center I glued a circle of frosted Foami, then I proceeded to glue a flower on each side of the doll... Finalizing this way this organizer!

Resultados | Result✨
Muchas veces tenemos objetos guardados sin darle ninguna utilidad, como este caso yo poseía ese caso el cual, ahora Lionella le dará una nueva oportunidad y lo mejor de una forma muy útil.
Espero que te haya gustado, te agradezco por quedarte a leer hasta el final.. ¡HASTA UNA PRÓXIMA OPORTUNIDAD! 💗
Many times we have objects stored without giving any use, as in this case I had that case which now Lionella will give it a new opportunity and the best in a very useful way.
I hope you liked it, I thank you for staying to read until the end... SEE YOU NEXT TIME! 💗

📷Ediciones | Editing in Canva and Picstar
✨Traducciones | Translations in Deepl