Hola amigos, reciban un cordial saludo, les comparto este llavero el cual he realizado con la finalidad de recordar las llaves, muy a menudo las olvido y se me ocurrió que colocándole un llavero vistoso y grande será más difícil olvidarlas.
Es algo fácil de realizar, con pocos materiales y además se pueden escoger los colores a gusto personal. Espero les guste la idea para obsequiar a sus seres queridos o simplemente para utilizar con sus llaves. Acá les dejo un paso a paso, espero les guste.
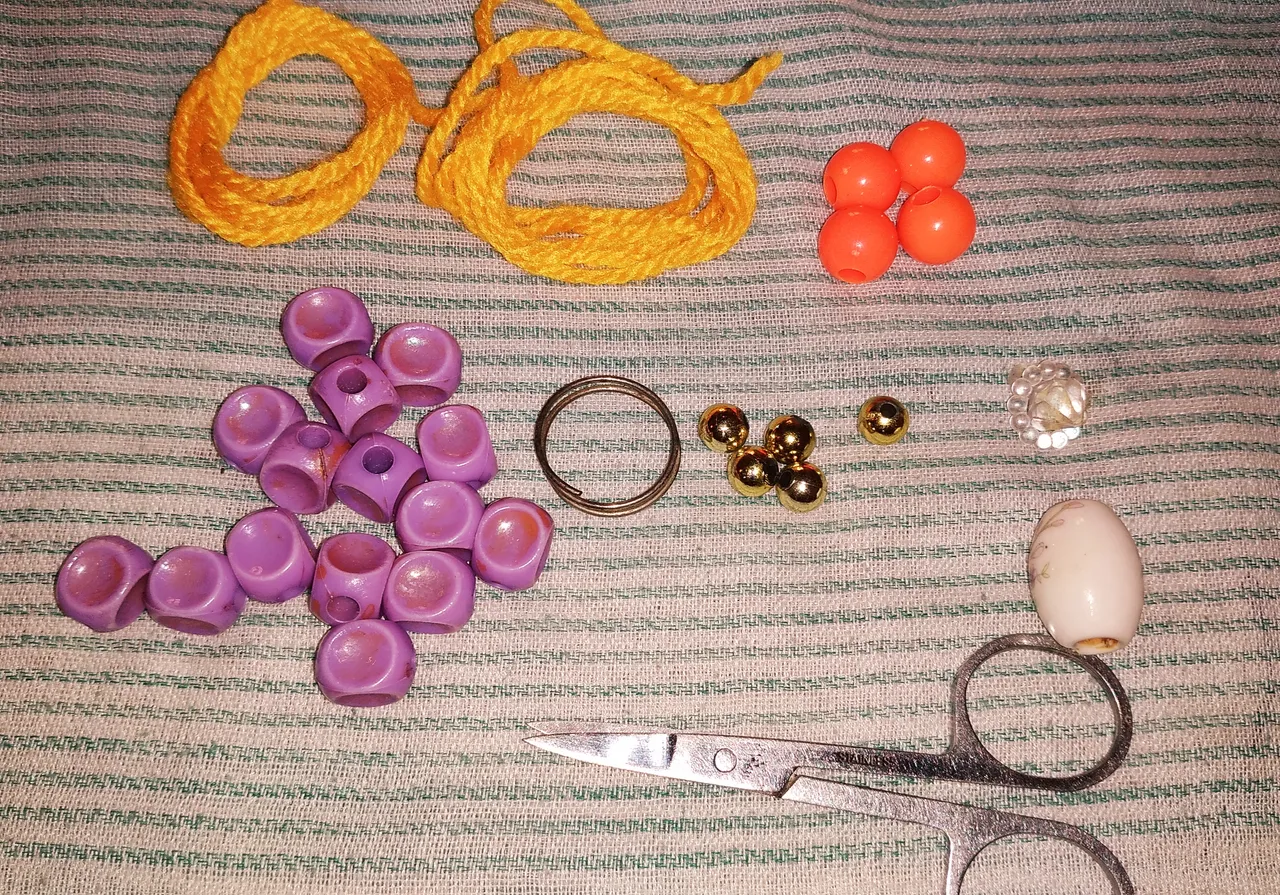
Materiales: 🌼
- cuentas plásticas de color morado y naranja
- cuentas pequeñas color dorado
- una cuenta ovalada para la cabeza
- 2 trozos de estambre color amarillo.
- tijera
- un aro para llaveros
Pasos a Seguir🌼
Paso N° 1.🌼
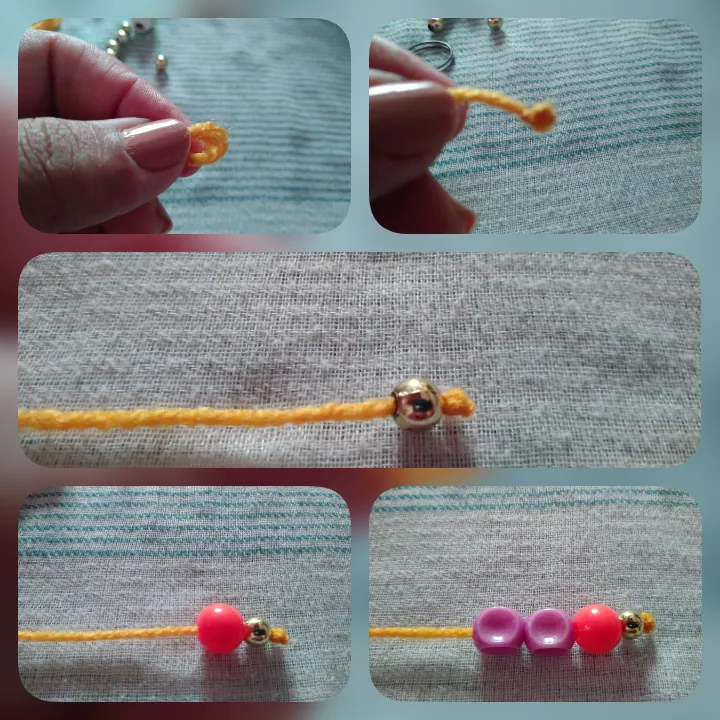
Lo primero que hice fue cortar 4 trozos de estambre de una medida de 20cms cada una. procedí a anudar uno de los extremos de cada trozo de estambre con el fin de evitar que las esferas se salgan.
Paso N° 2.🌼

En este momento procedí a formar las extremidades del muñeco, para lo cual comencé colocando una esfera dorada, luego una color naranja y 4 color morado, así se repite hasta obtener 4 juegos.
Paso N° 3.🌼
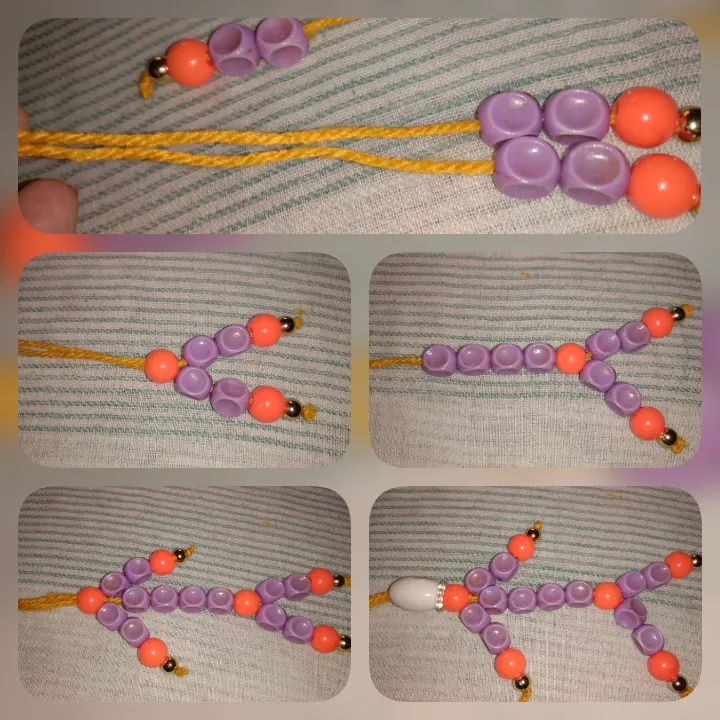
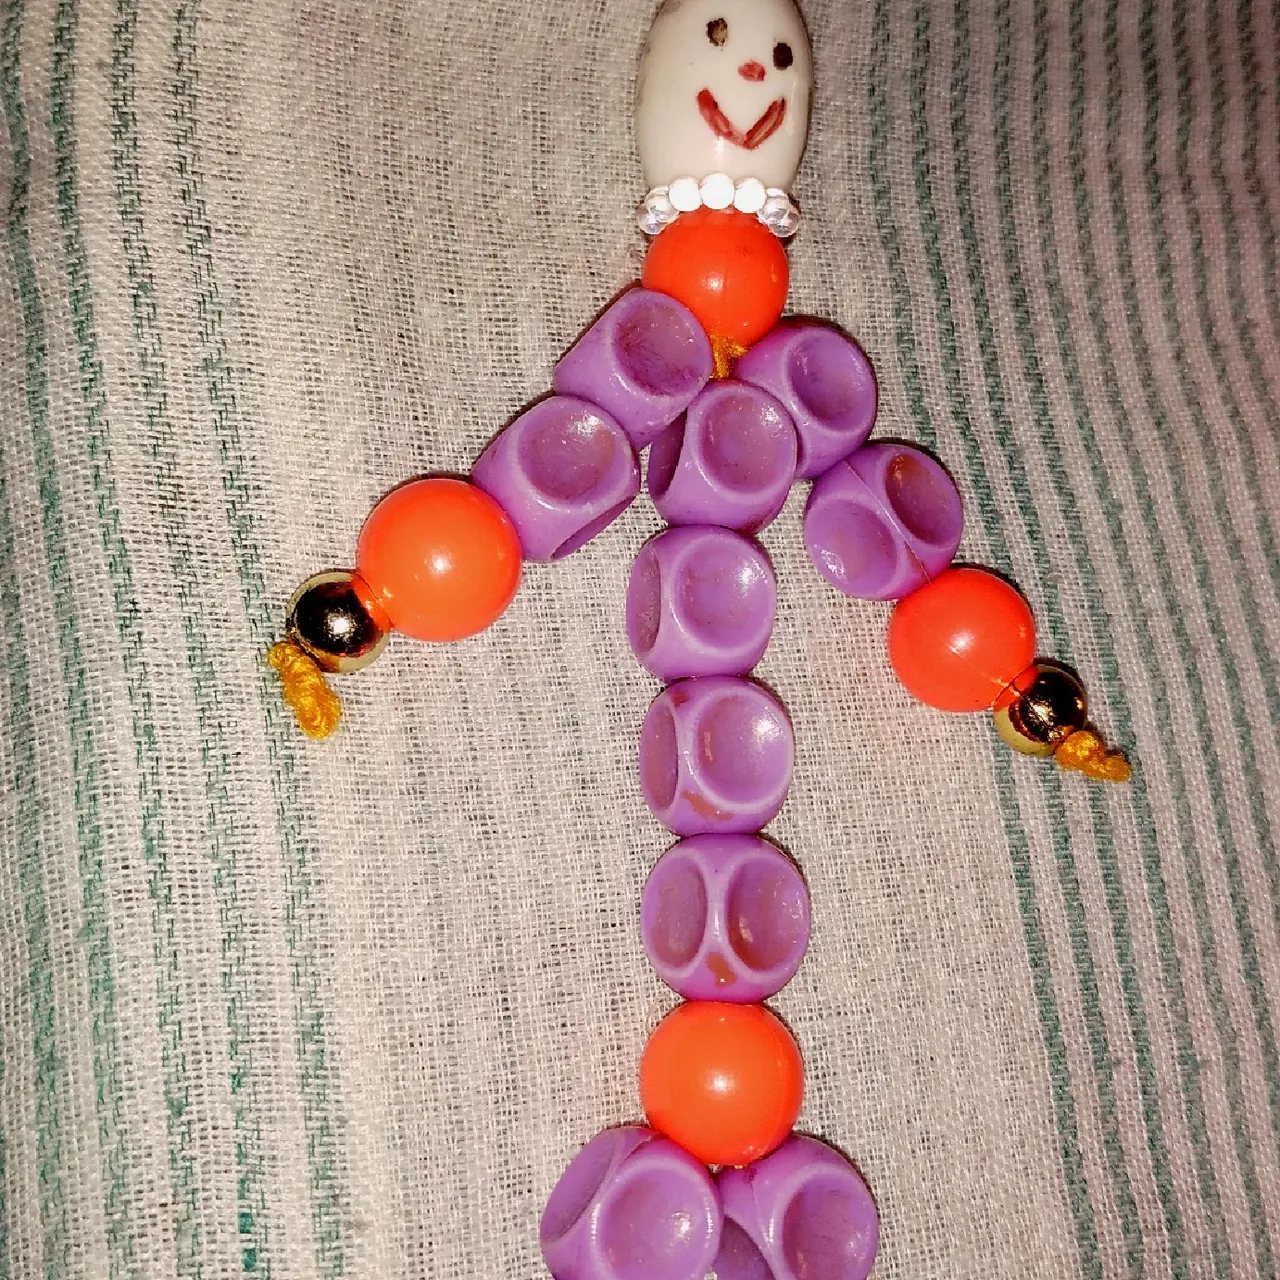
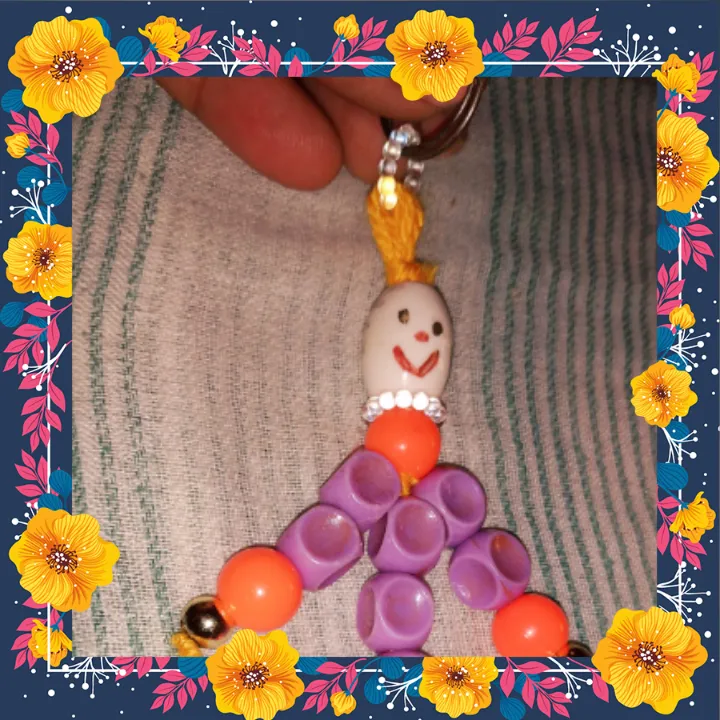
Comienzo a armar el muñeco, desde los pies a la cabeza, tomo dos extremidades y las uno utilizando una cuenta color naranja, luego le agrego 4 cuentas color morado y coloco las extremidades superiores, colocó la cabeza y finalmente el aro de llaveros.Luego para culminar le pinto el rostro.
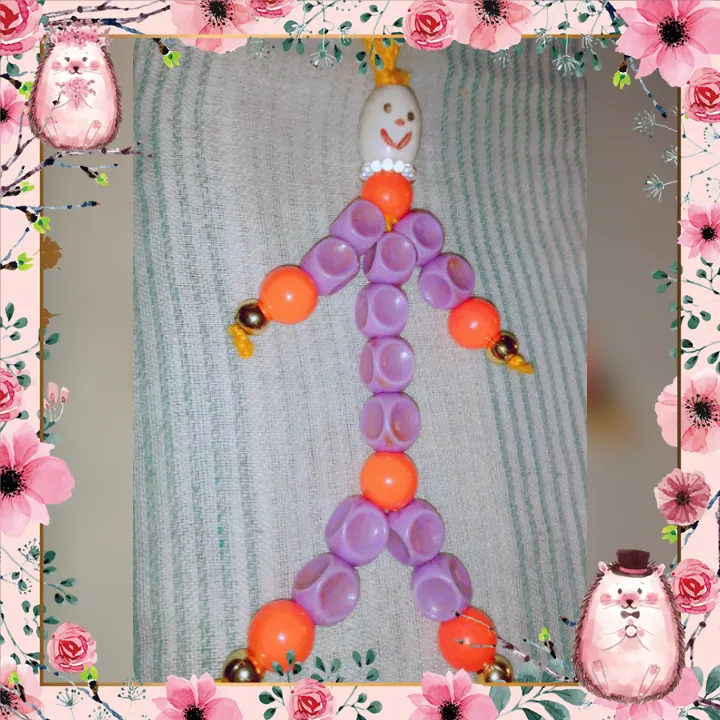
Aquí el producto final...
🌼🌼🌼🌼🌼🌼🌼🌼🌼🌼🌼🌼🌼🌼
🌼🌼🌼🌼🌼🌼🌼🌼🌼🌼🌼🌼🌼🌼

La Vida es Arte...
¡Gracias por leerme! Nos encontraremos en el próximo post @dorada.
Nota: fotos de mi autoría capturadas con dispositivo móvil redmi 8.
English Version
Hello friends, receive a cordial greeting, I share with you this key ring which I have made with the purpose of remembering the keys, very often I forget them and it occurred to me that placing a colorful and big key ring will be more difficult to forget them.
It is something easy to make, with few materials and also you can choose the colors to personal taste. I hope you like the idea to give as a gift to your loved ones or simply to use with your keys. Here is a step by step, I hope you like it.
Materials: 🌼
- purple and orange plastic beads
- small gold colored beads
- one oval bead for the head
- 2 pieces of yellow yarn.
- scissors
- a ring for key rings
Steps to follow🌼
Step N° 1.
The first thing I did was to cut 4 pieces of worsted measuring 20cms each. I proceeded to knot one of the ends of each piece of worsted in order to prevent the spheres from slipping out.
Step N° 2.
At this point I proceeded to form the extremities of the doll, for which I started by placing a golden sphere, then an orange one and 4 purple ones, thus repeating until I obtained 4 sets.
Step N° 3.
I begin to assemble the doll, from the feet to the head, I take two extremities and join them together using an orange bead, then I add 4 purple beads and place the upper extremities, I place the head and finally the key ring, then to finish I paint the face.
Here is the final product...
🌼🌼🌼🌼🌼🌼🌼🌼🌼🌼🌼🌼🌼🌼
🌼🌼🌼🌼🌼🌼🌼🌼🌼🌼🌼🌼🌼🌼
Life is Art...
Thanks for reading me! I'll meet you in the next post @dorada.
Note: photos of my authorship captured with redmi 8 mobile device.