What's up bees!
One fun thing about craft is that you keep getting ideas and along the line things change.
This isn't initially what I intended to do but while making this, a different pattern of design came into my mind, and imagining it, my mind captured a perfect design so I went ahead to birth that idea.
Here I will show you what craft tricks I made today.
I already knew I would be finishing this quite late. If I tell you I used 3 good hours to make this you might think I am joking or kidding you lol, but that is what it is.
You know cutting out those circles is a big work on its own.
Now let's get started, enough of the complaints :)
Materials Used
- Cardboard (pink and blue)
- Top gum
- Scissor
- Pen
- Round container
STEPS
I laid out both cardboard, drew a circle on them, a bugger circle on the blue cardboard and a smaller one on the pink cardboard

Then I carved and cut out those circles I drew on the cardboard
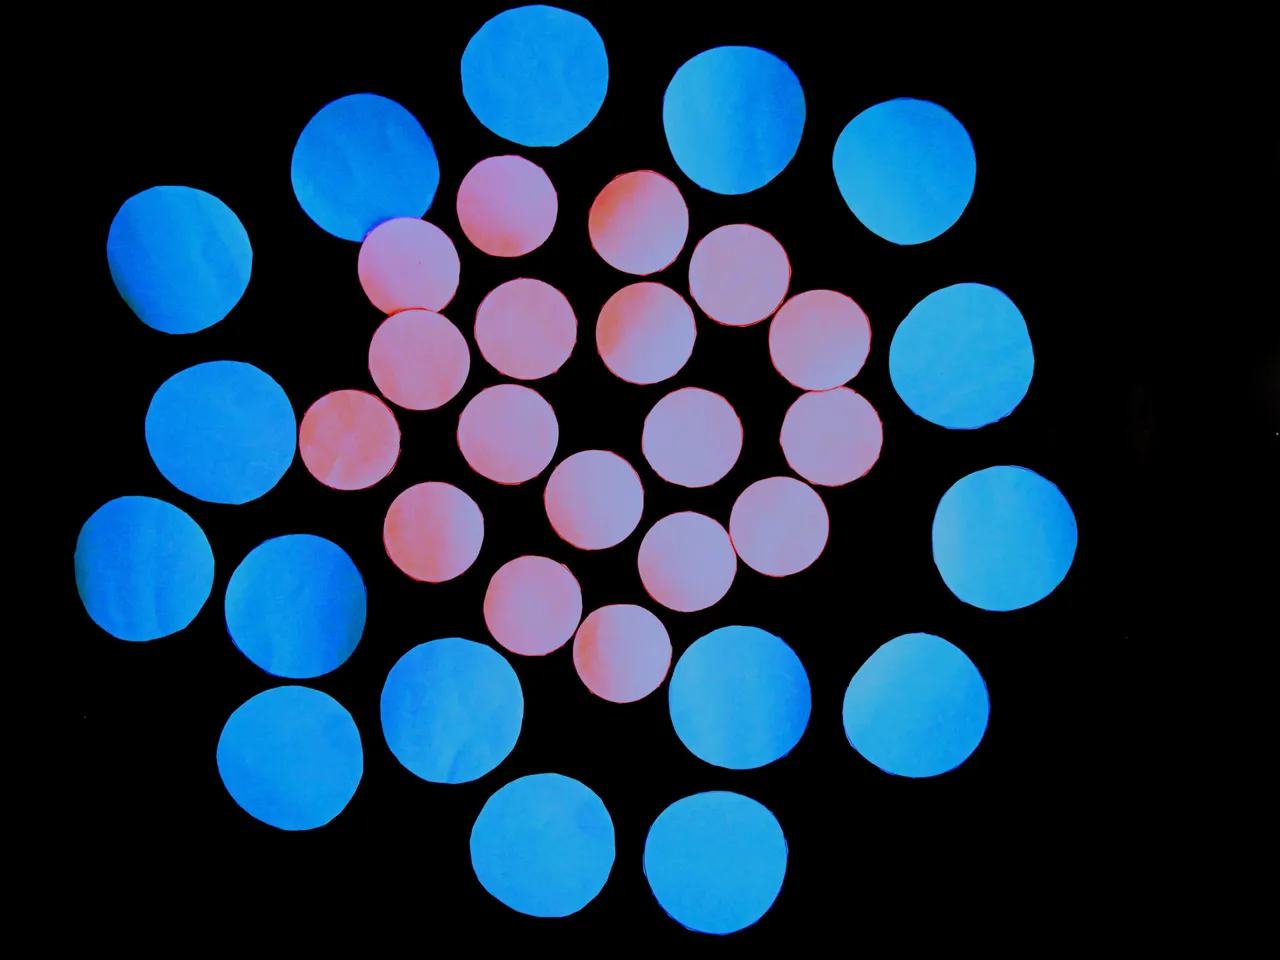
I folded it in a round figure, applied gum, and made it stick and dry out

After that, I picked the small pink cardboard, applied gum at the back of it, and further stocked it to the finished blue cardboard.
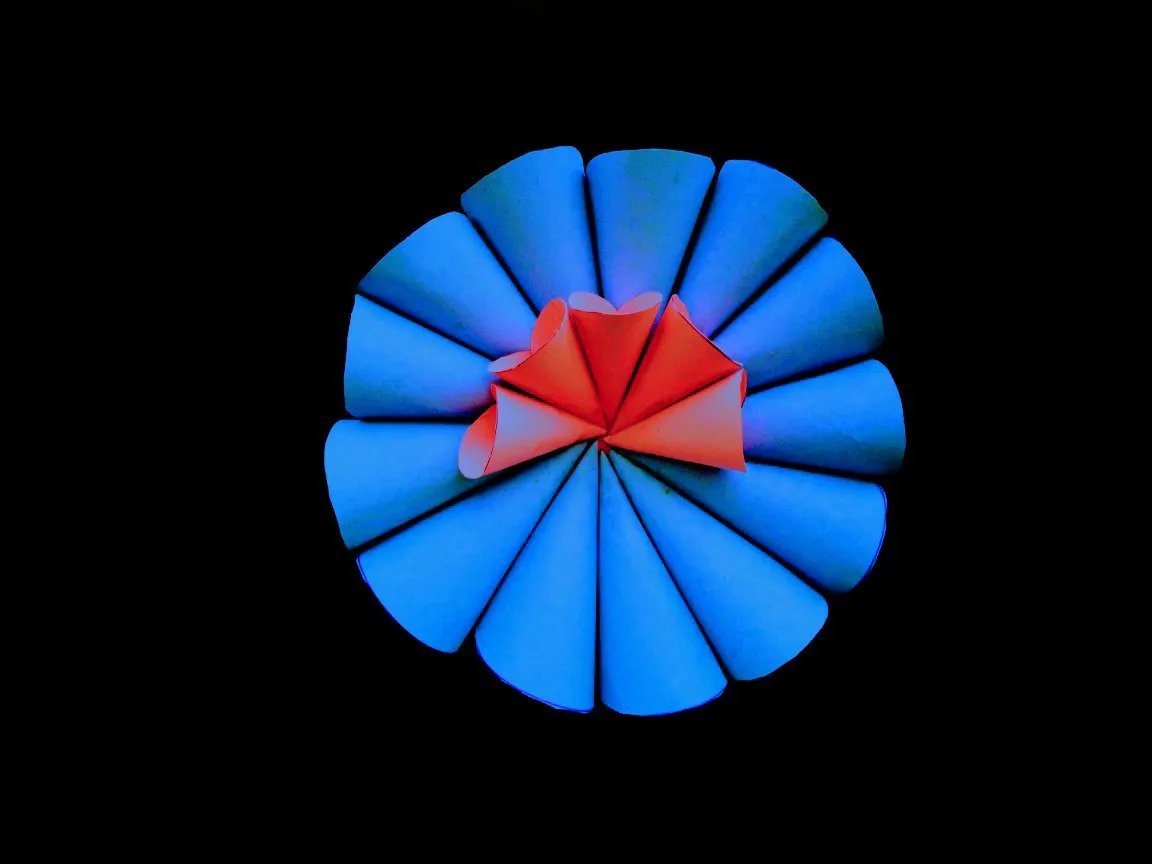
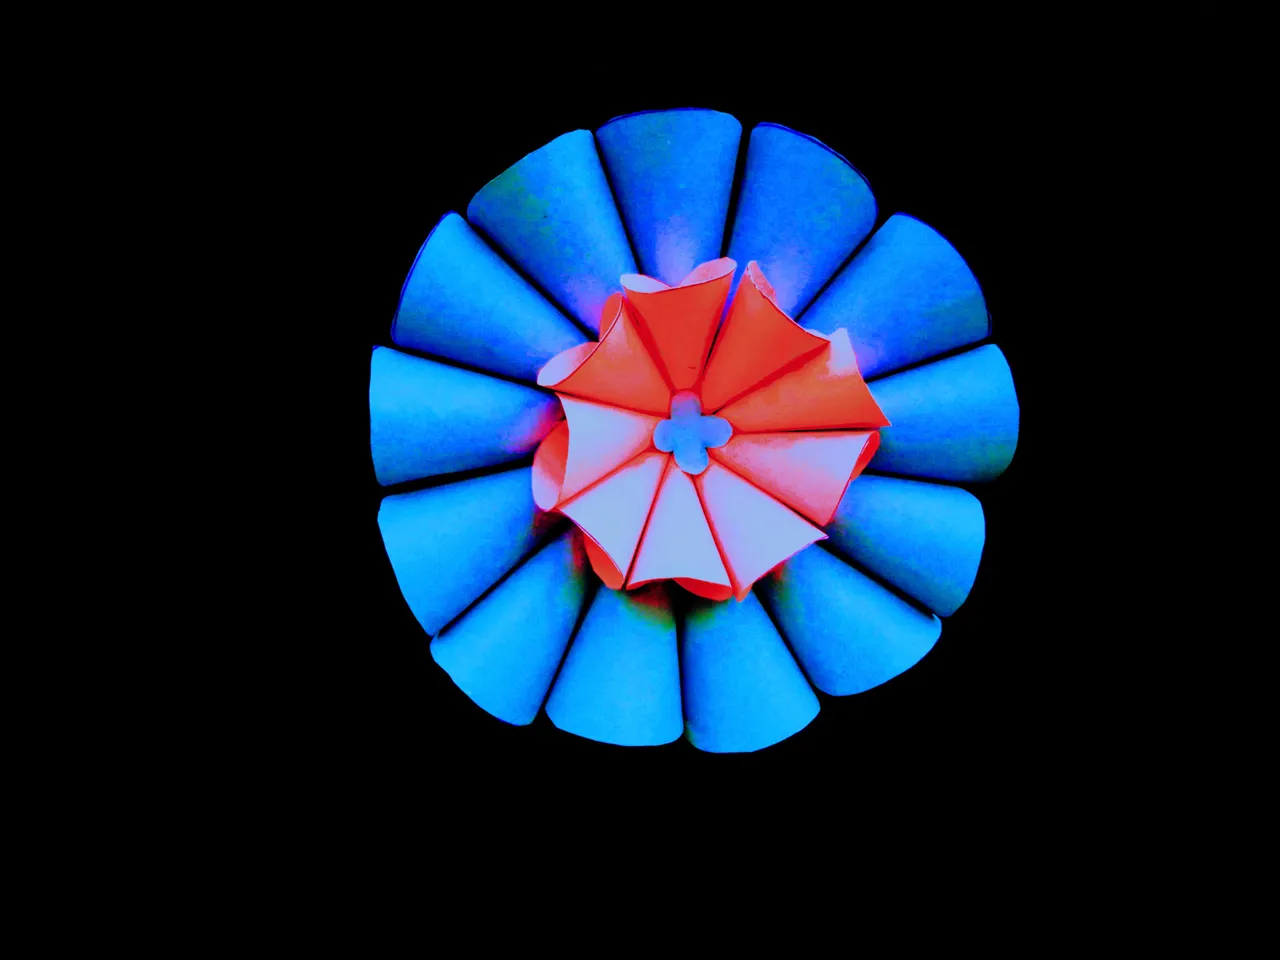
Then I measured a small blue cardboard piece, cut out the shape of a flower, and then stick it to the middle as seen in the photo.
When I finished with the ropes, I applied gum to it and pasted it at the back of the finished flower
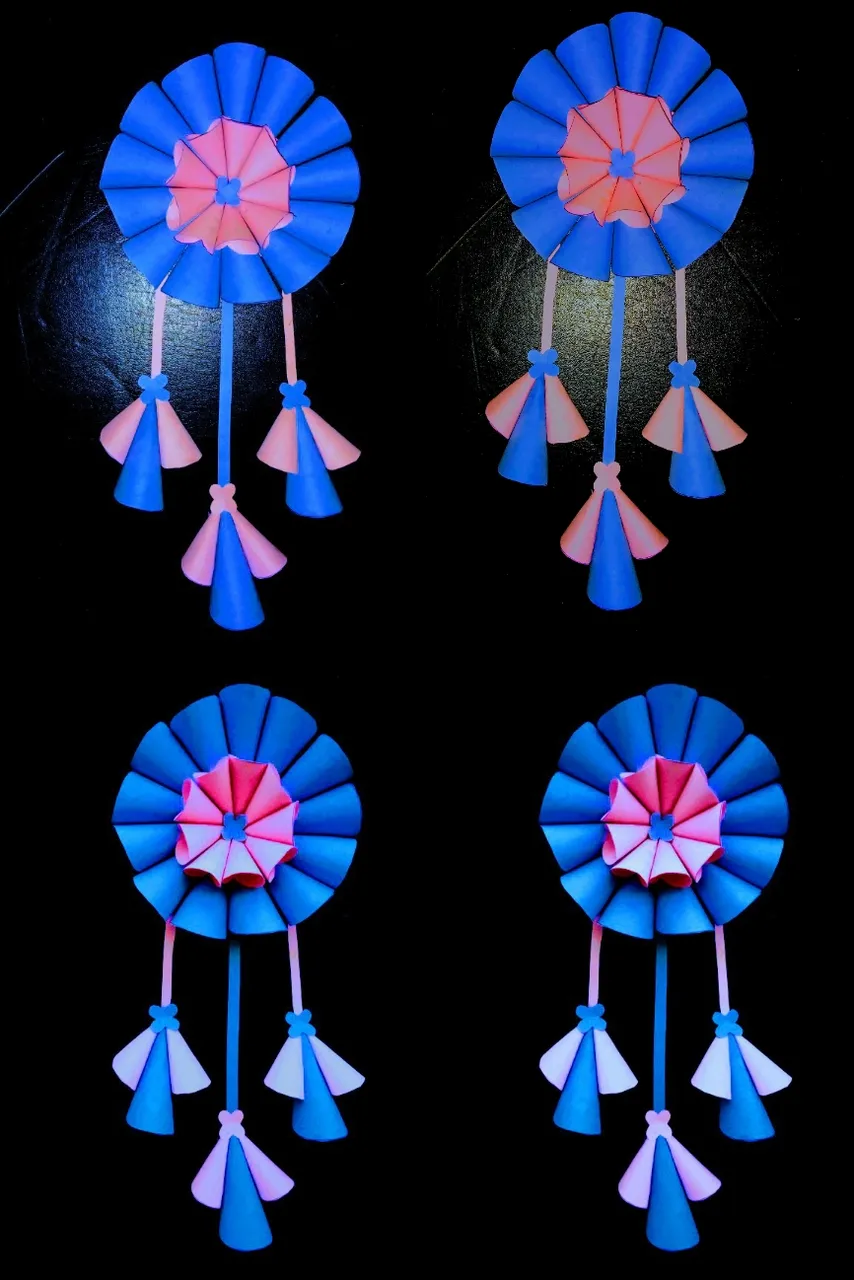
I placed the blue and longer rope at the center and the other two beside.

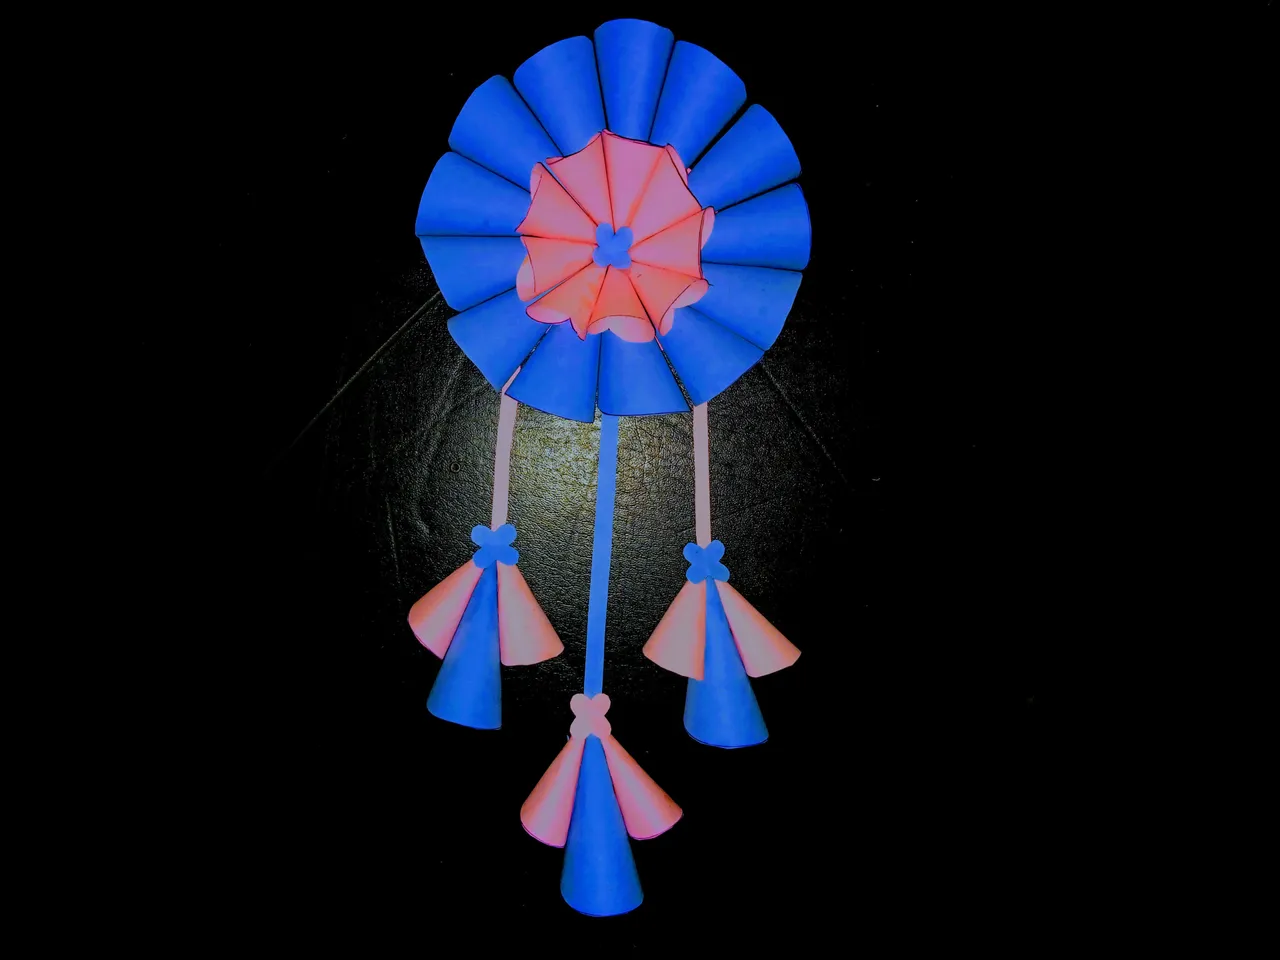
It's much clearer and lovely in this shot I guess.

I cut out a bigger circle from the link cardboard, applied gum to it, and then stick all the big blue cardboard I gummed earlier.

I continued sticking the blue cardboard around the circle using the gum.

I repeated this till the circle was filled up as you have seen below.

I continued the application of gum to the pink cardboard and sticking them to the blue cardboard.

After that, I cut pieces of ropes, two pink and a single blue rope, and then stocked the petals to the rope.
I also measure a small piece of cardboard and carved out tiny flowers and gummed them to the rope.

And a different shot of the last process and previous step.
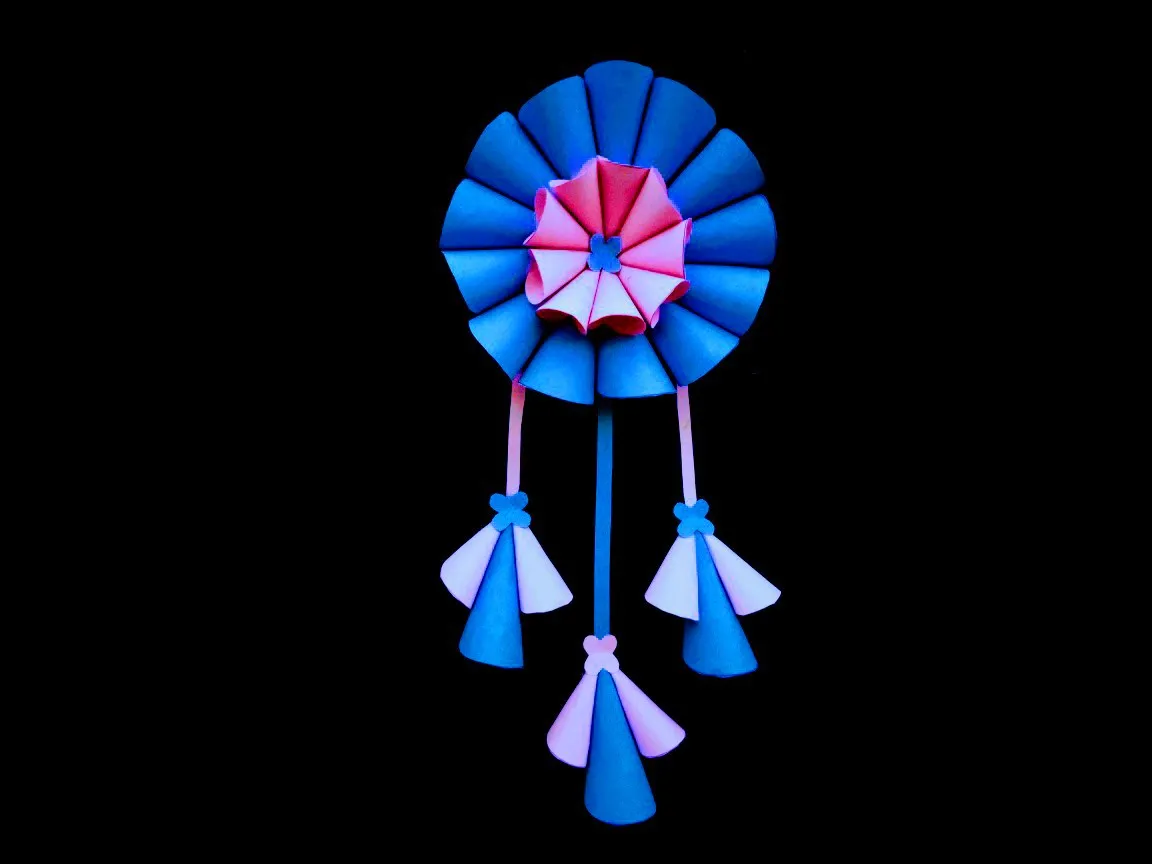
And voilá our lovely ornament is ready.
And this ends the process of our ornament making.