Hello my dear friends of HIVE, today I want to show you how to make a pencil case with recycled material, we can use that waste that we think may be garbage but with creativity transform it into something useful, we must teach our children the habit of recycling from a young age because they will be who tomorrow will have to take care of the environment
Manos a la obra mis queridos amigos
Get to work my dear friends
Materiales a utilizar:
The materials to use:
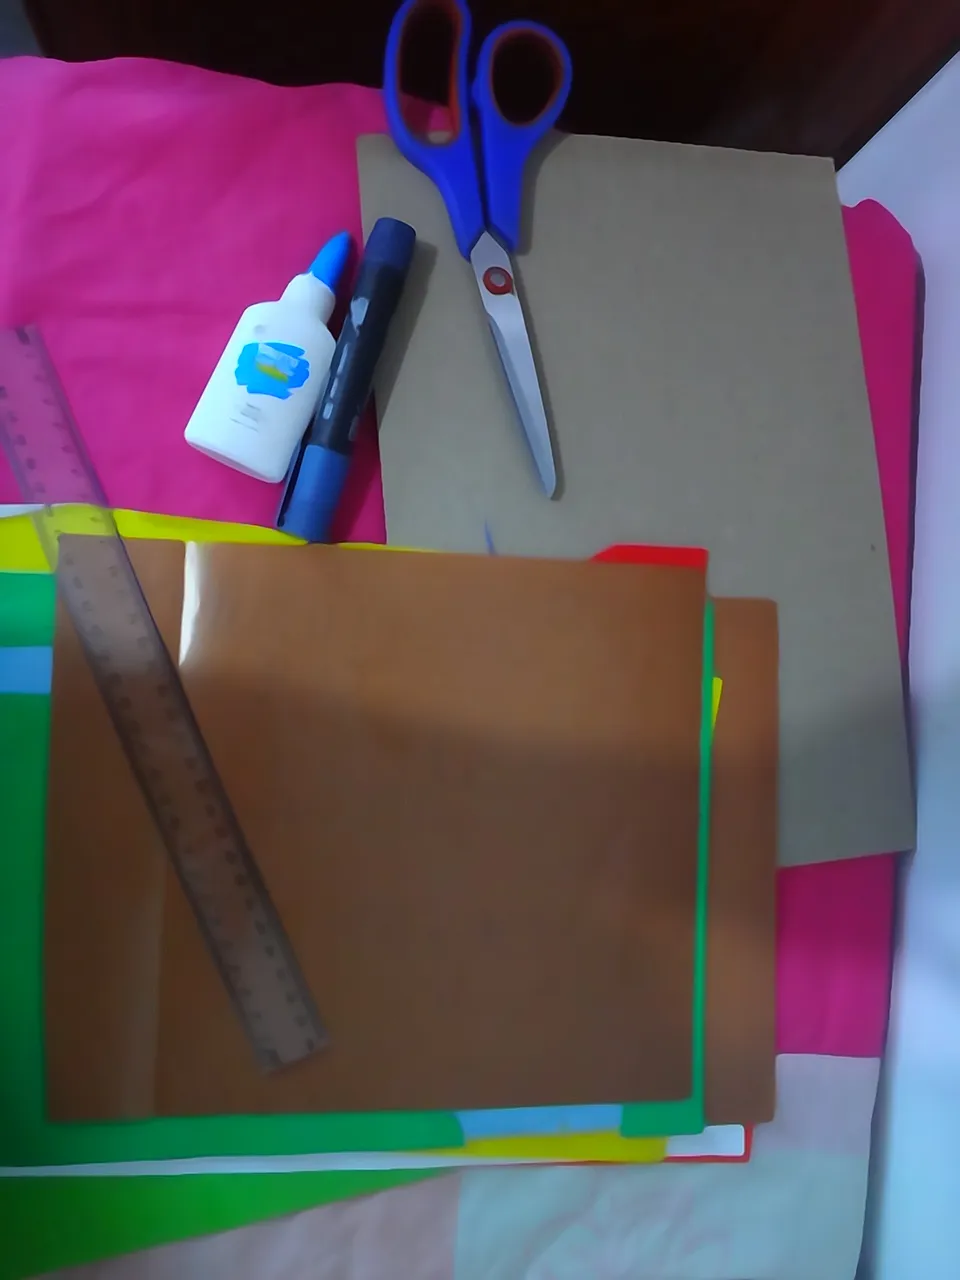
- Cartón
- Tijeras
- Regla
- Hojas de colores
- Pega o silicón
- Marcador o lápiz (cualquier que sirva para marcar)
- Paperboard
- Pair of scissors
- Rule
- Colored sheets
- Glue or silicone
- Marker or pencil (any that serves to mark)
Process
Paso 1 : cortamos una lamina del tamaño que deseamos nuestra cartuchera y marcamos 1 cm a los lados
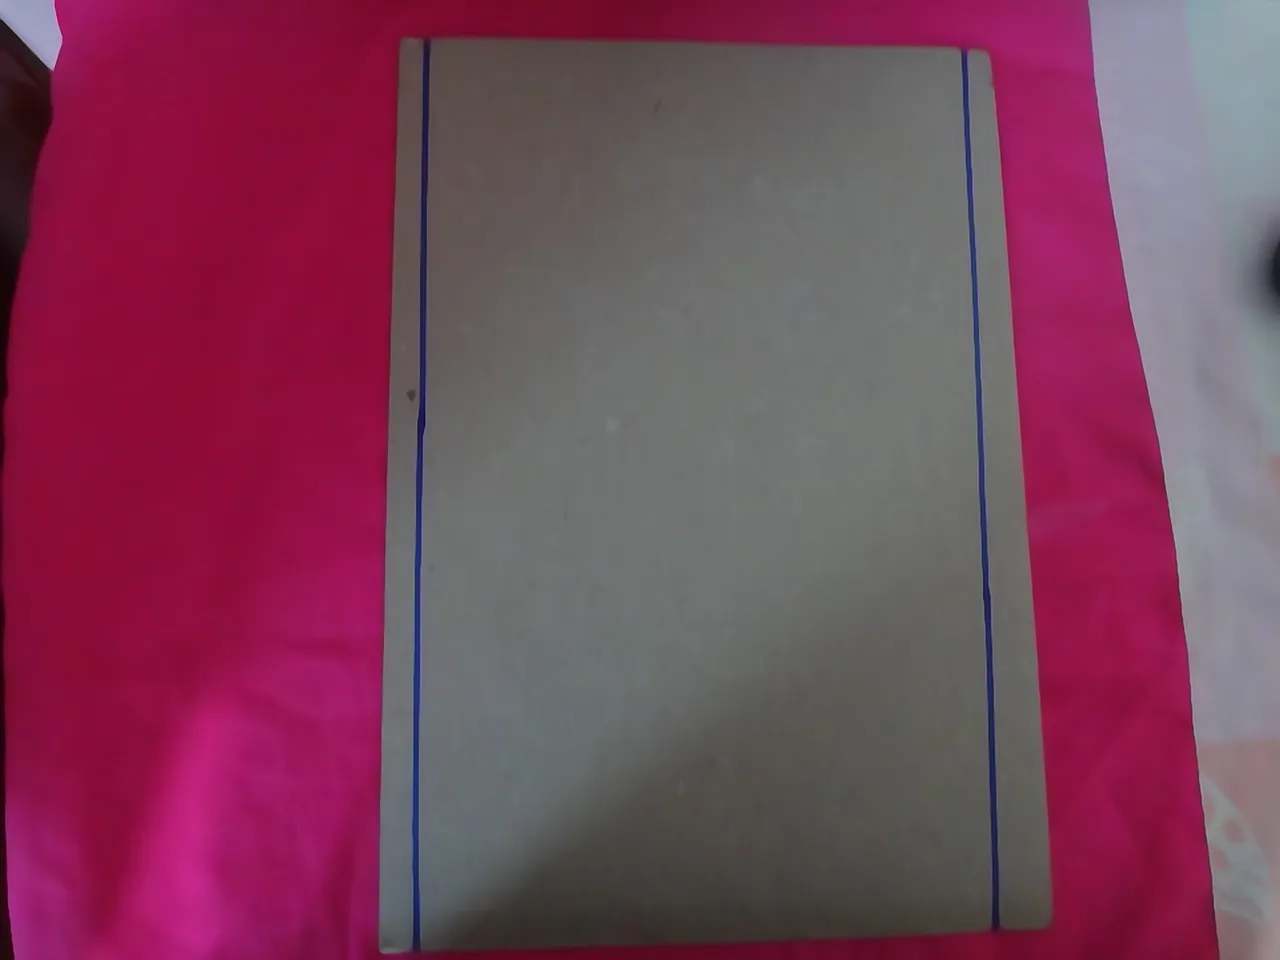
Step 1: we cut a sheet of the size we want our pencil case and we mark 1 cm on the sides
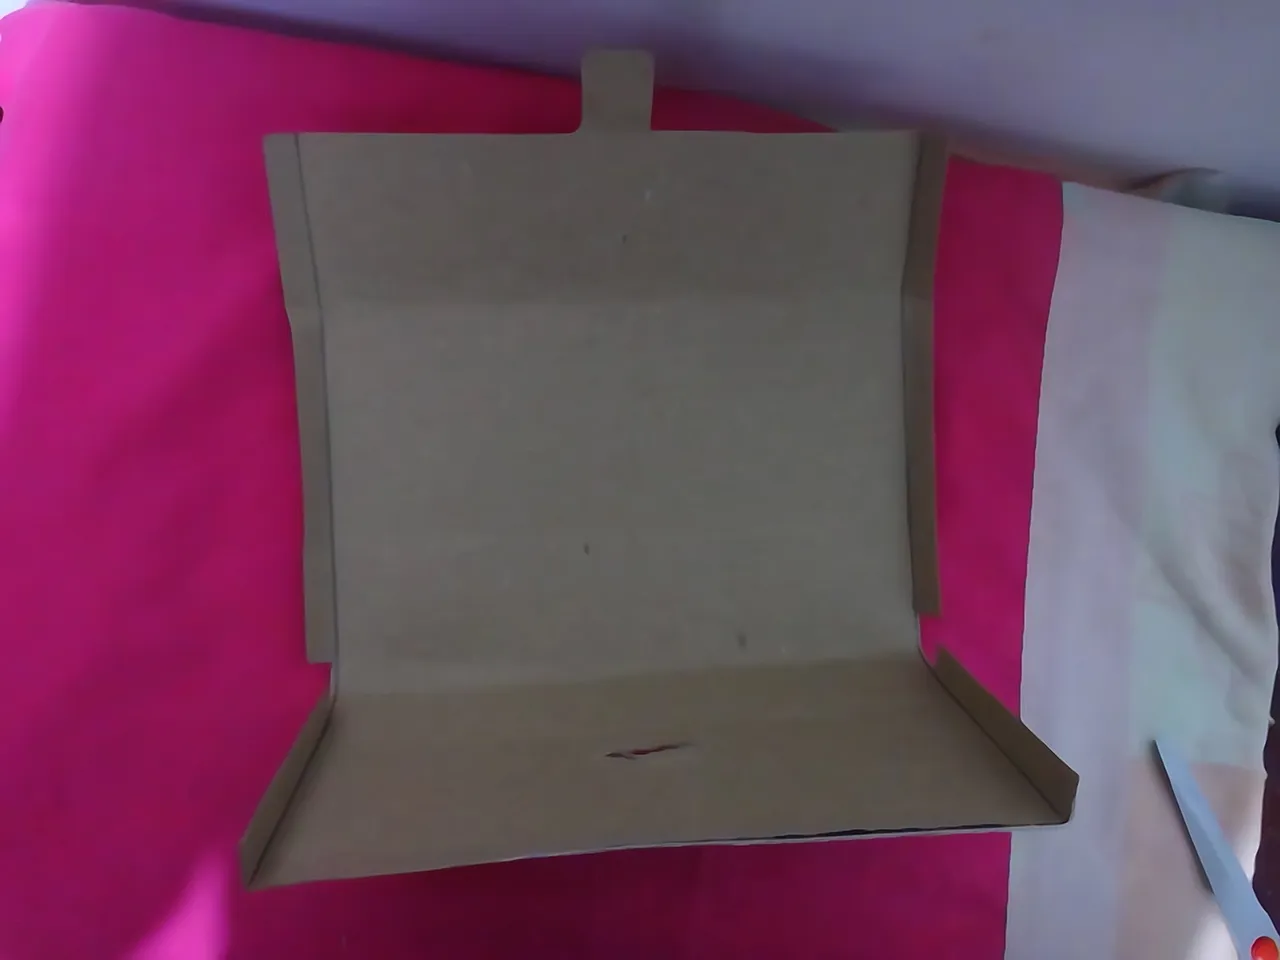
Paso 2 : doblamos en tres partes iguales el cartón

Step 2: we fold the cardboard in three equal parts
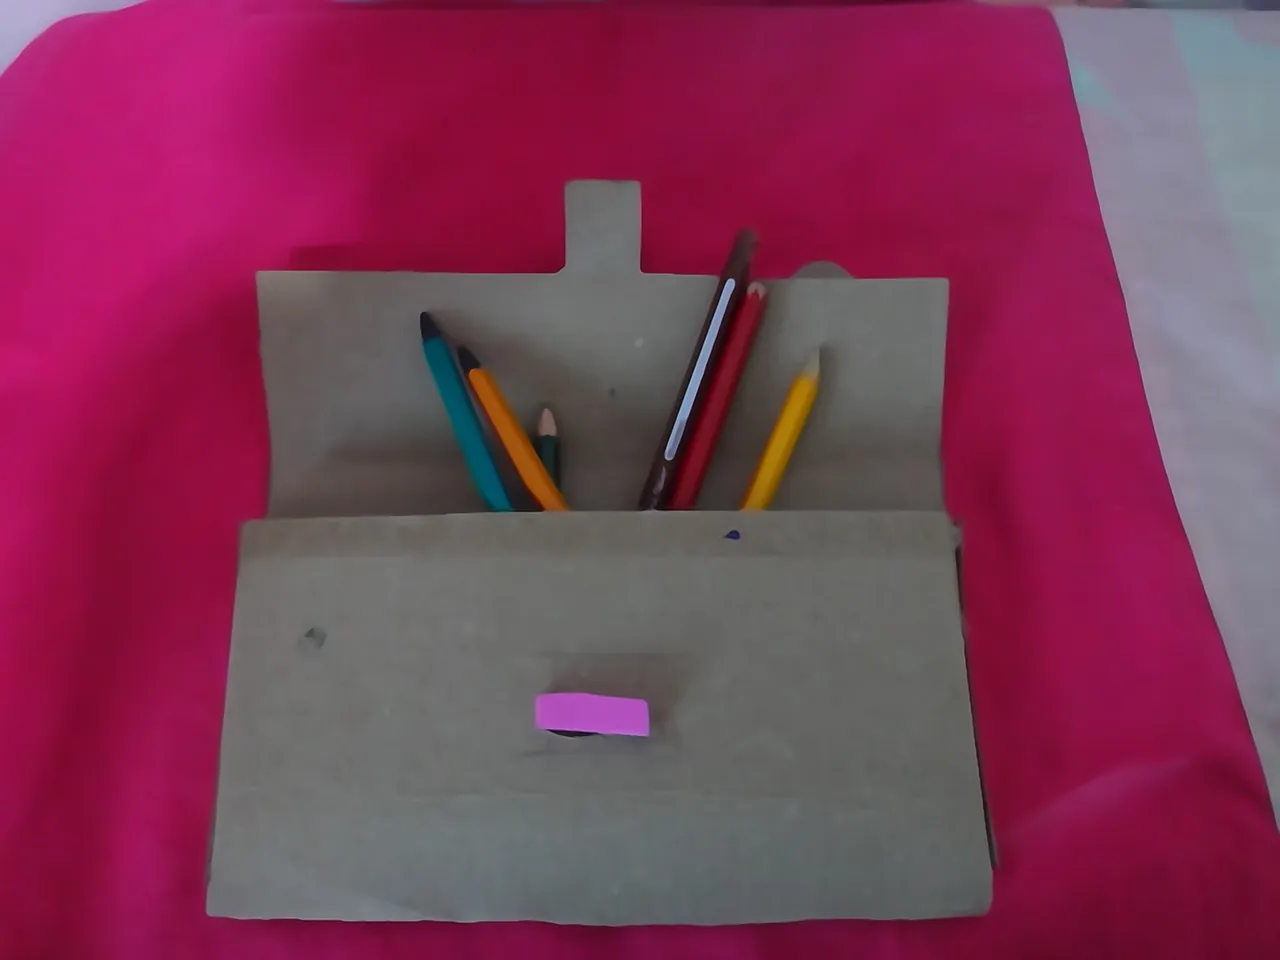
Paso 3 : abrimos y la parte de arriba será la tapa
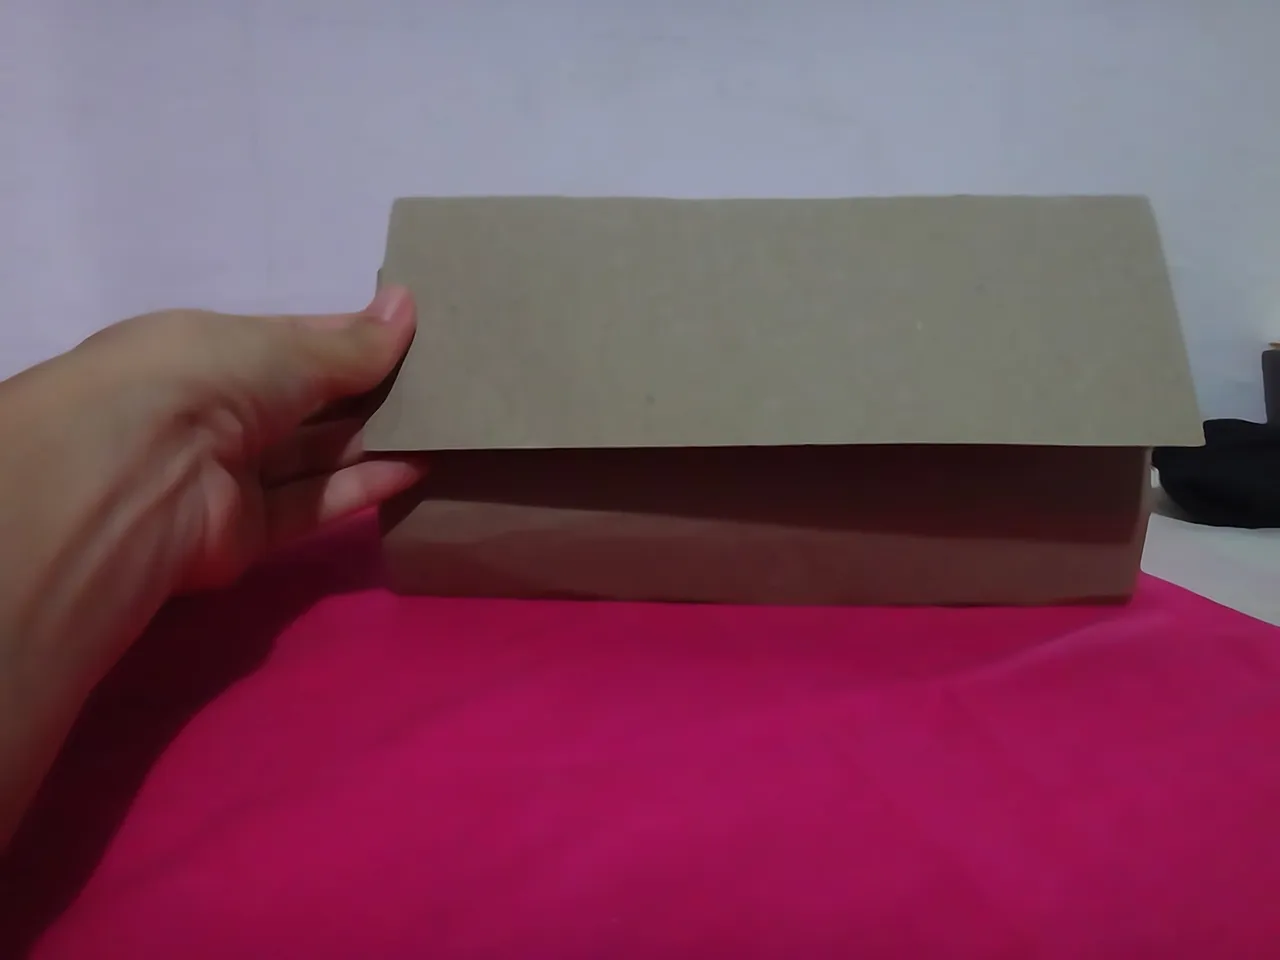
Step 3: we open and the top part will be the lid
Paso 4 : en la tapa marcamos y cortamos la pestaña que nos va a permitir cerrarla
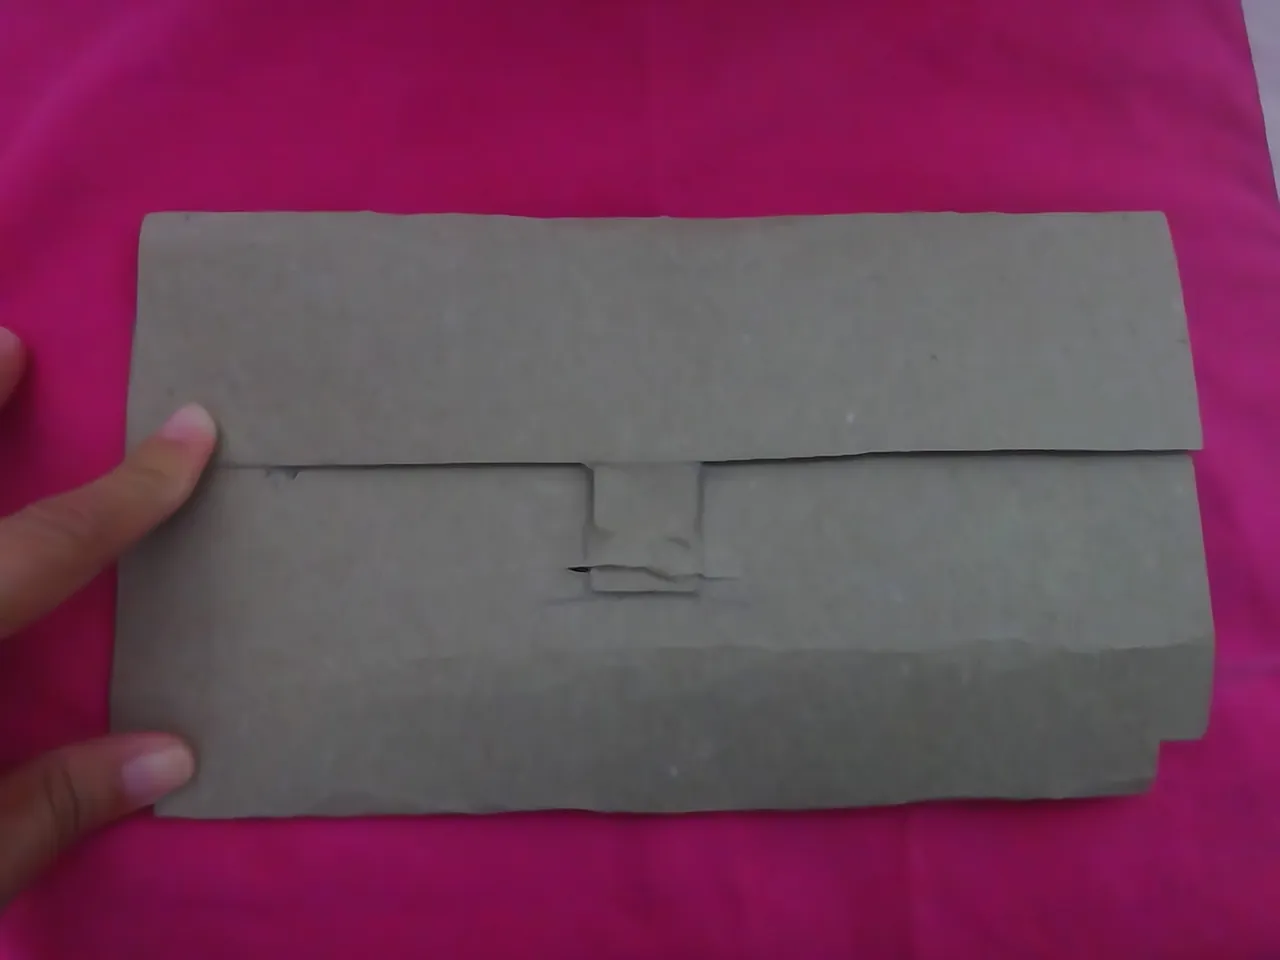
Step 4: on the lid we mark and cut the tab that will allow us to close it
Paso 4 : doblamos el centímetro que marcamos al principio y lo pegamos
** Step 4 **: we fold the centimeter that we marked at the beginning and glue it
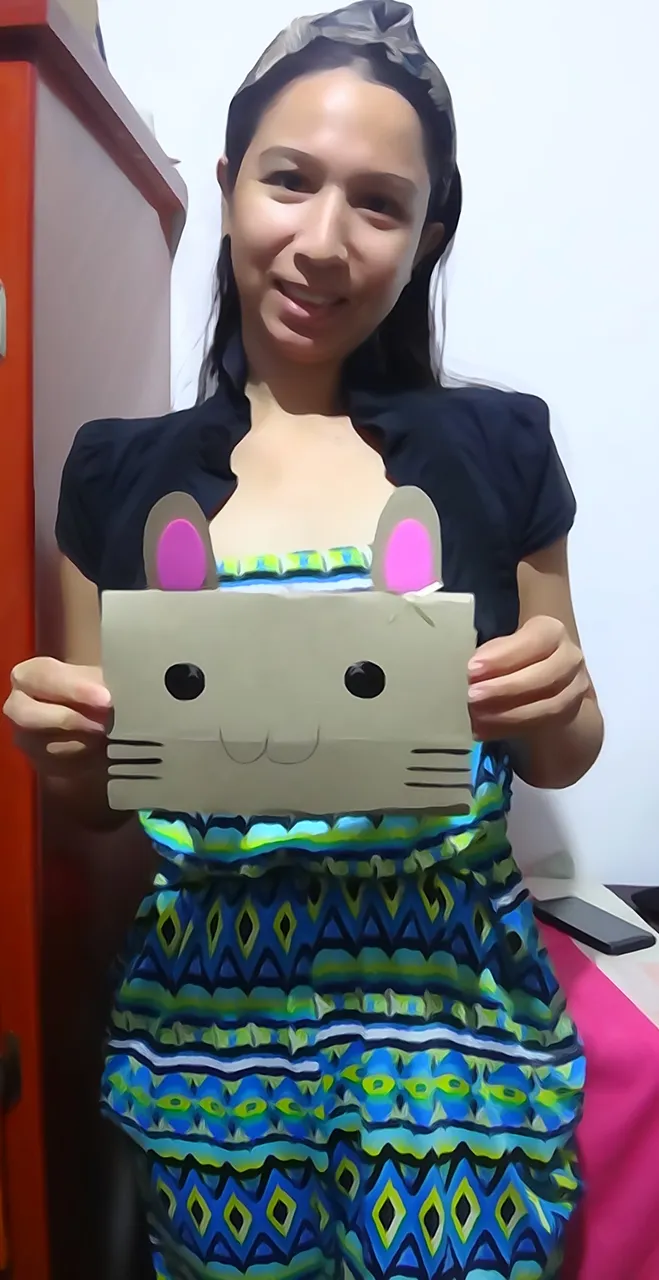
Paso 5 : decoramos nuestra cartuchera utilizando nuestra creatividad, realice unas orejitas, recorte los ojitos y pinte, quedando una linda gatita
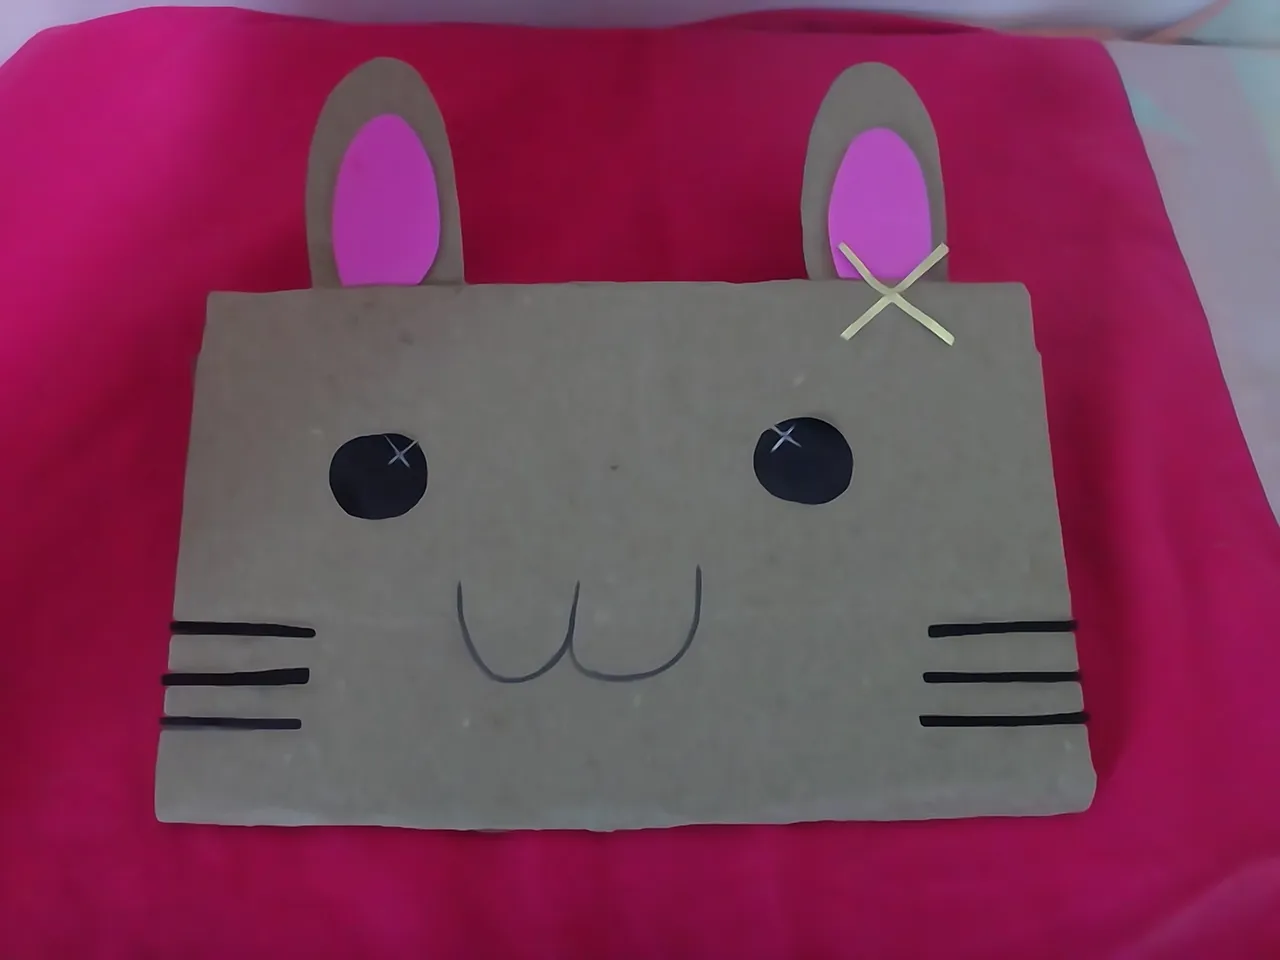
Step 5: we decorate our pencil case using our creativity, make some ears, cut out the eyes and paint, leaving a cute kitten
They are very useful when organizing the desk, giving someone special, also as party favors for a birthday, in the same way they can be made with foamy and let our imagination fly, I hope you liked it and that you are encouraged to make them
Todas las fotos son de mi autoría tomadas con mi telefono zte blade, soy @yurasil
All the photos are of my authorship taken with my zte blade phone, I am @yurasil
Hasta una proxima oportunidad, Dios les bendiga
** Until next time, God bless you **