un saludo Creativos!!
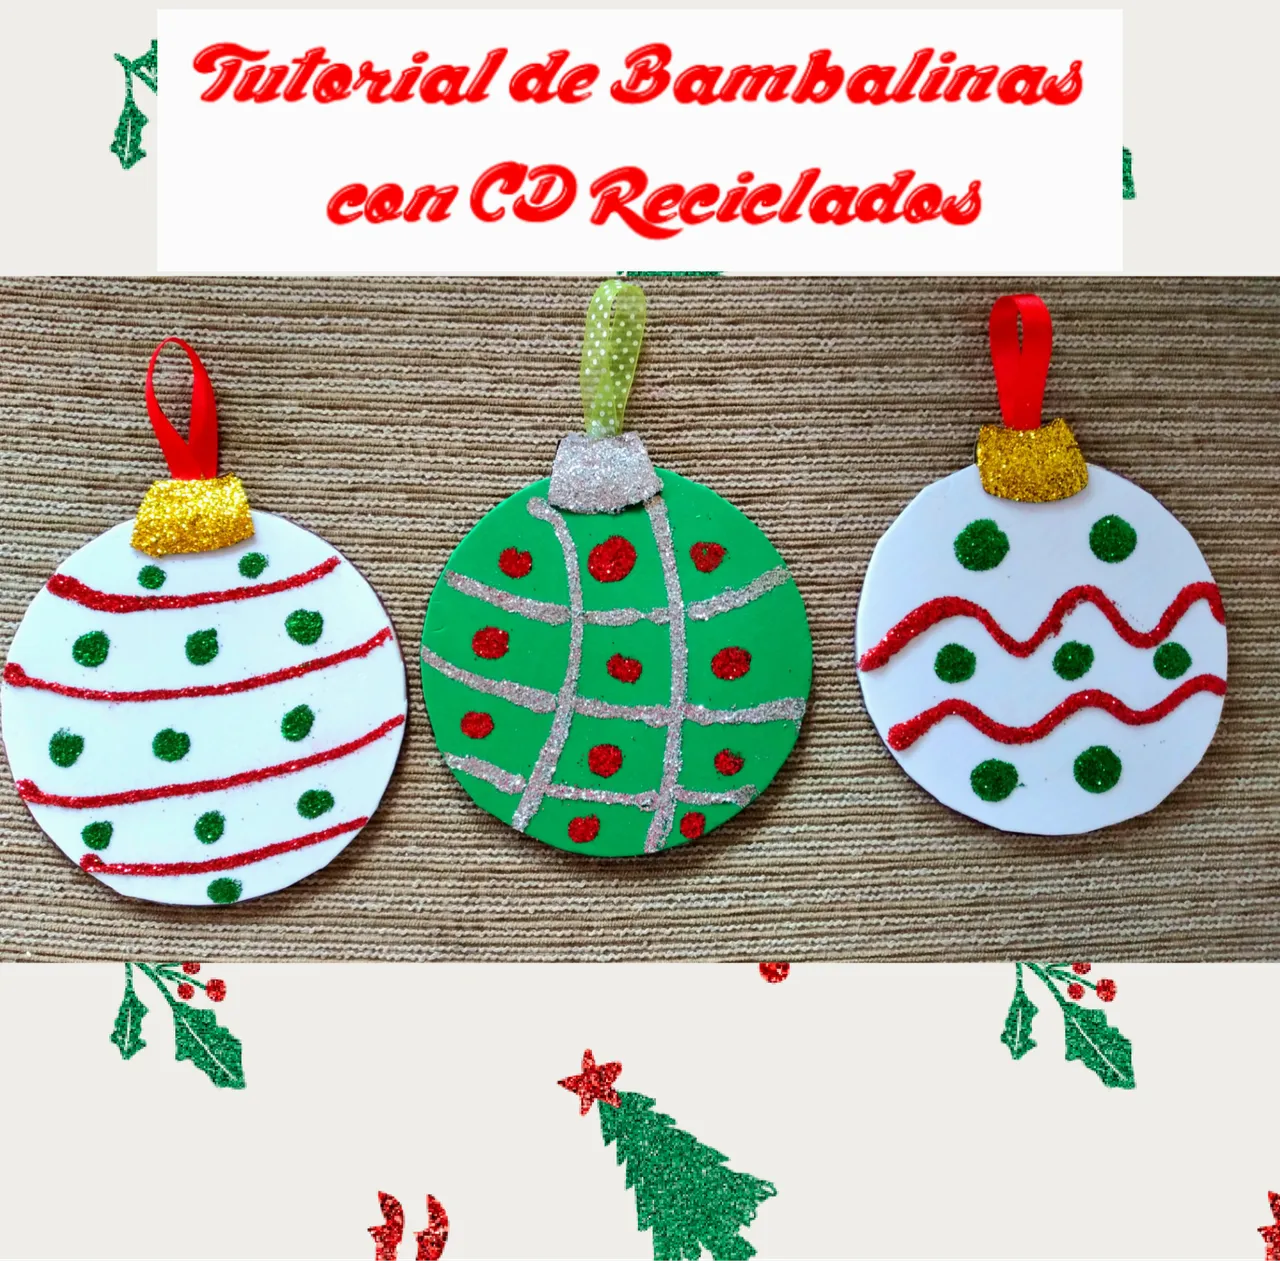
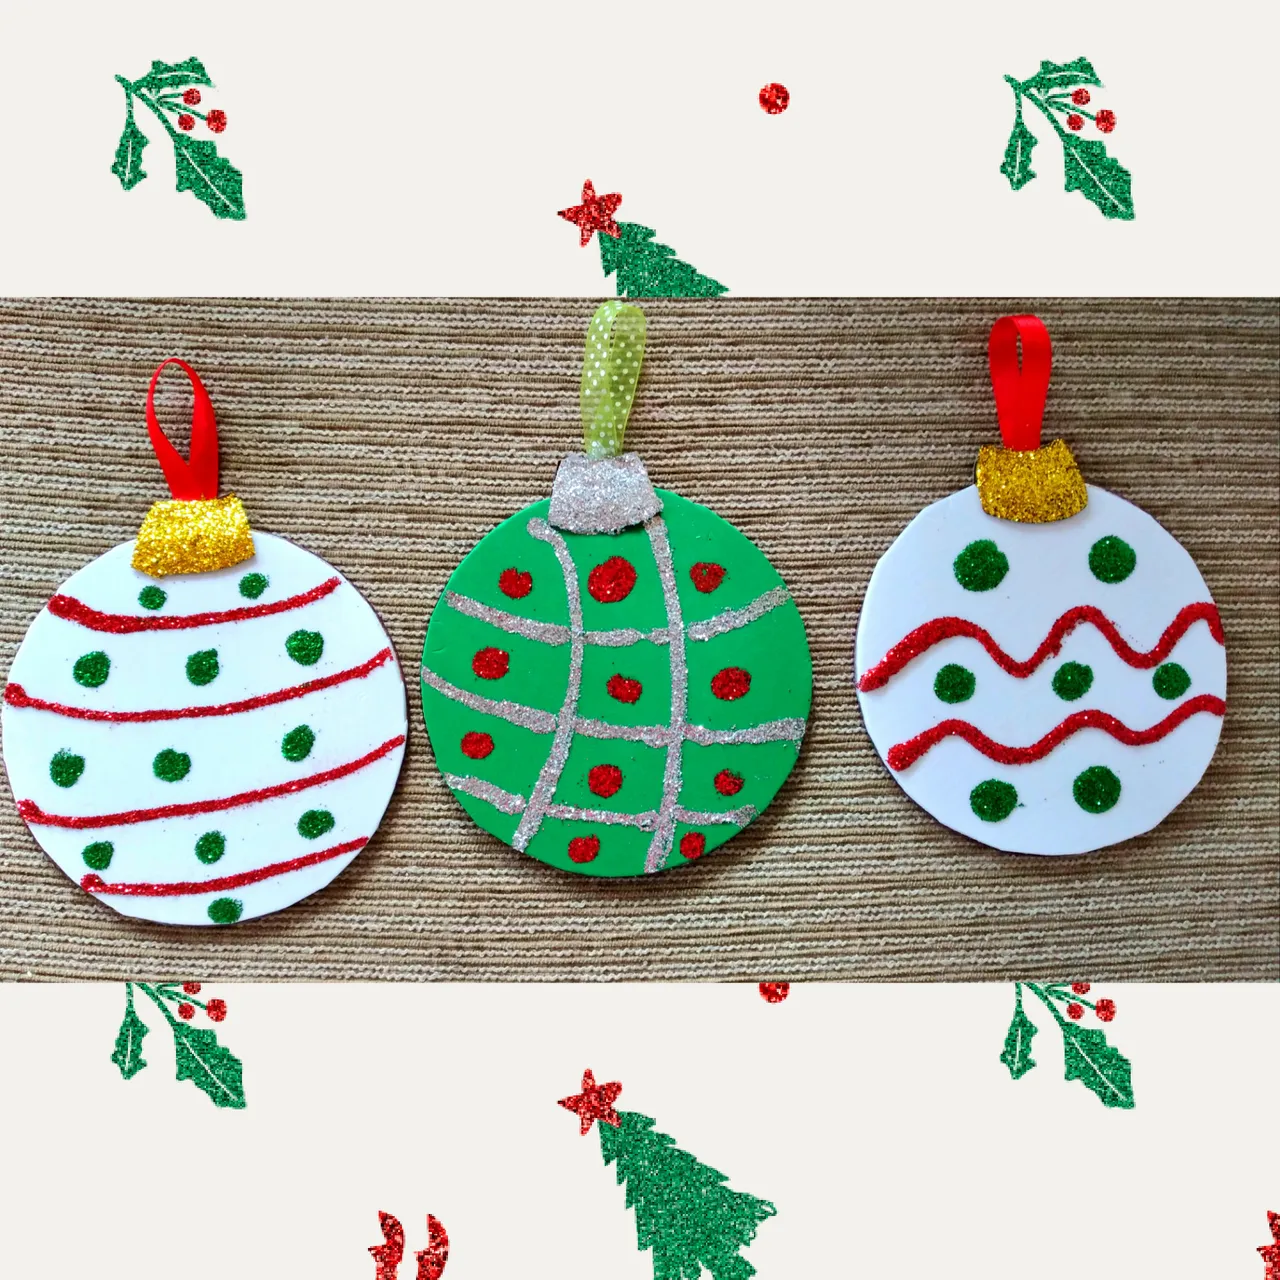
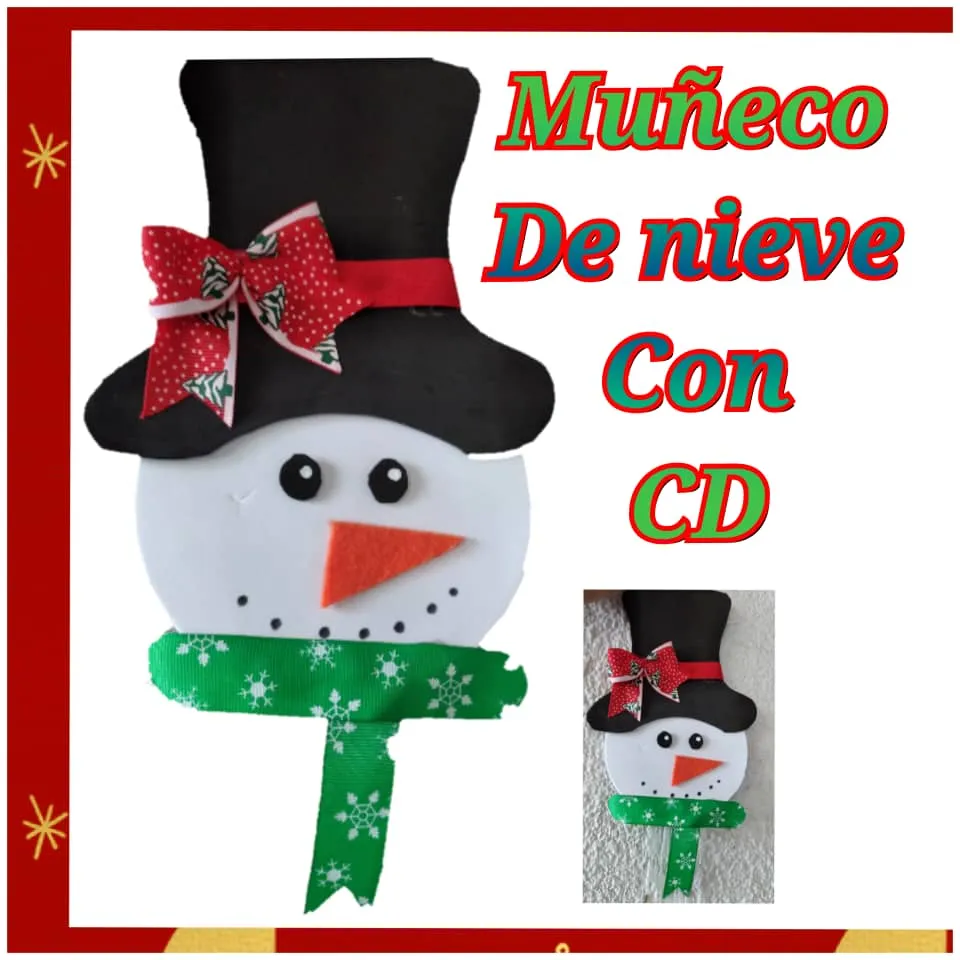
Como van las decoraciones de sus casas?, pues la mía aún está en proceso, hoy les traigo un tutorial de bambalinas hechas con CD reciclados, ideal para colocar o en el árbol de navidad, para colocar en pared o en una guirnalda ustedes deciden donde las colocarán, as que manos a la obra!!
a creative greeting!!
How are the decorations of your houses going, since mine is still in process, today I bring you a tutorial of backstage made with recycled CDs, ideal to put on the Christmas tree, to place on the wall or in a garland you decide where to put them, so let's get to work!
Materiales:
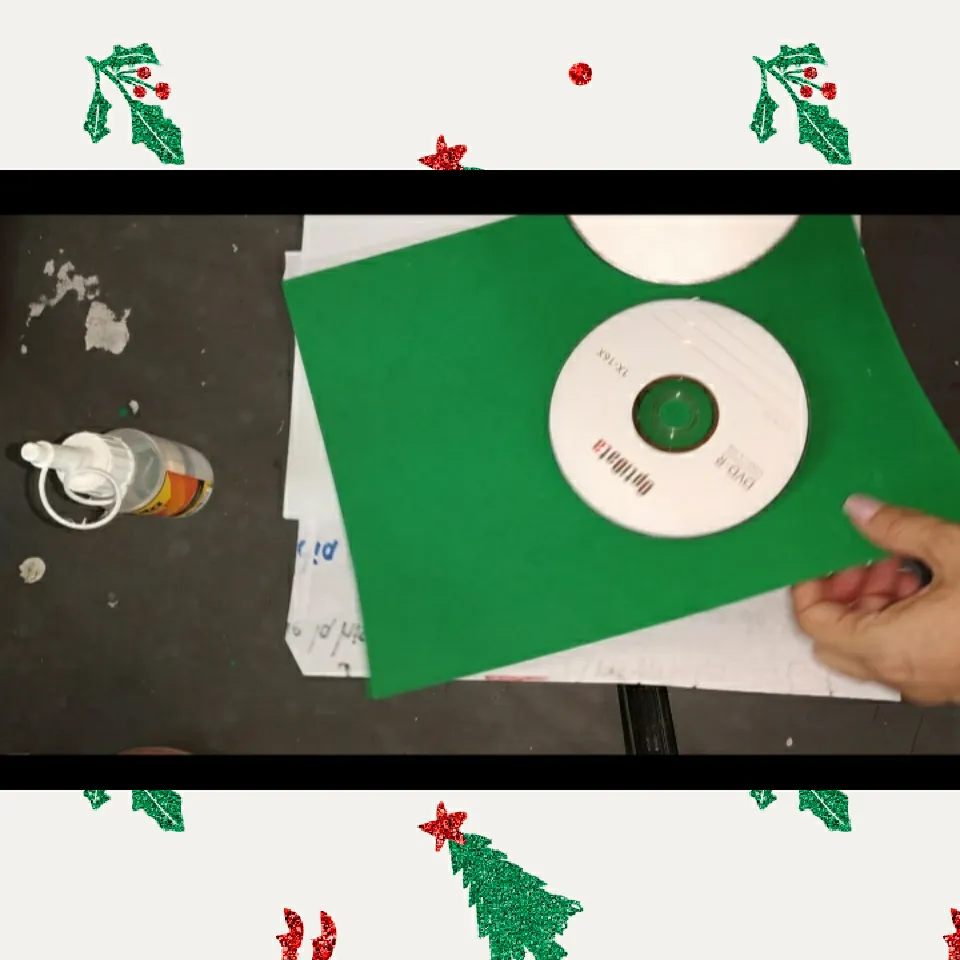
🎅 CD para reciclar
🌲 silicon frío y caliente
🎅 Cinta decorativa
🌲 Purpurina o escarcha
🎅 Pega Escolar
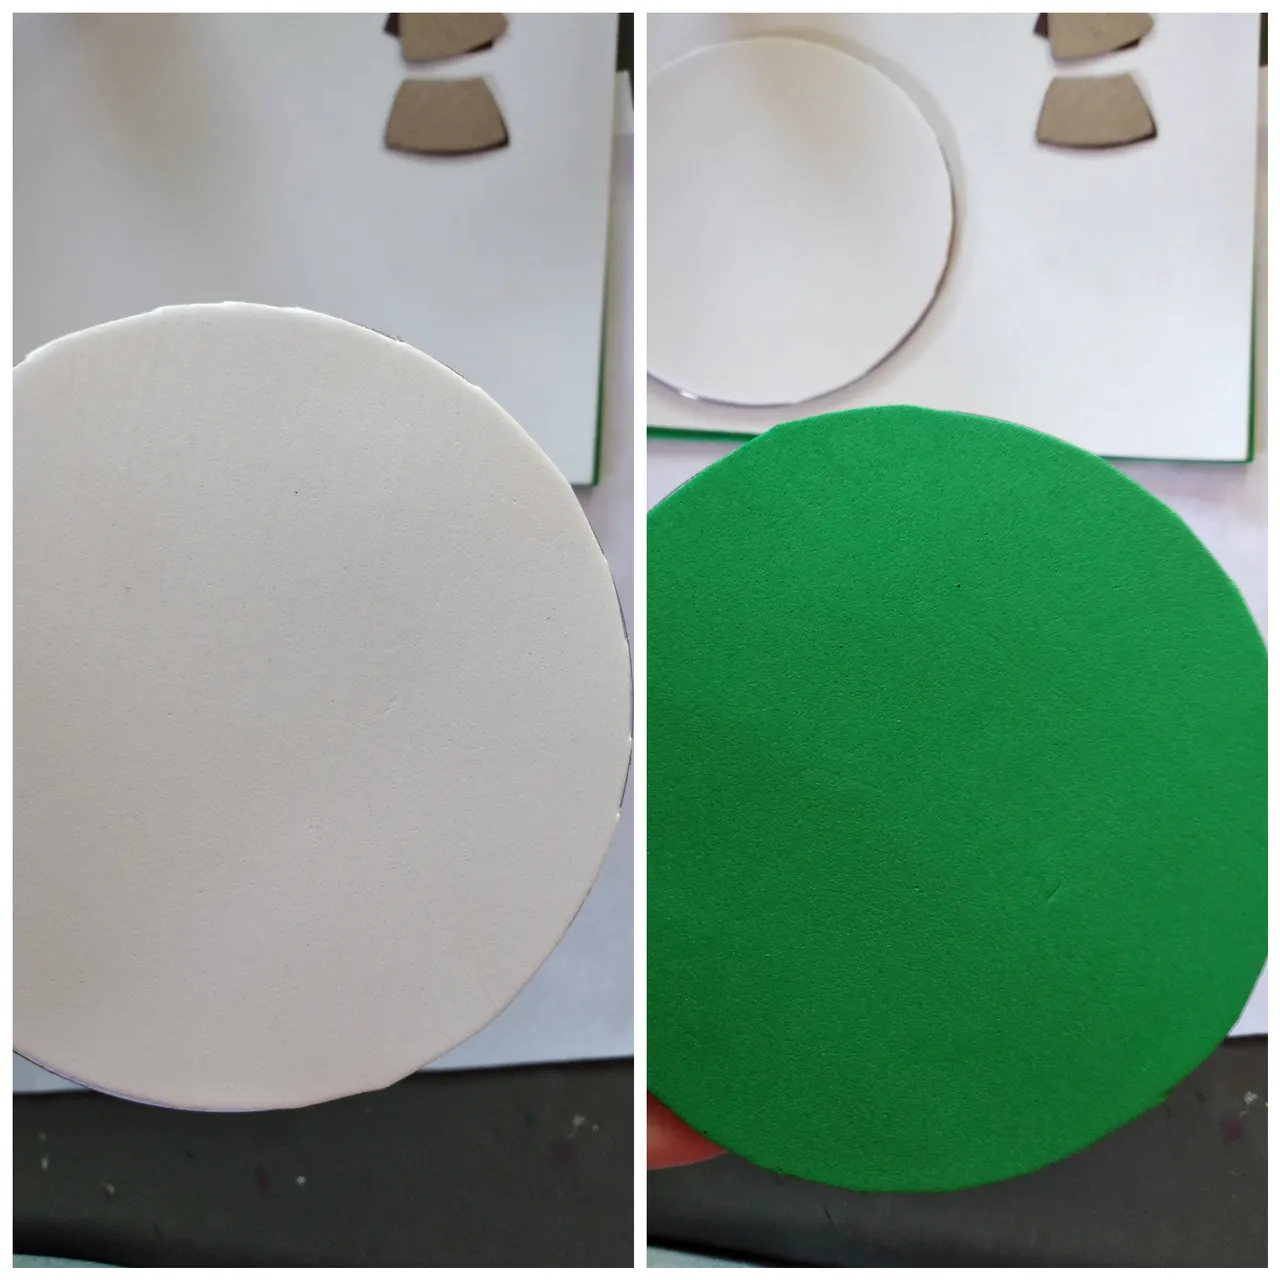
🌲 Fomi
🎅 Cartón fino
Materials:
🎅 Recycling CD
🌲 hot and cold silicone
🎅 Decorative ribbon
🌲 Glitter or frost
🎅 School Punch
🌲 Fomi
🎅 Fine cardboard
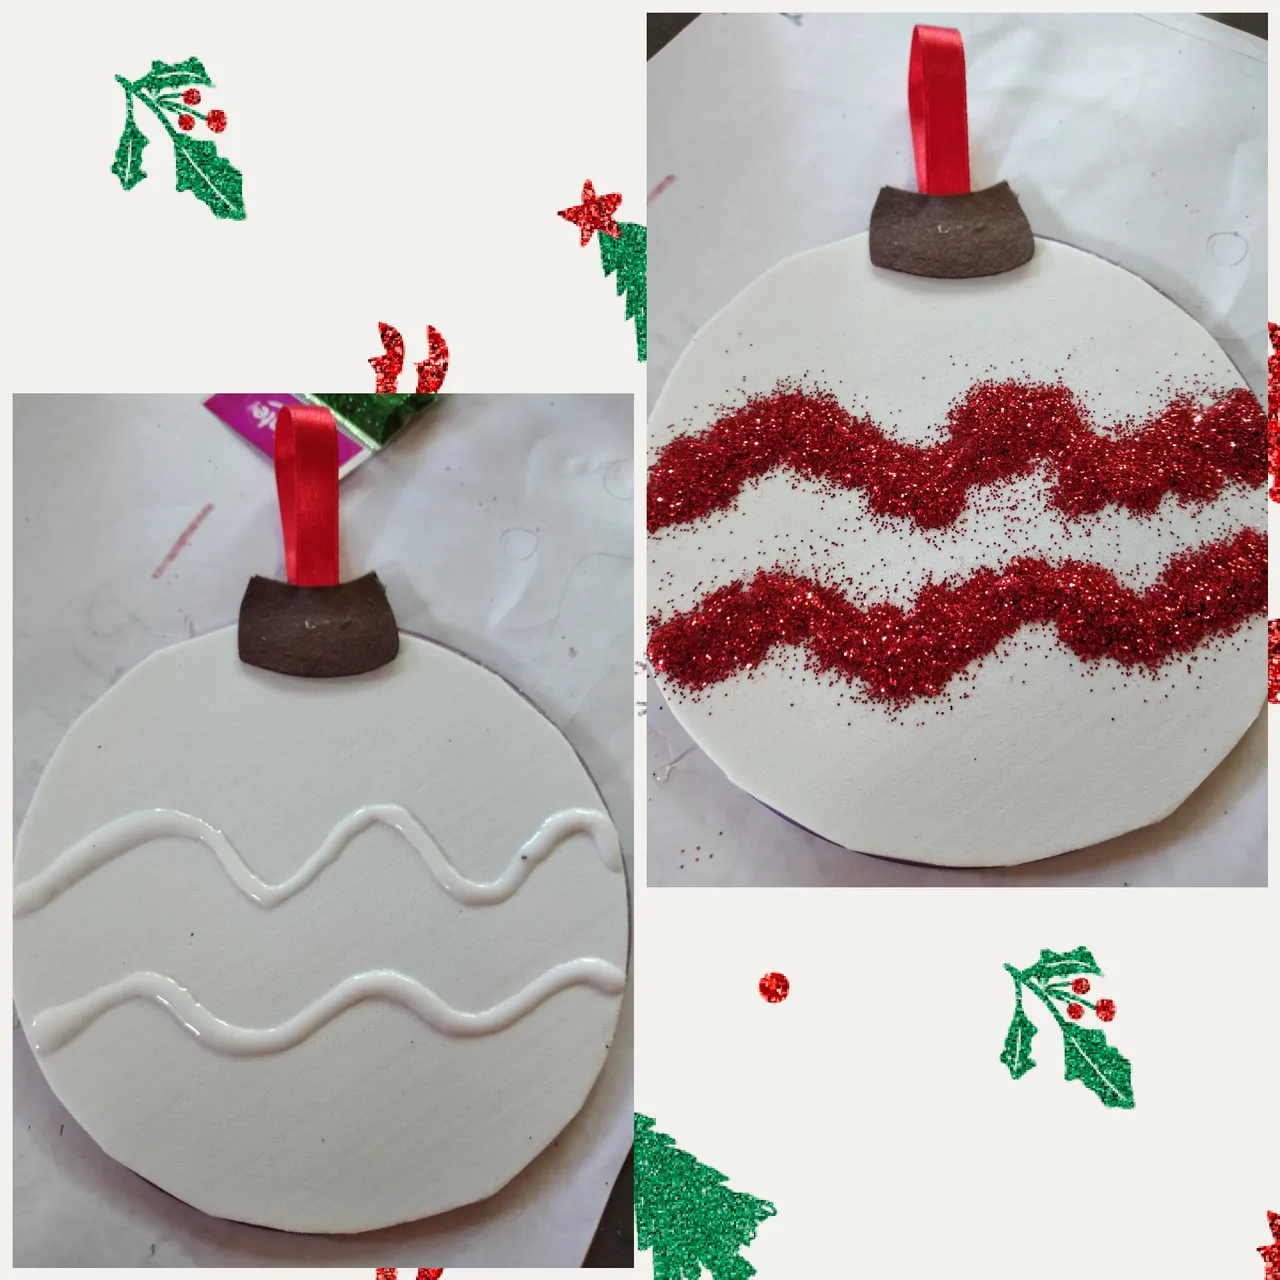
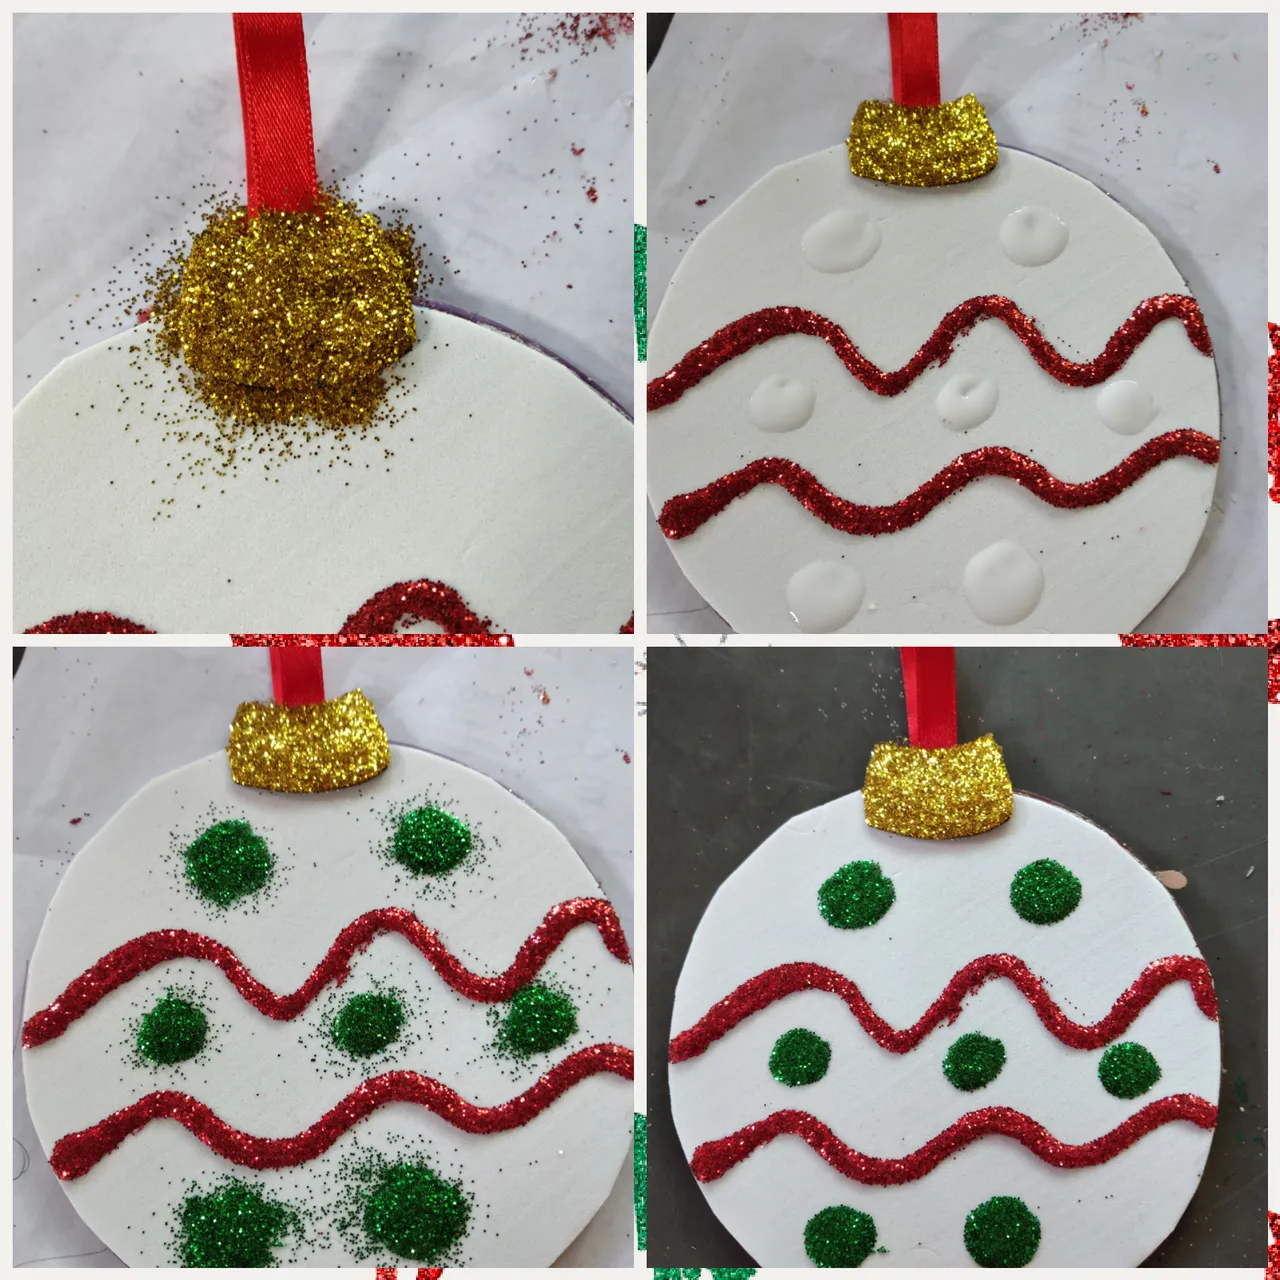
Paso a paso / Step by step
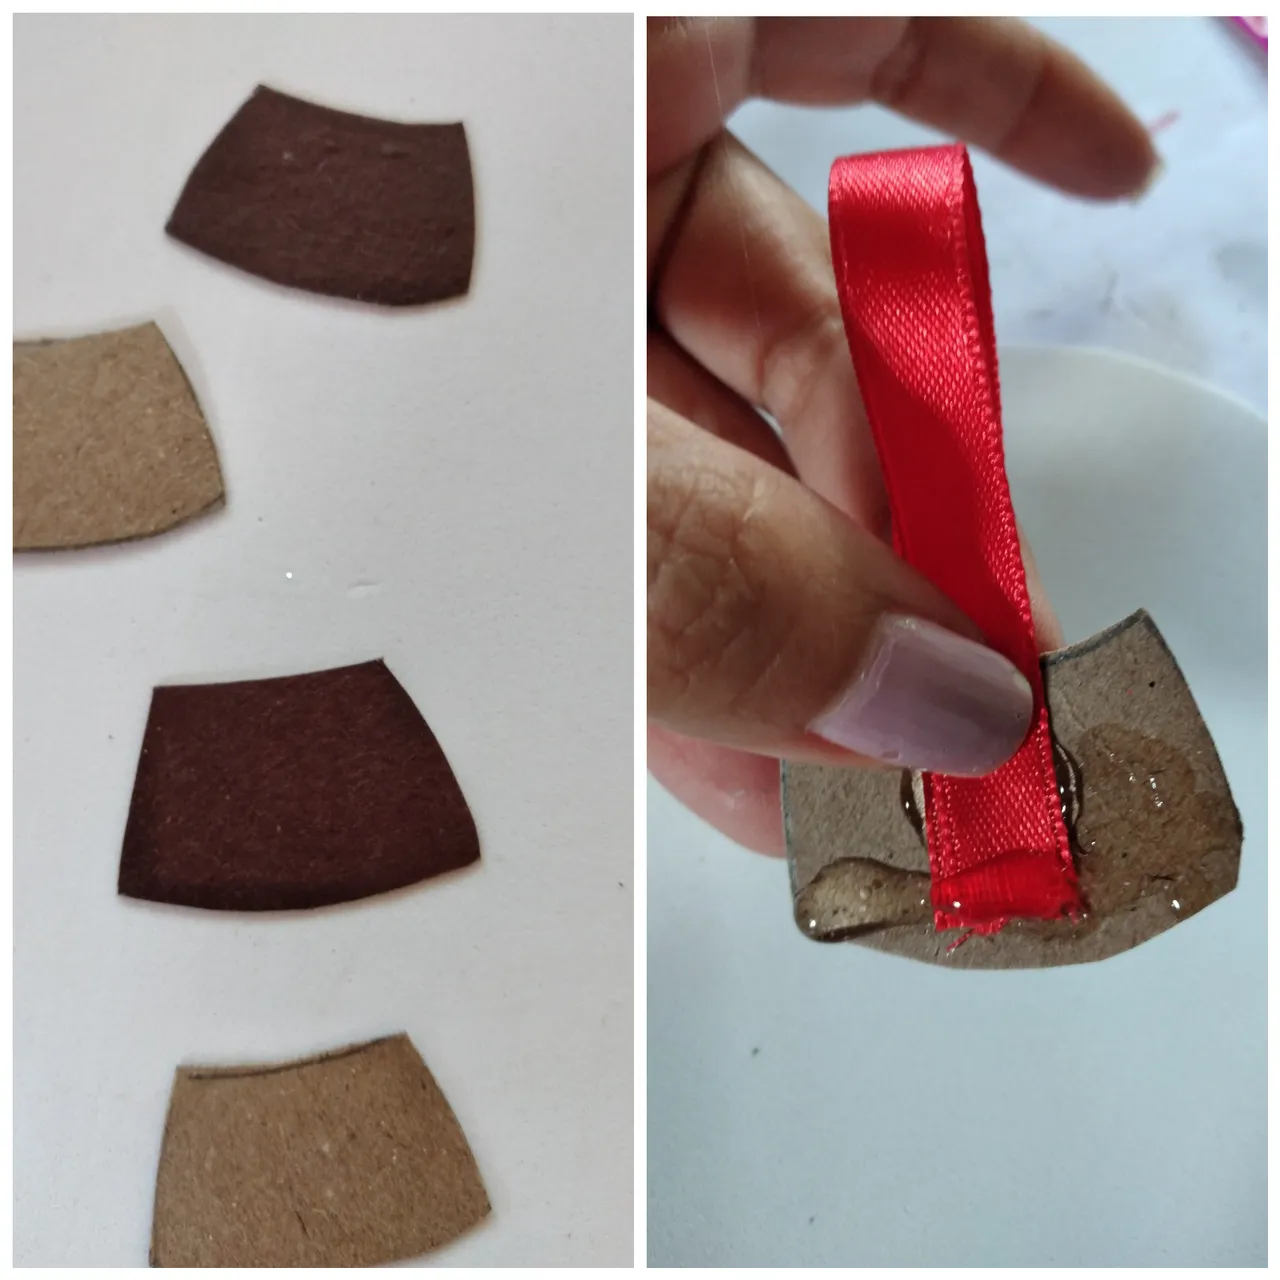
Second, we are going to make a kind of collar with a wider part with a cardboard and as shown in the picture we made 2 parts.
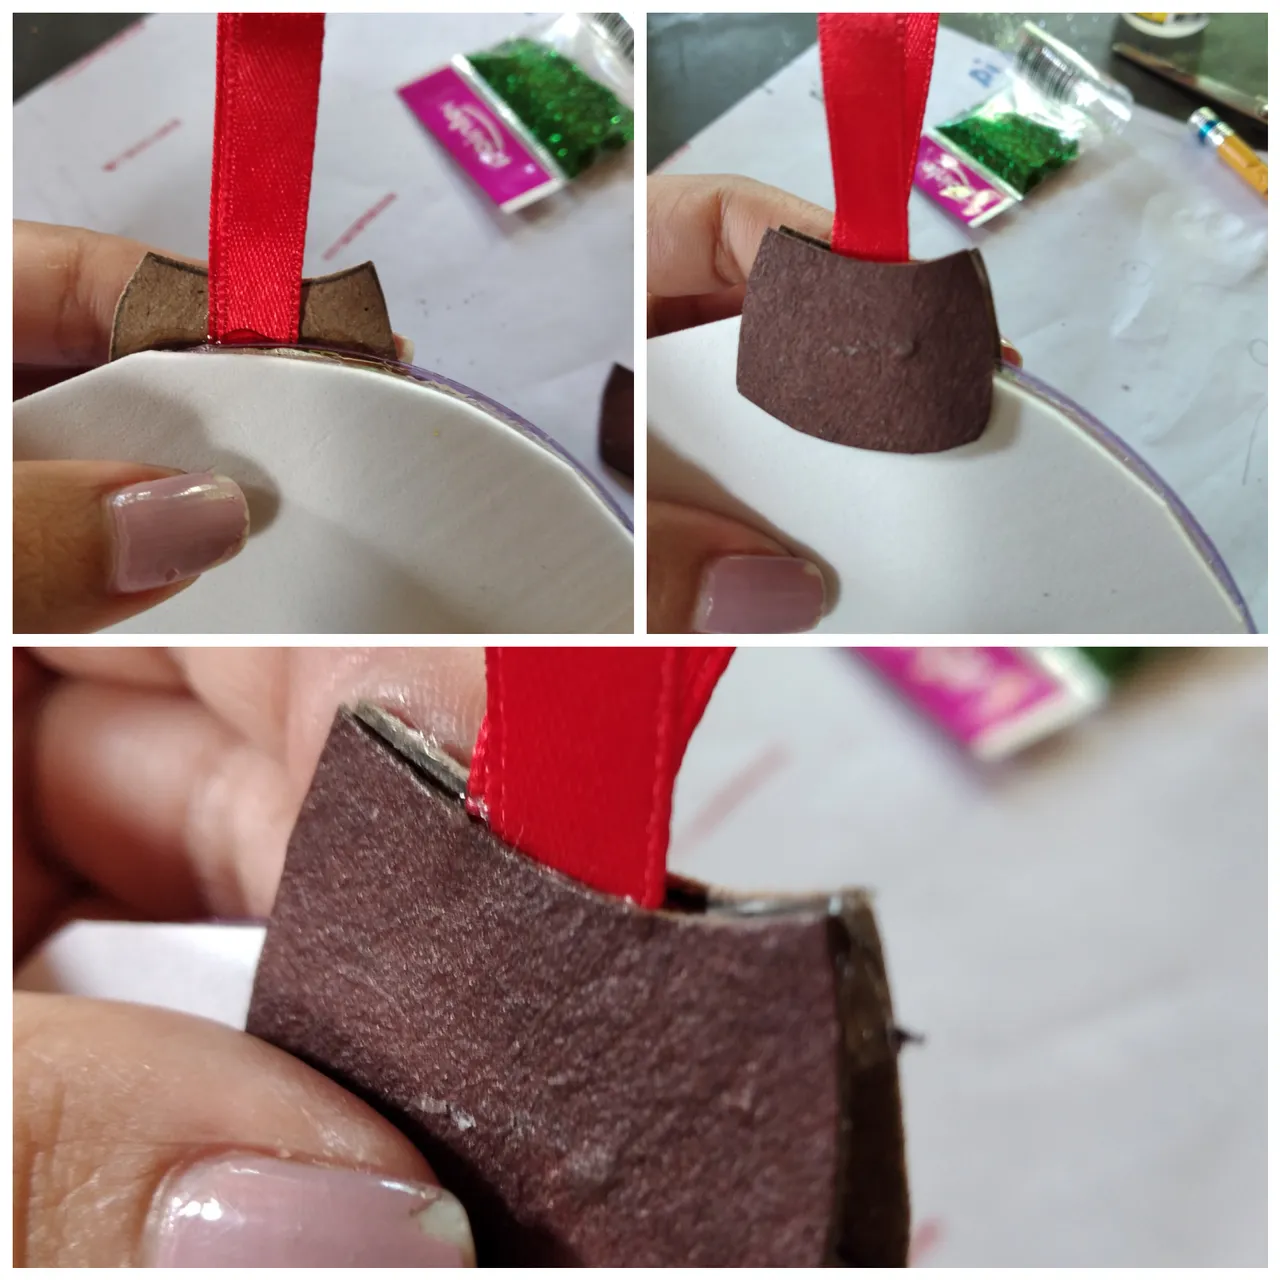
En una de las partes vamos a pegar la cinta decorativa doblada con sklicon caliente y pegaremos en la parte de atrás del cd, luego pegamos la otra parte en el cd por la parte delantera y luego pegamos ambos como se muestra en la foto.
Gracias por leer mi blog, bendiciones 🌲🎅
Thanks for reading my blog, blessings 🌲🎅
Algunos Proyectos que pueden interesarte // Some Projects that may interest you:


Todas las fotos son de mi propiedad editadas en canva.
All photos are of my property edited in canva