Hello friends of this creative
hive! Today I bring you a very useful job for the home.
Hola amigos de esta creativa colmena!!! Hoy les traigo un trabajo muy útil para el hogar.
This sewing box is made from a recycled tin and pretending to be a spool of thread. I did it with a video of #giselafernandez.
Este costurero está hecho con una lata reciclada y simulando ser un carretel de hilo. Lo hice con un vídeo de #giselafernandez.

The materials that I used are: a can, three Styrofoam lids for ice cream pots (two are the same size and one smaller), cold porcelain (various colors), vinyl glue, stakes, brush, rolling pin, a piece of fabric, fleece and two polystyrene spheres (which I forgot to put in the photo, of different sizes).
Los materiales que utilicé son: una lata, tres tapas de telgopor de potes de helado (dos son del mismo tamaño y una más pequeña),porcelana fría (varios colores), cola vinilica, estecas, cepillo, palo de amasar, un trozo de tela, vellon y dos esferas de telgopor (que me olvidé de poner en la foto, de diferentes tamaños).
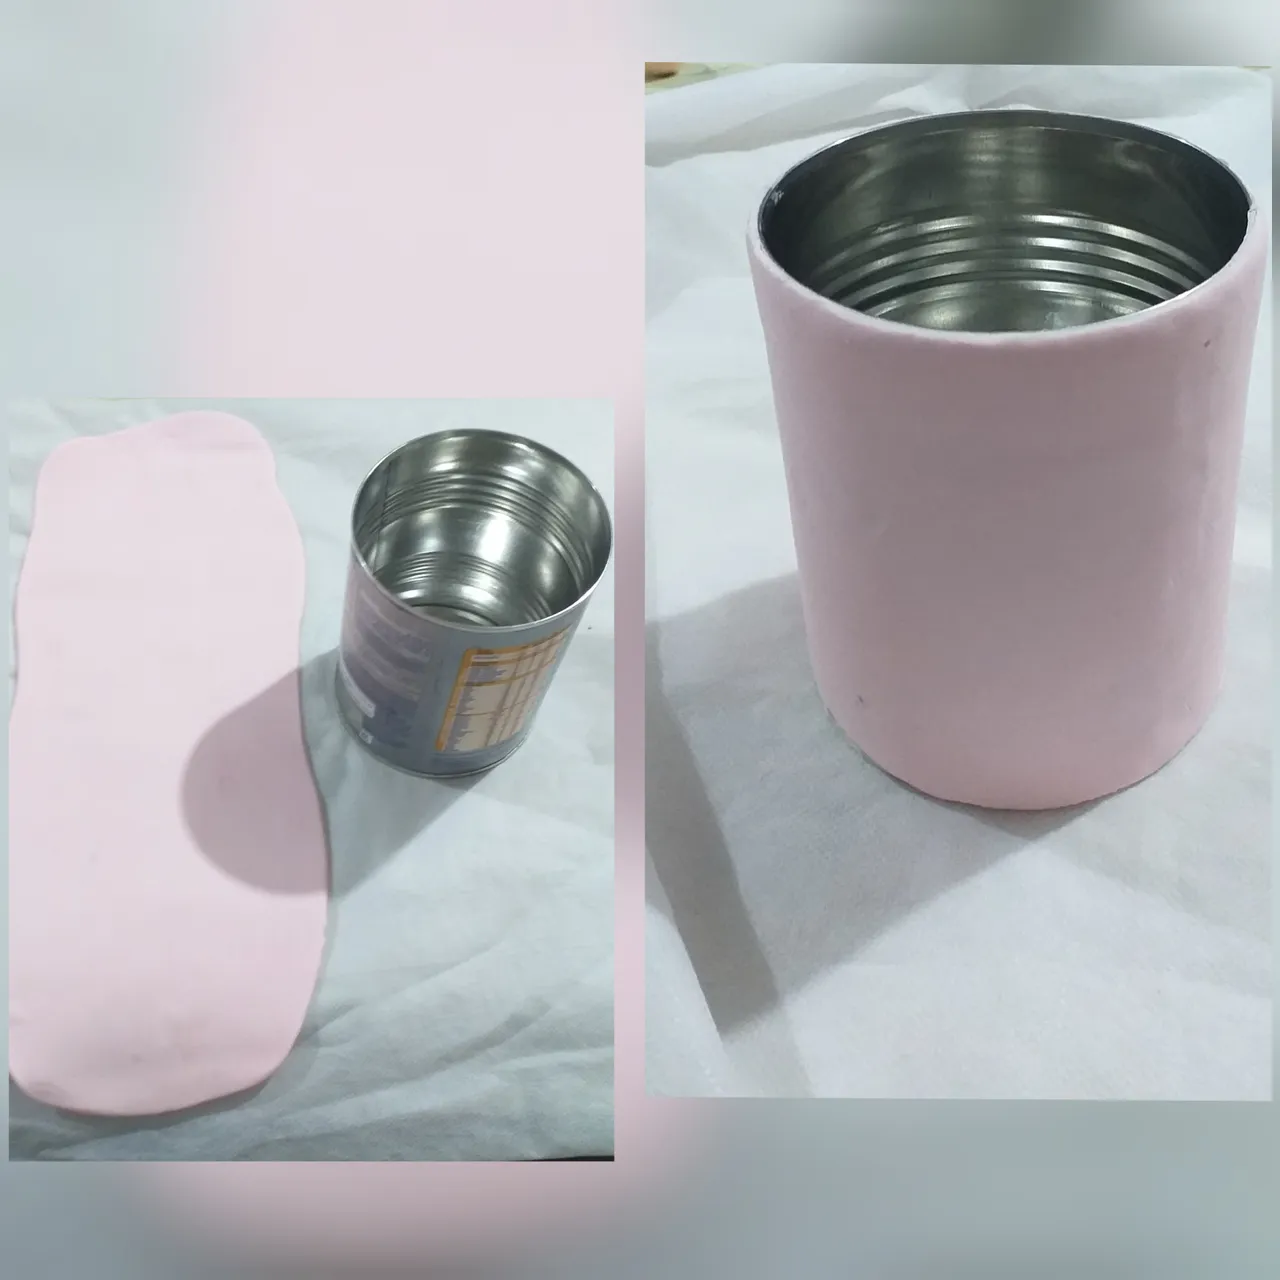
We stretch very fine cold porcelain, we put vinyl glue to the whole can and we wrap it with the mass. We remove the surplus.
Estiramos porcelana fría bien fina, ponemos cola vinilica a toda la lata y la envolvemos con la masa. Quitamos el excedente.
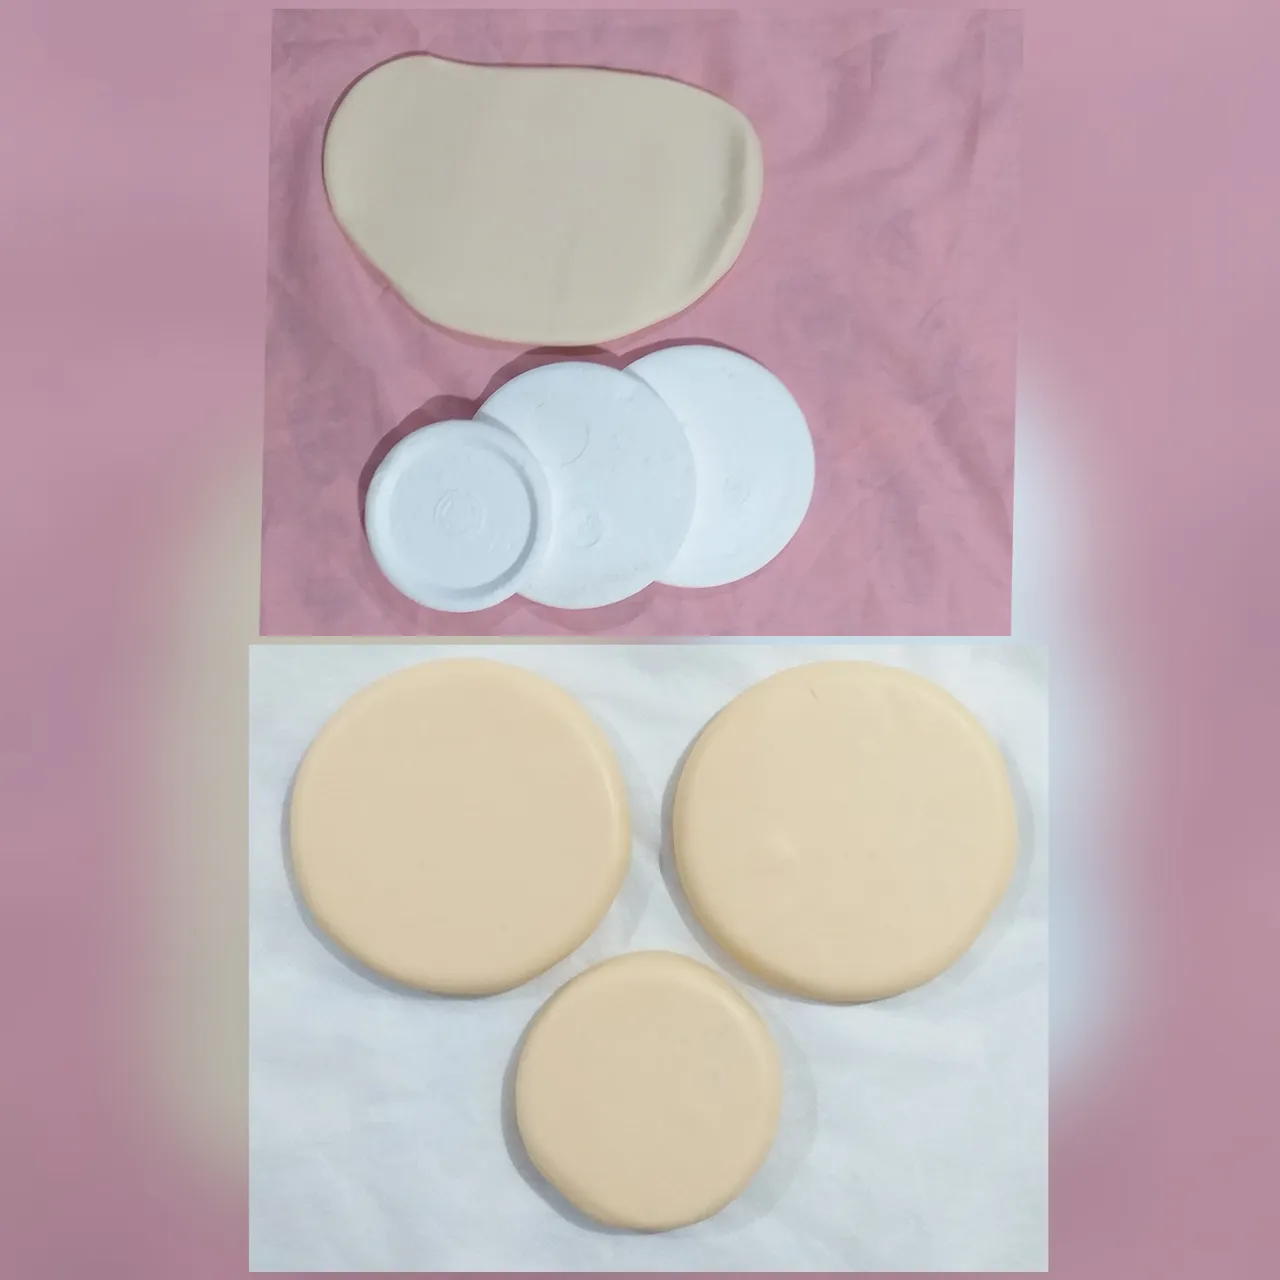
We roll out brown dough, put vinyl glue on all the styrofoam lids and wrap each lid with the cold porcelain.
We superimpose the smallest cap to one of the largest caps.
Estiramos masa color marrón, ponemos cola vinilica a todas las tapas de telgopor y envolvemos cada tapa con la porcelana fría.
Superponemos la tapa más chica a una de las tapas más grande.
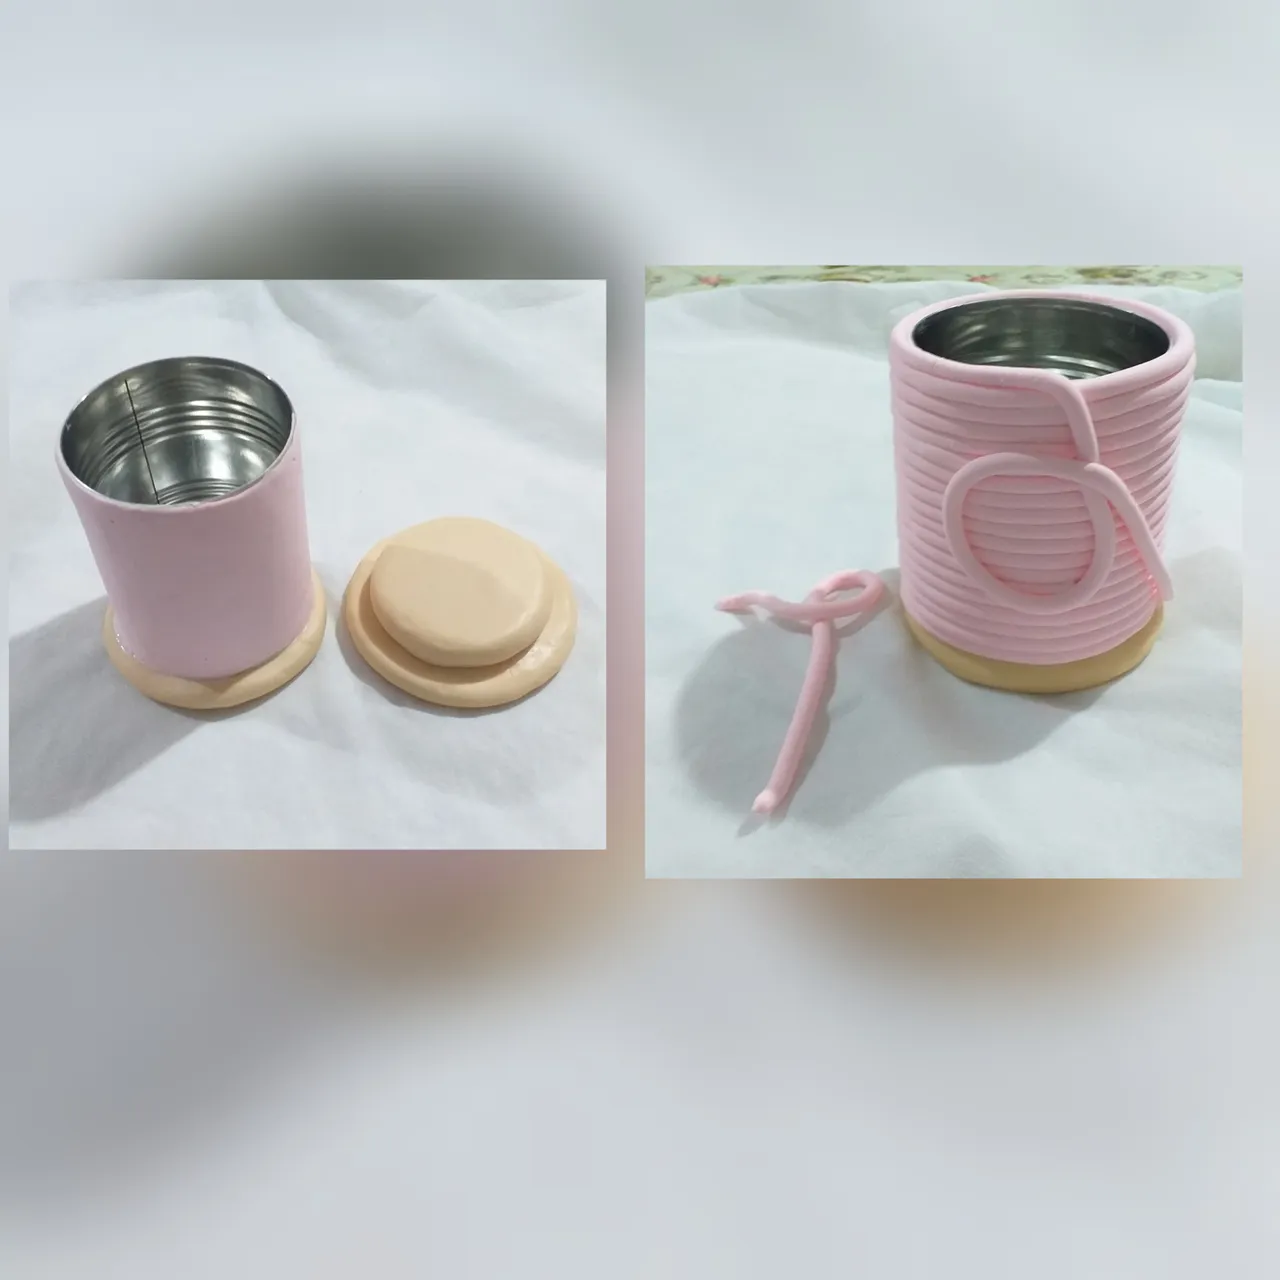
We glued the lid that was left on the base of the can.
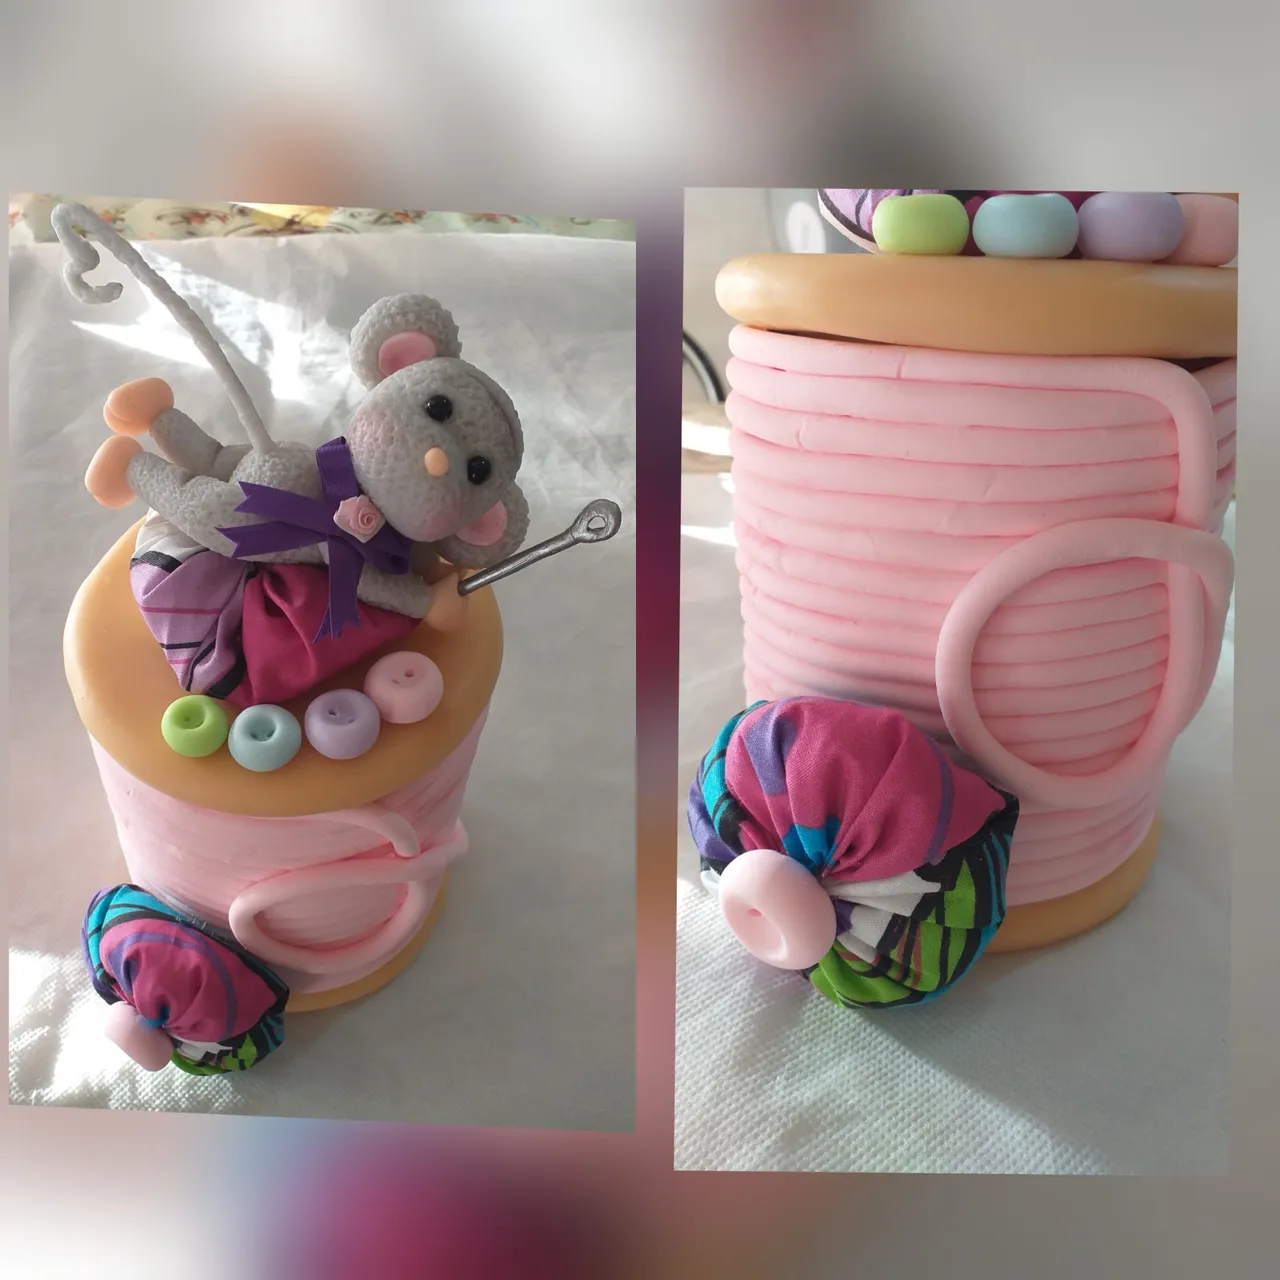
We knead the cold porcelain evenly to simulate the thread.
We cover the whole can with the roll from the bottom up, we can make a loop.
Pegamos la tapa que quedó en la base de la lata.
Amasamos la porcelana fría de forma pareja para simular el hilo.
Cubrimos toda la lata con el rollo desde abajo hacia arriba, podemos hacer un bucle.

We cut two circles of any fabric (about 15 centimeters in diameter), we pass the thread with the needle around the edge and we gather, we fill with fleece.
We make a small porcelain ball that we hollow in the middle and drill by making two small holes to simulate a button which we glue in the center of our little pillow.
We stick one at one end and the other on the top cover.
Cortamos dos círculos de cualquier tela (más o menos 15 centímetros de diámetro), pasamos el hilo con el aguja por todo el borde y fruncimos.Rellenamos con vellón.
Hacemos una bolita de porcelana que ahuecamos en el medio y perforamos haciendo dos pequeños orificios para simular un botón el cual pegamos en el centro de nuestra pequeña almohada.
Una la pegamos en un extremo y la otra en la tapa que va arriba.

For the body of the mouse, we make a ball of dough, insert the foam ball, shape it into a pear and texture with the brush.
Para el cuerpo del ratón hacemos una bolita de masa, introducimos la bola de telgopor, damos forma de pera y texturamos con el cepillo.
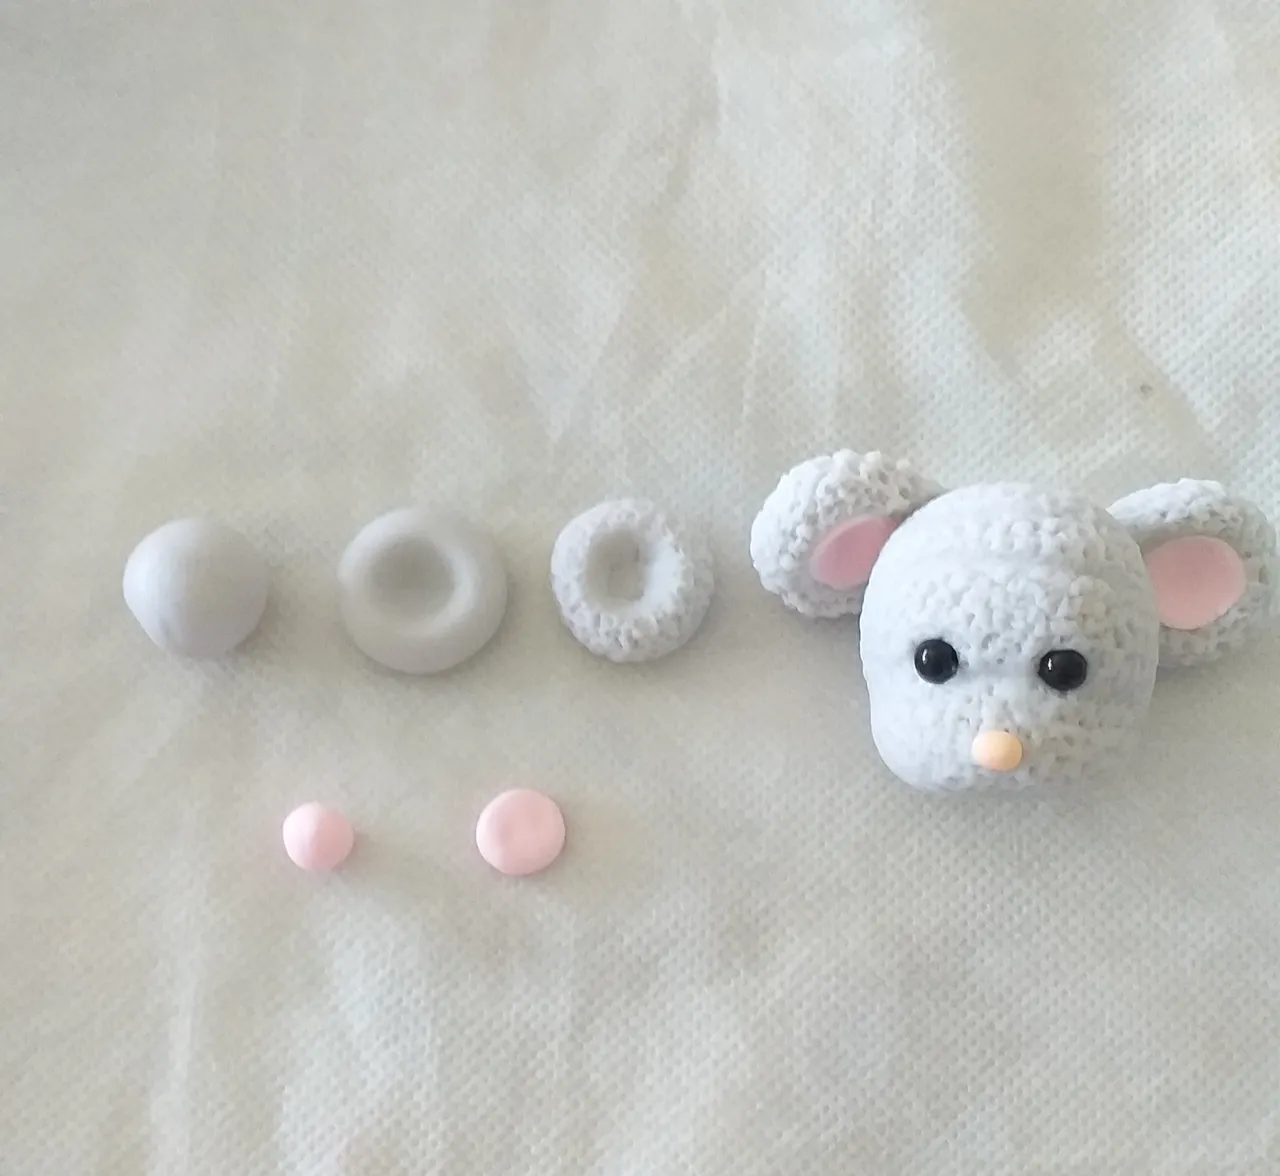
For the mouse head, we repeat the same steps as with the body, but we give it a shorter pear shape.
We put two black pearls for the eyes and a very small ball for the nose.
For the ears we make two equal balls, we hollow out and texture. We fill with a smaller ball that we flatten.
Para la cabeza del ratón repetimos los mismos pasos que con el cuerpo pero le damos forma de pera más corta.
Ponemos dos perlas negras para los ojos y una bolita muy pequeña para la nariz.
Para las orejas hacemos dos bolitas iguales, ahuecamos y texturamos. Rellenamos con una bola más pequeña que aplanamos.

For the hands we make two equal balls, we shape a pear and make a cut in the shape of a "one" to simulate a mitten.
For the legs we repeat the process but we make two soft cuts to mark the fingers (the balls have to be a little bigger than those of the mittens).
For the legs and arms we do the same: we make two equal balls, we knead until one part is finer than the other. We texture.
Para las manos hacemos dos bolitas iguales, damos forma de pera y hacemos un corte en forma de "uno" para simular una manopla.
Para las patas repetimos el proceso pero hacemos dos cortes suaves para marcar los dedos (las bolitas tienen que ser un poco más grande que las de las manoplas).
Para las piernas y los brazos hacemos lo mismo: hacemos dos bolitas iguales, amasamos hasta que quede una parte más fina que la otra. Texturamos.
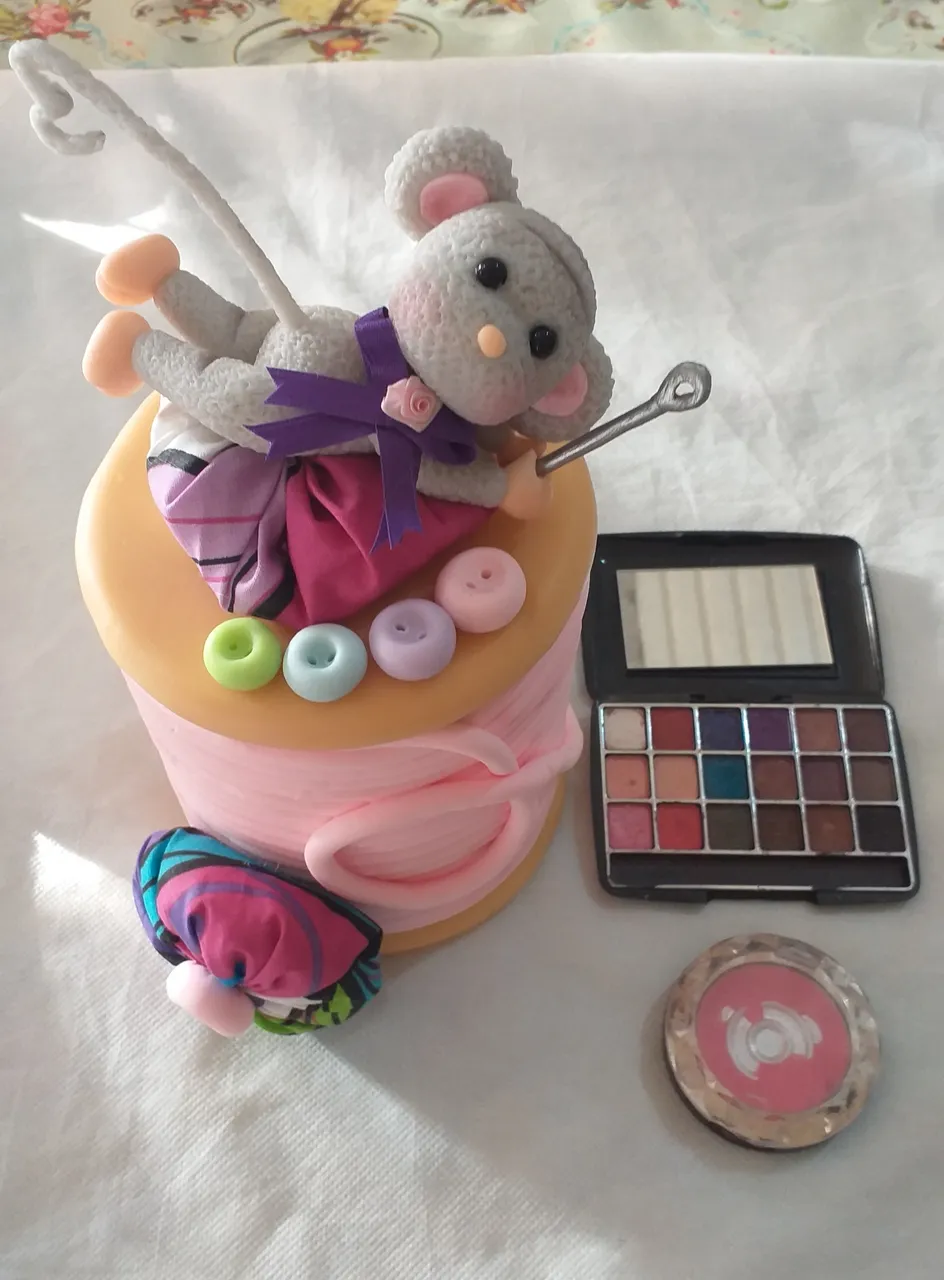
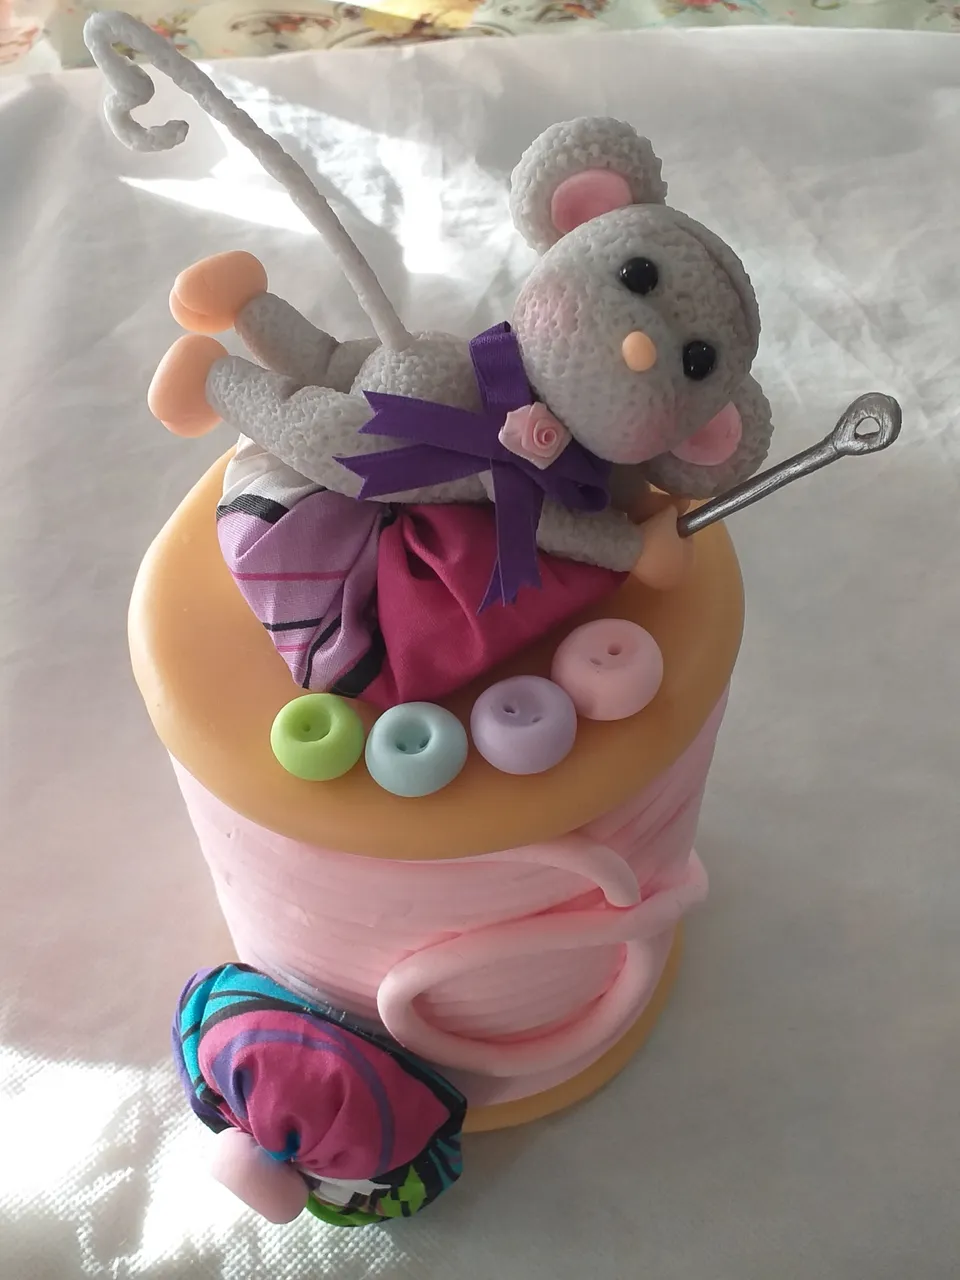
We join all the parts of the mouse and glue it on the top lid, we add the tail.
We use a toothpick that we cover with a little dough and paint silver for the needle.
With cold porcelain of different colors we make several buttons.
With ribbon we make a bow and stick it on the neck. We finally put on makeup.
Unimos todas las partes del ratón y lo pegamos en la tapa de arriba, le agregamos la cola.
Usamos un palillo que cubrimos con un poco de masa y pintamos de plateado para la aguja.
Con porcelana fría de diferentes colores hacemos varios botones.
Con cinta hacemos un moño y lo pegamos en el cuello. Finalmente maquillamos.
And so we finish another beautiful job, hopefully they can be useful. Greetings. Andrea
Y así terminamos otro bello trabajo, ojala le puedan dar utilidad. Saludos. Andrea