My son is 9 year old this year, he loves creative stuffs and wanted to start doing small wood working projects which is great. He some times help me with my own projects when I need hands with holding boards or painting and finishing wood. As I work in the garage, he often comes with me and play with my hand tools and do children stuffs with my wood offcuts.
Recently, he's been collecting sandstones and breaking them into powder and pretend it's concrete when mixing with water. So I built him a mini anvil for him to use to break the rocks with the hammer.
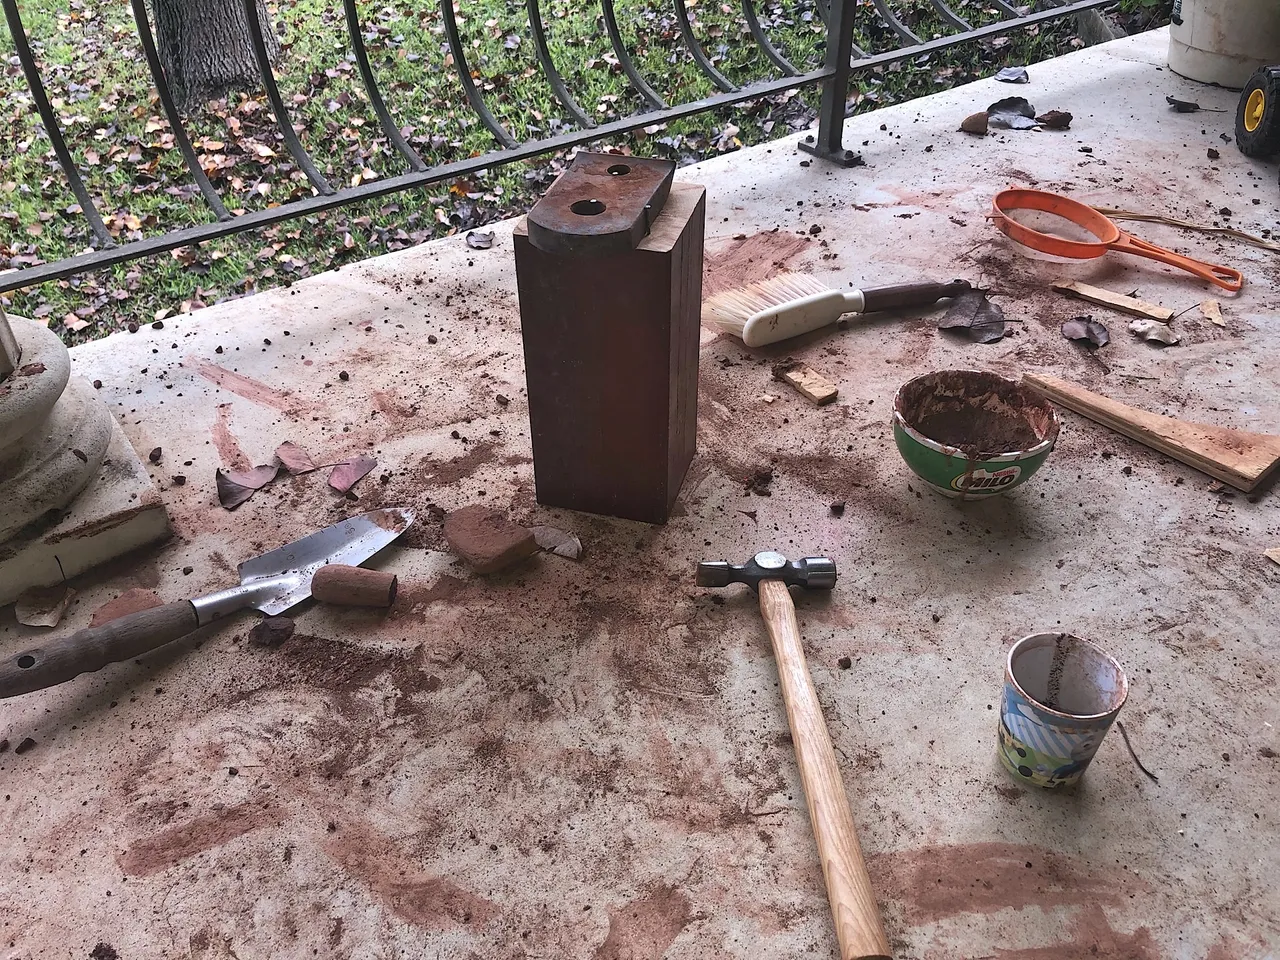
He's been making a real mess on the balcony but that's way better than him spending too much time on the TV or the console.
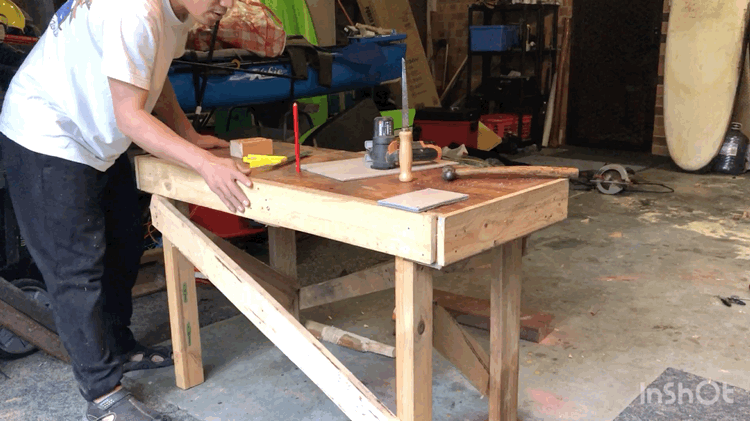
After a week or so, I thought maybe I should build him a proper workbench with the steel plate mounted on it so he can organise his stuff and he won't need to sit down on the floor bending his back.
So I went in the garage and picked some pallet wood and offcuts and started the work. Lacking of wood, I started to dismantle some old unused project and San helped me removed the screws that held them together. We started with a hand screwdriver but it was too tight for him so I thought I would introduce him to his first power tool, the drill.
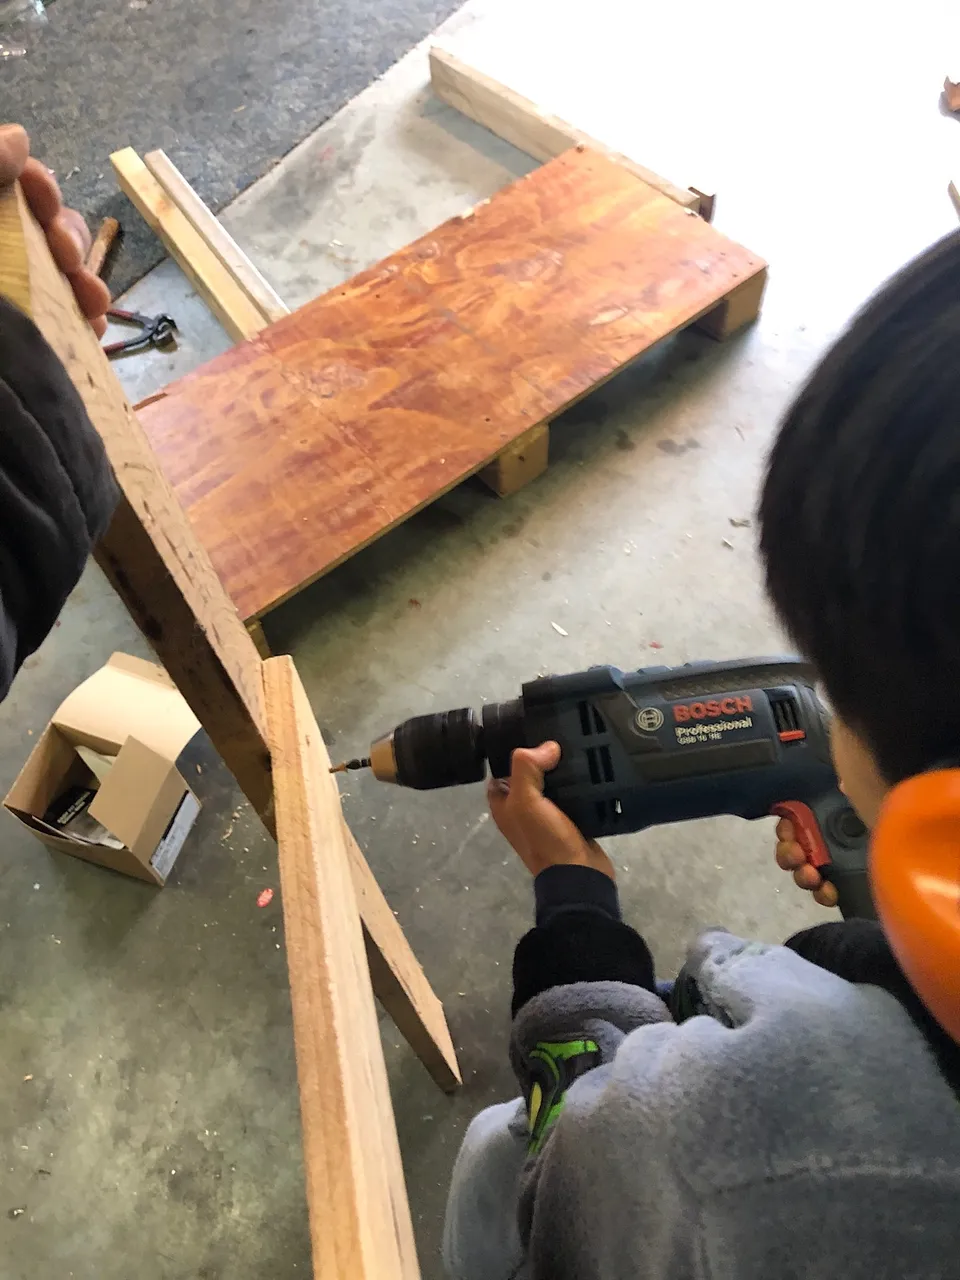
He quickly learned how to hold the drill and discovered that angle and pressure is important.
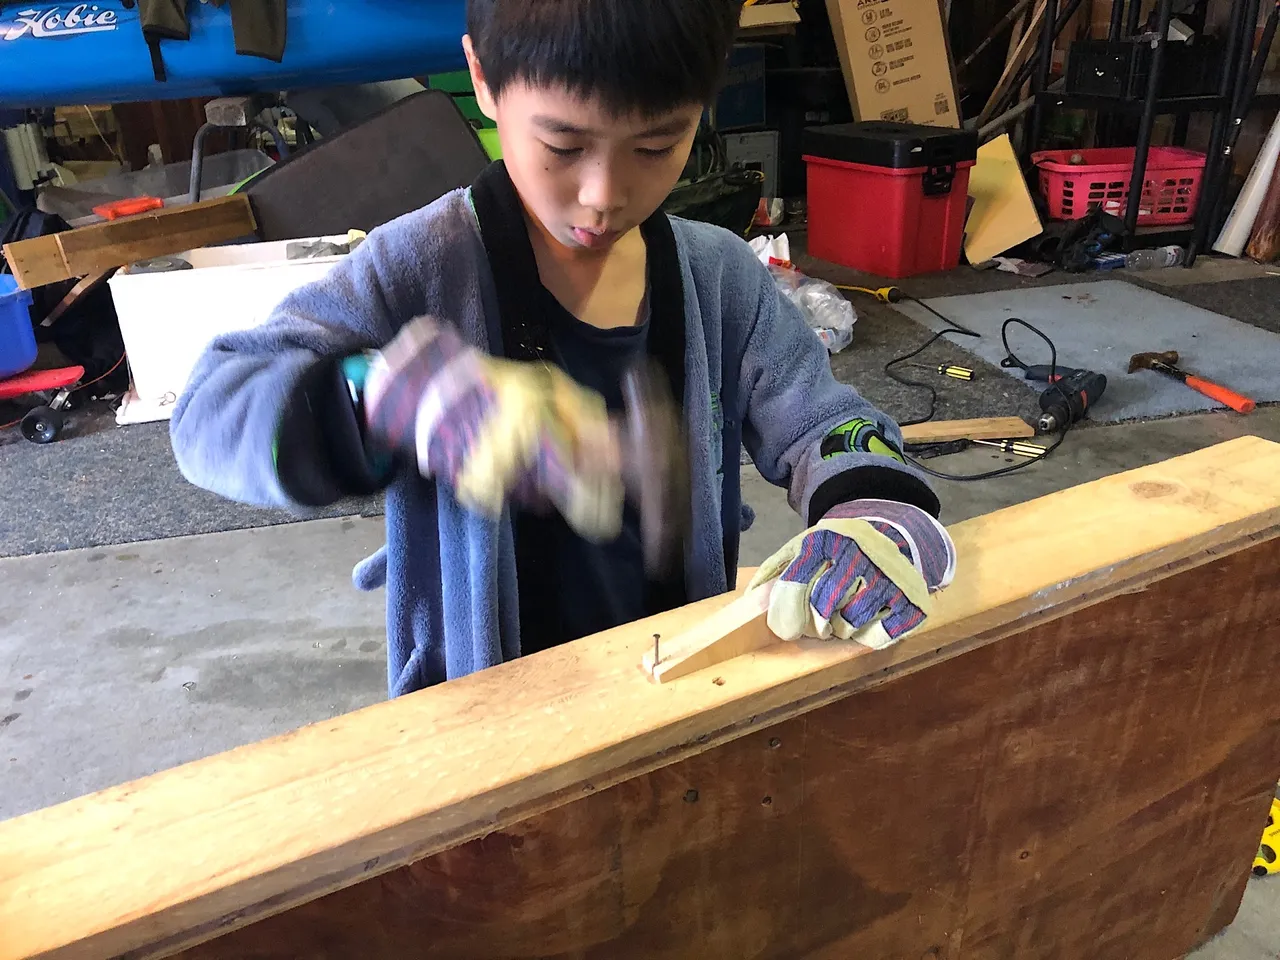
He then helped me hammering nail onto some wooden board around the wooden pallet. I showed him how to make a simple nail hammering jig that will not only help him nail straighter but will also protect his fingers from the hammer blows.
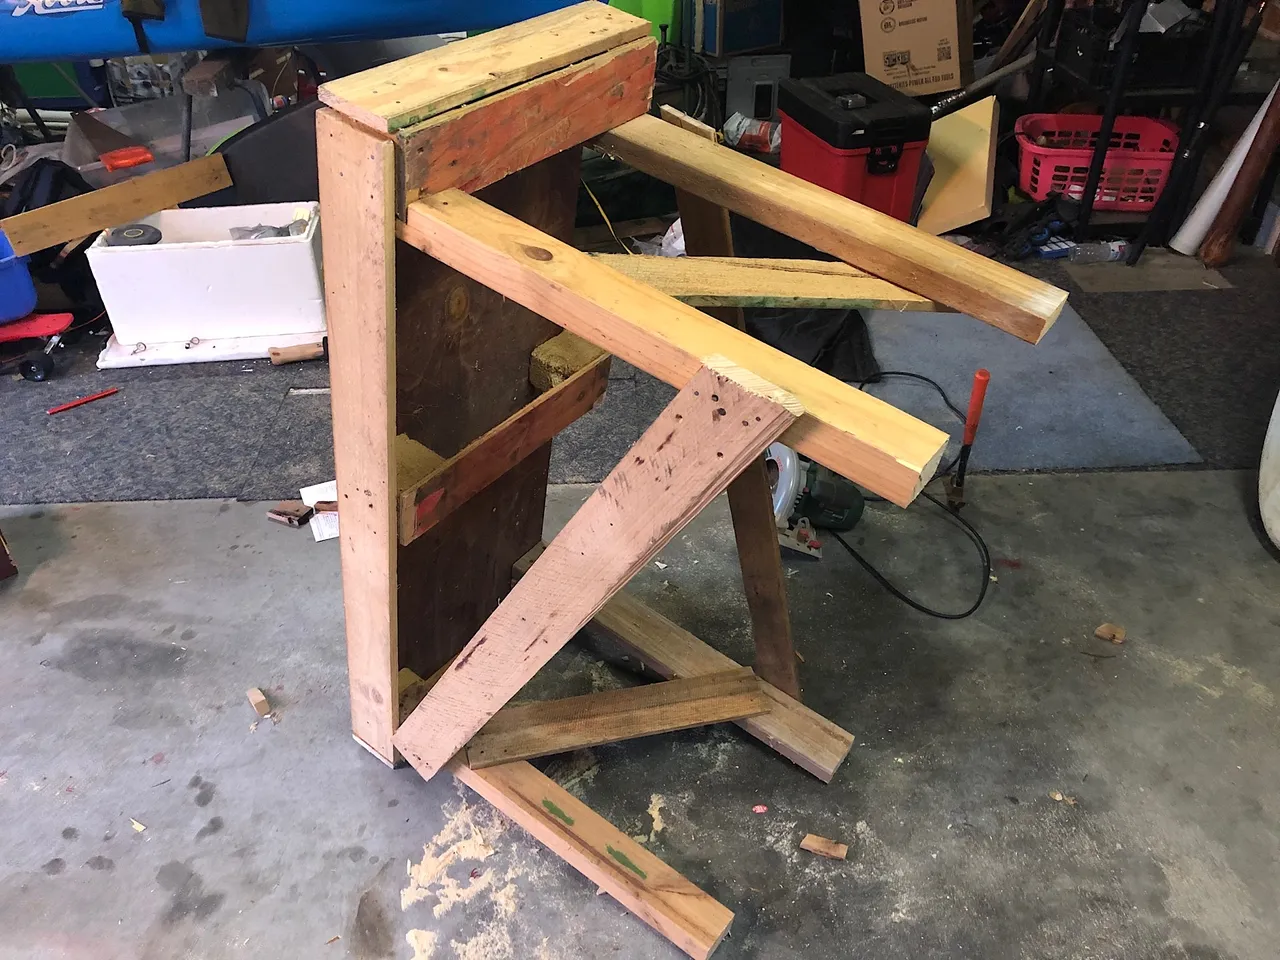
After the four legs made, we tested the workbench and of course it was super wobbly. So we started to nail in some braces to reinforce and stabilise the legs and the finished results was super stable. We also adjusted the length of the legs to make sure the top is at his waist level, I did measure the wood before nailing but I forgot to take into consideration the thickness of the pallet.
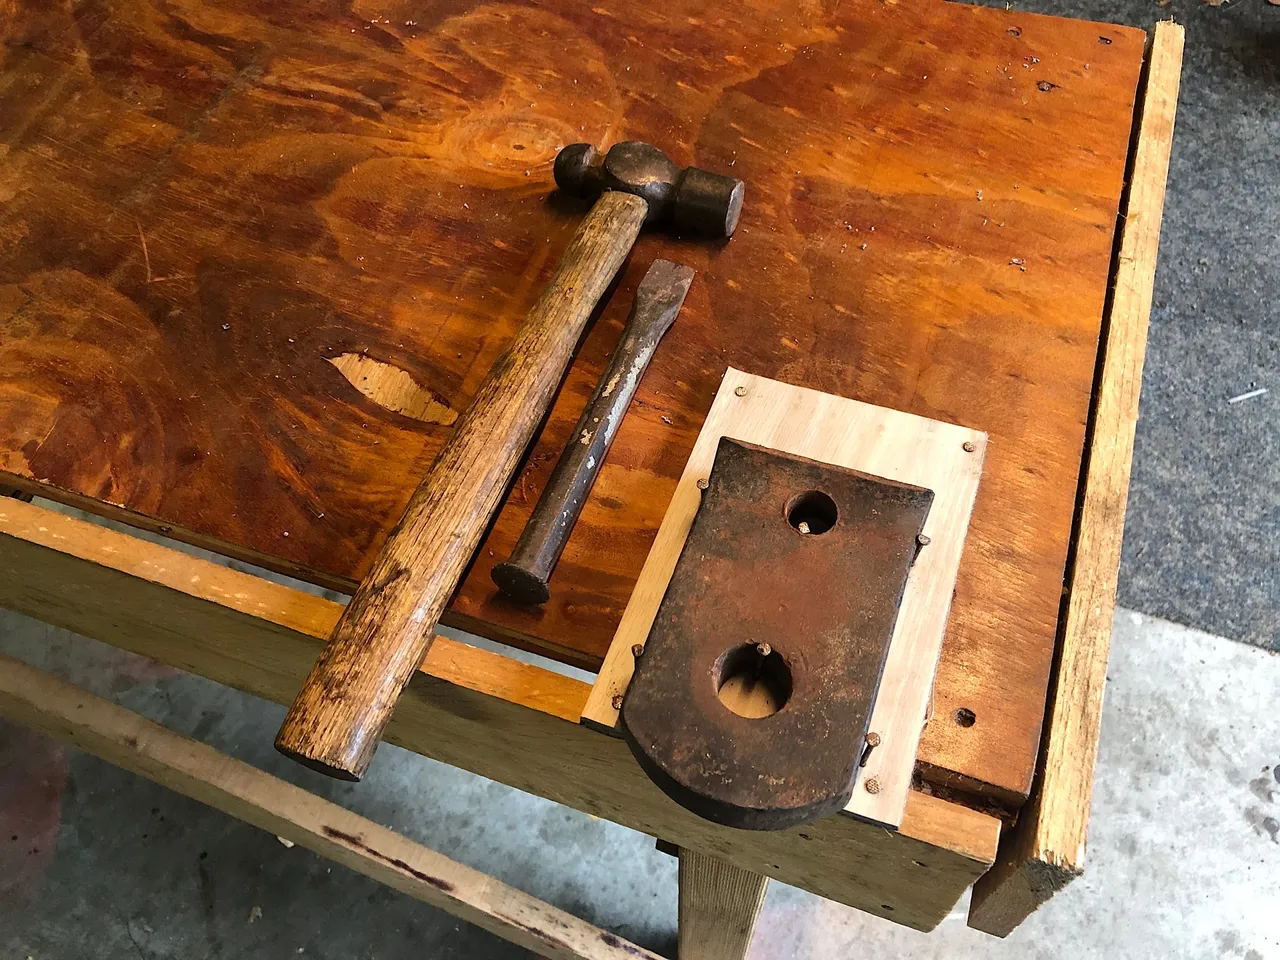
Now it's time to remove the steel plate from his previous anvil and install it on the workbench at the corner right above one of the legs. I added some offcuts of vinyl boards to dampen the sound.
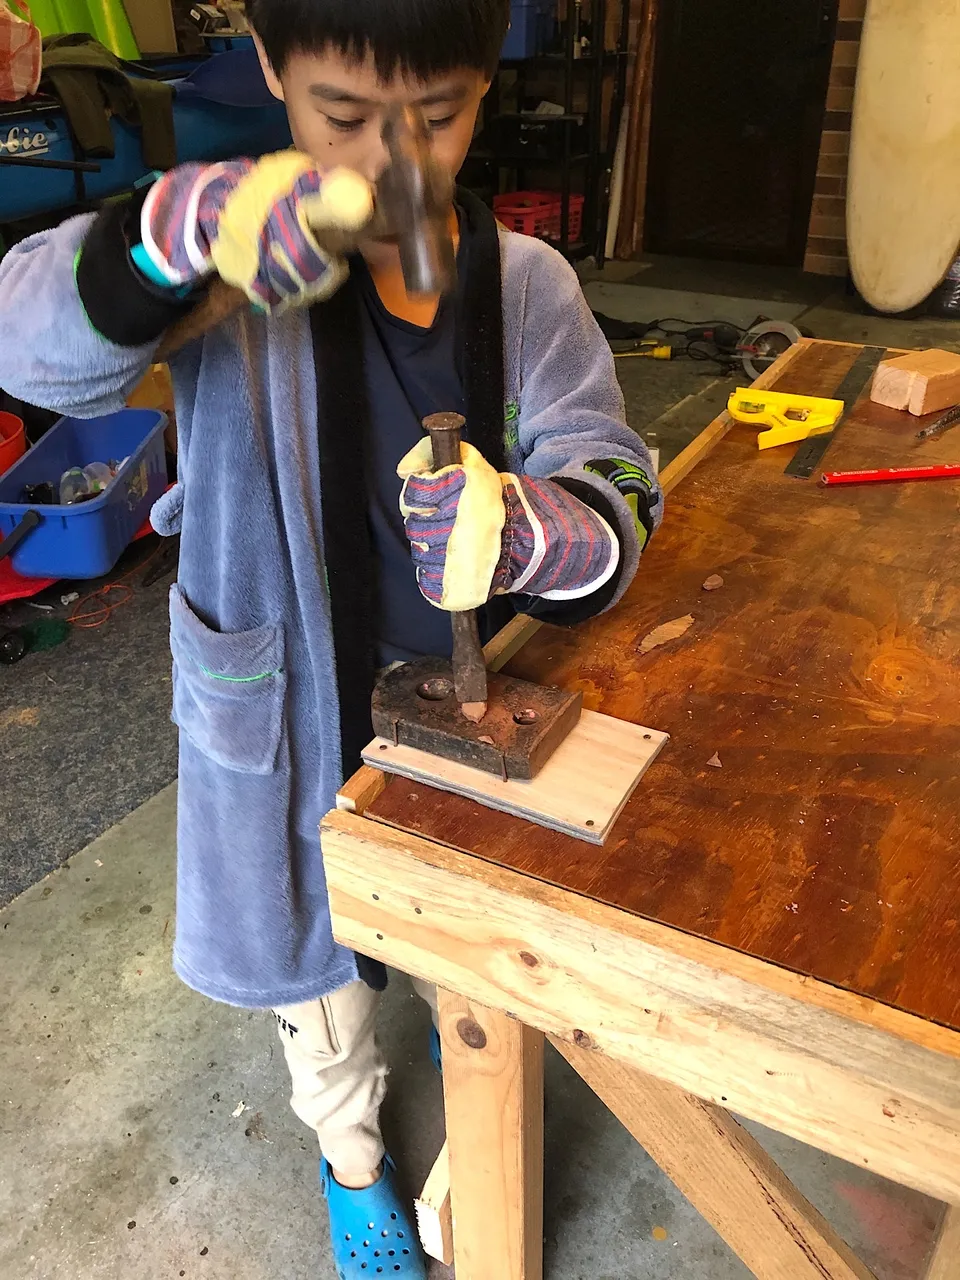
Time to test if everything works and San is playing with an old coal chisel and tried to break a little stone with it.
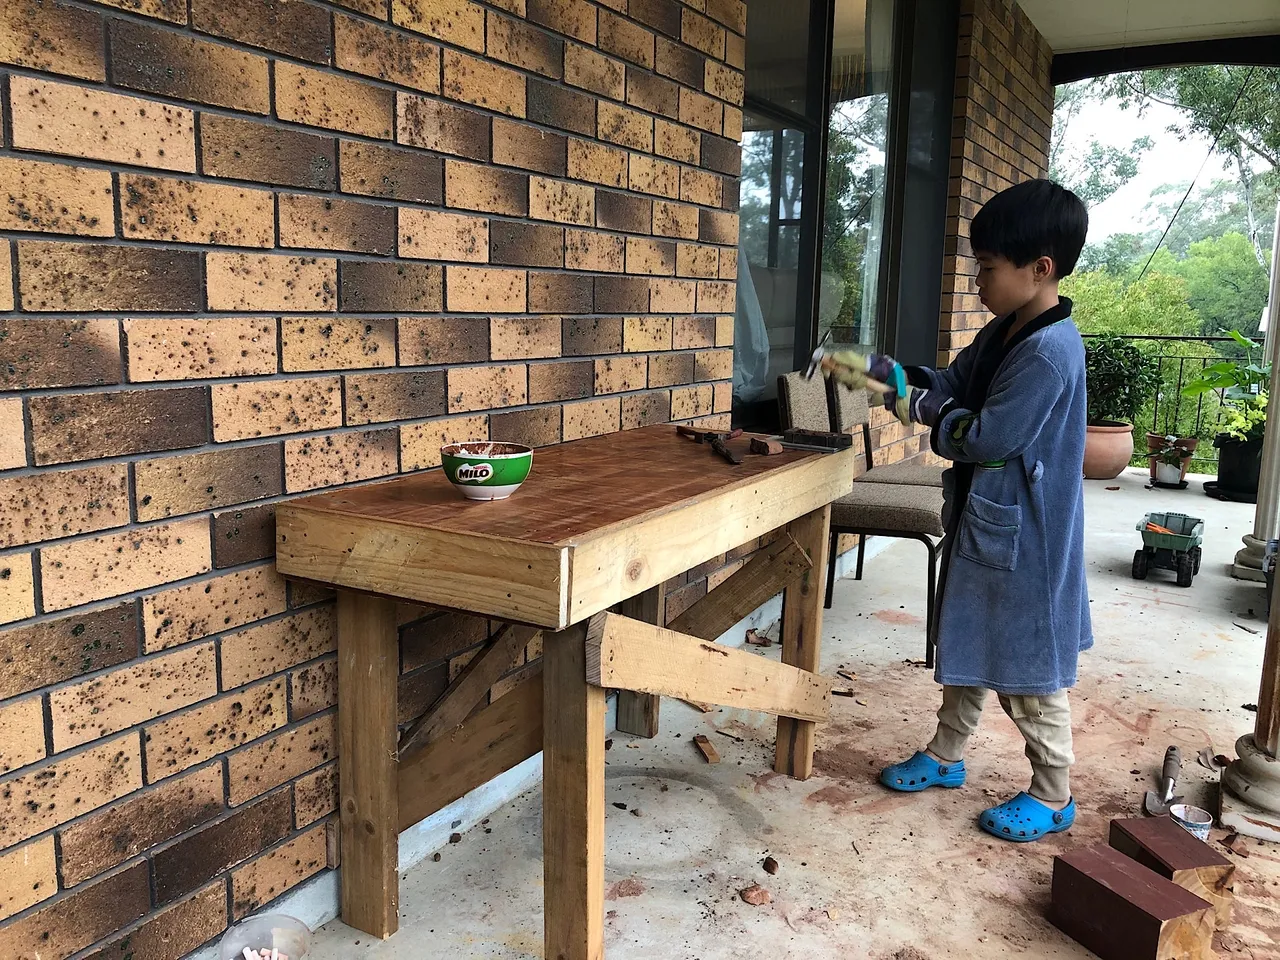
The workbench is now ready and installed on the balcony.
![]()
I'm also a Hive Witness, I have been helping some communities and contributing to the Condenser (the software that powers this blogging platform). Support me by voting for my Witness