Mis queridos amigos de hive, espero que se encuentren bien y estén aprovechando al máximo la semana, para continuar con mis publicaciones hoy les vengo a compartir mi idea de cómo elaborar una hermosa maraquita con la cáscara de huevo ,acompáñame a realizarlo.
My dear friends of hive, I hope you are well and are making the most of the week, to continue with my publications today I come to share my idea of how to make a beautiful maraquita with eggshell, join me to make it.


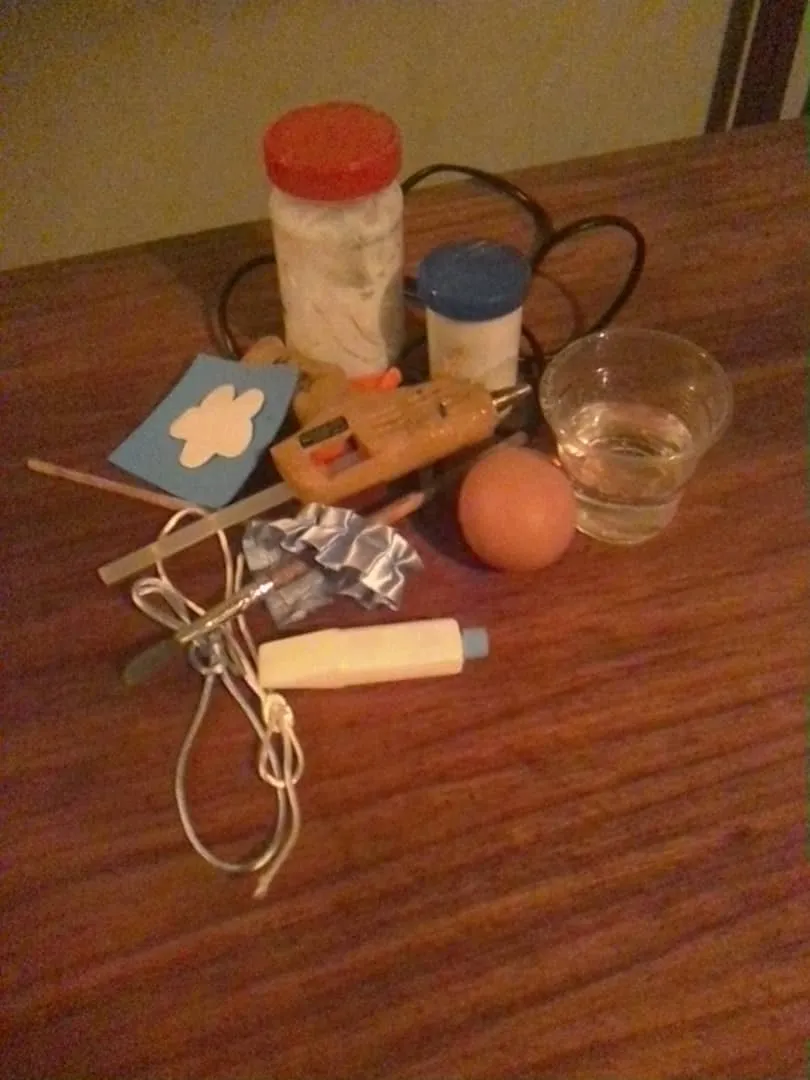
- 1 cáscara de huevo.
- 60 cm de cinta cola de ratón(30 cm blanca y 30 cm azul)
- Pintura al frio blanca.
- Palito de madera o palito de altura.
- 1 cucharadita de arroz.
- Silicón en barra.
- Un pincel.
- Pega blanca.
- Cinta de raso plisada(12 cm)
- Foami azul tamaño 7x7 cm.
- Patrón de florecita.
- 1 eggshell.
- 60 cm of mouse tail ribbon (30 cm white and 30 cm blue).
- White cold paint.
- Wooden stick or height stick.
- 1 teaspoon of rice.
- Silicone stick.
- A paintbrush.
- White glue.
- Pleated satin ribbon (12 cm).
- Blue Foami size 7x7 cm.
- Little flower pattern.
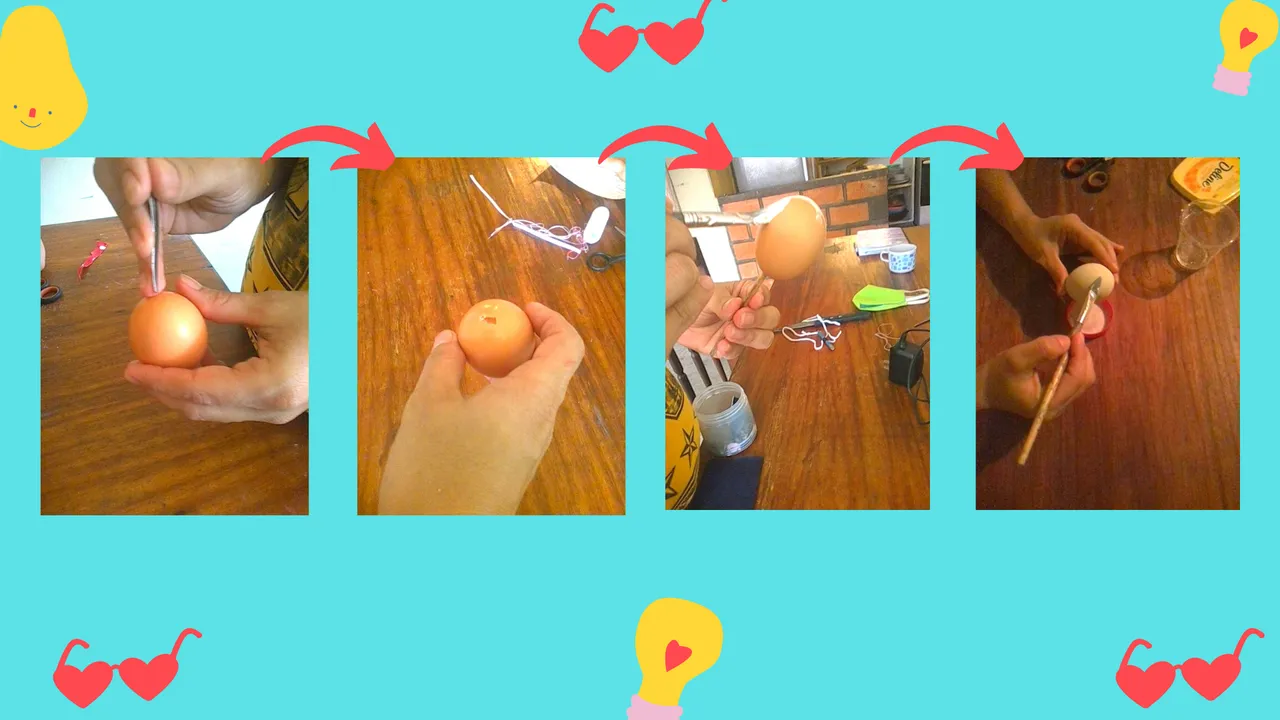
Seleccionamos un huevo, con la punta de un cuchillo le realizamos un pequeño agujero para extraerle la clara y la yema, lavamos muy bien y con mucho cuidado para no romperlo, ponemos a escurrir.
Luego con la pintura al frio pintamos la cáscara de manera uniforme, aplicamos de 2 a 3 capas hasta cubrir bien, dejamos secar.
We select an egg, with the tip of a knife we make a small hole to extract the white and yolk, wash very well and very carefully so as not to break it, we put to drain.
Then with the cold paint we paint the shell evenly, apply 2 to 3 coats until well covered, let it dry.
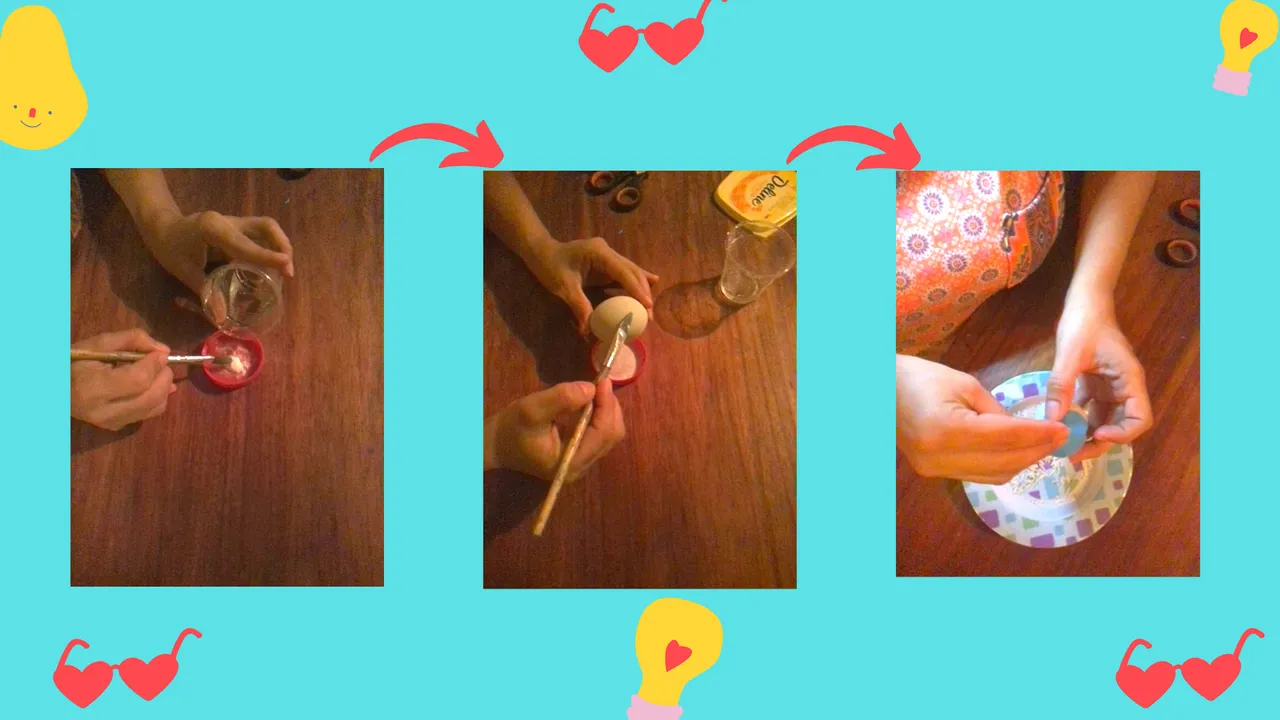
- Una vez que la pintura esté completamente seca, colocamos un poquito de pega blanca en una tapita y ligamos con agua, tratemos que sea la misma cantidad, con ésta mezcla pincelamos la cáscara y esperamos que seque, hacemos este procedimiento 2 o 3 veces, esto le dará brillo y firmeza a la cáscara.
- Once the paint is completely dry, put a little bit of white glue in a small cap and bind with water, try to be the same amount, with this mixture we paint the shell and wait for it to dry, we do this procedure 2 or 3 times, this will give brightness and firmness to the shell.
- Por la abertura que le hicimos anteriormente a la cáscara vamos a introducir la cucharadita de arroz.
- Through the opening we previously made in the shell we will introduce the teaspoon of rice.
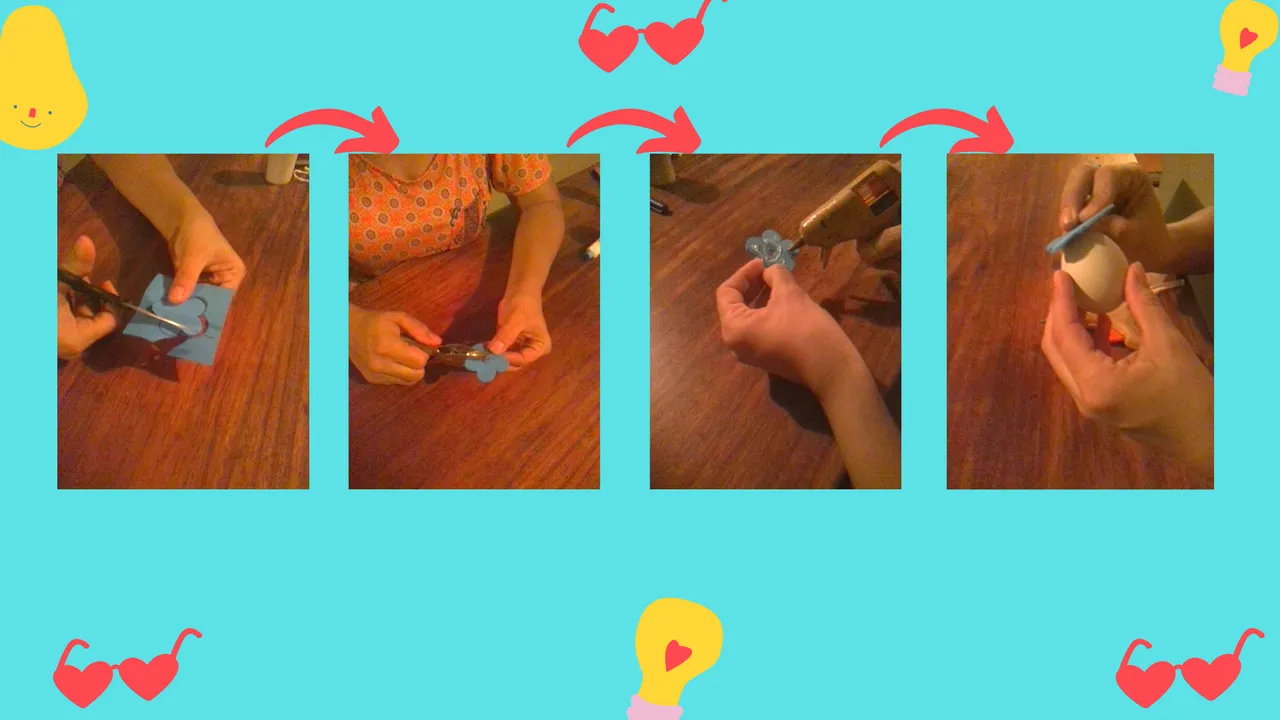
- Tomamos la pieza de foami, sacamos la forma de una flor, esto será como una base, le abrimos un pequeño huequito y pegamos en la cáscara, en este paso introducimos el palito de madera por el centro de la flor y fijamos con silicón.
- We take the piece of foami, we take the shape of a flower, this will be like a base, we open a small hole and glue it on the shell, in this step we introduce the wooden stick through the center of the flower and fix it with silicone.
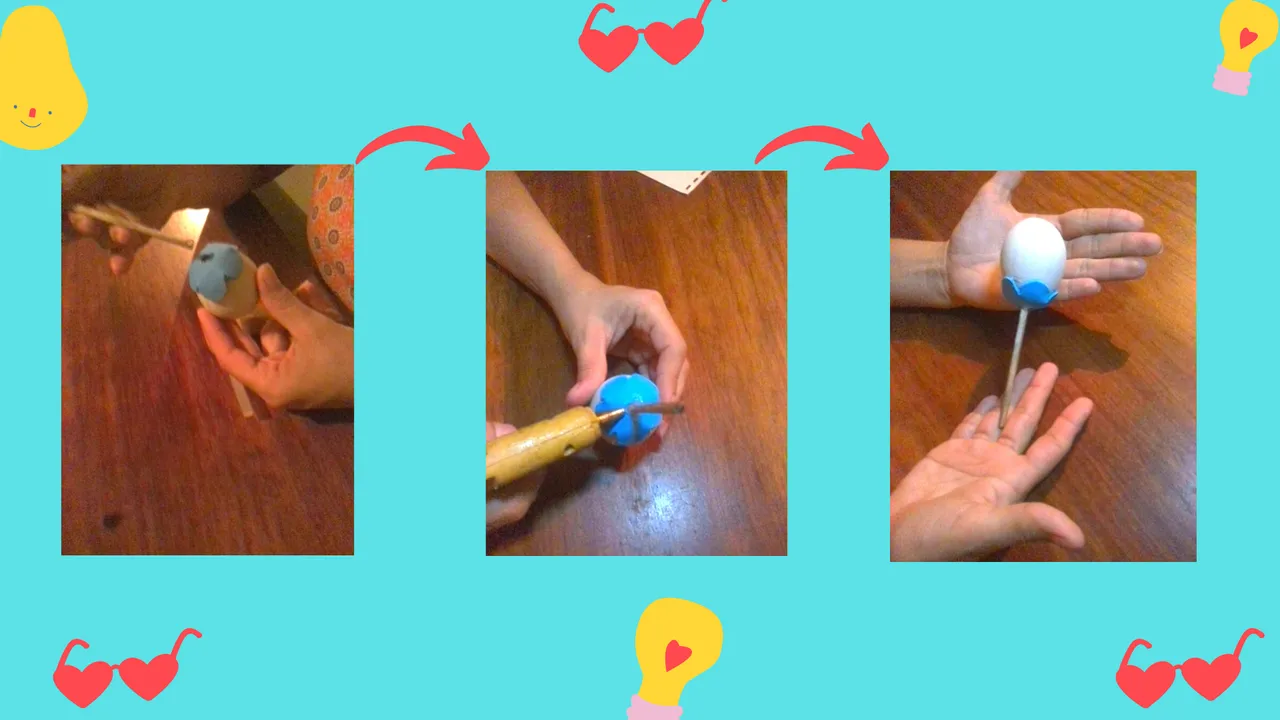
- Ahora forramos el palito de madera con las cintas de cola de ratón, la colocamos juntas, unimos sus puntas y pegamos.
- Now we cover the wooden stick with the ribbons of mouse glue, place them together, join their ends and glue.
- Finalmente decoramos con la cinta raso plisada de un extremo a otro.
- Finally we decorate with the pleated satin ribbon from one end to the other.

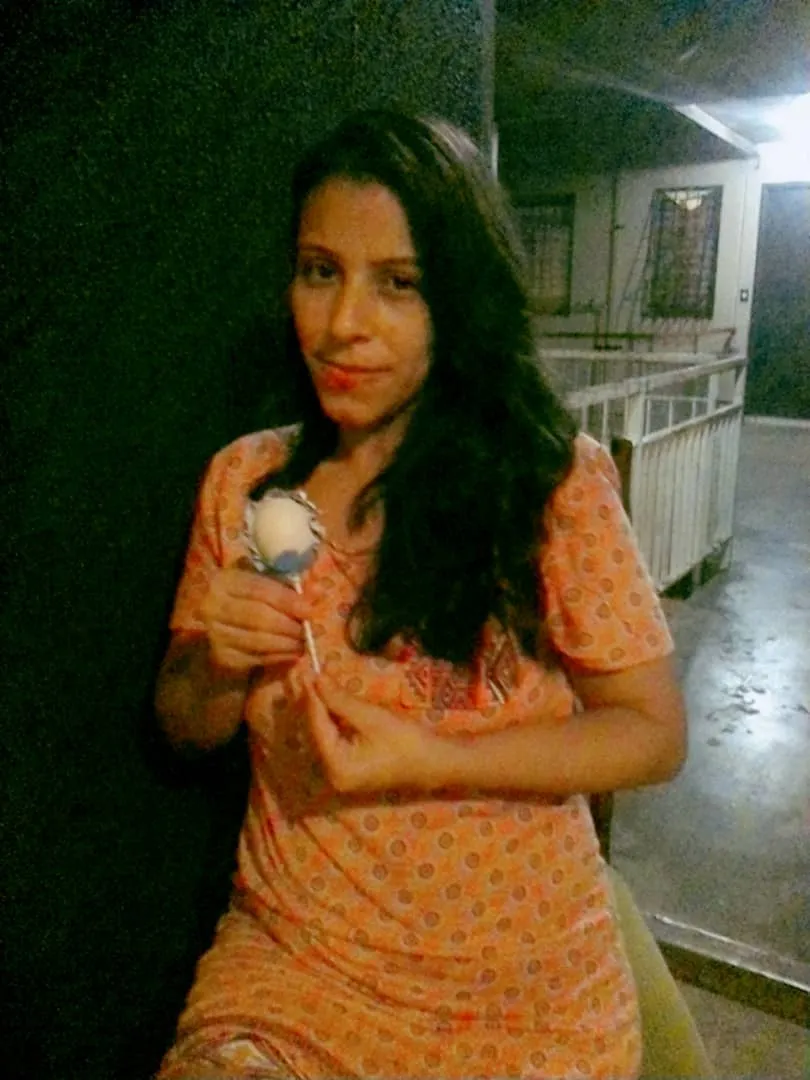
This is a very cool idea that can be used as baby shower favors or for the birth of your baby, I hope you like it and are encouraged to do it.