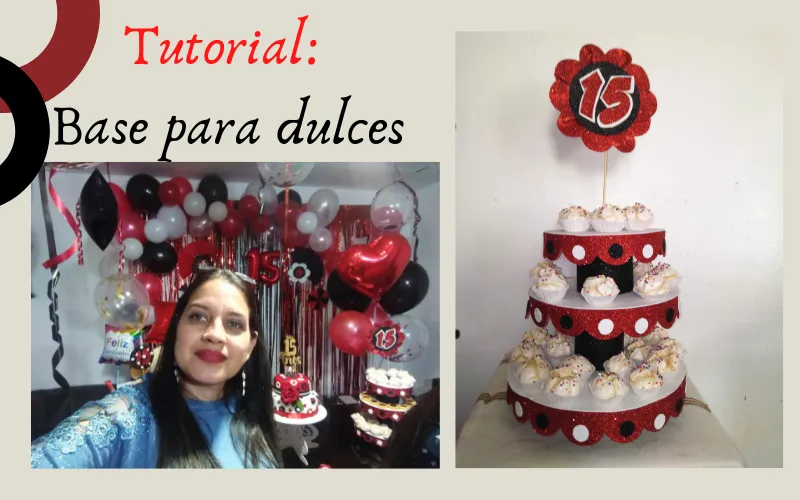

Estoy emocionada al elaborar este proyecto porque tiene un significado muy especial para mi. Se trata de una base para cupcakes y dulces de las que se colocan para decorar la mesa en los cumpleaños.
En esta oportunidad es para el cumpleaños número 15 de mi querida sobrina, y me produce mucha emoción colaborar con la decoración de la pequeña e intima fiesta para celebrar una ocasión tan especial.
Hello my dear creative friends. Today I am happy to come and share with you my new crafting and recycling project.
I am excited to make this project because it has a very special meaning for me. It is a base for cupcakes and candies of those that are placed to decorate the table on birthdays.
This time it is for my dear niece's 15th birthday, and I am very excited to collaborate with the decoration of the small and intimate party to celebrate such a special occasion.

- Cartones de cajas
- Foami escarchado en los colores negro, blanco y rojo.
- Tijeras
- Cutter
- Silicon liquido
- Silicon en barra
- Cinta adhesiva
- Box cartons
- Frosted Foami in the colors black, white and red.
- Scissors
- Cutter
- Liquid silicon
- Silicon stick
- Adhesive tape

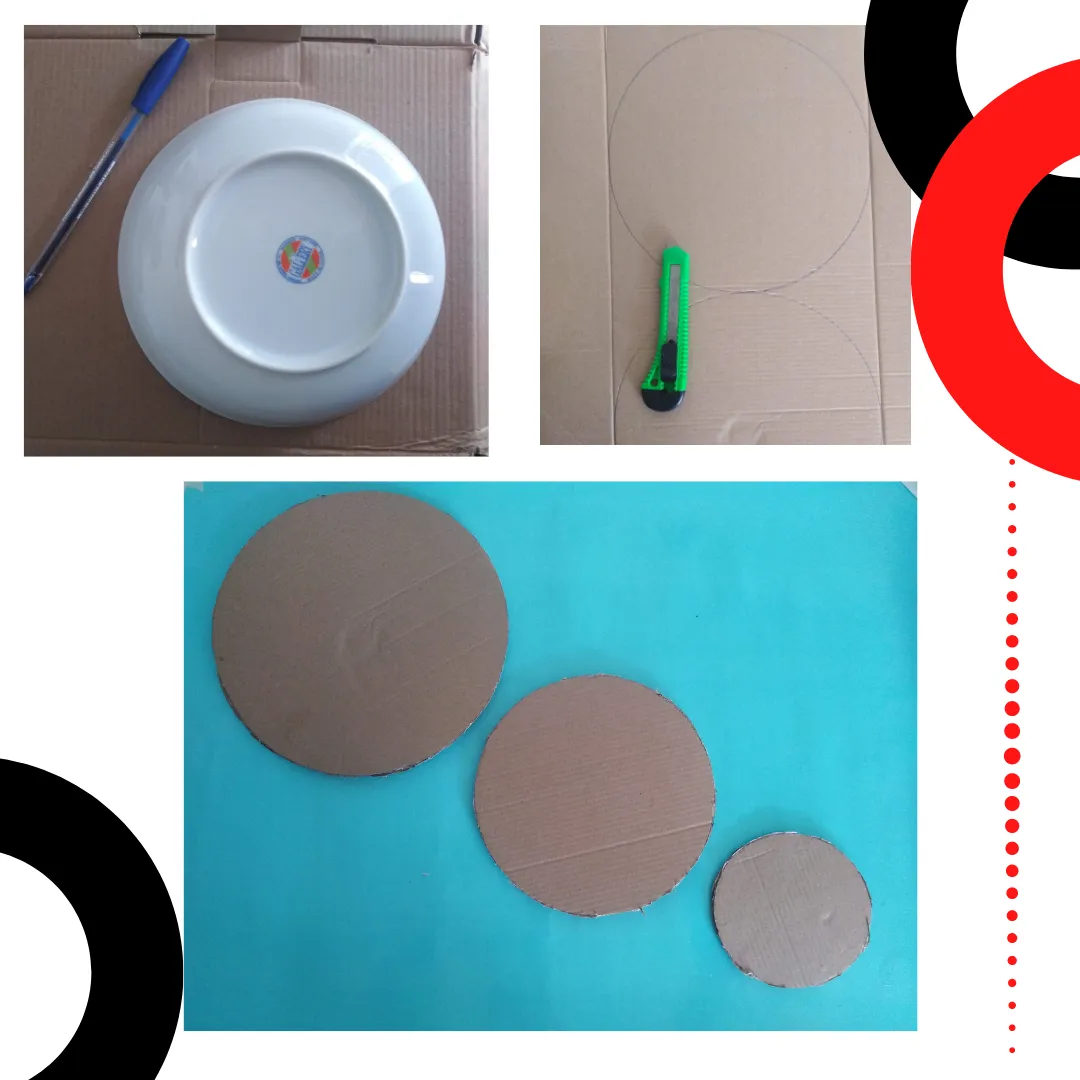
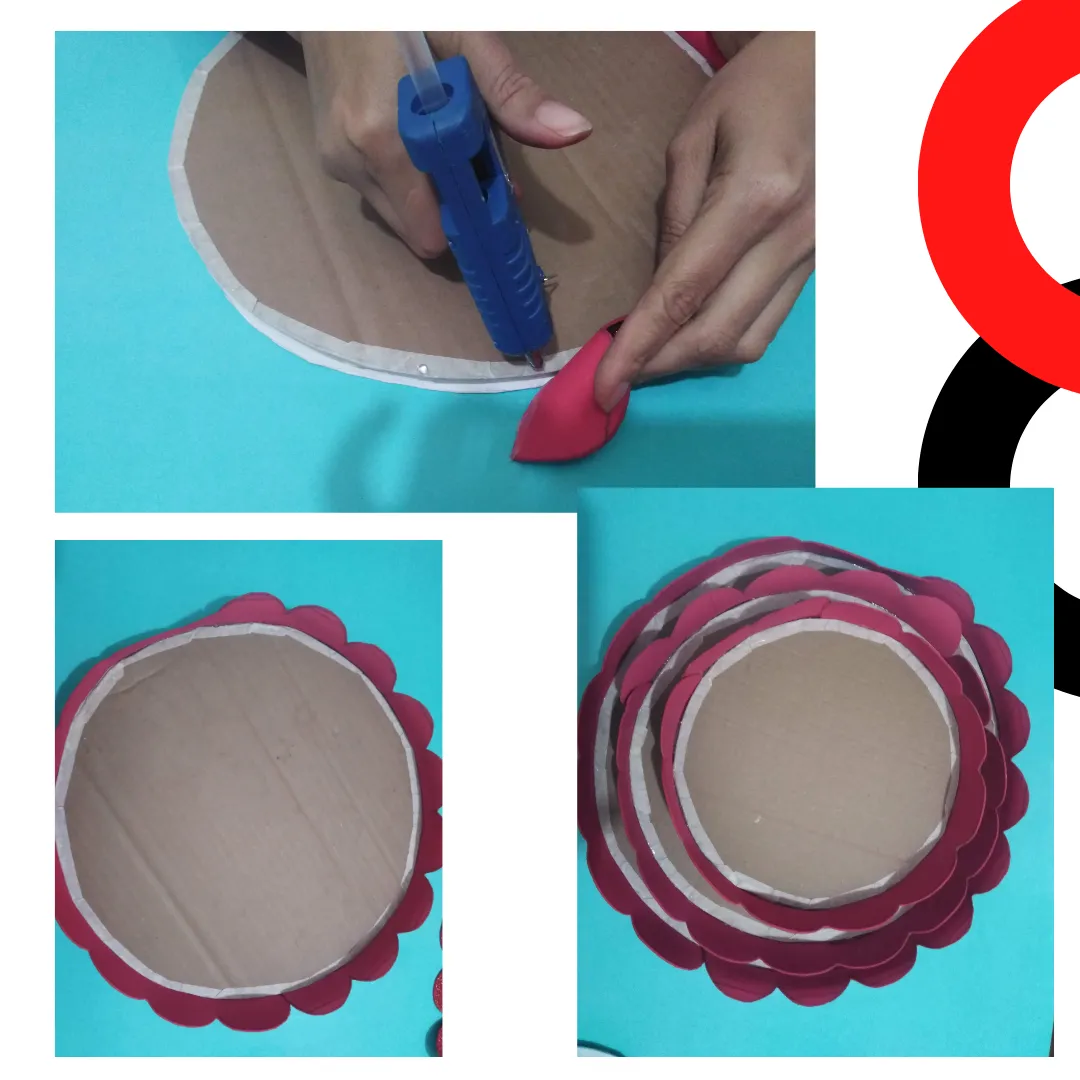
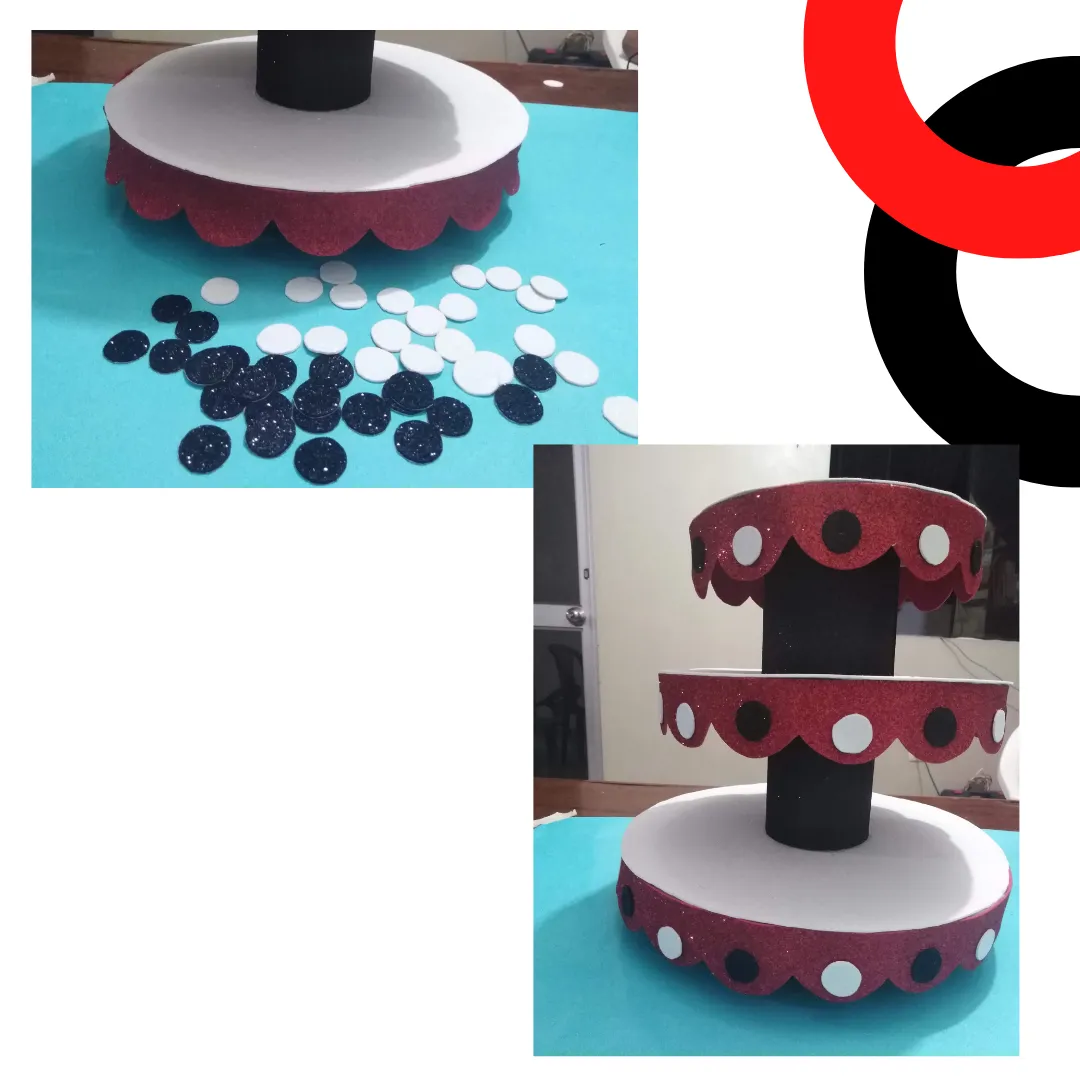
Since I am going to make a circular base with three levels, I must mark on the cardboard three circles of different sizes, and then cut them out with the cutter. Since the cardboard I used is not that thick, I cut out two pieces of each size.
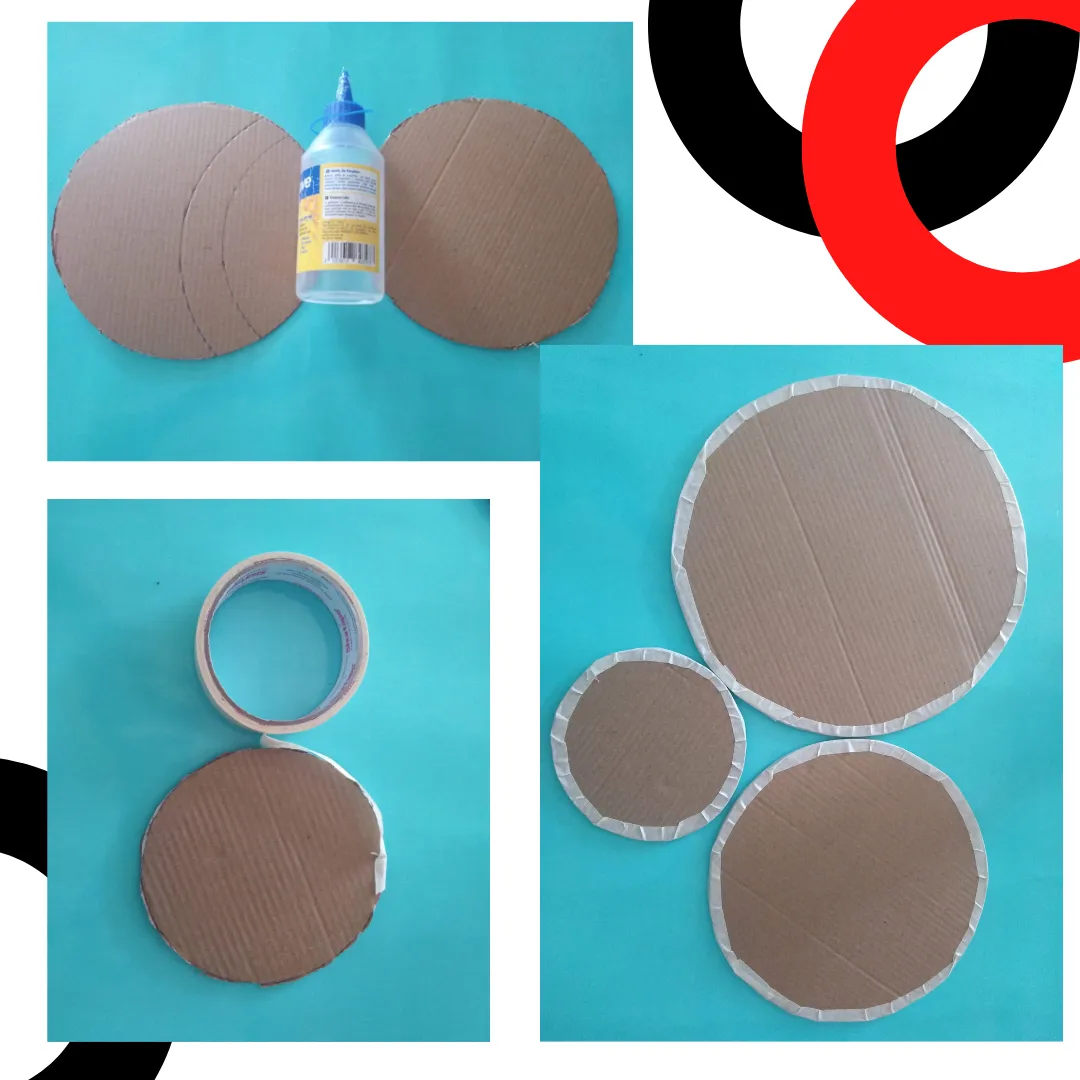
Then, I joined the two pieces of the same size, gluing them together with liquid silicone. Then I put tape all around the edge of the cardboard discs, so that they would be more secure and easier to work with the foami.
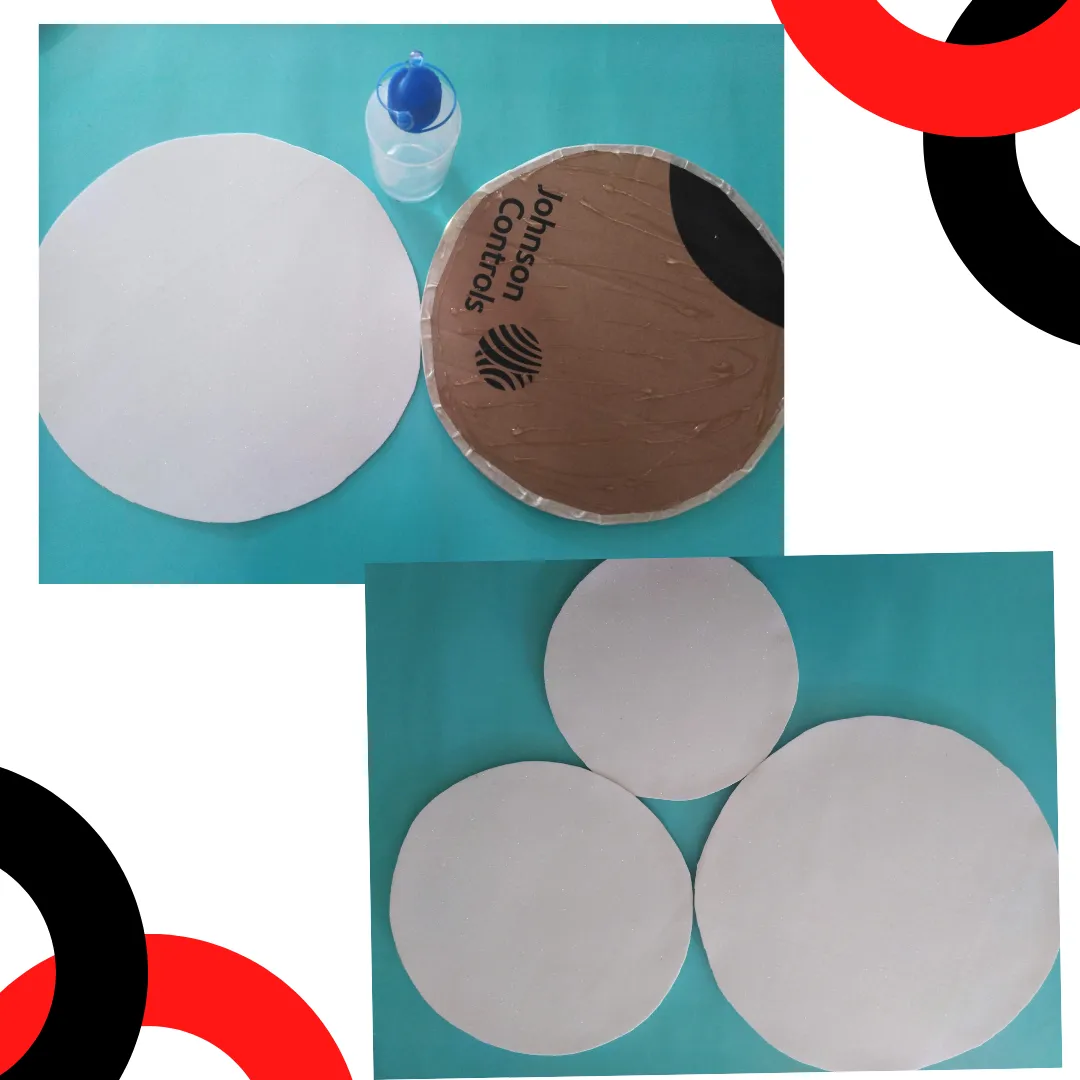
Then I lined the cardboard discs with white frosted foami.
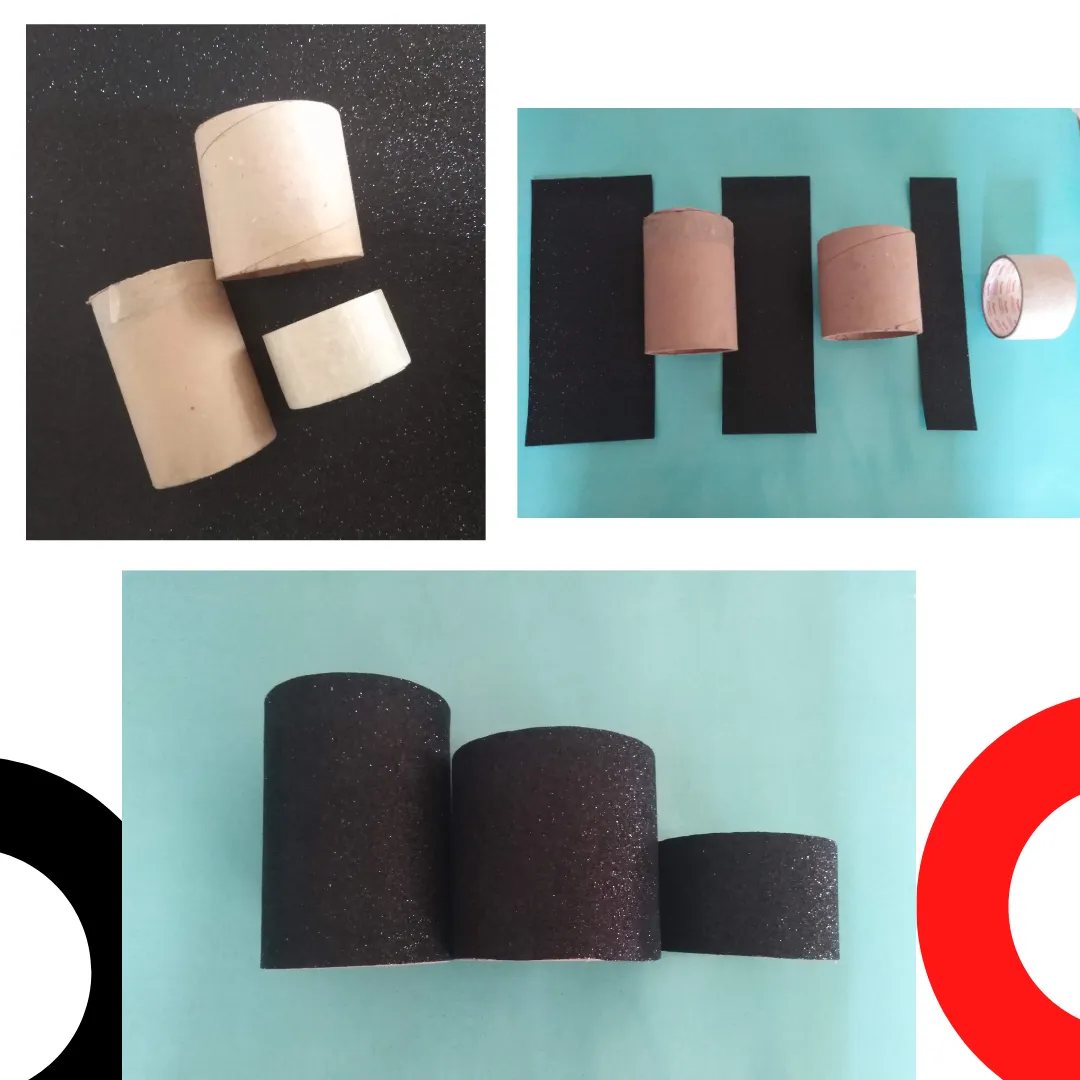
For the center of the base, I used three very thick and resistant cardboard cylinders. I lined these cylinders with black frosted foami.
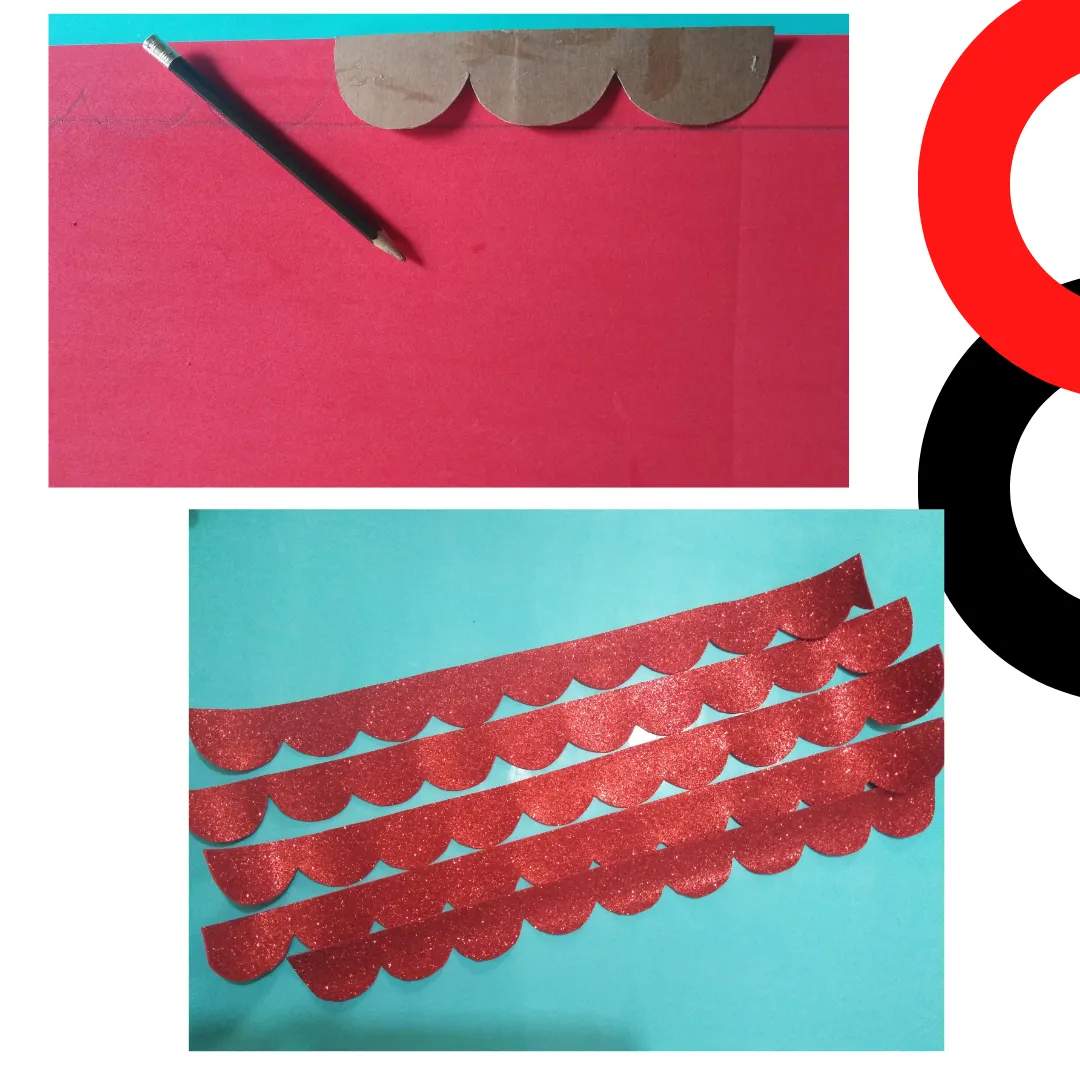
To decorate the discs, I marked and cut out several strips of red foami with semi-circular waves.
Then I glued the red foami strips on the edge of the three circles. For this I used the silicone gun, as it dries much faster than liquid silicone.
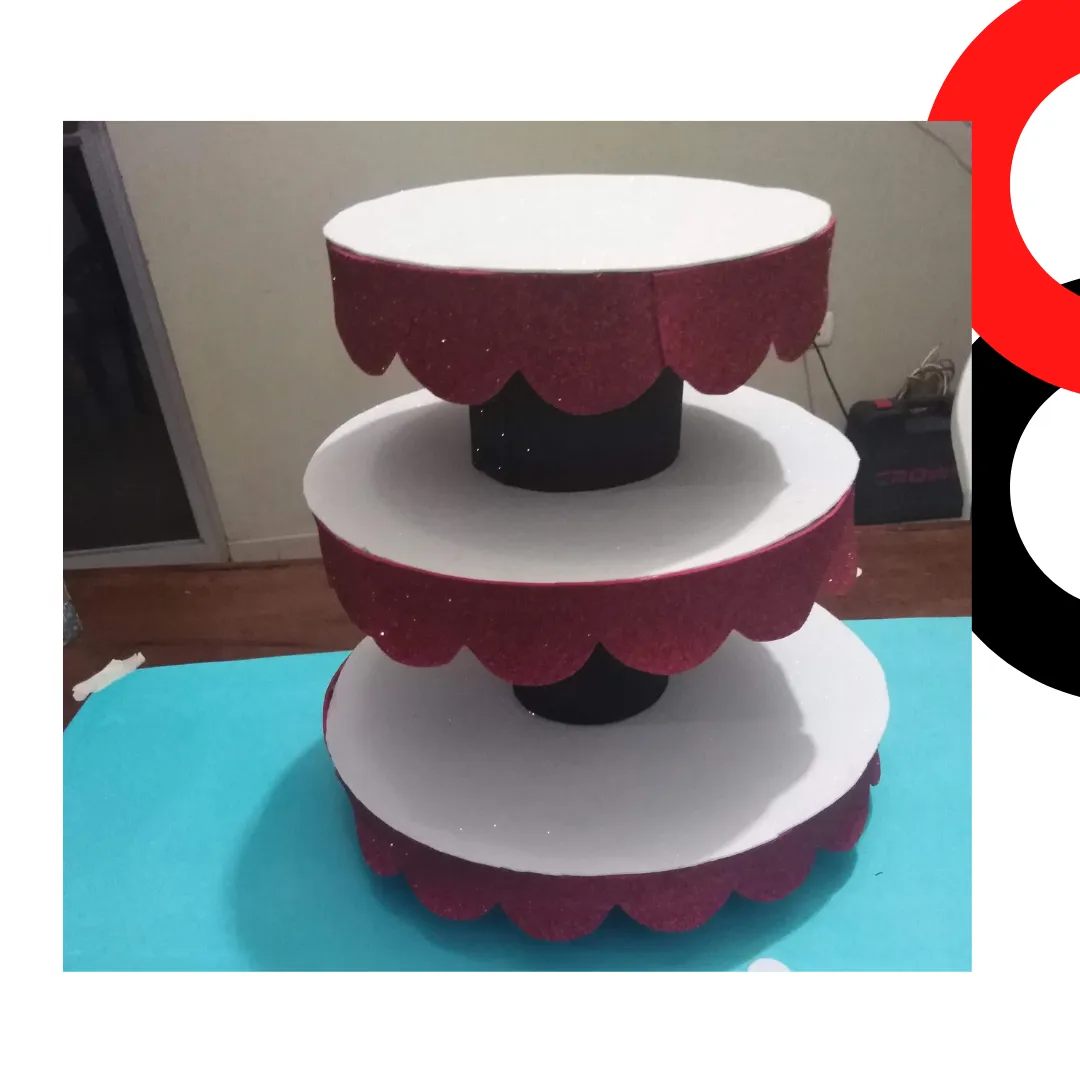
With everything ready, I assembled the three-tiered base. I placed pieces of cardboard on the cylinders to attach them to the disks and thus make them more resistant.
I then cut out several small black and white circles and glued them to the red border.
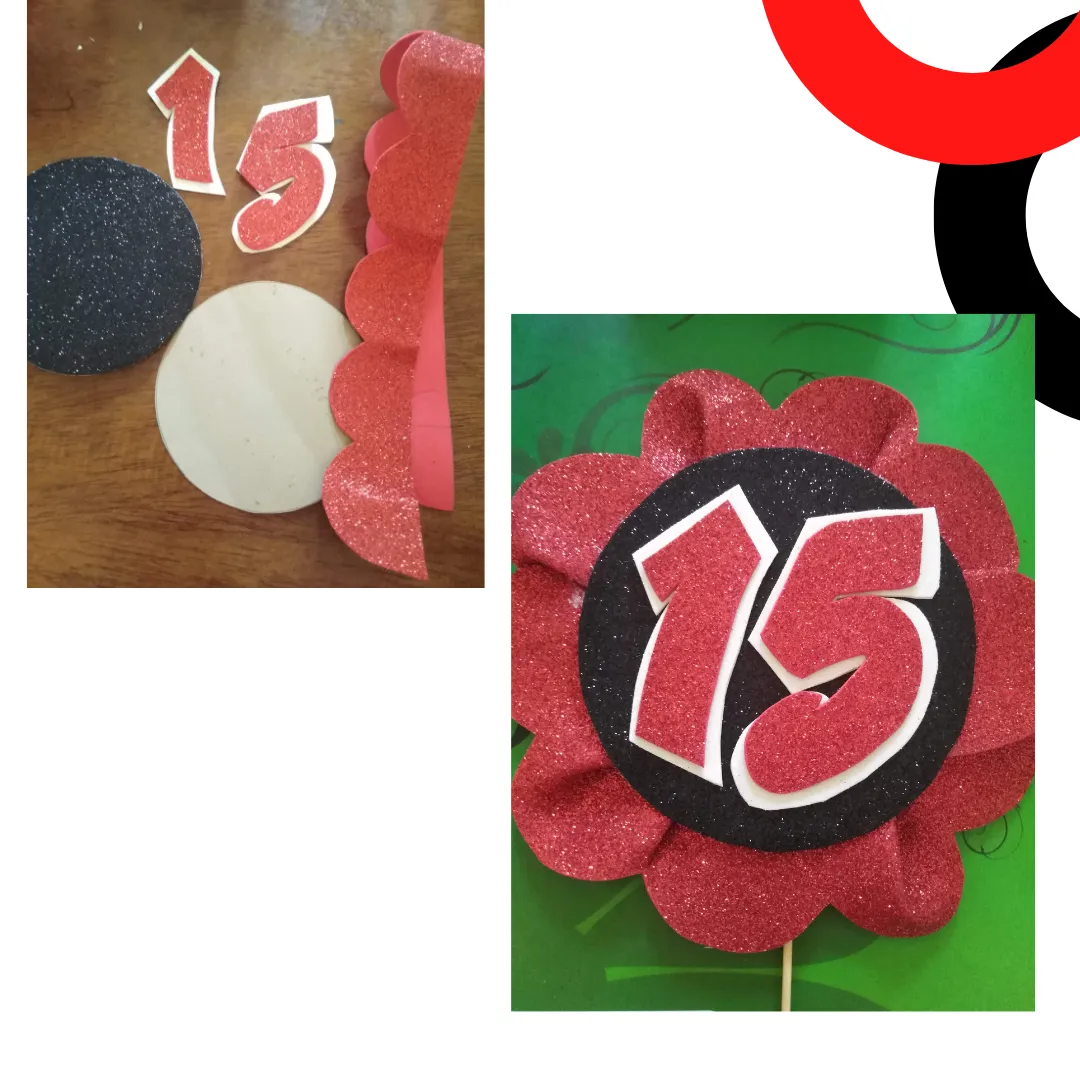
Lo siguiente fue decorar con un borde rojo y darle aspecto de flor.
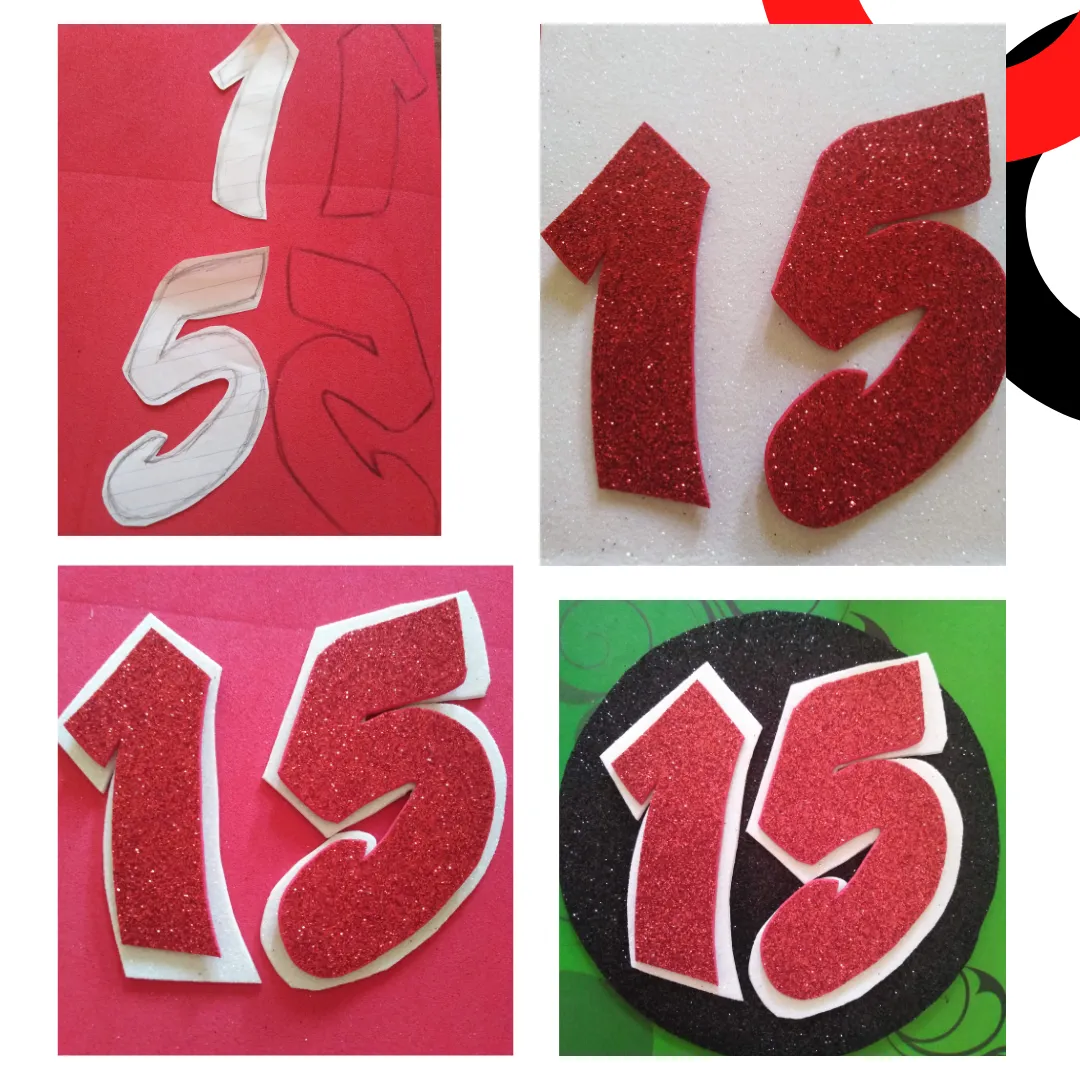
Then I started the elaboration of the number 15 that will be placed as a central ornament on the candy base. To do this, I marked the numbers on the red foami and then marked them in a larger size on the white foami. After cutting them out, I placed them on a circle of black foami.
The next thing was to decorate with a red border and make it look like a flower.
Así queda terminada esta sencilla pero bonita base para dulces,
Espero les haya gustado el tutorial. Gracias por leer, saludos y bendiciones.
Finally, I glued the number on a wooden stick and placed it in the center of the base.
This is how this simple but beautiful candy base is finished,
I hope you liked the tutorial. Thanks for reading, greetings and blessings.
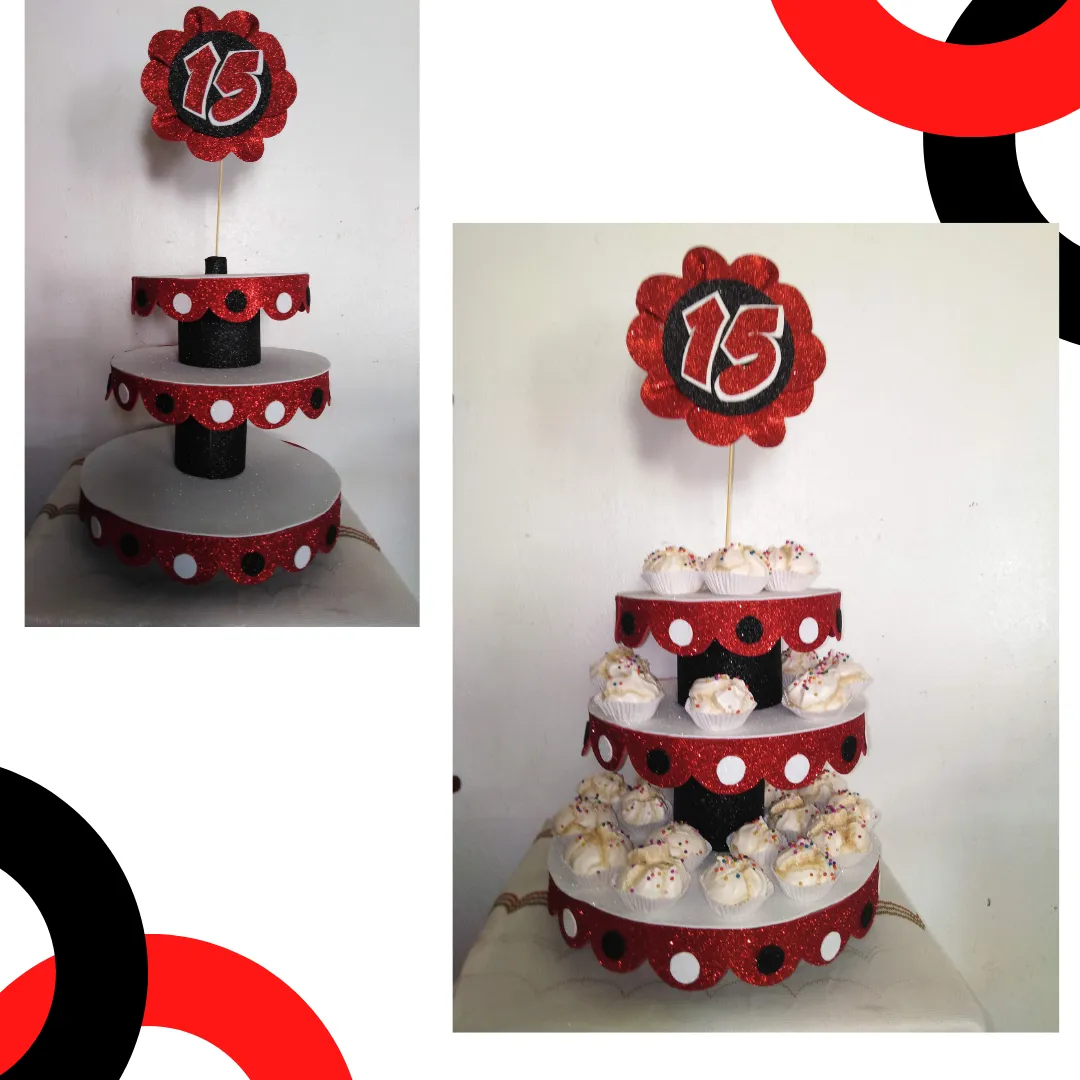
Imagen de portada y los separadores de texto son diseñados con Canva.com
Uso traductor Deepl
