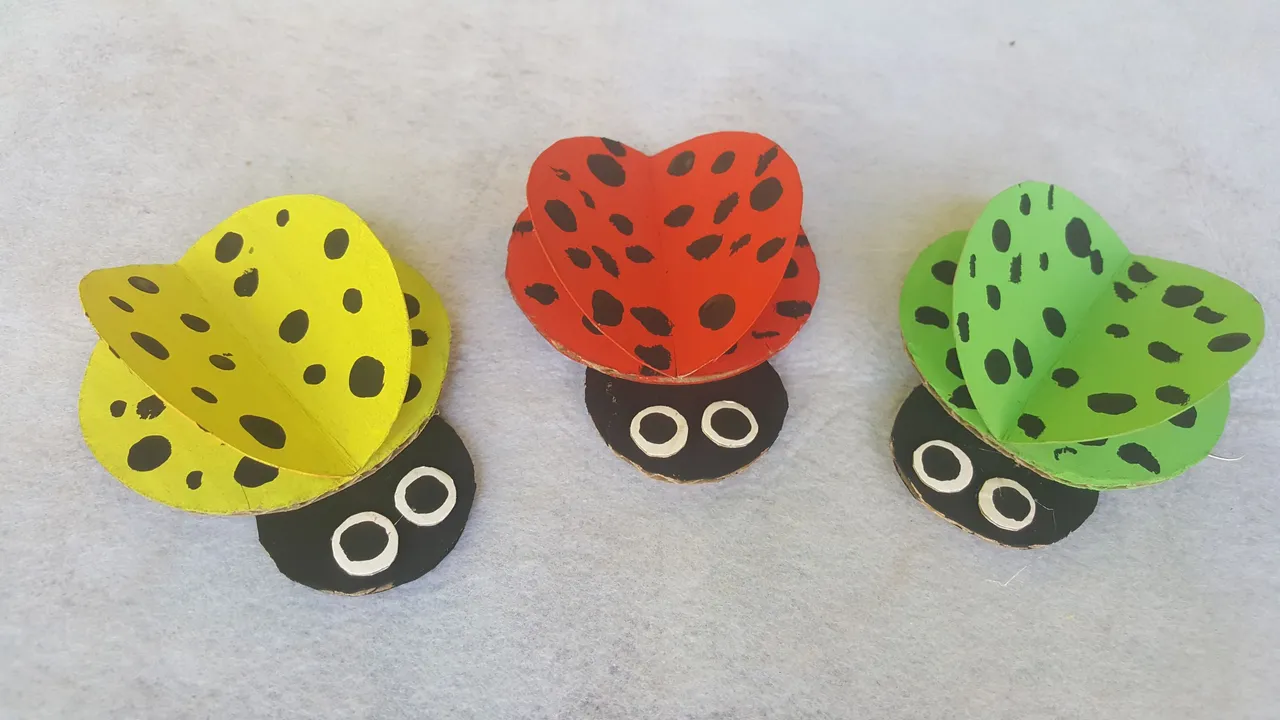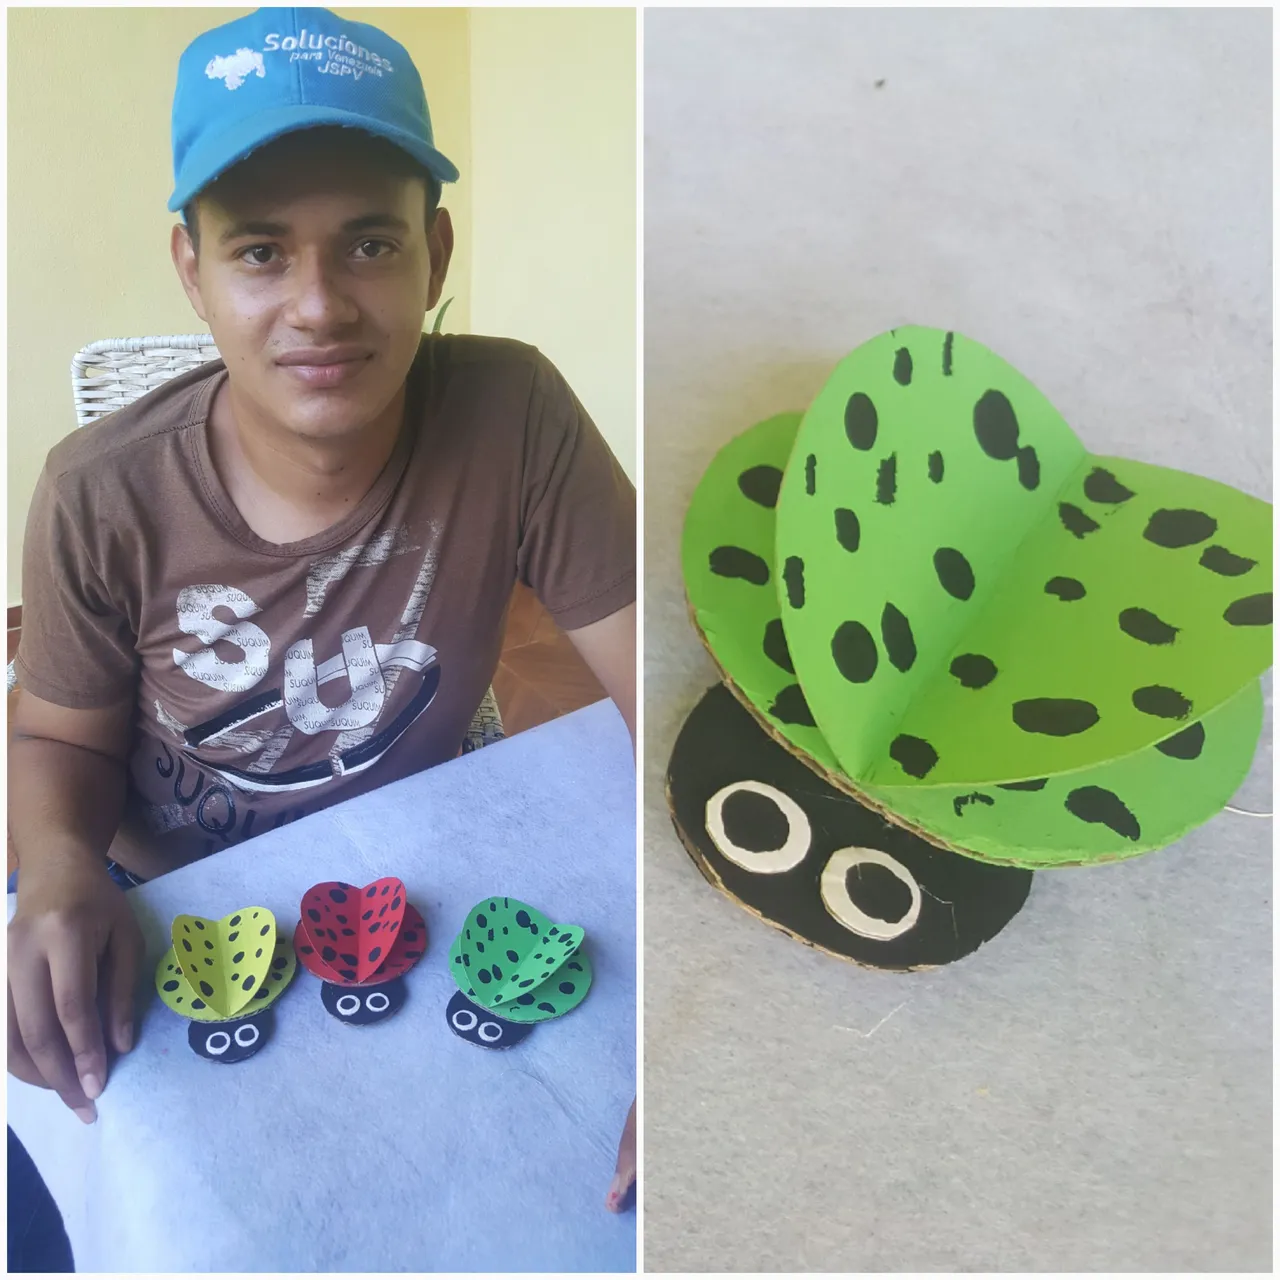
Hola queridos amigos de Hive hoy les traigo un tutorial de como hacer unas bellas mariquitas decorativas que podemos poner en cualquier lugar de la casa .
Hello dear friends of Hive, today I bring you a tutorial on how to make beautiful decorative ladybugs that we can put anywhere in the house.
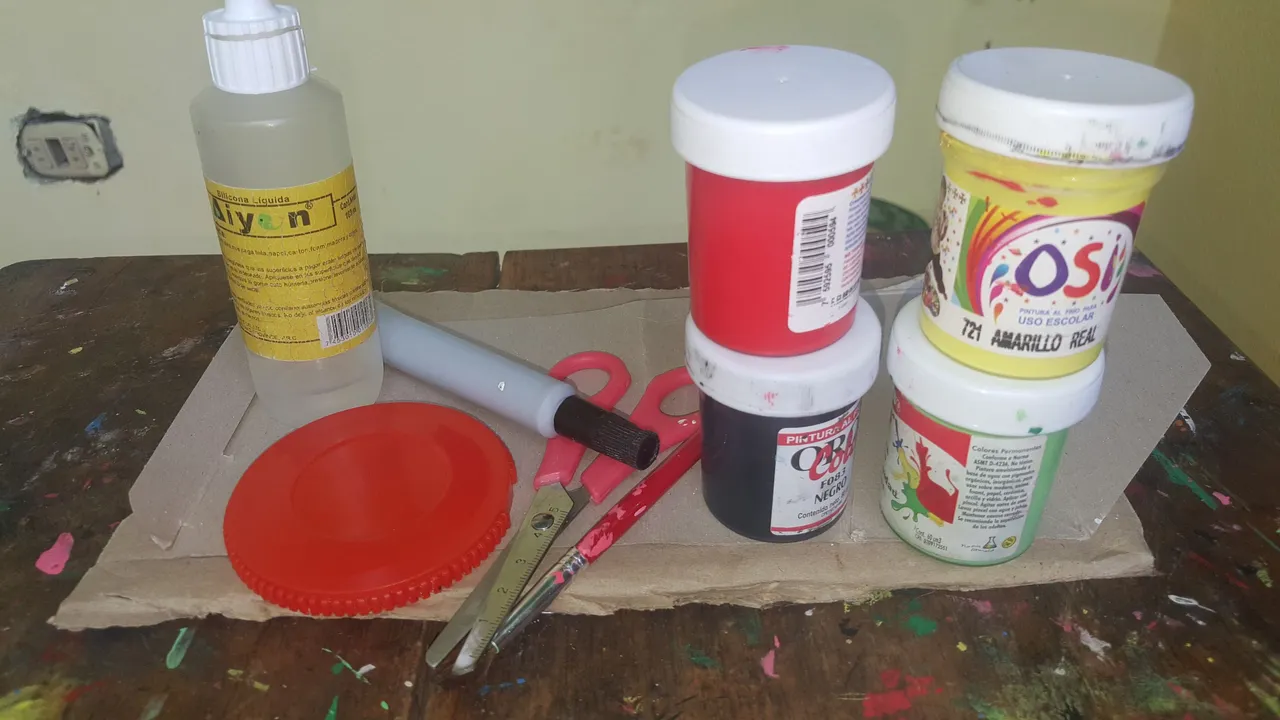
Materiales:
Cartón delgado y grueso
Pintura roja, negra, amarilla y verde
Silicon liquidó
Pincel
Tijera
Marcador.
Materials:
Thin and thick cardboard
Red, black, yellow and green paint
Liquid silicone
Brush
Scissor
Marker.
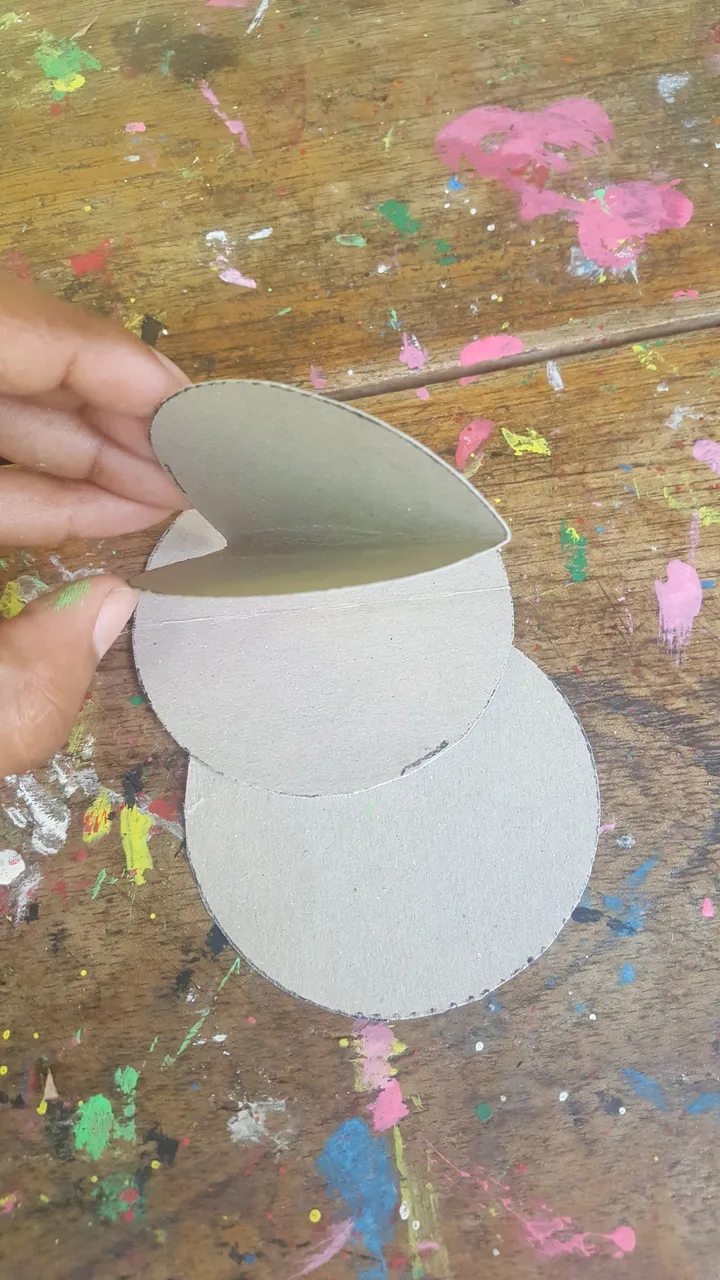
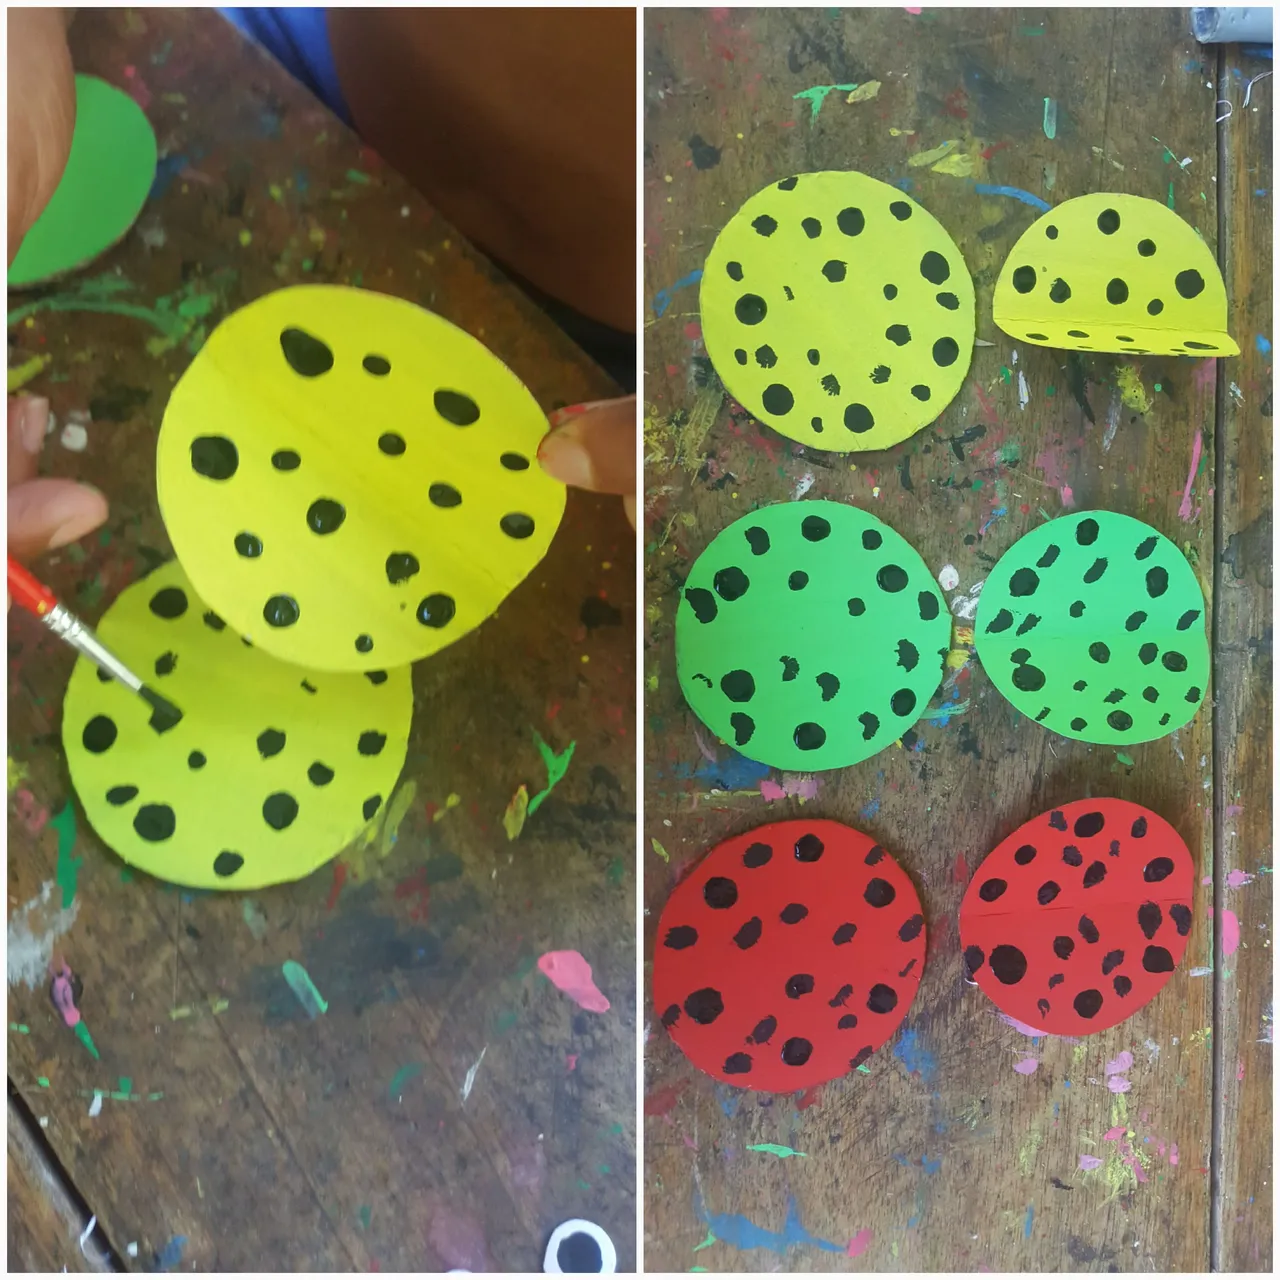
Paso 1: Para comenzar hacer las mariquitas tomanos una tapa mediana con el marcador marcamos en el cartón grueso 3 círculos y en el cartón delgado 3 círculos más, con una tapa más pequeña marcamos tres círculos más pequeños que serán la cabeza de las mariquitas.
Step 1: To start making the ladybugs, take a medium lid with the marker, we mark 3 circles on the thick cardboard and 3 more circles on the thin cardboard, with a smaller lid we mark three smaller circles that will be the head of the ladybugs.
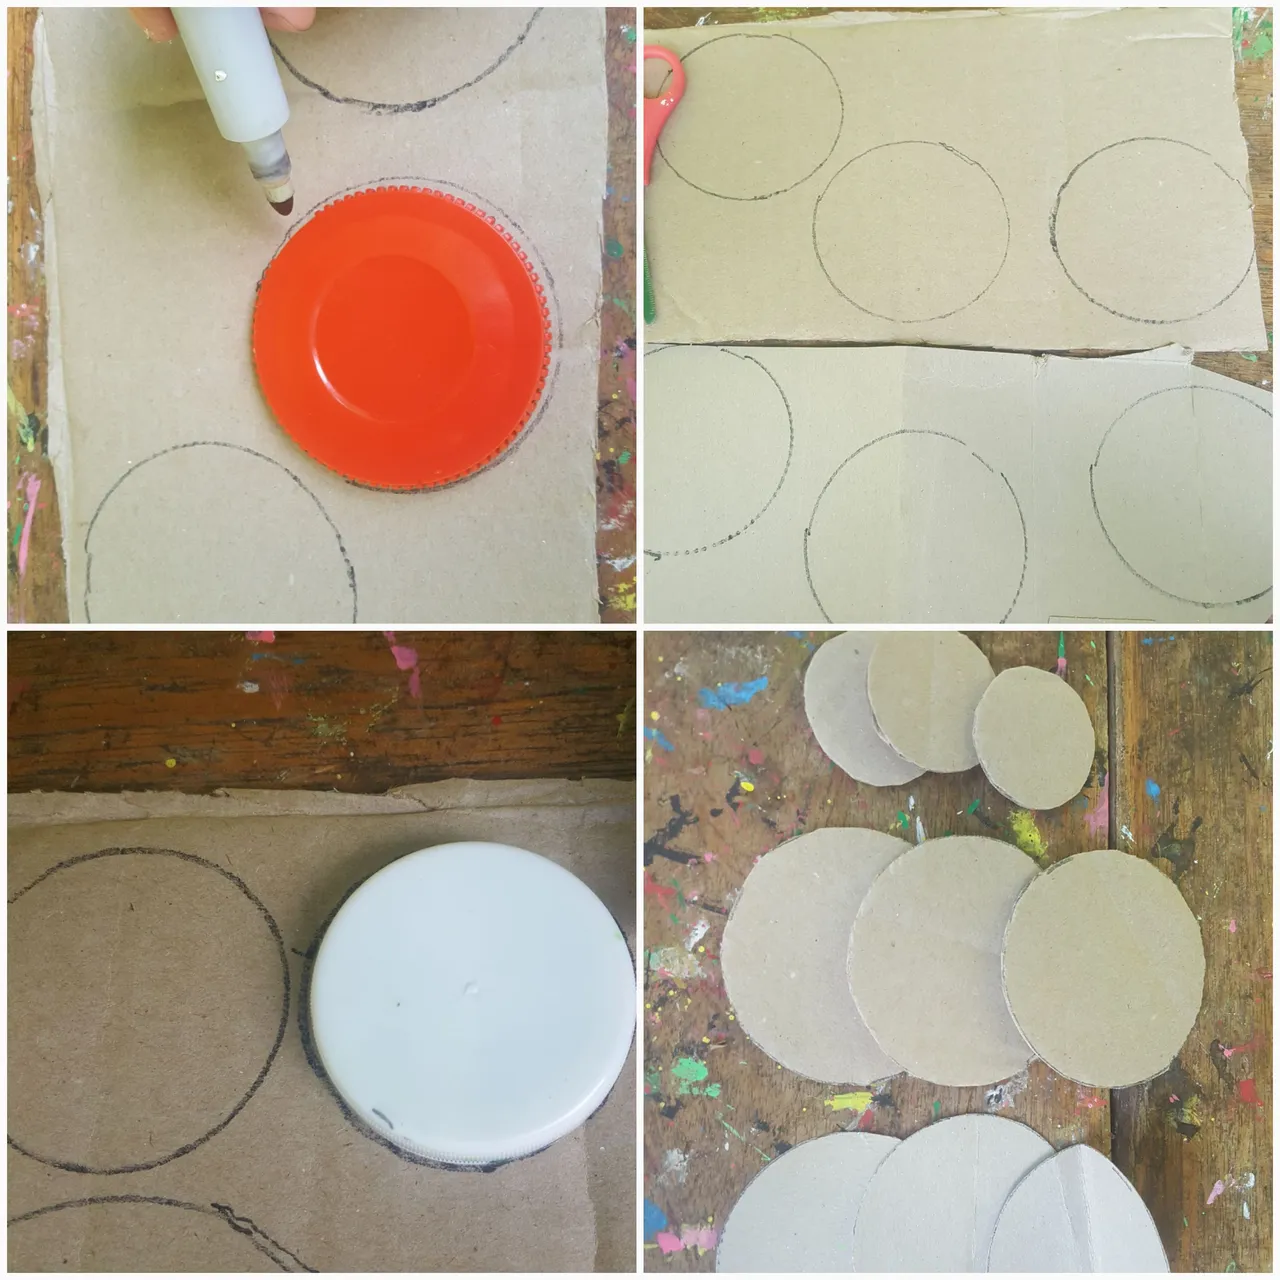
Los círculos que cortamos del cartón delgado los doblamos a la mitad por que serán las alas de las mariquitas.
The circles that we cut from the thin cardboard we fold in half because they will be the wings of the ladybugs.
Paso 2: En este paso sacamos 3 pequeños círculos los cuales serán los ojos de la mariquita con el pincel y la pintura negra le damos forma a los ojos.
Step 2: In this step we draw 3 small circles which will be the eyes of the ladybug with the brush and the black paint we shape the eyes.
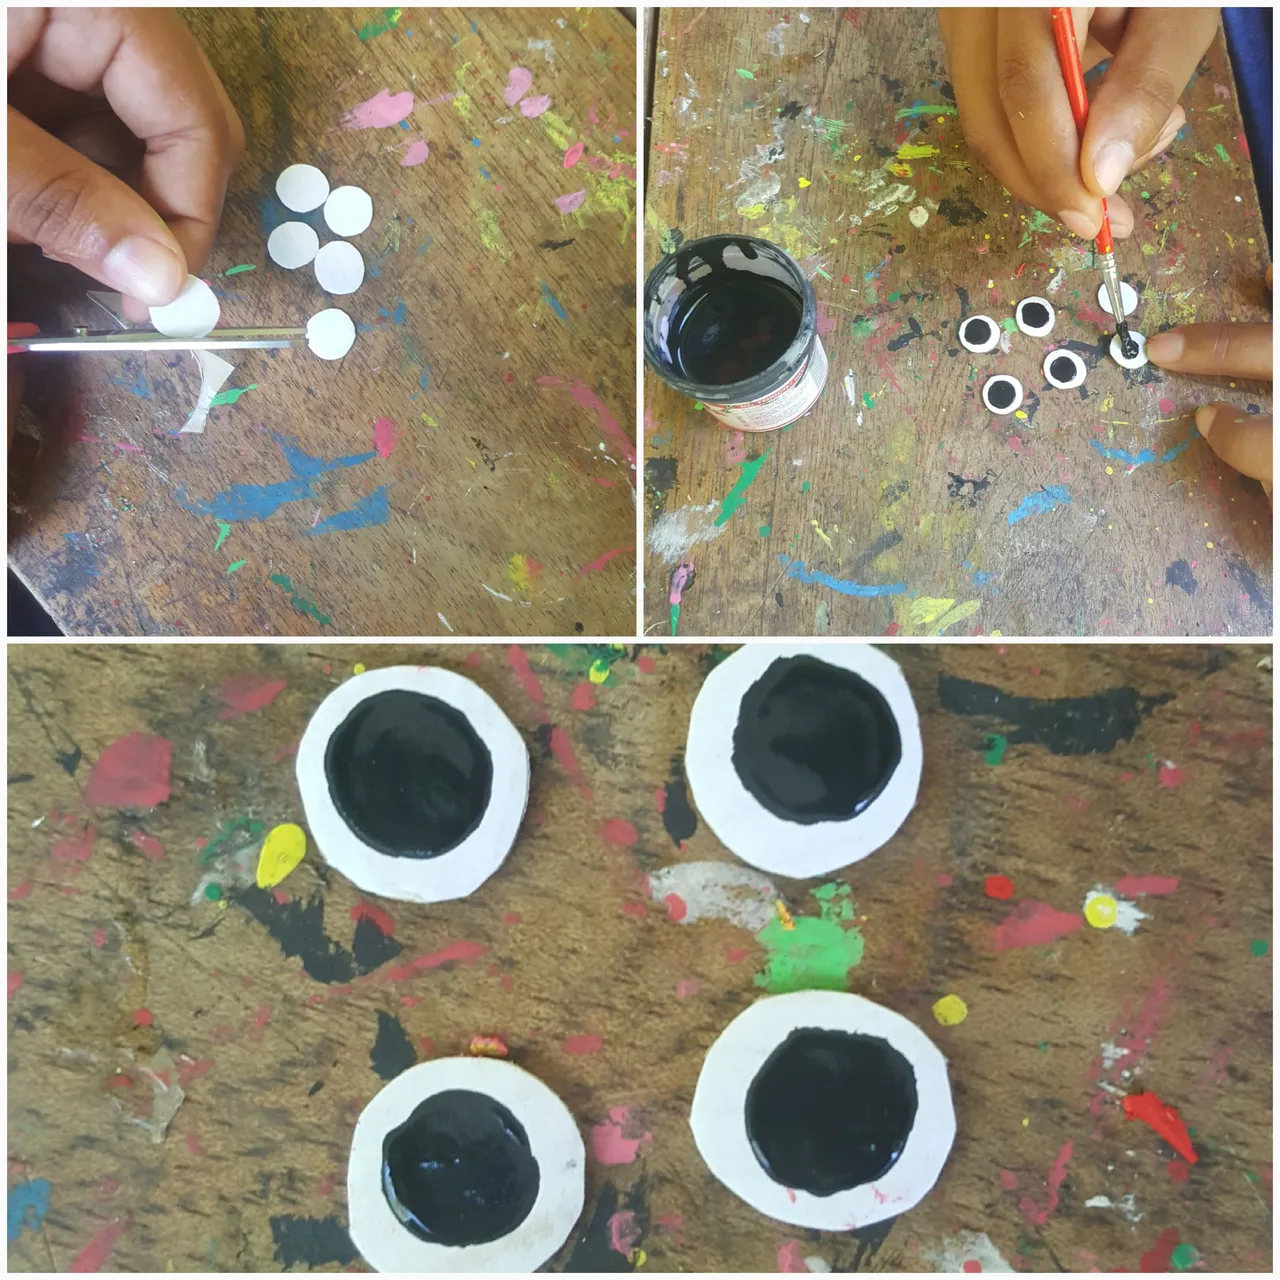
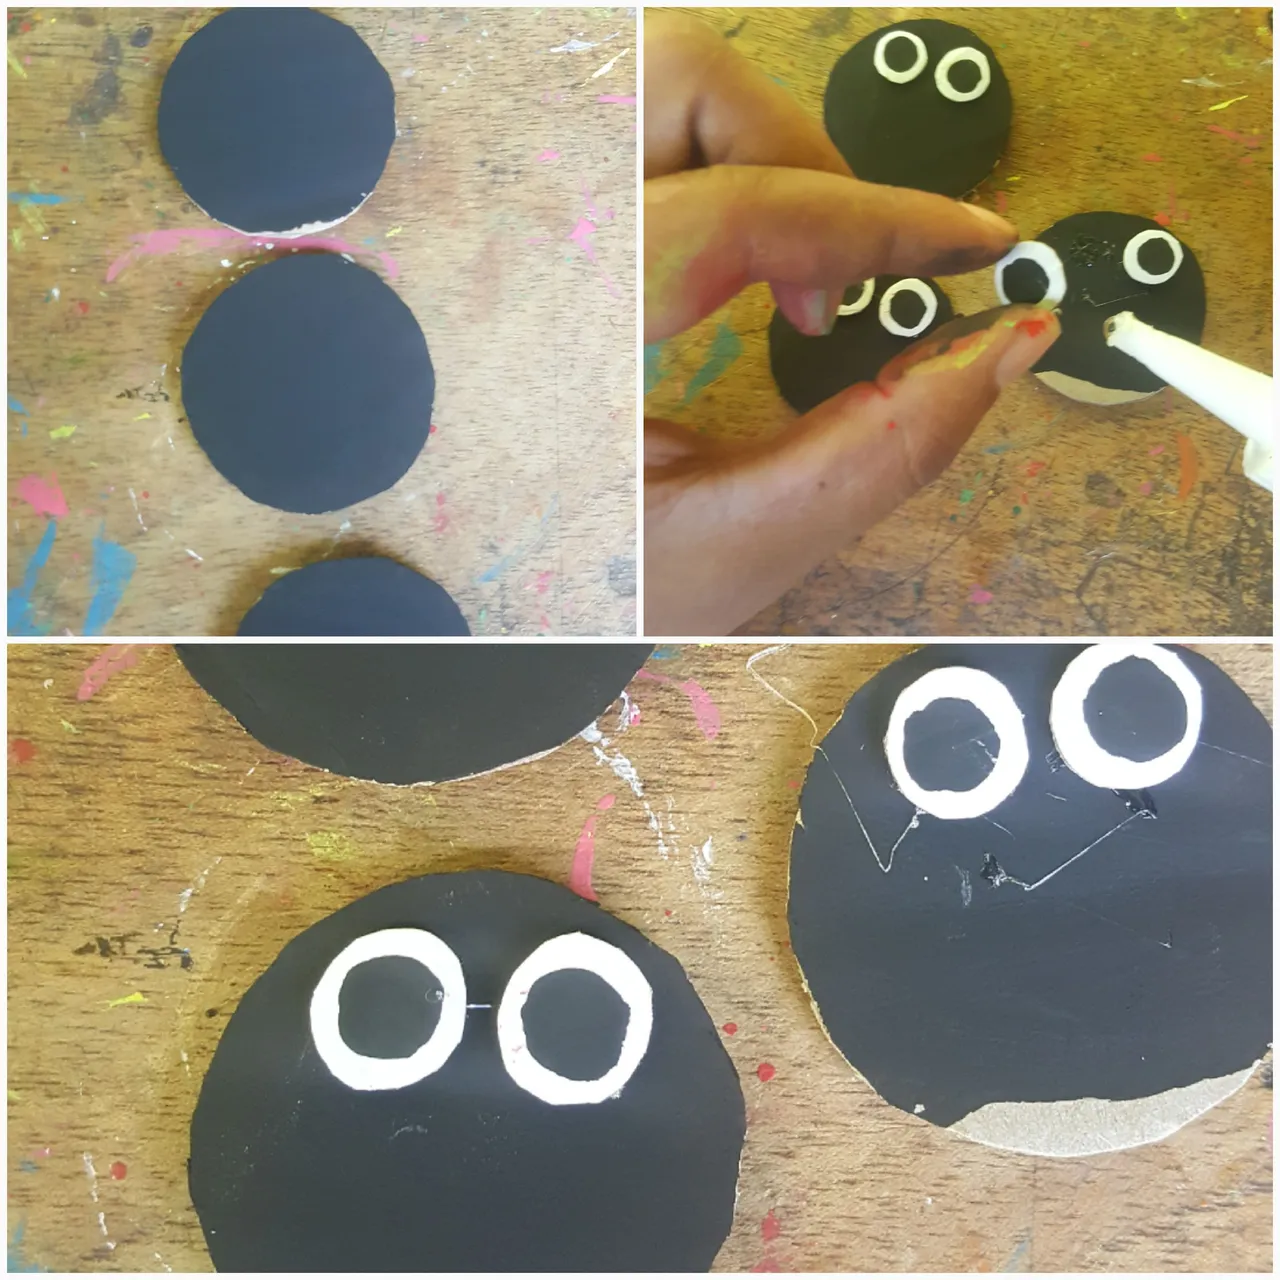
Los círculos pequeños los pintamos con la pintura negra y le pagamos a cada círculo dos ojos para darle forma a la cabeza de las mariquitas.
We paint the small circles with the black paint and pay each circle two eyes to shape the head of the ladybugs.
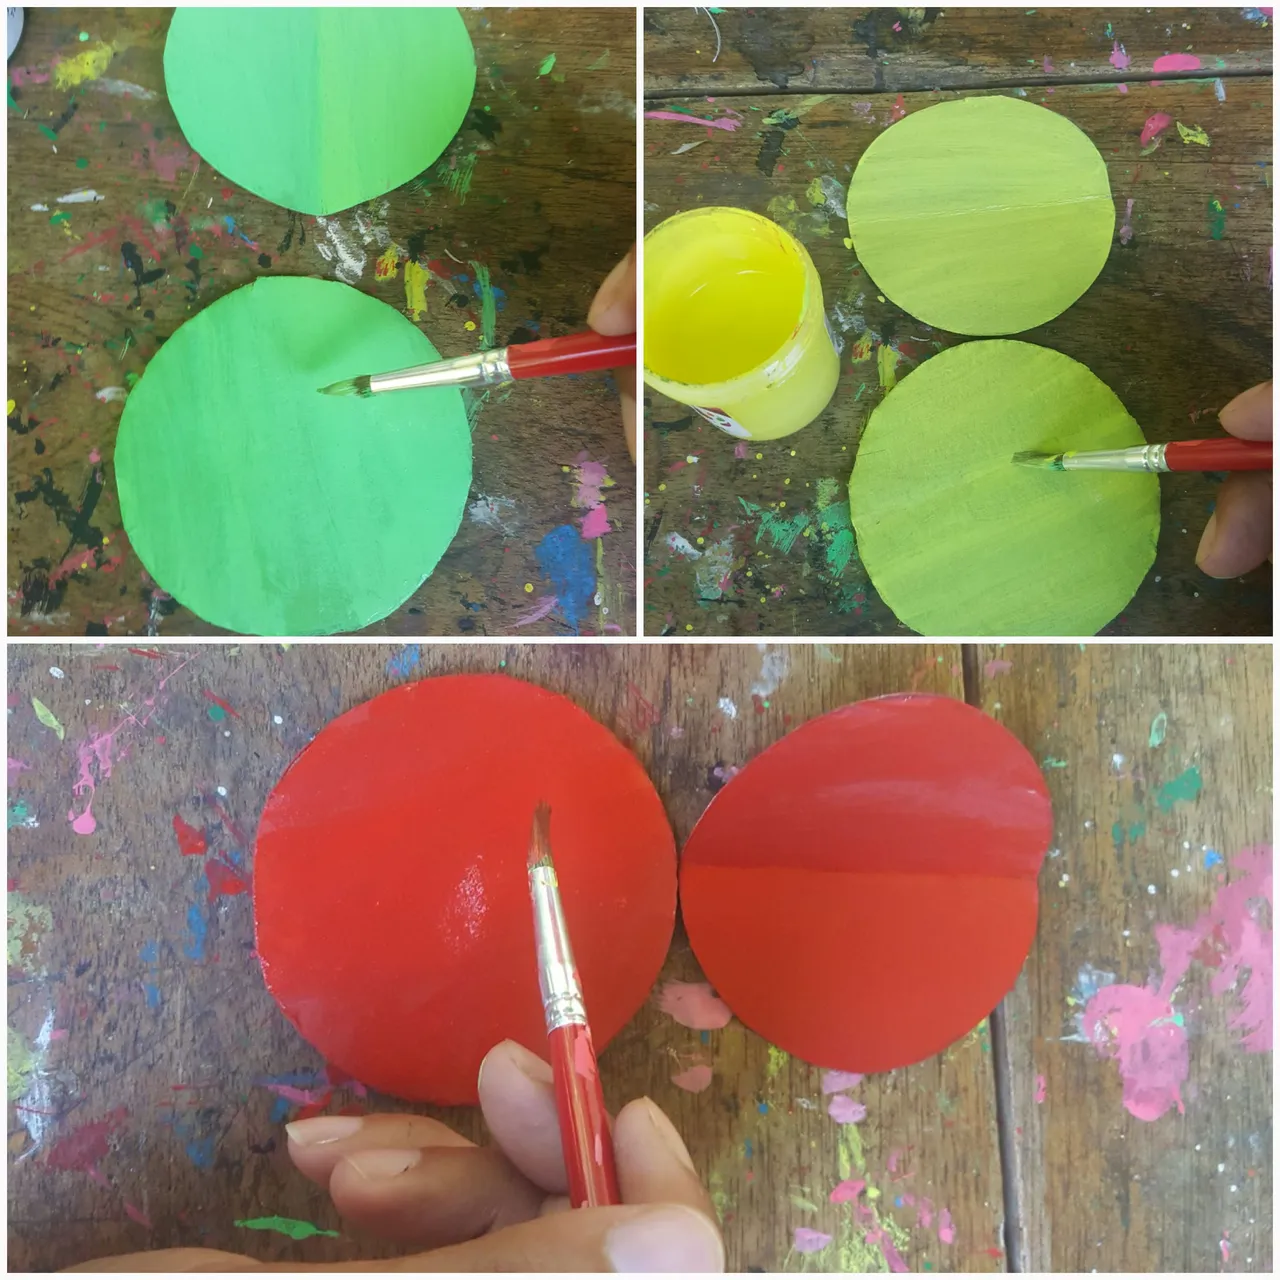
Cada mariquita lleva un color una amarilla, verde y roja debemos pintar los 6 círculos que nos restan como se muestra la imagen.
Each ladybug has a yellow, green and red color, we must paint the 6 remaining circles as shown in the image.
Después con la pintura negra y el pincel le hacemos pintas negras a todos los círculos para así armar las mariquitas.
Then with the black paint and the brush we make black paints to all the circles in order to assemble the ladybugs.
Paso 3: Nos toca armar las mariquitas para eso pegamos cada una de las cabezas a los círculos grandes, luego los otros tres círculos los doblamos a la mitad y los pegamos sobre el otro círculo para así darle forma de alas a las mariquitas.
Step 3: We have to assemble the ladybugs for that we glue each of the heads to the large circles, then the other three circles we fold in half and we glue them on the other circle to give the ladybugs the shape of wings.
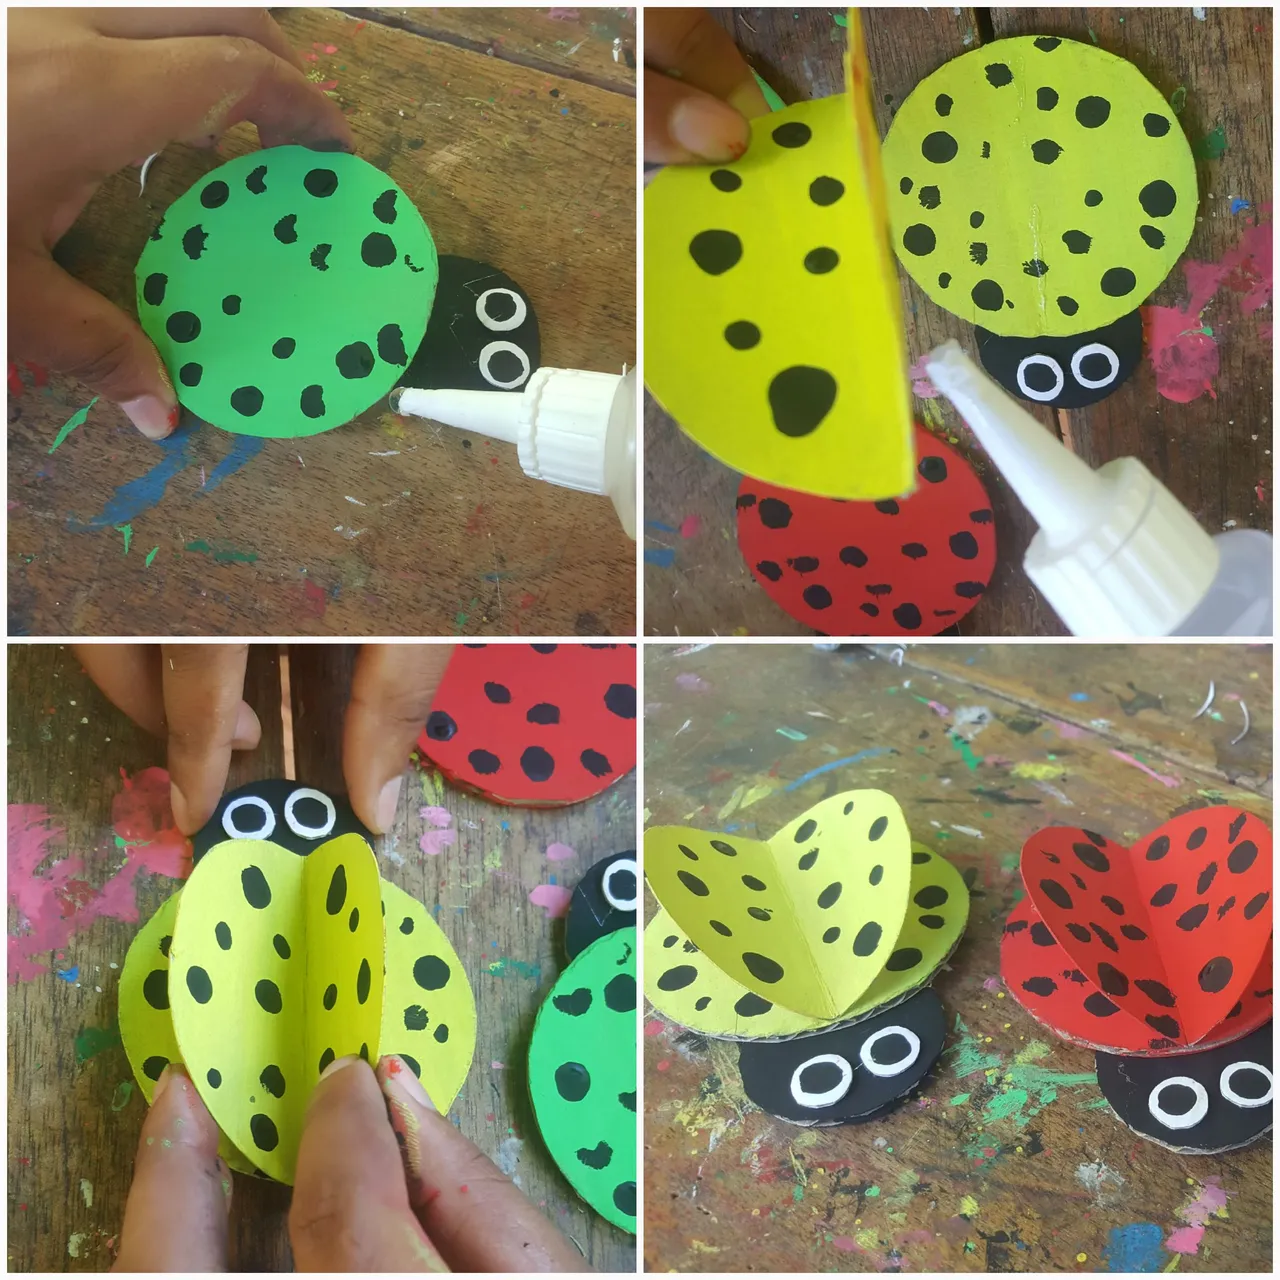
Así quedan estas bellas mariquitas espero les guste se les quiere a todos.
This is how these beautiful ladybugs remain. I hope you like it, you love them all.