BIENVENIDOS A MI BLOG 💖
WELCOME TO MY BLOG 💖

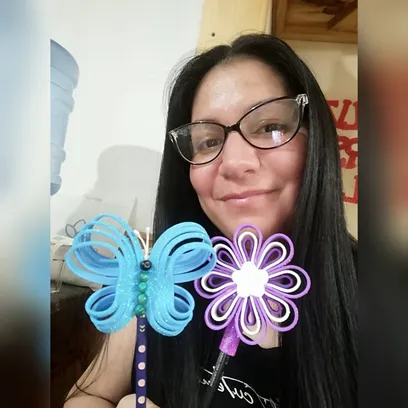
Hoy realizaremos y aprenderemos como hacer una flor para personalizar tus lápices aplicando la técnica de la filigrana.
Today we will make and learn how to make a flower to personalize your pencils applying the filigree technique.
Quedaras encantada (o) con el resultado de este trabajo. No solo se ve bello sino la gran utilidad del mismo.
You will be delighted with the result of this work. It not only looks beautiful but the great utility it has.
Lo mejor de este trabajo es que son muy pocos los materiales que debemos usar.
The best thing about this work is that there are very few materials that we must use.
Sin más que decir acompáñame a hacer este paso a paso.
Without more to say join me to do this step by step.

1.- Pistola y barra de silicón.
1.- Gun and silicone stick.
2.- Goma eva.
2.- Eva rubber.
3.- Tijeras.
3.- Scissors .
4.- Regla.
4.- Ruler.
5.- Puntero (opcional).
5.- Pointer (optional).

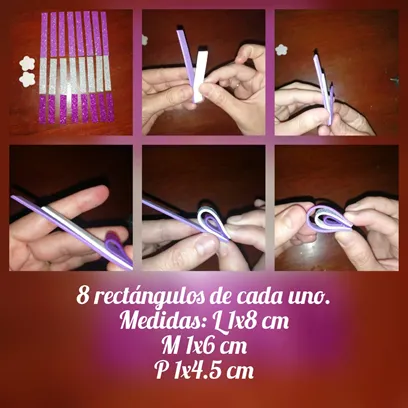
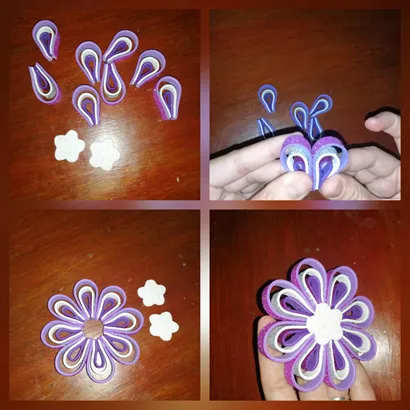
FIRST STEP: Cut 8 rectangles of eva rubber, some long, medium and small. Its measurements would be, the long ones of 1x8 cm, the medium ones of 1x6 cm and the small ones of 1x4.5 cm.
Luego tomamos uno de cada rectángulo y los pegamos con un punto de silicon en uno de sus extremos, una vez lista por ese lado unimos el otro extremo con la parte que ya habíamos unidos, dando la forma de gota de agua. Observar la imagen.
Then we take one of each rectangle and glue them with a point of silicone on one of its ends, once it is ready on that side we join the other end with the part that we had already joined, giving the shape of a drop of water. Observe the image.
STEP TWO: Ready all the petals we begin to glue one by one, thus forming the flower. Then we make a foami flower, it is we would stick it to the center of the flower.
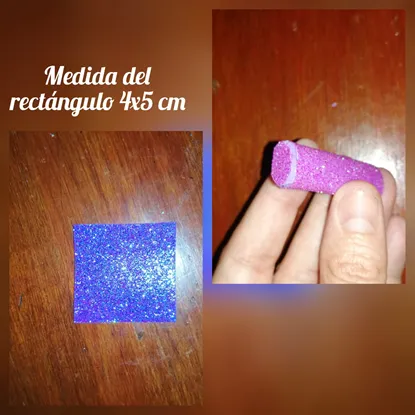
THIRD STEP: As a last step, we cut out a 4x5 cm rectangle, we glue each end, this would be the base where we will support the flower and to insert the pencil.
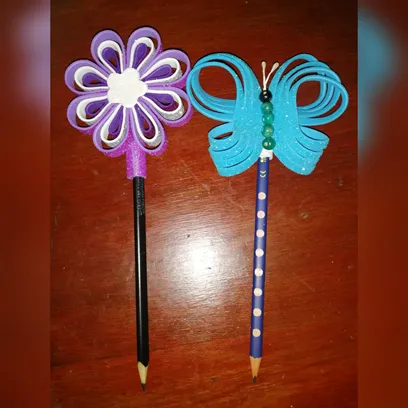
Es un procedimiento bastante fácil de hacer y el acabado queda maravilloso, también realice una mariposa ya que soy amante a ellas.
It is a fairly easy procedure to do and the finish is wonderful, I also made a butterfly since I am a lover of them.
Todas las fotos son de mi autoria/ All photos are my authorship
Nos vemos en un próximo post, me despido con amor 😍 @jayoxaju.
See you in a next post, I say goodbye with love 😍 @jayoxaju.