Welcome to my corner ✶✶✶✶✶
Bienvenidos a mi Rincón ✶✶✶✶✶
Buenas amigos, tengan buenas tardes y bienvenidos a mi pequeño rincón, tu rincón cinco estrellas! Hoy veremos la elaboración un bello topper elaborado a partir de cartulina tipo espejo y foami. Aprende a elaborarlos y obsequia a tus seres queridos . Espero sea de tu agrado, sin mas que decir ¡¡¡Comencemos!!!
The materials we will use are as follows:
Los materiales que usaremos serán los siguientes:
Materials
- Foami or eva gum (black and gold frosted)
- Scissors
- Hot or cold glue
- Mirror cardboard
- exacto or cutter
- Shopping Cart
- Pencil
- Yellow cardboard
- Brown corrugated cardboard
- Chopsticks
Materiales
- Foami ó goma eva (negro y dorado escarchado)
- Tijera
- Silicón frió ó caliente
- cartulina tipo espejo
- exacto o cuter
- Compras
- Lápiz
- Cartulina amarilla
- Cartulina corrugada marrón
- Palillos
PROCEDURES // PROCEDIMIENTOS:
STEP #1: / PASO #1:
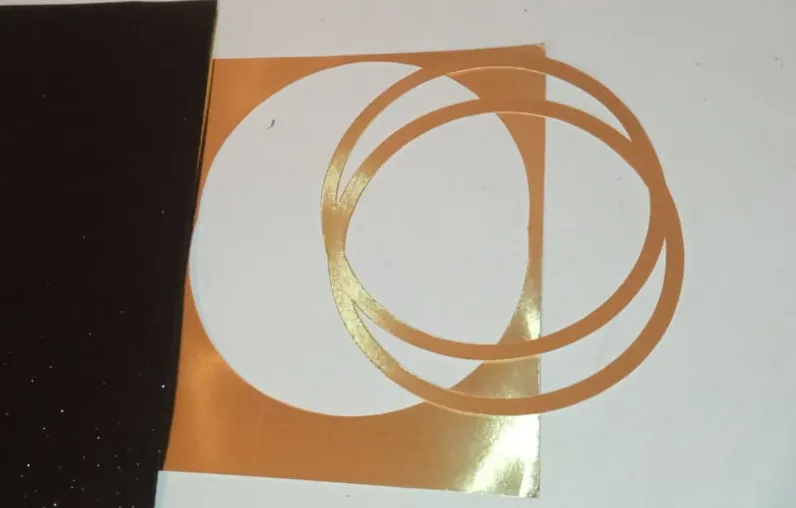
We mark on the back of the mirror type cardboard, the model we choose, in my case I wanted to do it with a model style linked rings, after having marked it we proceed to cut it carefully with an exacto or cutter.
Marcamos por la parte de atrás de la cartulina tipo espejo, el modelo que elijamos, en mi caso lo quise hacer con un modelo estilo anillos enlazados, luego de haberlo marcado procedemos a cortarlo cuidadosamente con un exacto o cuter.
STEP #2: / PASO #2:
We cut some thin strips of frosted foami with the scissors and glue it with cold silicone, in my case I used gold and black. We proceed to glue it carefully so that it looks like this.
Cortamos unas tiras delgadas de foami escarchado con la tijera y lo pegamos con silicón frio, en mi caso use el dorado y negro. procedemos a pegarlo cuidadosamente hat que deque de la siguiente manera.

STEP #3: / PASO #3:
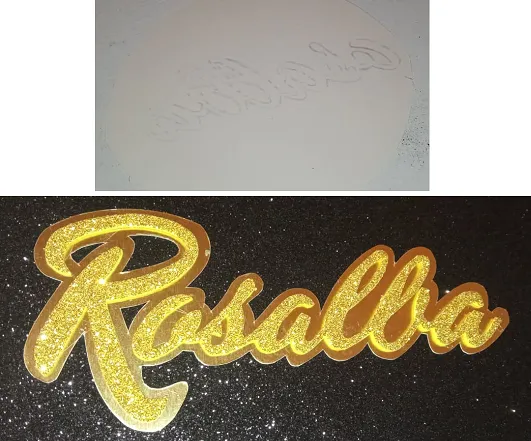
We mark the name we want on the foami, we cut it out and then with the help of the silicone we glue it to the mirror cardboard, with the cutter we cut only 3 mm of edge with respect to the frosted foami.
Marcamos el nombre que queremos en el foami, lo recortamos y después con ayuda del silicón lo pegamos a la cartulina tipo espejo, con el cuter cortamos solo 3 mm de borde con respecto al foami escarchado.
STEP #4:/ PASO #4
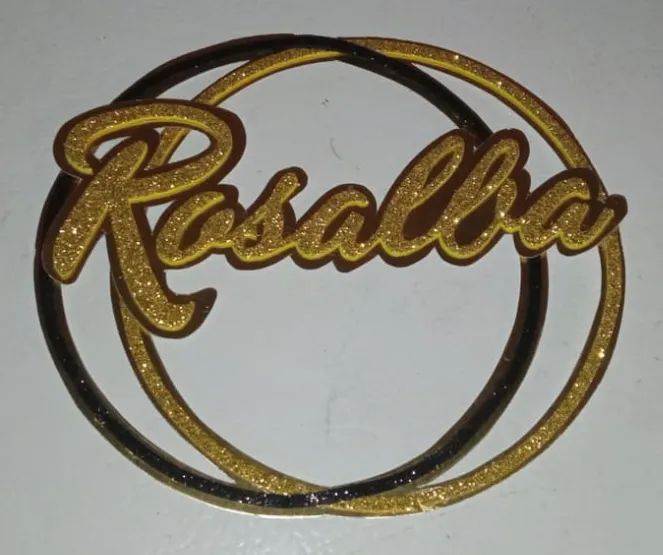
Once the name is cut out, we glue it to our linked rings.
Una vez recortado el nombre lo pegamos a nuestros aros enlazados.
STEP #5: / PASO #5:
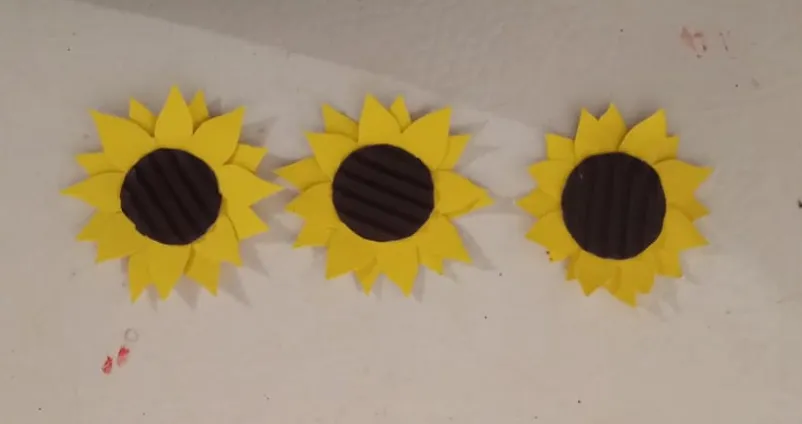
We mark the sunflower on yellow cardboard, cut it out and glue it.
Marcamos cartulina amarilla el girasol y, recortamos y pegamos.
STEP #6: / PASO #6:
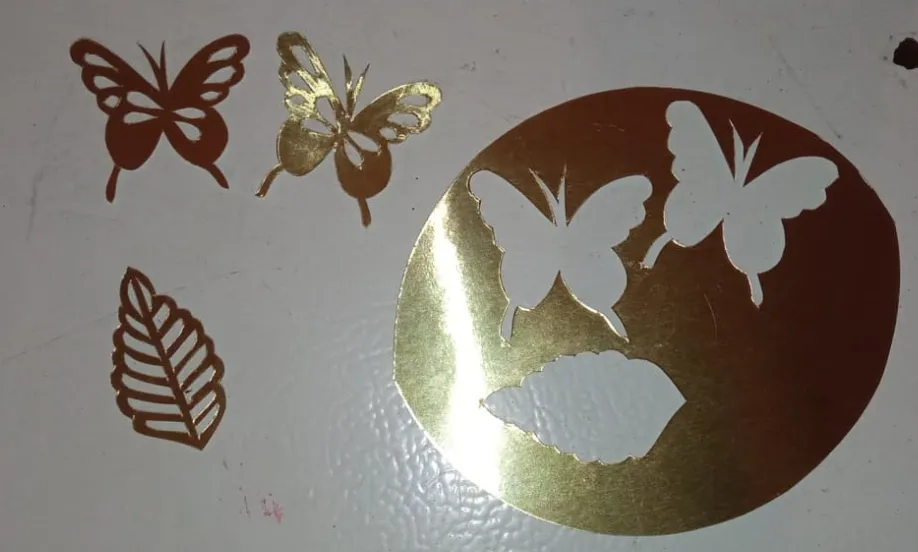
On the mirror cardboard we mark the back side of the butterflies we like and with the help of an exacto or cutter we cut them out very carefully.
En la cartulina tipo espejo marcamos por la parte de atrás las mariposas que nos guste y con ayuda del exacto o cuter recortamos con mucho cuidado.
STEP #7: / PASO #7:
Once everything has been cut out, we assemble our topper and with the help of silicone we glue
Una vez recortado todo ensamblamos nuestro topper y con ayuda del silicón pegamos
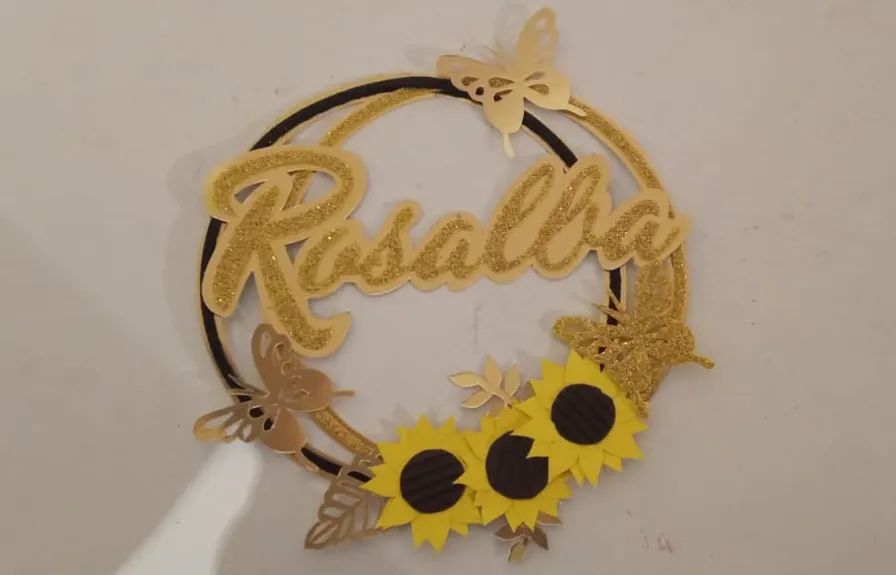
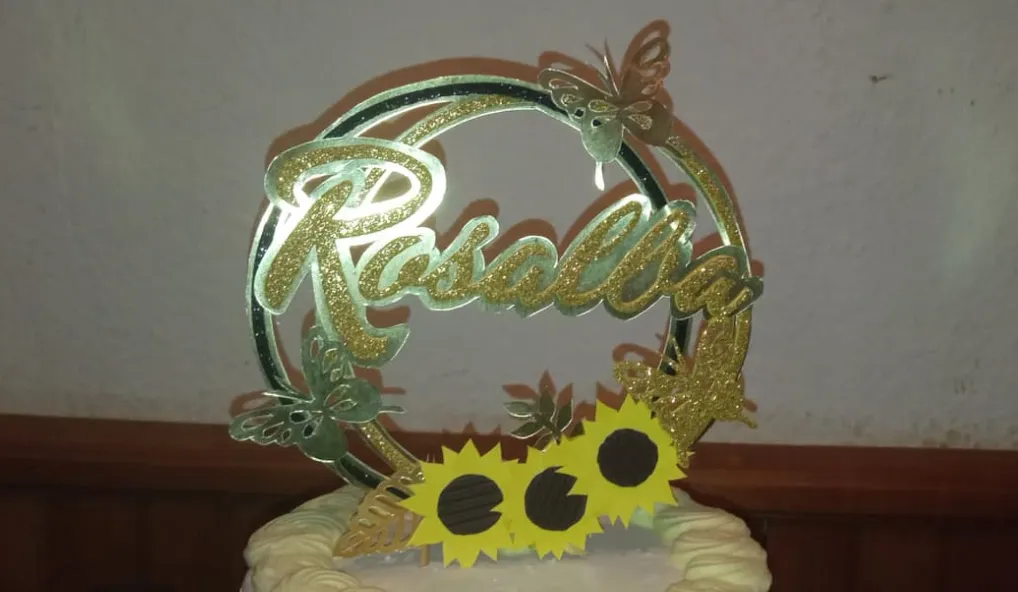
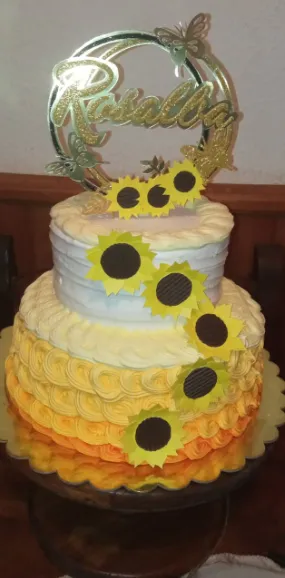
Once everything is assembled, we glue 2 sticks with silicone on the back and we can place it on the cake or cake. And so we finish our sunflower topper with butterfly on mirror cardboard.
Una vez ensamblado todo, pegamos 2 palillos con silicon por la parte trasera y ya lo podemos colocar a la torta o pastel. Y así damos por terminado nuestro topper de girasoles con mariposa en cartulina tipo espejo.
Any questions, suggestions or recommendations, let me know in the comments.
Alguna duda, sugerencia o recomendación, déjamelas saber en los comentarios.
Thank you for visiting my blog and I hope you like the material. See you next time.
Gracias por visitar mi blog y espero que el material sea de su agrado. Nos vemos la próxima publicación.

RESOURCES USED
Photograph taken by Redmi note 8
Crop and edit images in Paint
Banner created in PowerPoint 2010
Screenshots taken by Lightshot
RECURSOS UTILIZADOS
Fotografía tomadas por Redmi note 8
Recorte y edición de imágenes Paint
Banner creado en PowerPoint 2010
Capturas de pantalla realizadas por Lightshot