
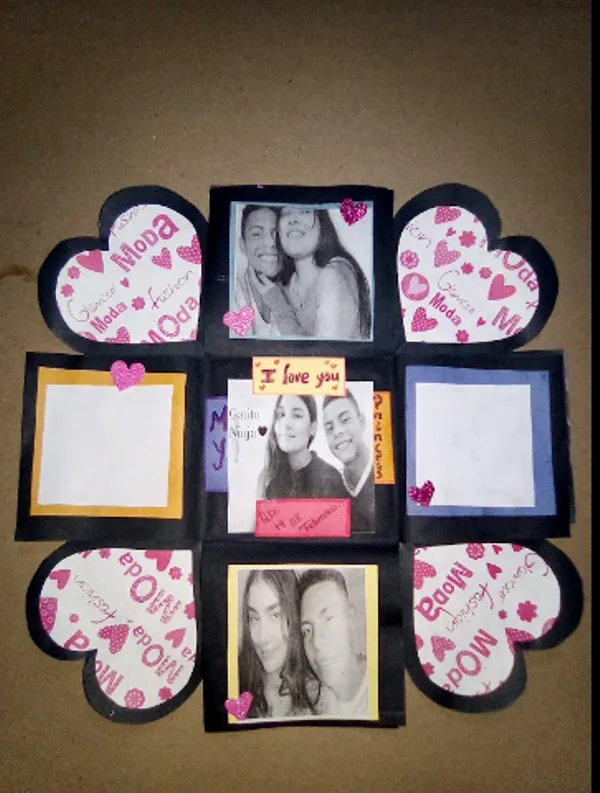
Hello dear beehive, this time I leave you in this creative community, a surprise box that was recently made as a gift. I will tell you a little about the history of this box, as you will see there are black and white photographs, this is a nice job in which I help my brother make an anniversary gift. He really liked my help because I did it with affection so that they would remember him with a great feeling, I only collaborated with this detail, he bought the materials and did other things. But hey, going back to the main focus, I will show you the materials and step by step to make this beautiful surprise love box.
Hola querida colmena, en esta ocasión te dejo en esta comunidad creativa, una caja sorpresa que se hizo recientemente como regalo. Les contaré un poco de la historia de esta caja, como verán hay fotografías en blanco y negro, este es un lindo trabajo en el que ayudo a mi hermano a hacer un regalo de aniversario. A él le gustó mucho mi ayuda porque lo hice con cariño para que lo recordaran con gran sentimiento, yo solo colaboré con este detalle, él compró los materiales e hizo otras cosas. Pero bueno, volviendo al enfoque principal, te mostraré los materiales y paso a paso para hacer esta hermosa caja sorpresa de amor.

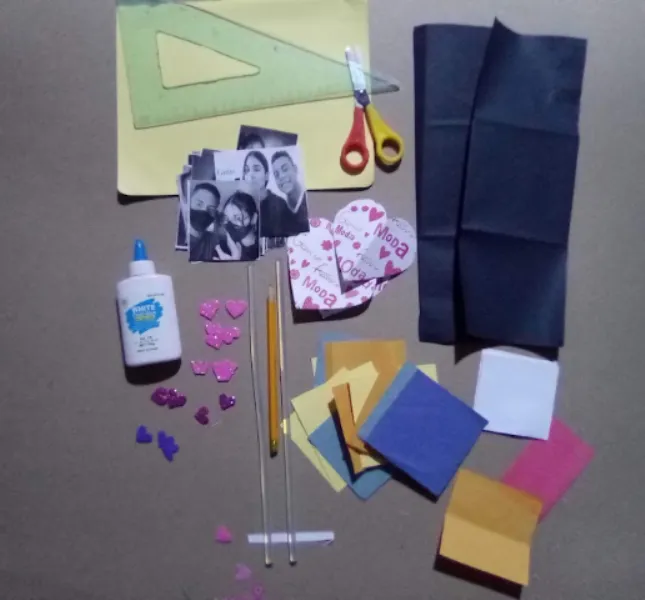
MATERIALS:
Black, yellow and blue cardstock
Pair of scissors
Foami
Photos
Markers
Glue
MATERIALES:
Cartulina negra, amarilla y azul
Par de tijeras
Foami
Fotos
Marcadores
Pegamento
STEP BY STEP
- We take the black cardboard, and we obtain three cardboard squares 50cm long and wide. And we take out the shapes that appear in the image
PASO A PASO
- Tomamos el cartón negro y obtenemos tres cuadrados de cartón de 50cm de largo y ancho. Y sacamos las formas que aparecen en la imagen
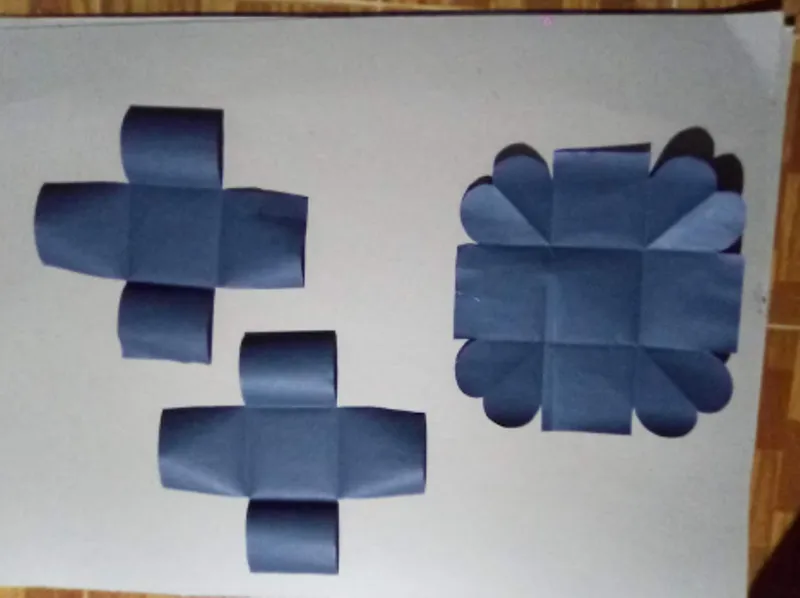
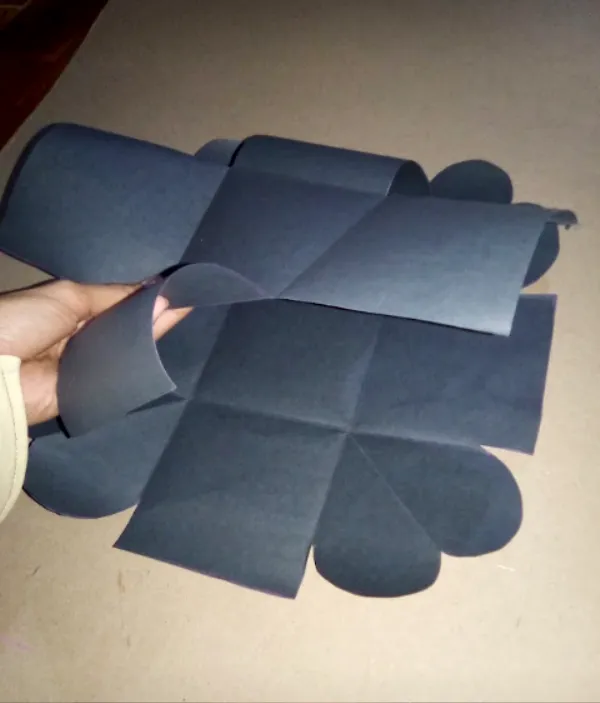
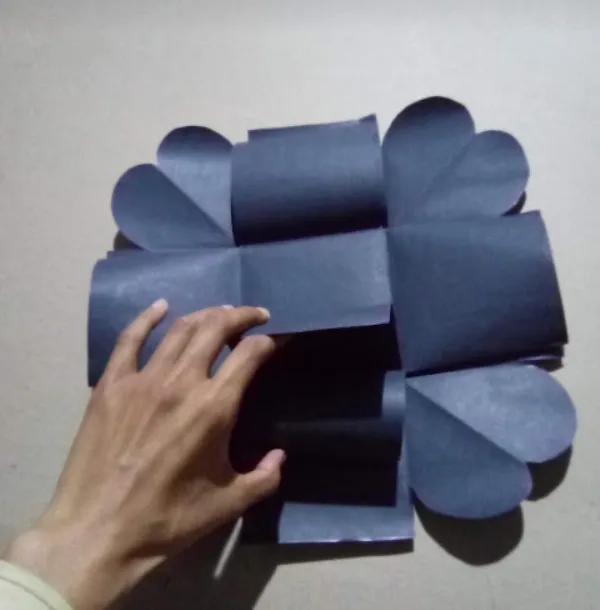
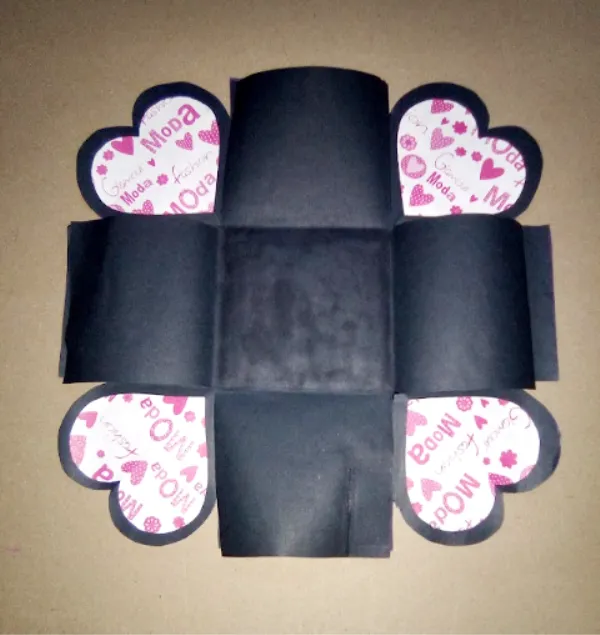
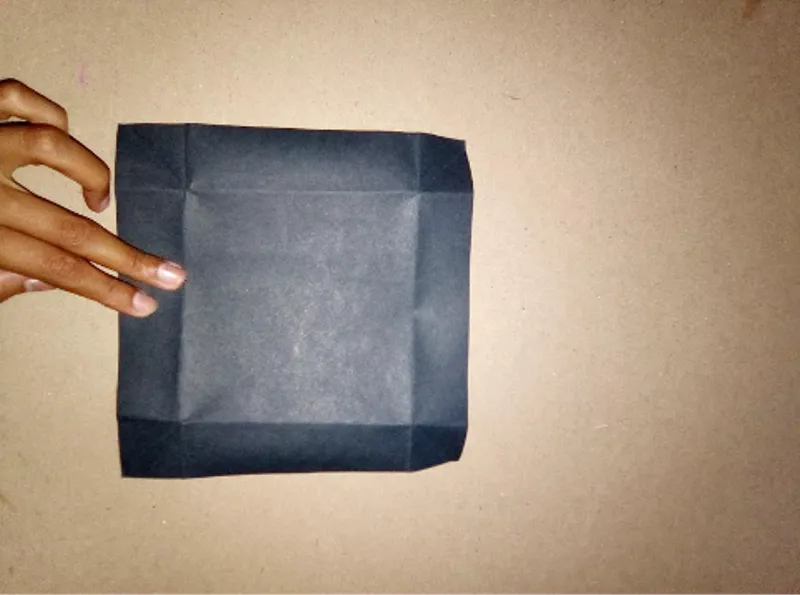
2. Here we use the base for the box, which has its corners in the shape of a heart
And then we put the two boxes that have a cross shape, each square of the box measures 16.5 cm.
2. Aquí usamos la base para la caja, que tiene sus esquinas en forma de corazón
Y luego ponemos las dos cajas que tienen forma de cruz, cada cuadrado de la caja mide 16.5 cm.
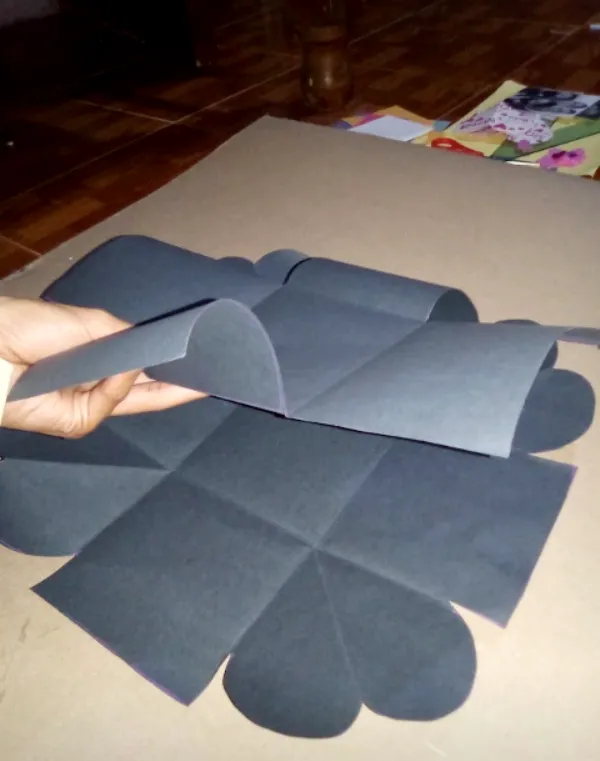
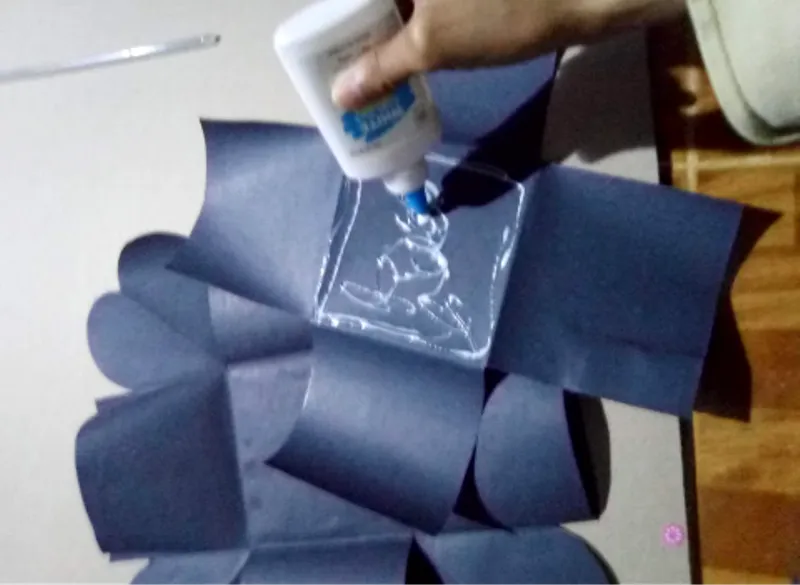
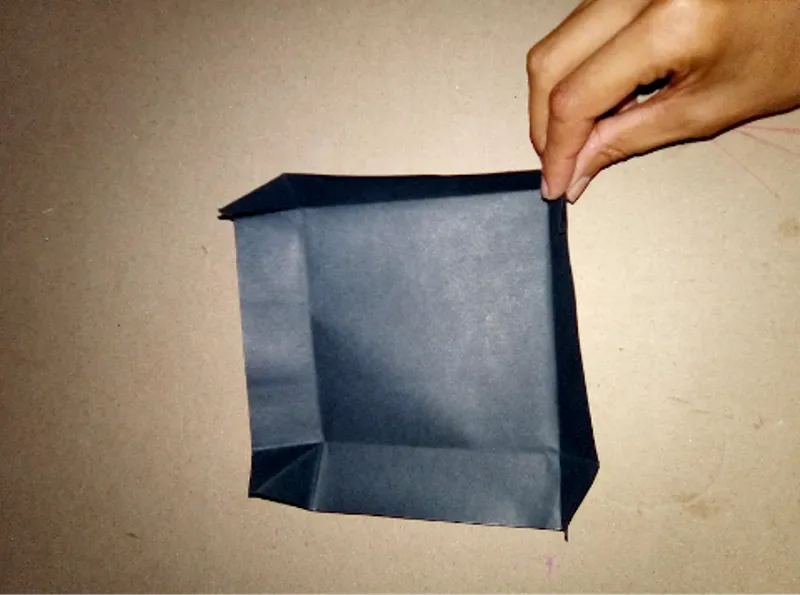
3. We are going to apply glue, only in the center of the box, at the bottom.
3. Vamos a aplicar pegamento, solo en el centro de la caja, en la parte inferior.
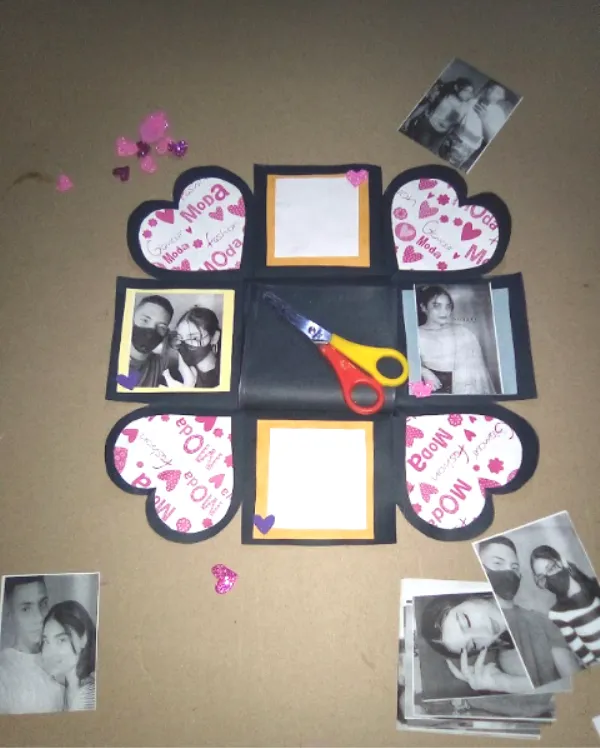
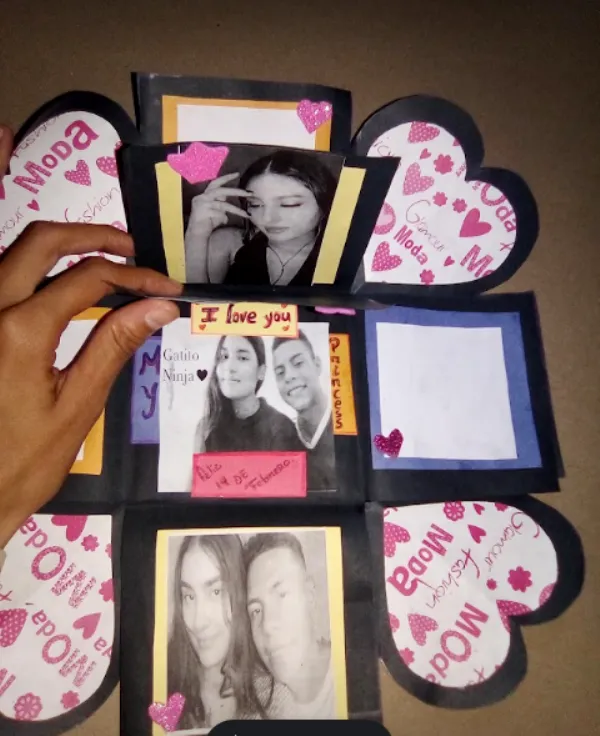
4. When it is well pasted, we add the details. Here we can see other images with colored cardboard to make a beautiful writing. Then we paste the photographs.
4. Cuando esté bien pegado, agregamos los detalles. Aquí podemos ver otras imágenes con cartulina de colores para hacer una hermosa escritura. Luego pegamos las fotografías.
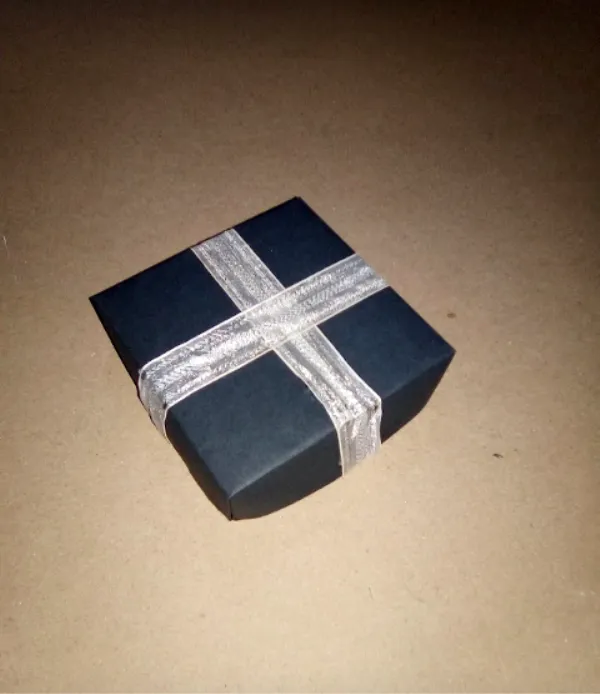
5.Now we make a lid to close the surprise box. Which consists of cutting a square 20cm long and wide. Then we make the measurement with the box to close it and make it fit, we cut a corner to make the lid
5.Ahora hacemos una tapa para cerrar la caja sorpresa. Que consiste en cortar un cuadrado de 20cm de largo y ancho. Luego hacemos la medida con la caja para cerrarla y hacerla encajar,doblamos las esquina para hacer la tapa
6. Finally, we glue a white tape to the lid of the box.
6. Finalmente, pegamos una cinta blanca a la tapa de la caja.

7. And also our surprise box, when you open it you will have a nice memory.
7. Y también nuestra caja sorpresa, cuando la abras te quedará un bonito recuerdo.
Well friends I hope you liked this beautiful craft to give to a special person for you and that you keep a beautiful memory. Until next time, I leave you hugs and kisses.
Bueno amigos espero que les haya gustado esta hermosa manualidad para regalar a una persona especial para ustedes y que guarden un genial recuerdo. Hasta la próxima, les dejo abrazos y besos.
Friends here i leave my social networks/Amigos aquí dejo mis redes sociales
Copyright @eulymer - All rights reserved